
 LinkBack URL
 About LinkBacks


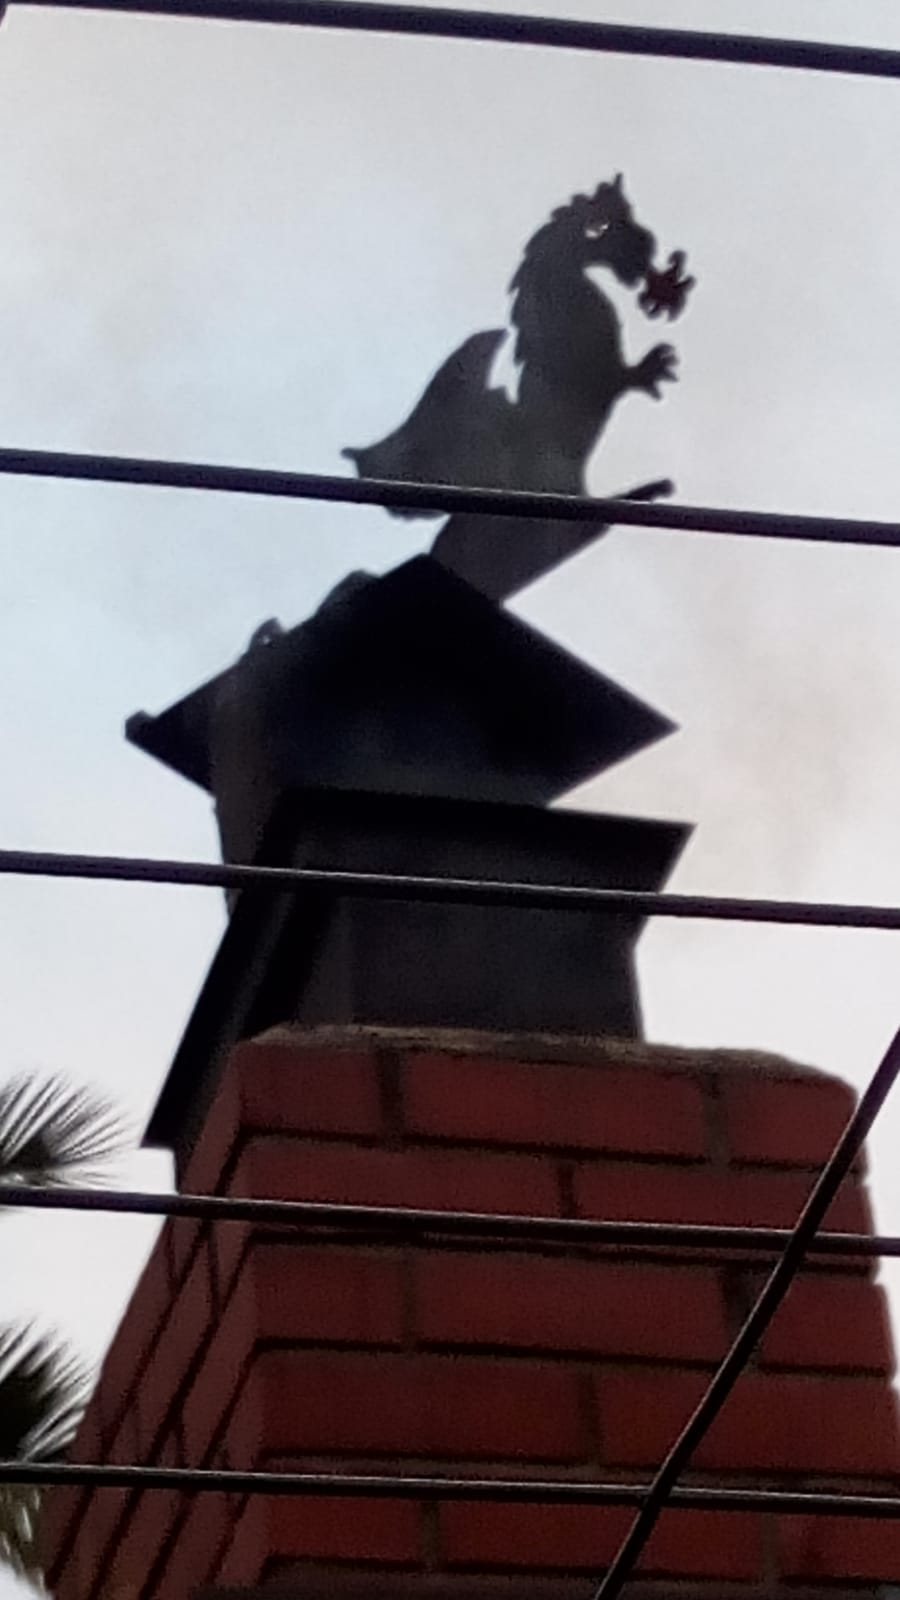
My wife and I made this in the 1980s to replace the rain cap that was on our chimney. It's built like a weather vane to keep the opening aimed downwind.
No closeup pictures as we're currently burning the first load of wood this winter...we actually have an "ok to burn" day that is also chilly!
(oops, wrong picture on the first try)
Construction (all welded steel):
There's a rectangular box that fits snugly over the clay chimney pipe (that broke in the 1989 'quake but has a stainless steel liner).
Inside the box is a piece of heavy expanded steel to catch any flaming paper used to start the fire. Don't know how necessary this is, we have a starved air wood stove so there isn't that much flow up the pipe.
There's a couple of inches gap over that expanded steel to allow the smoke to get over to the round hole cut in the top of the box.
Around the outside of the hole is a piece of steel strap on edge, welded all the way around. This keeps rain out.
Running up the middle (supported by the mesh and a cross bar in the hole) is a flat ended steel shaft around 1/2" diameter.
On to the moving part...
There's a steel water pipe that slips over the steel rod. There's a plug of rod welded into the top, adjusted so everything is the right height when installed. See below for secret bearing technology.
The pipe is welded to a square steel plate which will be the top of the rain cap.
A section of standard tinned steel stove pipe is opened into a C and welded to the bottom of the cap. Make sure it's a bit bigger than the steel strap on the chimney cap.
Weld in a cross support at the bottom to hold the C open.
Draw a dragon on some sheet steel and cut out with torch.
Weld Mr Dragon onto that top plate so that well over half his body is past the center of the plate towards the opening.
Now to balance.
With the chimney cap on the bench, pull a glass marble out of your pocket and wrap your hand around the top of that center steel bar, holding the marble in place.
Slide the rotating part down over the marble, being careful to not drop it.
Once in place, add steel weights to the rotating cap opposite the opening until it balances and turns freely. Weld the weights in place.
Paint with stove paint.
Install.
Enjoy.
You will sometimes hear it turning in the breeze, your assurance that Random is on the job.


 Reply With Quote

Bookmarks