Free 186 More Best Homemade Tools eBook:  
Get 2,000+ tool plans, full site access, and more.

User Tag List

Results 1 to 5 of 5

Thread: CNC Plasma Cutting Complex Shapes

  1. #1
    Supporting Member tmate3's Avatar
    Join Date
    Jan 2021
    Posts
    110
    Thanks
    9
    Thanked 251 Times in 63 Posts

    tmate3's Tools

    CNC Plasma Cutting Complex Shapes

    Assuming that you have your new CNC plasma cutting table ups and running, how are you going to use it to make anything more complicated than simple brackets and geometric shapes? It is capable of so much more than that. Here are some suggestions to help get you start fully utilizing your new machine.

    The plasma cutting process generally gets bad marks for the lack of detail possible compared to laser or water-jet. This is due to the significantly greater kerf width produced by plasma arc. However, it is possible to create a surprising amount of detail if certain methods are used in planning and creating shapes.

    It is natural for us to look for the easiest way of accomplishing anything. There some relatively easy ways to come up with shapes to be cut. They can perhaps be scanned from an image, purchased on-line as a dxf file, or imported as clip art. While these methods may be ok for cutting simple brackets, they have definite limitations when creating complex original shapes.

    Many of the dxf files available for purchase on-line were developed by artists with no plasma cutting experience. They may be too complicated for the desired size, they may contain lines and internal that are too close together, or cutouts within cutouts. Even if you can find one that is usable, it is unlikely that it will be exactly what you want.

    While bitmaps such as drawings and photos can be scanned and automatically traced by some software, in practice this is easier said than done. The background must be in total contrast with the image. Photos must be very high resolution for the edges to be well defined. Lines should be thin and crisp. Often it will take more work to fix a scanned and traced shape than to create one from scratch. Clip art is usually cartoon-like and originally drawn without any intention of their being plasma-cut.

    The bottom line is that if you are going to do complex shapes, you will have to do some drawing. Most drawing and editing features included with CNC plasma cutting table are simplistic, and lack a number of labor saving features. There are a wide variety of top-notch graphics packages available to help you create your own original shapes. Just Google "best drawing and shape editing programs" to get an idea of what's out there. Once you have selected a program and become thoroughly familiar with it, you will be able to create plasma-cut shapes with a surprising amount of detail.

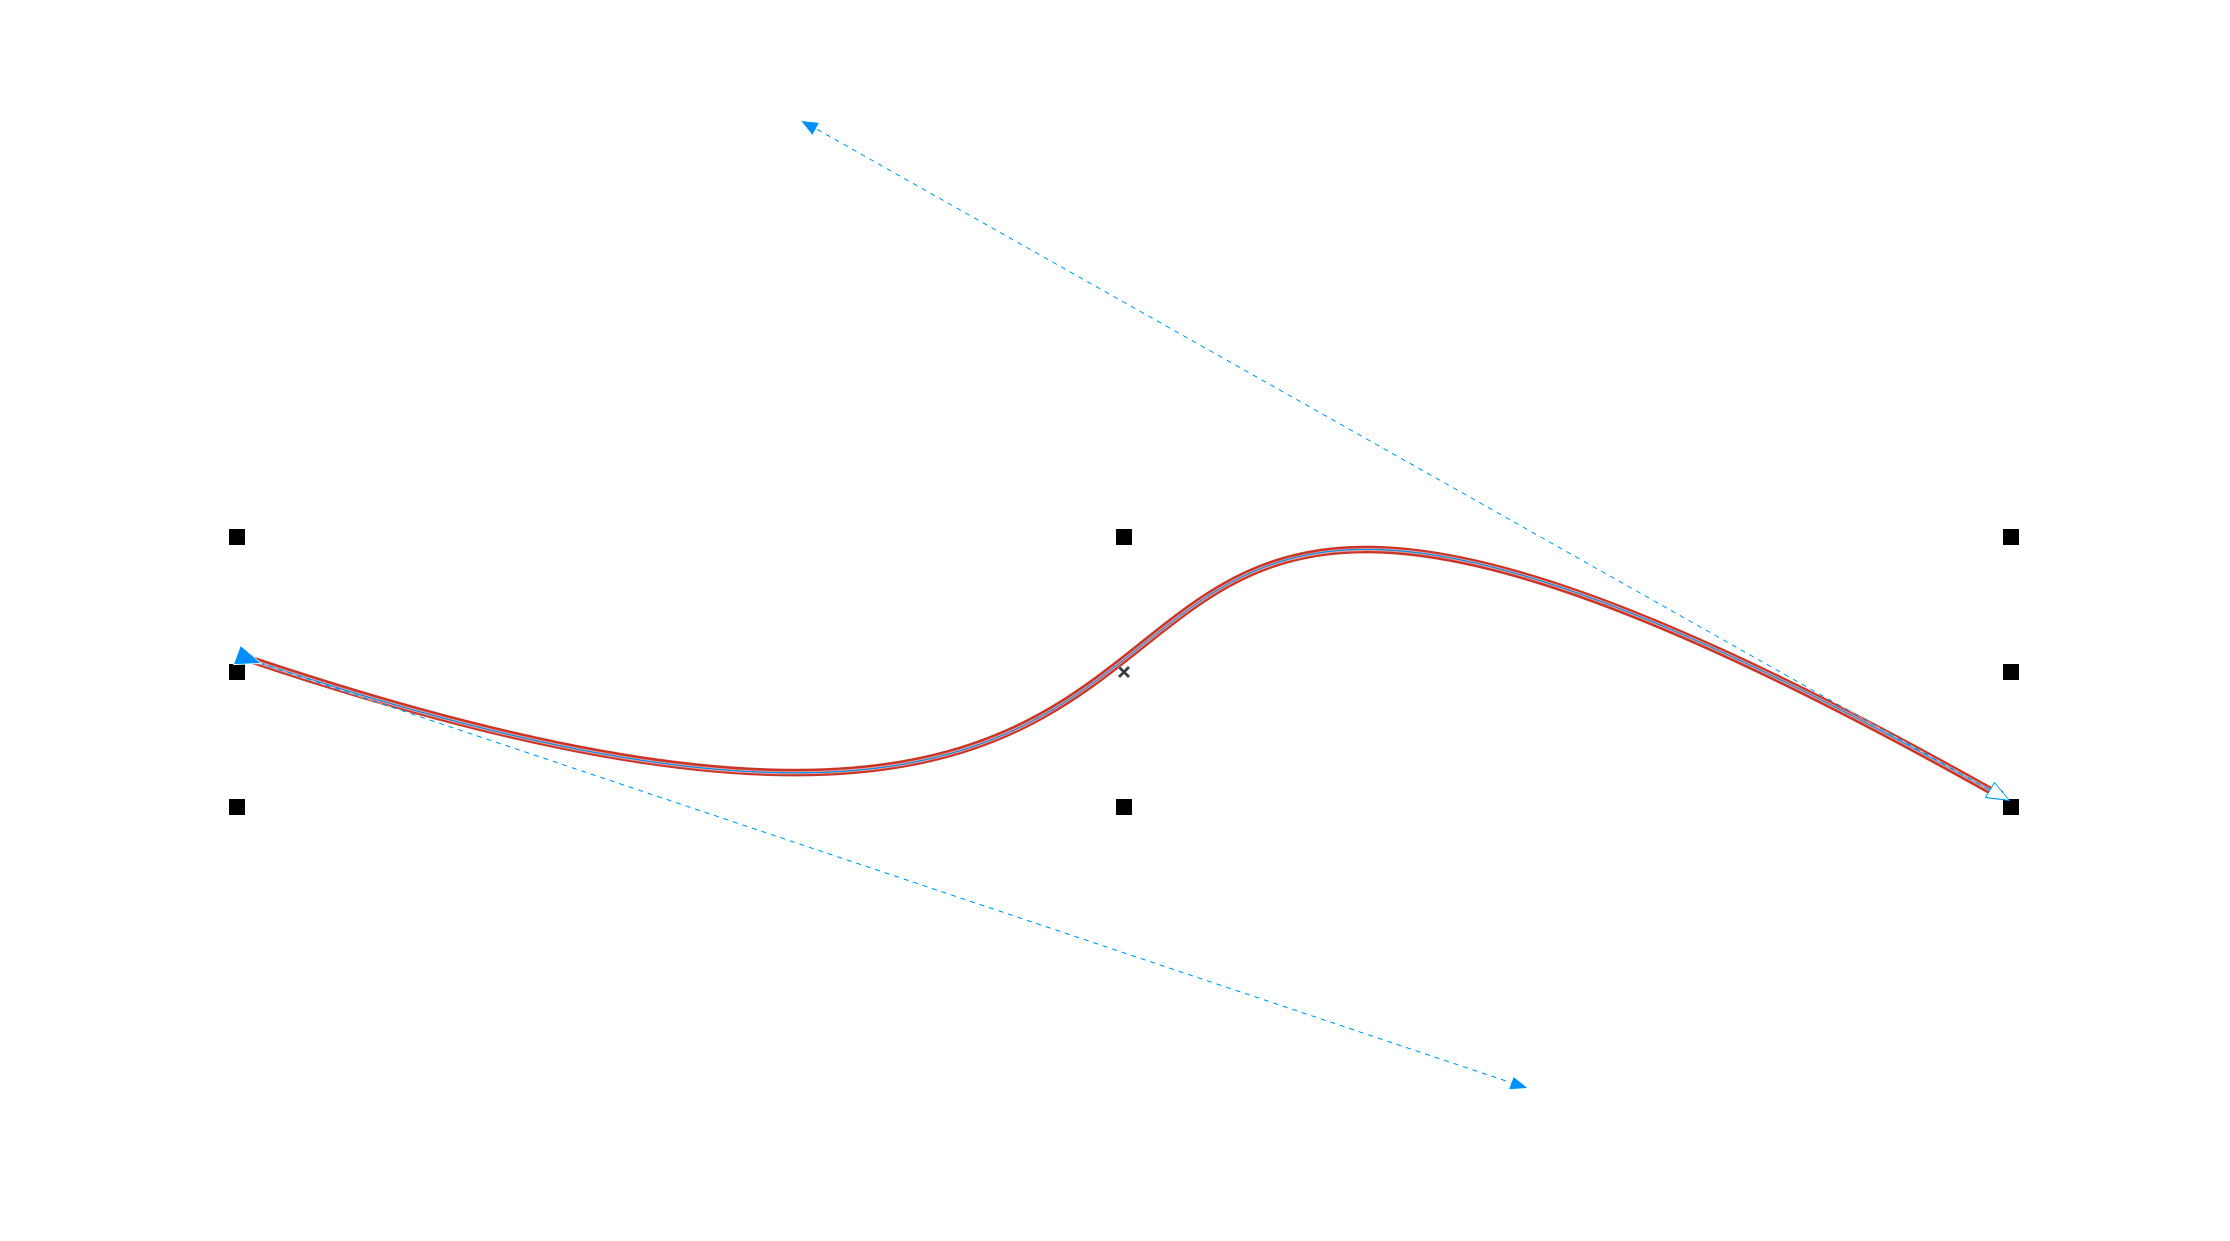
    I personally have used CorelDraw for a number of years. It has the ability to auto-trace photos and other bitmaps. It allows you to draw lines of any desired thickness quickly around any contour, and then fine-tune them in seconds to fit precisely. It allows you to easily maintain a given amount of space between lines and shapes (about .150" or 3.8mm for plasma). It also has the ability to let you automatically color lines and fill shapes to give you a near perfect idea of what your cut piece will look like.

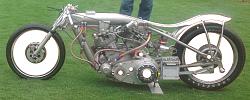
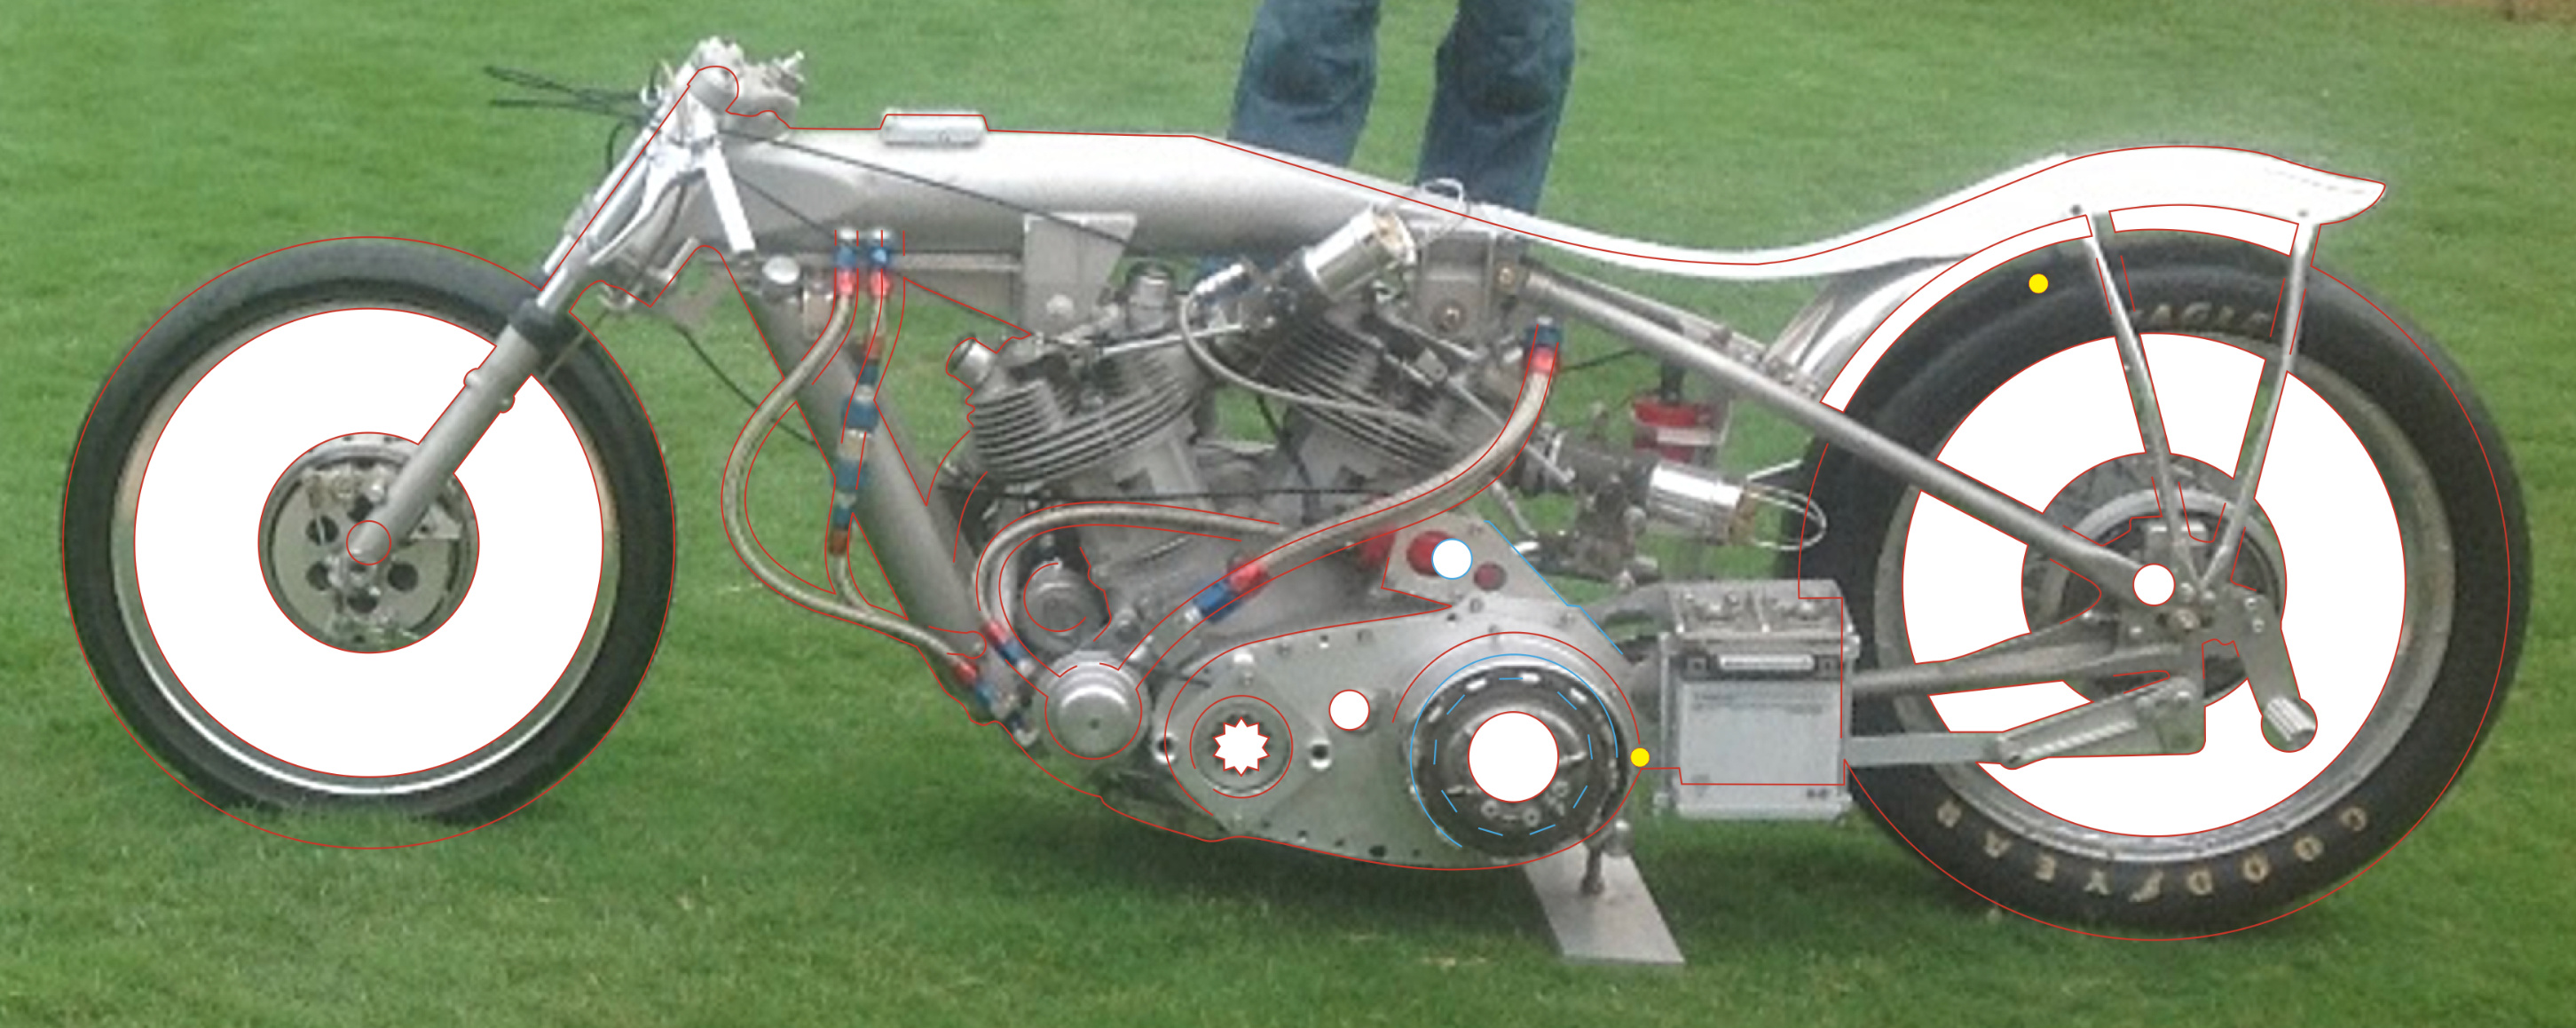
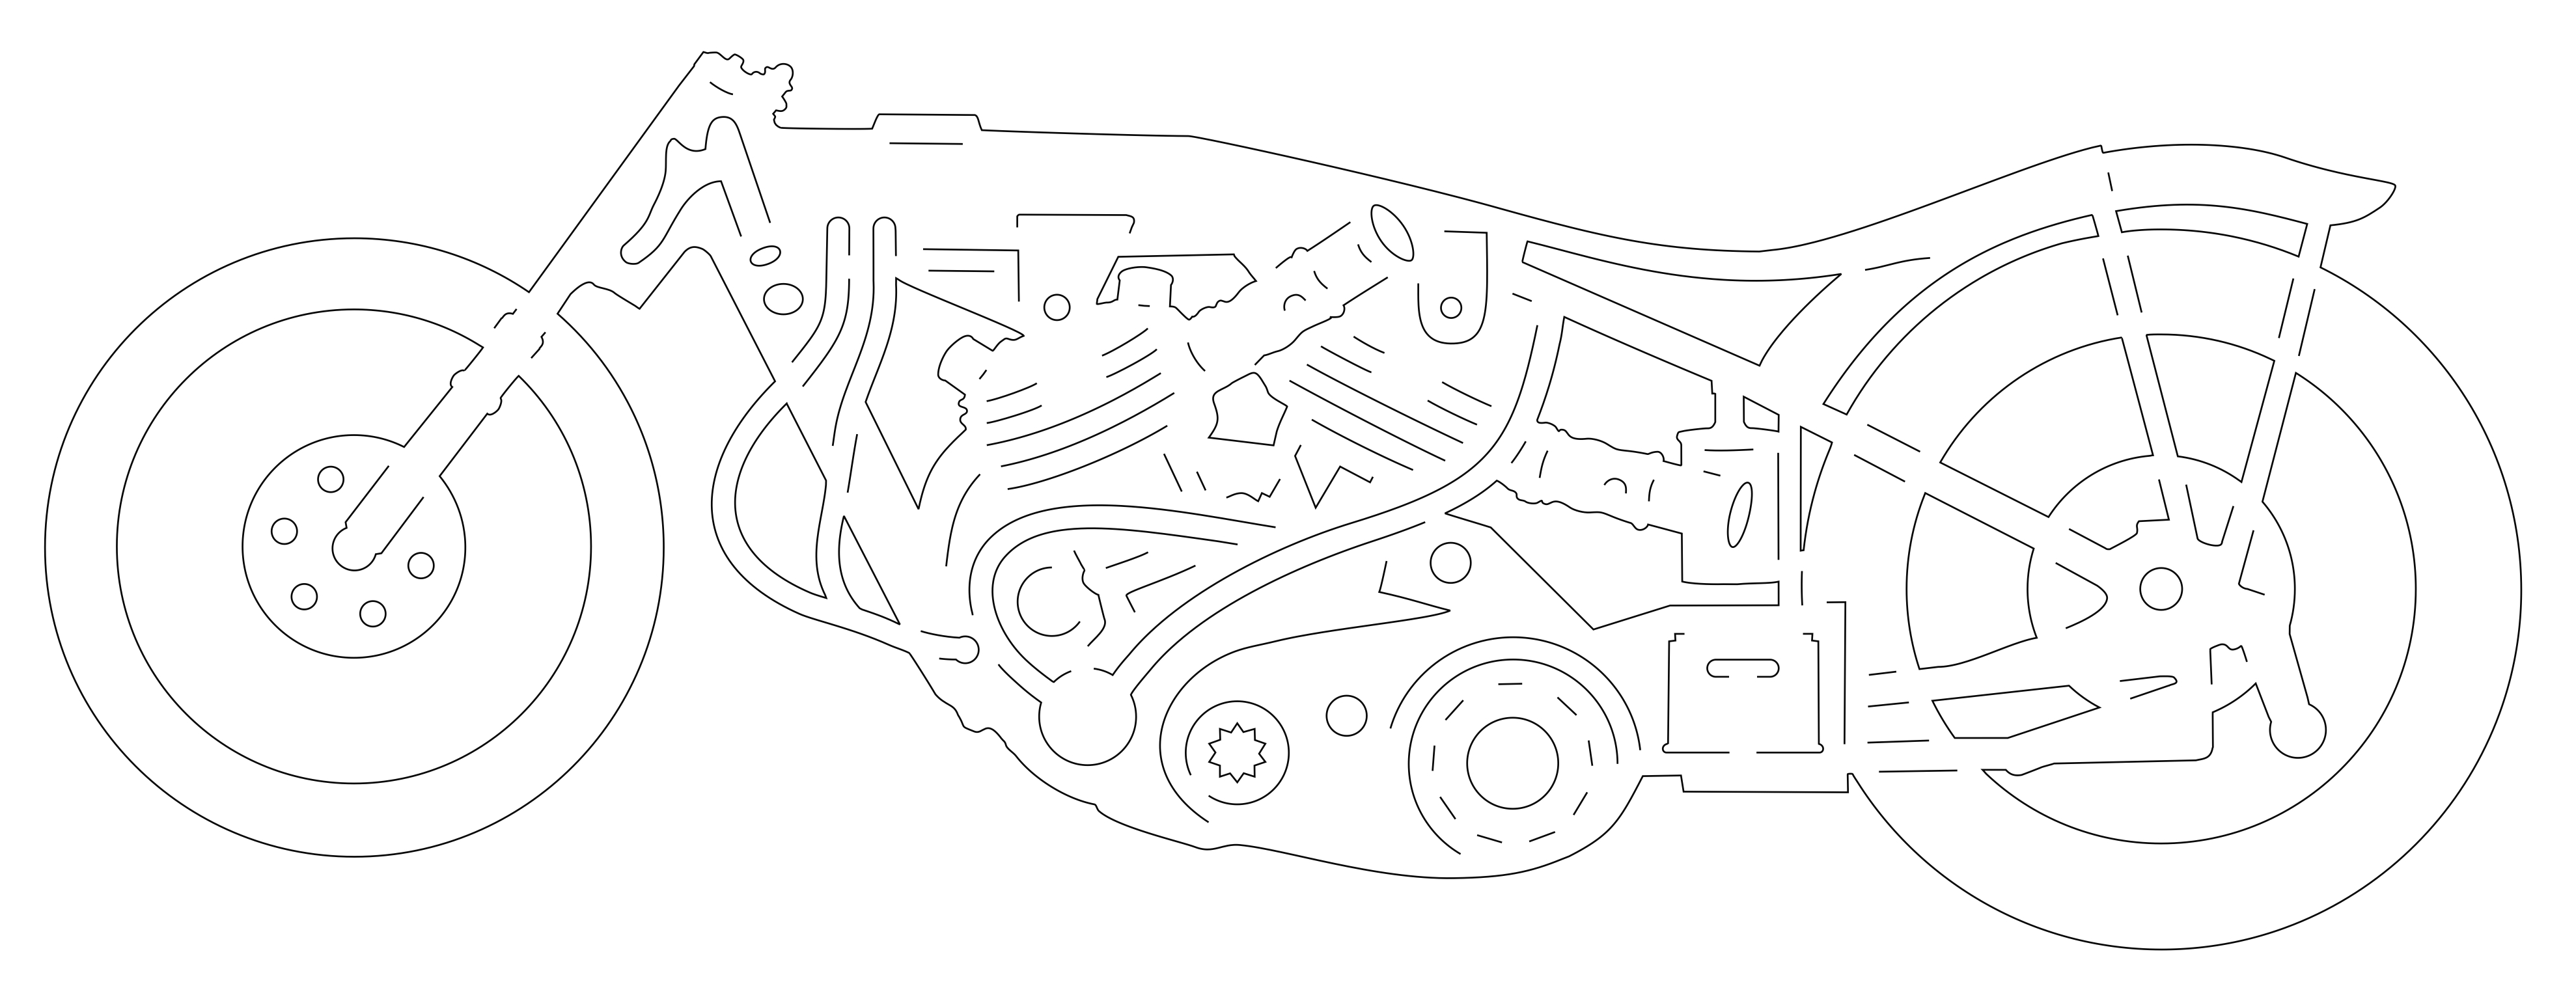
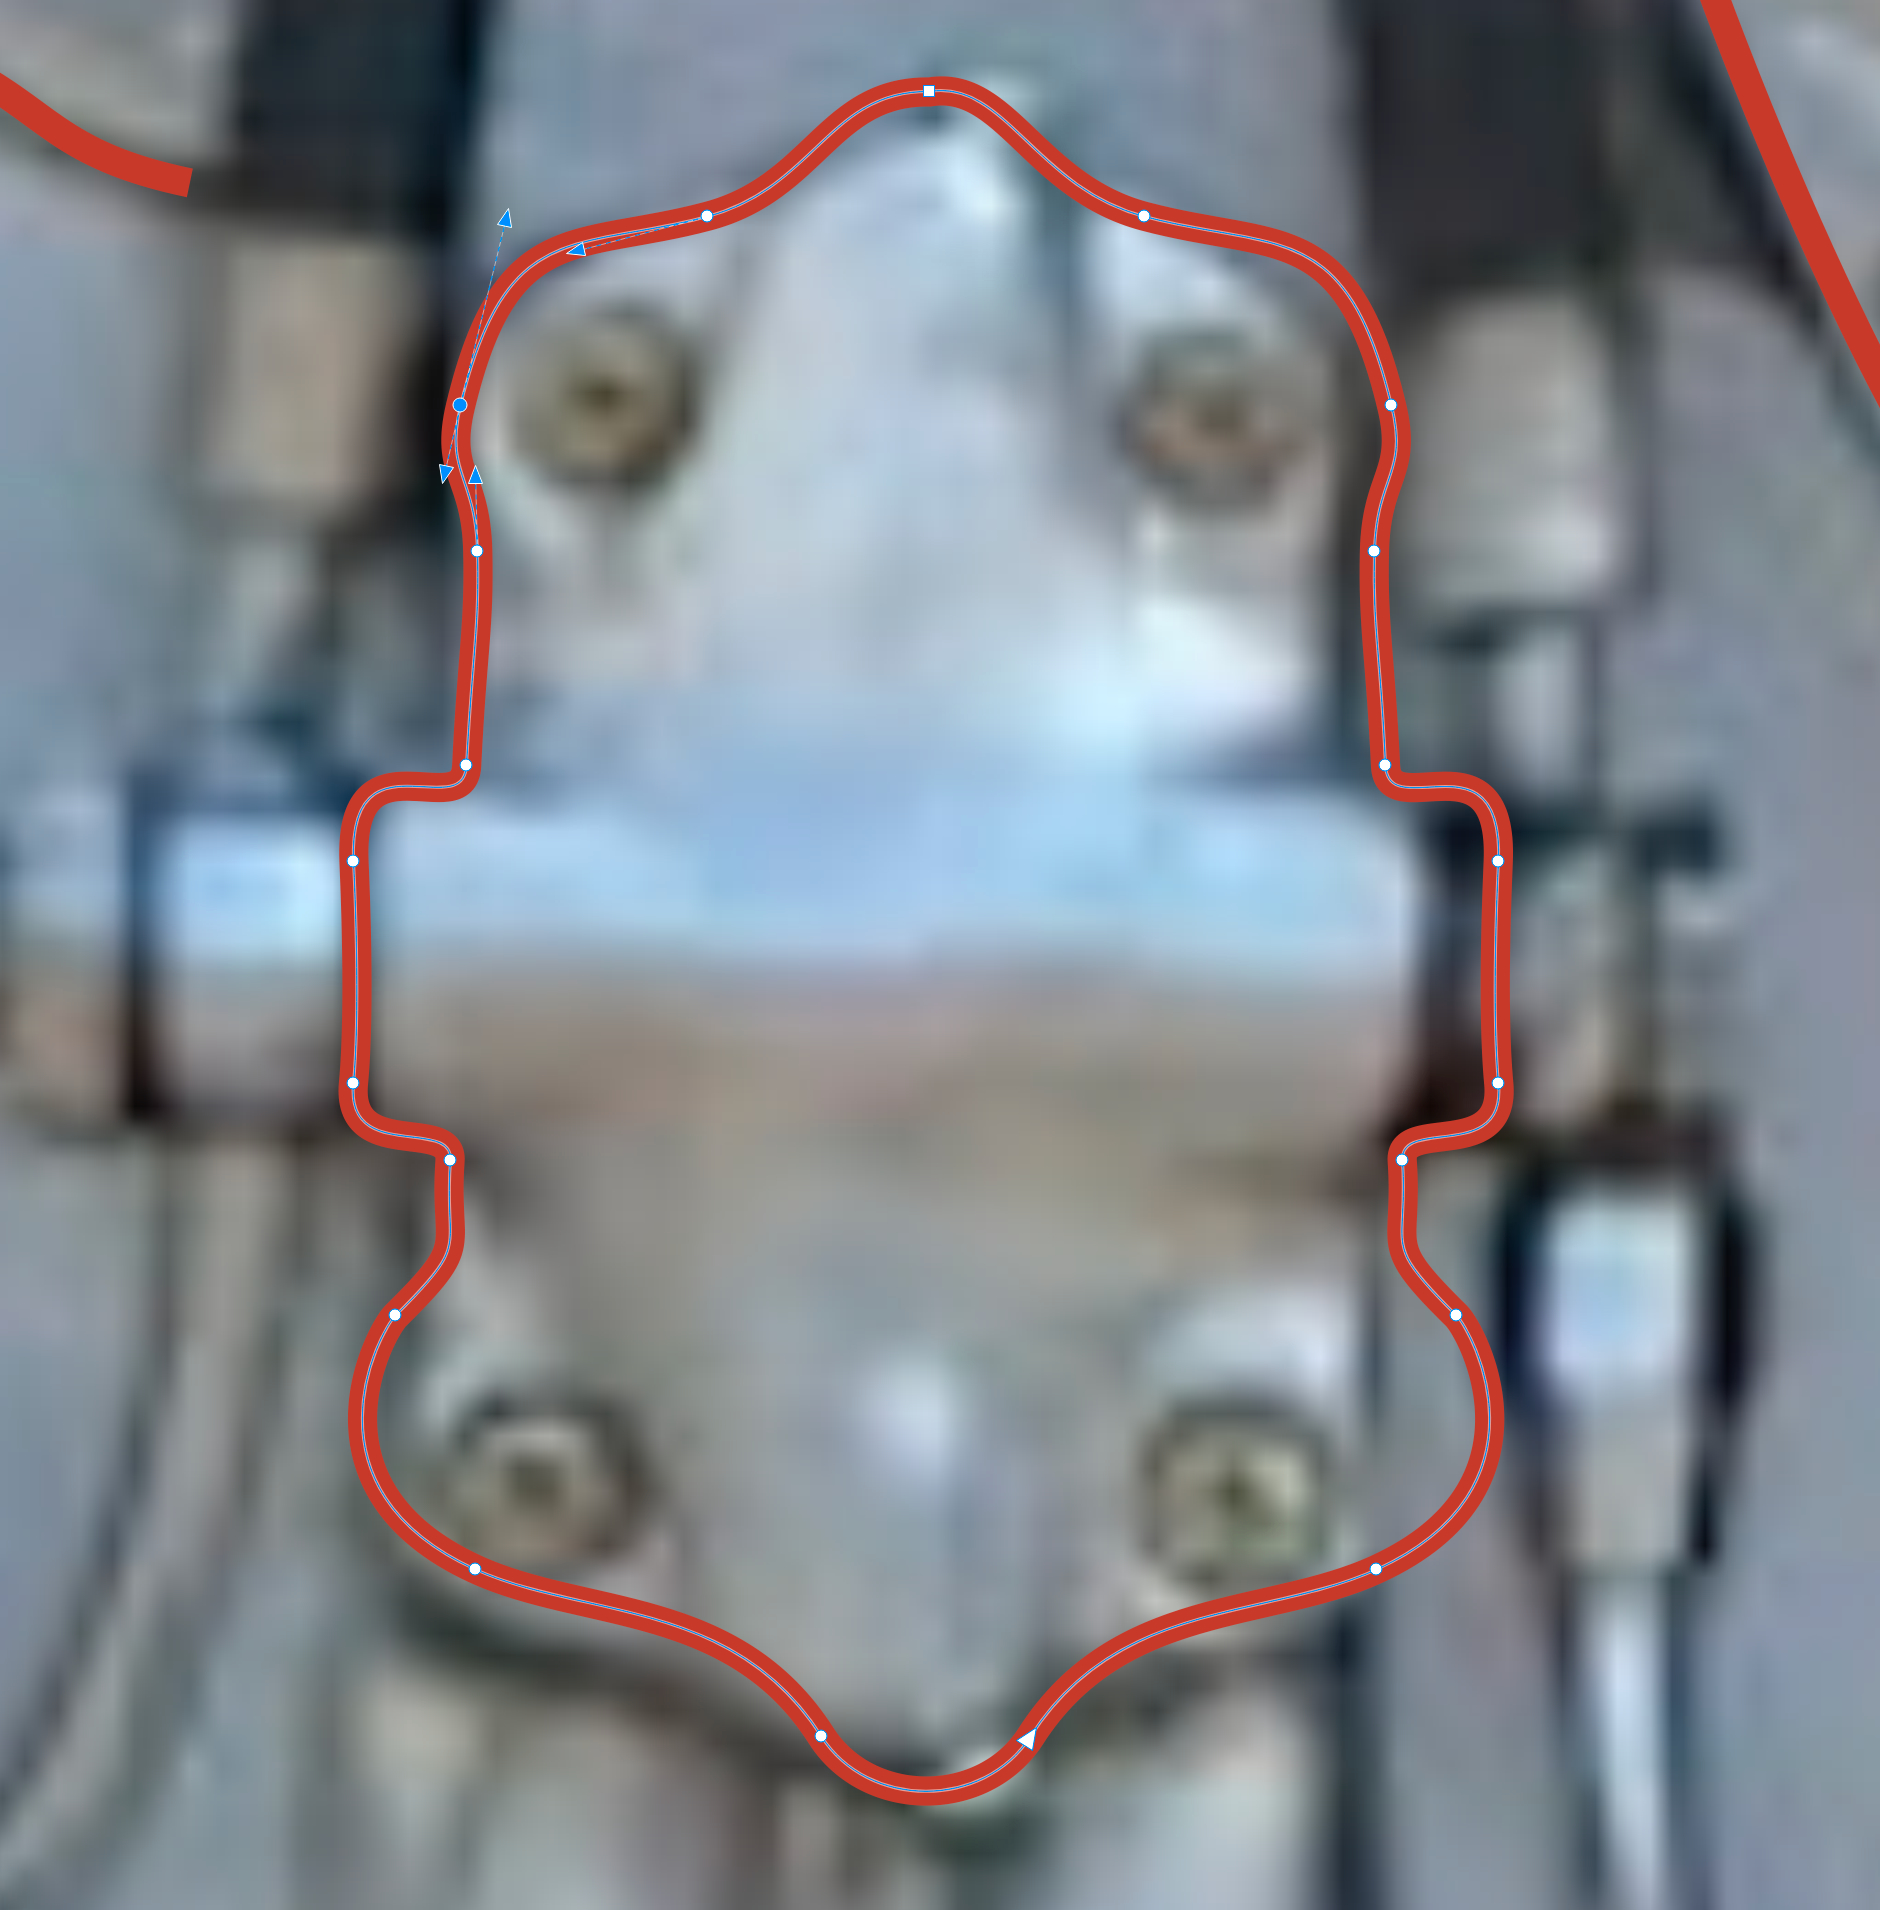
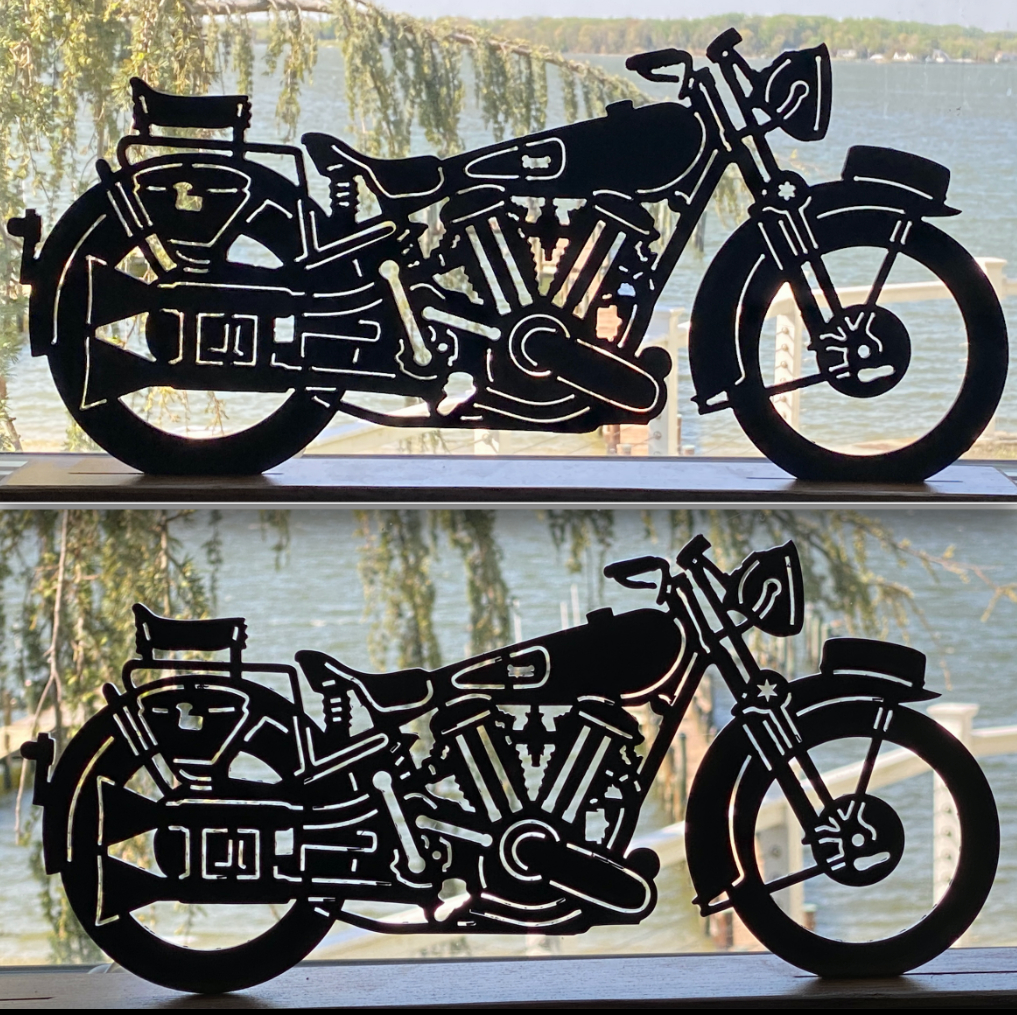
    The following photos show a fairly complicated drawing created by manually tracing over a photograph. Note the small yellow colored circle which is exactly the right diameter to assure the proper clearance between objects. Lines and internal shapes must be shifted slightly from their photo counterparts to obtain the clearances. The thinnest eternal shape that can be satisfactorily cut is around .150" while slots and internal shapes can be slightly thinner.

    When I have completed the drawing in CorelDraw, I export it as a dxf file, which can then be imported into my CNC software. The CNC software (FlashcutCNC) converts the dxf file into G Code, which the computer understands. It also arranges the cut order, inserts lead-ins and lead-outs, compensates for the kerf (gap) created by the torch, and determines the direction of torch travel. Your CNC software should be capable of doing these chores, as well.

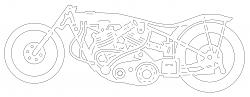
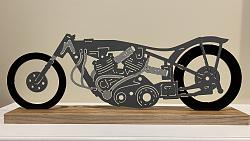
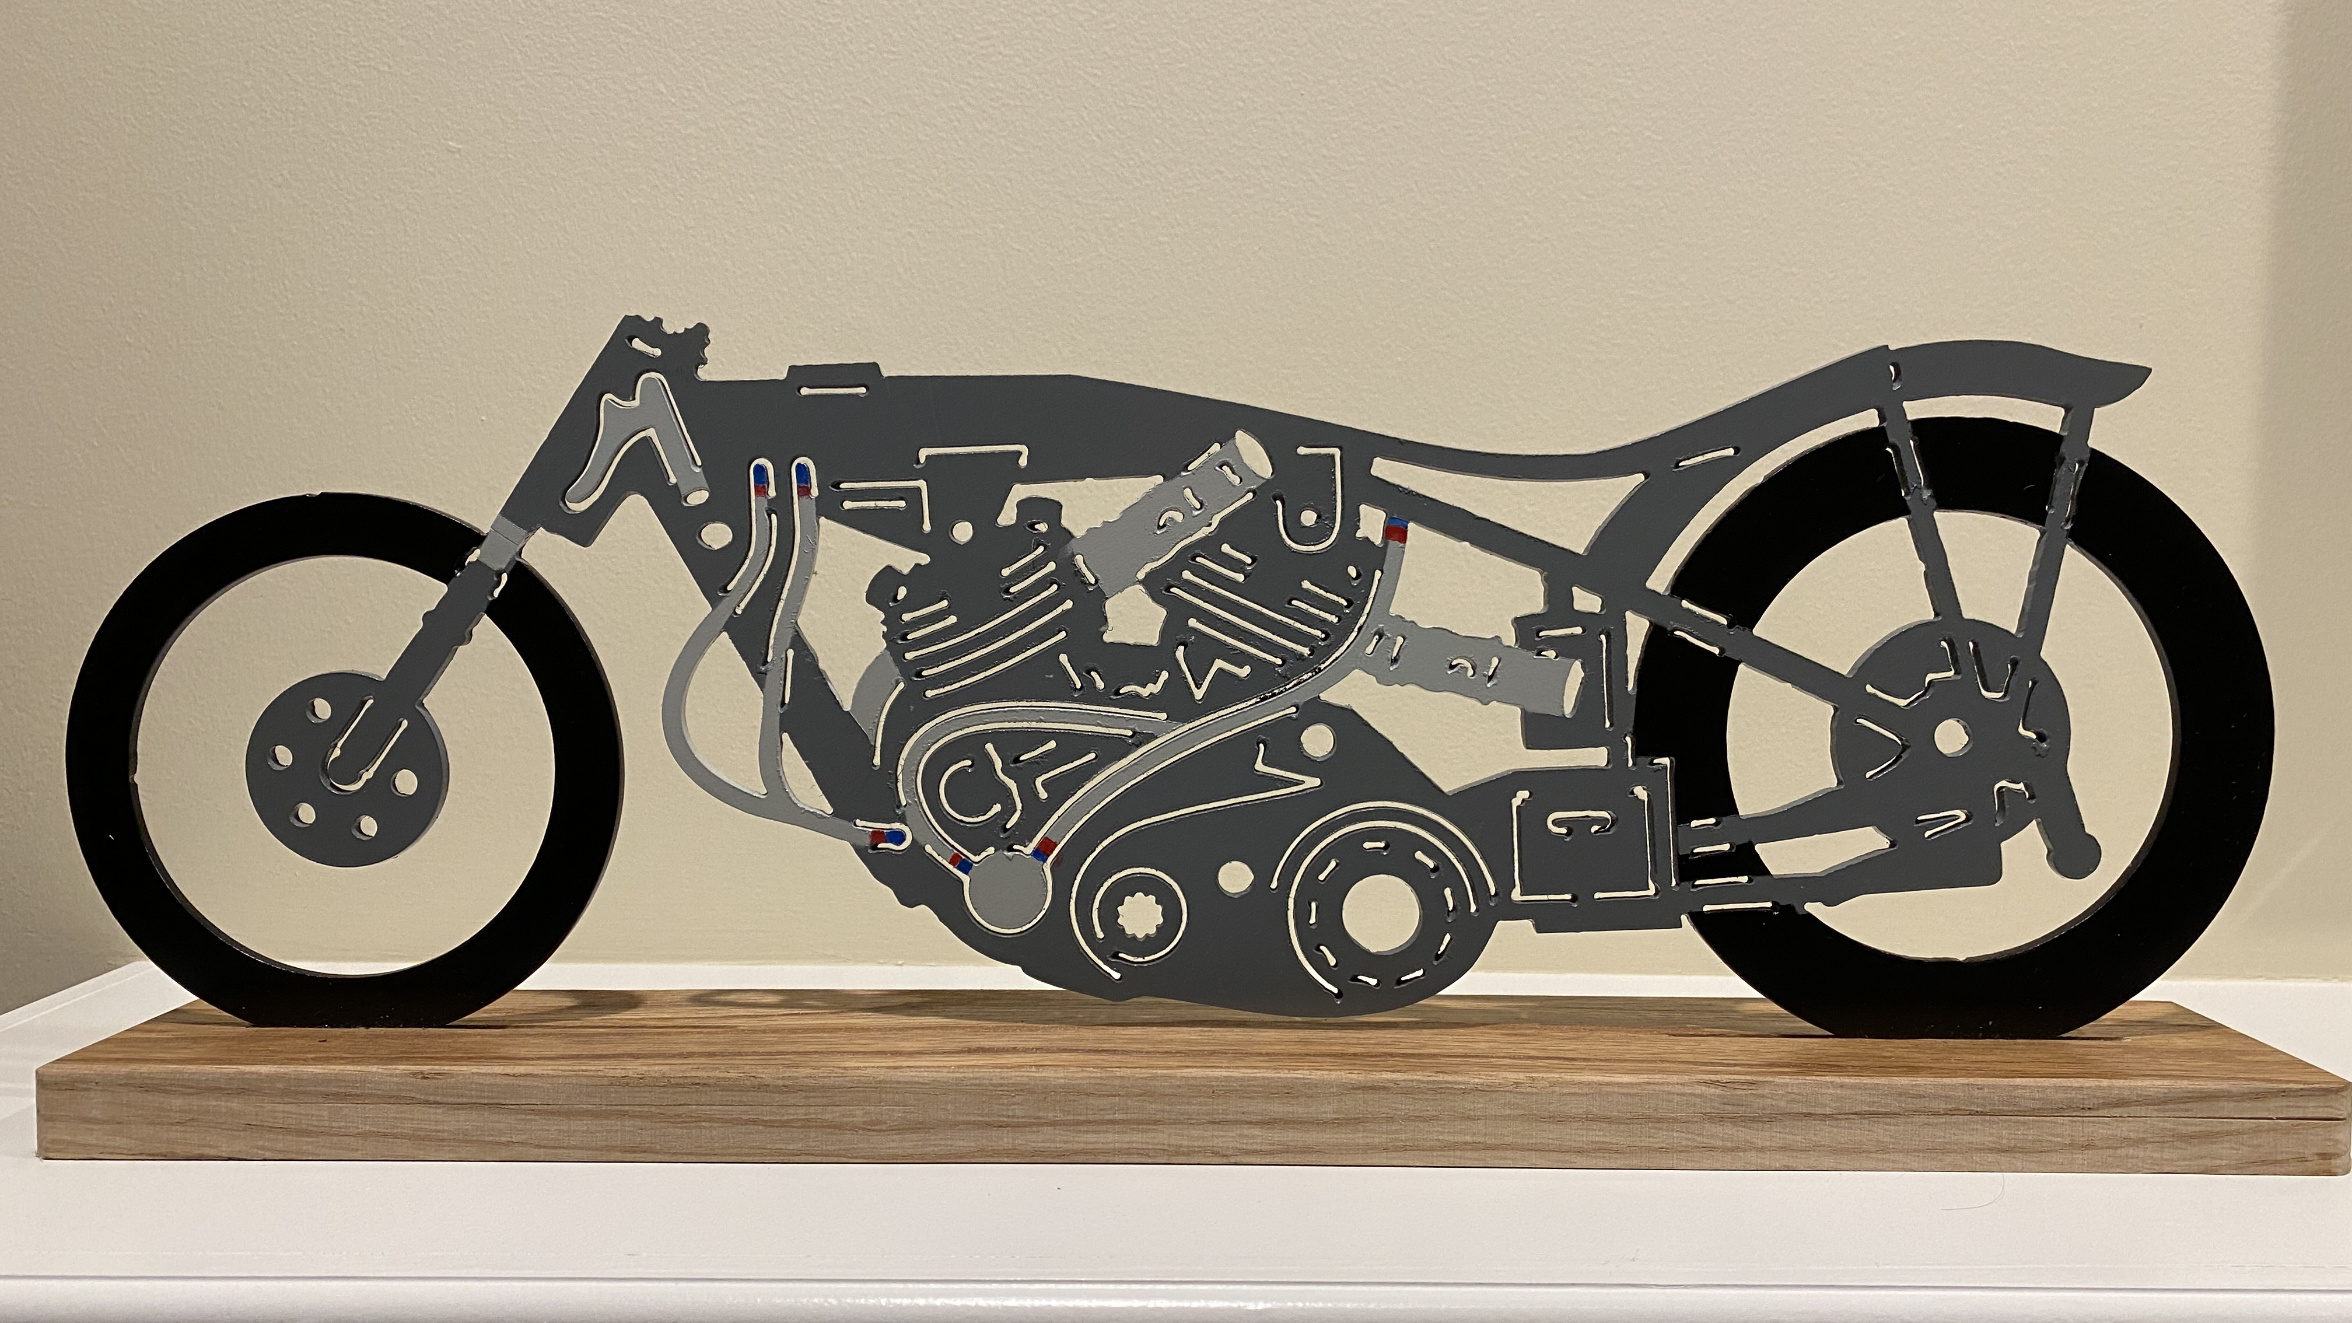
    The first photo shows a photo with lines and shapes partially drawn over it. The second photo shows the finished outline. The third photo shows the CorelDraw drawing with fill applied to provide a preview of what the finished piece will look like. The fourth photo is the finished shape.


    CNC Plasma Cutting Complex Shapes-over-photo-95%25.jpg CNC Plasma Cutting Complex Shapes-barn-job-no-fill.jpg CNC Plasma Cutting Complex Shapes-barn-job-fill.jpg CNC Plasma Cutting Complex Shapes-barn-job-1-mb.jpg

    186 More Best Homemade Tools eBook

  2. The Following 3 Users Say Thank You to tmate3 For This Useful Post:

    gigabyte1 (Apr 22, 2022), Inner (Apr 21, 2022), that_other_guy (Apr 21, 2022)

  3. #2
    gigabyte1's Avatar
    Join Date
    Dec 2020
    Location
    Shouth Africa
    Posts
    3
    Thanks
    1
    Thanked 0 Times in 0 Posts
    i Finaly got My company to invest ina CNC plasma Cutter .We geting a XPR 300 PLASMA CUTER with all bels and wisels include .i Am new to Plasma CNC and dit intensive online Trainig and Recurch . I dun a simpel Company Logo to PDF and to DXF . I noted that lines and curfs was jaged when zooming in on the detail .i had to do re do the logo in a picture editing mode and fine tune the DXF output to get it to cut the curfs and coners smoothly So no Quik COPY and PASTE if you want Qality Details .i agree it is inportant to hafe a propper Picture Editing Program.

    2000 Tool Plans

  4. #3
    Supporting Member tmate3's Avatar
    Join Date
    Jan 2021
    Posts
    110
    Thanks
    9
    Thanked 251 Times in 63 Posts

    tmate3's Tools
    Quote Originally Posted by gigabyte1 View Post
    i Finaly got My company to invest ina CNC plasma Cutter .We geting a XPR 300 PLASMA CUTER with all bels and wisels include .i Am new to Plasma CNC and dit intensive online Trainig and Recurch . I dun a simpel Company Logo to PDF and to DXF . I noted that lines and curfs was jaged when zooming in on the detail .i had to do re do the logo in a picture editing mode and fine tune the DXF output to get it to cut the curfs and coners smoothly So no Quik COPY and PASTE if you want Qality Details .i agree it is inportant to hafe a propper Picture Editing Program.
    What software are using to edit the lines? Will it let you move nodes around as shown in this screen shot? Click on thumbnail.

    CNC Plasma Cutting Complex Shapes-node-editiing-screen-shot.jpg

  5. #4
    Supporting Member tmate3's Avatar
    Join Date
    Jan 2021
    Posts
    110
    Thanks
    9
    Thanked 251 Times in 63 Posts

    tmate3's Tools
    Quote Originally Posted by tmate3 View Post
    What software are using to edit the lines? Will it let you move nodes around as shown in this screen shot? Click on thumbnail.

    Click image for larger version. 

Name:	Node editiing screen shot.jpg 
Views:	90 
Size:	1.31 MB 
ID:	42553
    I am using CorelDraw. You can create, delete, and move the nodes around. You can also highlight a group of nodes and duplicate only that section of the drawing.

    What I have done here is draw one side of the shape, duplicate it, mirror the duplicate and connect it to the existing side. This gives me a shape that is perfectly symmetrical on both sides.

    The nodes have little "handles" on them that let you manipulate the contour of the line between them. When you draw a line, you only need the two end nodes to shape it as desired. Click on thumbnail below:

    CNC Plasma Cutting Complex Shapes-coreldraw-nodes.jpg

  6. #5
    Supporting Member tmate3's Avatar
    Join Date
    Jan 2021
    Posts
    110
    Thanks
    9
    Thanked 251 Times in 63 Posts

    tmate3's Tools
    In case there is any interest, here is the same motorcycle shape cut out with plasma and with laser for comparison purposes. The laser cut shape is 6" x 12" and the plasma version is 9 1/2" x 19". In the laser-cut piece, the lines were cut as narrow slots so they would show up.

    The narrower kerf of the laser is apparent in the little star shape in the front forks. The plasma-cut piece, having lines rather than narrow slots, has visible pierce points. The material thickness is the same for both.

    Just an interesting comparison of both processes on a moderately complex shape. The plasma version was cut on my little 2' x 2' home-made table. The laser version was cut on a high-end laser equipped cutting table costing several hundred thousand dollars.

    CNC Plasma Cutting Complex Shapes-brough-superior-plasma-vs-laser-1_2mb.jpg


    186 More Best Homemade Tools eBook

Thread Information

Users Browsing this Thread

There are currently 1 users browsing this thread. (0 members and 1 guests)

Bookmarks

Posting Permissions

  • You may not post new threads
  • You may not post replies
  • You may not post attachments
  • You may not edit your posts
  •