Free 186 More Best Homemade Tools eBook:  
New: 300+ fresh build posts/day from 275 forums → BuildThreads.com

User Tag List

Results 1 to 4 of 4

Thread: Converting baking tray to coolant drip tray.

Threaded View

  1. #1
    Supporting Member thehomeengineer's Avatar
    Join Date
    Nov 2017
    Location
    Berkshire UK
    Posts
    762
    Thanks
    764
    Thanked 2,388 Times in 483 Posts

    thehomeengineer's Tools

    Converting baking tray to coolant drip tray.

    Hi All

    Making use of baking tray to make drip tray for 4x6 saw.

    The reason for using the baking tray was the fact it is already nicely formed and finished so little work needed to convert it in to a drip tray.

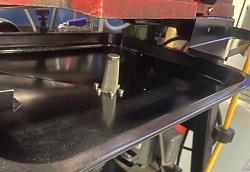
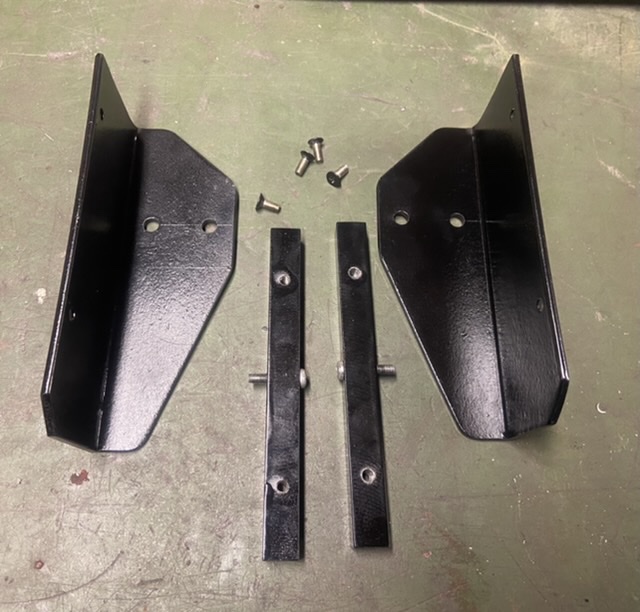
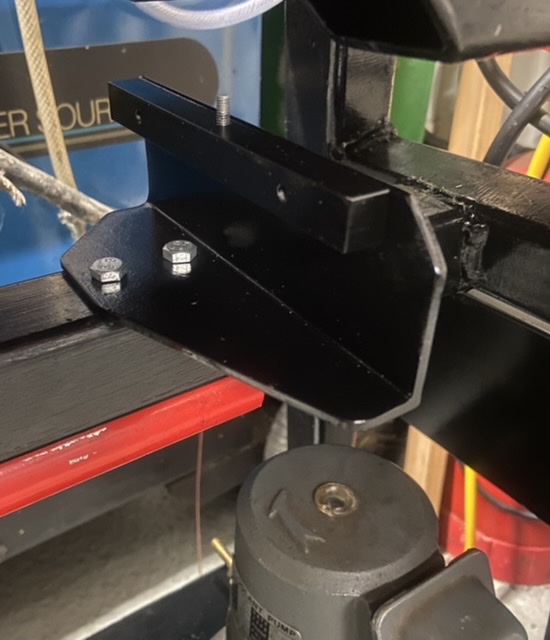
    The first thing I made was two supports for the tray, which bolts directly to the custom base.
    Click image for larger version. 

Name:	992FC5F3-0244-4876-8AAB-335863F0CD7C.jpeg 
Views:	179 
Size:	117.0 KB 
ID:	41834 Click image for larger version. 

Name:	3008C4AC-44A8-4753-900B-F9F06B9EB6C6.jpeg 
Views:	196 
Size:	80.2 KB 
ID:	41836

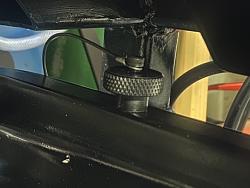
    The tray was also drilled for the thumb screws so the correct pitch for the second bracket could be attached.

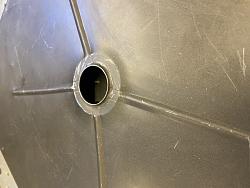
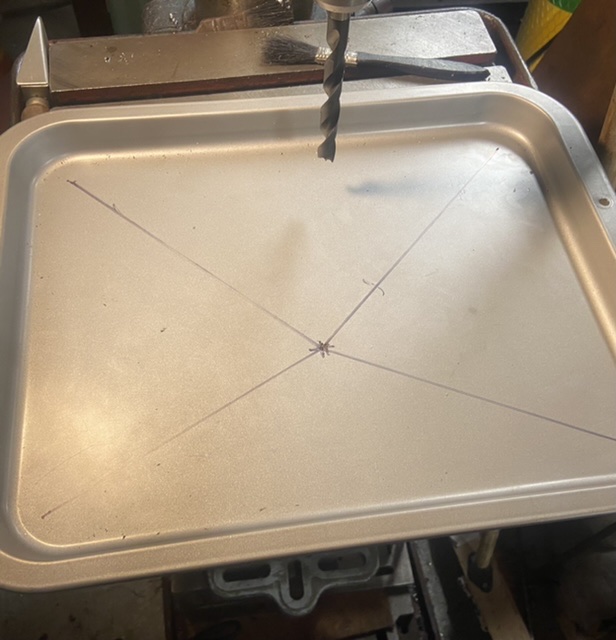
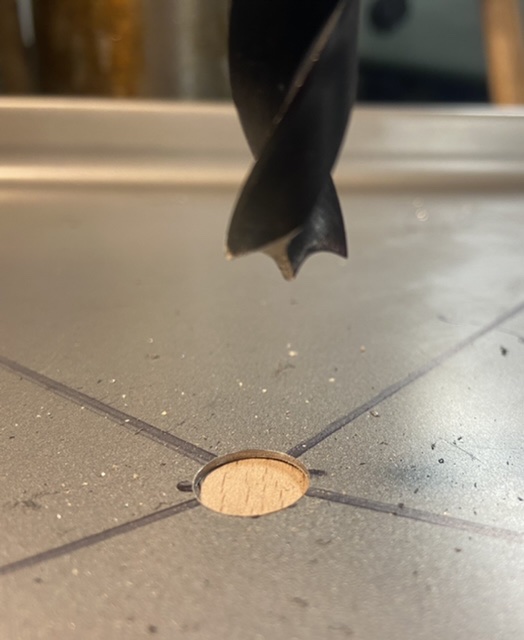
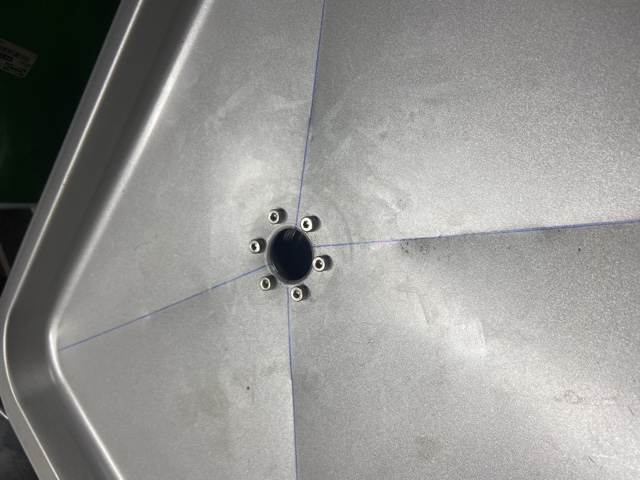
    The baking tray is obviously flat so I decided to bead roll the tray to allow coolant to run to the drain hole. But before doing this I drilled a hole and used a Q-max cutter to make the drain hole. Following makes out lines the crease’s were then rolled.
    Click image for larger version. 

Name:	2887C13D-77B5-4262-8FD7-34F86E0CDD8C.jpeg 
Views:	161 
Size:	100.6 KB 
ID:	41837 Click image for larger version. 

Name:	24E73412-86C3-4873-BC84-0DBEE78727C3.jpeg 
Views:	197 
Size:	70.7 KB 
ID:	41838 Sheet metal drill to cut hole.

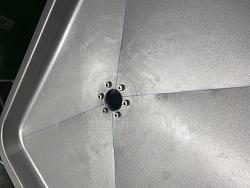
    A press tool was made to flatten the middle and put a lip. The press tool was then converted into the filter housing.
    Click image for larger version. 

Name:	E348A888-DE0A-42AD-9002-988A00B98D48.jpeg 
Views:	173 
Size:	88.7 KB 
ID:	41840
    Holes were then drilled using drill template. (Not shown)
    Click image for larger version. 

Name:	A06C5BCB-84F0-4CE5-9742-AA0C9F11D417.jpeg 
Views:	176 
Size:	108.3 KB 
ID:	41839
    Once finished a coat of paint and fitted
    Click image for larger version. 

Name:	8D6BCAAD-4590-4F86-9A69-215CD60E9607.jpeg 
Views:	200 
Size:	72.2 KB 
ID:	41841 Click image for larger version. 

Name:	C3E57E7E-867A-4CA0-8DD8-7B9F75C3A7B2.jpeg 
Views:	181 
Size:	71.2 KB 
ID:	41842 Click image for larger version. 

Name:	8D6BCAAD-4590-4F86-9A69-215CD60E9607.jpeg 
Views:	200 
Size:	72.2 KB 
ID:	41841


    Thank you for viewing
    The Home Engineer
    Attached Thumbnails Attached Thumbnails Click image for larger version. 

Name:	97EB806F-6AFF-4C60-B37B-BEB2D8FA54E3.jpeg 
Views:	138 
Size:	77.3 KB 
ID:	41835  

  2. The Following 2 Users Say Thank You to thehomeengineer For This Useful Post:

    LMMasterMariner (Feb 11, 2022), NortonDommi (Feb 8, 2022)

Thread Information

Users Browsing this Thread

There are currently 1 users browsing this thread. (0 members and 1 guests)

Bookmarks

Posting Permissions

  • You may not post new threads
  • You may not post replies
  • You may not post attachments
  • You may not edit your posts
  •