
 LinkBack URL
 About LinkBacks


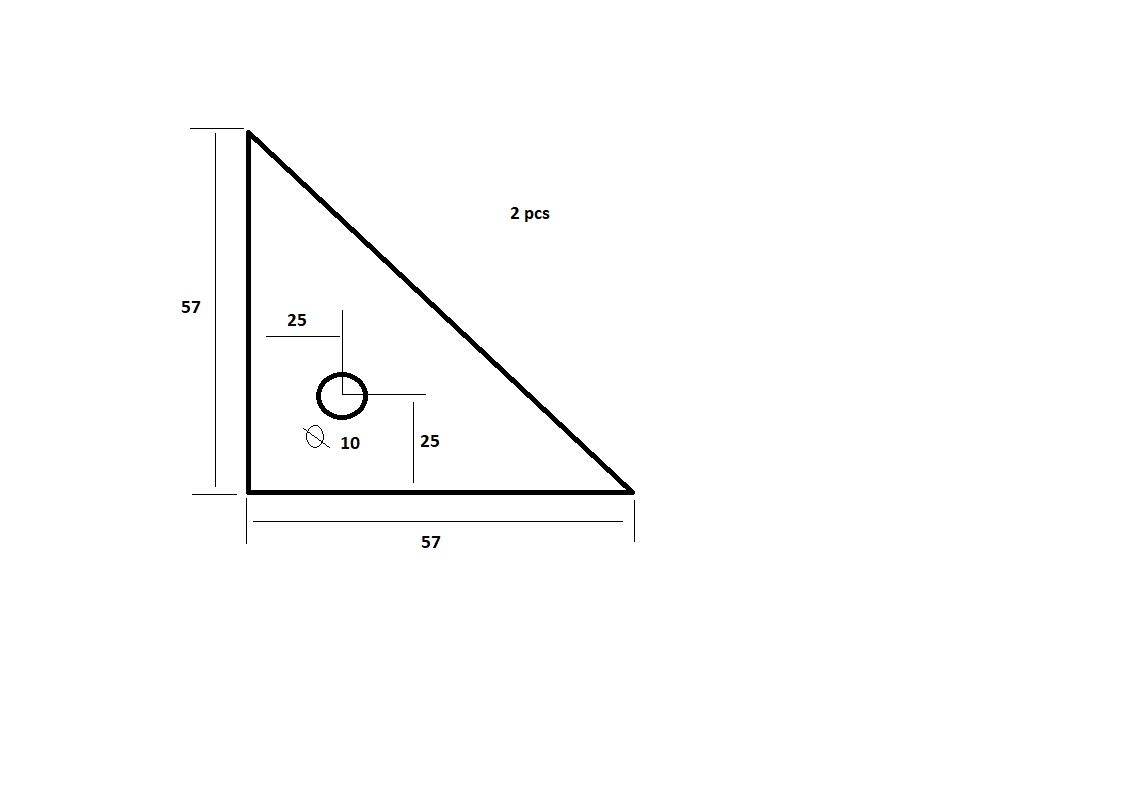
M10 threaded rod, lenght 250mm
Three M10 bolt, washers and nylock screw.
3mm x 30mm flat bar. 160mm long piece.
10mm axle. (two 20mm long pieces / clamp)
Plans:
Plans:
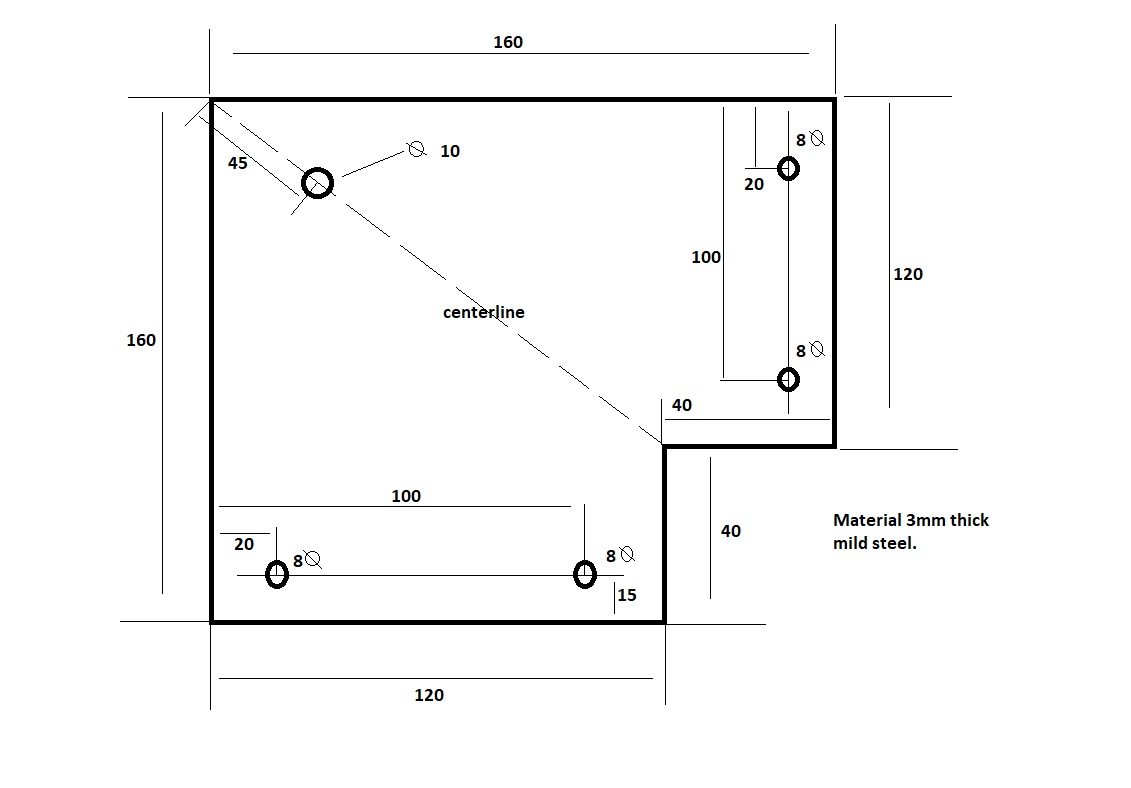
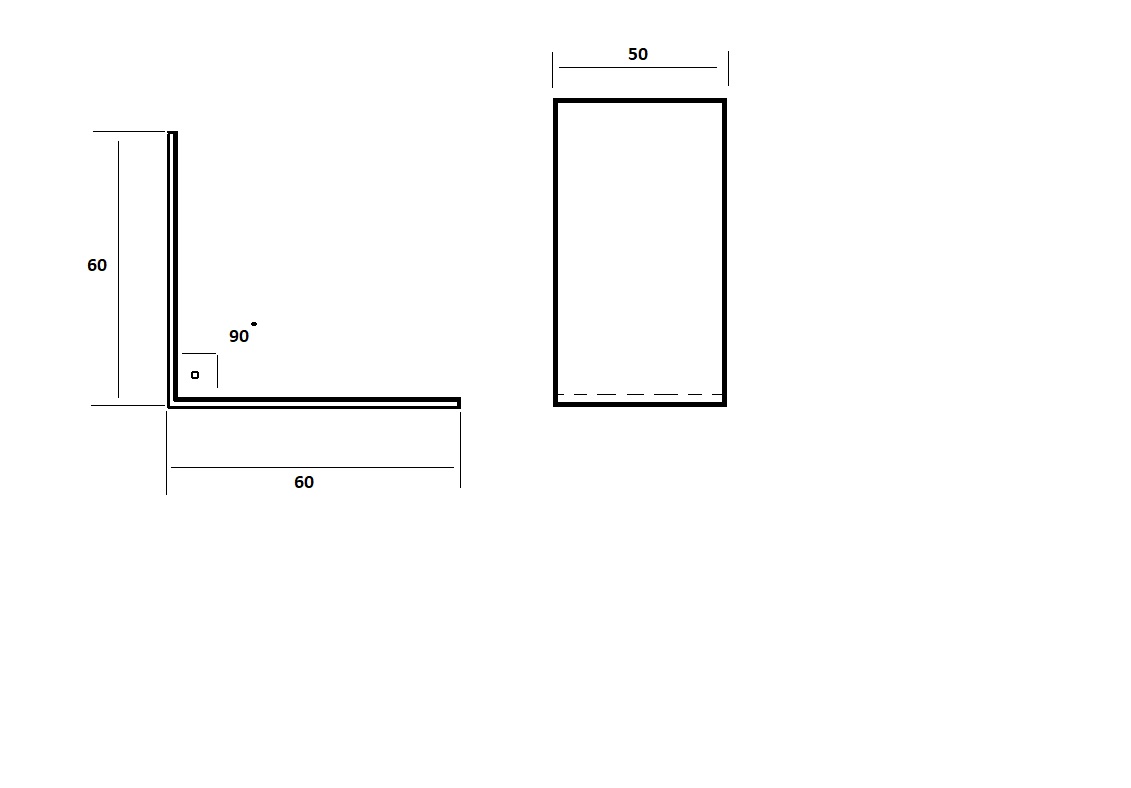
Part 1 is the base plate.
8mm holes are for plug welds.
Under the base plate i placed a support from 3mm x "Pin It")
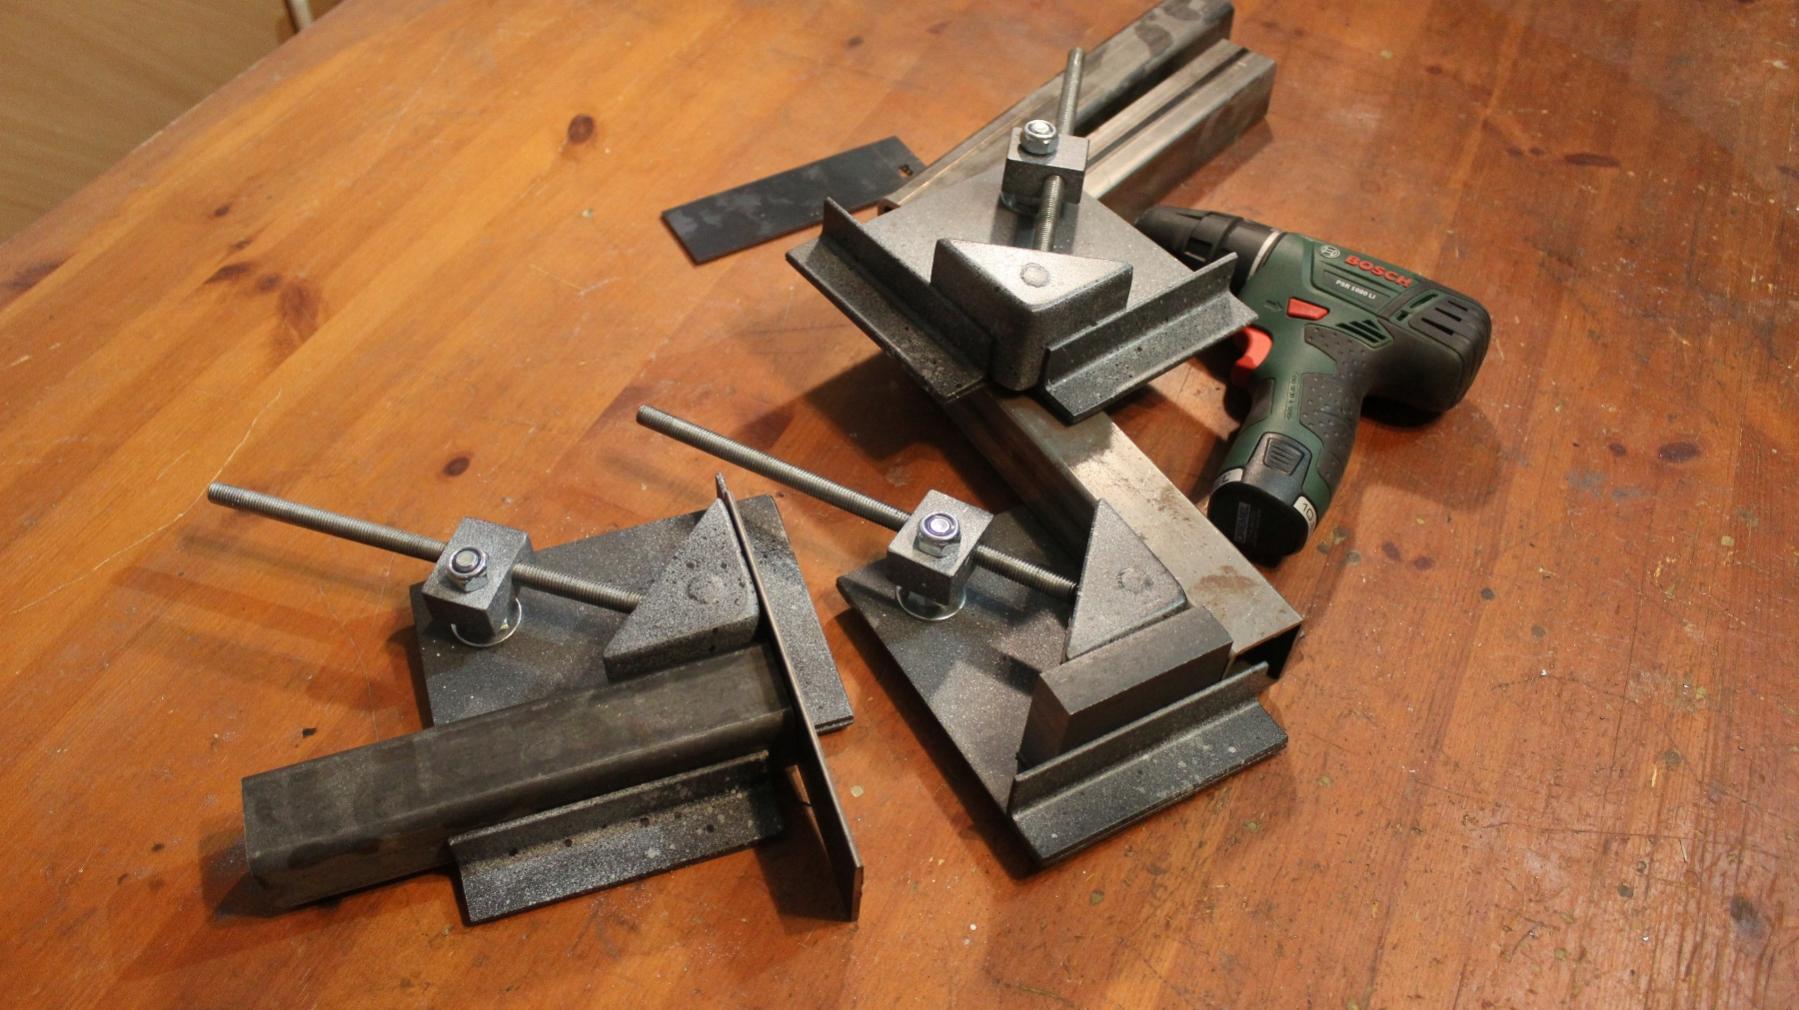
Made couple corner clamps.
Materials:
3mm thick mild steel.
3mm x 30mm x 30mm L-profile. ( two 120mm long pieces / clamp )
M10 threaded rod, lenght 250mm
Three M10 bolt, washers and nylock screw.
3mm x 30mm flat bar. 160mm long piece.
10mm axle. (two 20mm long pieces / clamp)
Plans:
Plans:
Part 1 is the base plate.
8mm holes are for plug welds.
Under the base plate i placed a support from 3mm x 30mm flat bar. Lenght 160mm. Holes for the plug welds. 20mm from the both ends and one in the middle. Made holes with 8mm drill.
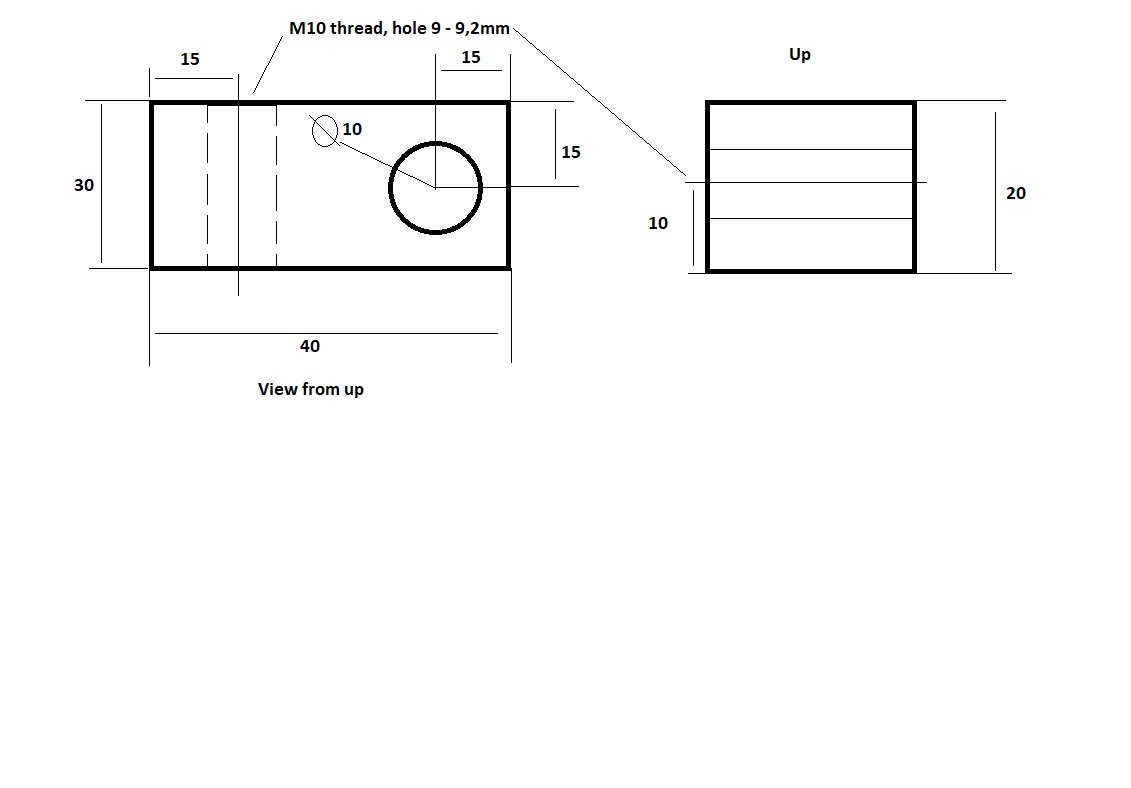
Part 2 works as a hinge.
10mm hole is for mounting it to the base plate. M10 thread is for the threaded rod that tightens the clamp.
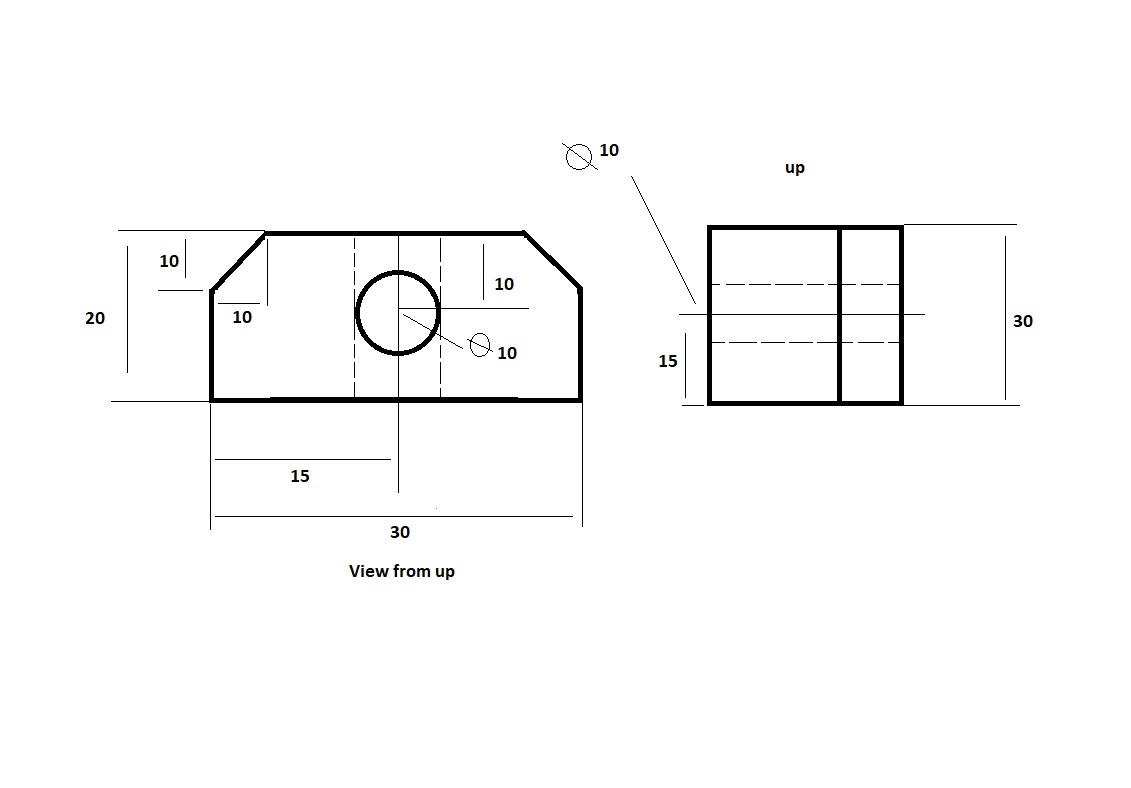
Part 3 goes as inside the "nose" and works as a swivel, it allows "nose" to tilt side to side.
Part 4 is the body of the "nose", Parts nro 5 are weld to part 4 from the edges, chamfer short edges before welding.
Part 6 is two pieces of 20mm long 10mm axle.
Weld one bolt the the end of the threaded rod. Shape it thinner, so that it fits inside the "nose".
After assembling and welding parts of the nose together, weld second nut to the threaded rod.
If threaded rod doesn't spin easily after welding, you can use power drill to force it to spin, and after a while its "machined" and spins smoothly.


 Reply With Quote

Bookmarks