
 LinkBack URL
 About LinkBacks

 by itzikdiy - Hi all,
This is my first post in this forum. I hope you like it!
I wrote this post from scrach twice since I had a fault and the data was lost
For a long time, I planned to make a table with a Jigsaw connected upside down, in order make faster and more accurate round cuts. (Like a bendsaw / scroll saw)
I saw some Jigsaw tables projects, but I don't have too much space to store such table an= "Pin It")
Hi all,
This is my first post in this forum. I hope you like it!
I wrote this post from scrach twice since I had a fault and the data was lost
For a long time, I planned to make a table with a Jigsaw connected upside down, in order make faster and more accurate round cuts. (Like a bendsaw / scroll saw)
I saw some Jigsaw tables projects, but I don't have too much space to store such table and also I didn't want to invest too much work in it, since I need it only for rarly DIY home projects.
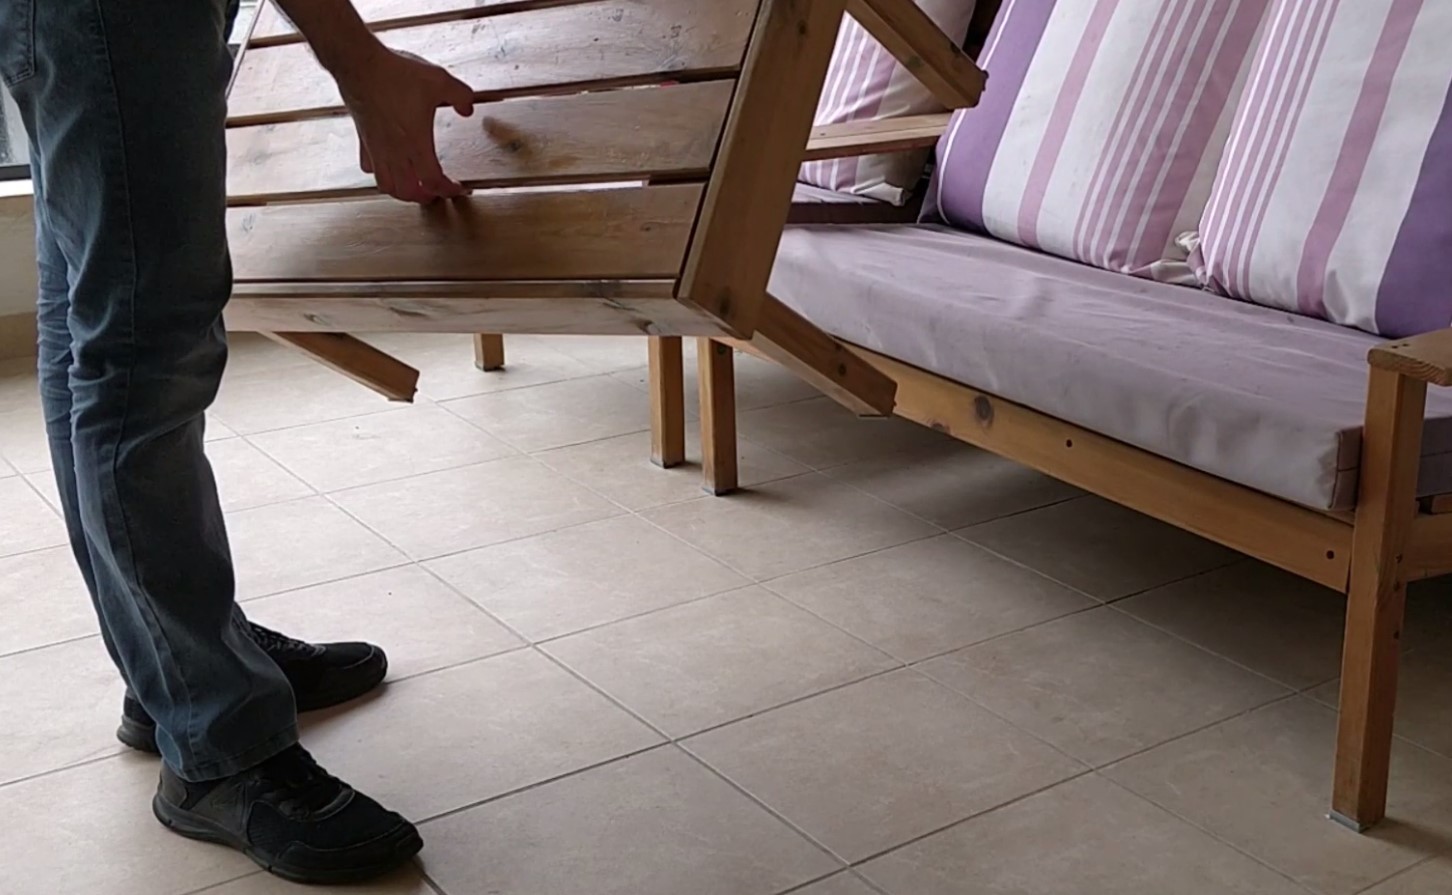
I decided to use my garden table for this project, due to the spaces it has between its top boards.
The main purpose was to make the table, with easy connection and disassemble of the saw and the accessories, and keep the table without destroying it.
The full project can be seen at the attached video. I would love to hear your comments and suggestions for improvements (as long as it doesn't destroys the table).
You can visit my starting YouTube Channel to see additional projects and subscribe in order to support me!
Thank you.
NOTE: This project, as other projects using a saw and other tools, can be dangerous. If you make it, please do it carefully and safely and at your own risk.
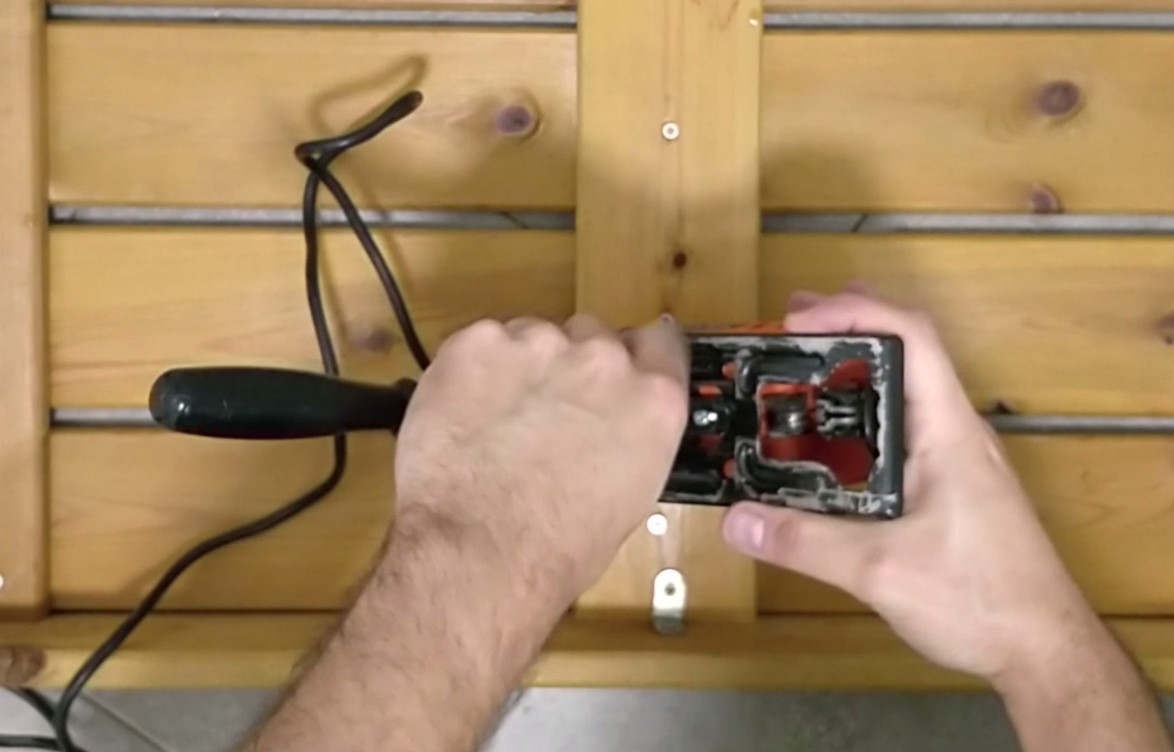
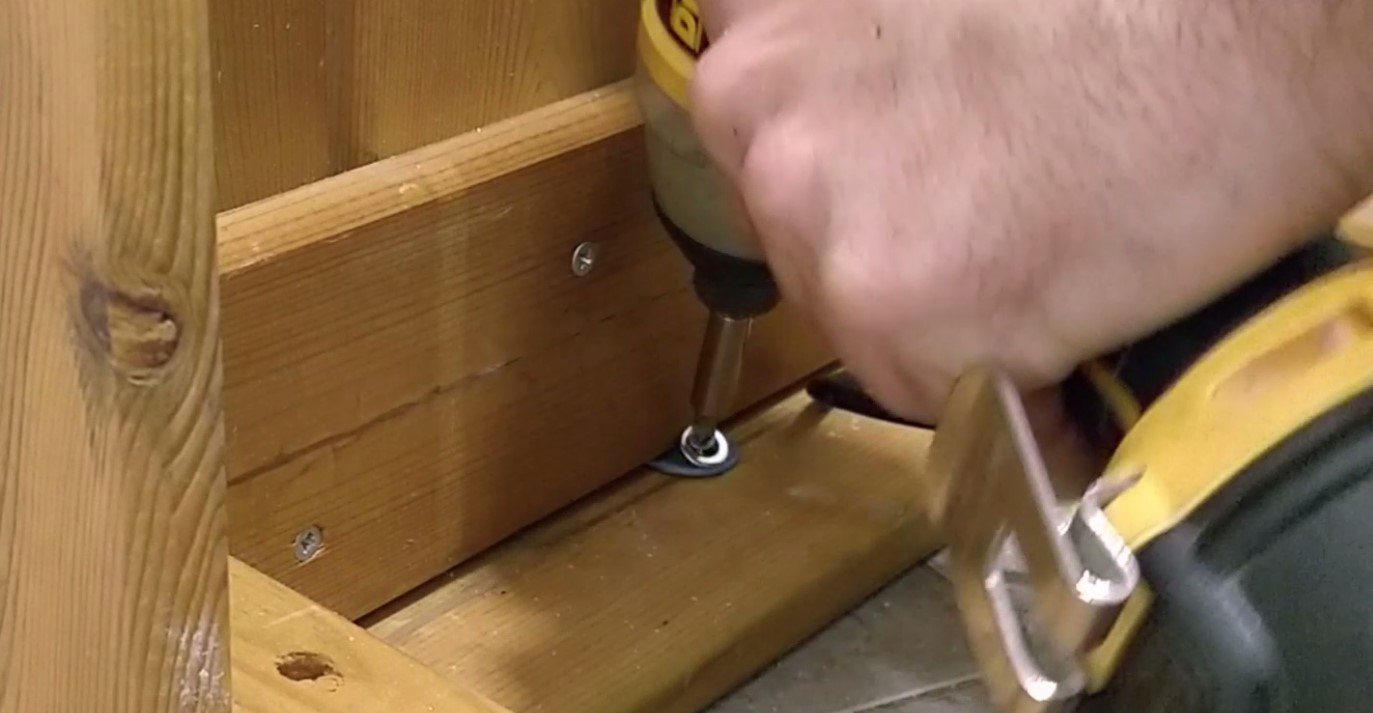
I started with removal of the Jigsaw bottom base.
I disassembled the screws holding it and positioned it on the bottom of the table to check the location for its conneciton.
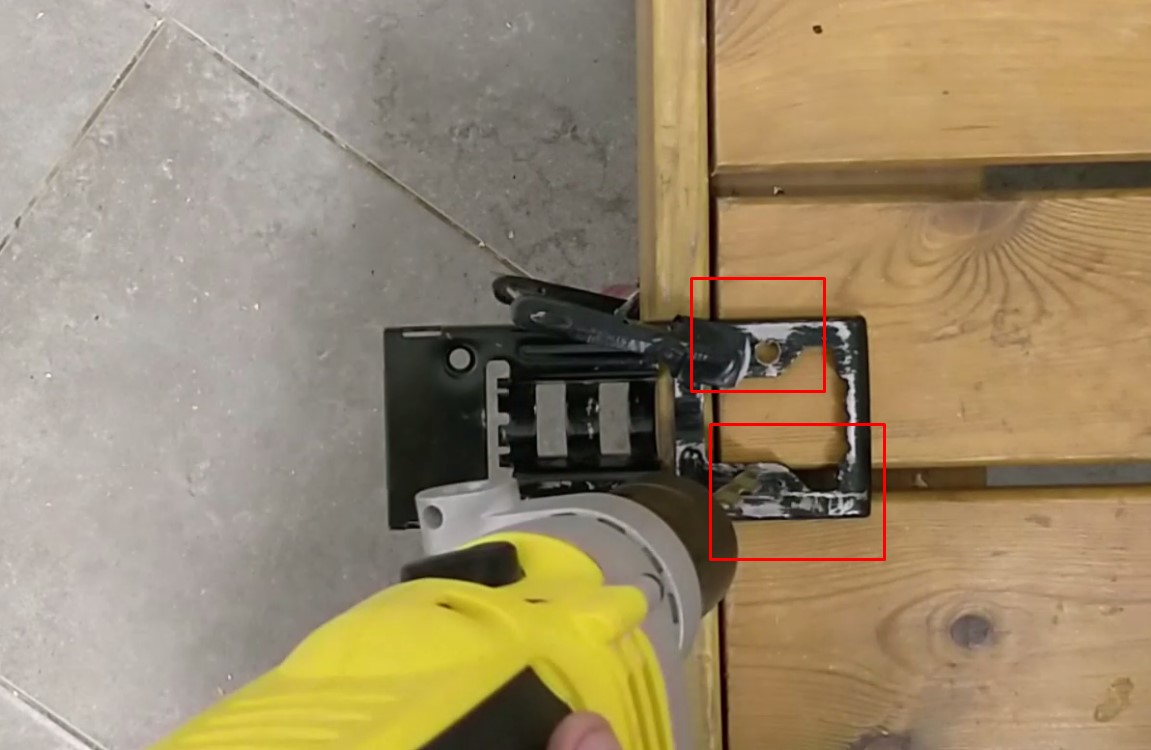
The base already had 2 holes.
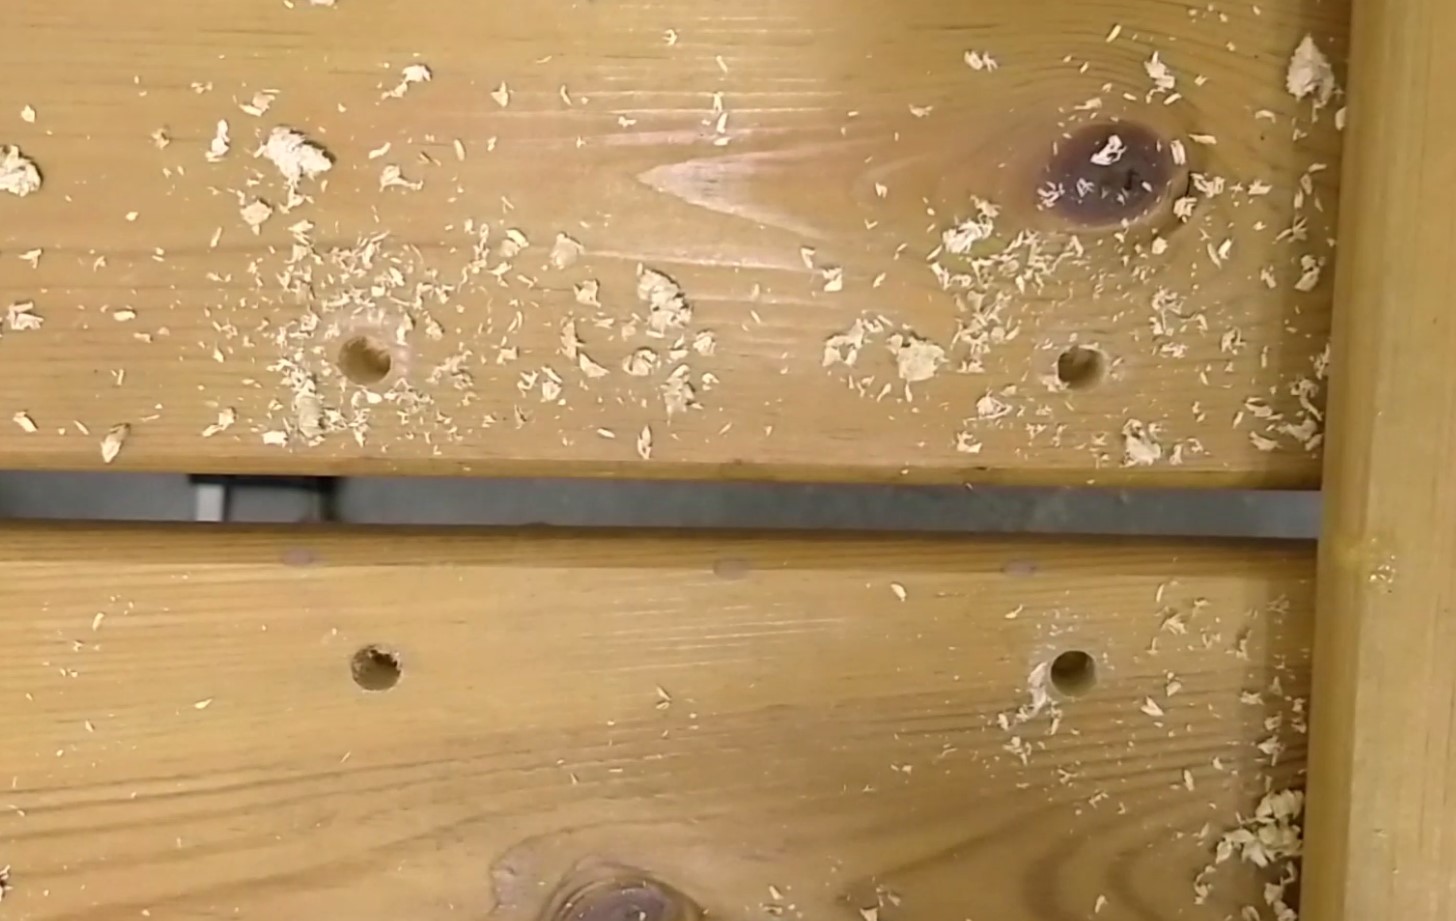
After marking the position with a hammer, I drilled 2 additional 8mm holes using a metal drill.
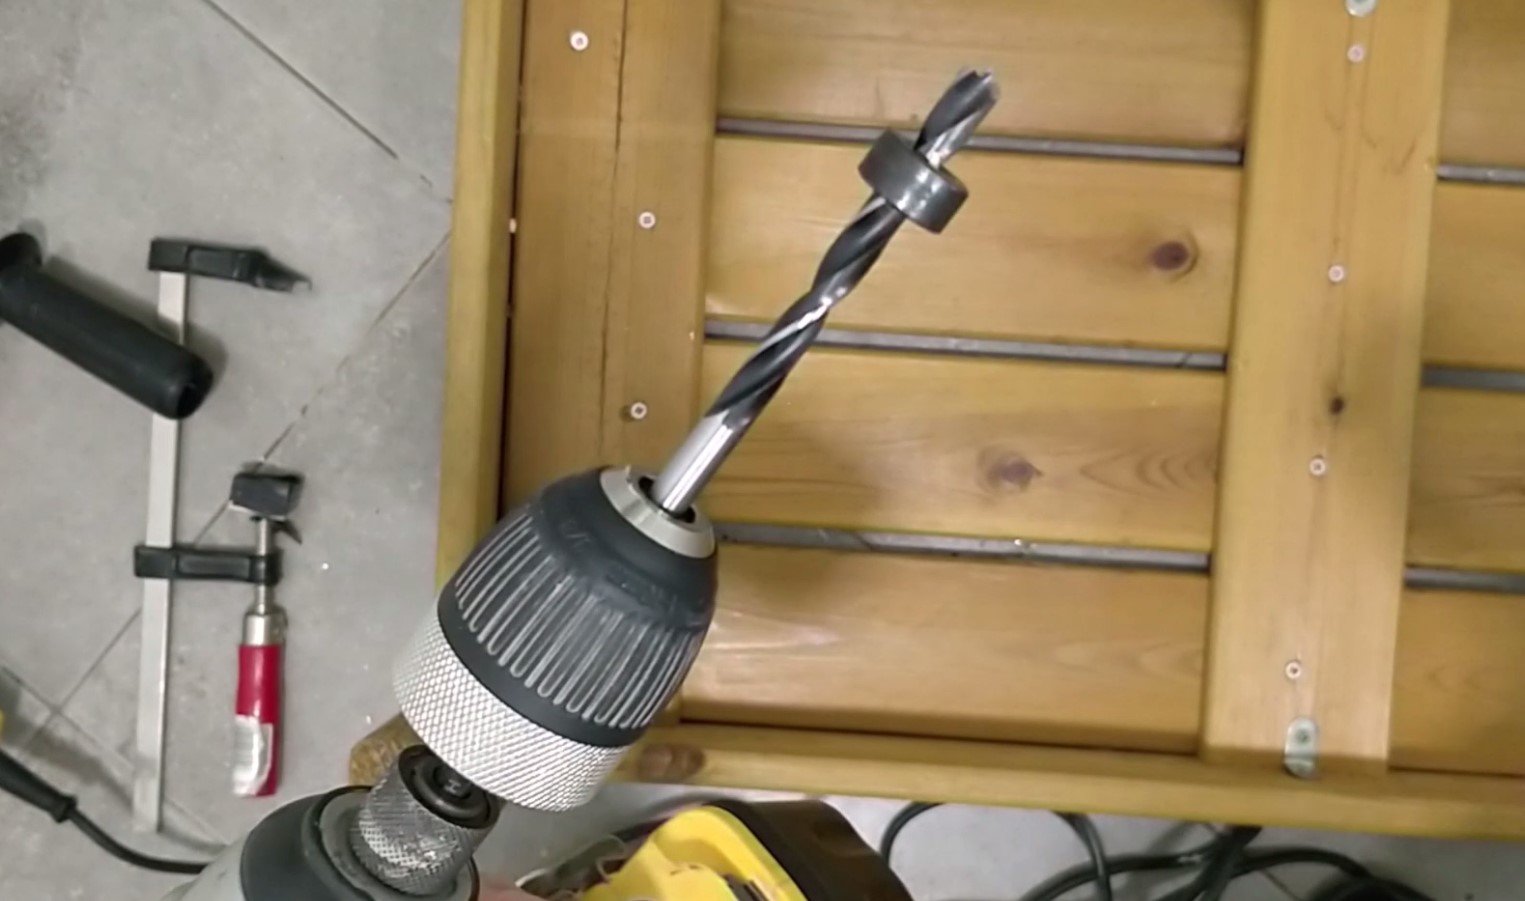
I marked the positions of the 4 base's holes, on the table bottom and drilled with 7mm wood drill and a stopper for 14mm depth (in order avoid getting to the other side, in the 18mm wood).
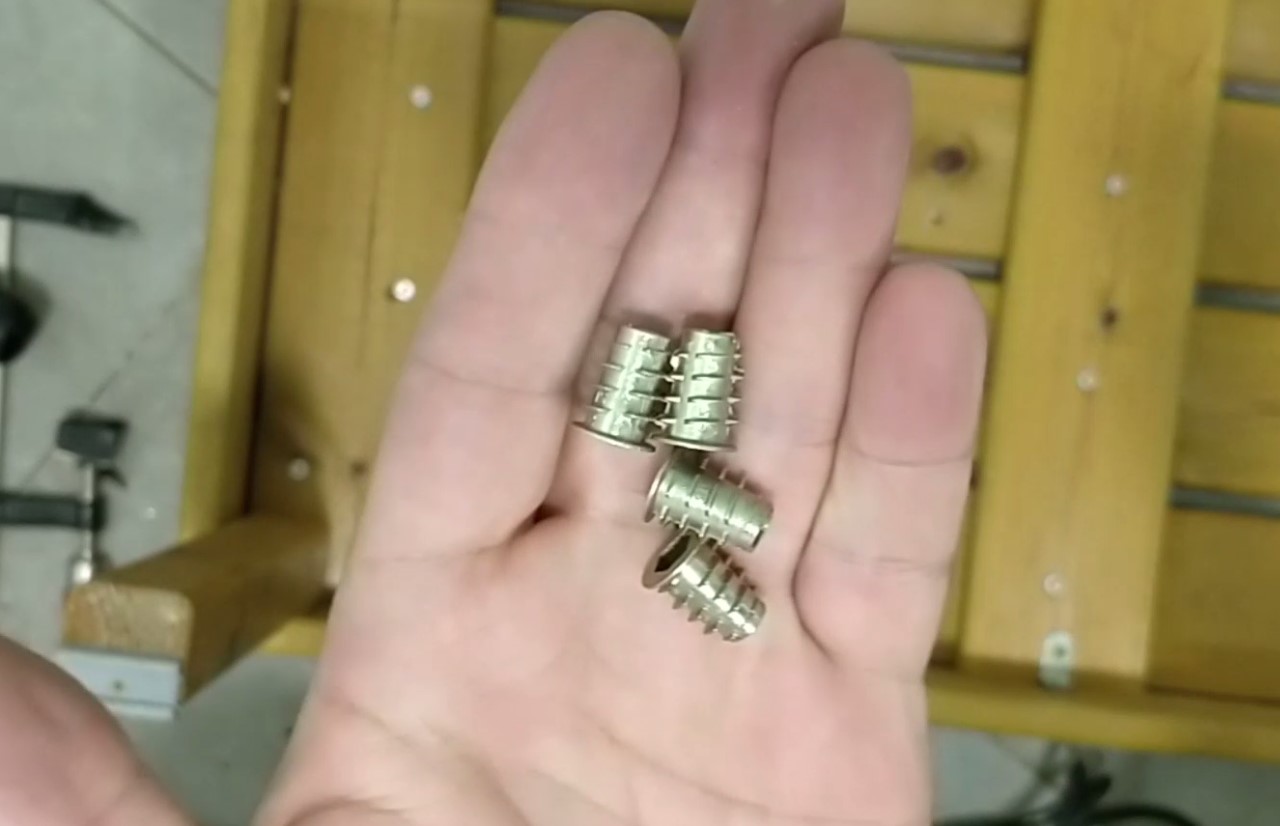
I took 4 threaded inserts / insert nuts and matching screws and metal rings.
These inserts, allow easy removal and re-connection of the screws and the Jigsaw to the table.
If I would use regular wood screws directly to the wood board, it won't hold too much reconnections...
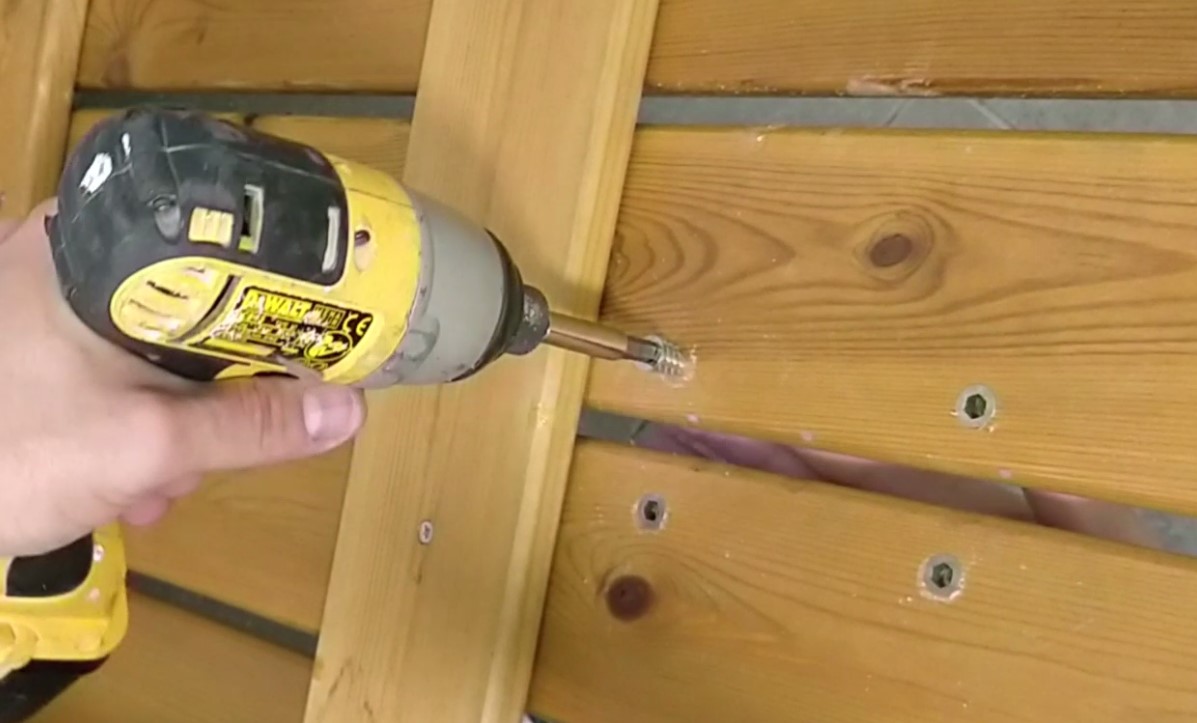
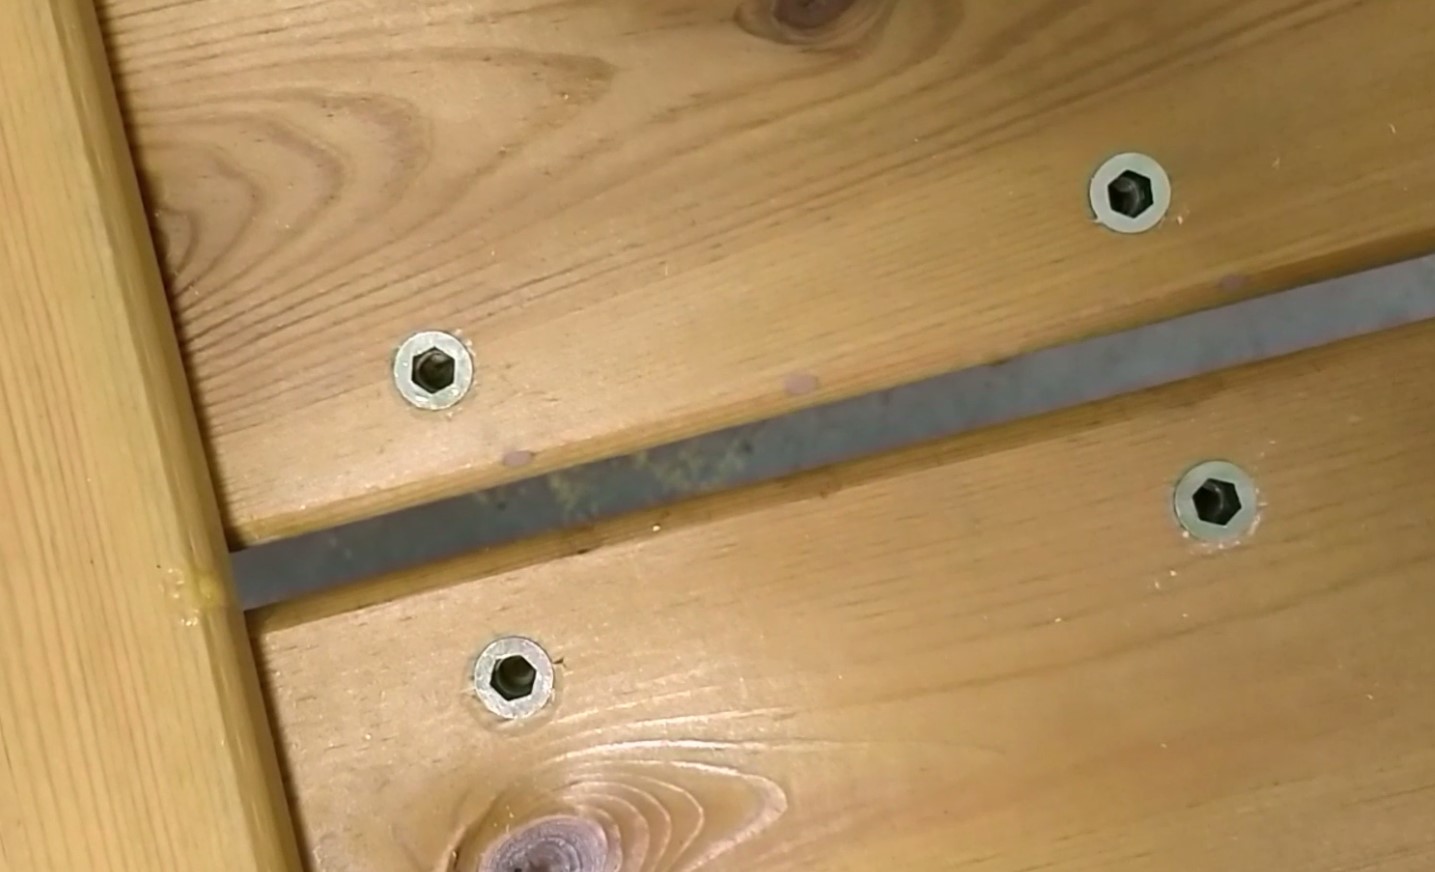
I connected the inserts into the previous step drilled holes. I did it carefully so the insert won't be passed to the other side of the table top.
I connected the metal base back to the Jigsaw.
Later, I connected the Jigsaw to the table using the screws and metal rings to the inserts.
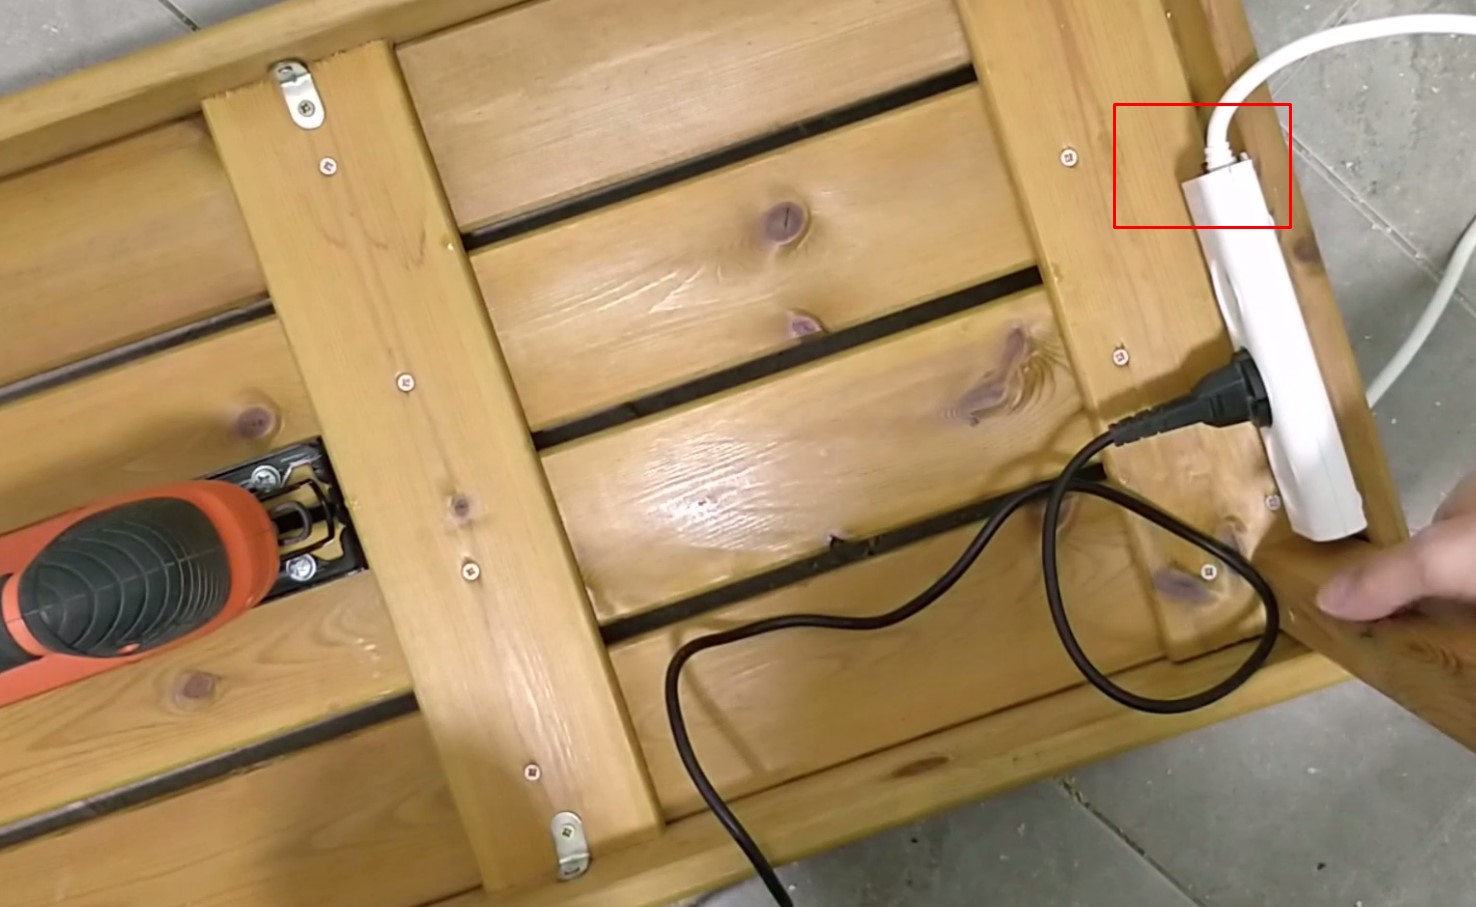
I pressed the Jigsaw switch and locked it using the lock button, so it would work without pressing it.
Finally I connected its power cord to an extension cord with a switch.
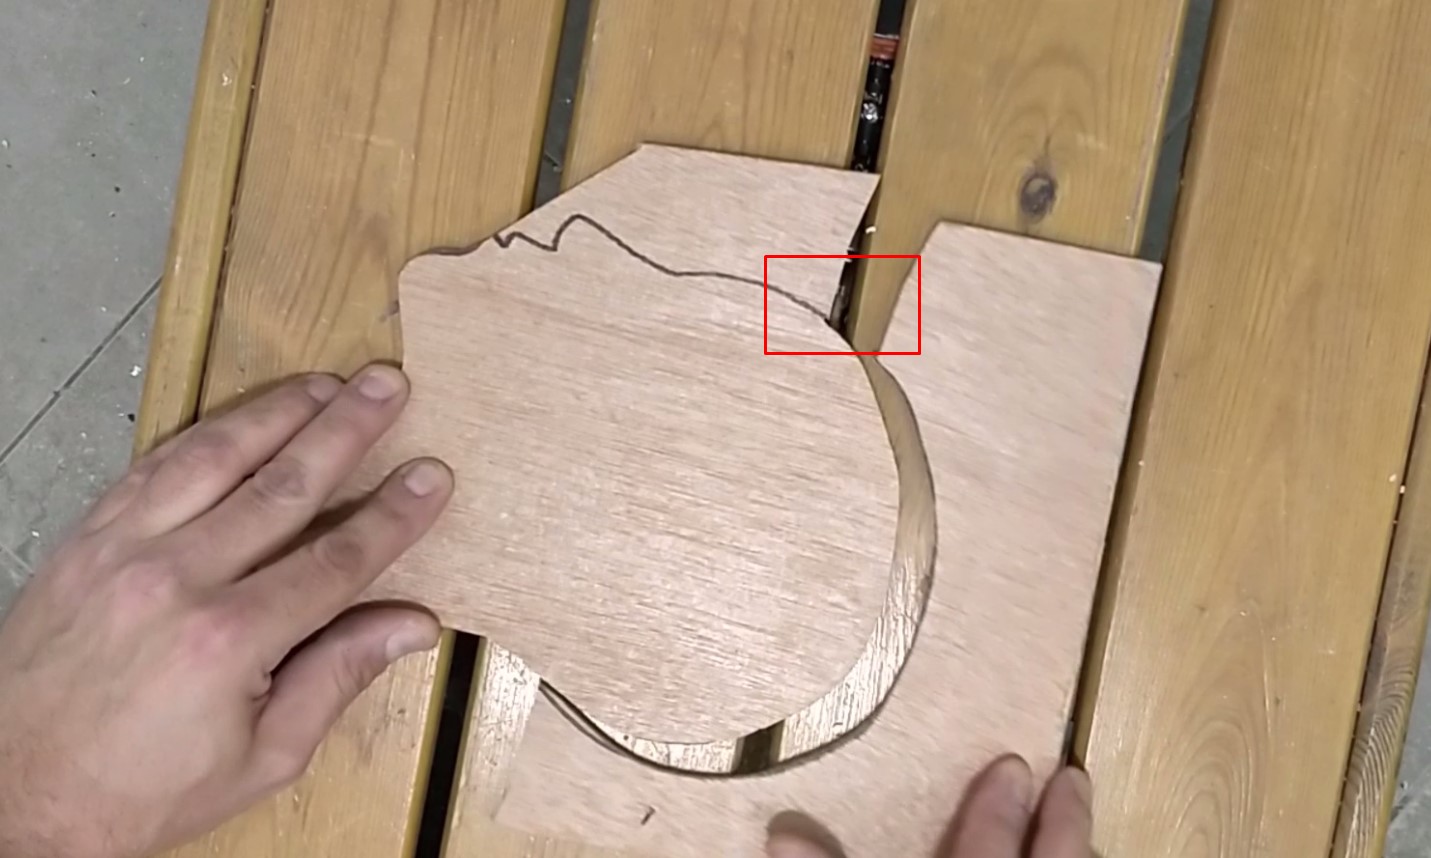
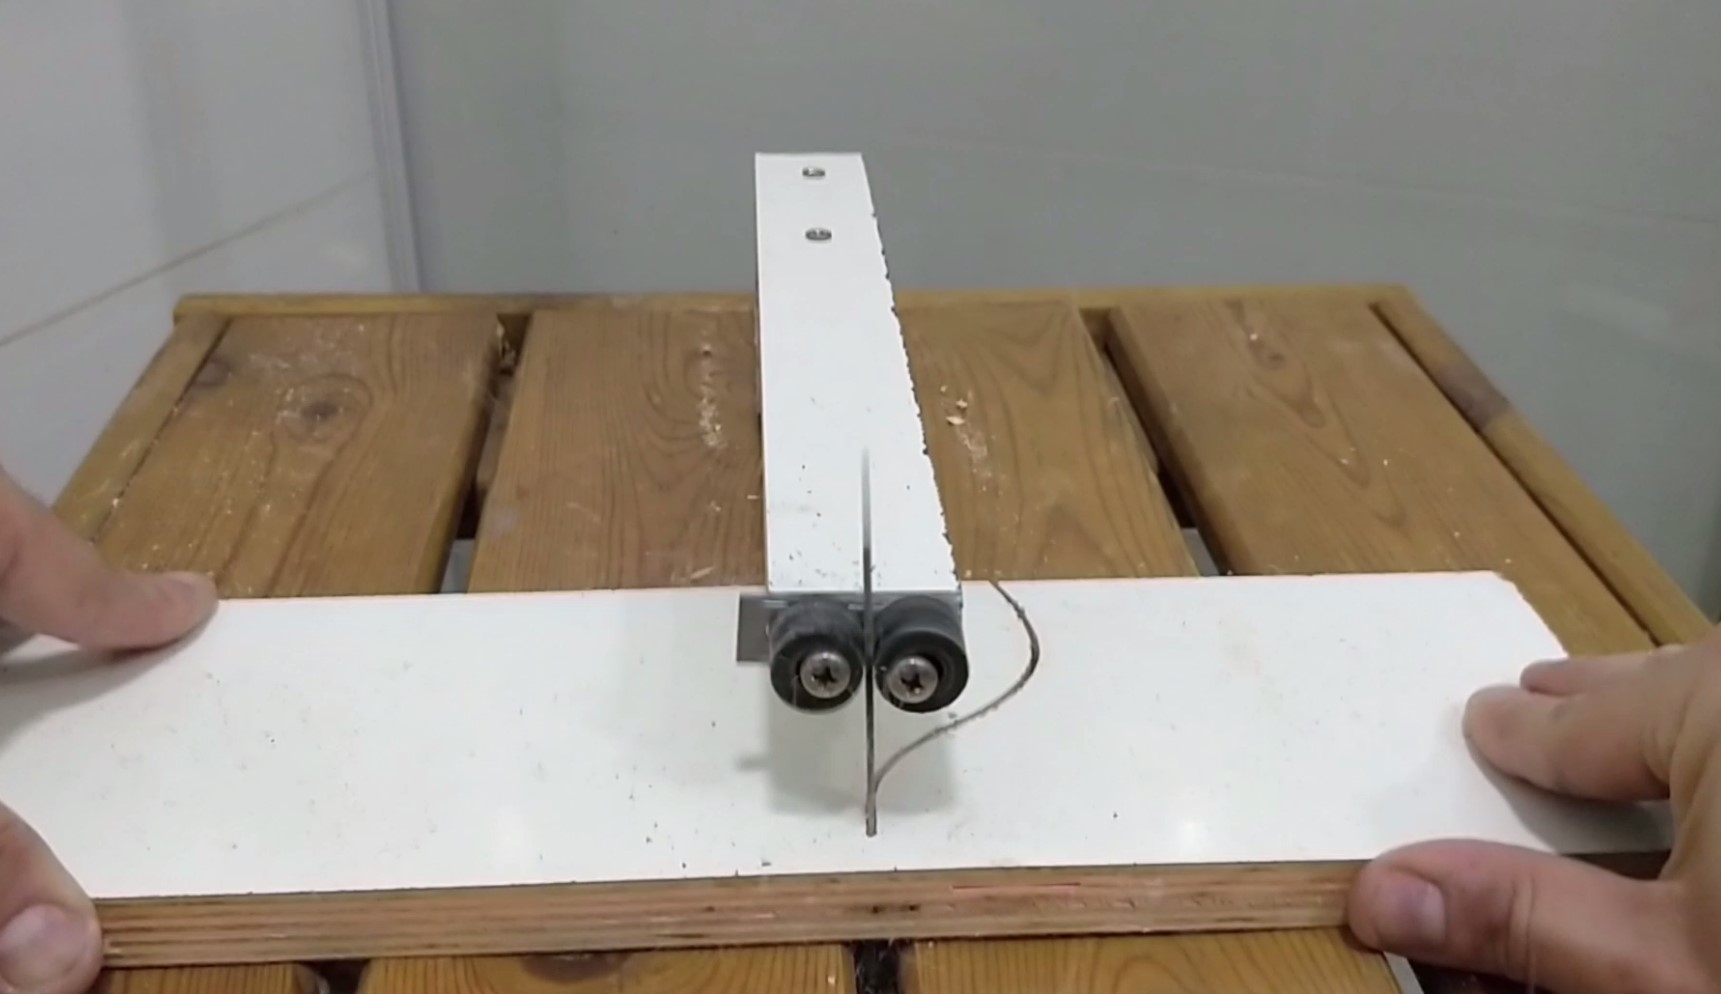
At first, I tried to cut without a special guide for the blade.
As you can see in the video, It cut well but the only issue is that the blade moves from side to side and I decided to add additional guide for the blade, in order to stabilize it.
In addtion, it was hard to see the blade without any mark on the table (although I could see it well from the side while cutting).
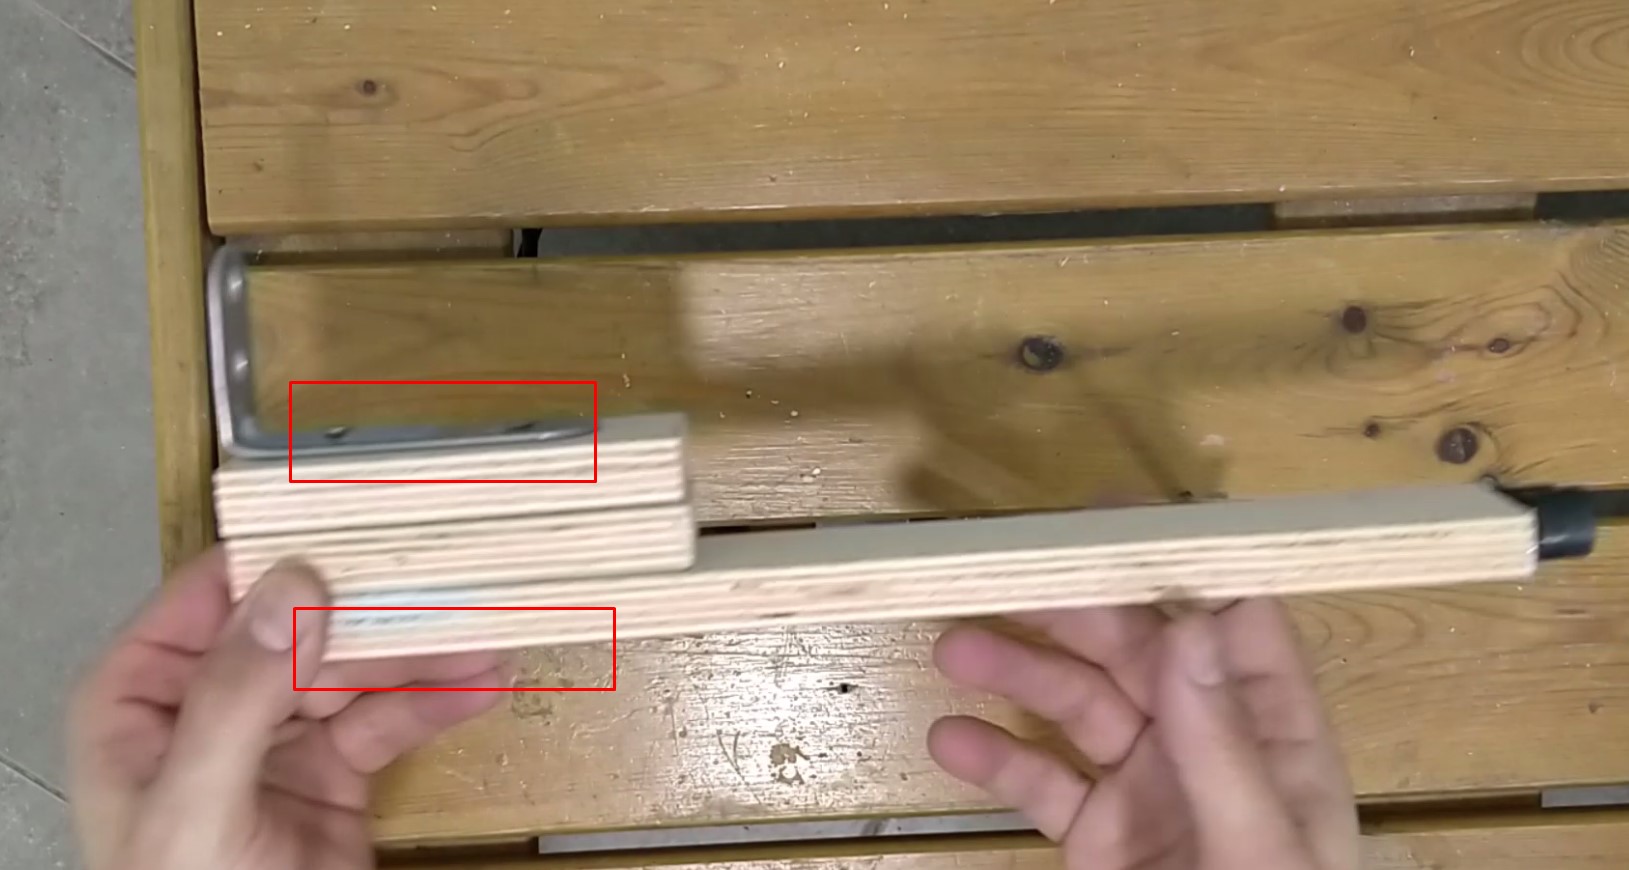
I took the cylindrical plastic parts I had (I assume it's made of Aokolon), and connected them side by side, leaving a space for the blade.
Usually, people are using bearings for such projects but I couldn't find ones.
I decided to use the plastic parts although they can be worn out after some time, but I don't plan to use it intensively and I can replace it later for any other parts.
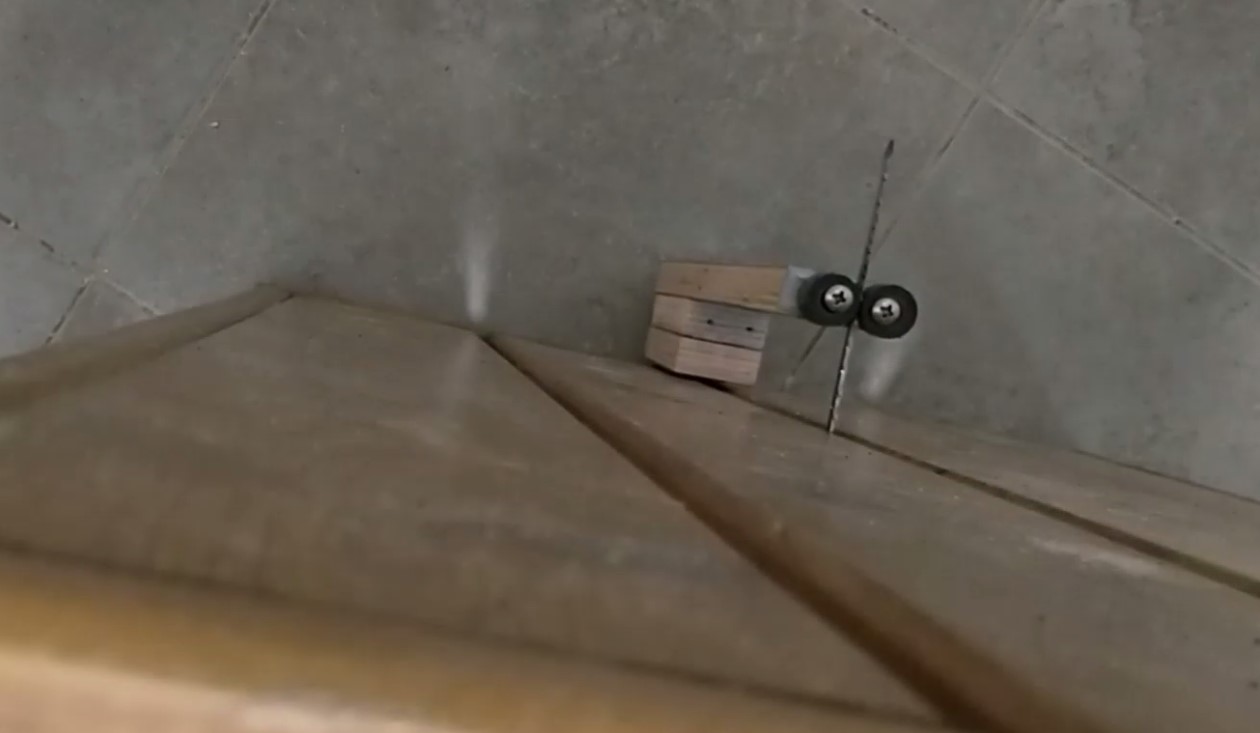
I cut some wood pieces for making the guide holder.
I connected the wood pieces together as you can see in the image. I made it high enough for the wood I need to cut.
finally, I connected a metal angle at the bottom, in order to connect it to the table.
I connected it with screw below the table.
On the second try with the blade guide, the blade was much more stable, as you can see in the video.
After finishing, I easily removed the Jigsaw, the guide and the extension cord.
That's it. Table is back to its regular usage without any harm
On the past, I made a wooden car toy, built from layers of wood (on the below video). I cut it using the jigsaw and it was hard.
I'm sure that if I would have this table while I made the car, It would be much easier and accurate to cut the car layers. NEXT TIME!
DIY


 Reply With Quote

Bookmarks