
 LinkBack URL
 About LinkBacks


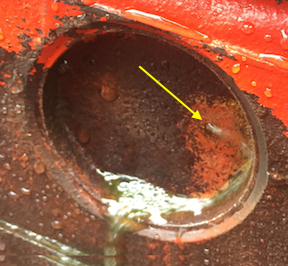
I have an old Ford 860 Farm tractor. While blowing off the accumulated dirt and oil, I blew a hole in a core plug (freeze plug) with the pressure washer. The plug with the hole was in the cylinder head, in an easy place to repair.
But there is an other one, right below it, in the engine block that is partially blocked by the bell housing. It was not leaking, but I had to believe if one was bad the others were bad also. My brain would not let me put the tractor back in service until that plug had been replaced. Many in various tractor forums said the tractor has to split to properly replace that plug.
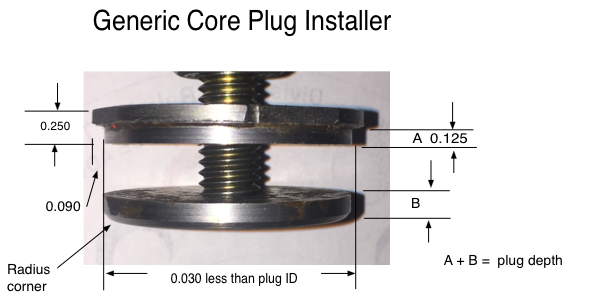
With a bolt, nut and 2 pieces of 1/4" x 2" x 2" steel plate I was able to made a tool to allow replacement. I drilled and tapped the plates for 1/2-13 NC thread. (yeah I know, some want me to use metric, but my bolt bucket has way more inch stuff in it.)
Then chucked up the bolt and nut in the lathe. Spun the plates onto the bolt and against the nut to hold them away from the chuck. Then turned them as one piece to make the installer. Dimensions are generic as few will need the same size. When sizing the tool to fit the plug ID, you need 0.020 to 0.030 clearance to allow for the plug to shrink as you drive it in. (no need to ask how I know this!!!!)
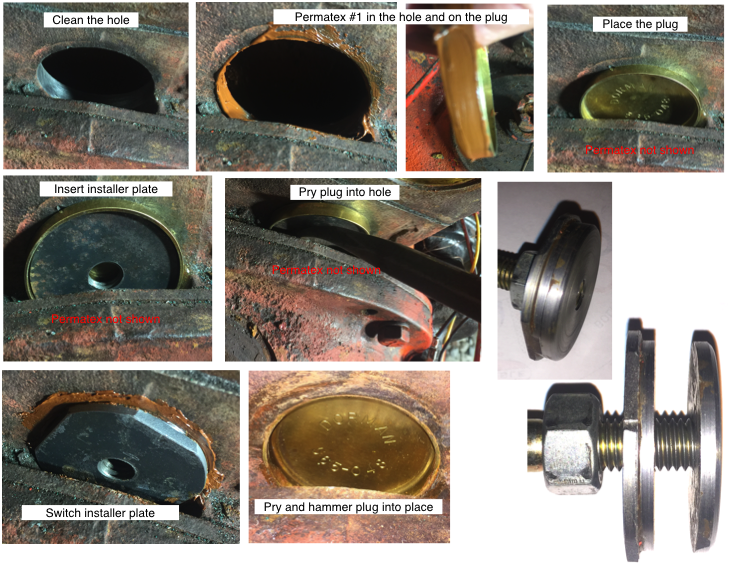
I used the tool assembled with the bolt to drive in the easy ones. Then used just the plates to install the hard one. The thin plate fits inside the plug. Then a pry bar, bearing against the bell housing can used to push in the plug without distorting it. When the plug is part way in, the second plate, which presses on the rim of the plug is used to finish the installation using a pry bar and hammer as needed. The flange on the installer, prevents the plug from being pressed in too far. The top of the bell housing is above the center of the plug so the bolt cannot be used.


 Reply With Quote

Bookmarks