
 LinkBack URL
 About LinkBacks


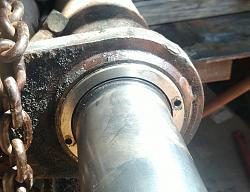
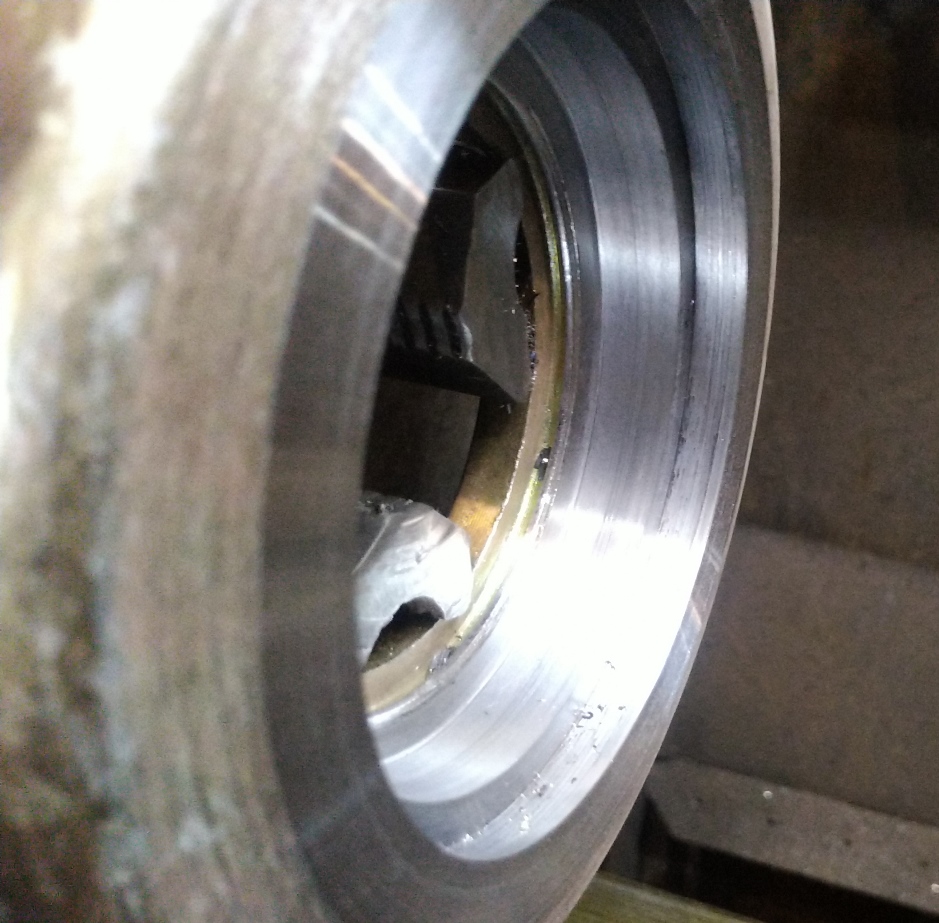
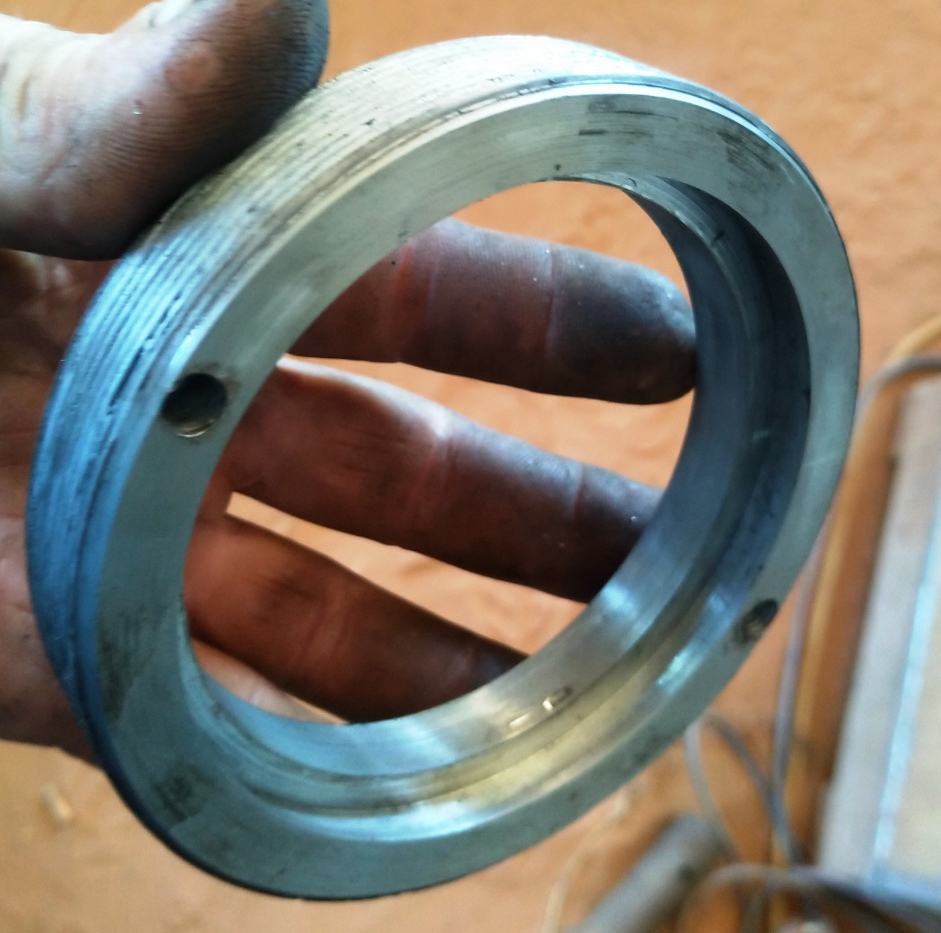
The gland nut on 1 of the Siamese cylinders had some weak looking threads once I had it removed. I decided I should make a new one rather than try and clean up the threads on the old nut.
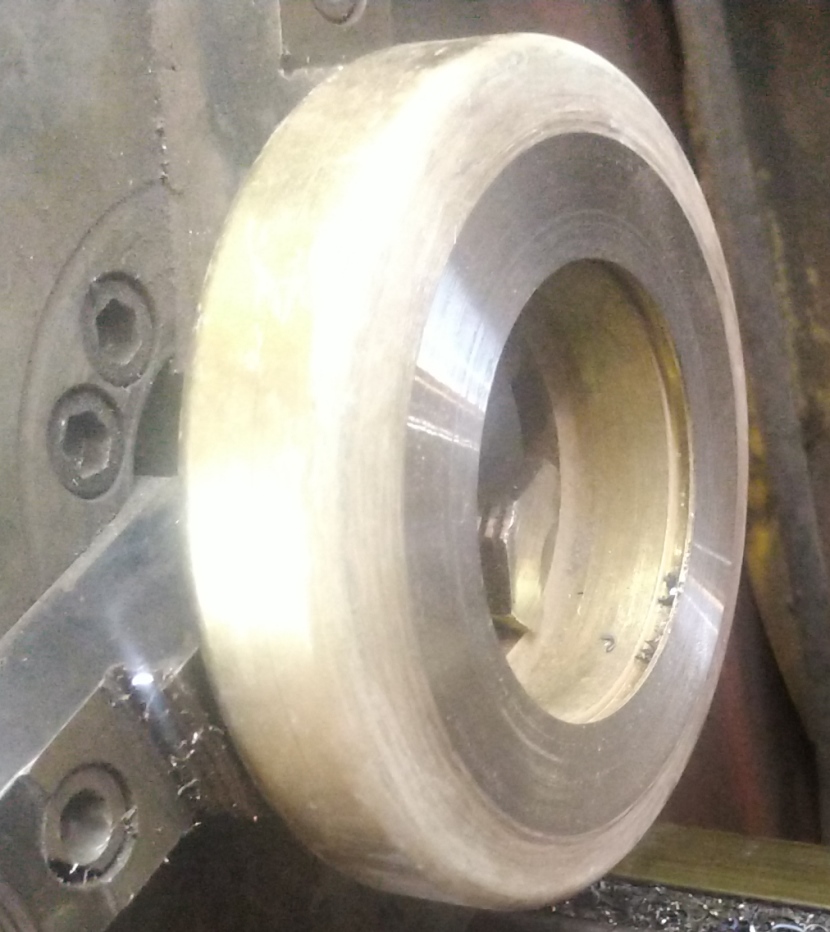
I started out with a roller I had left over from a bygone era of manufacturing 2 post lifts
I faced off 1 side
then bored to size deep enough to make the nut
Then added the wiper grove
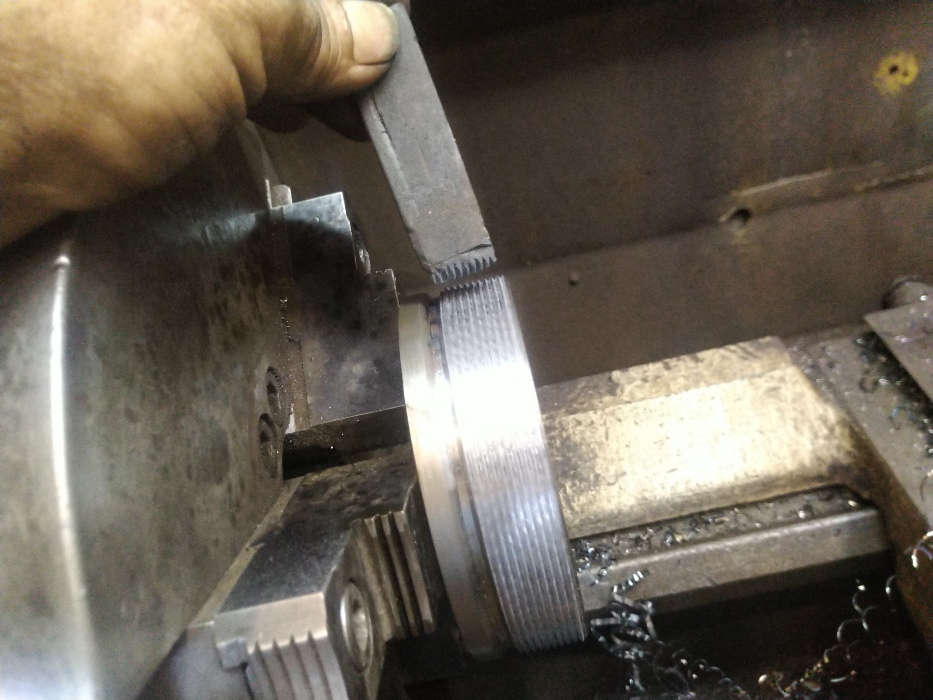
Then turned the OD and treaded to 12TPI and used a stone to smooth the threads
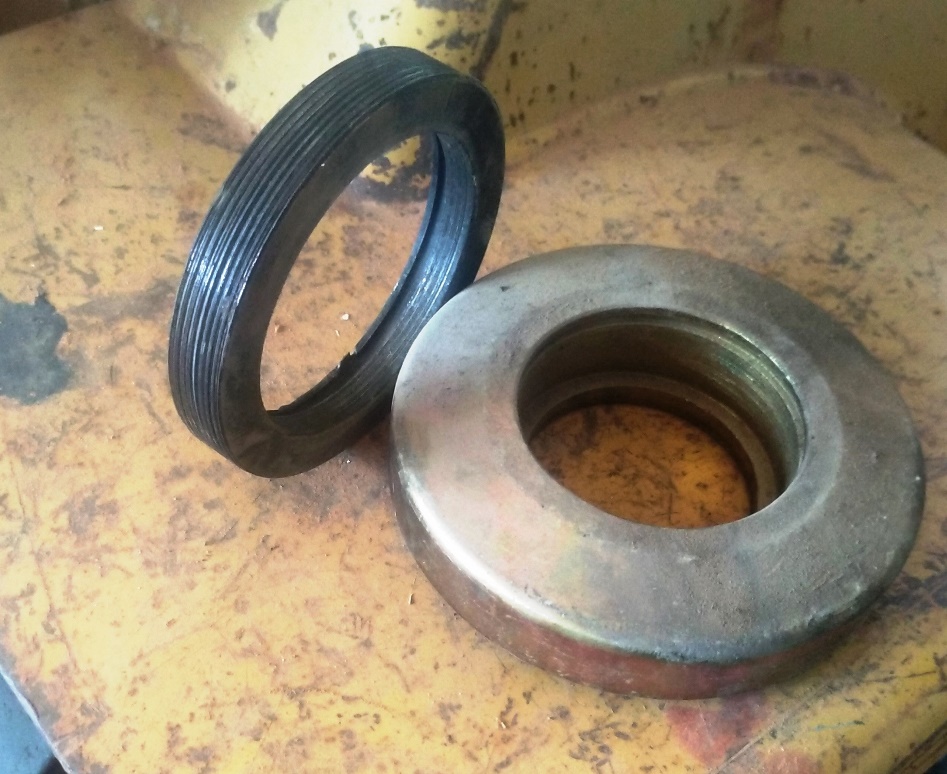
Its hard to see but I scribed a mark on the OD incase I needed to return the nut to the lathe and take off a little more of the thread depth
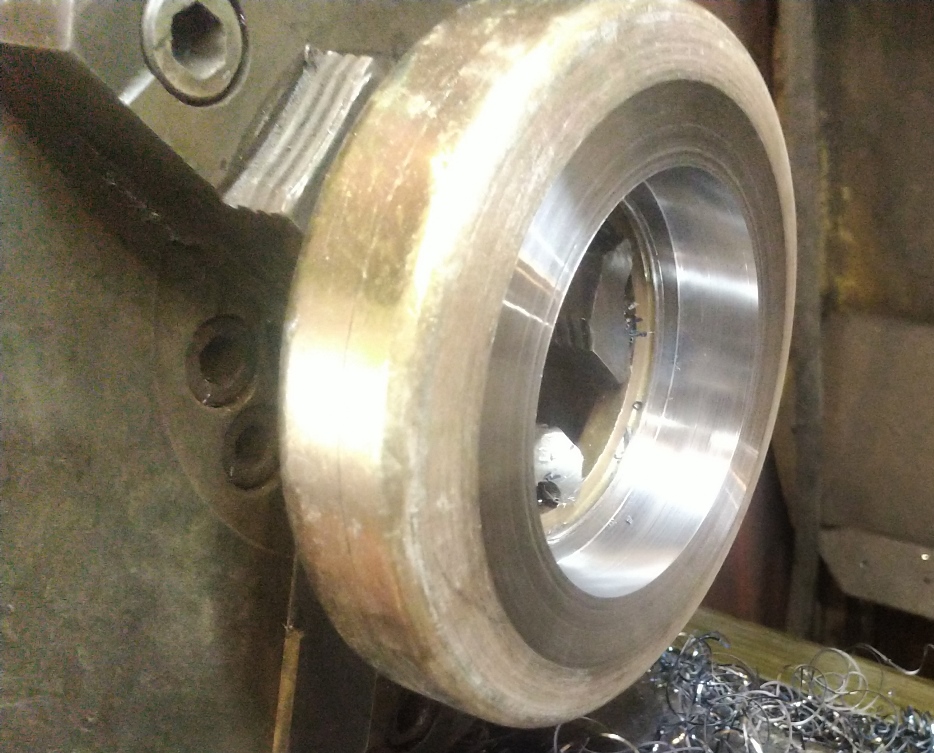
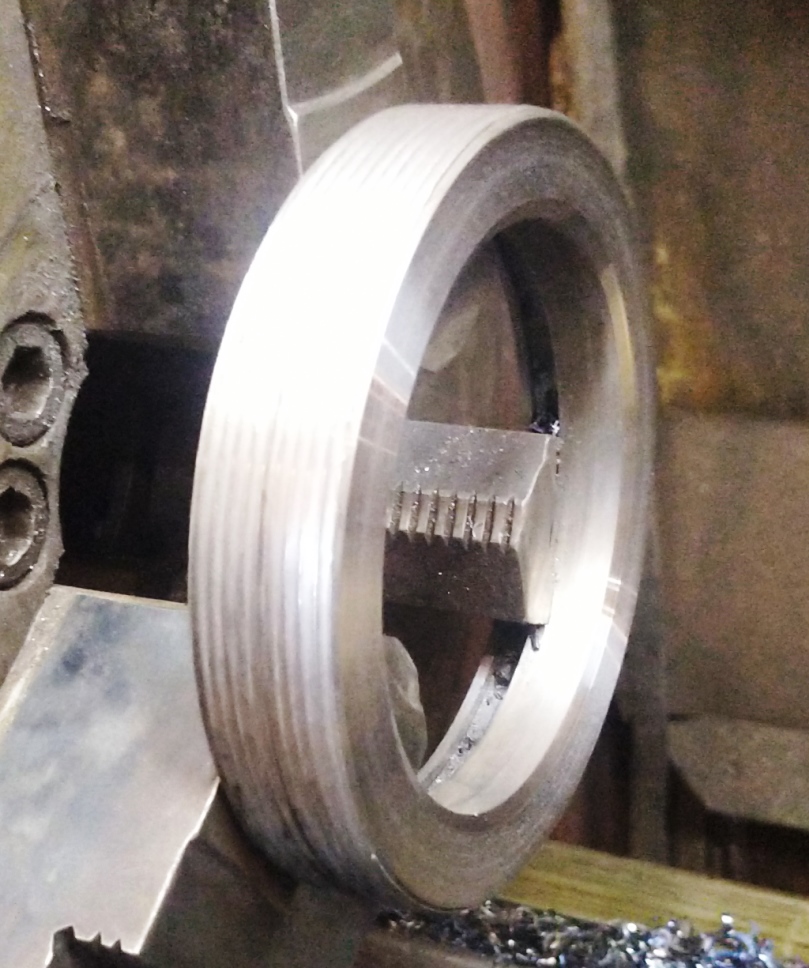
Once satisfied the nut would mate up to the threads in the cylinder I chucked it from the opposite side and removed the excess thickness
the finished nut
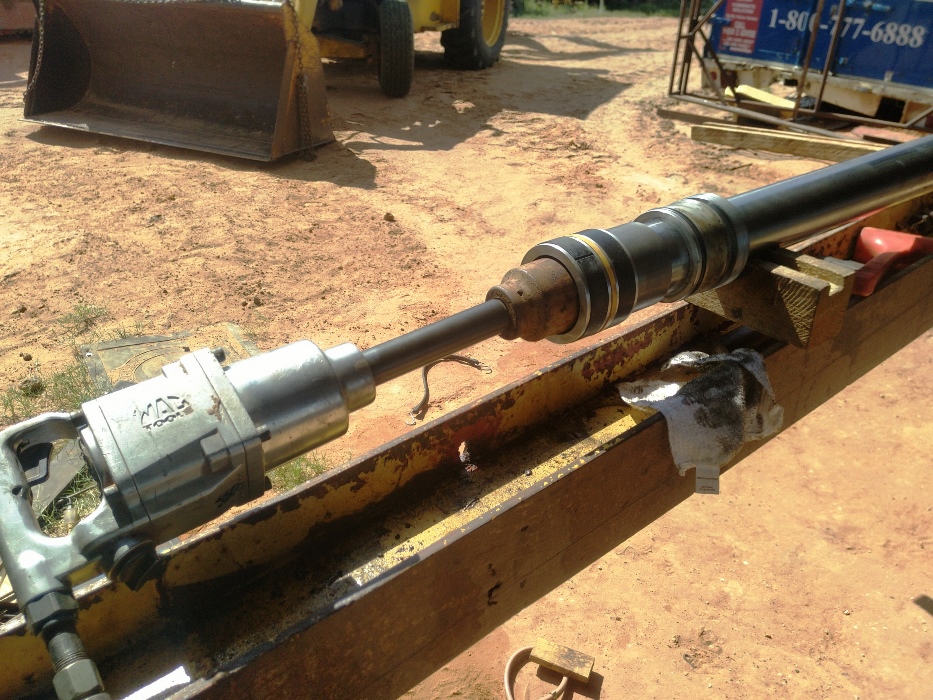
Assembly
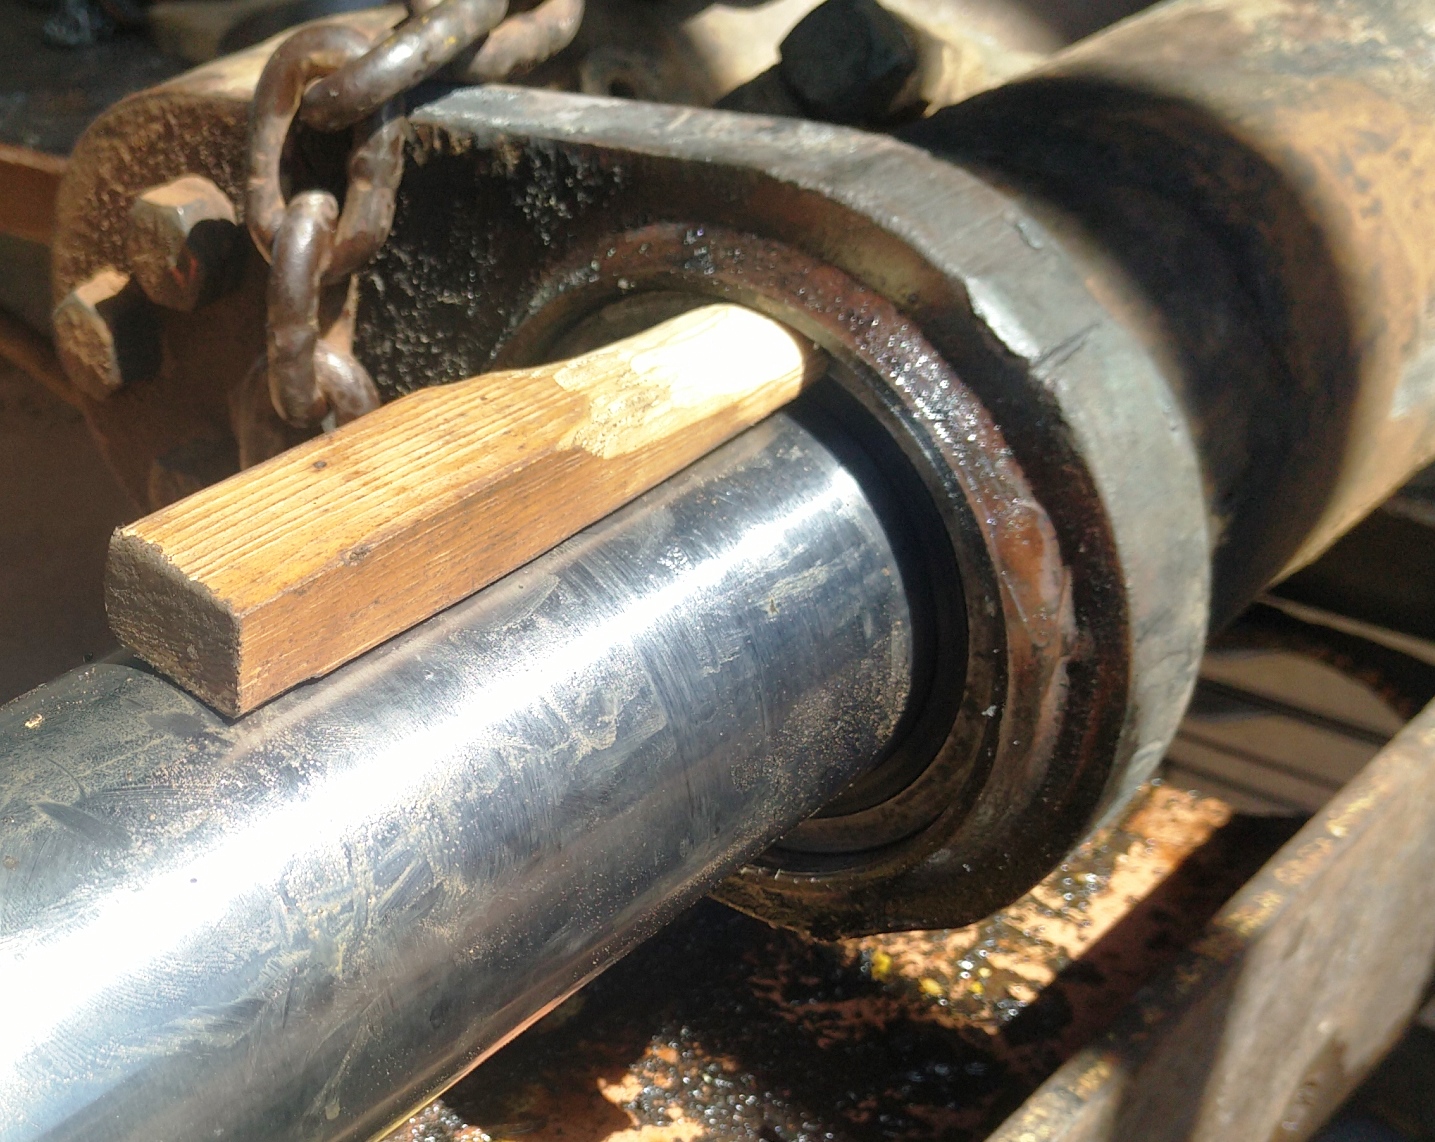
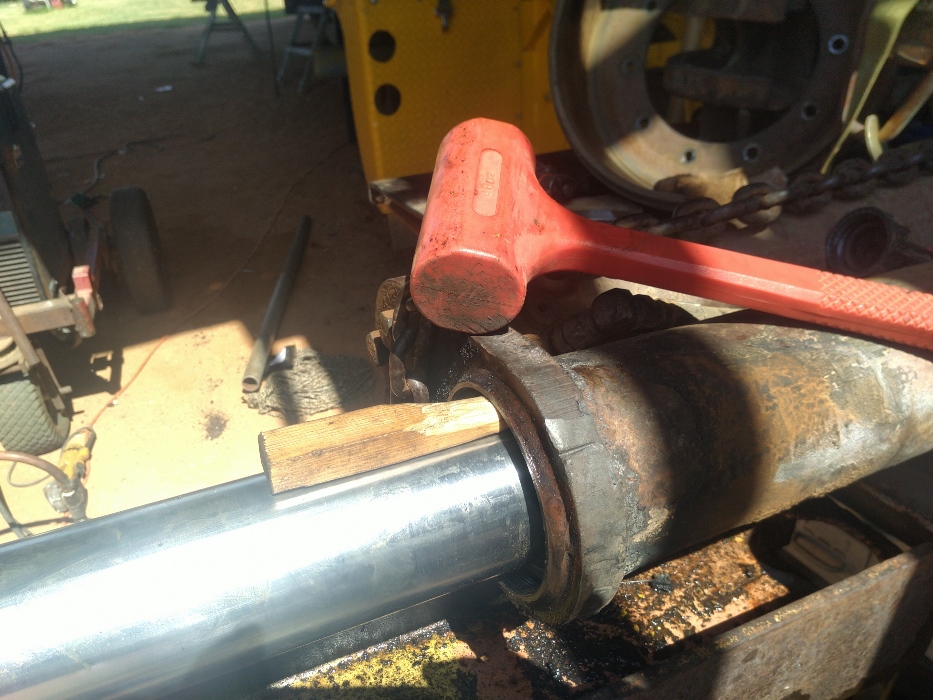
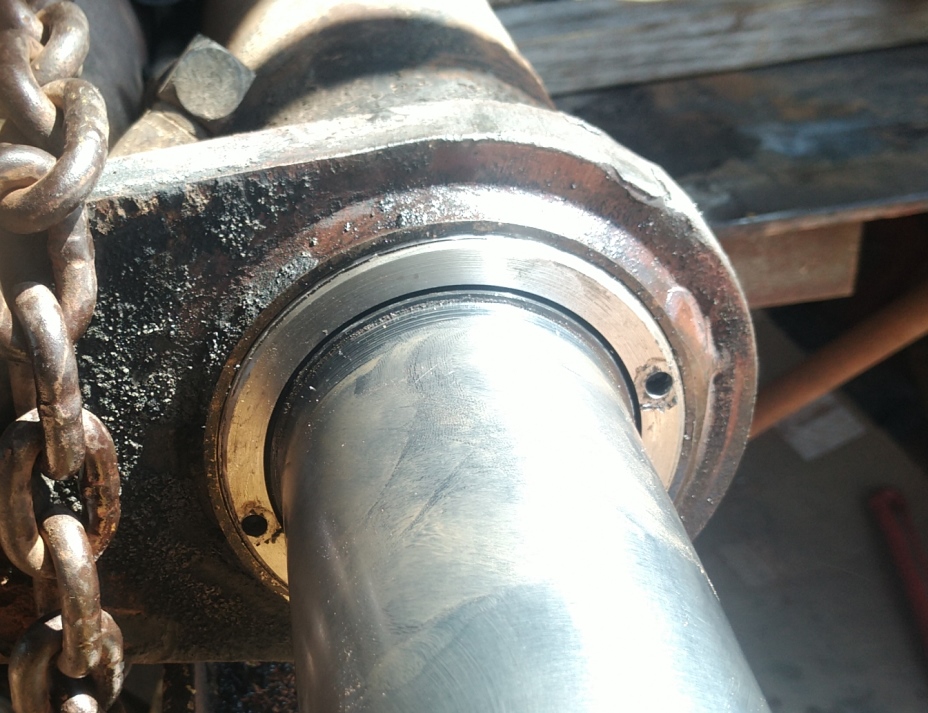
Carving a piece of wood makes the best drift for tapping the gland in place. My brass and aluminum drifts were too large in diameter.
I will put this in my tool box to use again
Fully assembled


 Reply With Quote

Bookmarks