
 LinkBack URL
 About LinkBacks


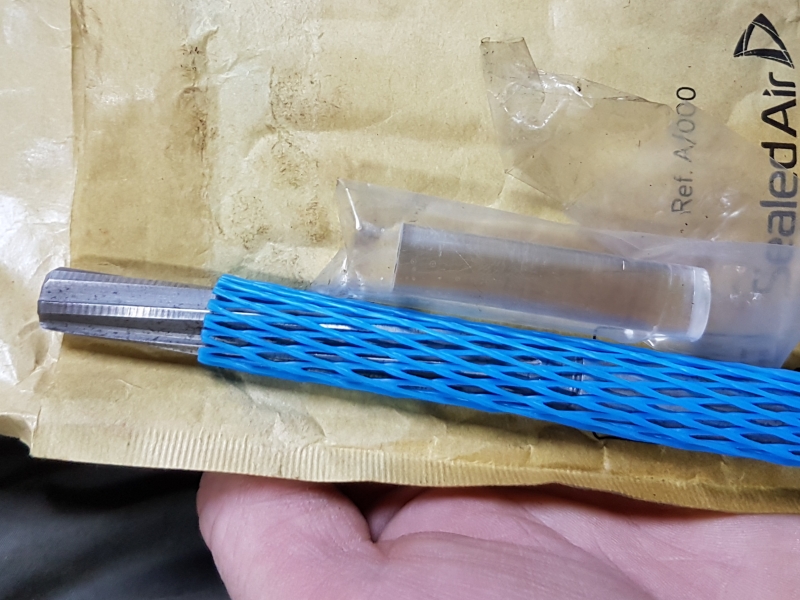
I've had an optical centre punch on my="to make=" list for ages and was slowly gearing up to make one. I decided to go with 12mm for the punch and got a 12mm reemer and some 12mm x 50mm acrylic rod in preparation:
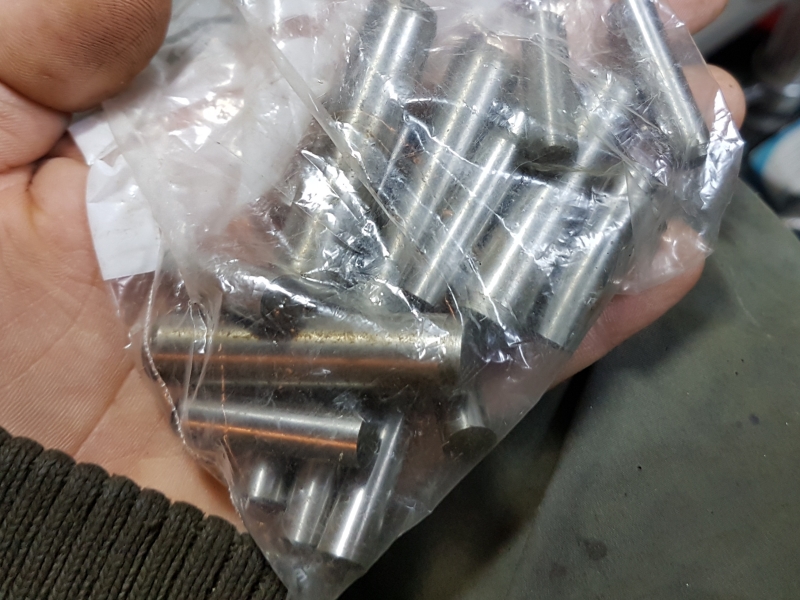
Not long after, I snagged a bag of hardened and ground dowel pins of varying diameters, some of which also happen to be 12mm x 50mm and figured I could use one to make a punch:
I've h= "Pin It")
Seasons Greetings folks *< []: )
I've had an optical centre punch on my "to make" list for ages and was slowly gearing up to make one. I decided to go with 12mm for the punch and got a 12mm reemer and some 12mm x 50mm acrylic rod in preparation:
Not long after, I snagged a bag of hardened and ground dowel pins of varying diameters, some of which also happen to be 12mm x 50mm and figured I could use one to make a punch:
I've had a lot of other financial commitments recently, so have been unable to acquire a piece of brass to make the base with so was saving the project for a later date.
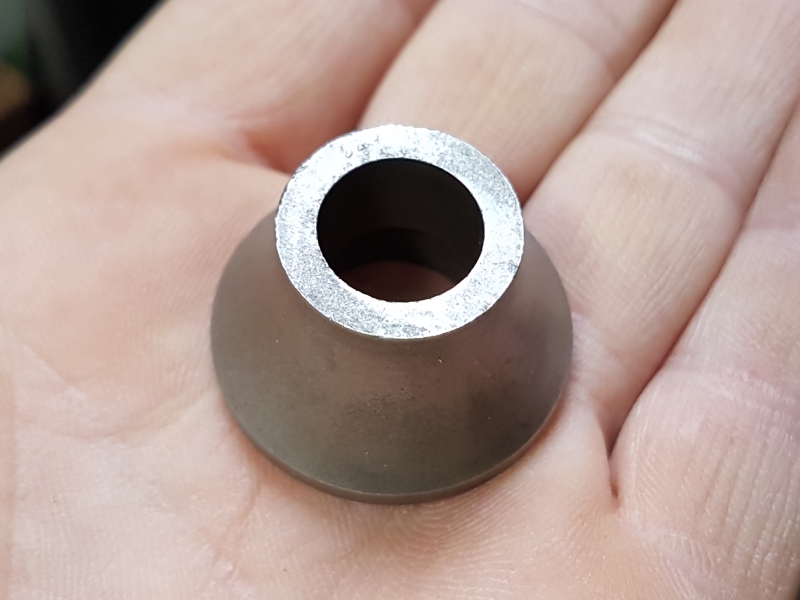
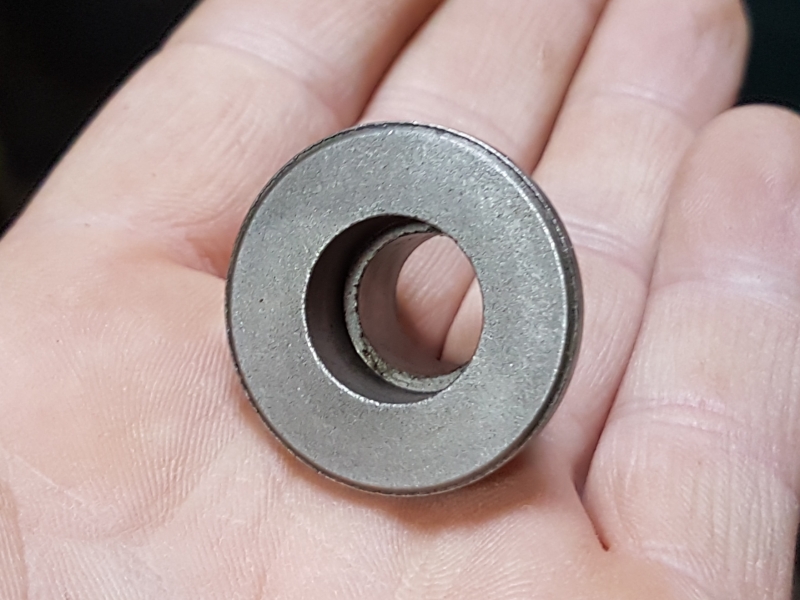
That was until today. I was given a steering column essembly to salvage parts from a few days ago and I decided to strip it down this afternoon.
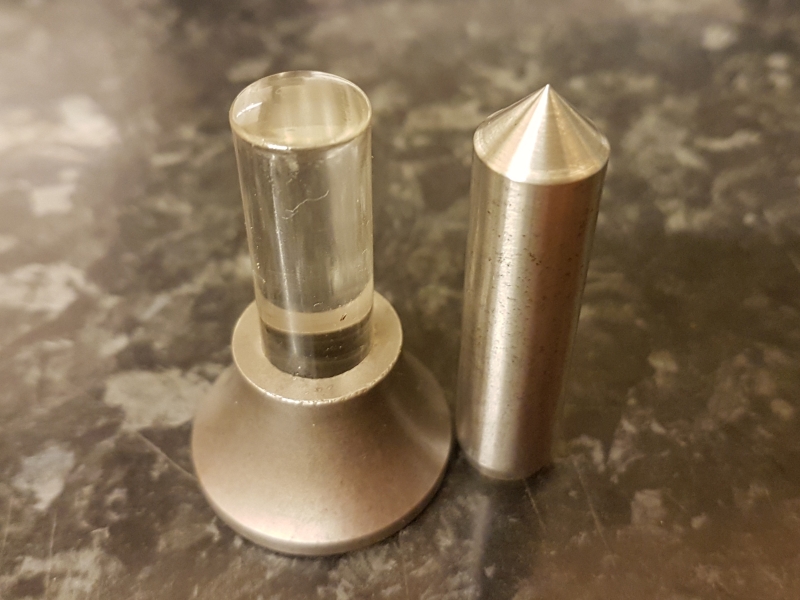
I was interested in one part in particular as it looked like it could be used as a milling jack. It wasnt until I got it free that I realised that it was actually made up of three pieces and as such, was way too short to make into a jack (bummer) but by shear coincidence the part was perfect as an optical punch base as it's quite heavy and very hard (files just skip across it and I couldn't "soften" the edges with my noga deburr) and the bore is such a good fit for the dowel that when one end is blocked, I get a "pop!" when removing it or the acrylic rod:
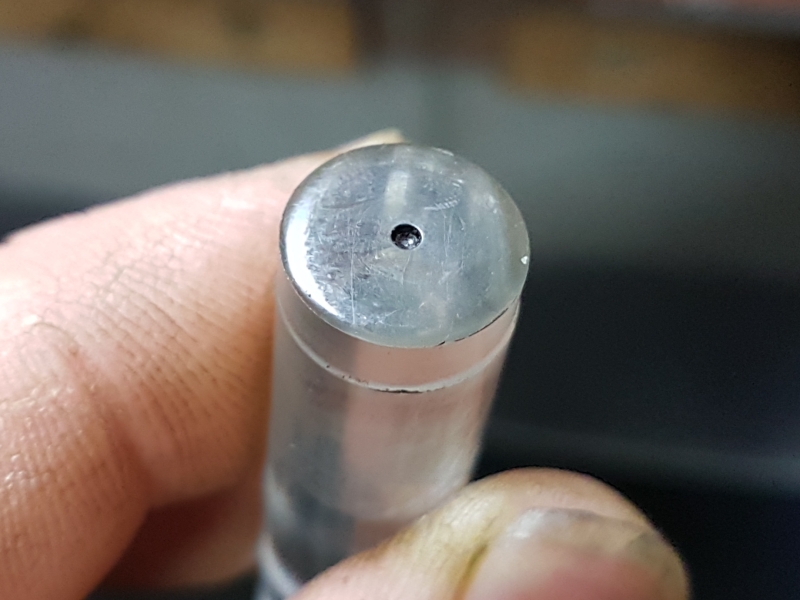
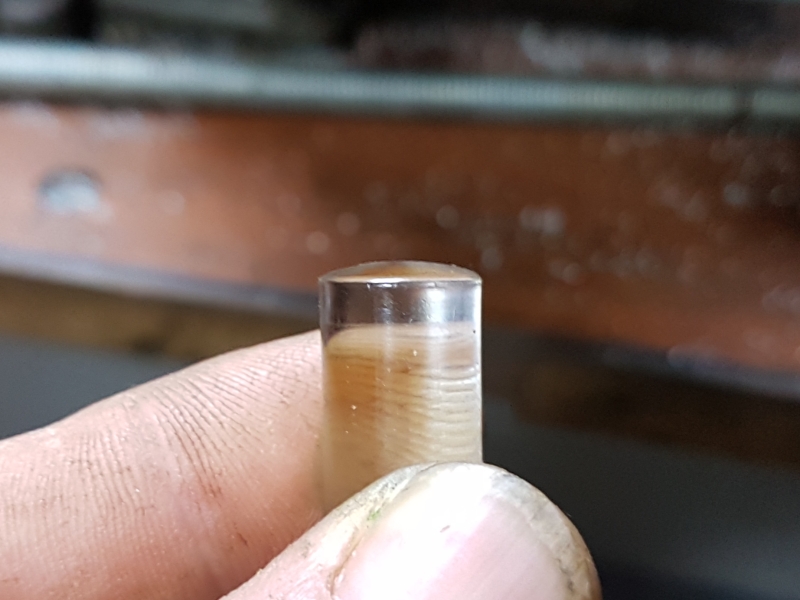
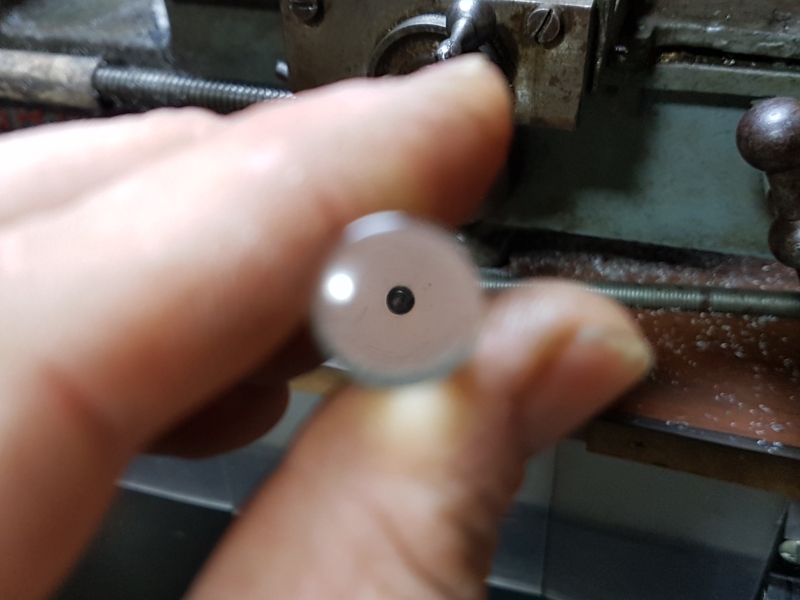
With that, I took the acrylic rod and chucked it in an ER32 on my lathe. I then faced, spotted and then sanded the end to get rid of any tool marks. Afterwhich I carefully heat polished it to make it optically clear again and used a permanent fine tipped marker to black the central indent:
I then flipped it round and used my lathe file to make a slight some. I'm given to inderstand that the optimal dome radii is 15° but without a way to accurately achieve that, it took a bit of playing around to shape the end to a usable magnification, in this case it's closer to 24° but it still turned out fit for task:
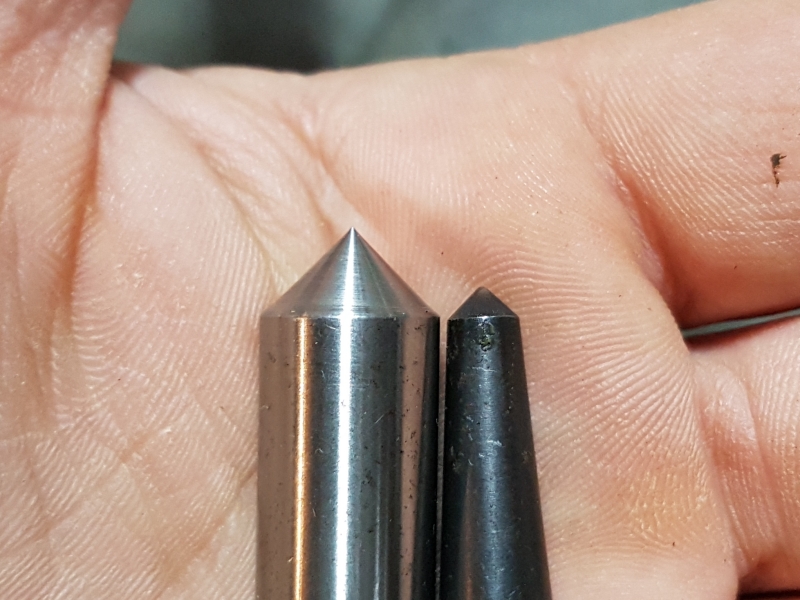
With the optical part complete, I turned to making the punch, nothing of which was spectacular enough to write home about but it did involve a little hard turning, so I broke out the carbide tooling for this job.
I wasn't entirely sure what the optimal included angle was for a metal punch, so simply set my topslide to copy the business end of one I already had and voila:
I will make a brass base for it one day but at least I have one on hand when I need one
Have a fantastic Christmas one and all and I wish you all the best for the new year.
Canobi *< []: )


 Reply With Quote


Bookmarks