Free 186 More Best Homemade Tools eBook:  
New: 300+ fresh build posts/day from 275 forums → BuildThreads.com

User Tag List

Results 1 to 5 of 5

Thread: Jointing plane

Threaded View

  1. #1
    Supporting Member Philip Davies's Avatar
    Join Date
    Dec 2015
    Location
    Reading, Berks, UK
    Posts
    1,085
    Thanks
    1,551
    Thanked 1,192 Times in 429 Posts

    Philip Davies's Tools

    Jointing plane

    Click image for larger version. 

Name:	3E8DEC37-711C-4748-8B18-709D2D4E2A42.jpg 
Views:	301 
Size:	237.6 KB 
ID:	35654

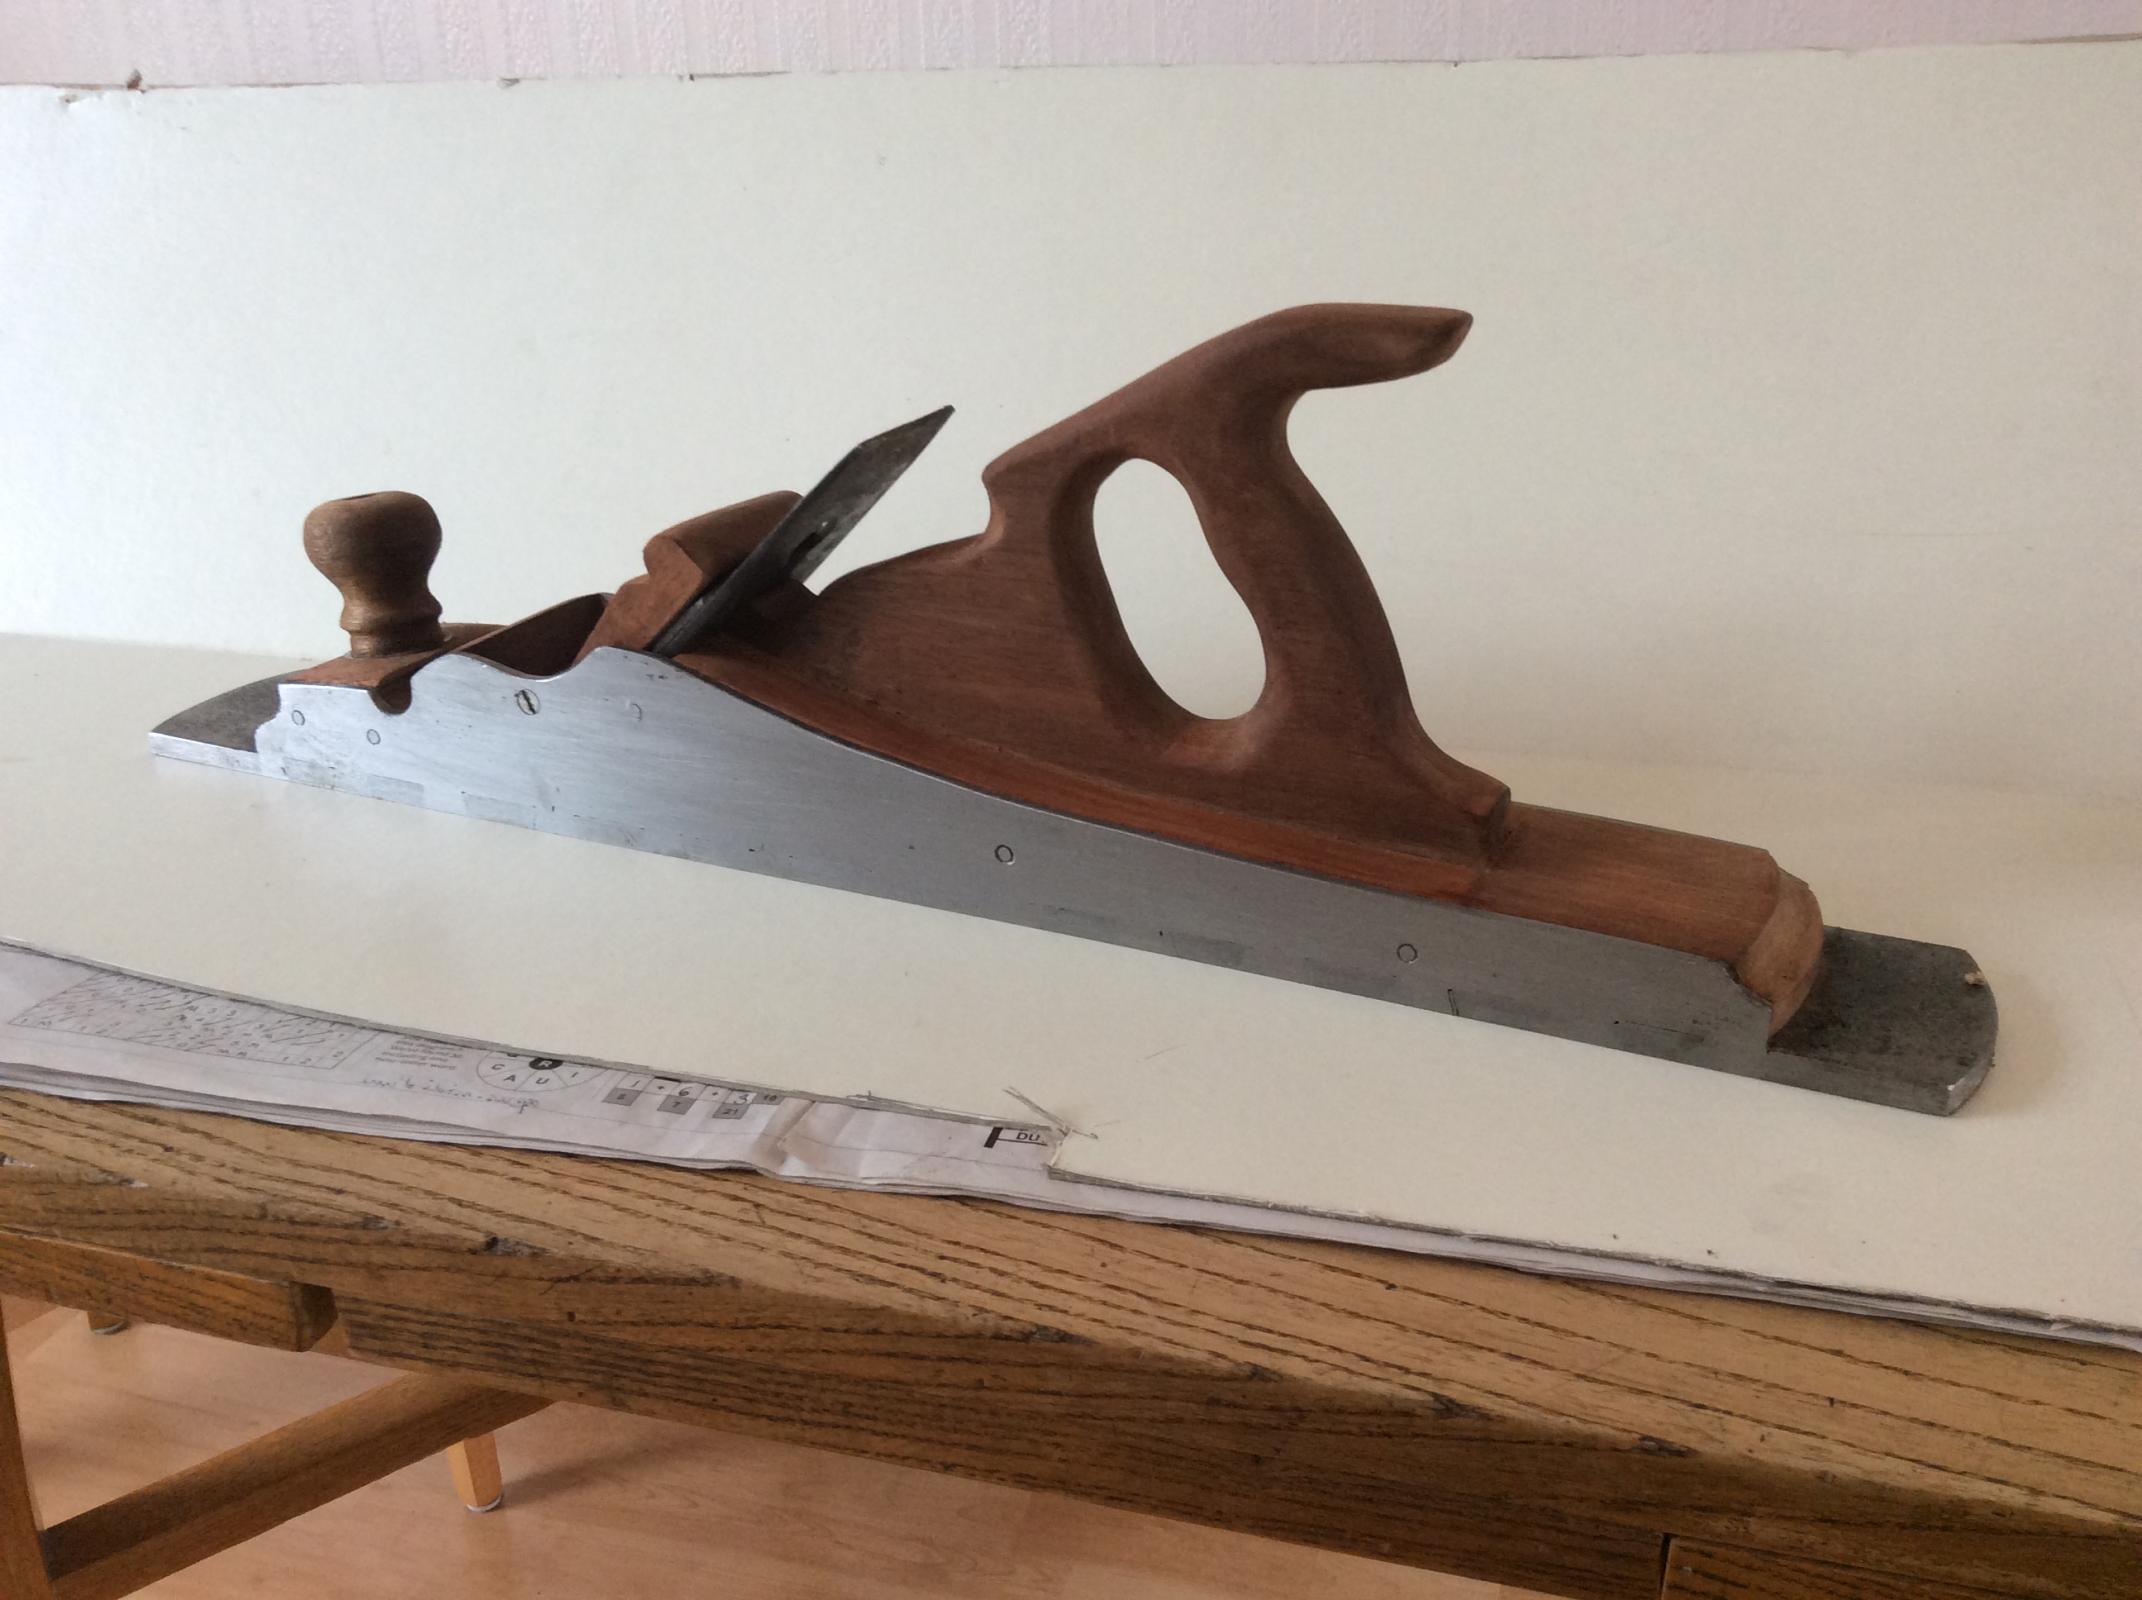
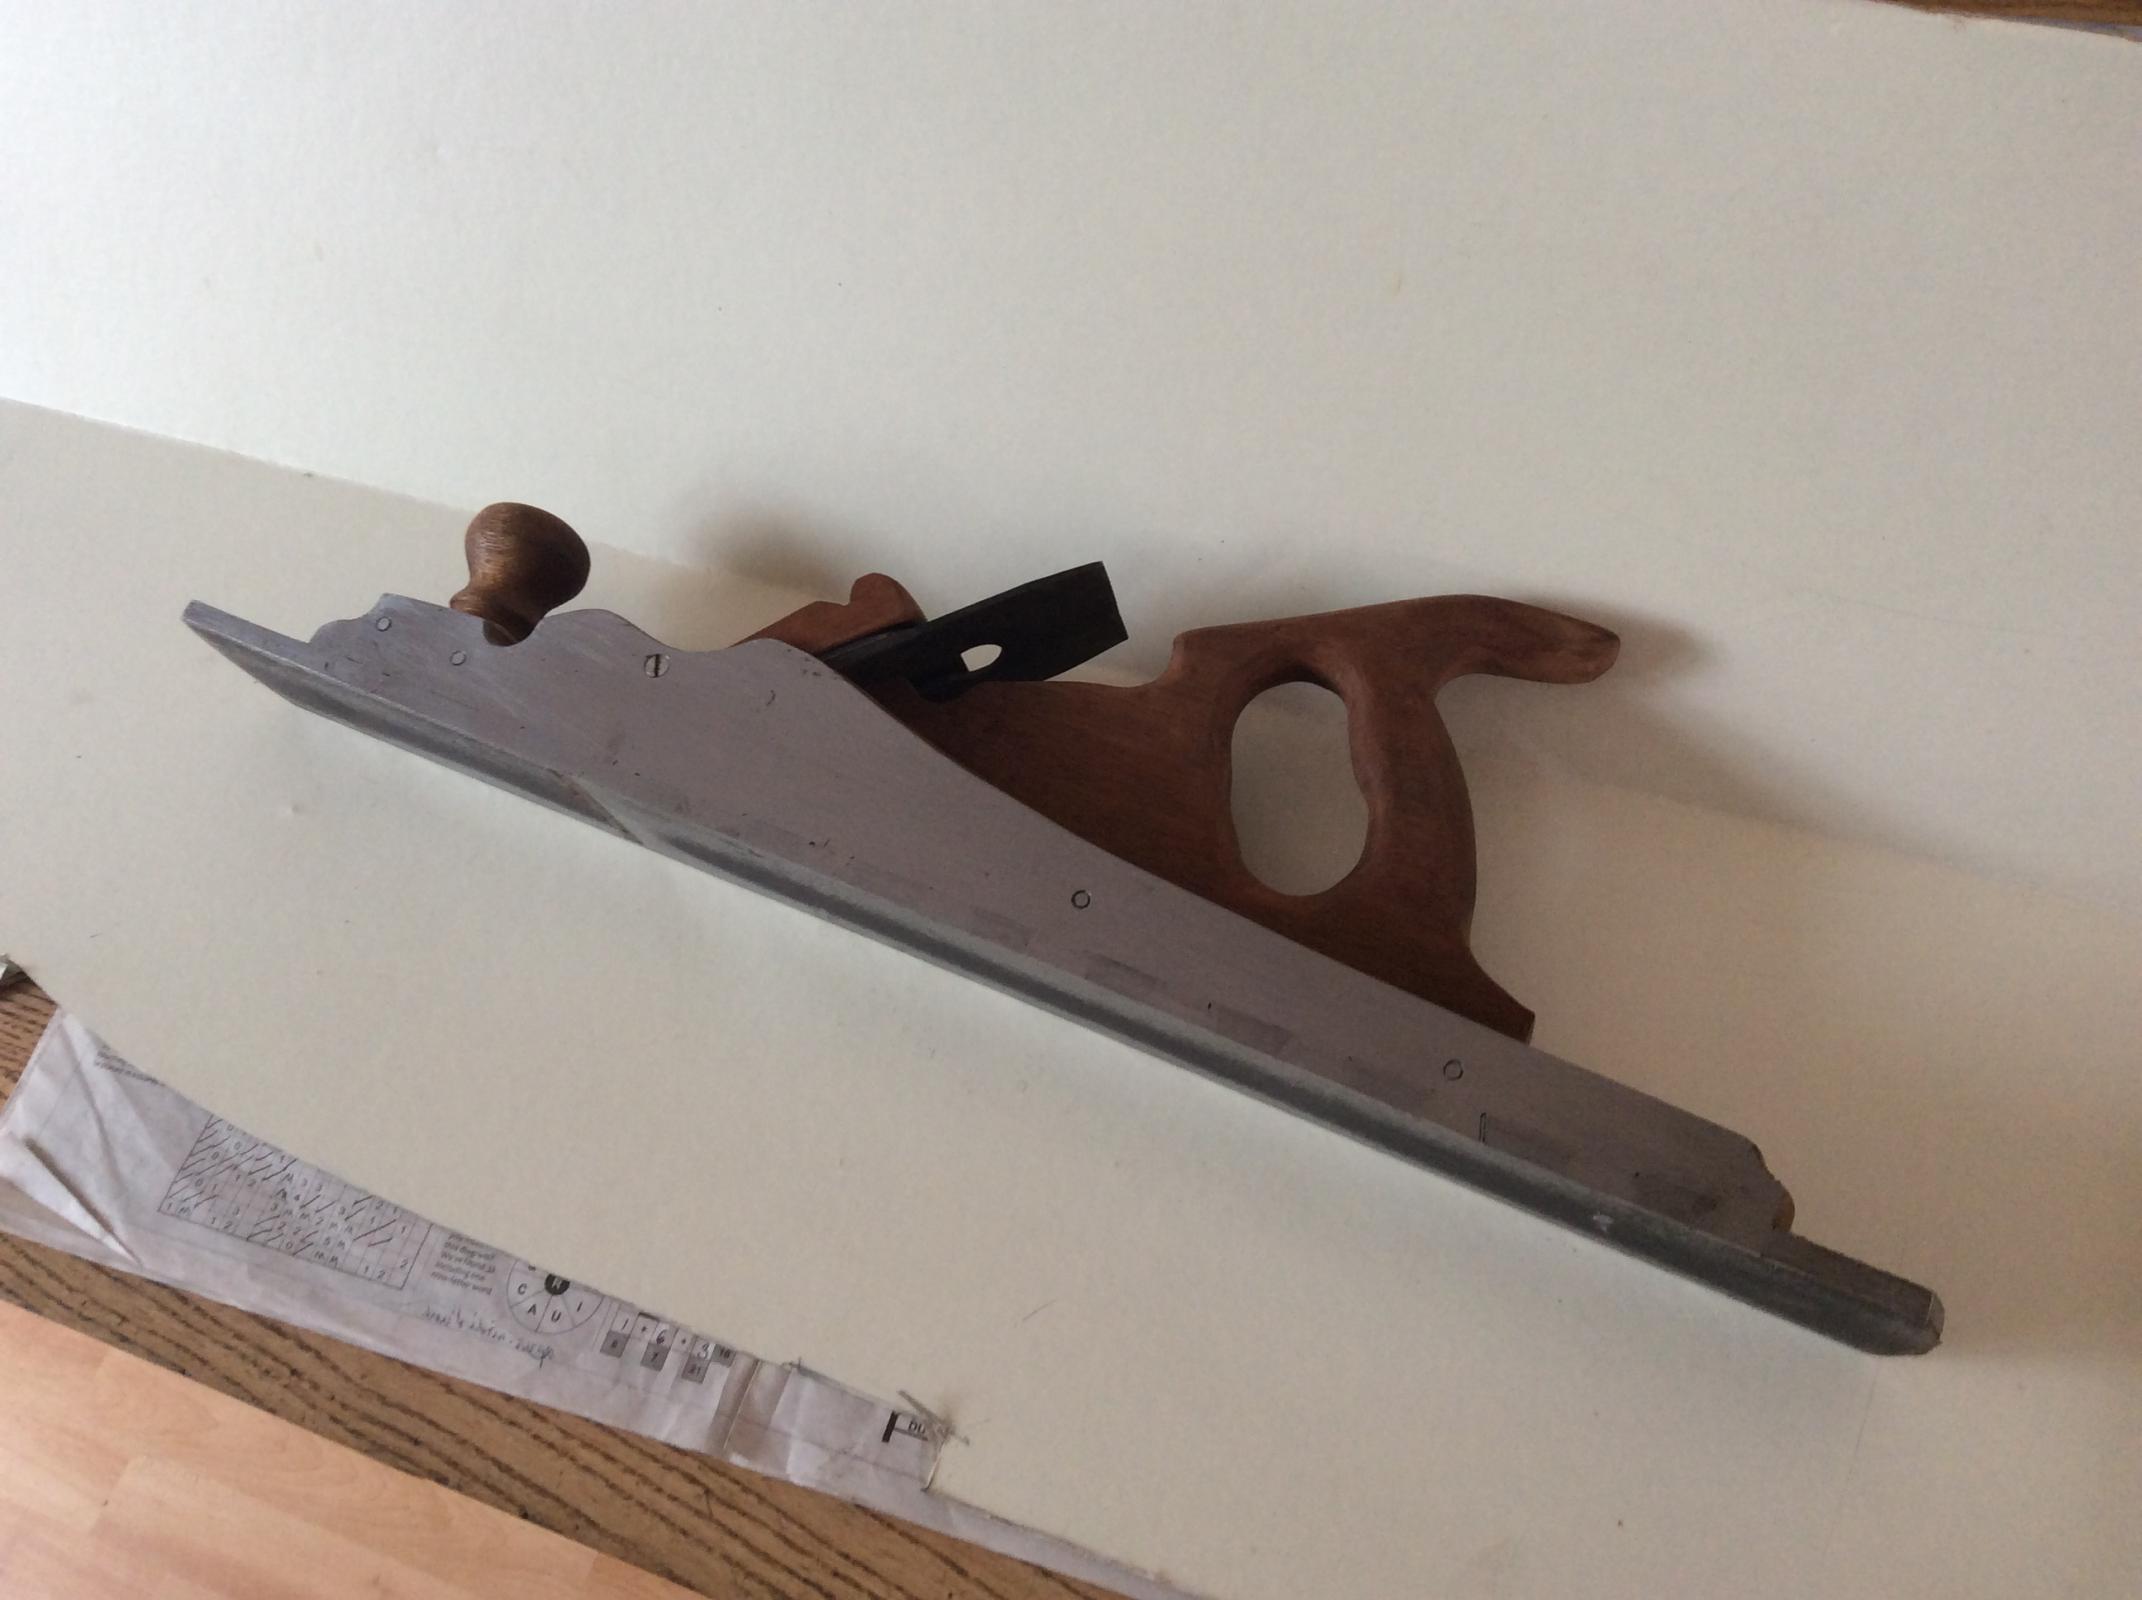
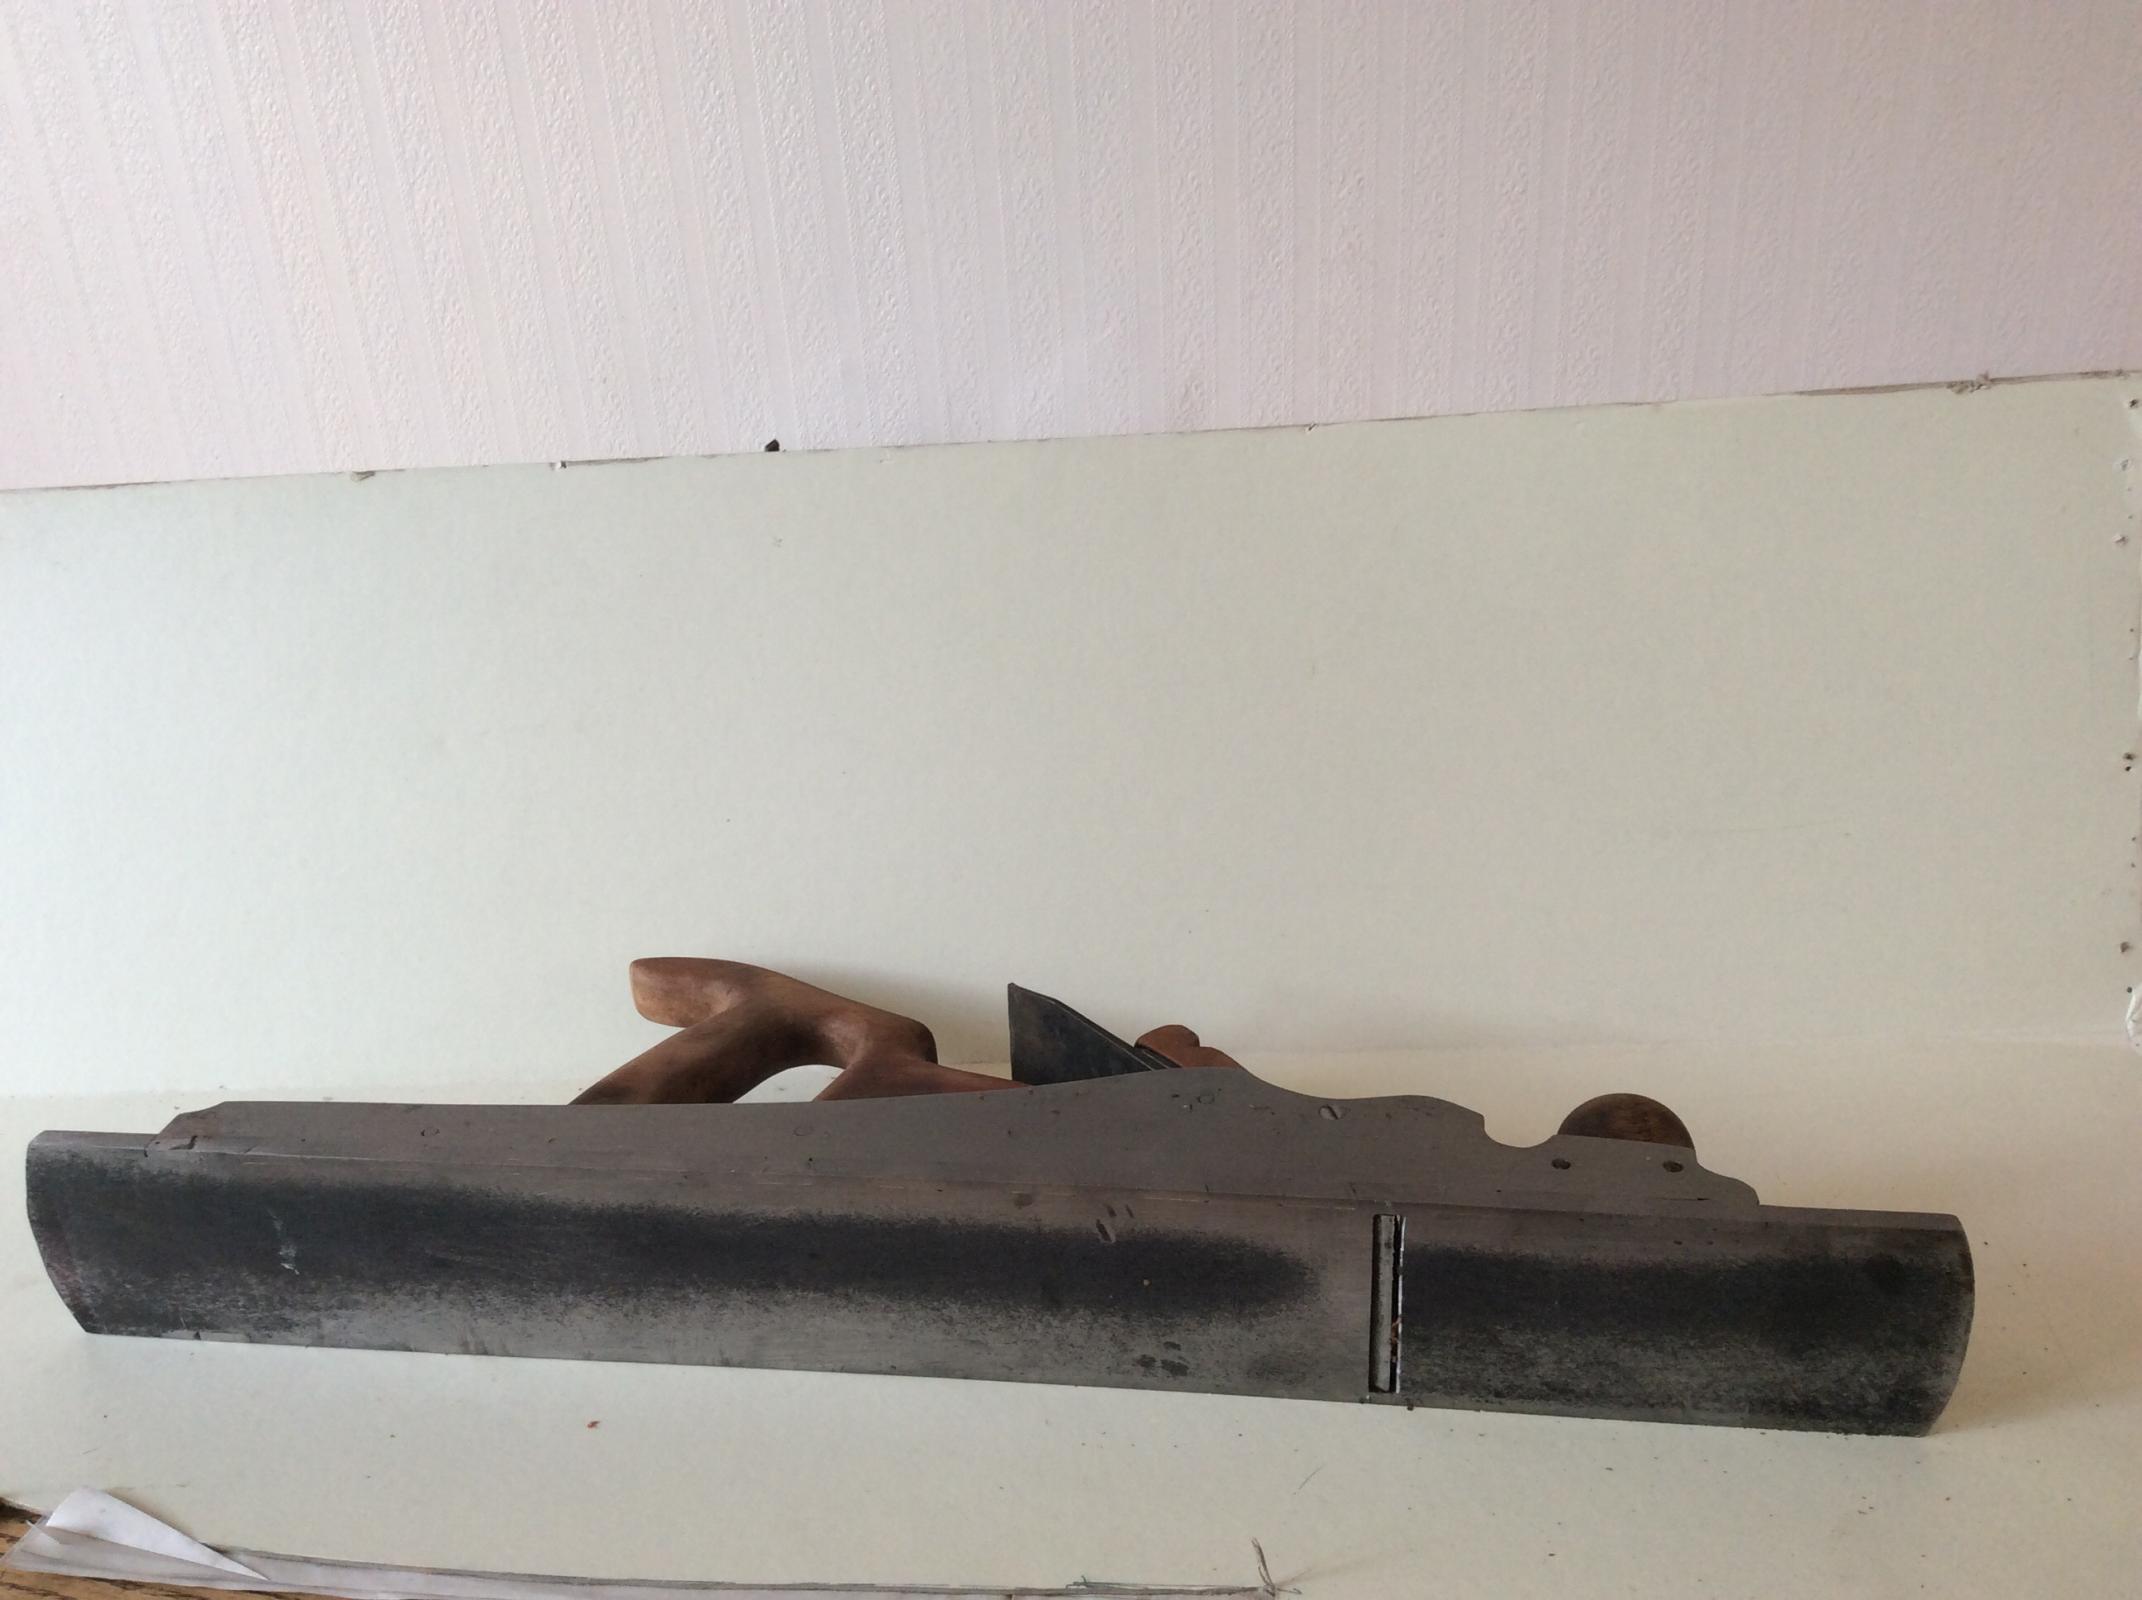
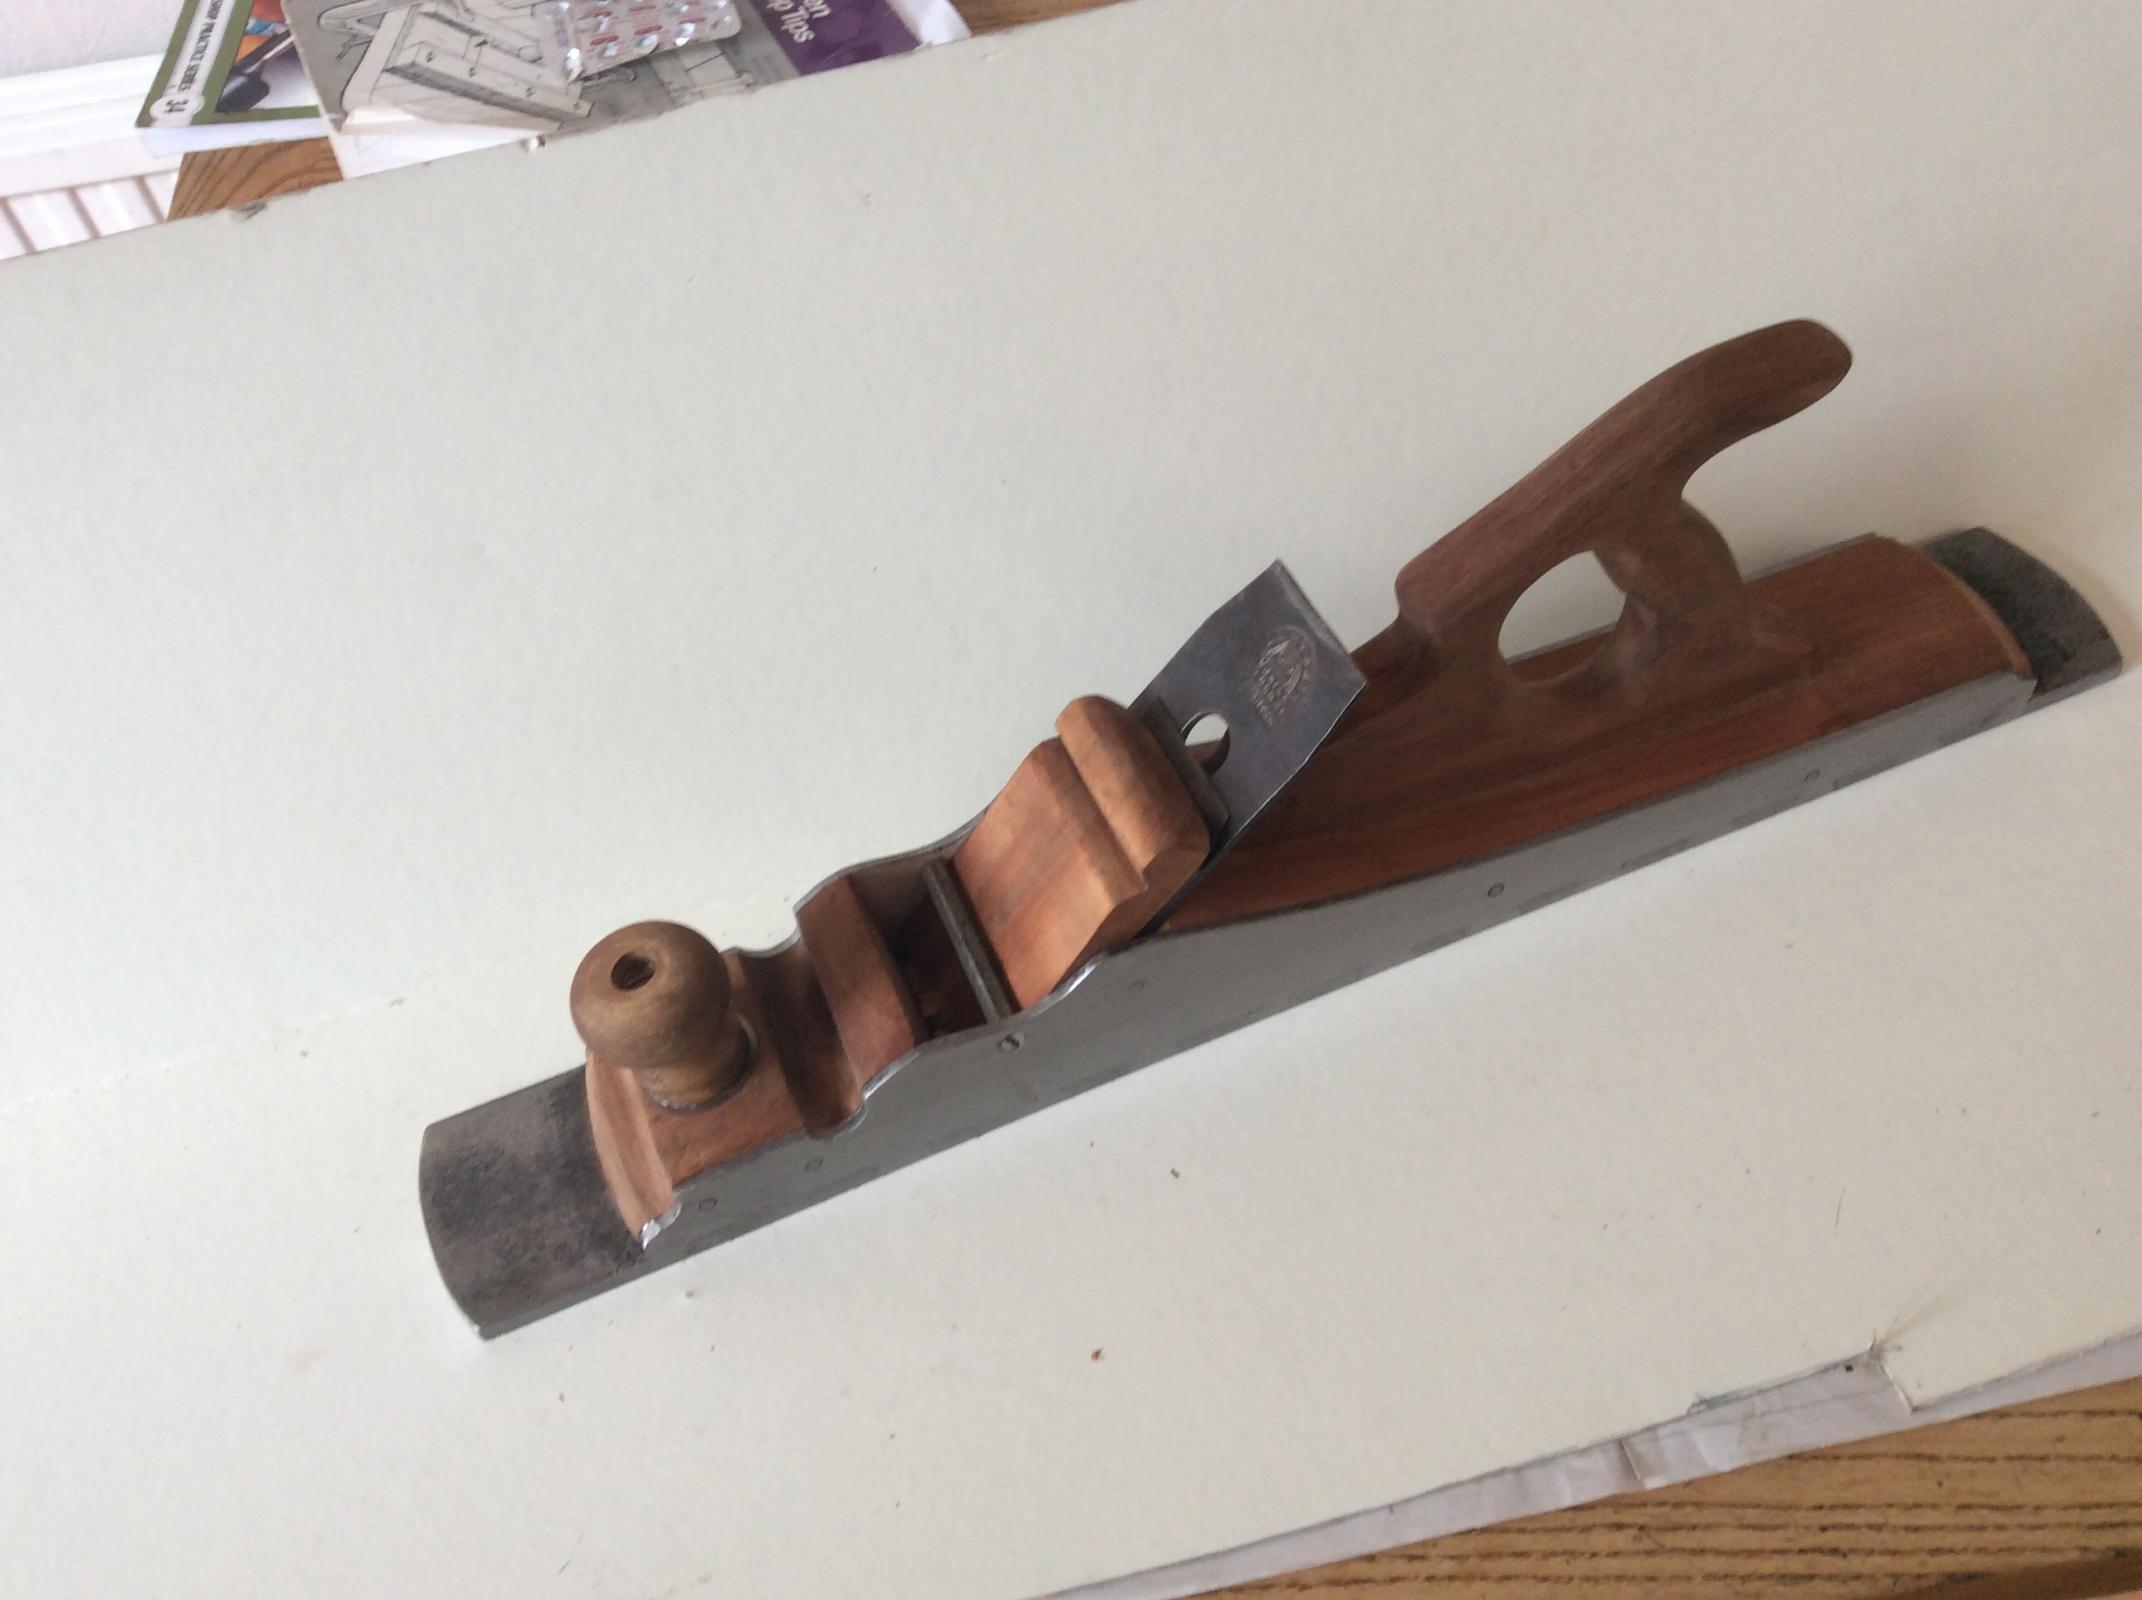
    This plane is just finished. A jointing plane is also called a trying plane, I think. It is used for trueing boards that will be butted together. This one is 24 “ long, 3” wide and is almost 7” high. The sole is 7/32” thick. I would have made it longer - I have a 30” wooden jointer- but that was what I had. It is all made from salvaged materials. So some of the dings arose before starting and it would be silly to try to file the sole all the way to eradicate them.
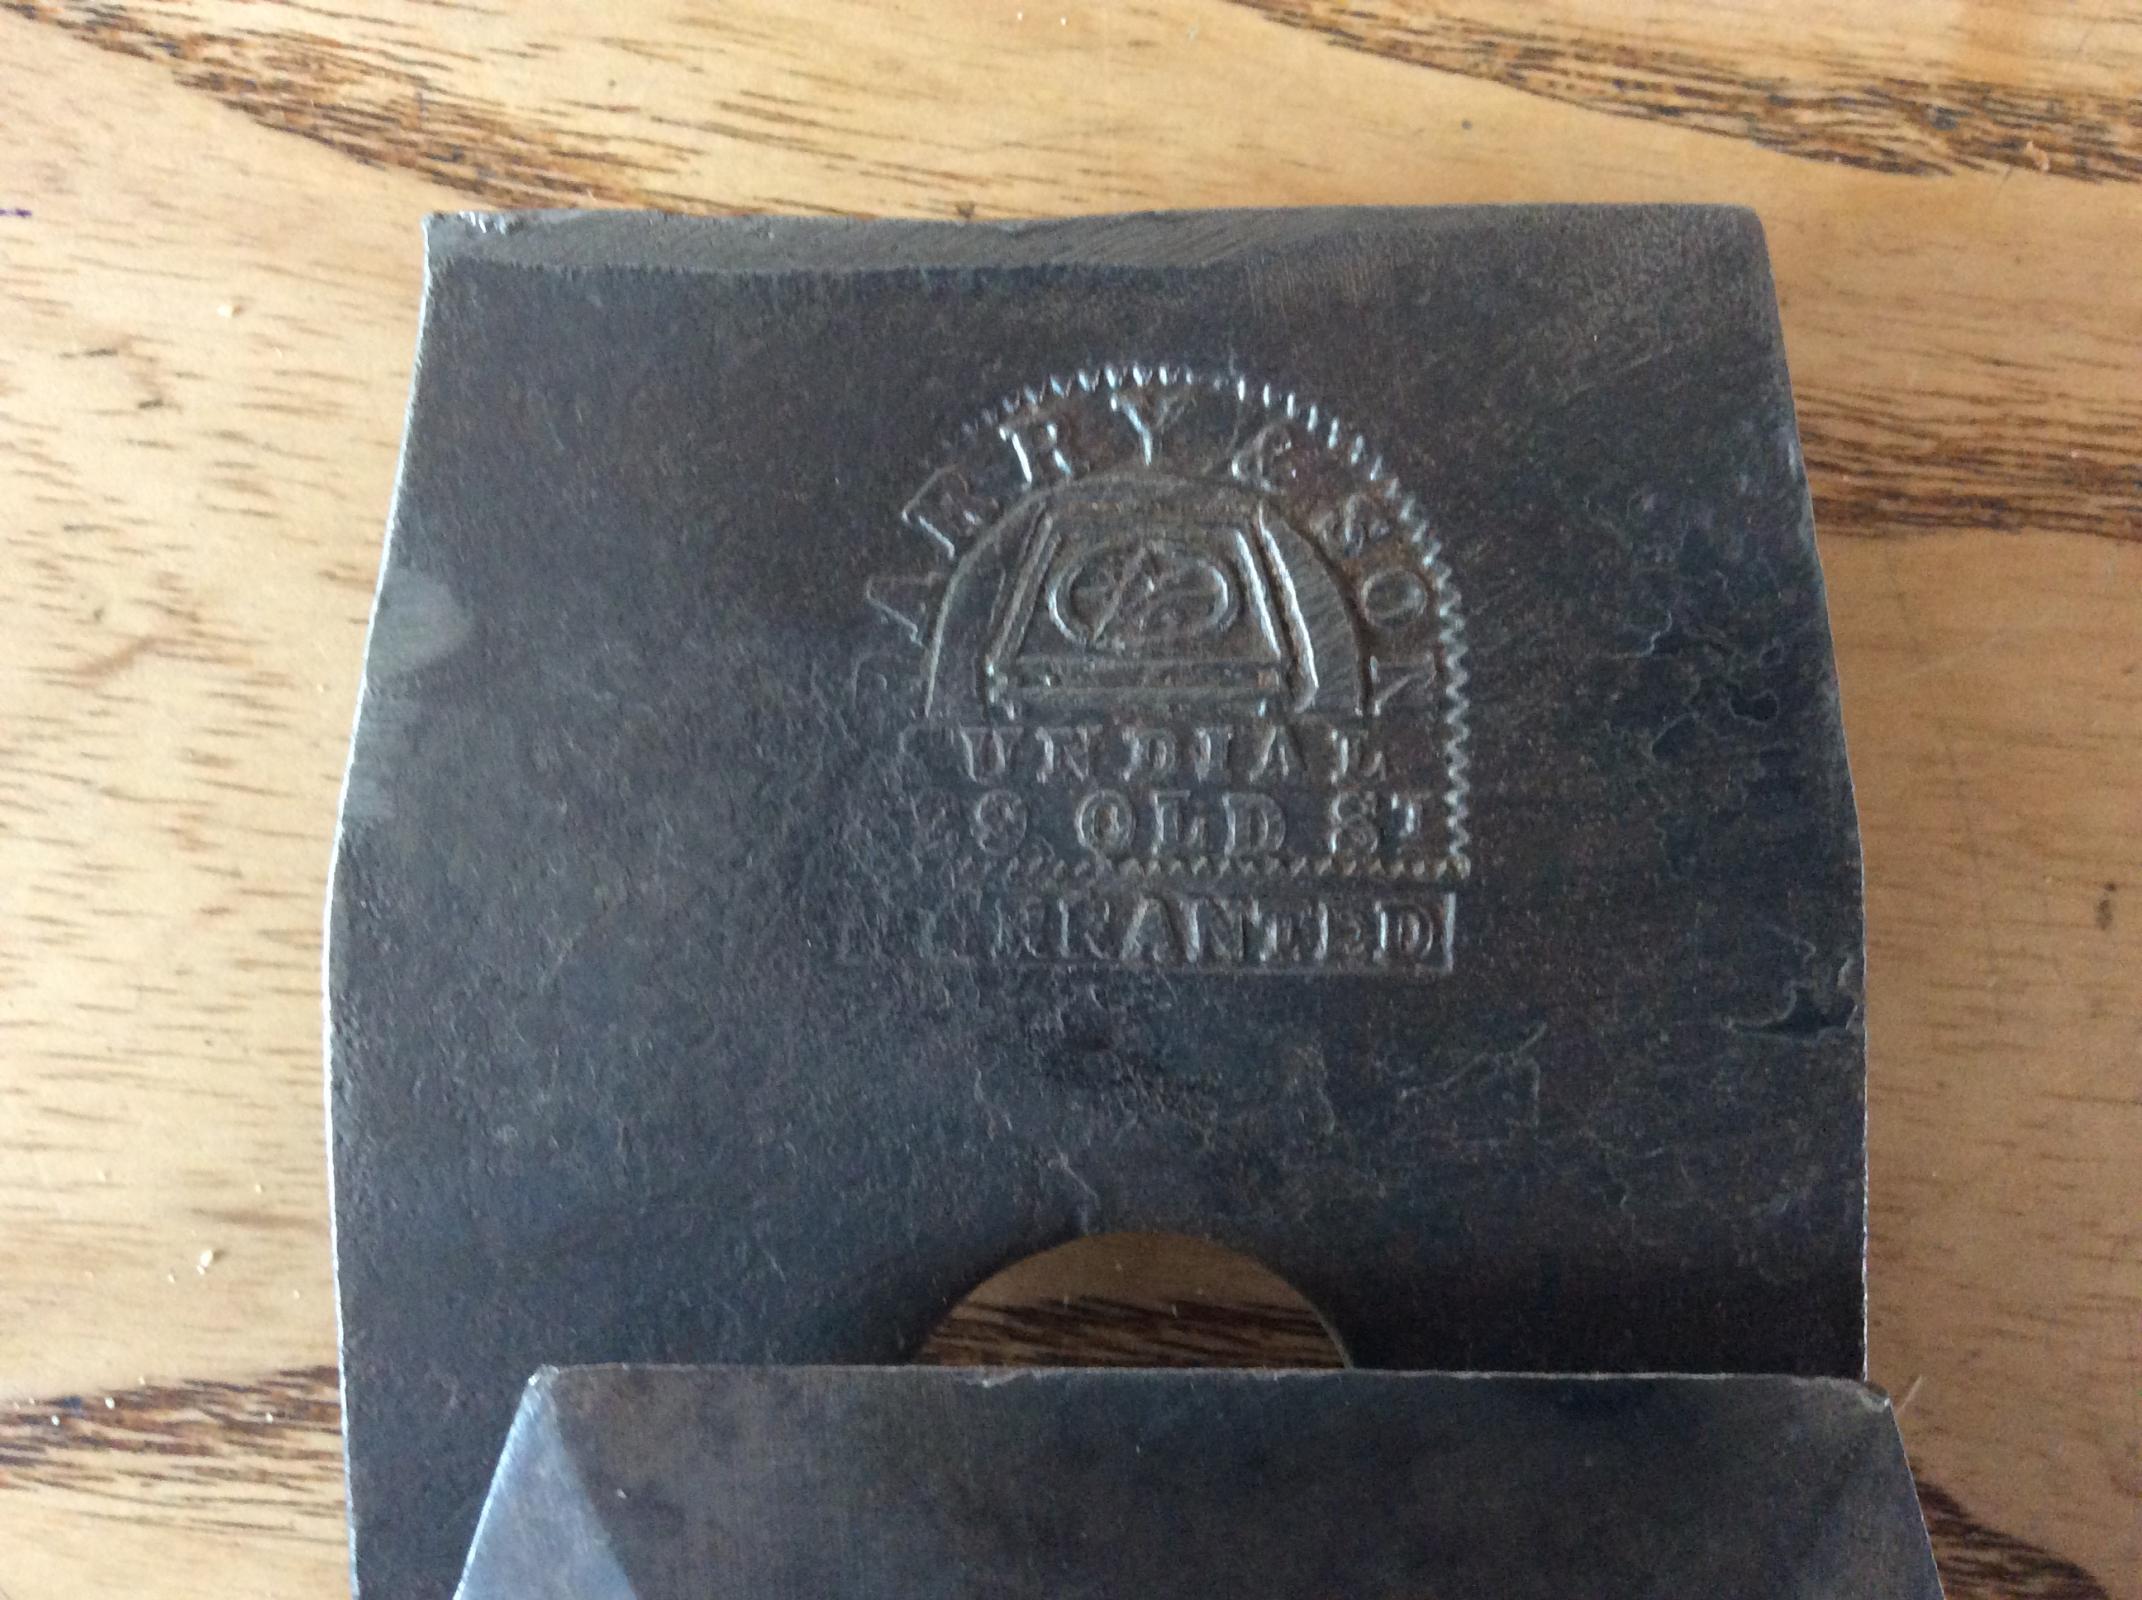
    The iron is stamped
    Click image for larger version. 

Name:	767C89DE-142B-4829-9A6C-9514441DCCC1.jpg 
Views:	280 
Size:	343.9 KB 
ID:	35655
    “ Parry & Son
    Sundial
    29 Old St”

    It came from a wormy old jack plane.

    Click image for larger version. 

Name:	442647B7-5CA2-43FB-B854-1215E58F64C0.jpg 
Views:	314 
Size:	181.6 KB 
ID:	35656

    The sides are splay dovetailed to the sole. I don’t believe I am doing it correctly. You are not supposed to see the joints. However, I wasn’t as clumsy with peening as with the first attempt.
    Click image for larger version. 

Name:	image.jpg 
Views:	320 
Size:	202.3 KB 
ID:	35659


    The infill is mahogany. Mahogany is far too soft, but that is what I have. I believe some infill planes were stuffed with mahogany. It is not as if it will be used very often.

    Click image for larger version. 

Name:	image.jpg 
Views:	308 
Size:	171.3 KB 
ID:	35657

    The only way to adjust depth of cut is to tap.

    The only machining was using a bench drill to remove some of the waste and a bandsaw to cut some of the infill. The finish satisfies me, I am not spending any more time sanding it, it is sufficient for use.
    Attached Thumbnails Attached Thumbnails Click image for larger version. 

Name:	image.jpg 
Views:	262 
Size:	210.3 KB 
ID:	35658  

  2. The Following 9 Users Say Thank You to Philip Davies For This Useful Post:

    bruce.desertrat (Jul 1, 2020), ChasT (Mar 7, 2022), Drew1966 (Jul 5, 2020), Jon (Jul 2, 2020), mwmkravchenko (Jul 1, 2020), Paul Jones (Jul 6, 2020), Slim-123 (Mar 4, 2022), threesixesinarow (Jul 2, 2020), Tonyg (Jul 2, 2020)

Thread Information

Users Browsing this Thread

There are currently 1 users browsing this thread. (0 members and 1 guests)

Tags for this Thread

Bookmarks

Posting Permissions

  • You may not post new threads
  • You may not post replies
  • You may not post attachments
  • You may not edit your posts
  •