
 LinkBack URL
 About LinkBacks


I had a couple of thin pieces of cherry that I wanted to rip in half so I made a tool to help me rip them accurately.
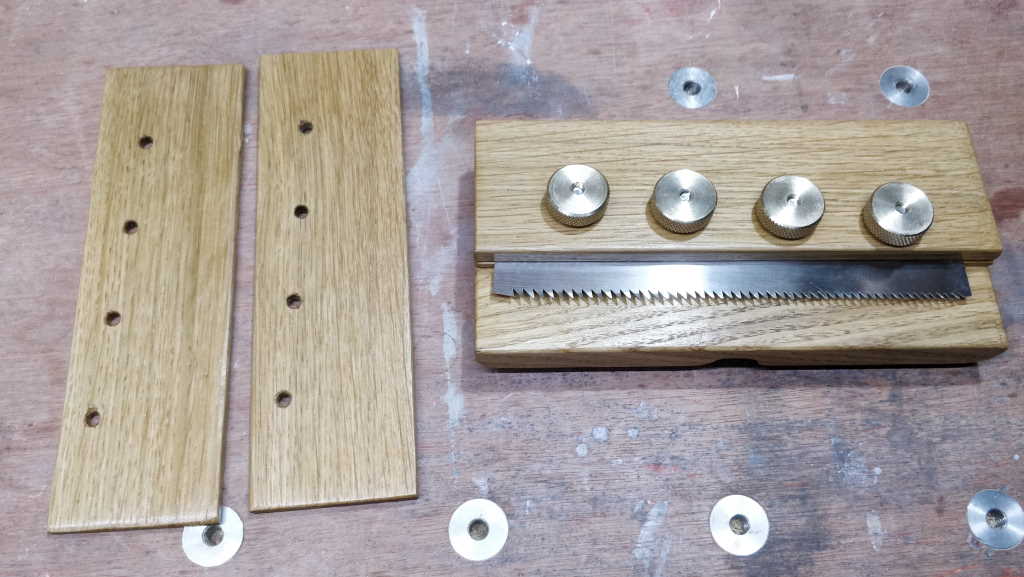
I guess you'd call it a kerfing saw or something like that. It's made out of oak, about 200 mm long and about 90 mm high; the spacers and clamp pieces are 60 mm high. I've made spacers in a few different thicknesses; I'll probably make some more in due course - they're very easy to make. The 8 mm one has more dramatically rounded edges than the others as I'll generally use that as the outer clamp piece when using thinner spacers and it makes it more comfortable in the hand having rounded edges.
By combining multiple spacers, the kerfing saw can cut its mark up to 15 mm from the fence.
The idea is that you fit a spacer about 1 mm thicker than the thickness of wood you want and then press the fence against the side of the wood while taking cuts all the way round the edge of the board. You then get a normal saw out and it's fairly easy to follow the pre-cut kerf.
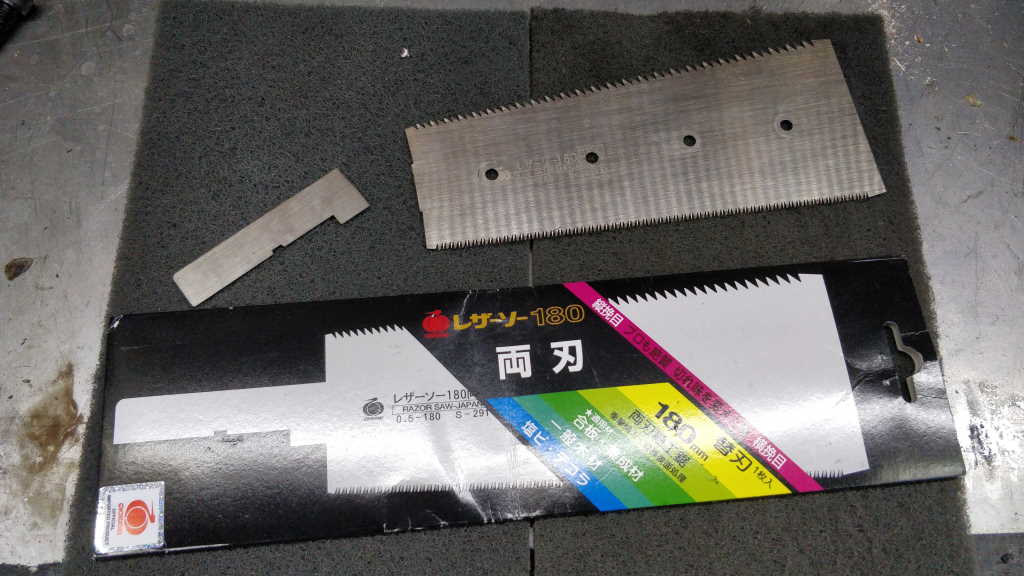
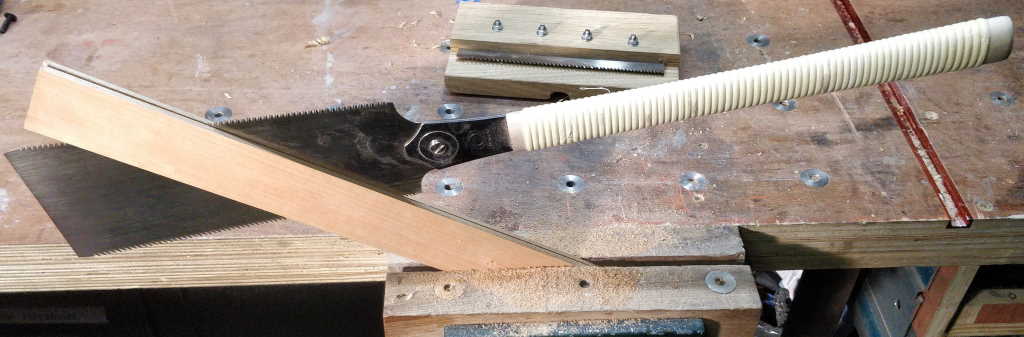
It all started with this saw blade, which I spotted on ebay for £10 (someone had bought the wrong blade for their saw). I don't have the saw but I saw a potential use.
I snapped off the tang and drilled four holes in it - I was a bit worried about how easy it would be to drill, but it was quite straightforward.
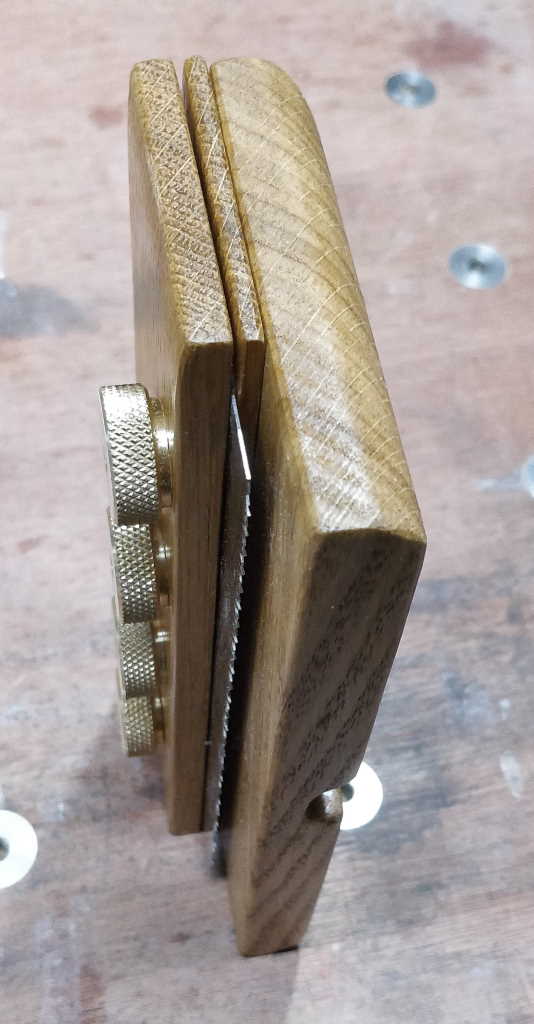
This photo shows what it looks like inside the saw.
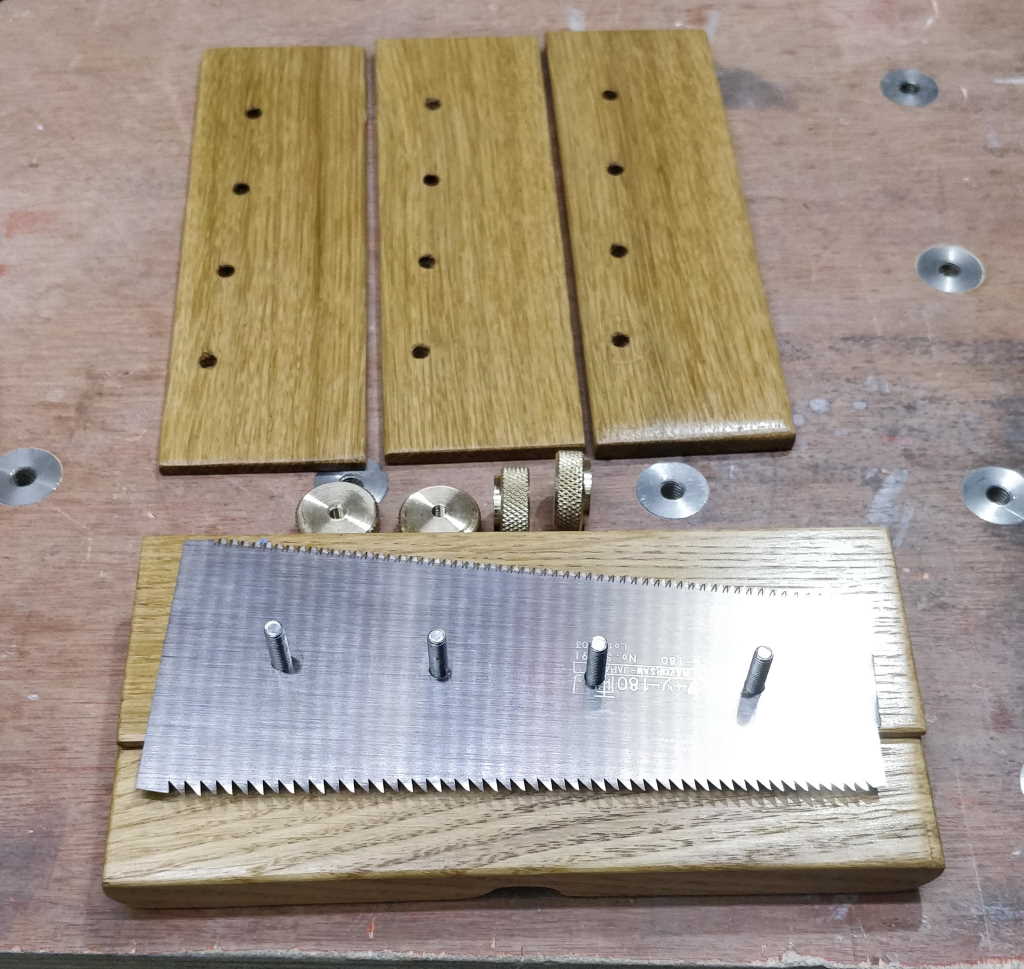
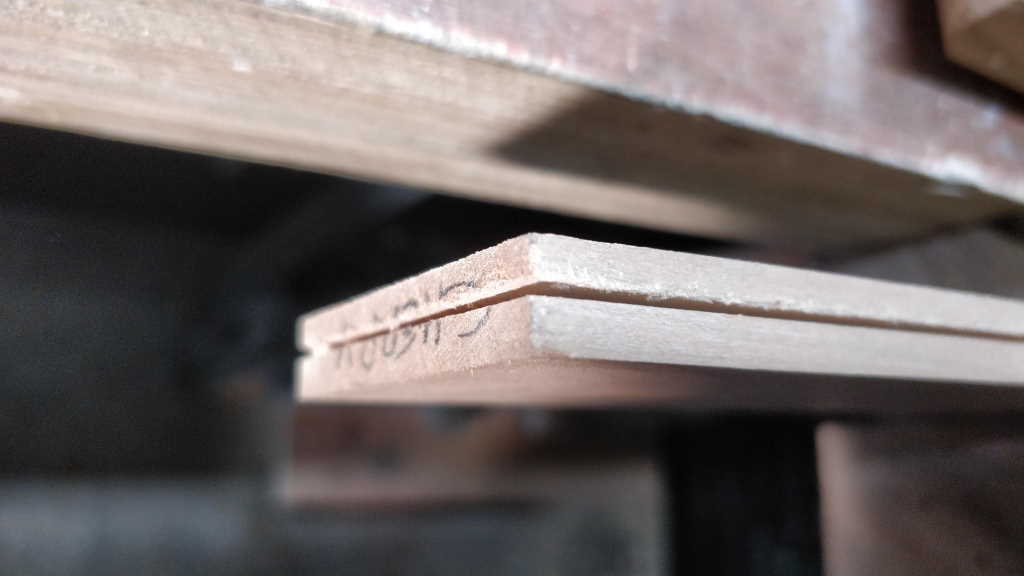
This photo shows what the result looks like with a 9 mm thick bit of cherry and the 4 mm spacer.
The saw then follows the cut very easily (this one was done as a test before I applied the finish or made the knurled brass knobs - hence the nuts and washers).
There are a few more photos on my website: https://www.cgtk.co.uk/woodwork/handtools/kerfingsaw


 Reply With Quote

Bookmarks