
 LinkBack URL
 About LinkBacks

, or taking up valuable drawer space that could better be used for organisi "Pin It")
Hello again folks
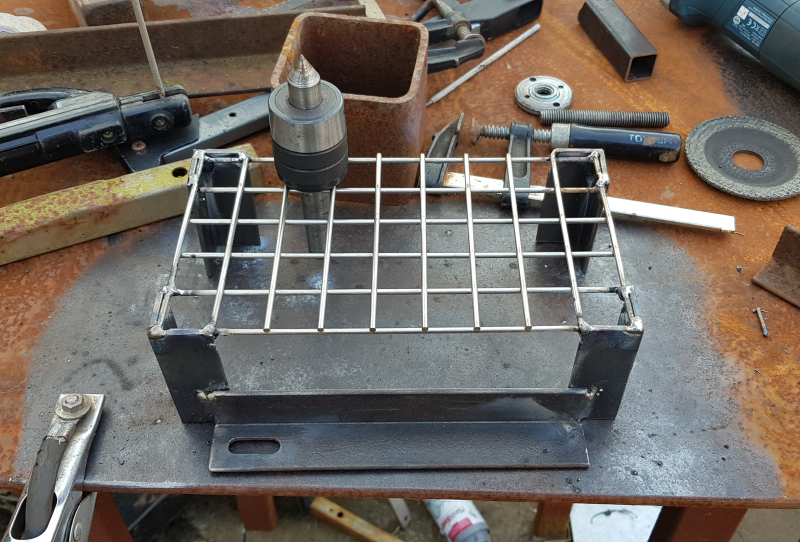
While tidying up the leftovers from yesterdays fun and frolics making a BBQ, I paused while holding a small section of the mesh I'd cut off to make the grill.
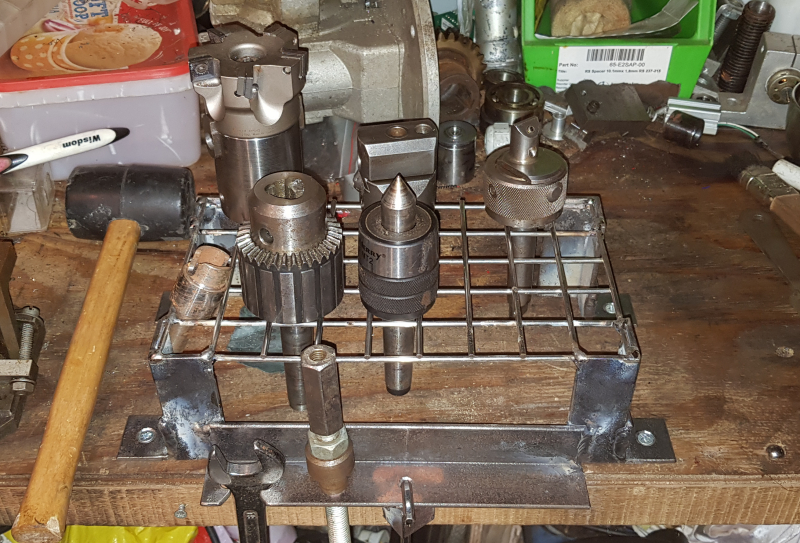
Being quite a small piece but made of 3mm gauge wire, it was noticeably sturdy and I instantly thought it would make a decent rack for my morse taper tooling that was either homeless (Jacobs and live centre), or taking up valuable drawer space that could better be used for organising my slowly growing reamer collection which is currently boarding in my endmill drawer.
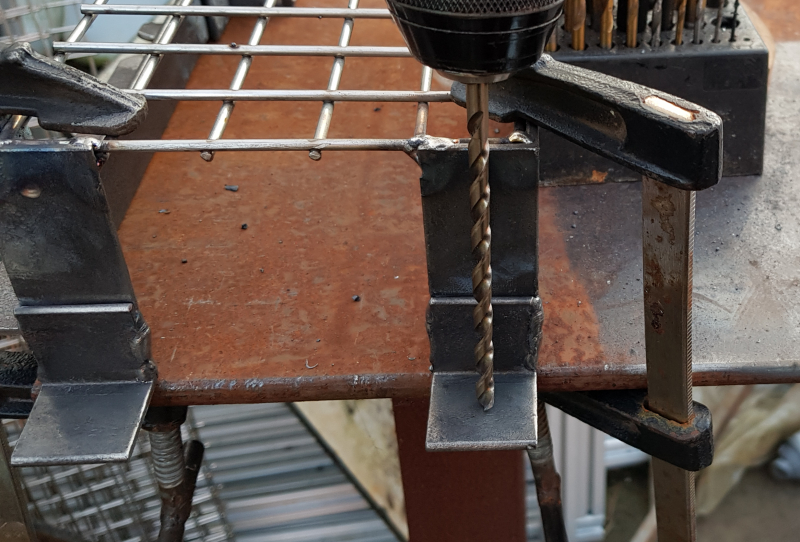
First job was a little trimming the piece of mesh as there were unconnected ends sticking out around three sides. I then gathered up a handful of angle iron offcuts and after using a wire wheel to clean them up, I stacked and lined them up so they were all roughly flush on one side and then used my horizontal bandsaw to cut off the odd length ends in one go. I then flipped the stack round and sliced about .5mm off to ensure they were all exactly the same length. With the angle cut to length, I deburred the edges with the wire wheel and one by one, welded them to each corner.
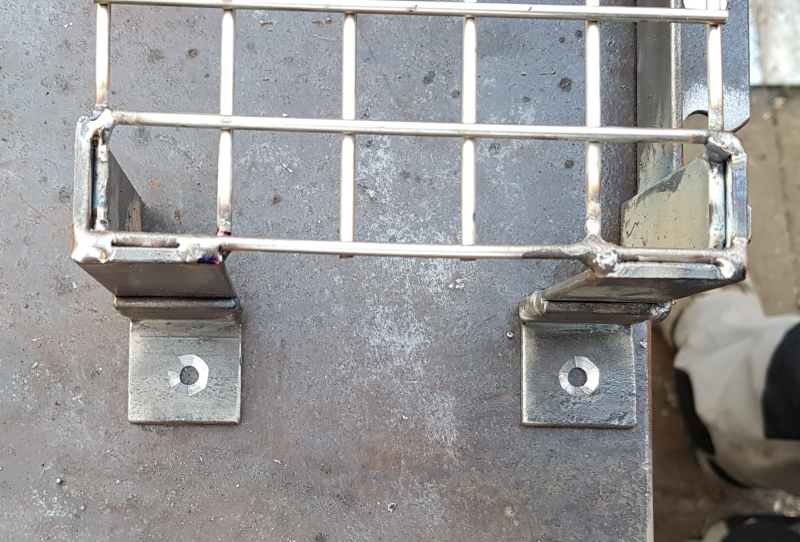
I then grabbed another offcut that was lying close by which was just long enough to span the gap between the front legs of the rack and welded it to the legs.
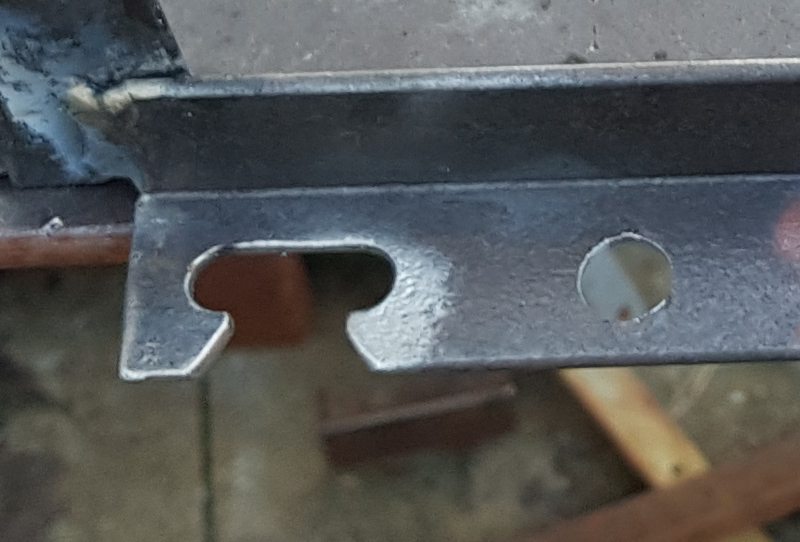
I utilised the slot on the laft for the tailstock draw bar spanner by cutting out a portion a little thinner than the width of the spanner shank.
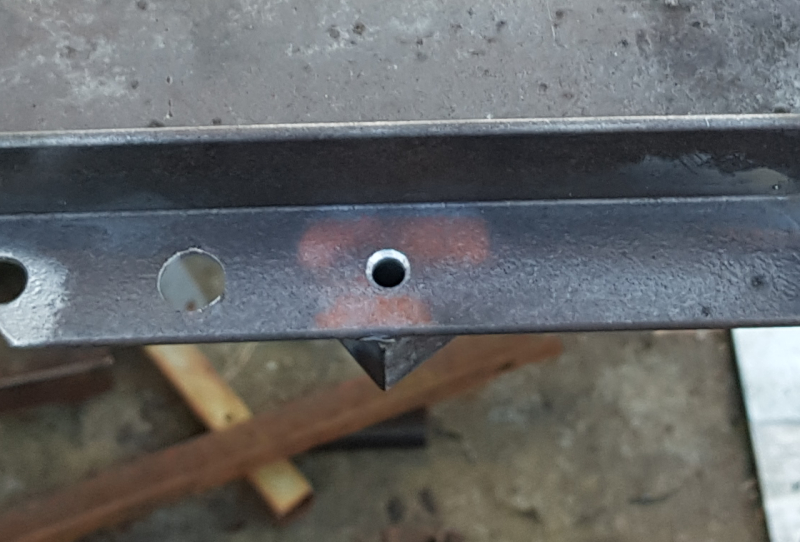
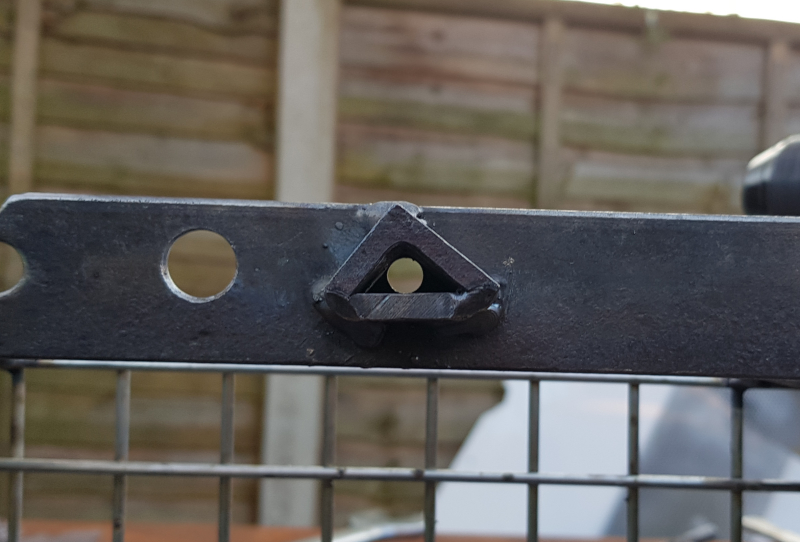
I then drilled a 12mm hole about 2" to the right of the slot, and a 6mm hole about 2" to the right of that, the larger hole being for my tailstock drawbar and the smaller hole is for the alen wrench for the cap head bolts that clamp the topslide down.
The alen wrench was a bit prone to falling through though, so to encourage it to stay in place, I took one of the drops from making the legs and shortened each side and then welded it underneath so the v was flush with the hole and then capped the open end with one of the pieces I cut off of it.
Next I cut four short lengths of angle to make feet for securing the rack to my workbench and welded them in place. I then drilled the holes in them with a long series 5mm drill bit and counter sunk them with a 15mm bit.
I plan on making two more slots, one for a 13mm spanner I use a lot for hold down nuts and one for my lathe file but otherwise it is done and a very welcome addition to my workshop.
Thanks for looking


 Reply With Quote

Bookmarks