
 LinkBack URL
 About LinkBacks


Hi,
I'd like to propose something a bit longer than a simple post, maybe it's more of an article this time.
I wanted to show the full process I have used to digitally design and make a leather hand-stitched item.
Obviously, the process I will show here is way overkill, and this is not even my process of choice, I keep preferring doing things manually,
but as I am playing with my new laser cutting setup on my CNC, I just wanted to give it a try, for once.
I wont detail too much each of the steps, but I will explain the workflow, and in particular all the software tools I use in this process.
Some of them are really useful, and I'm sure one can reuse them in any other context.
1 - The need
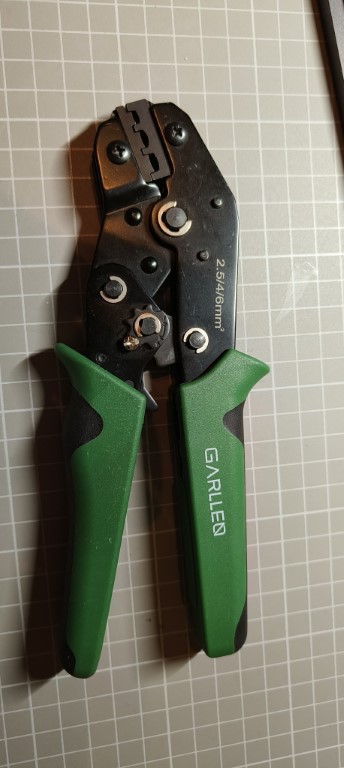
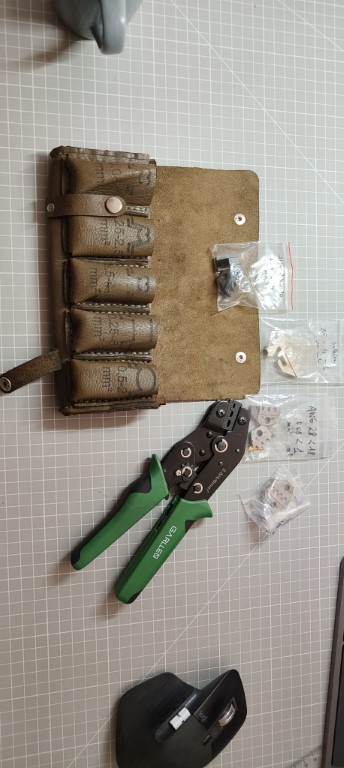
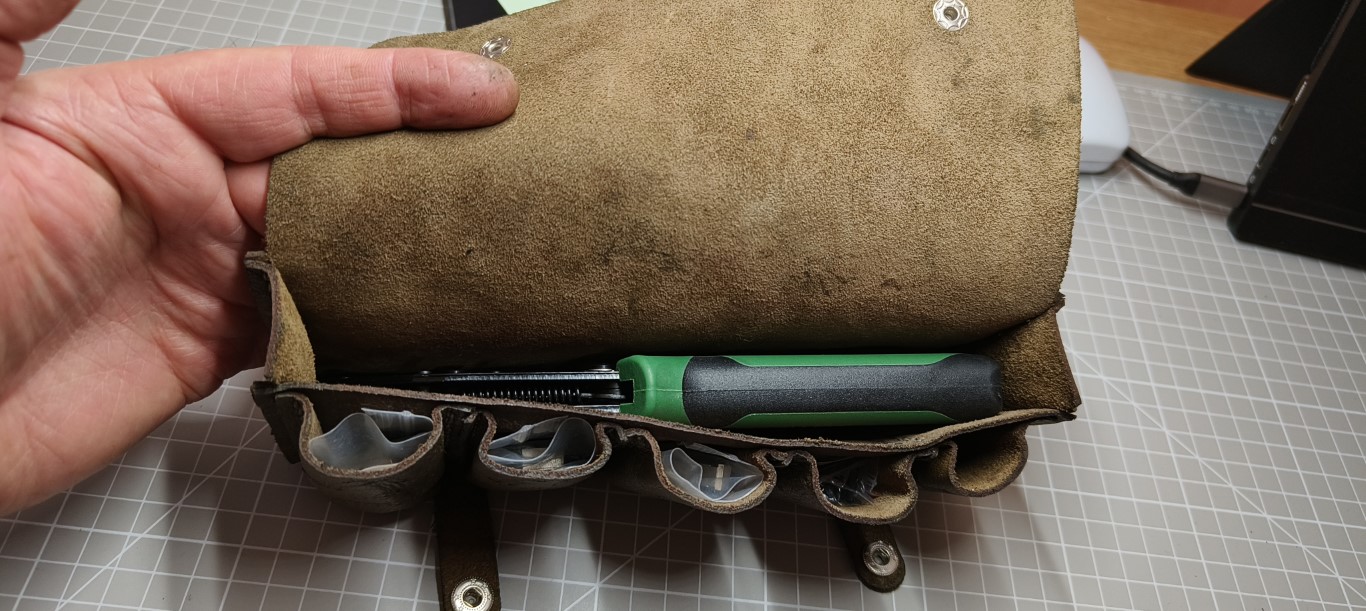
I will use the excuse of making a leather case for my crimping tool, and the set of jaws I have with it, and possibly to document the use of each jaws set.
2 - 3D Modeling
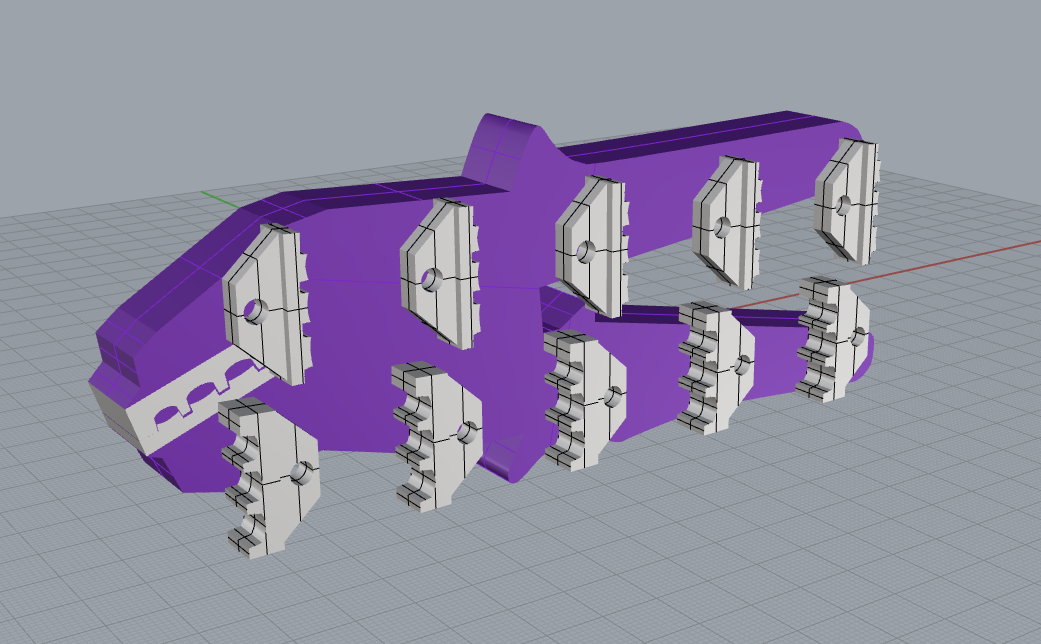
First of all , using the above picture taken from the tool, I roughly sketch the contour, and extrude it to it's maximum thickness.
I also roughly sketch the jaws, and I place them into space to start visualizing the shape of the case.
For 3D modeling I use Rhino3D, but any good 3D CAD software could do the job.
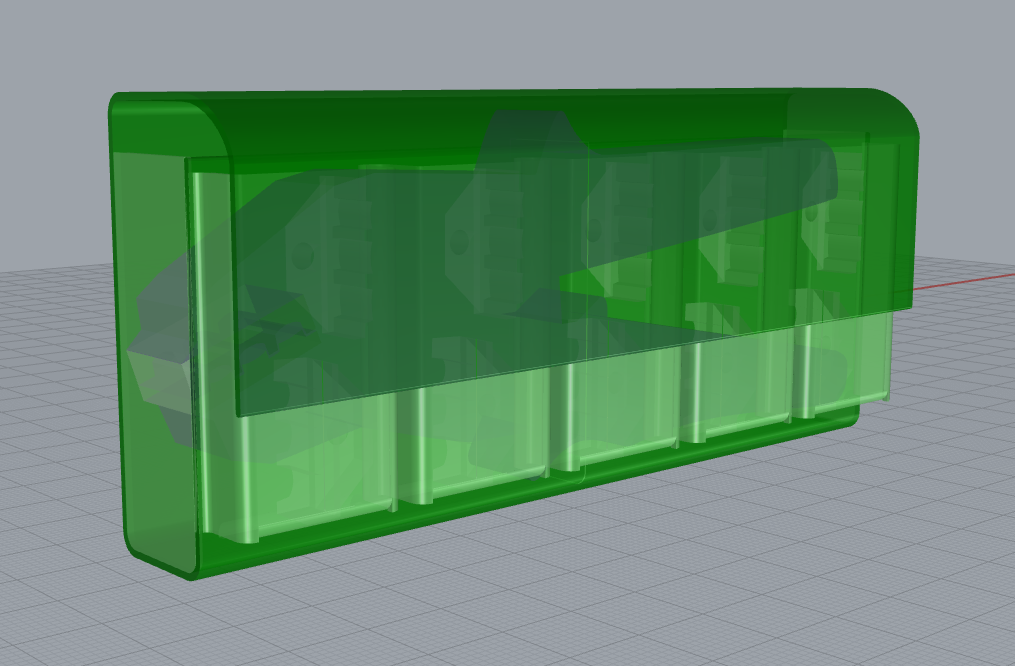
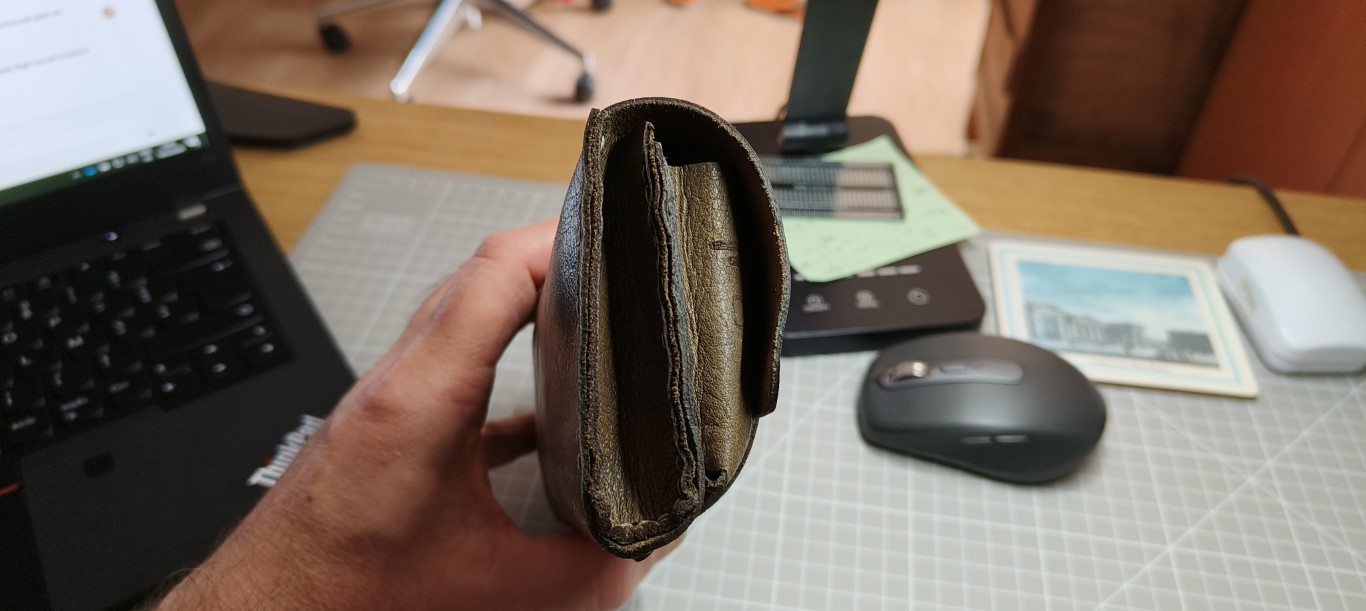
Then I wrap the shape with leather. This is not mandatory, but I first went with a realistic modelling, accounting for the thickness of the leather, the fold, the pockets, etc.
It depends how fluent you are with 3D modelling, I personally like it, and I frequently find myself adding much more details than necessary...
What you really need in the process is this, just simple surfaces with no thickness. I actually considered the center line in the middle of the thickness of the leather. All surfaces must be developable surfaces. The pockets are simplified to simple parallelepipeds.
At this stage, you do not need to consider any stitching allowance, this will be done at a later step.
3 - Unfolding the pattern
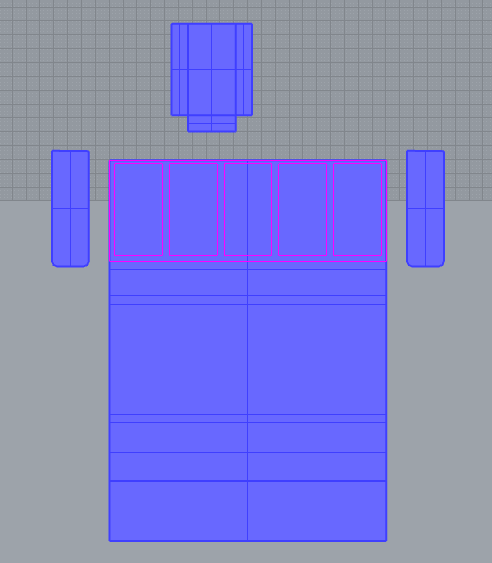
Good 3D softwares usually provide a way to unroll polysurface objects. This involves extracting all the surfaces, unfolding them and placing them flat on a single plane.
You need to tweak a little bit and arrange the shapes in order to obtain something usable like the image below. You need to include enough details to locate the future stitch lines (purple lines here).
We are done with the 3D modeling now and we need to export the flat drawing in SVG format.
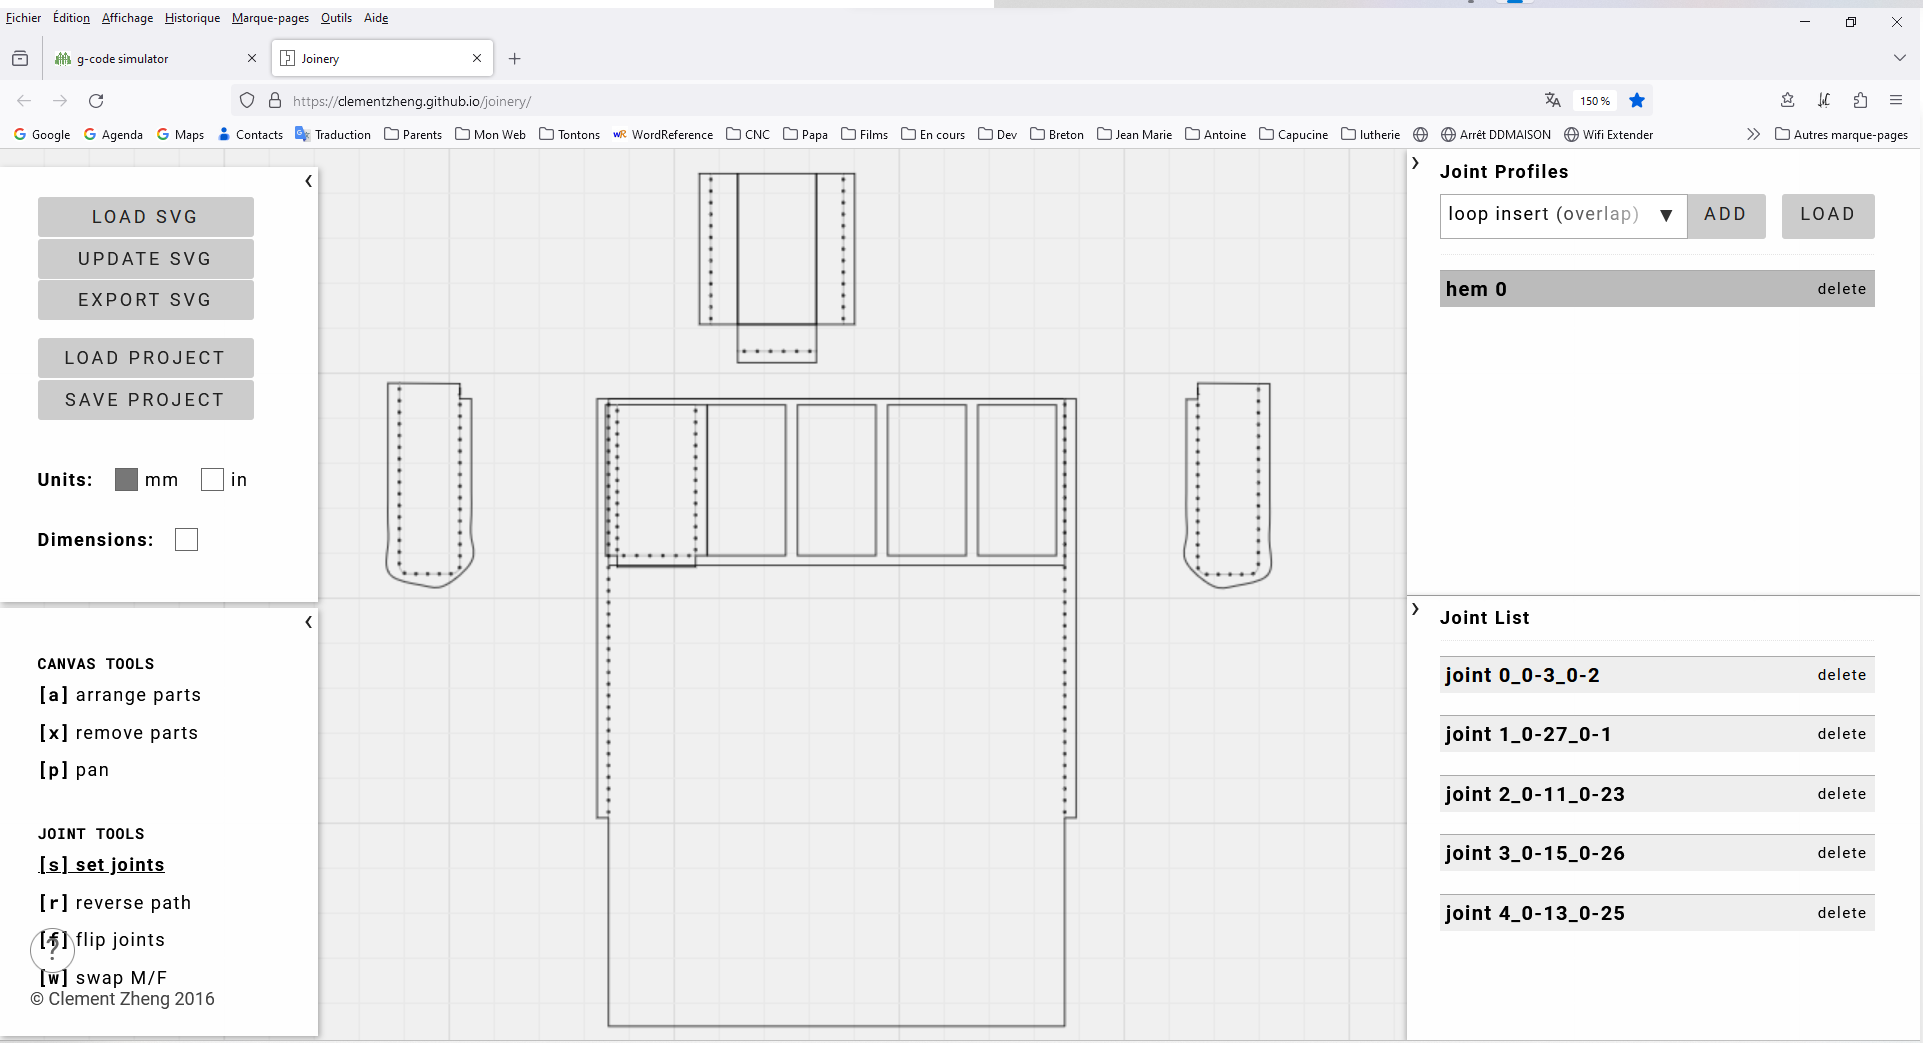
4 - "Joinery" to take care of how pieces will be jointed together.
Now a little bit of magic. This is a great piece of software called "Joinery" by Clement Zheng. It's a free online tool that takes a SVG drawing as input and lets you define what edge joins what other edge, what kind of joint you want, and it draws for you all the details.
Please visit this page to understand more all the benefit of Joinery.
https://www.instructables.com/Joiner...ut-Assemblies/
The tool by itself is accessible here :
clementzheng.github.io/joinery.
In my case, I didn't go too fancy and chose simple stitch points, (so called hem joint in the tool).
Here is the result : (see some weird curves here and there, but nothing dramatic)
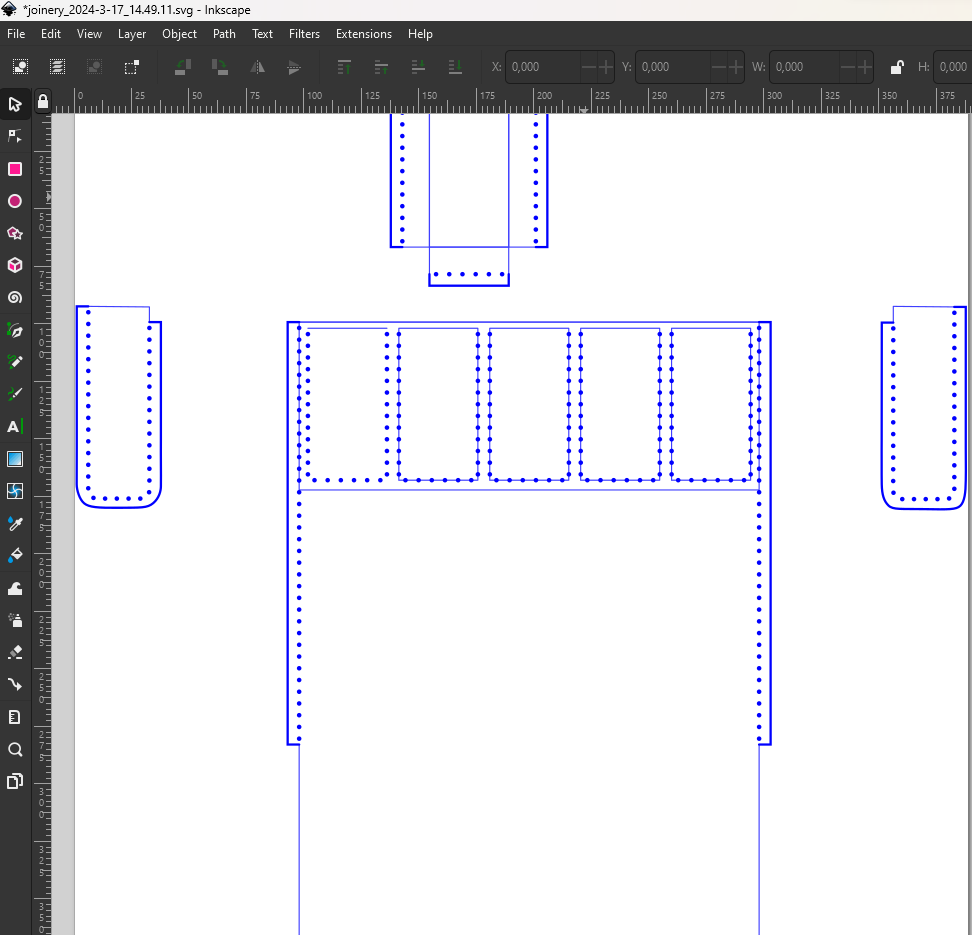
5 - Inkscape to fix things up .
Joinery will let you export the result as SVG file again, and then I use Inkscape to touch up whatever needs it.
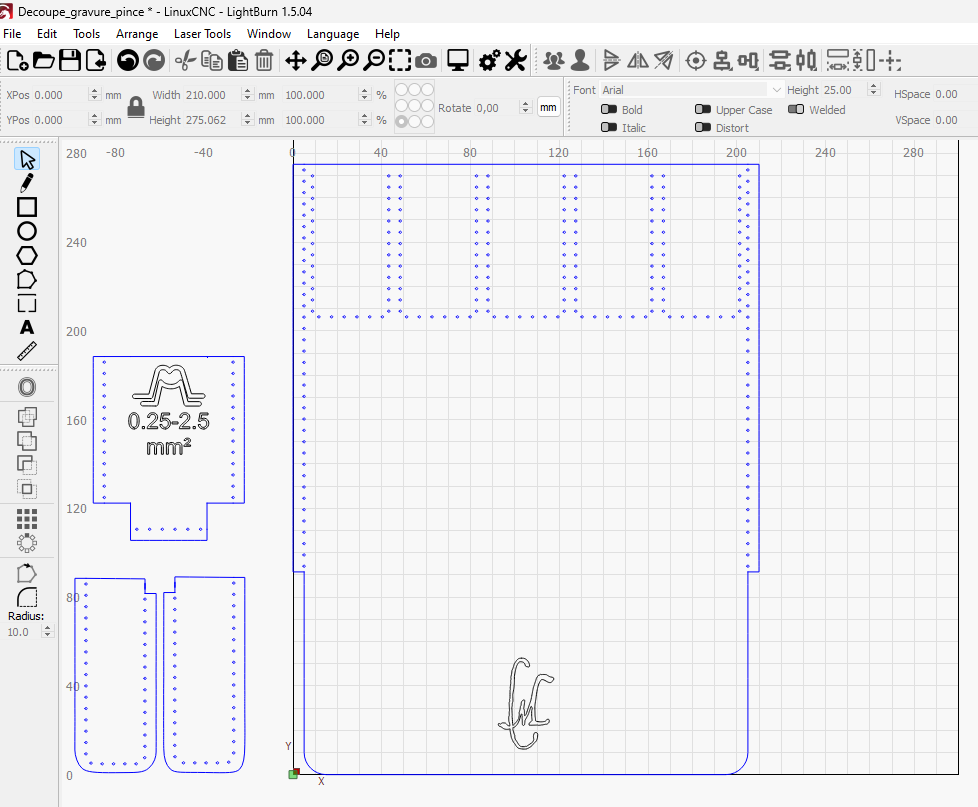
6 - Prepare for laser cutting
I have tried many things, but so far, the most versatile software I have found to control laser engraving and cutting is "Lightburn".
This software is an all in one that allows you to draw, layout shapes and text, and then to define all sorts of laser engraving or cutting strategies, and to finally drive your Laser cutter, provided the machine is known already to the software.
My laser cutter setup is basically my CNC, to which I have added a 5W diode laser head.
Unfortunately, this setup is not known from Lightburn, and I cannot use it to directly send the pattern to the machine, but I can export the gcode, and run it using my usual CNC controler software.
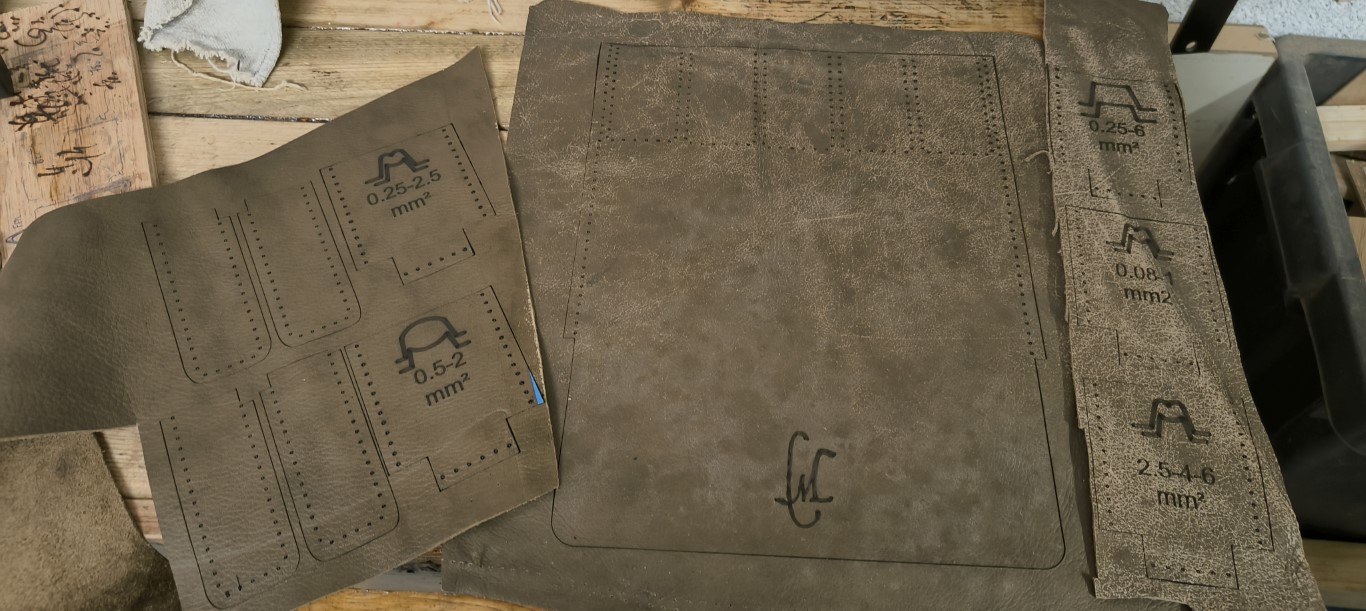
Here I use lightburn to sketch the markings I want on the pockets to identify what jaws are in them and what they are used for.
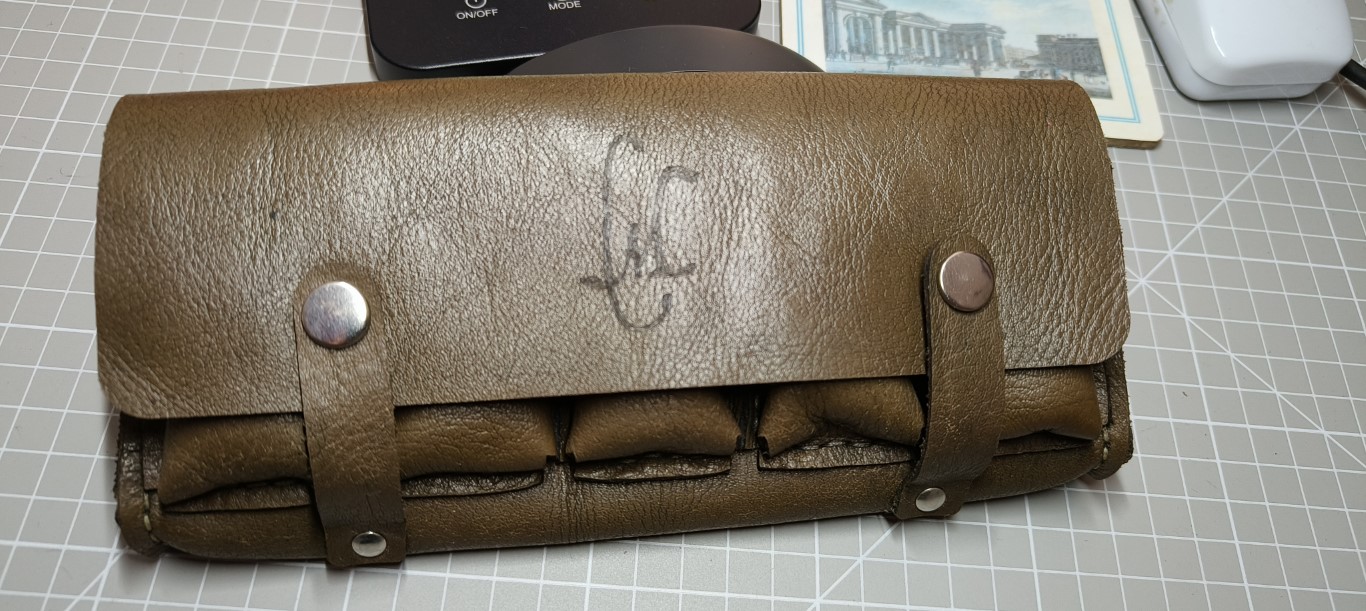
I also imported my SVG Logo to add my personal touch
I prepare different gcode files corresponding to the different pieces I want to cut separately.
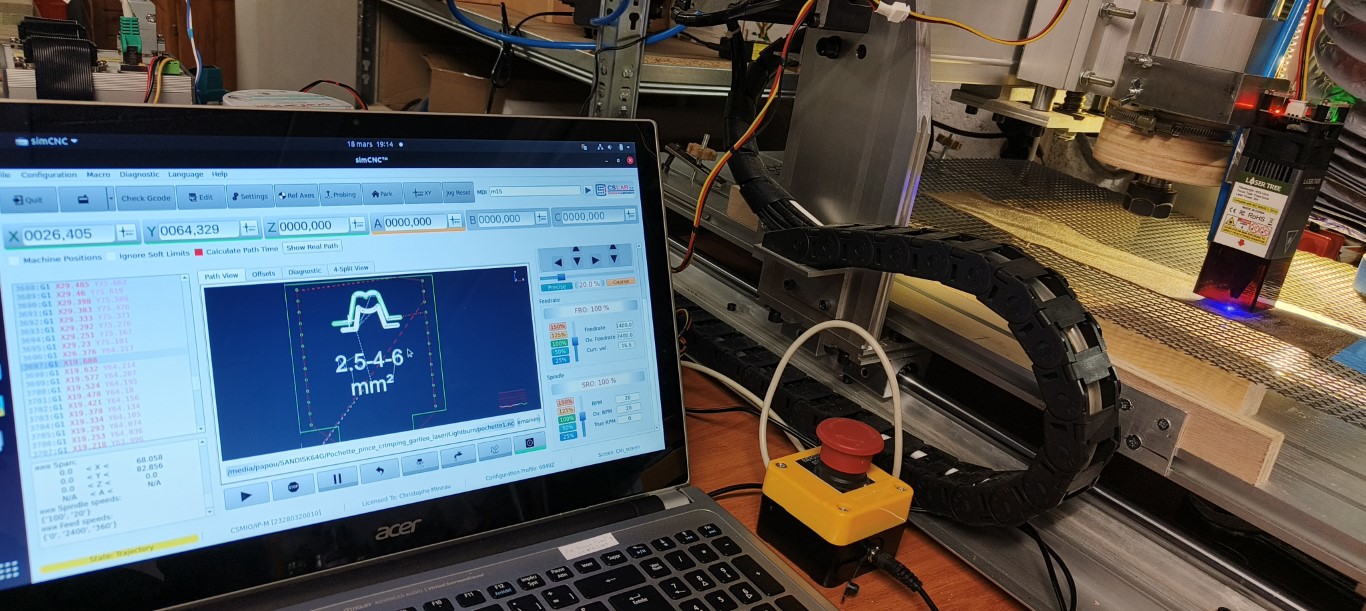
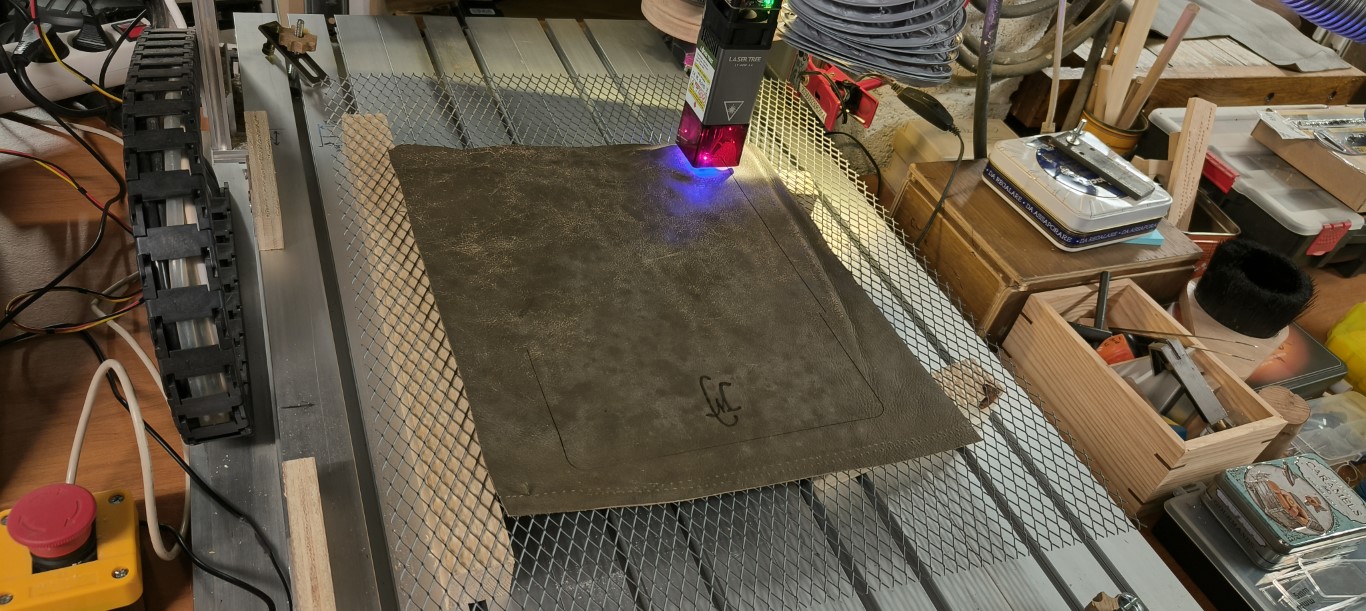
7 - Laser cutting
Here I am cutting the pieces on my Laser-CNC. The control board of my machine is a CSMIO/IP-M from Cslab (replaced the original Chinese no -name board) and the software I use is "SimCNC" from CsLab as well.
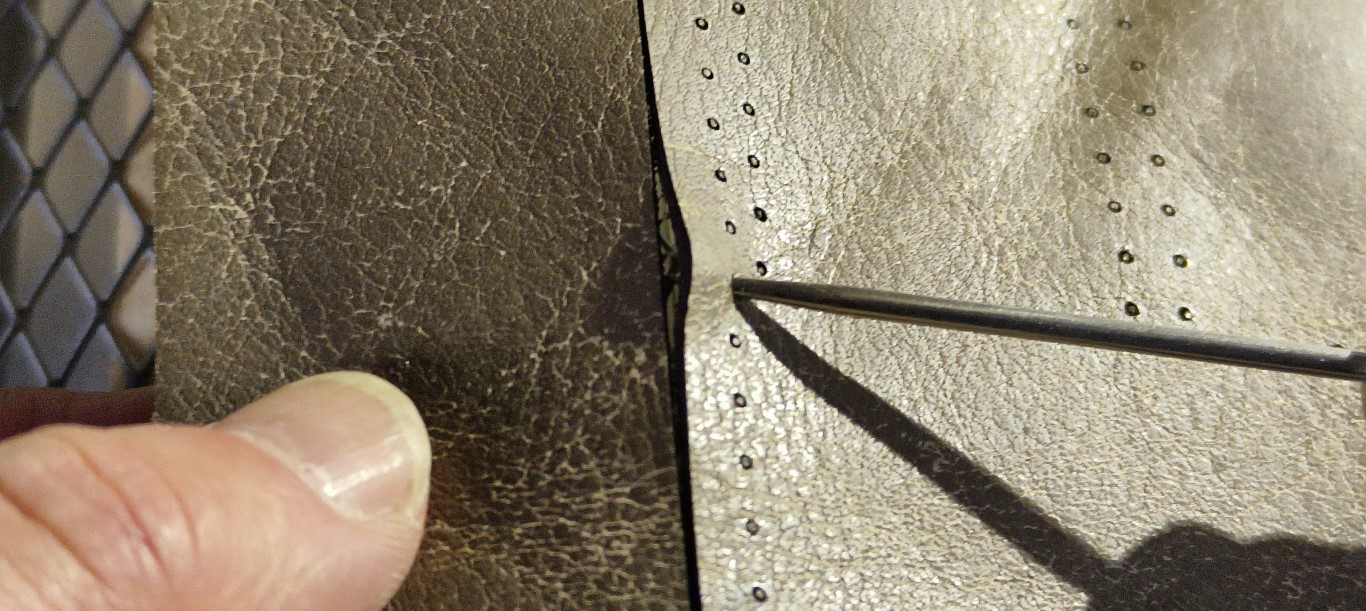
The holes are 1mm in diameter. I am verifying that a needle can go through them. No problem.
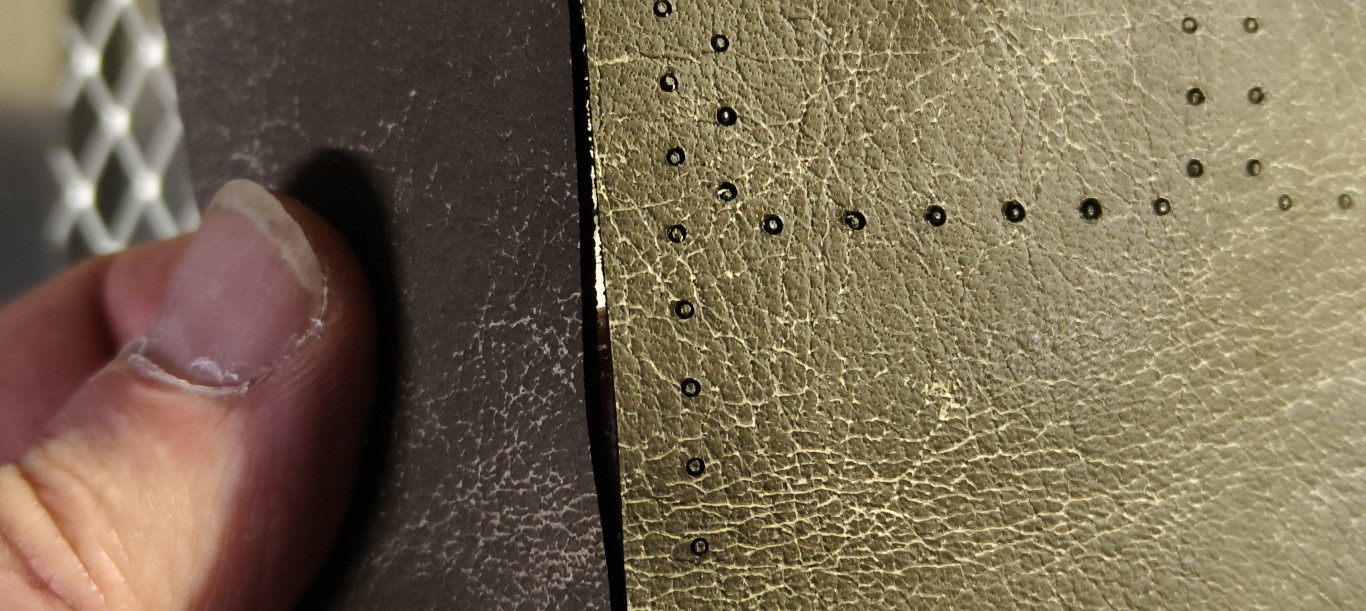
Now to be honest, this laser cutting technique has two major concerns :
- First it stinks ... and it stinks a lot ! I am not talking about the fumes (nasty) during the cutting, but the pieces after the cut, and quite a long time after cutting. That's not a good idea for a nice gift you want to do
Well, after a lot of cleaning up using glycerin soap, and a lot of nice smelling beeswax, the odor is almost gone, but not entirely.
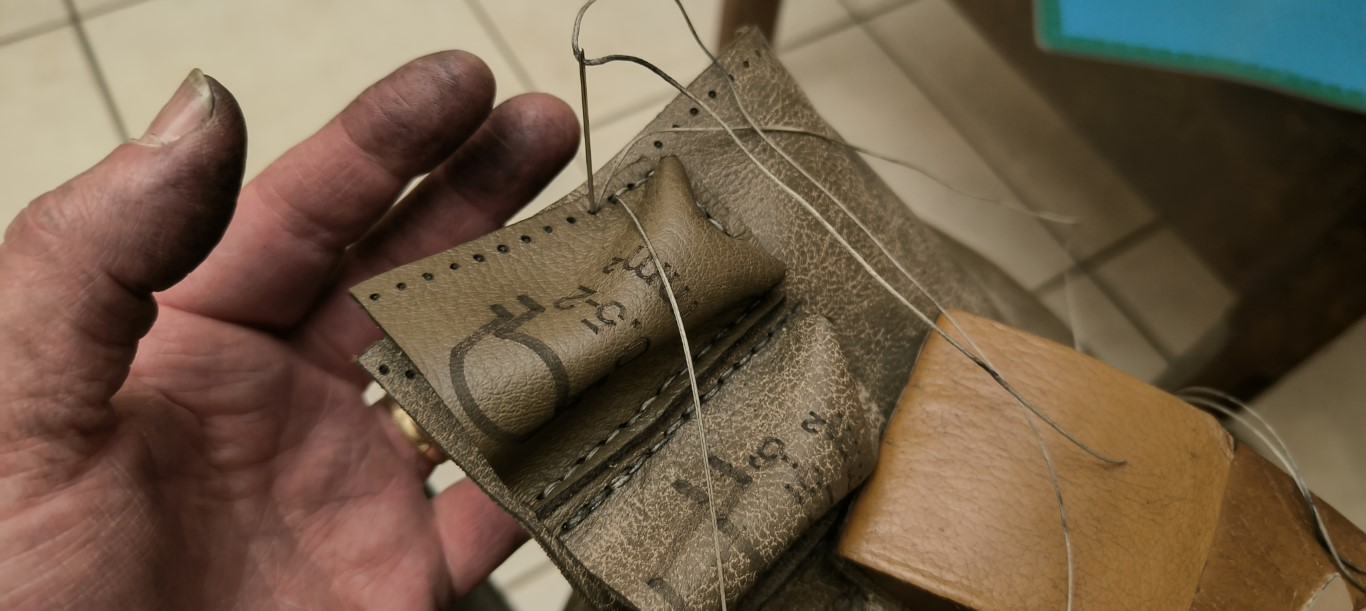
- Second, it is dirty. Impossible to use a white wire for your sewing, or at least it does not stay white very long, see the picture below, and look at my hands...
I must say that I usually love hand stitching, but here, it was not really pleasant.
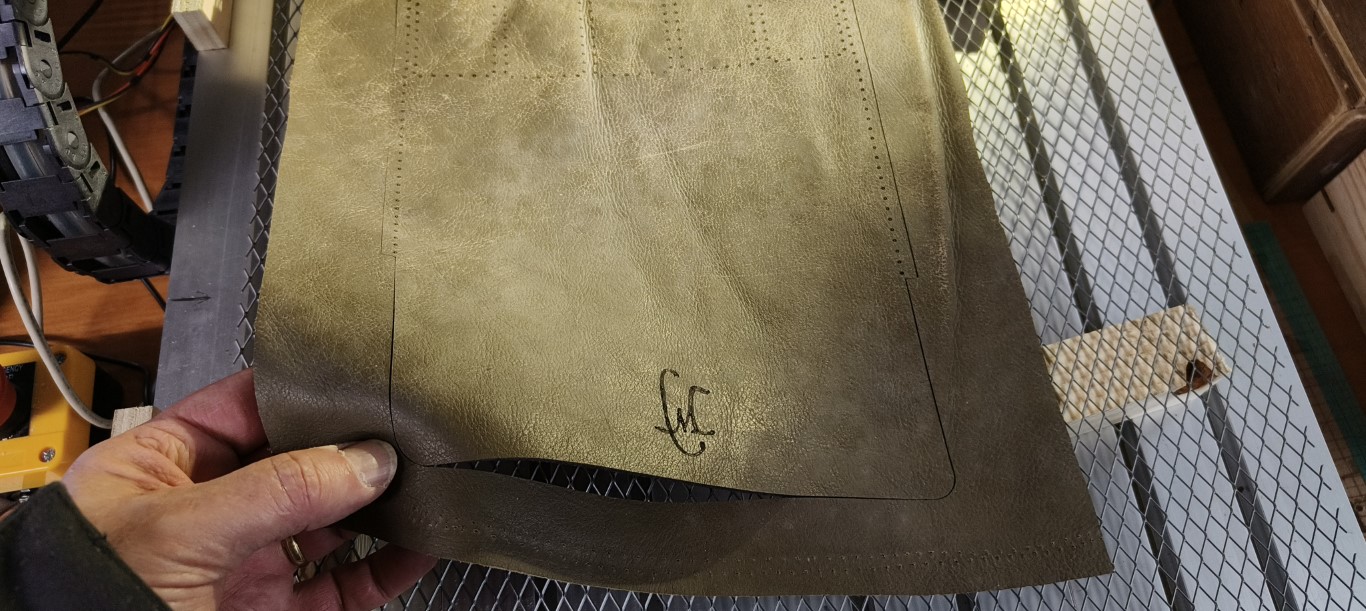
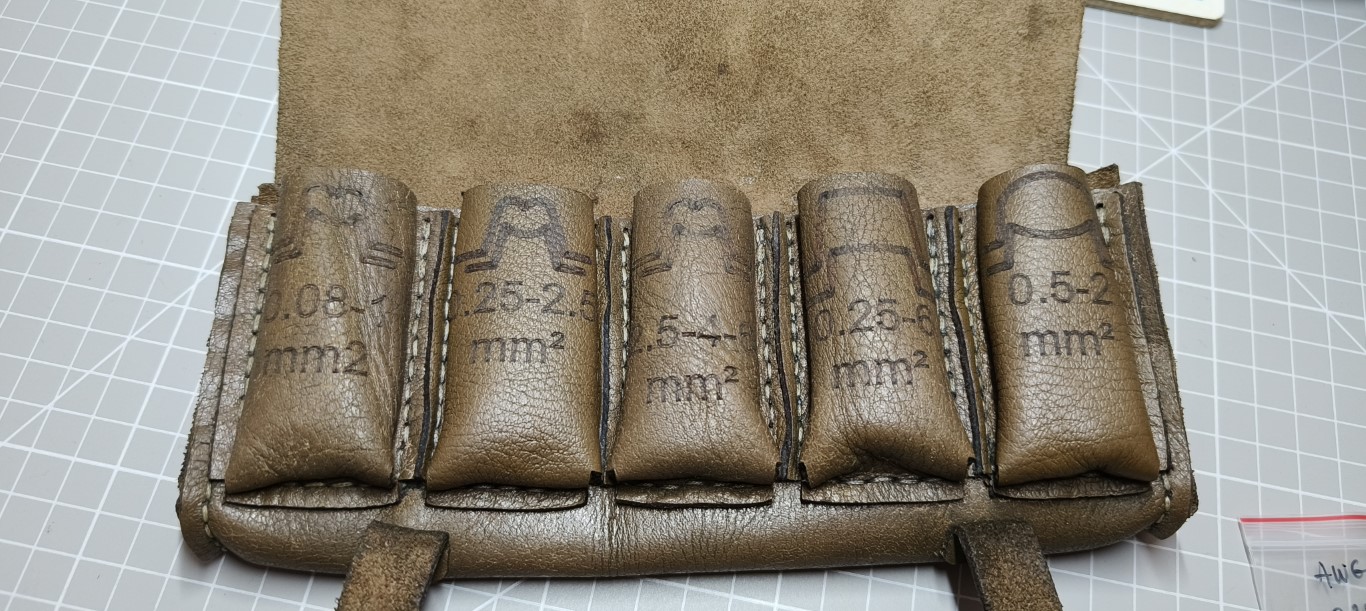
On the other hand, the layout was perfect and all pieces went together perfectly as expected, and all holes where perfectly aligned.
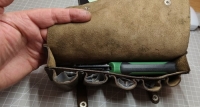
And here we go, after cleaning and waxing. Not too bad, I like the etching. (should have made the drawing smaller)
Thanks for reading me, sorry, this one was really long, but lots of pictures, and who knows, maybe it could be useful for someone !
(please, give me your feedback)


 Reply With Quote


Bookmarks