-
4 Attachment(s)
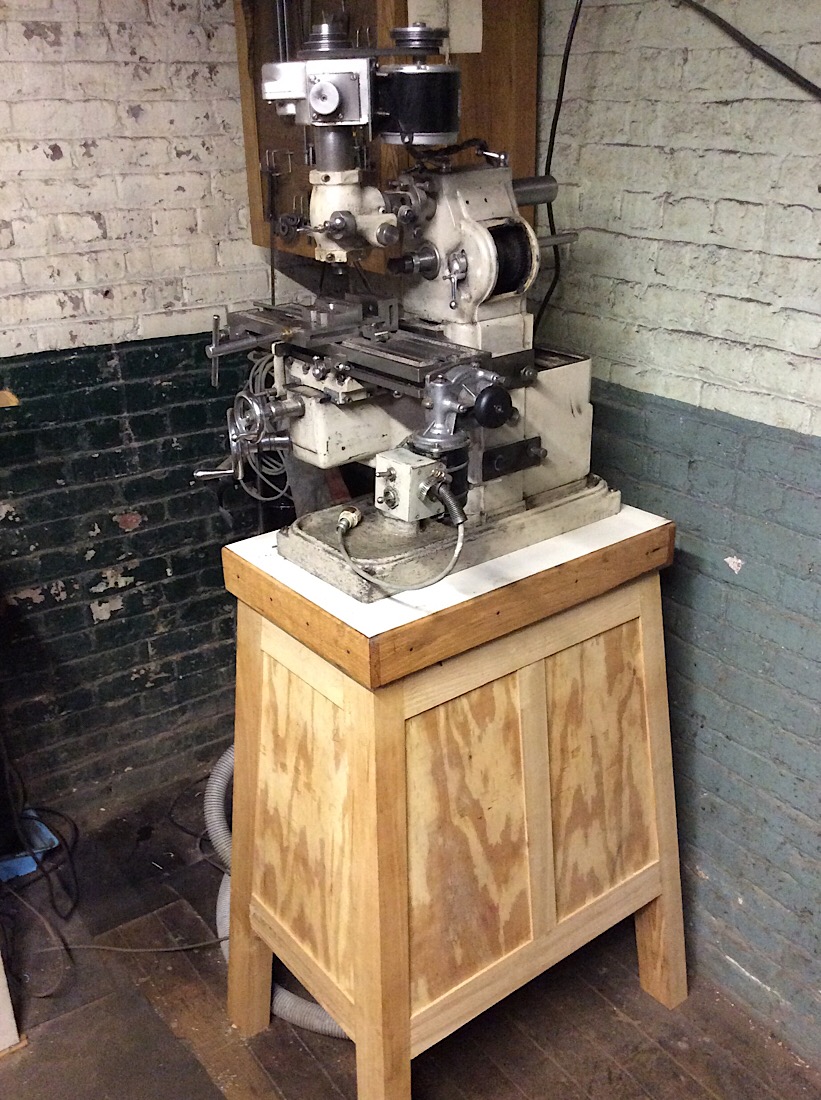
Milling machine stand
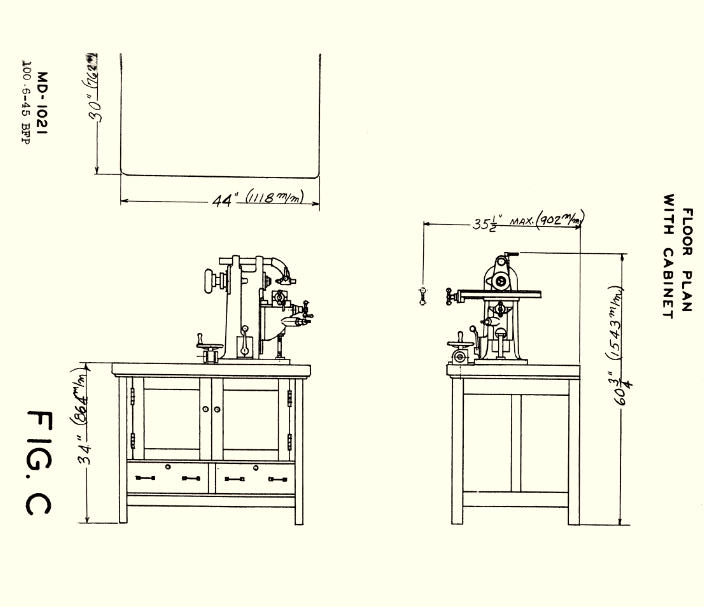
This is a stand I made for my small Atlas milling machine to replace a much bigger table. It has about the same footprint as cabinets originally sold by the manufacturer but is taller than those.
Like the Atlas stands it allows close access to the machine from the sides as well as the back, but it doesnt catch chips and cutting fluid like ones with chip pans, or even the old table. The left side is open, but I plan to add drawers instead of a shelf.
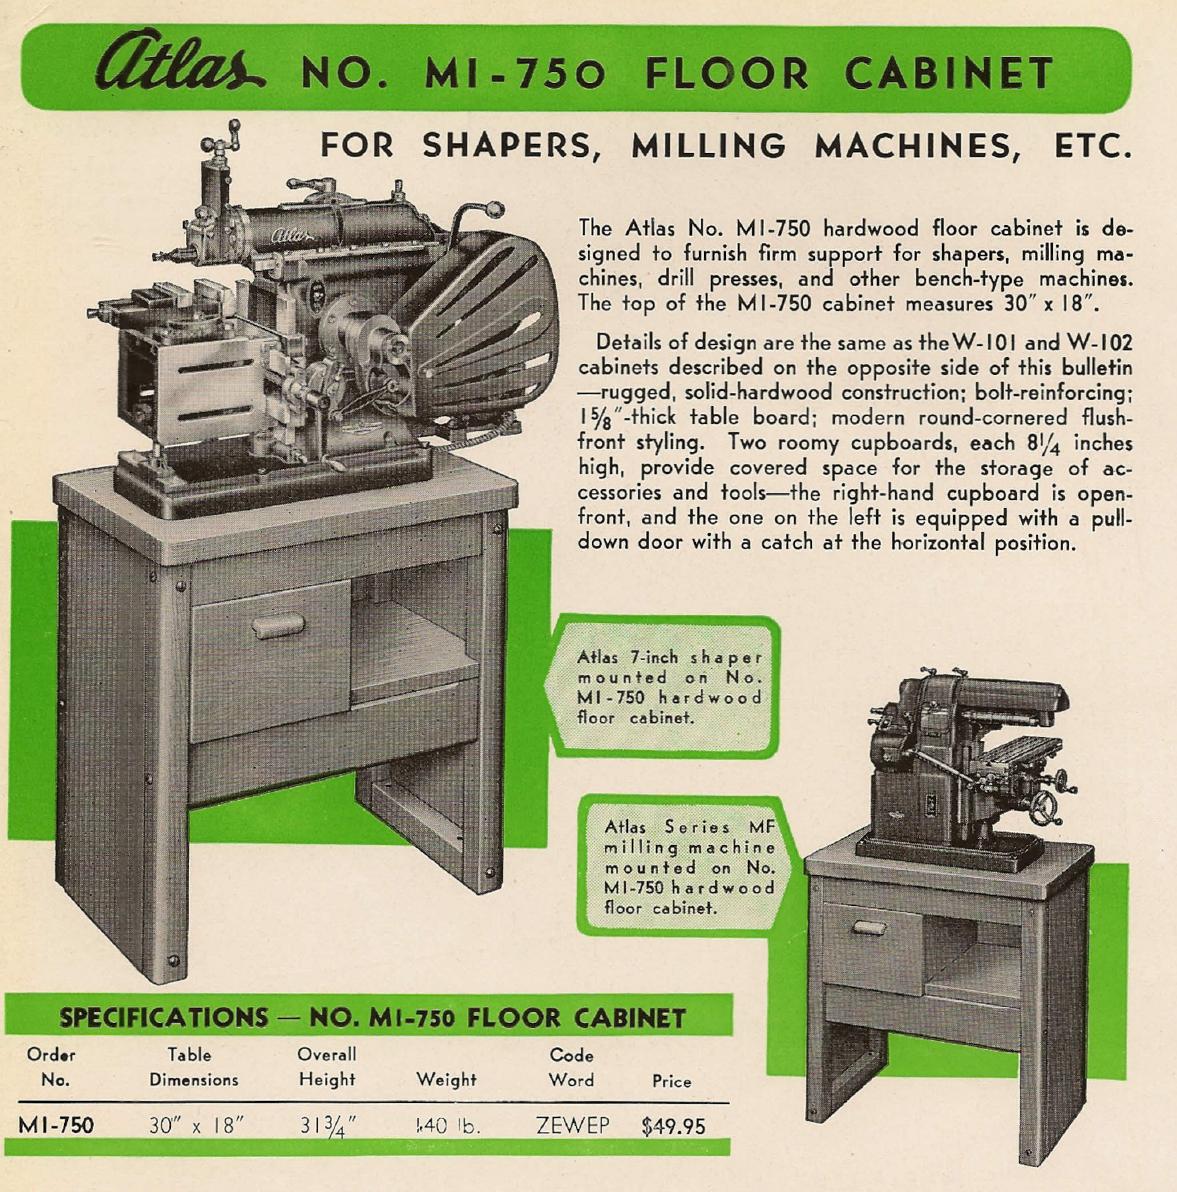
There are more practical substitutes for the sought-after originals - for example VSAncona built a nice version of the older lab-style hardwood stands from Atlas, and Ruxu modified a tool cabinet to make a neat base for a heavier mill-drill. There are many more.
Mine probably could be a couple inches lower, which would still put the spindle and handles a lot higher than what seems to have been standard eighty years ago - I just copied the height from the old table which was alright to use. It could be heavier, too: it only weighs half as much as the wooden Atlas stands.
Construction is pretty much the same as my lathe bench, and like with it I used mostly recycled materials. The 3-ply top is edged with oak and covered with formica left over from making that.
Attachment 30766 Attachment 30767
Attachment 30768 Attachment 30769
-
<!-- BEGIN /var/www/html/homemadetools/protected/modules/zeus/views/tool/postUpdate.php -->
Thanks threesixesinarow! We've added your Milling Machine Stand to our Dollies and Stands category,
as well as to your builder page: threesixesinarow's Homemade Tools. Your receipt:
<div id="blocks">
<div class="block b1 pngfix">
<div class="bimg">
<div>
<a href="https://www.homemadetools.net/homemade-milling-machine-stand-2">
<img src="/uploads/225843/homemade-milling-machine-stand-2.jpeg"/>
</a>
</div>
</div>
<div class="head pngfix"></div>
<div class="left pngfix"></div>
<div class="right pngfix"></div>
<div class="blockover b1 pngfix">
<div class="title">
<a href="https://www.homemadetools.net/homemade-milling-machine-stand-2">Milling Machine Stand</a>
<span> by <a href="https://www.homemadetools.net/builder/threesixesinarow_2">threesixesinarow</a></span>
</div>
<div class="tags">tags:
<a href='https://www.homemadetools.net/tag/stand'>stand</a>, <a href='https://www.homemadetools.net/tag/mill'>mill</a> </div>
</div>
</div>
</div>
<!-- END /var/www/html/homemadetools/protected/modules/zeus/views/tool/postUpdate.php -->
-
10 Attachment(s)
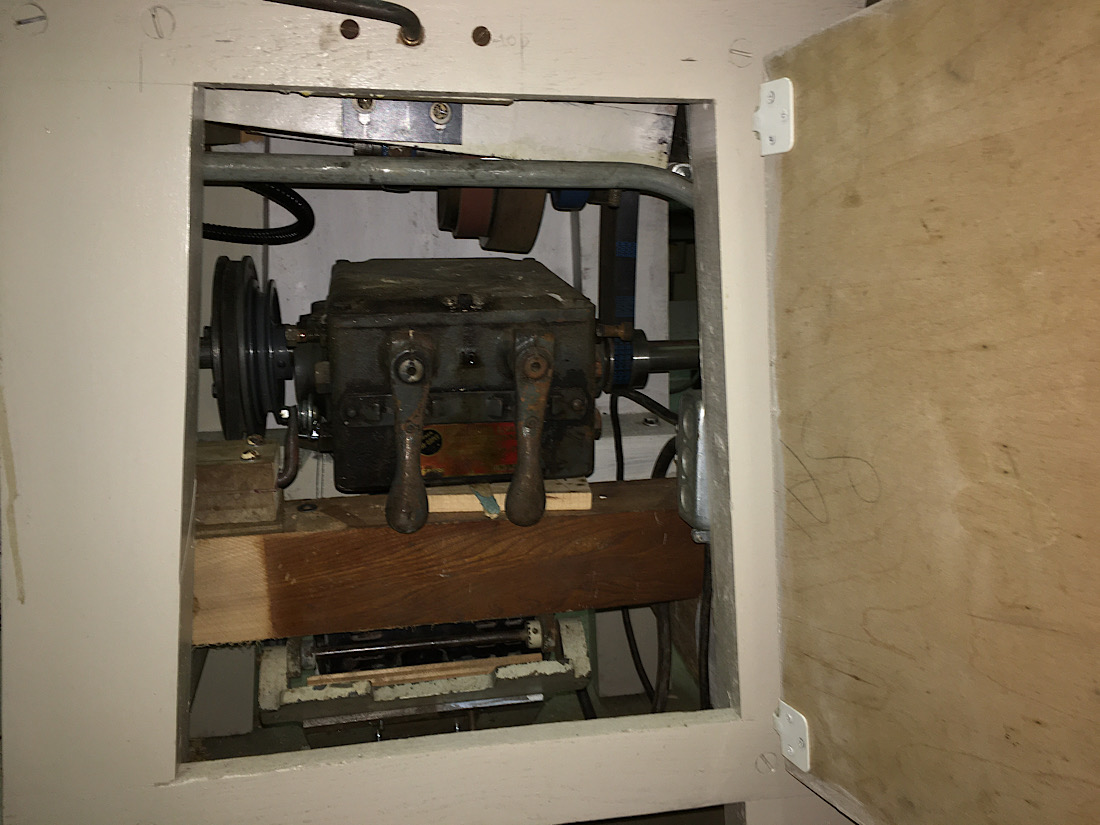
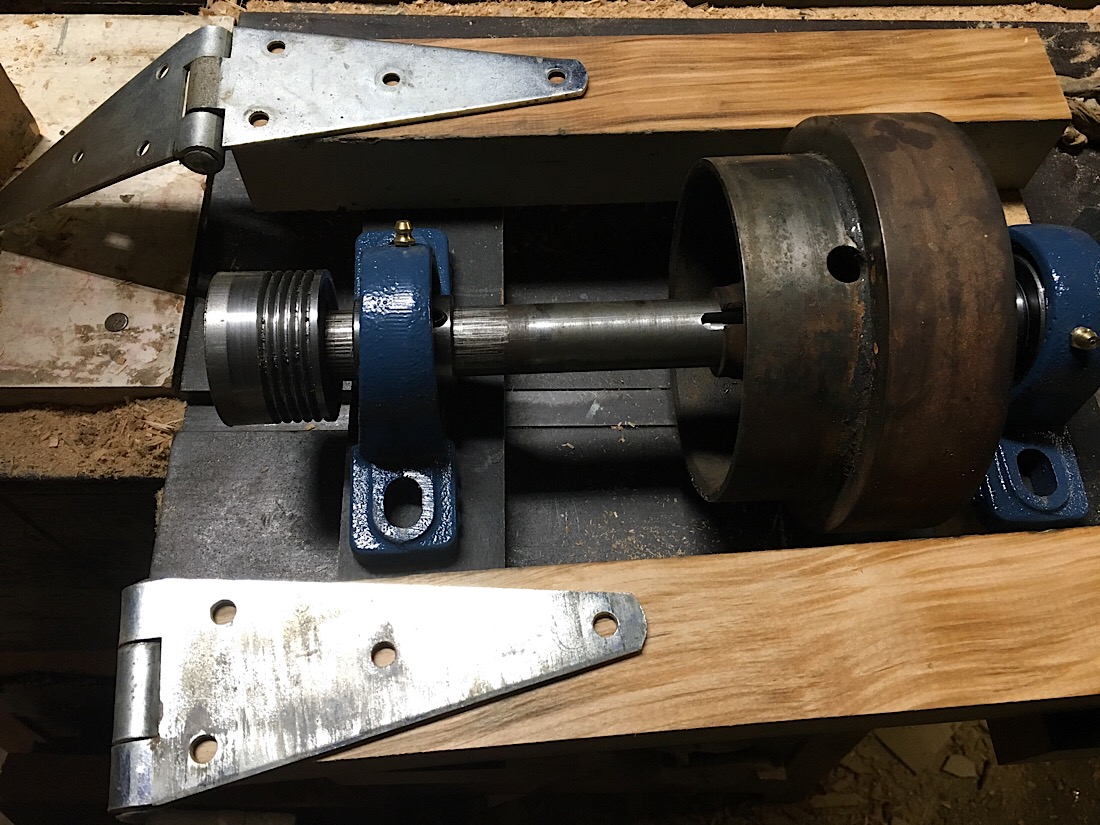
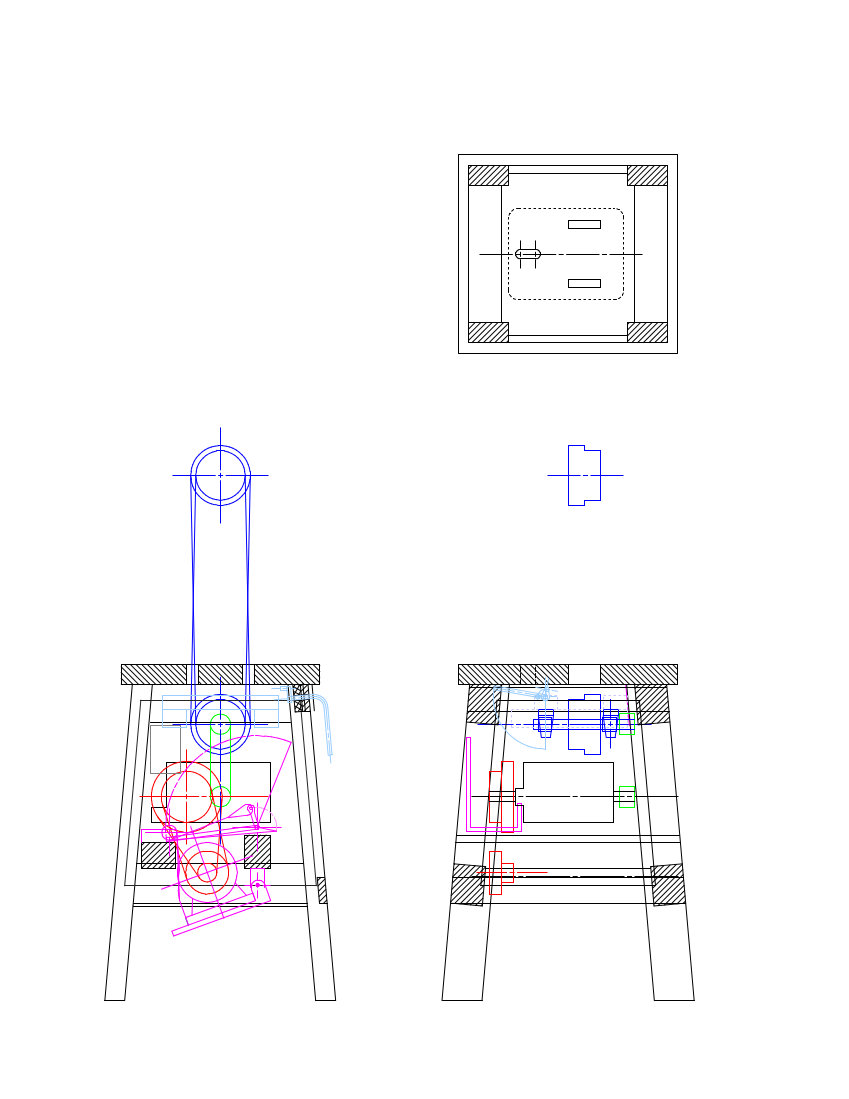
I made a similar stand for an old Stark mill I picked up last Spring. (Stark Bench Milling Machines on lathes.co.uk)
It came on a nice shop built wood top metal stand arranged around a 3-phase motor and a neat 4-speed Turner Uni-Drive transmission. That stand was more compact than ones Ive seen for Starks and similar mills - for example this Pratt & Whitney and this Hardinge - but this new one is about half its size, making it easy to get next to and behind the machine to operate, and easier to fit in the shop.
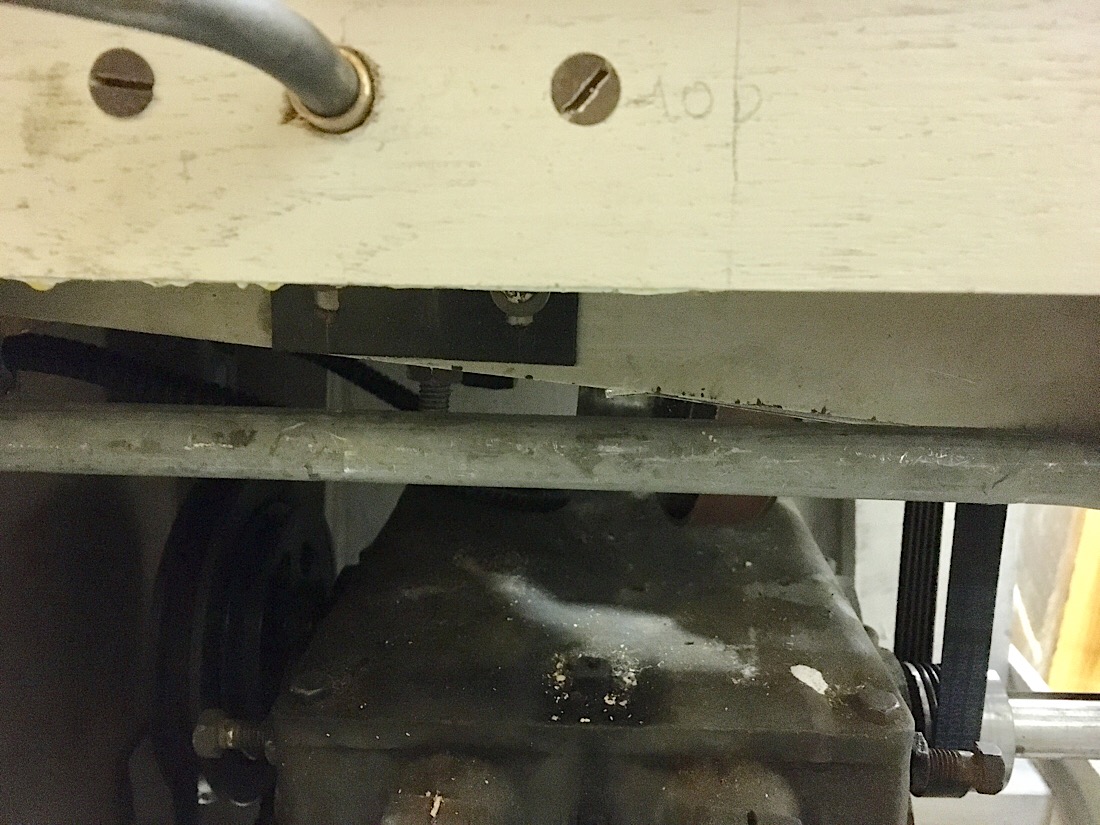
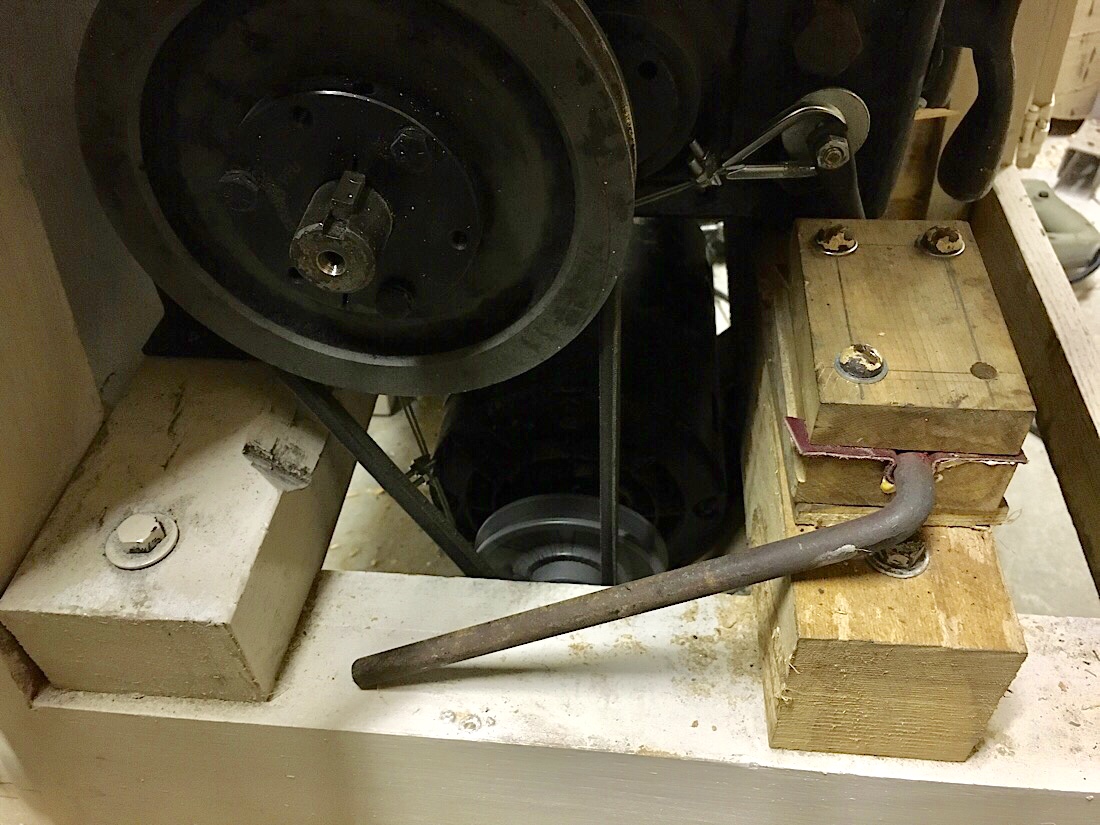
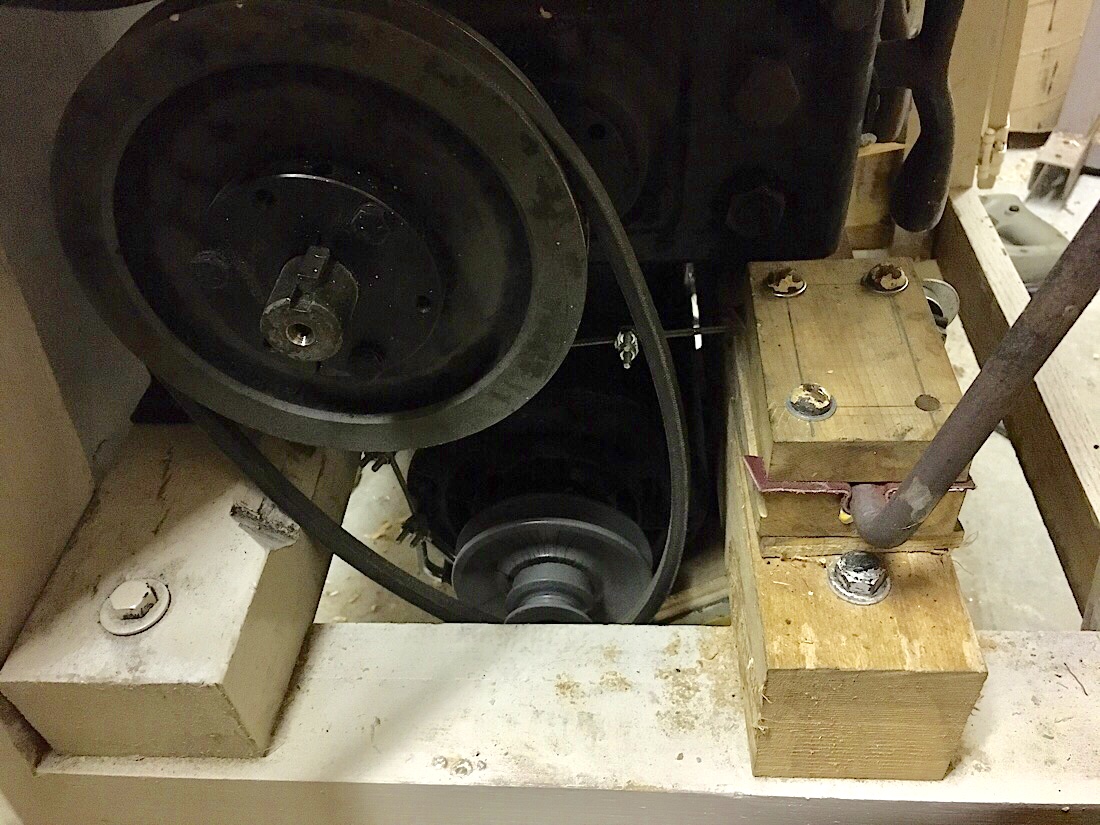
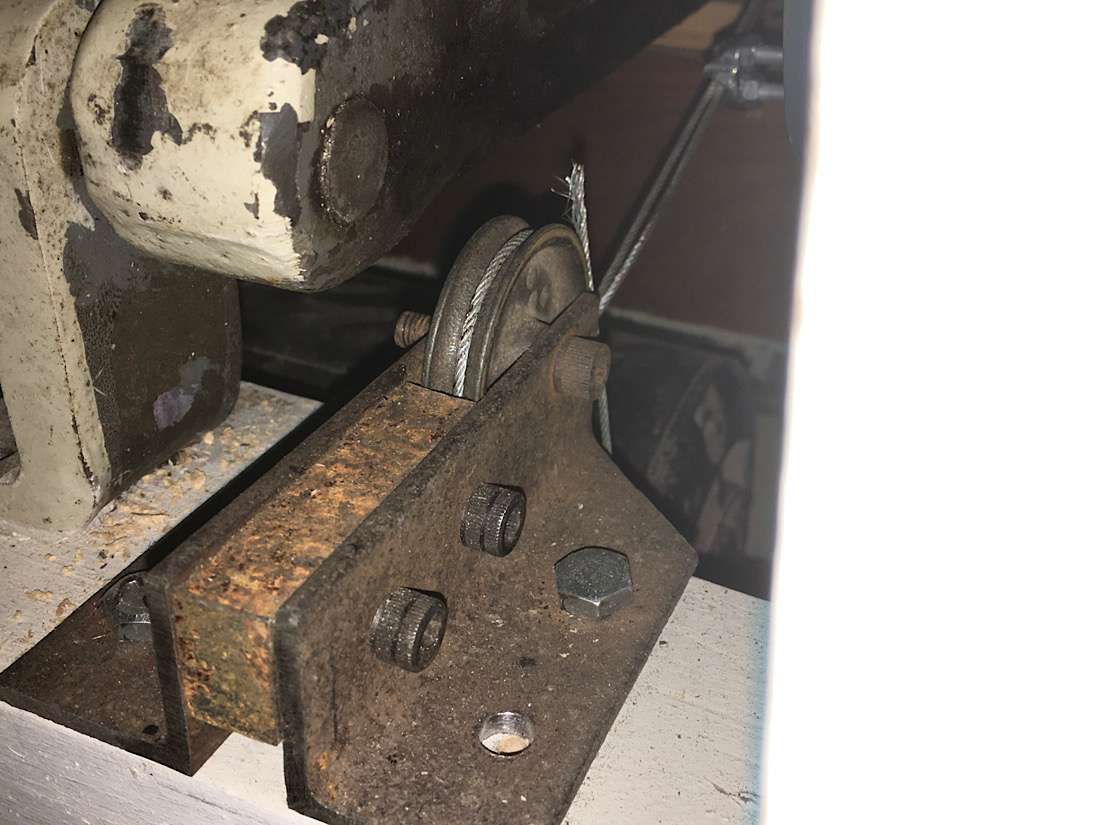
In order to make it smaller I added a countershaft above the transmission, which allowed that to be lower and more centered in the stand. The countershaft pivots close to the center of the driven pulley so the transmission itself doesnt have to move when I shift the belt for the spindle. The motor pivots more conventionally.
I like the size, and the out of the way drive is great compared with the side slung Atlas but I miss the storage space it displaces. Im not sure it was worth it just to shoehorn another small mill in, but I had some of the pulleys and got a great deal on the motor so it probably was a little less expensive than getting a VFD for the old motor, or getting a dc motor controller for a big treadmill motor I saved. The wood, at least, was free.
The stand is about 20 x 22 and 33 high, which puts the spindle at 52, kind of in between normal height and where I have the Atlas.
Attachment 33615 Attachment 33617
Attachment 33618 Attachment 33619
tight, loose
Attachment 33620 Attachment 33621
Attachment 33616 Attachment 33622
countershaft hinges, and motor lever pulley
Attachment 33623 Attachment 33624
-
My stand is much like that but I used 4x4s for the legs with large diameter lag screws in the ends for level adjusters and triple layered the top with 3/4" plywood laminated together. I also enclosed the area under the tabletop and it's proved to be handy for storing accessories. It's a solid reliable fixture.
I made mine tall too and my quill is only slightly below eye level so that I don't have to work hunched over. Over the years I've become pretty fed up with everything being sized for hobbits (and don't get me started about nearly all shower nozzles positioned so that they squirt me in the throat).
-
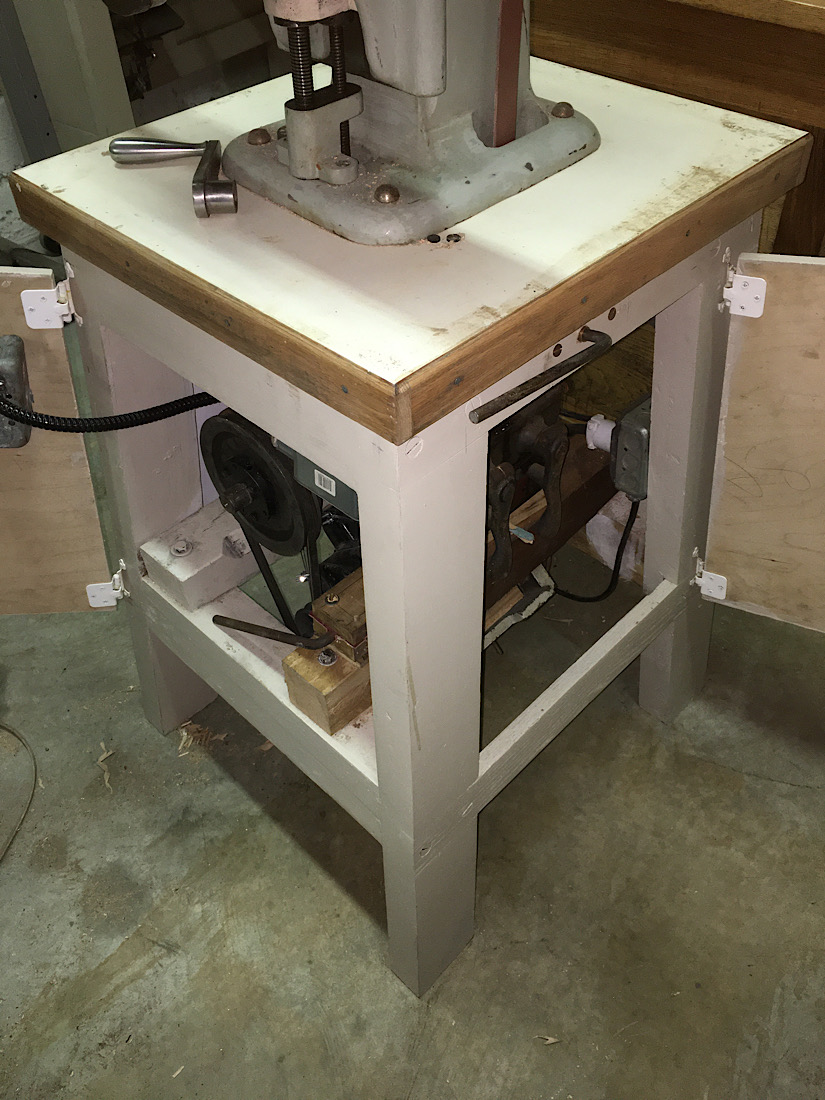
1 Attachment(s)
These legs are about 4x2. On the Atlas, which including the drive weighs about half as much, theyre 3x1-1/2. Both are pretty solid.
With that oversize drive theres not much usable space underneath the Stark - the old stand for had a metal cabinet attached to the front but that kind of got in the way. Id still like to store a few things for it inside the doors like on some old Swiss machines, basically arbors and collets, but will need to upgrade the hinges first!
This example is for one of these Aciera F1 Page 1
Attachment 33647
I havent figured out different machine heights. I put mine a lot higher than usual, I thought maybe its because theyre smaller, but those little Swiss mills are 2 inches lower than many bigger American machines!
It is nicer setting up when theyre lower, and, for many jobs, running the horizontal spindle, which is why I made this one a little lower than the Atlas.
But I think at its lowest the machine table is higher than a Bridgeport table at its highest.
Is it because manufacturers anticipated workpieces and accessories that are heavier and bigger and harder to see over?
I just keep a step stool handy.
-
The cynic in me would say that it's because lower stands cost less to manufacture and ship.
Don't forget the outside for storage. Plywood boards hung on the outside are handy for collets, clamping kits, end mills, etc. and can be made so that they can be easily removed and taken to the work, then returned when finished. I spritz mine with a diesel fuel and ATF mixture to stave off rust and occasionally brush the swarf off.
-
<!-- BEGIN /var/www/html/homemadetools/protected/modules/zeus/views/tool/postUpdate.php -->
Thanks threesixesinarow! We've added your Mill Stand to our Dollies and Stands category,
as well as to your builder page: threesixesinarow's Homemade Tools. Your receipt:
<div id="blocks">
<div class="block b1 pngfix">
<div class="bimg">
<div>
<a href="https://www.homemadetools.net/homemade-mill-stand-5">
<img src="/uploads/229723/homemade-mill-stand-5.jpeg"/>
</a>
</div>
</div>
<div class="head pngfix"></div>
<div class="left pngfix"></div>
<div class="right pngfix"></div>
<div class="blockover b1 pngfix">
<div class="title">
<a href="https://www.homemadetools.net/homemade-mill-stand-5">Mill Stand</a>
<span> by <a href="https://www.homemadetools.net/builder/threesixesinarow_2">threesixesinarow</a></span>
</div>
<div class="tags">tags:
<a href='https://www.homemadetools.net/tag/stand'>stand</a>, <a href='https://www.homemadetools.net/tag/mill'>mill</a> </div>
</div>
</div>
</div>
<!-- END /var/www/html/homemadetools/protected/modules/zeus/views/tool/postUpdate.php -->
-
1 Attachment(s)
I can understand bigger machines being lower.
But the stands sold for mini mills are 35 tall - I guess that puts the machine table at about 40-41? My tiny Unimat-size mill is higher up than that!
Attachment 33667
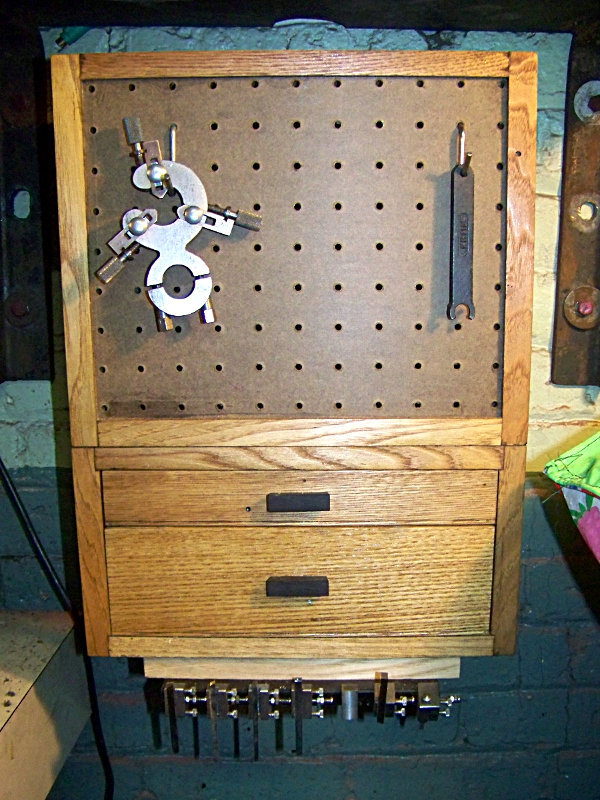
I do like using the outside, too, especially for tools I always need for that machine like wrenches and chuck keys, but it depends what and where it is, and at what height. I wanted good access from at least a couple sides of the mills where I dont have to worry about brushing stuff off, even if its just chips caught on other things.
Im not really a fan of pegboard but have used this stuff for panels in some of the furniture I made for the shop.