Free 186 More Best Homemade Tools eBook:  
Get 2,000+ tool plans, full site access, and more.

User Tag List

Results 1 to 7 of 7

Thread: SIEG SX3L Milling Machine Stand

  1. #1
    Supporting Member ruxu's Avatar
    Join Date
    May 2017
    Location
    Southern Finland
    Posts
    18
    Thanks
    1
    Thanked 128 Times in 14 Posts

    ruxu's Tools

    SIEG SX3L Milling Machine Stand

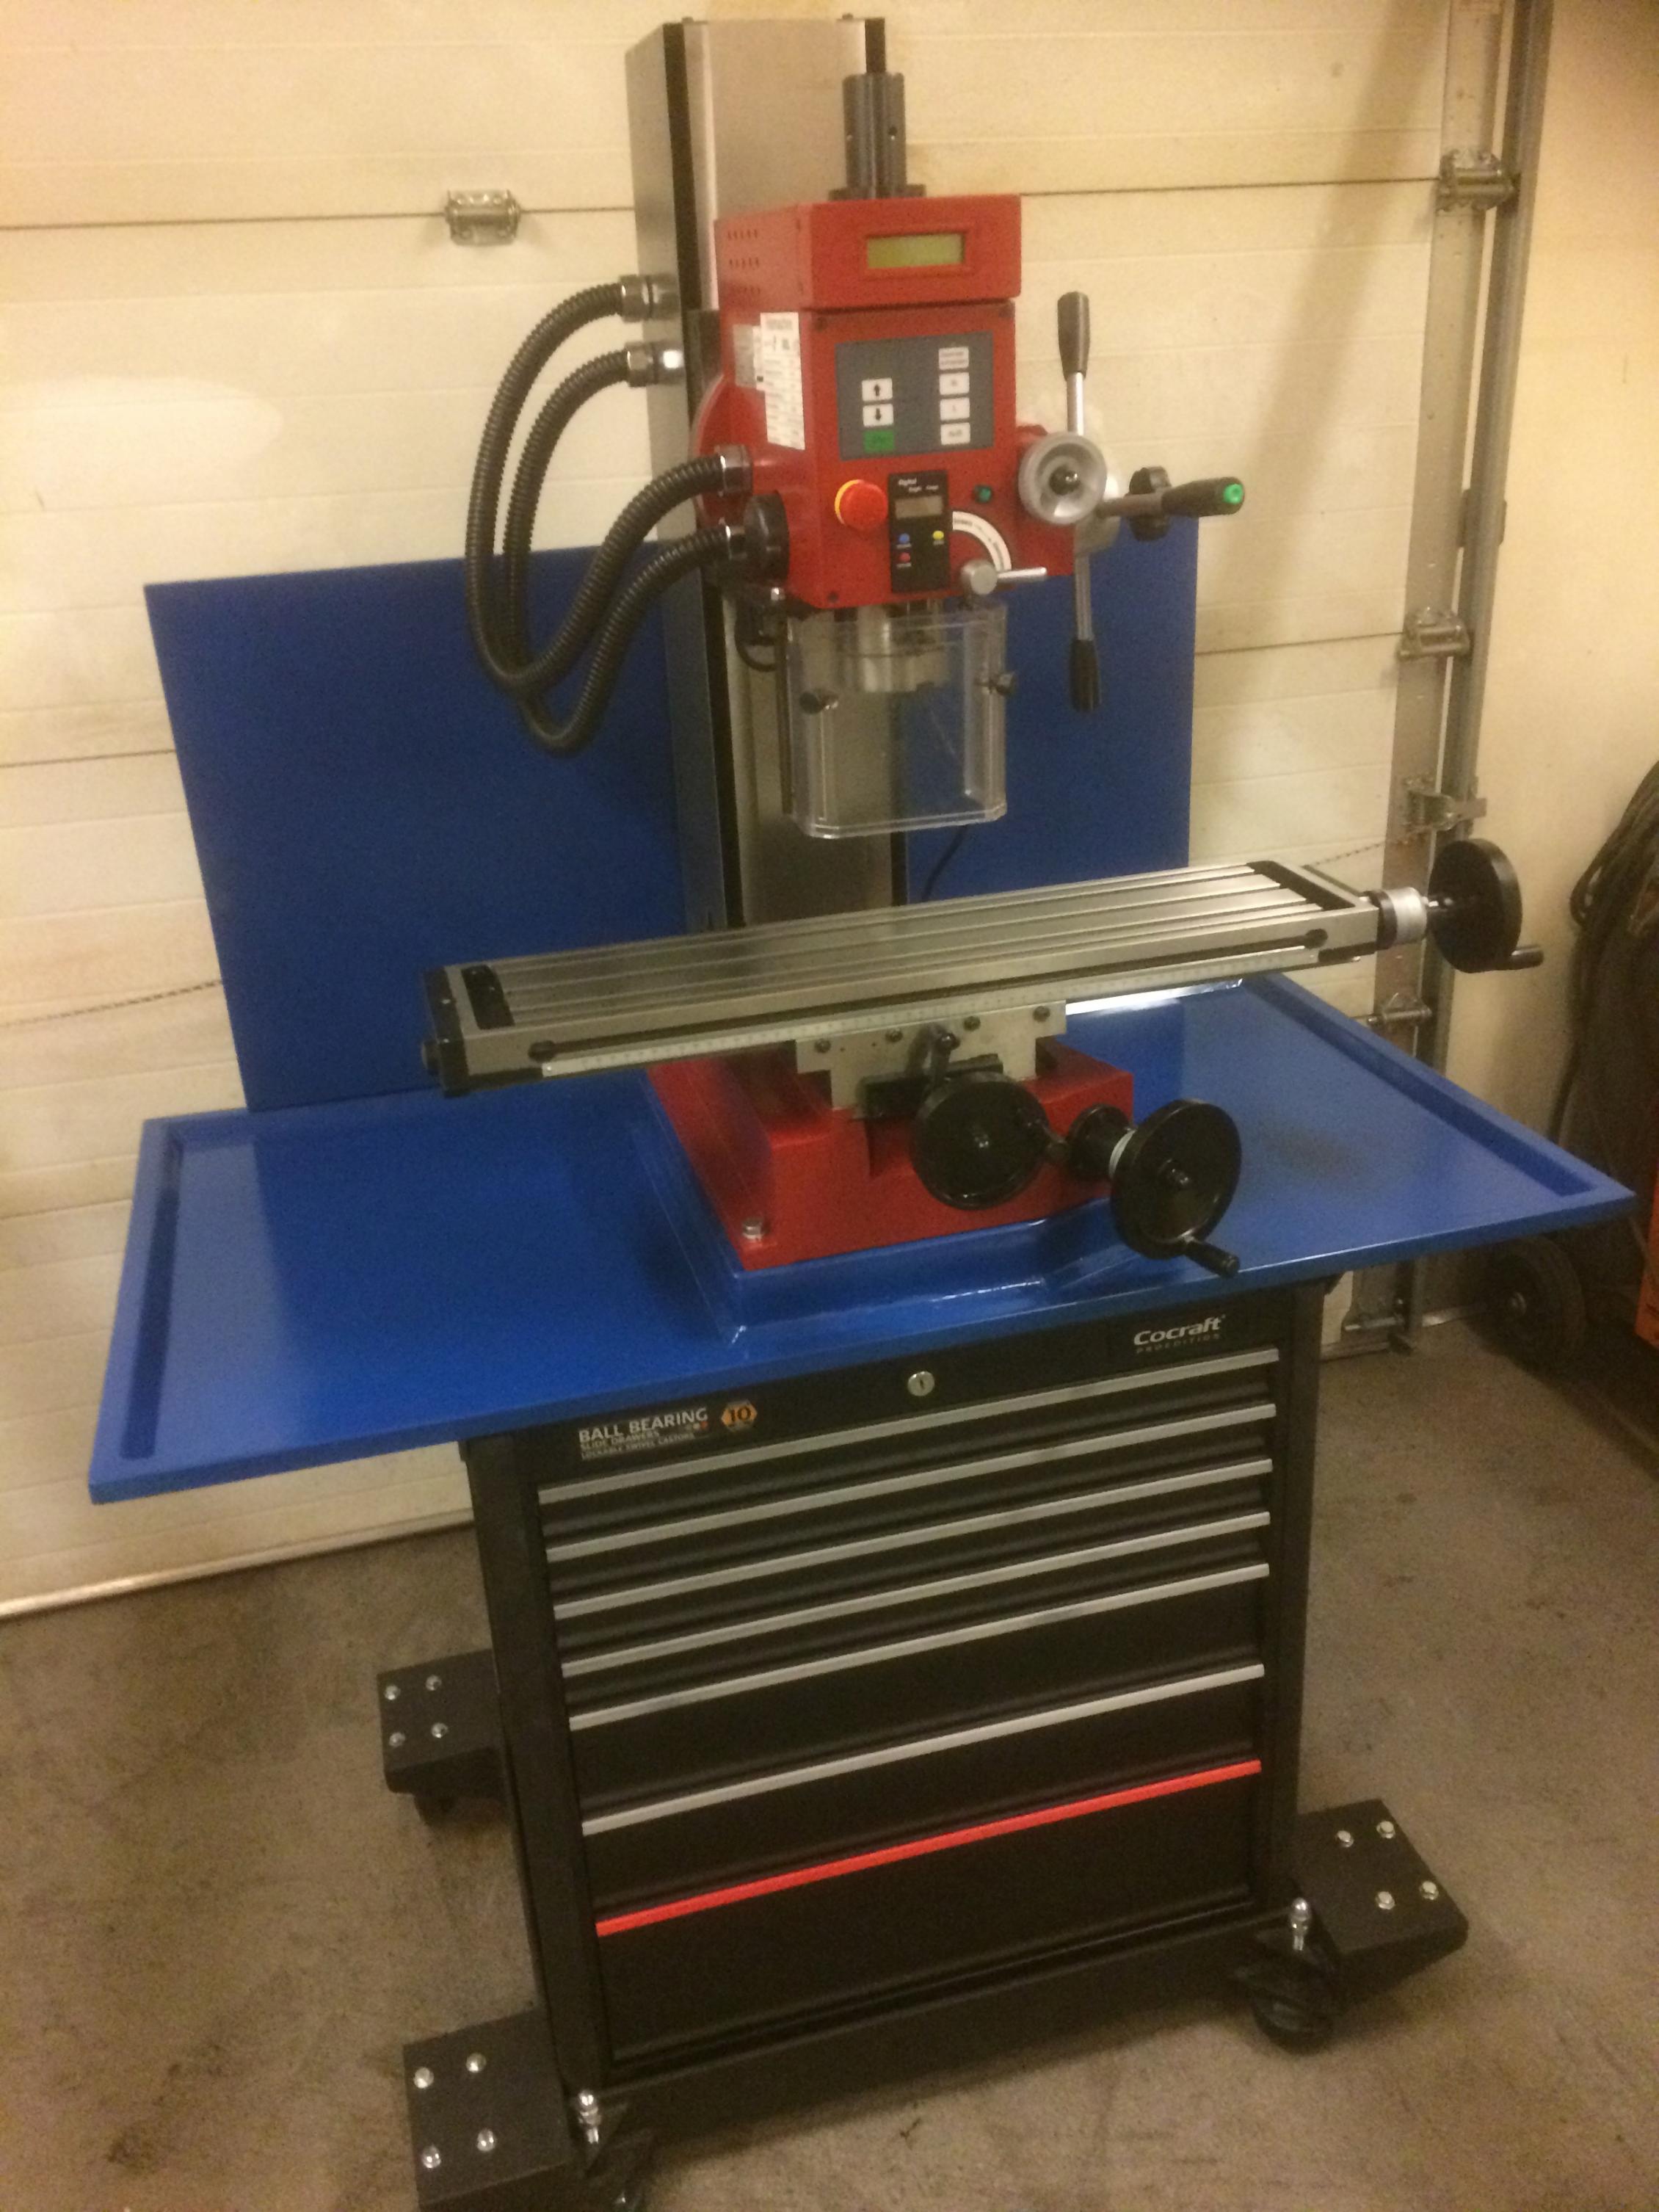
    Finally I got tired of trying to mill on a lathe vertical slide and invested in a Sieg SX3L milling machine. The machine stand that is available for the mill did not satisfy me because it must be bolted to the floor and the cabinet with one shelf is not ideal for storing the large number of accessories that goes with a milling machine. So I decided to make an own machine stand design.

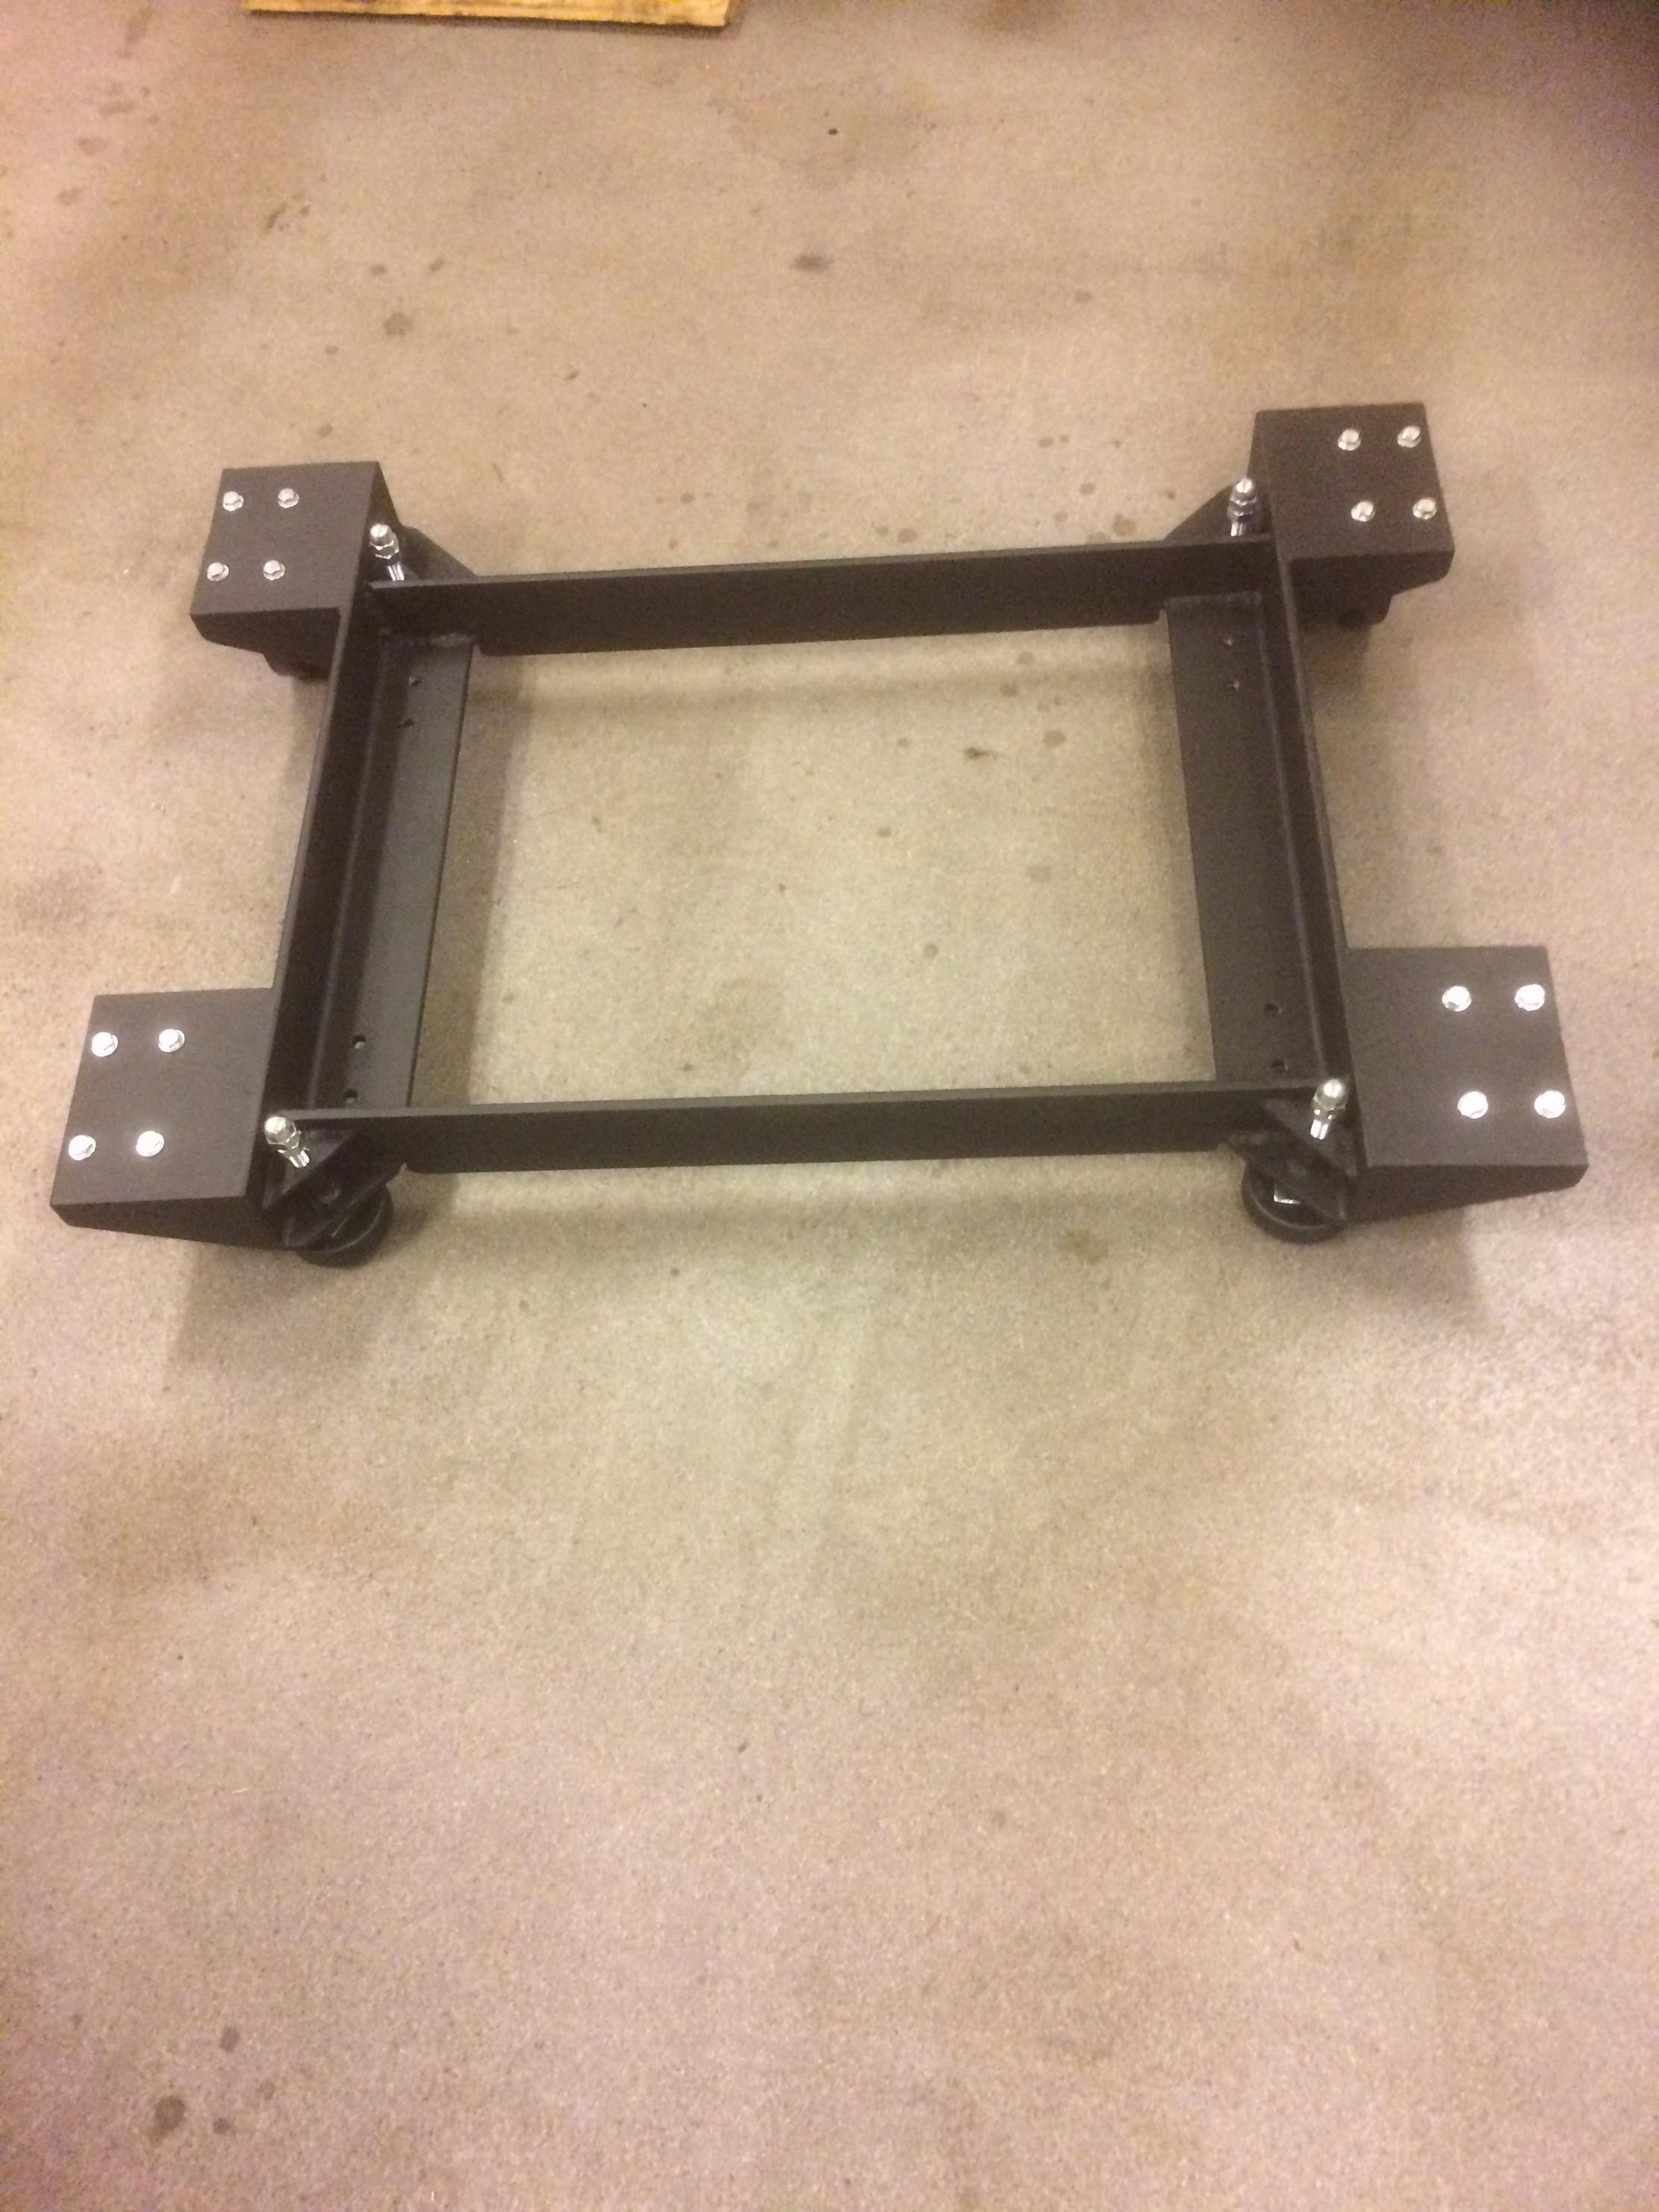
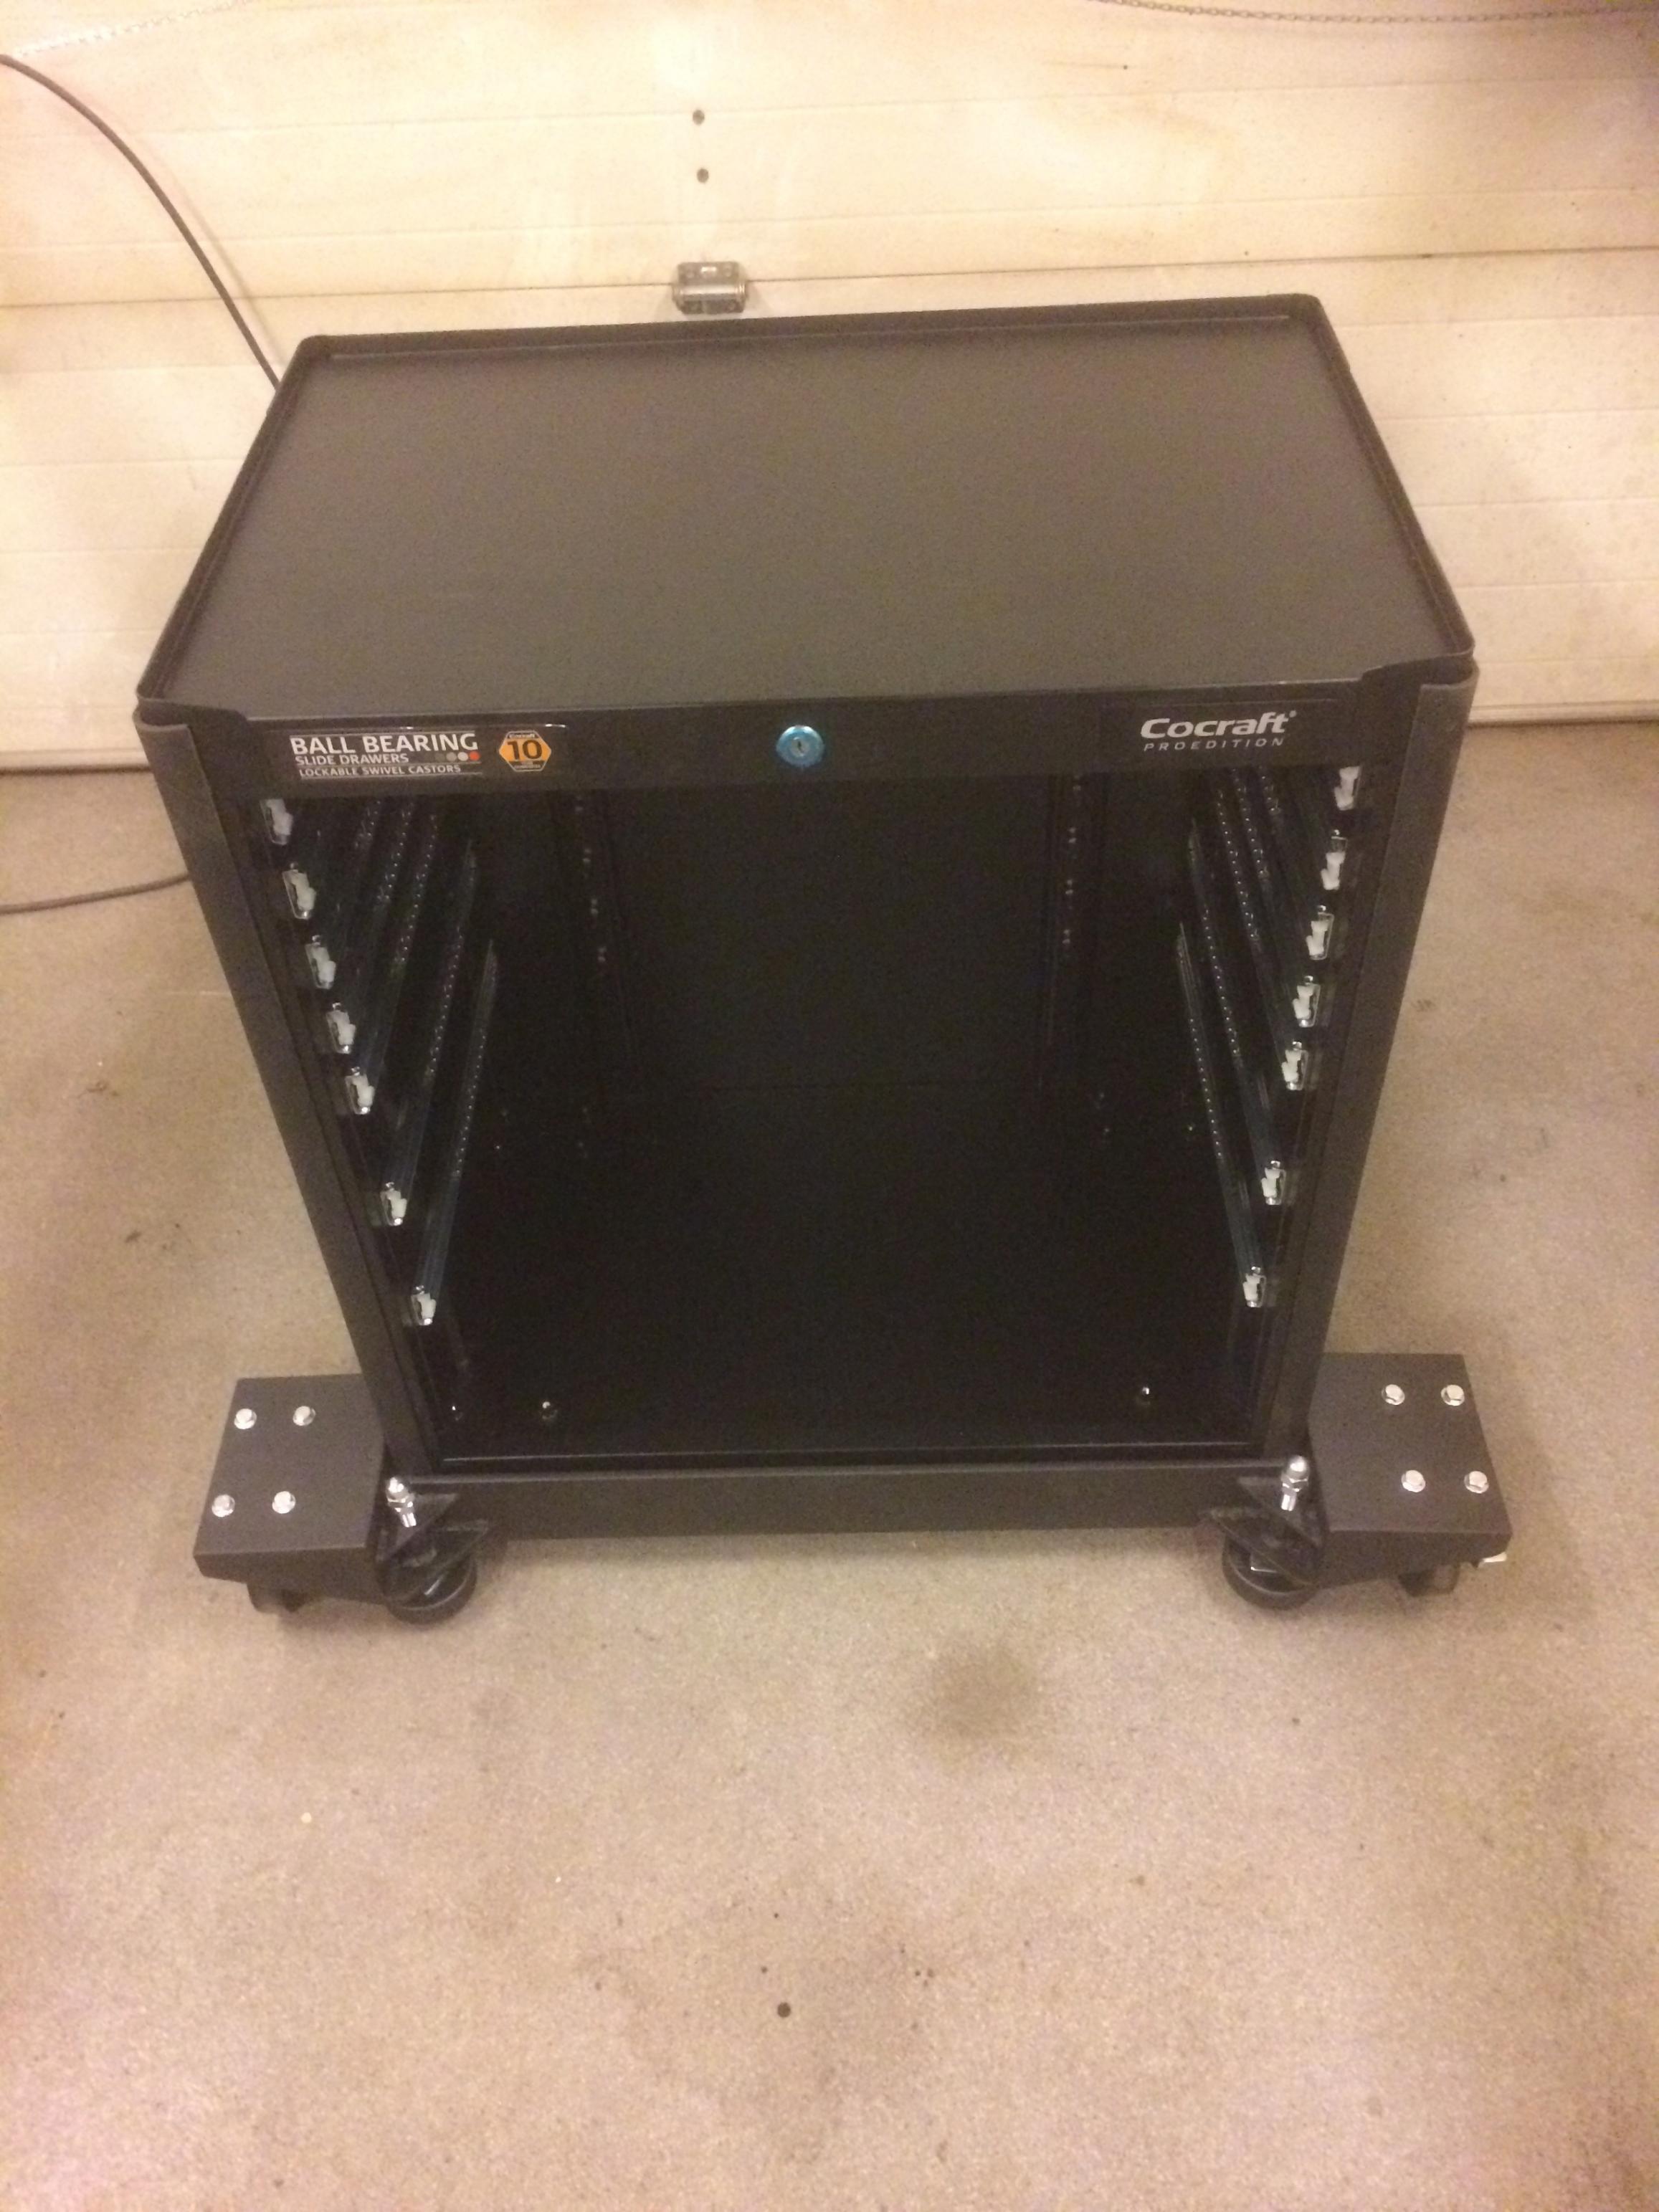
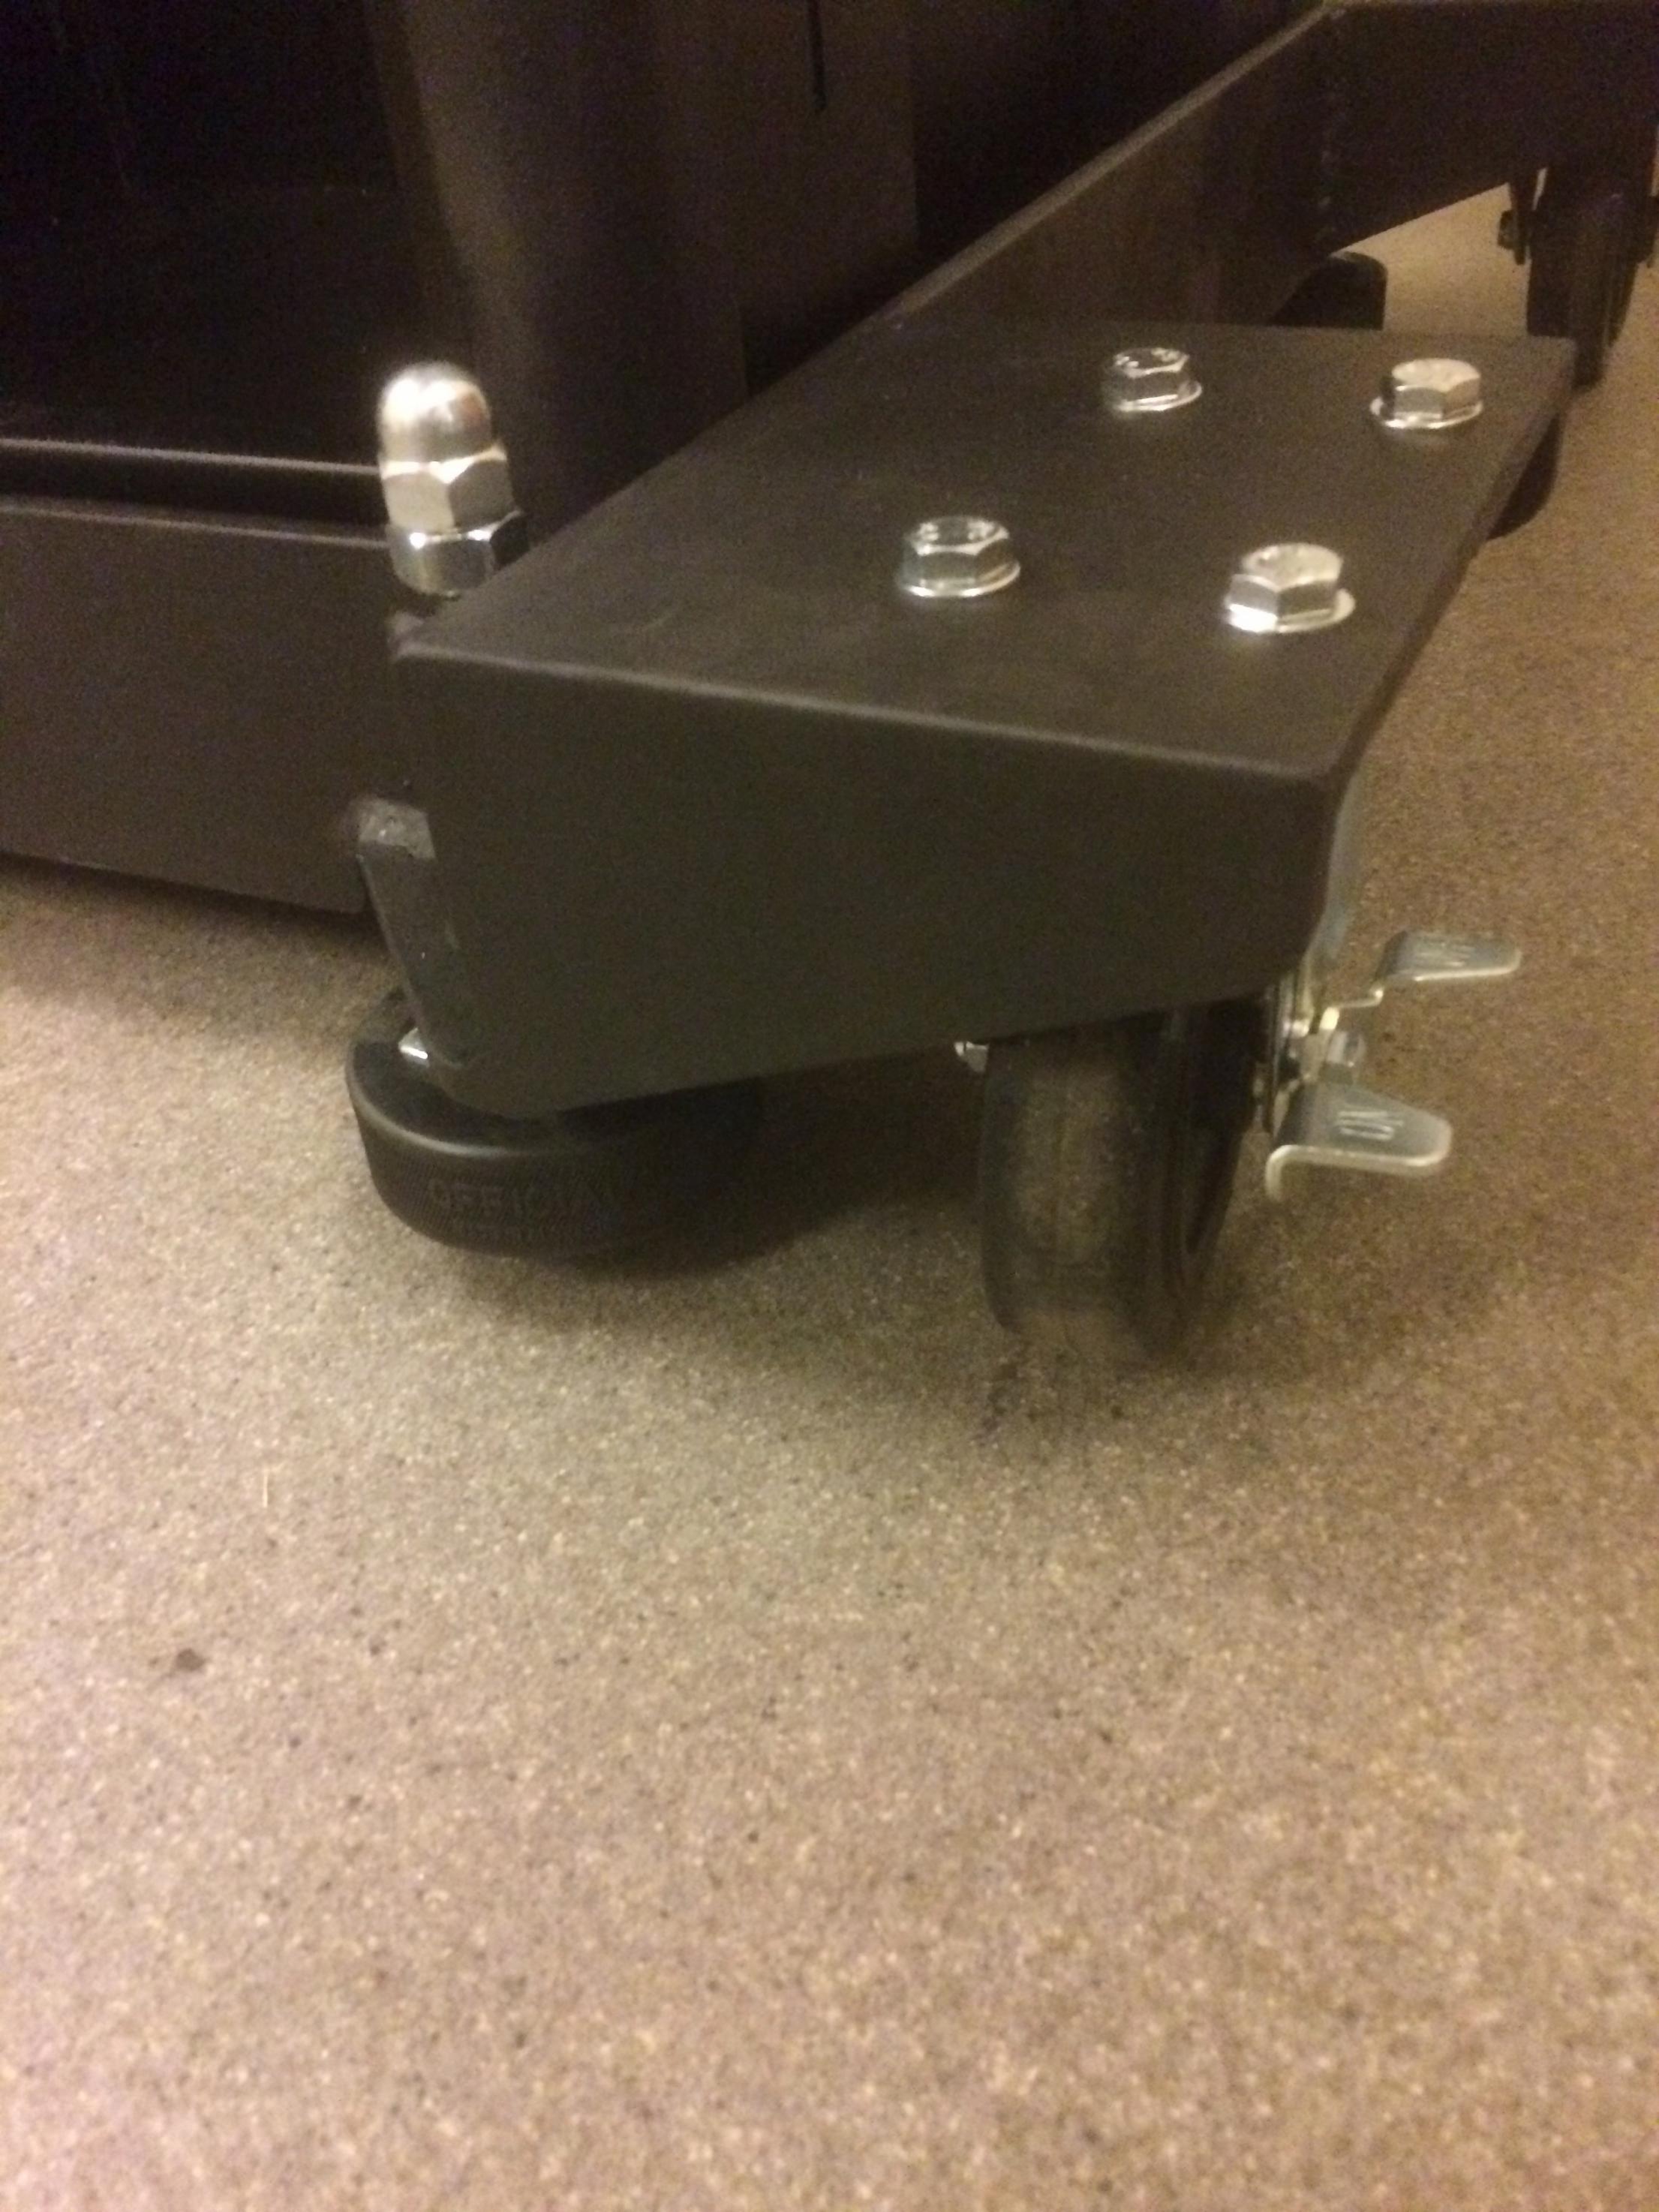
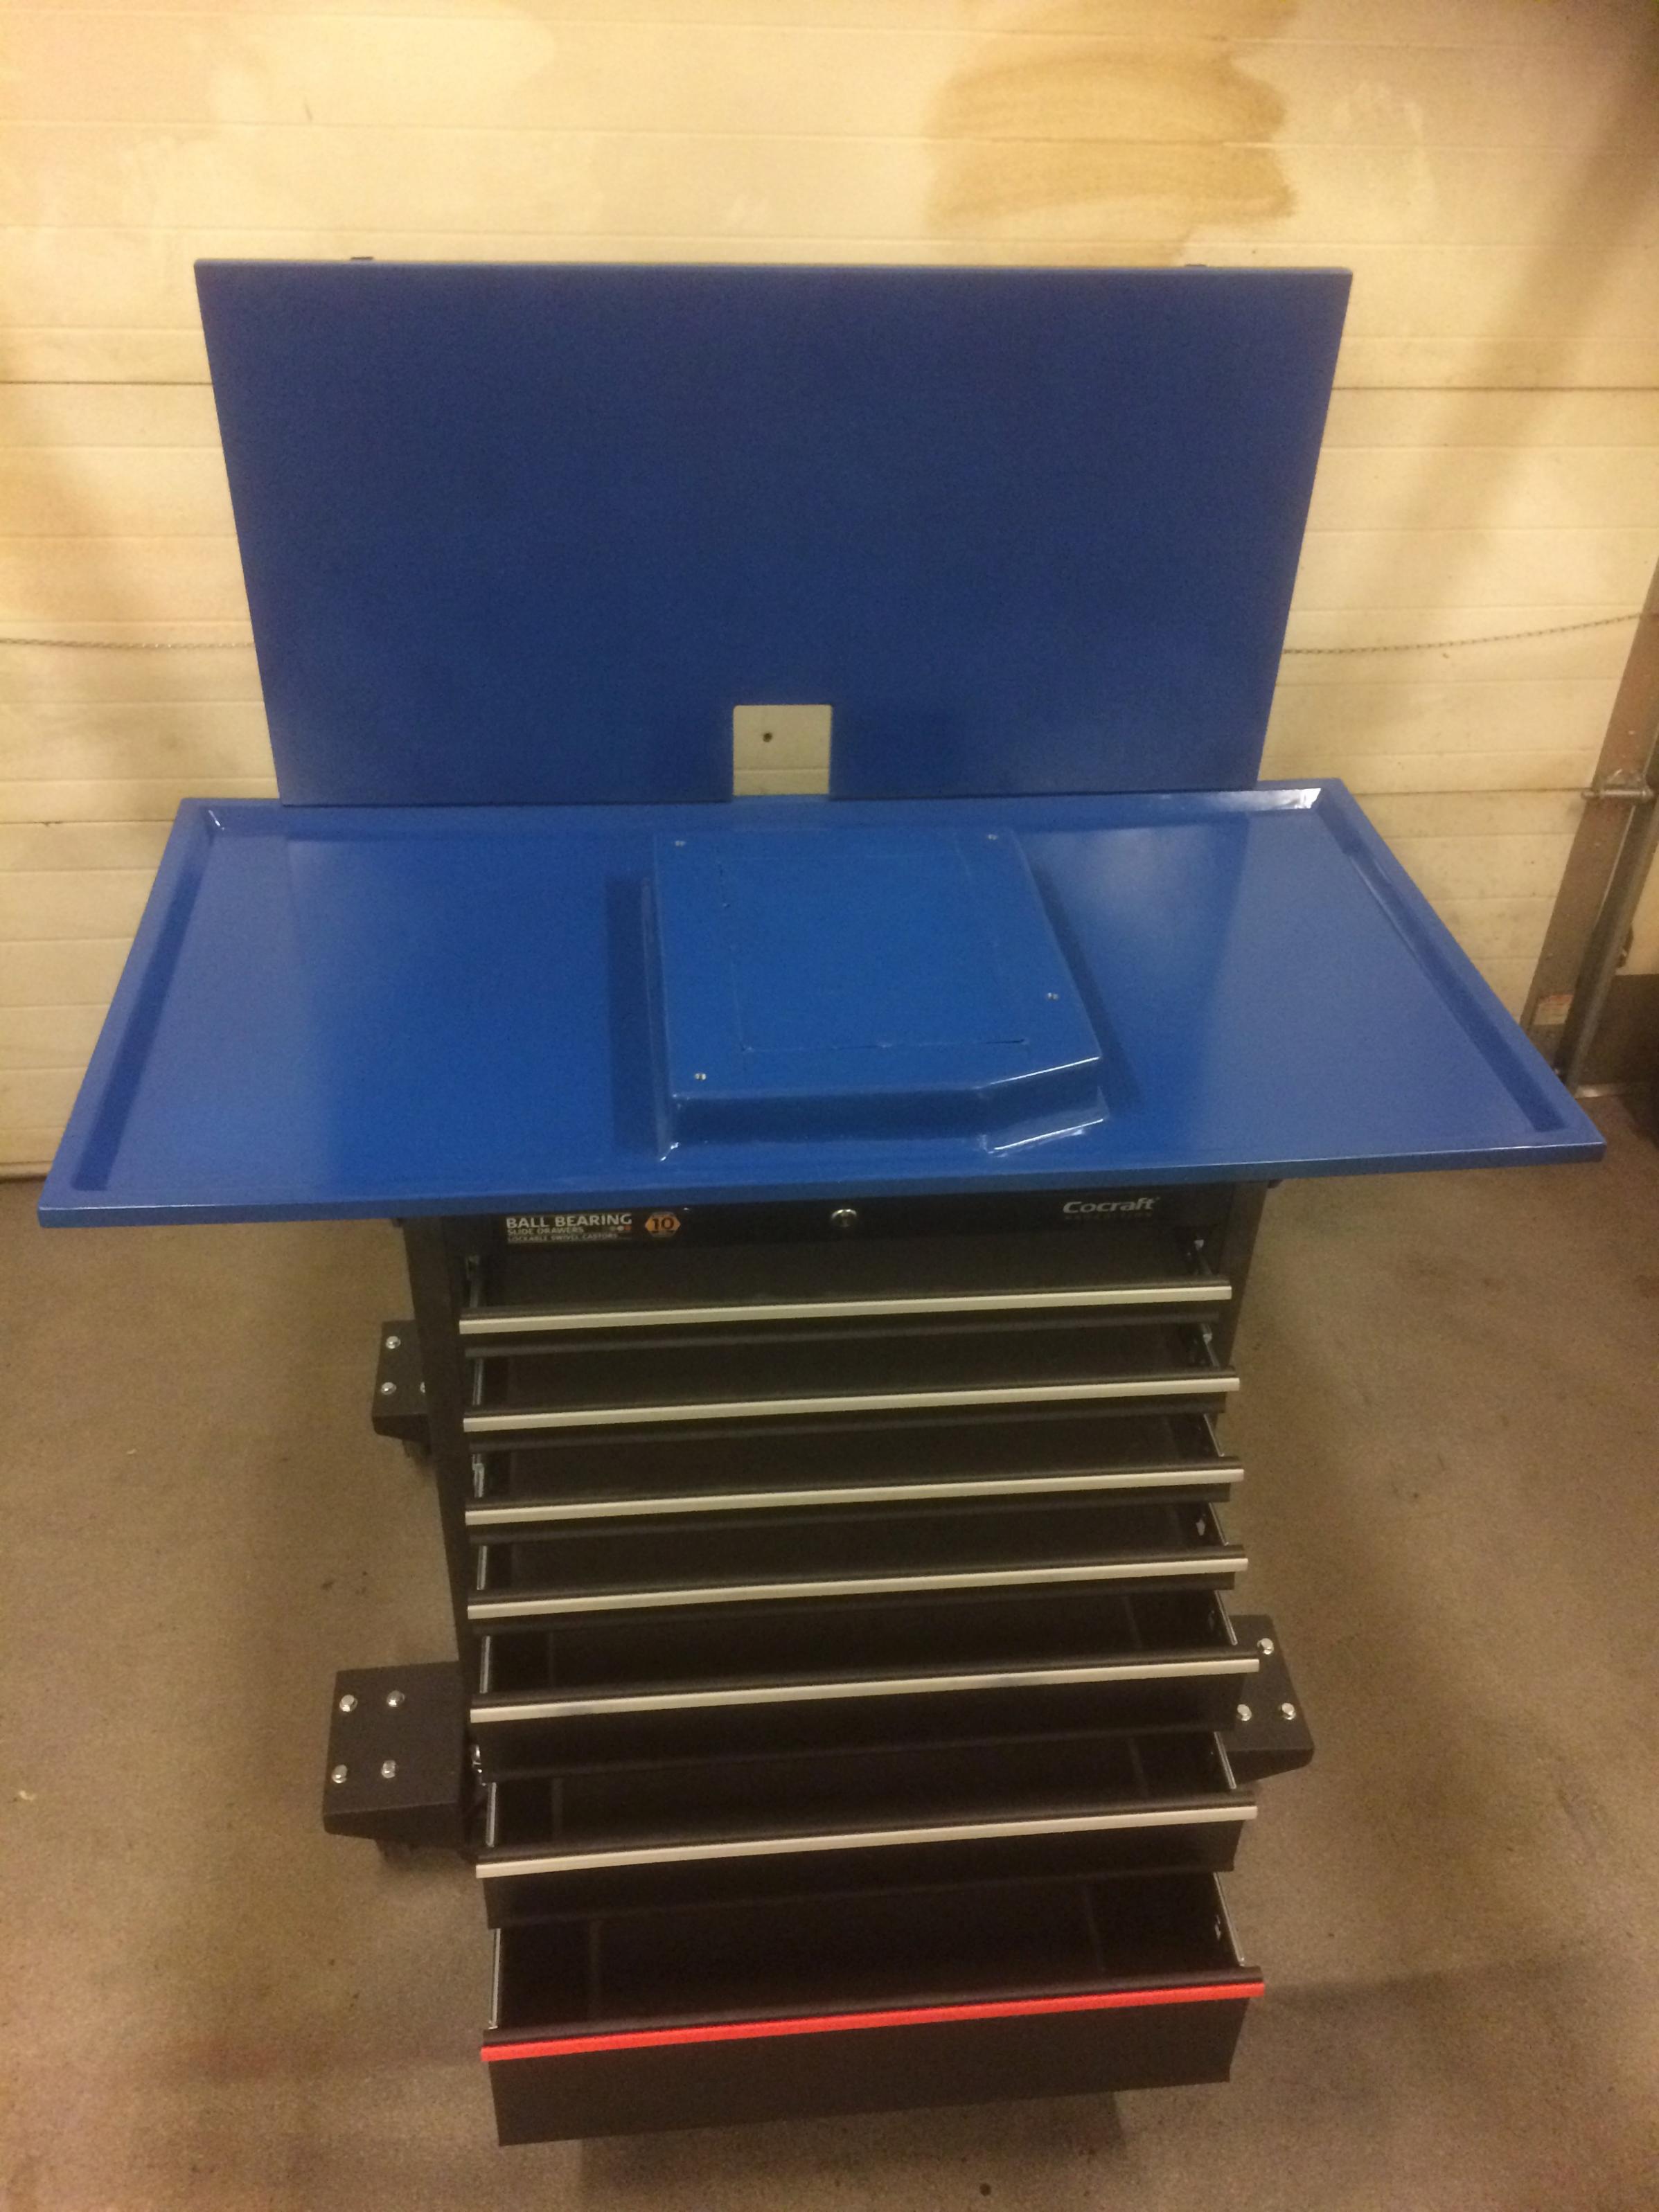
    As a base for the stand I purchased a CoCraft tool cabinet that can carry a weight of around 380 kg. The caster wheels were however too near one another for the cabinet to be stable enough and the final milling table height would also have been slightly too high. To overcome these small issues I made a frame of 80 x 80 mm angle bar and 80 mm flat bar that extended the castor wheel positions and also lowered the cabinet by around 50 mm.

    SIEG SX3L Milling Machine Stand-img_1717.jpg SIEG SX3L Milling Machine Stand-img_1722.jpg

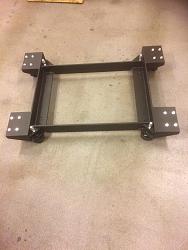
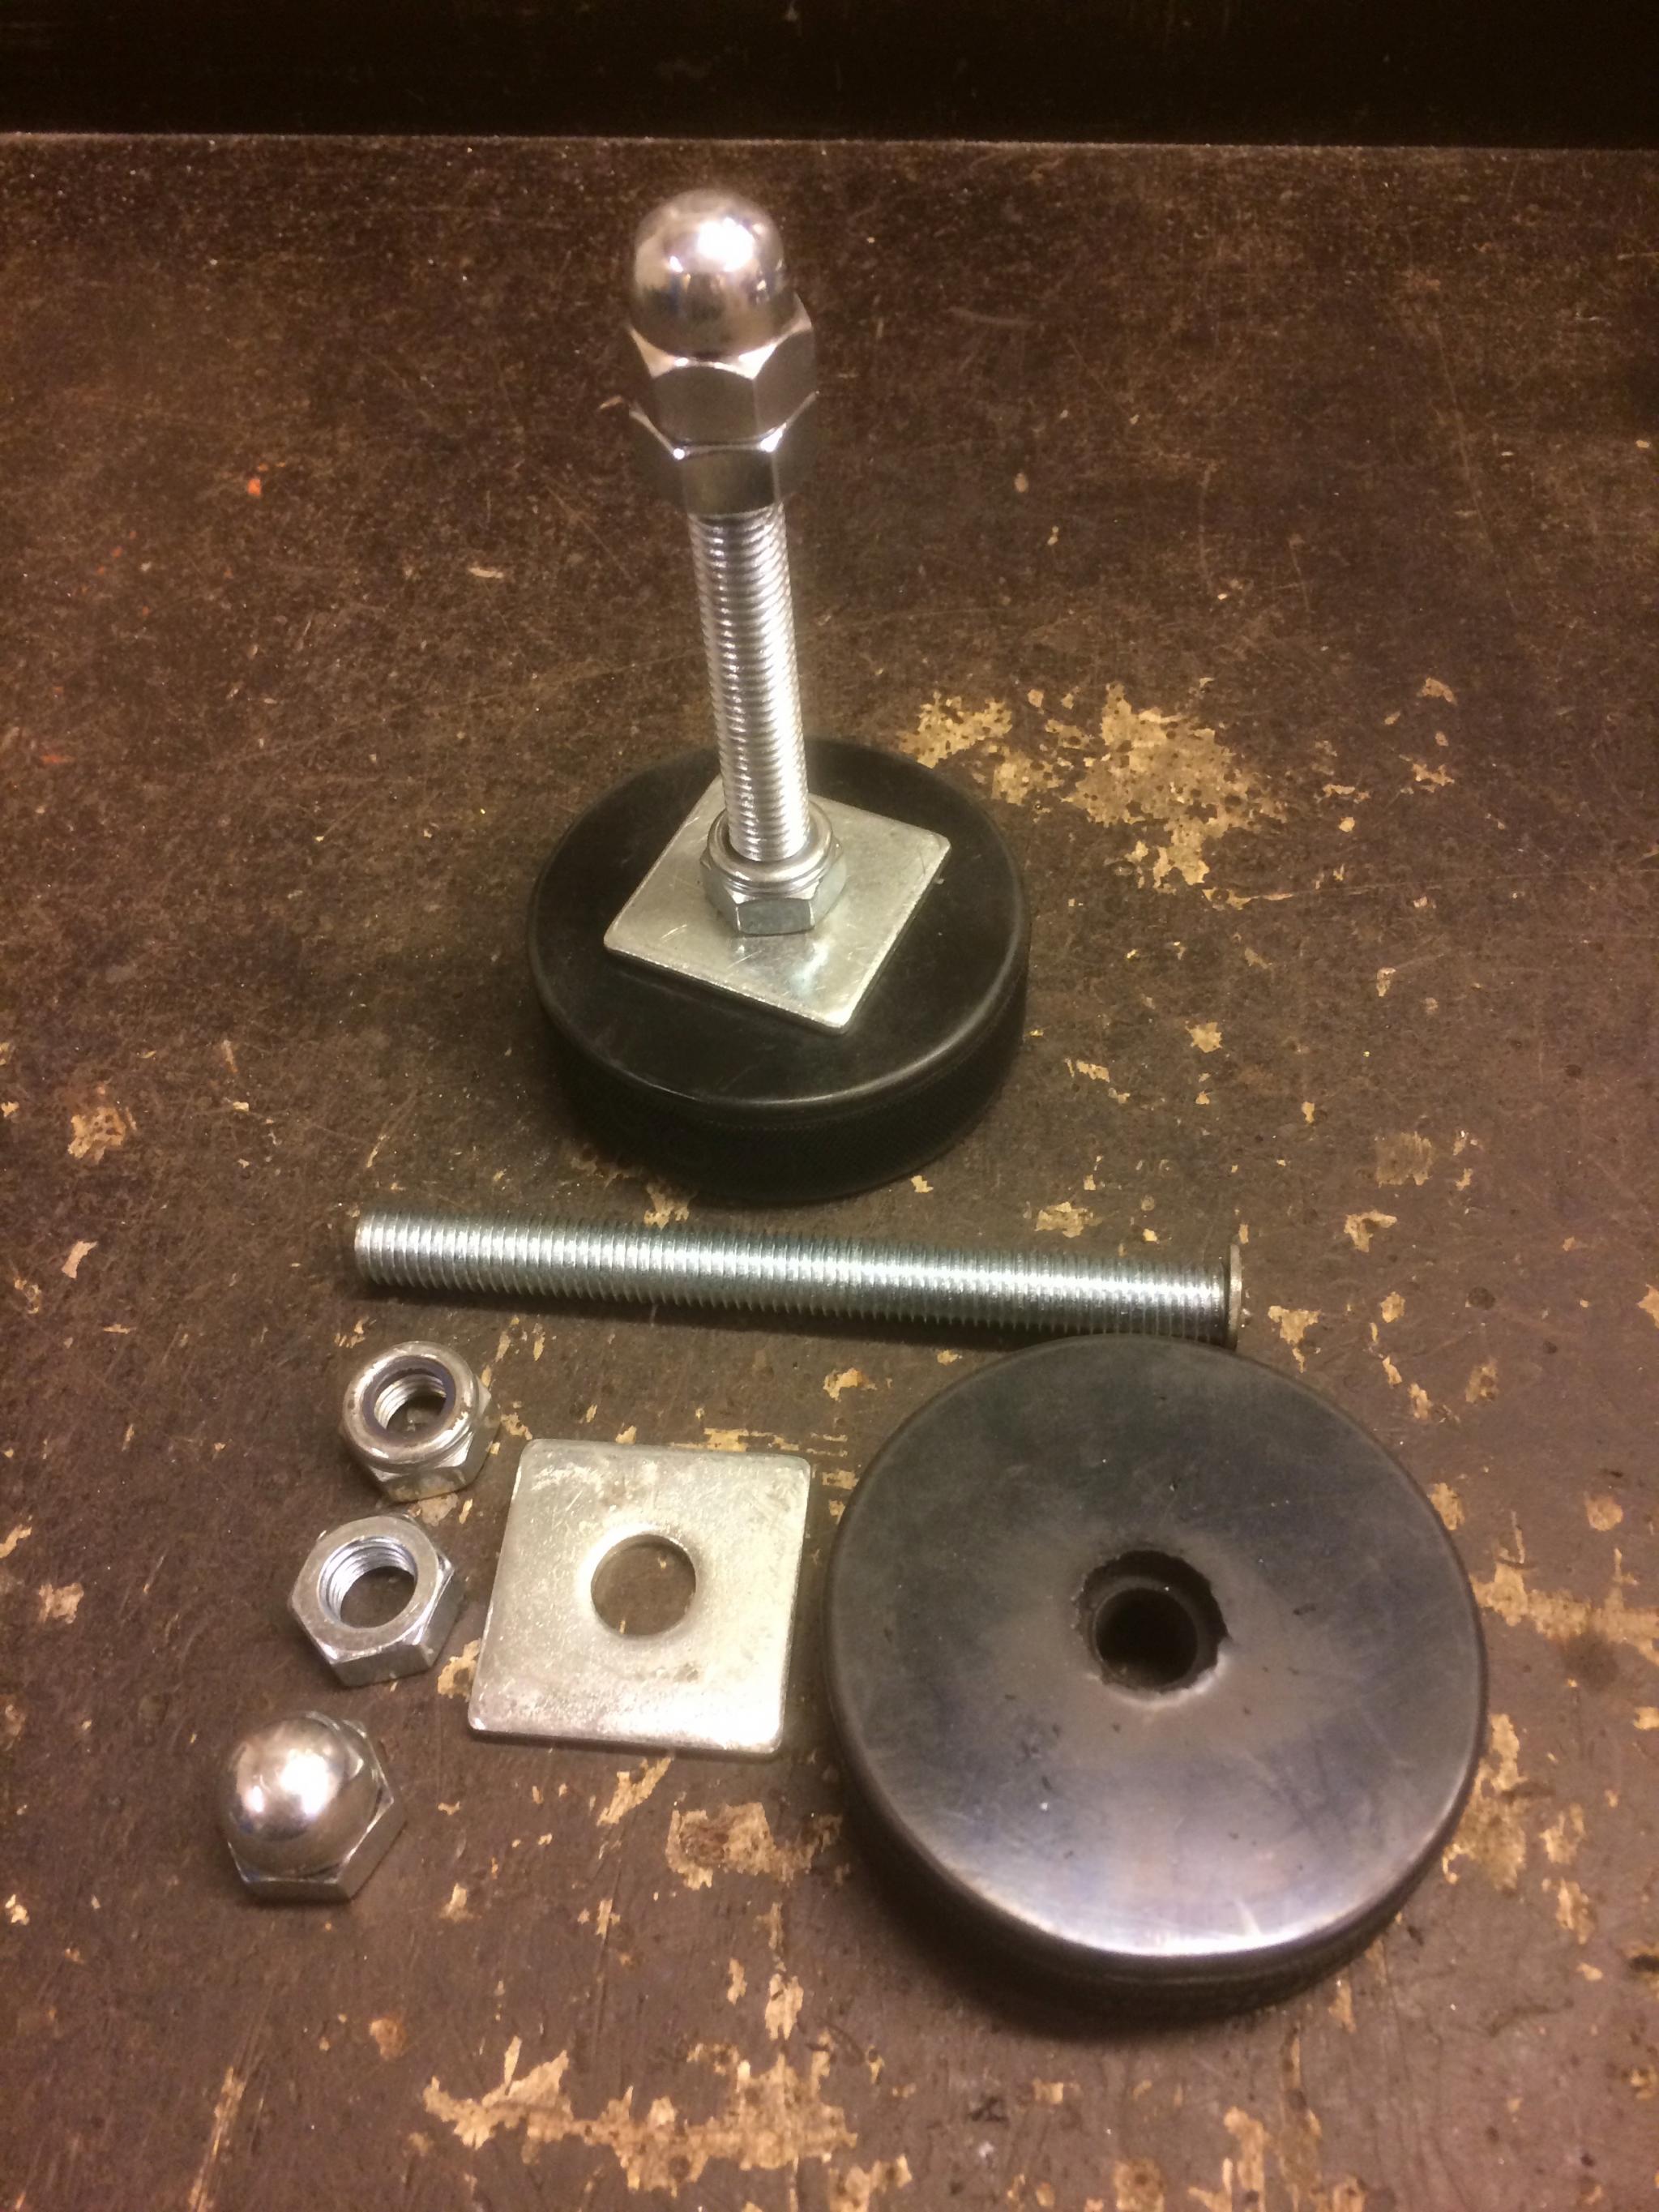
    For final levelling I also needed four adjustable machine feets. As ready made were quite expensive I made them of M12 threaded rod and ice hockey pucks.

    SIEG SX3L Milling Machine Stand-img_1724.jpg SIEG SX3L Milling Machine Stand-img_1716.jpg

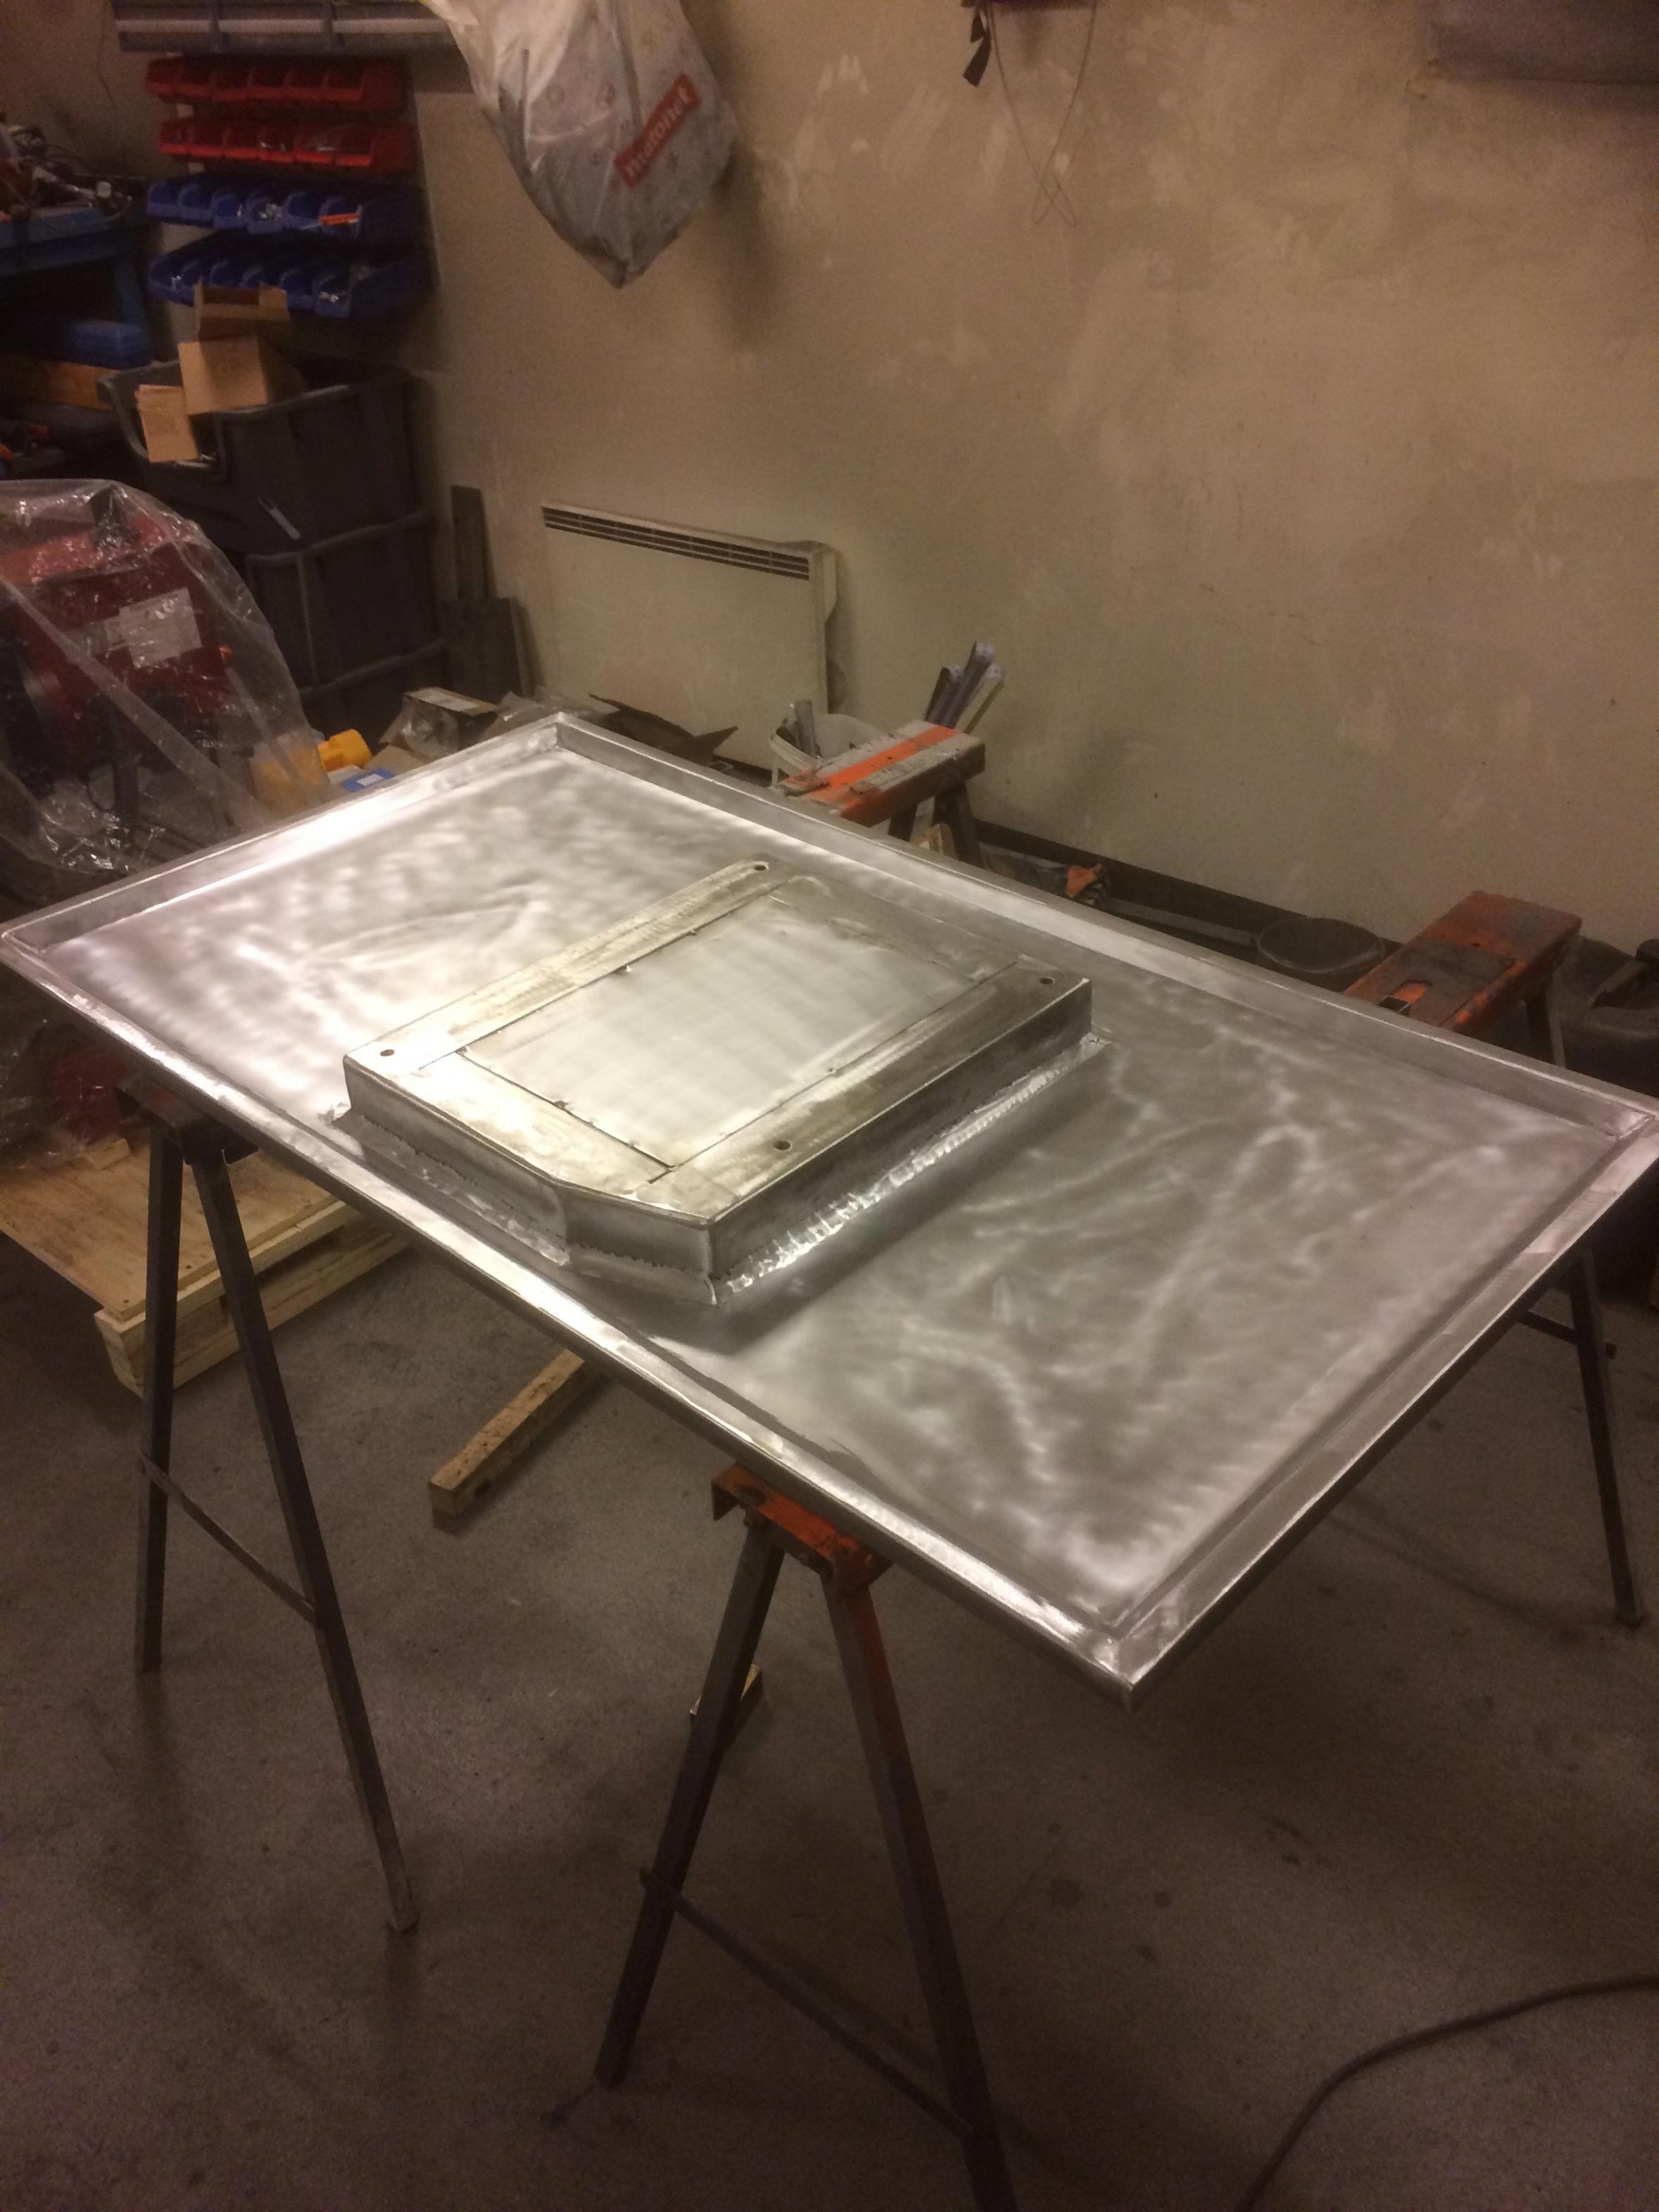
    Because of the Z-axle hand wheel position on the Sieg mill the swarf tray top was a little bit complicated to make as it needed a 60 mm high frame for mounting of the mill.

    SIEG SX3L Milling Machine Stand-img_1726.jpg SIEG SX3L Milling Machine Stand-img_1737.jpg

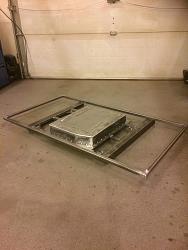
    To save space in my garage I made the tabletop only 650 mm deep. In order to still be able to access the electric cabinet of the mill I made the back splash guard removable and with a cabling opening.

    SIEG SX3L Milling Machine Stand-img_1739.jpg

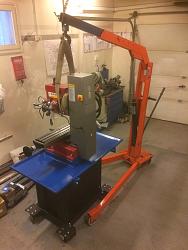
    Today I borrowed an engine hoist from a nearby car repair shop and lifted the milling machine from the transport pallet onto the machine stand. The hardest part was to get the heavy duty hoist down from my trailer and back on again - lifting and bolting the mill itself was a piece of cake.

    SIEG SX3L Milling Machine Stand-img_1741.jpg SIEG SX3L Milling Machine Stand-img_1744.jpg

    So now I have the mill ready for fitting of the X-axle power feed and storing of some accessories in the drawers. I only bought the most needed accessories and intend to learn milling by making some accessories myself. As I am new to “real” milling I will start with some simple projects - e.g. some workpiece clamping devices. Maybe make some useful projects from Harold Hall's books. Then when I am comfortable enough with milling I probably start a sheet metal bender project...

    If anyone can point to a table with proven speed and feed rates for common materials for a small mill I would be grateful...

    186 More Best Homemade Tools eBook
    Last edited by ruxu; Dec 1, 2017 at 11:44 AM.

  2. The Following 12 Users Say Thank You to ruxu For This Useful Post:

    almarghi (Aug 15, 2018), Canobi (Dec 1, 2017), IAMSatisfied (Jun 26, 2020), Jon (Dec 1, 2017), mr mikey (May 29, 2023), NortonDommi (Dec 1, 2017), Paul Jones (May 9, 2018), PJs (Apr 28, 2018), rlm98253 (Dec 1, 2017), Seedtick (Dec 1, 2017), Tule (Dec 2, 2017), wkelley70 (Dec 1, 2017)

  3. #2
    Supporting Member marksbug's Avatar
    Join Date
    Apr 2016
    Posts
    1,898
    Thanks
    725
    Thanked 372 Times in 298 Posts
    I dont use tables, for my manual mills, just find where it likes it for the material your working with that particular tool bit.it wont take long and you will remember it all. I made my mill table for my enco milldrill ( that isant even been turned on since I get my birdport 9x42 mill. ) well the table is made form 2x6's so it absorbs most vibrations real well, and has 2 big drawers under the mill,it's atleast a foot wider than the mill base to hold what ever. works great &was extra cheep&eazy to build& paint with leftover supplies., no wheels, just pull out the bottom drawr and roll in a floor jack to pick up 1/4" off floor and move where ever oh so eazy. never pick up stuff higher than 1/2" or there is a tilt fall on YOU factor that multiplies extreamly fast. and be carfull rolling on casters as a tiny pos can stop a wheel eazy and fast. you may want to get a er 32 or er 40 set instead of std R8 colletts.there real handy.I like the metric ones as there over laping sizes are just right. I have 2 sets of r8 and extras but like the er stuff too. ebay and banggood have great prices, banggood has free shipping if you wait from china warehouse. also indexable end mills can be your friend and the carbide inserts are cheep from the china suppliers on both sites. I did take a big 36x72" galvanized sine and cut it and foirm it kinda like yous under your mill , but I did it for my new 9x20 enco(now out of bizness from selling ****) 9x20 enco lathe.for a chip&drip tray. go's up the back and a nice angle all around to contain liquids&chips and holds a few dollor store trays I use under the lathe bed to catch the stuff for eazy clean up so i dont have to have a funkey chip pan...that cant be removed....trays can be removed eazely cleaned and replaced fast for a nice and new looking appearance all the tyme.

    2000 Tool Plans

  4. #3
    Supporting Member marksbug's Avatar
    Join Date
    Apr 2016
    Posts
    1,898
    Thanks
    725
    Thanked 372 Times in 298 Posts
    you may find making some side guards that clamp on or magnetic are handy for containing the flying chips to keep them out of your lunch and other things. eazy to do. plastic /aluminum, even vynel siding works great. and some small trays that fit your traywill be handy to empty and hold stuff instead of trying to keep the big non removable main tray you made nice and clean. it realy helps a lot and saves time with cleanups. and to hold all the needed tools right there when needed.

  5. #4
    Supporting Member Frank S's Avatar
    Join Date
    Aug 2015
    Location
    Peacock TX
    Posts
    11,179
    Thanks
    1,974
    Thanked 8,766 Times in 4,195 Posts

    Frank S's Tools
    Like someone said you might want to make some detachable sides and possibly a partial front side or eventually you will have a milling job that you would rather take the mill outside to do since the crazy things can toss the cuttings up to 10 feet a good machinist apron is a must at the very least
    I like your tray and back splash looks to be made for real easy clean up I might have gone with m 20 or larger for the feet adjusters but that is just me its not about the load strength but more about rigidity
    Never try to tell me it can't be done
    When I have to paint I use KBS products

  6. #5
    Content Editor
    Supporting Member
    DIYer's Avatar
    Join Date
    Aug 2013
    Posts
    3,056
    Thanks
    772
    Thanked 1,850 Times in 1,652 Posts


    Thanks ruxu! We've added your Milling Machine Stand to our Dollies and Stands category,
    as well as to your builder page: ruxu's Homemade Tools. Your receipt:


  7. #6
    Supporting Member marksbug's Avatar
    Join Date
    Apr 2016
    Posts
    1,898
    Thanks
    725
    Thanked 372 Times in 298 Posts
    i LIKE SILOCONE OR POLYURATHANE FOR MOUNTING OT HELP KEEP HARMONICS AWAY, ALSO THE SIDES OF THE TOOL BOX AND POSSIABLY THE BACK SPLASH MAY SET UP HARMONICS WHEN MILLING,THEY MAY NEED SOMETHING ON THEM TO DAMPEN THE HARMONICS TOO.EVERY LITTLE BIT HELPS AS HARMONICS CAN MULTIPLY FAST.

  8. #7
    Supporting Member Paul Alciatore's Avatar
    Join Date
    Mar 2014
    Location
    Beaumont, TX
    Posts
    303
    Thanks
    9
    Thanked 155 Times in 82 Posts

    Paul Alciatore's Tools
    Wow, great idea! I think you just showed me where I have a bunch of storage space in my shop that I had not thought of using. I wonder if I can get a double tool cabinet under my mill.

    Really great idea, THANKS!


    186 More Best Homemade Tools eBook
    Paul A.

  9. The Following User Says Thank You to Paul Alciatore For This Useful Post:

    soundguy (Jun 26, 2020)

Thread Information

Users Browsing this Thread

There are currently 1 users browsing this thread. (0 members and 1 guests)

Bookmarks

Posting Permissions

  • You may not post new threads
  • You may not post replies
  • You may not post attachments
  • You may not edit your posts
  •