-
8 Attachment(s)
My Little Toolbar
Made a little toolbar for my Allis Chalmers B-110. Made mostly from scrap metal and inventory hardware. The nice thing about this toolbar is that I can use it on the front or back of the tractor.
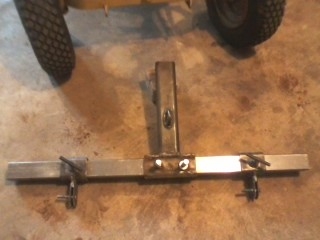
The basic unit is a 2x2x1/8 square tube inserted into a box sleeve that is welded to a push/pull bar and uses bolts to hold the tube in place. The sleeve and push/pull bar are 2.5x2.5x3/16. The push/pull bar has a hook welded on for lifting.
For tool clamps I made box sleeves with T-bolts and drilled holes in the brackets for connecting pins.
Attachment 19122
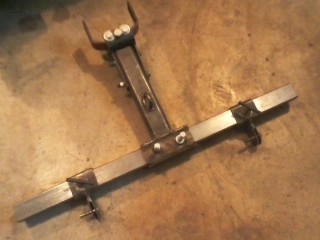
This shows the toolbar with connecting bracket and sleeve hitch for the rear of the tractor. Connecting bracket is borrowed from my Brinly box scraper
Attachment 19123
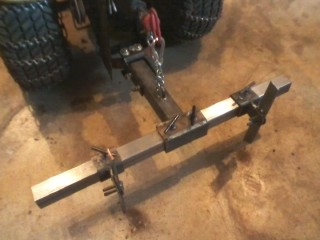
Here is a photo of the toolbar hooked up to the back of the tractor with some ripper shanks I made out of 1.5x1/4
Attachment 19124
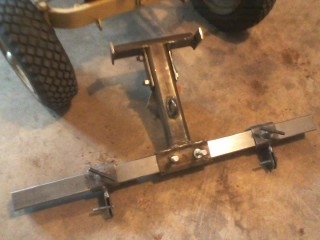
To use the toolbar on the front of the tractor I made another connecting bracket that bolts onto the push/pull bar replacing the Brinly bracket.
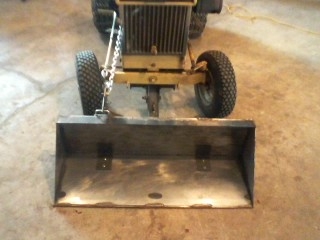
Attachment 19125
With the toolbar now connected to the front of the tractor, I made a scoop bucket and was able to attach the bucket to the tool clamps, with some store bought L-brackets, as the hinge points.
The bucket is 36in wide, 12in deep, 10in high, made out of 10 gauge sheet metal. There is 2x1/4 flatbar across the front for a lip and also for two reinforcements, under the bucket, which run back from the lip to the the inside angle brackets. The angle brackets are connected with bolts to everything they support.
Attachment 19126
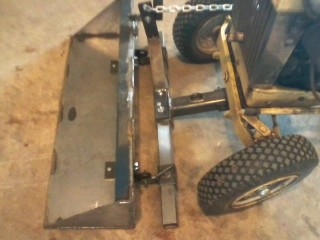
An L-shaped piece of flatbar was used to make the lifting bar. It is also bolted to the toolbar box sleeve and a diagonal brace was added for reinforcement. The flatbar/brace is 2x1/4
Attachment 19127
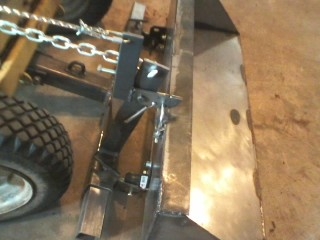
This is the latching mechanism used to keep the bucket upright during lifting. Release the latch and there is an instant gravity dump.
Lowering the bucket automatically resets the latch.
Attachment 19128
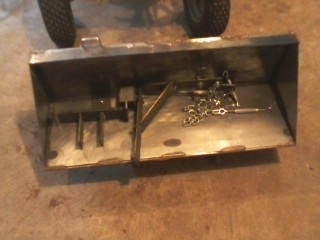
When the scoop bucket is no longer needed, all the associated pieces can be stored inside the bucket, placed on a moving dolly and rolled away for storage.
Attachment 19129
The whole project was a good challenge for me. I had wanted a toolbar for some time. When I decided to take up welding recently, this became a target project. After I learned enough welding skills I decided to go for it.
I'm pleased with the result. It's very stout. The whole toolbar and bucket apparatus weigh in about 75 lbs.
With 60 lbs counterweight on the back, and using the tractor's hydraulic lift, I can stand in the bucket and it will pick me up with ease. I weigh in at 170 lbs.
Now I just have to come up with more ideas of things to hook onto the toolbar. :)
-
<!-- BEGIN /var/www/html/homemadetools/protected/modules/zeus/views/tool/postUpdate.php -->
Thanks J_P! We've added your Tractor Bucket to our Farm and Garden category,
as well as to your builder page: J_P's Homemade Tools. Your receipt:
<div id="blocks">
<div class="block b1 pngfix">
<div class="bimg">
<div>
<a href="http://www.homemadetools.net/homemade-tractor-bucket-2">
<img src="/uploads/203265/homemade-tractor-bucket-2.jpeg"/>
</a>
</div>
</div>
<div class="head pngfix"></div>
<div class="left pngfix"></div>
<div class="right pngfix"></div>
<div class="blockover b1 pngfix">
<div class="title">
<a href="http://www.homemadetools.net/homemade-tractor-bucket-2">Tractor Bucket</a>
<span> by <a href="http://www.homemadetools.net/builder/J_P">J_P</a></span>
</div>
<div class="tags">tags:
<a href='http://www.homemadetools.net/tag/tractor'>tractor</a>, <a href='http://www.homemadetools.net/tag/farm-tools'>farm tools</a> </div>
</div>
</div>
</div>
<!-- END /var/www/html/homemadetools/protected/modules/zeus/views/tool/postUpdate.php -->