
 LinkBack URL
 About LinkBacks


Here is how I built my new routing table, as a mod of my recently purchased table saw.
Actually, I changed my table saw during this year, and on the previous one, I had a built in router table feature.
I changed the saw for more precision, capacity and to get a true steel table, and I'm very happy with this new saw, however I lost the router table.
I had the option to make a new stand alone table for that, but I would miss some space in the shop.
I also had the option to modify the saw to add the routing feature.
But for that, I had to dig a big hole in the extension table, and it was a heart breaker for me ...
But I decided to go with that last option, here is how I did it :
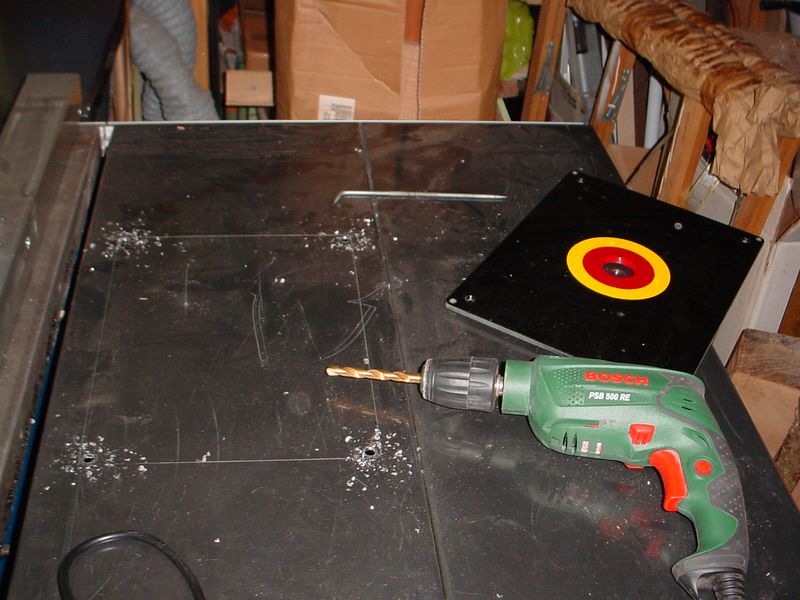
So, first I purchased this rectangular resin sole adaptation and I traced the contour on the side extension table, which is made out of thick metal sheet. I first drilled the 4 corner holes.
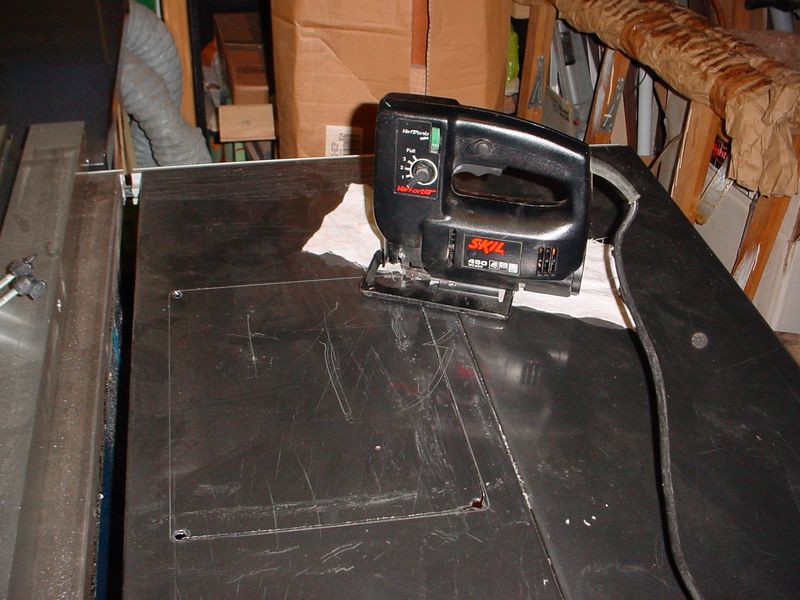
Then I used the jig saw with a metal blade to cut the metal sheet, but it is quite hard and thick steel and the blade teeth got worn very rapidly. I had to recut several times the blade with a dremel cutting disk, in order to get fresh teeth on the cutting range.
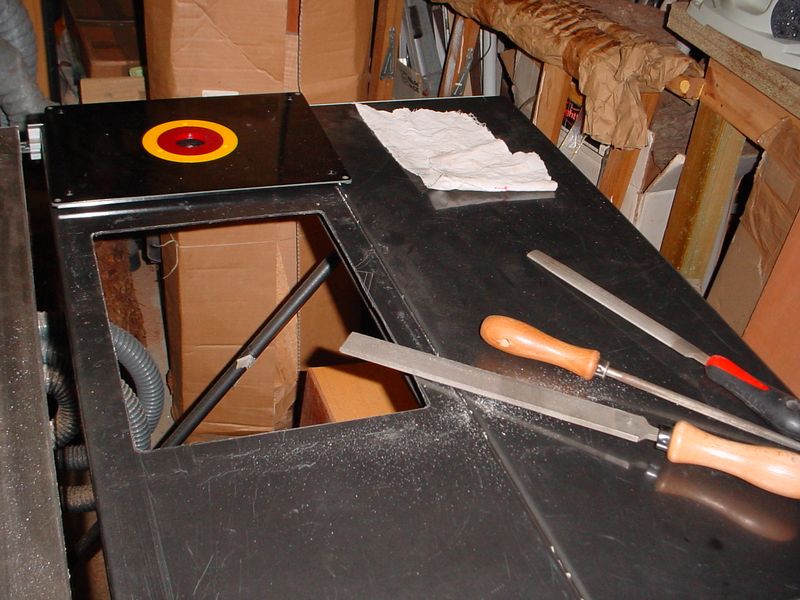
After a hard time cutting this metal sheet with the jig saw, I adjusted the contour with several files.
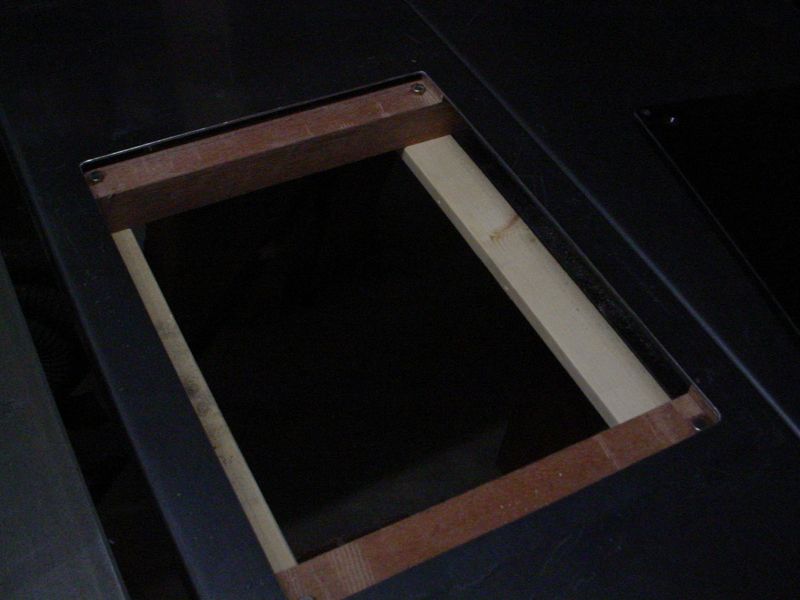
Then I had to find a way to fix the resin sole flush to the table. For that I made a wooden frame inserted in the U shape made at the edges of the metal sheet in order to stiffen it.
The frame is slotted so that the resin sole comes just flush to the table top.
To get a neat adjustment, the four corners have 4 neodyme magnets inlaid in the wood of the frame, and the sole has four metal set screws that stick to the magnets.
The frame, from the under side. You see how it is locked in the U shape at the edge of the table.
And here is the top side, just flush.

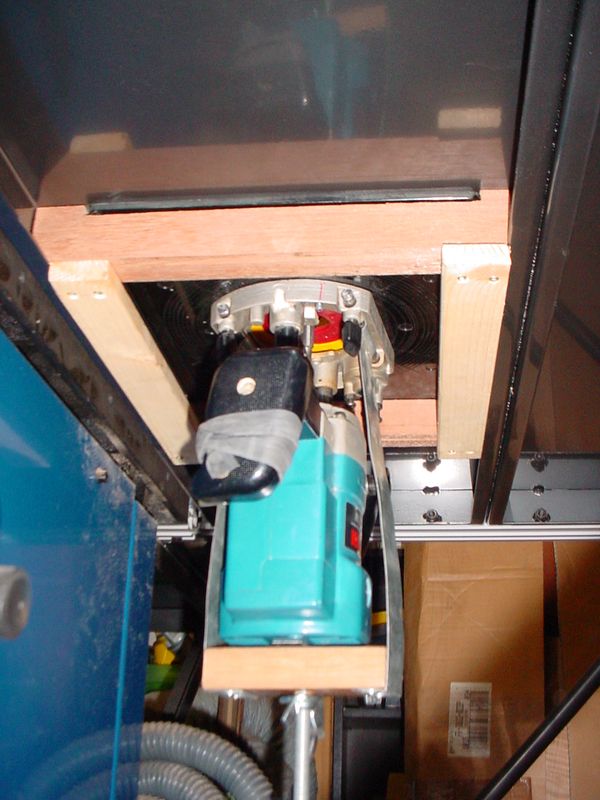
The router lift system as showed in the previous post.

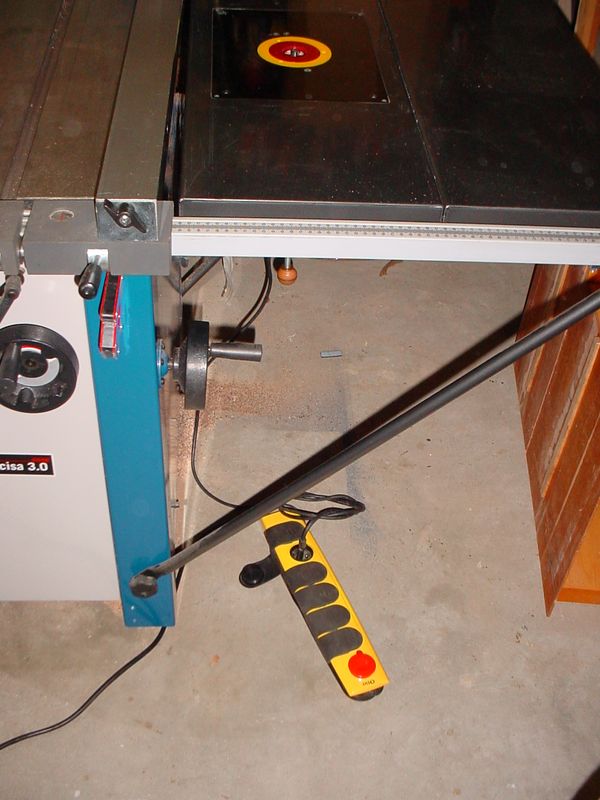
and here you see how I control the engine with the foot.


 Reply With Quote


Bookmarks