
 LinkBack URL
 About LinkBacks


This project is inspired by the router devices in upper position (overarm router jig). In these devices, as well as in the Daisy pin router, the principle relies on that the bit follows the contour of the template, guided by a pin of the same diameter, thereby faithfully reproducing the shape of the template.
Unlike the Dremel pin router where the Dremel is mounted on router table accessory and the pin is in the upper position, here the Dremel is fixed on a vertical support, above the work, and the pin is located at the base.
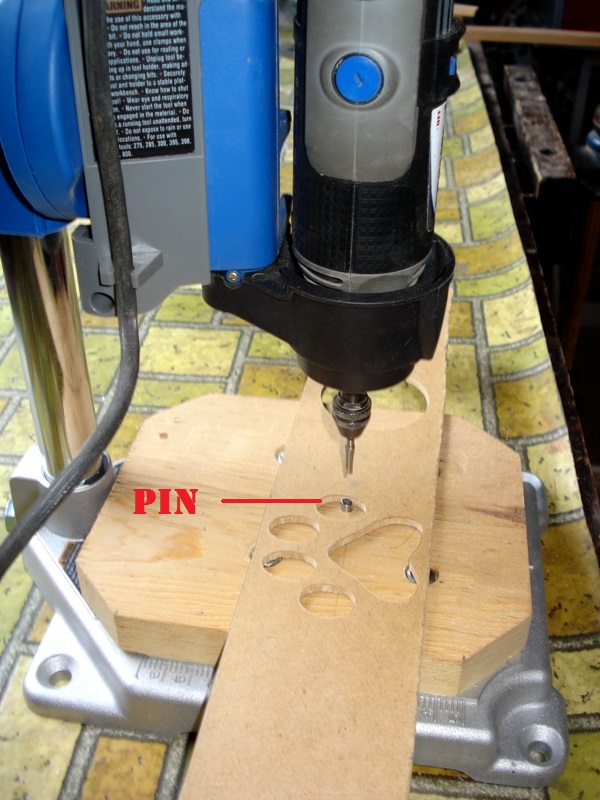
1- Dremel fixed in the vertical support. At the base is placed a PIN, 3/16 " Ø (marked with red line), which is aligned with the Dremel bit. Template cut in 4mm macocel is also shown.
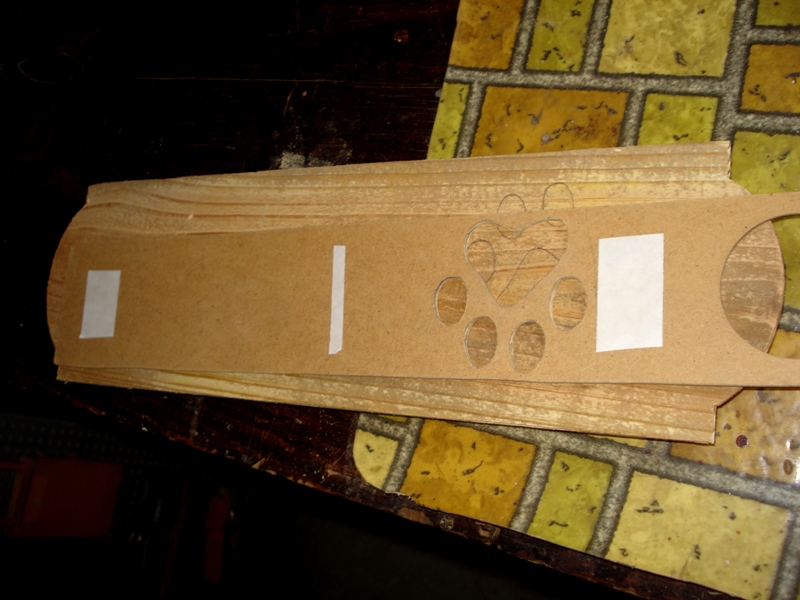
2- The template is fixed with double-sided tape to the back of the work.
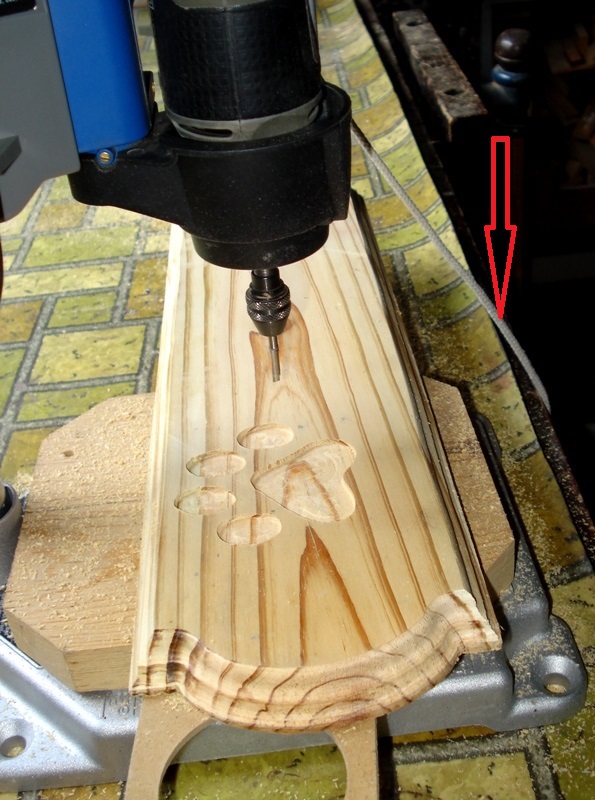
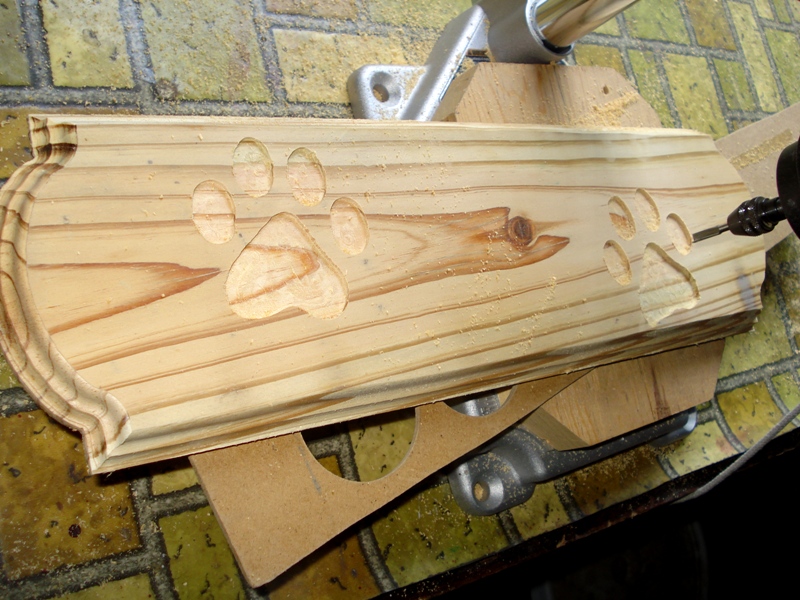
3- Milling on the front face, following the template. Procedure: one of the holes in the template, attached to the back of the work, is placed on the pin. With the Dremel on, you bring down the bit on the work, up to a preset limit (with a cord that is attached to the drop lever, marked with a red arrow) and the contour of this hole continues to completion. Once completed, the Dremel is raised and goes to the next holes, repeating the procedure.
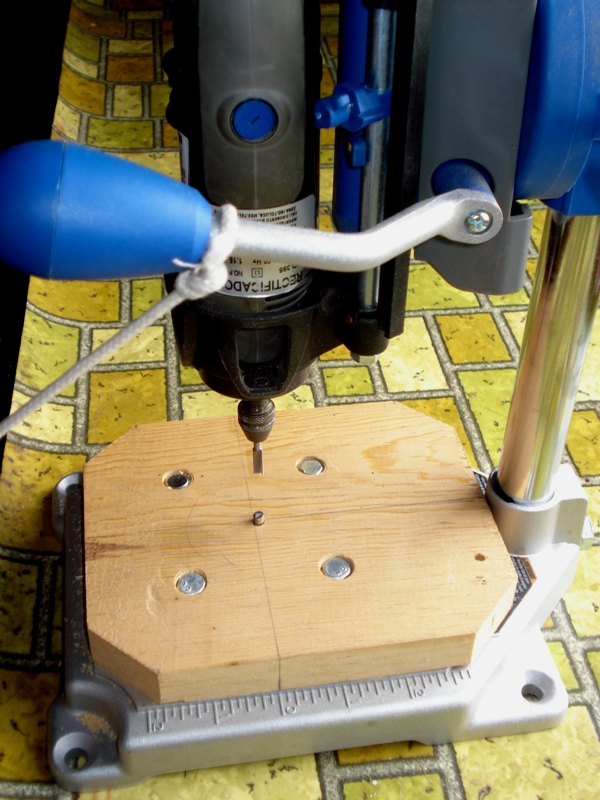
4- Second carved out with the same template. Note that area that carves the Dremel bit corresponds exactly to the shape of the template that is attached below the table you are working and guides the milling with the aid of pin.
5- Finished work, used drawing and template.
For those, like me, who do not have CNC router, these devices can consistently reproduce any design.


 Reply With Quote

Bookmarks