
 LinkBack URL
 About LinkBacks


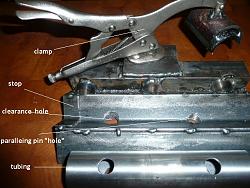
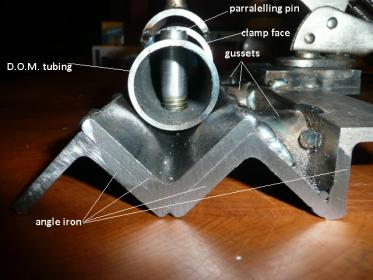
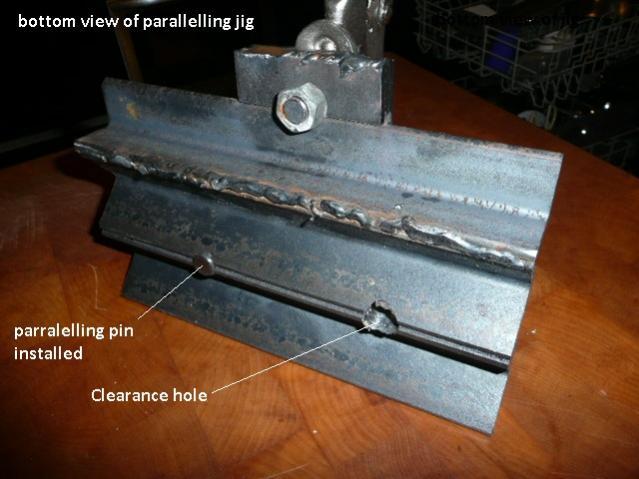
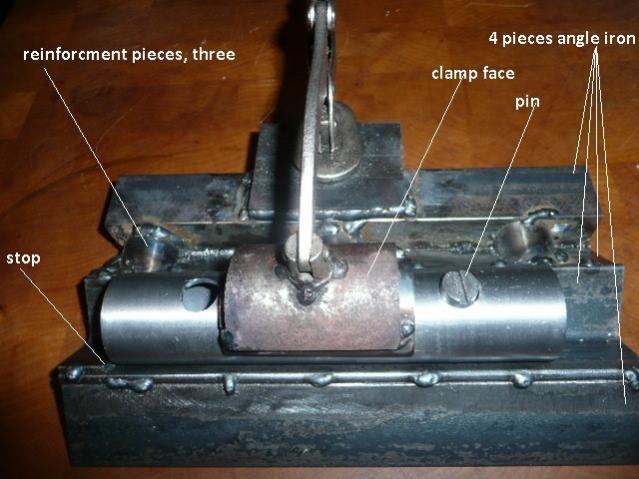
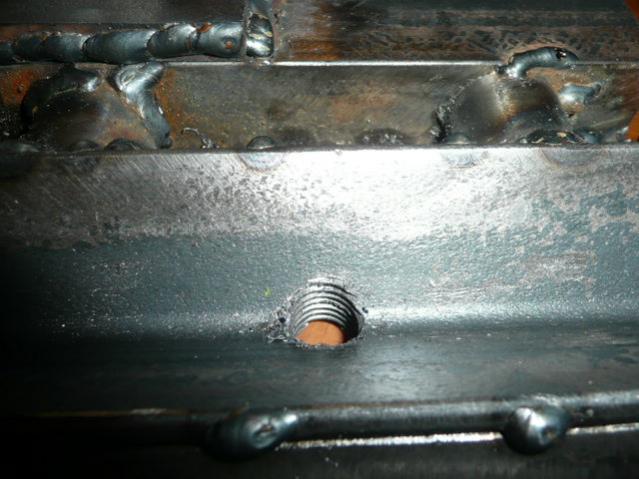
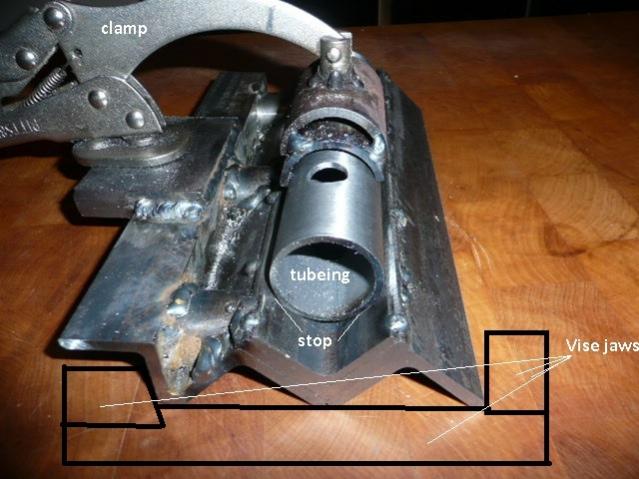
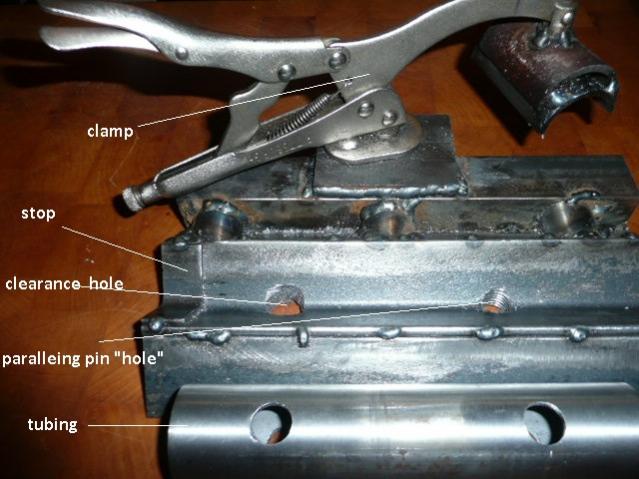
OK here is a jig I made to make sure the holes I needed to drill were both parallel to each other and centered on the DOM tubing I needed them in. The holes were 7/16Ths and I got a lot of chatter when the bit was about 3/4's of the way through the tubing, making it difficult to keep the hole parallel and centered on the tubing. Plus, anytime you are drilling thin walled anything, you always have that moment when it wants to grab the wall and send the piece spinning into orbit or failing that, tossing it directly into your head. OK, so here is my design. I simply took three pieces of angle iron and put them into the configuration as in picture 1. It makes a big upside down W and I welded them together. The three will give you a nice big v (in the center when you flip it over) and is flat and stable. You can put it in a 5-6 inch vice. Depending on the size of the tubing you want to drill you can use what ever size angle iron you need. I was only working with 1-1/2 inch tubing ). That's how I first tried this jig. Then came the god awful chatter and not being able to hold the thing steady, so I thought a bit and added the fourth piece of angle iron with the addition of the small bits of pipe gusseting ( for strength ) and the hold down clamp to keep the tubing from moving around radially in the V groove. There is a stop, (a small piece of the same angle iron to locate the pipe against). a clearance hole, and what I call the paralleling pin. This is what really makes certain you are going to have both holes perfectly parallel to each other and straight up and down. You also have to tap the jig so you can thread the paralleling pin into the jig. Be extra careful to get the pin "hole" tapped in the exact center of the angle iron piece and straight up and down. (pic 5)
Use of jig: You locate the tubing against the stop in the V groove of the jig without the paralleling pin installed and clamp it tightly. Then drill your first holes all the way through both walls of the tubing. Next remove the tube and install the pin, slip the tube over the pin, clamp it and drill the second set of holes. Viola! two sets of holes centered, perpendicular,and parallel to each other. You see these pieces of tubing are part of a rear end assembly that gets pillow blocks and an axle assembly mounted to them,so they must be straight and parallel with absolutely no twist. By the way the Paralleling Pin is simply the correct size bolt with the head cut off and a slot cut into the top. Let's say for example you are using a 7/17 size drill bit. You simply put a 7/16ths bolt with the head cut off and it will fit perfectly with enough clearance for that sized hole. If you have any questions just pm me and I will try to help. I hope this is useful to someone. PS: Yes I know my welding sucks but I am a newbie at it and I am getting better LOL
Slowly..


 Reply With Quote

Bookmarks