Free 186 More Best Homemade Tools eBook:  
New: 300+ fresh build posts/day from 275 forums → BuildThreads.com

User Tag List

Results 1 to 10 of 23

Thread: Racecar project and chassis jig

Threaded View

  1. #21
    Supporting Member
    Join Date
    Apr 2015
    Location
    NSW,Australia
    Posts
    25
    Thanks
    3
    Thanked 71 Times in 16 Posts

    Astro's Tools

    Some More updates

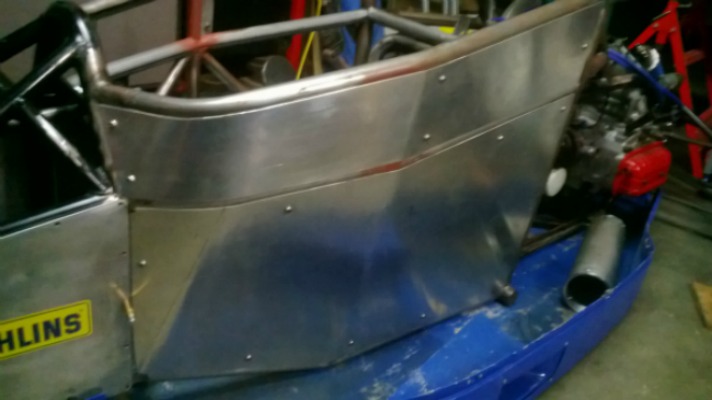
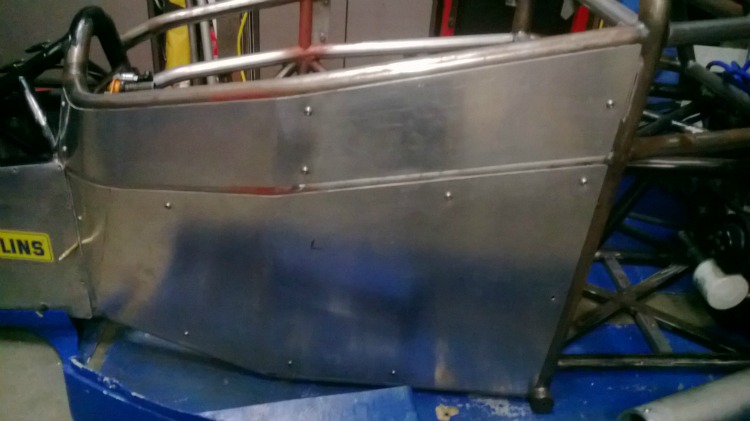
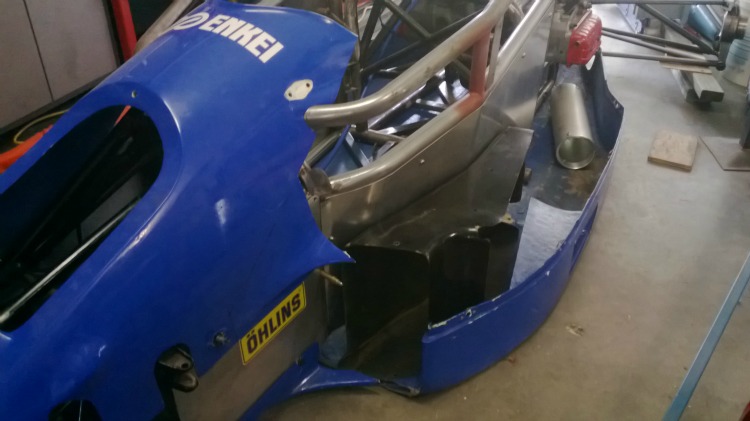
    Some more progress on the car. Made new inner body panels and mounts, these really soaked up a lot of time.Click image for larger version. 

Name:	IP1.jpg 
Views:	521 
Size:	68.0 KB 
ID:	7734Click image for larger version. 

Name:	IP2.jpg 
Views:	415 
Size:	77.8 KB 
ID:	7735
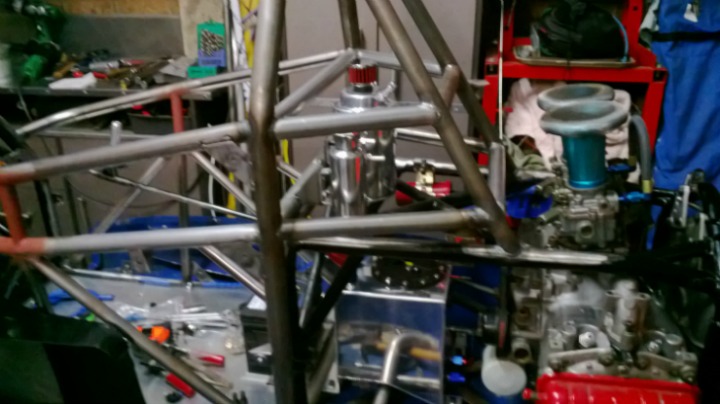
    Fitted an new fuel tank, header tank and oil catch can.
    Click image for larger version. 

Name:	HT1.jpg 
Views:	430 
Size:	94.7 KB 
ID:	7736Click image for larger version. 

Name:	HT2.jpg 
Views:	406 
Size:	85.8 KB 
ID:	7737
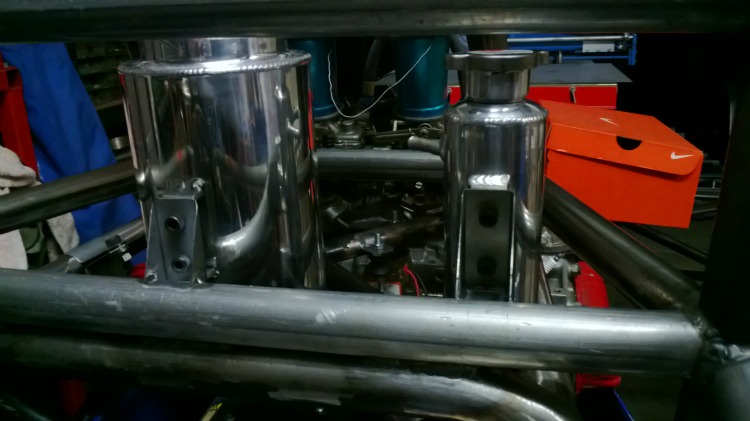
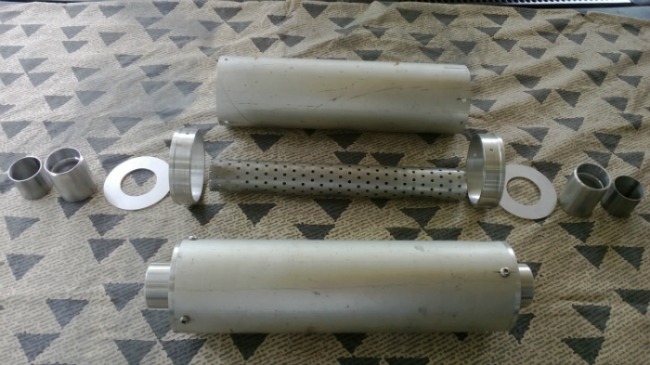
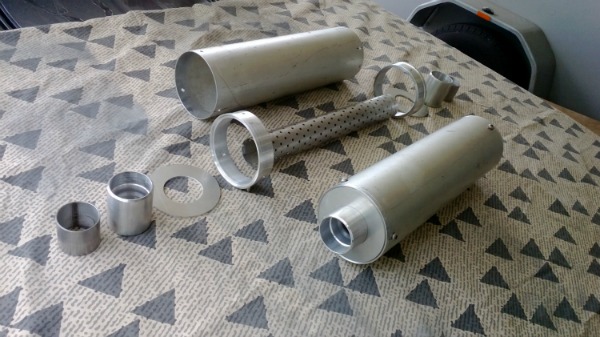
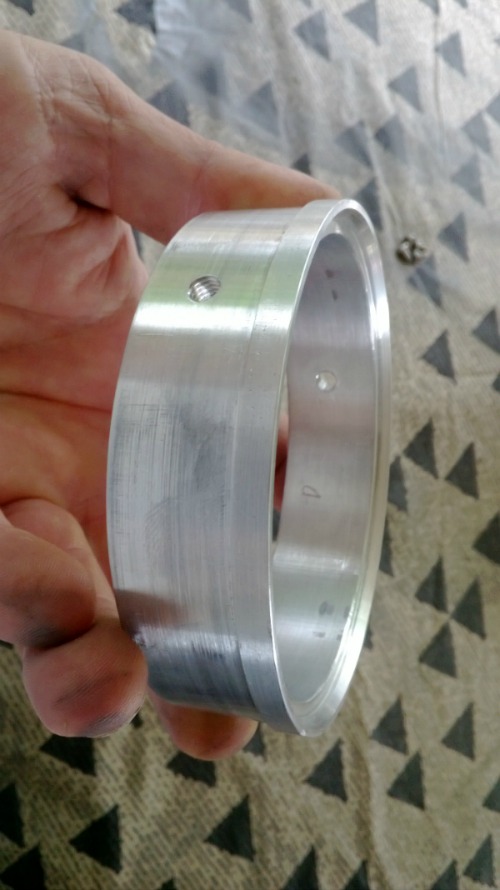
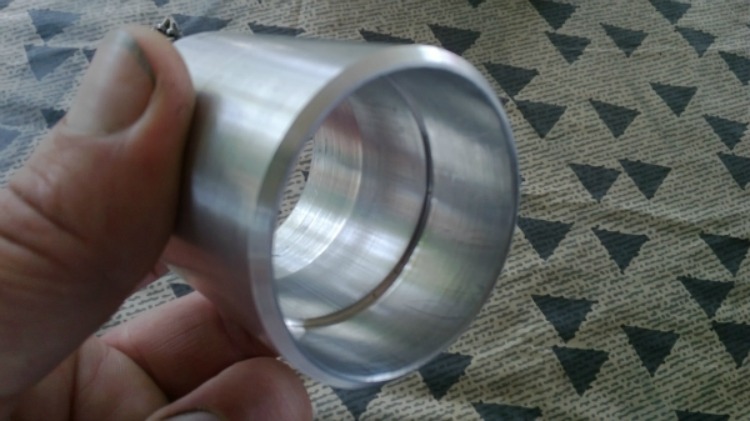
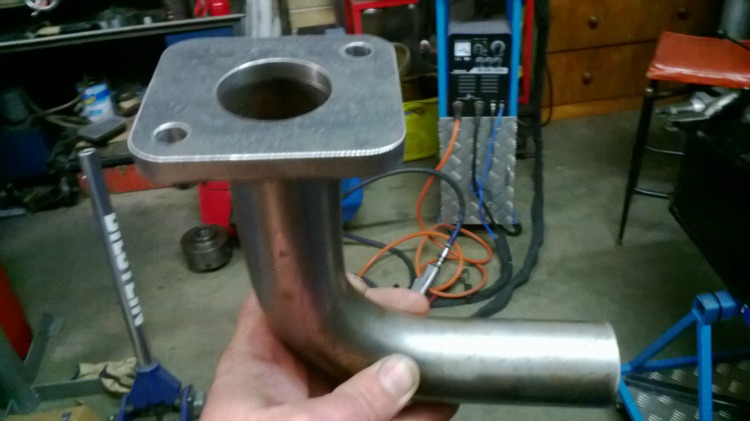
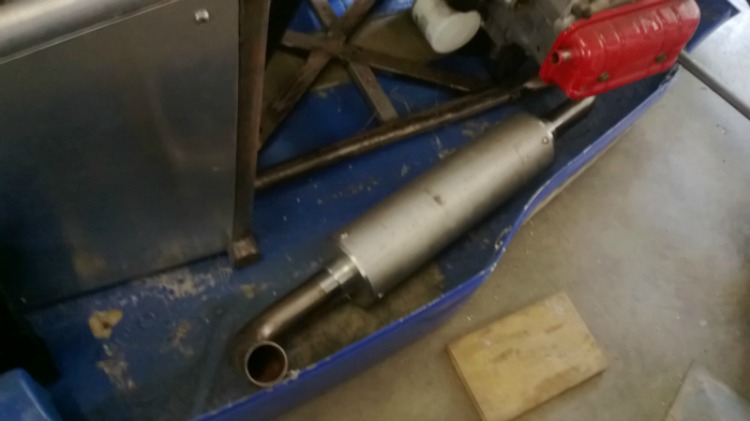
    I am making my own mufflers as I could not get commercially available ones to suit what I wanted. The main muffler body is 100mm by 1.5 wall, I had intended to machine the end caps from 1 billet but that was going to become expensive so I machined end cap rings from 100mm x 6mm wall tube, the rings were tapped m6 in 3 positions on each cap to allow me to disassemble to repack the mufflers. and made end plates from 3mm plate. The end cap socket I made from 50mm x 6mm wall, they were bored to fit the perforated tube on one end and an adaptor sleeve on the other end which will be welded to the exhaust tube. are all yet to be welded together. Just hope the sound is OK.
    Click image for larger version. 

Name:	EX6.jpg 
Views:	460 
Size:	88.7 KB 
ID:	7738Click image for larger version. 

Name:	EX5.jpg 
Views:	459 
Size:	91.3 KB 
ID:	7739Click image for larger version. 

Name:	EX2.jpg 
Views:	416 
Size:	97.0 KB 
ID:	7740Click image for larger version. 

Name:	EX3.jpg 
Views:	449 
Size:	97.2 KB 
ID:	7741Click image for larger version. 

Name:	EX4.jpg 
Views:	385 
Size:	85.5 KB 
ID:	7742Click image for larger version. 

Name:	EX7.jpg 
Views:	383 
Size:	85.9 KB 
ID:	7743Click image for larger version. 

Name:	EX1.jpg 
Views:	461 
Size:	64.6 KB 
ID:	7744
    I decided to run the exhausts forward in the body exiting out the side of the undertray, this made the exhausts much easier to make rather than running them through the suspension links and out the back.
    I have cut the original fibreglass bodywork to allow widening and am in the process of fitting all of that together with radiator ducts and new mounts.Click image for larger version. 

Name:	XP1.jpg 
Views:	430 
Size:	81.6 KB 
ID:	7745
    OK, back to the shed for now.

  2. The Following 3 Users Say Thank You to Astro For This Useful Post:

    Jon (Jan 25, 2016), kbalch (Jan 25, 2016), PJs (Nov 8, 2016)

Thread Information

Users Browsing this Thread

There are currently 1 users browsing this thread. (0 members and 1 guests)

Bookmarks

Posting Permissions

  • You may not post new threads
  • You may not post replies
  • You may not post attachments
  • You may not edit your posts
  •