Free 186 More Best Homemade Tools eBook:  
New: 300+ fresh build posts/day from 275 forums → BuildThreads.com

User Tag List

Results 1 to 3 of 3

Thread: Re-think, pulley tension adjustment for bead roller and slip rollers

Threaded View

  1. #1
    Supporting Member thehomeengineer's Avatar
    Join Date
    Nov 2017
    Location
    Berkshire UK
    Posts
    763
    Thanks
    764
    Thanked 2,390 Times in 484 Posts

    thehomeengineer's Tools

    Re-think, pulley tension adjustment for bead roller and slip rollers

    Hi All

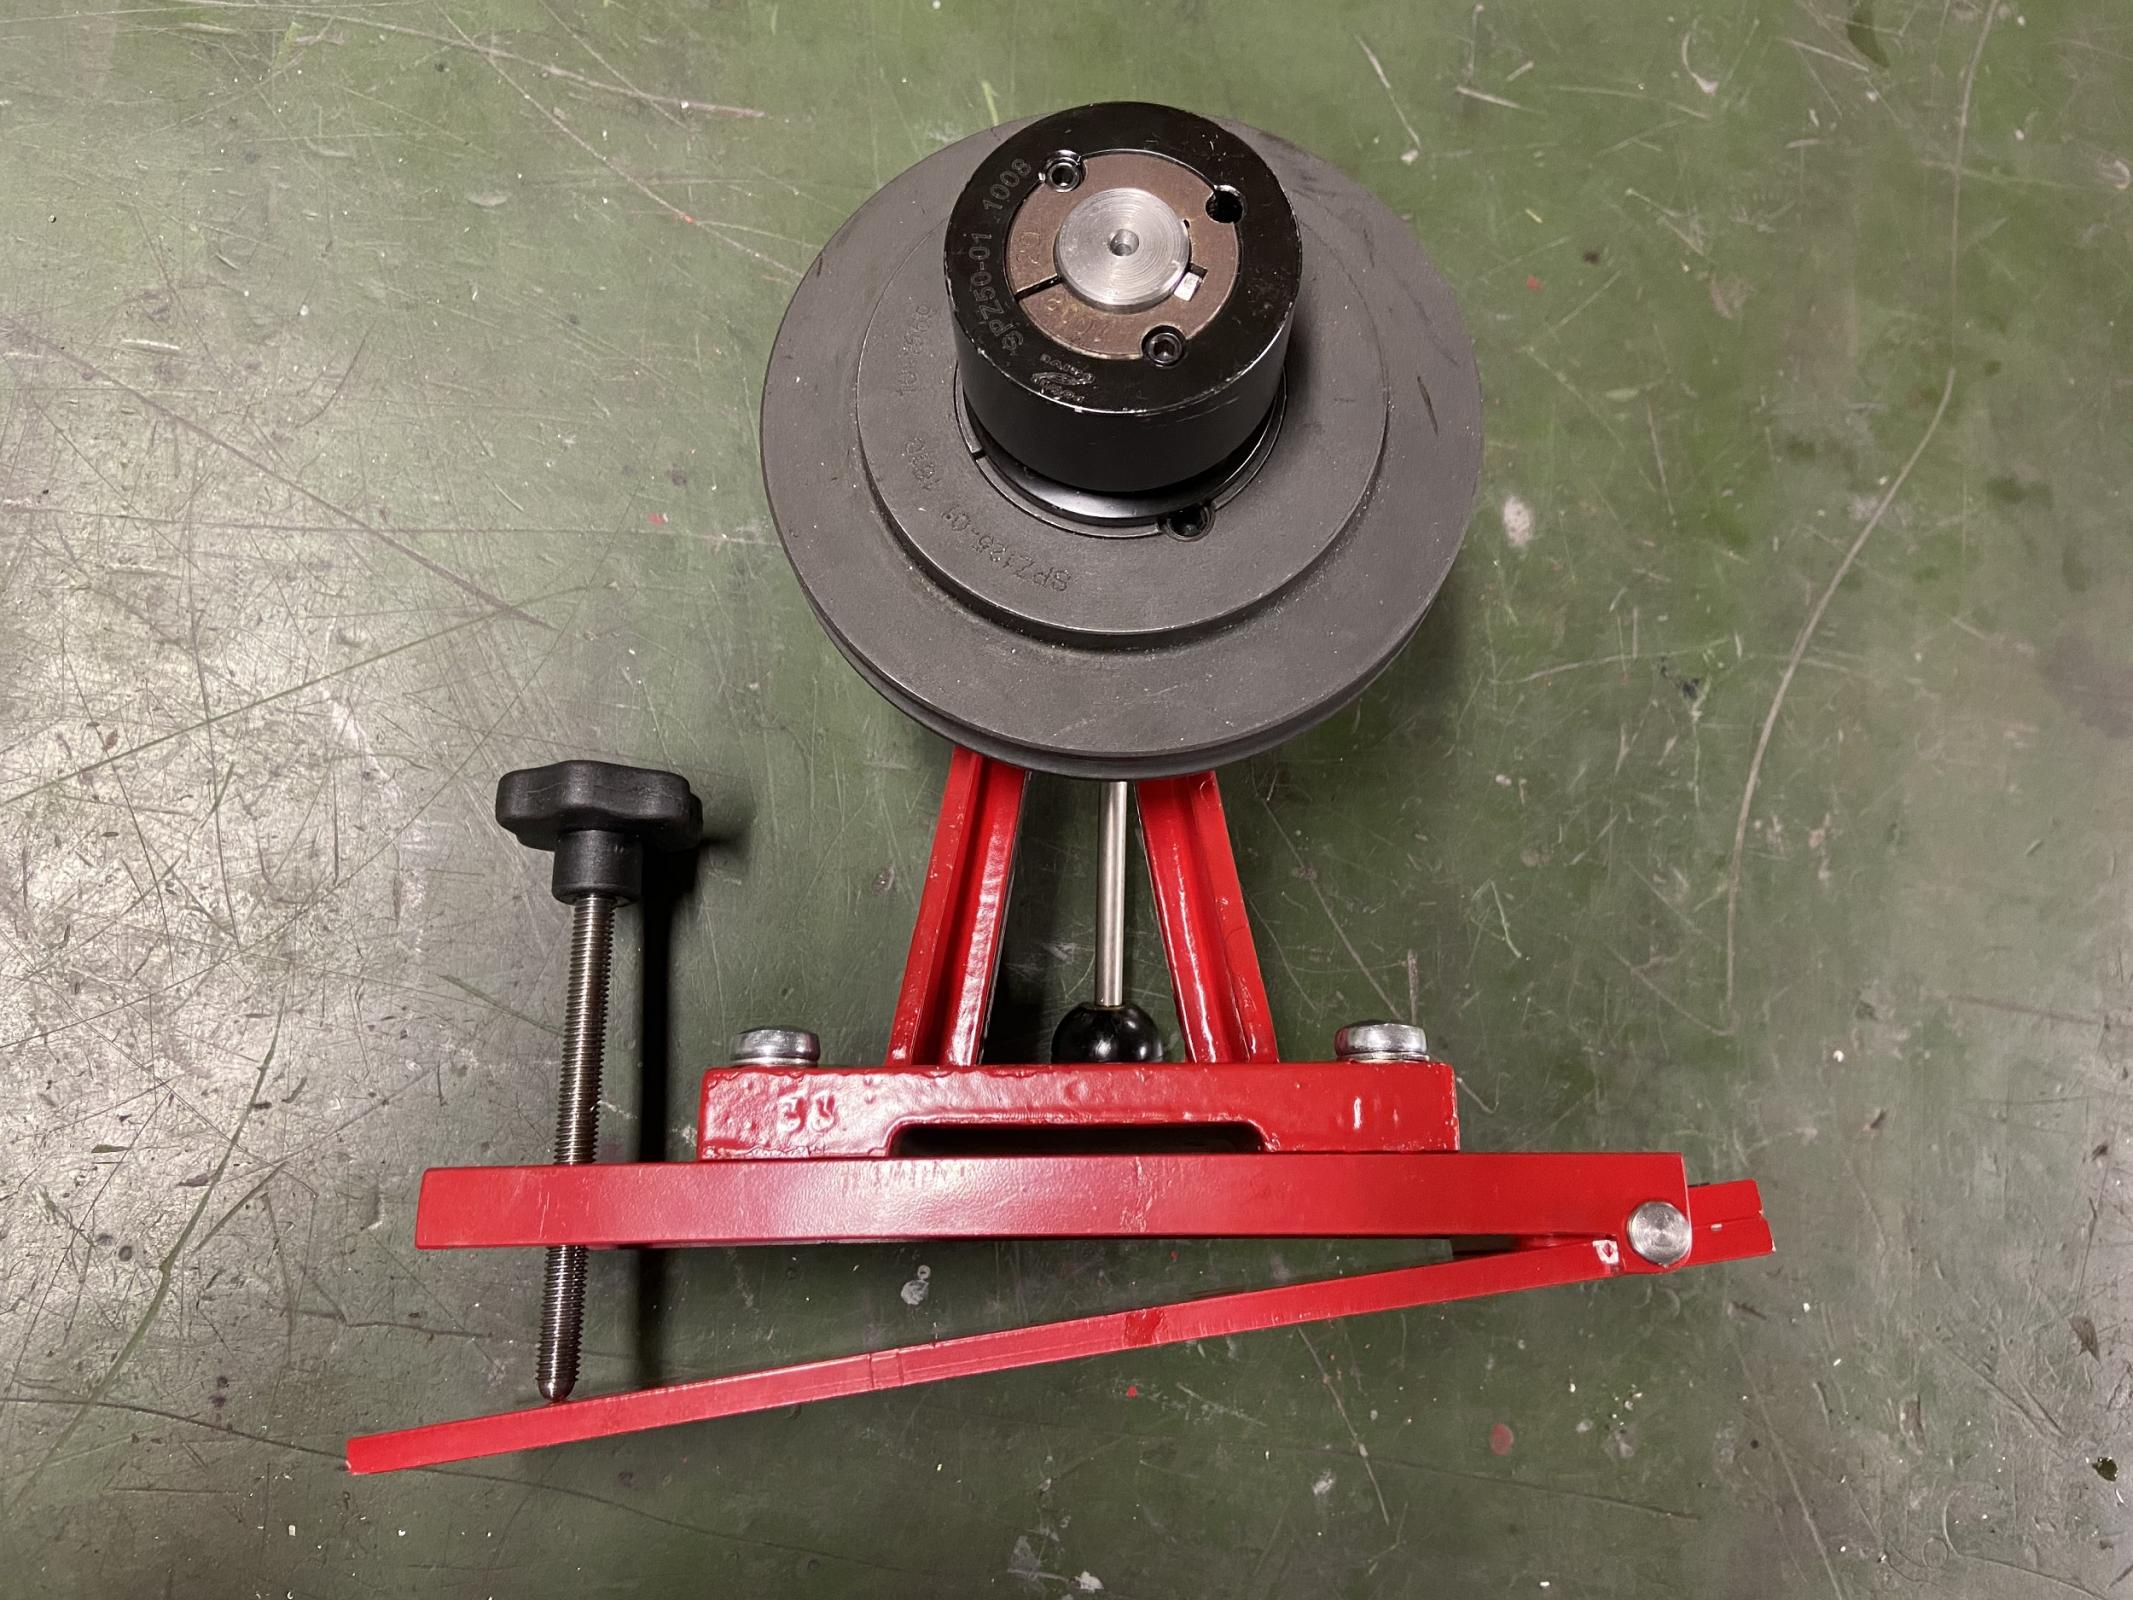
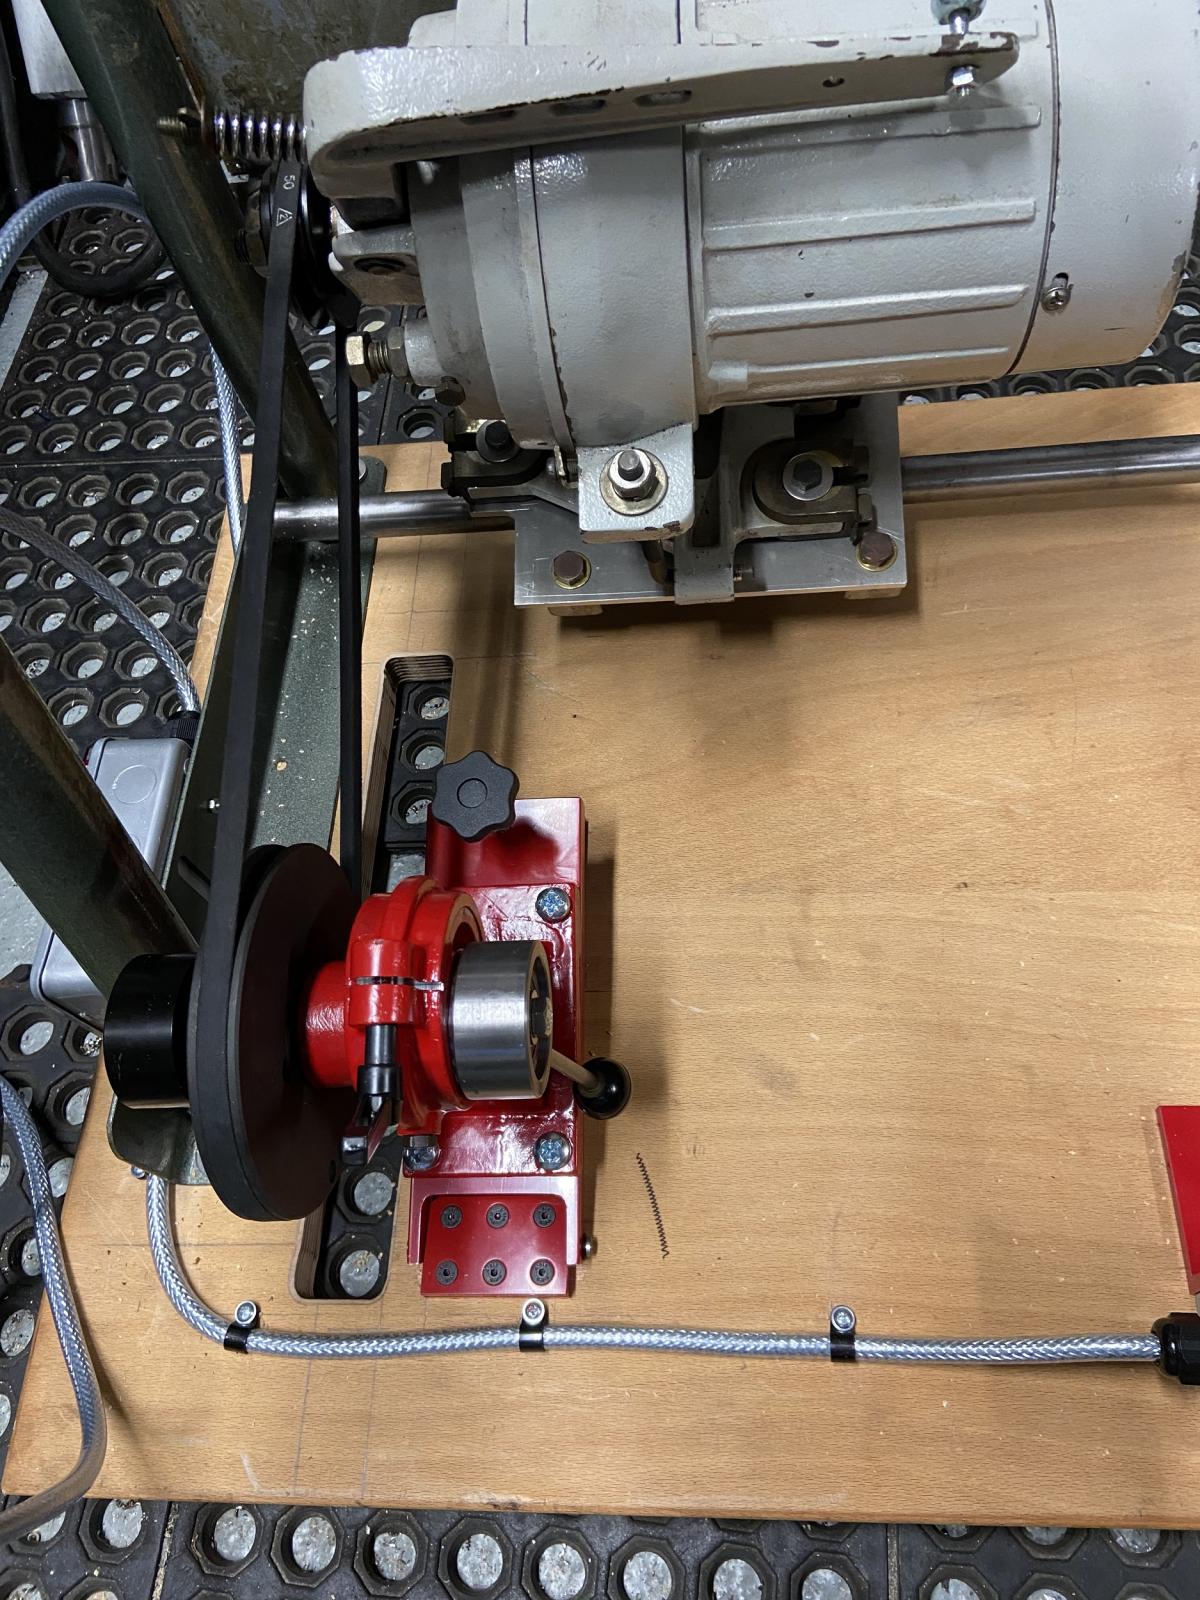
    After receiving the vee-belts in the post I soon realised the eccentric plummer block would not offer enough adjustment to tension both belts. So a re-think was needed and a solution to this problem.

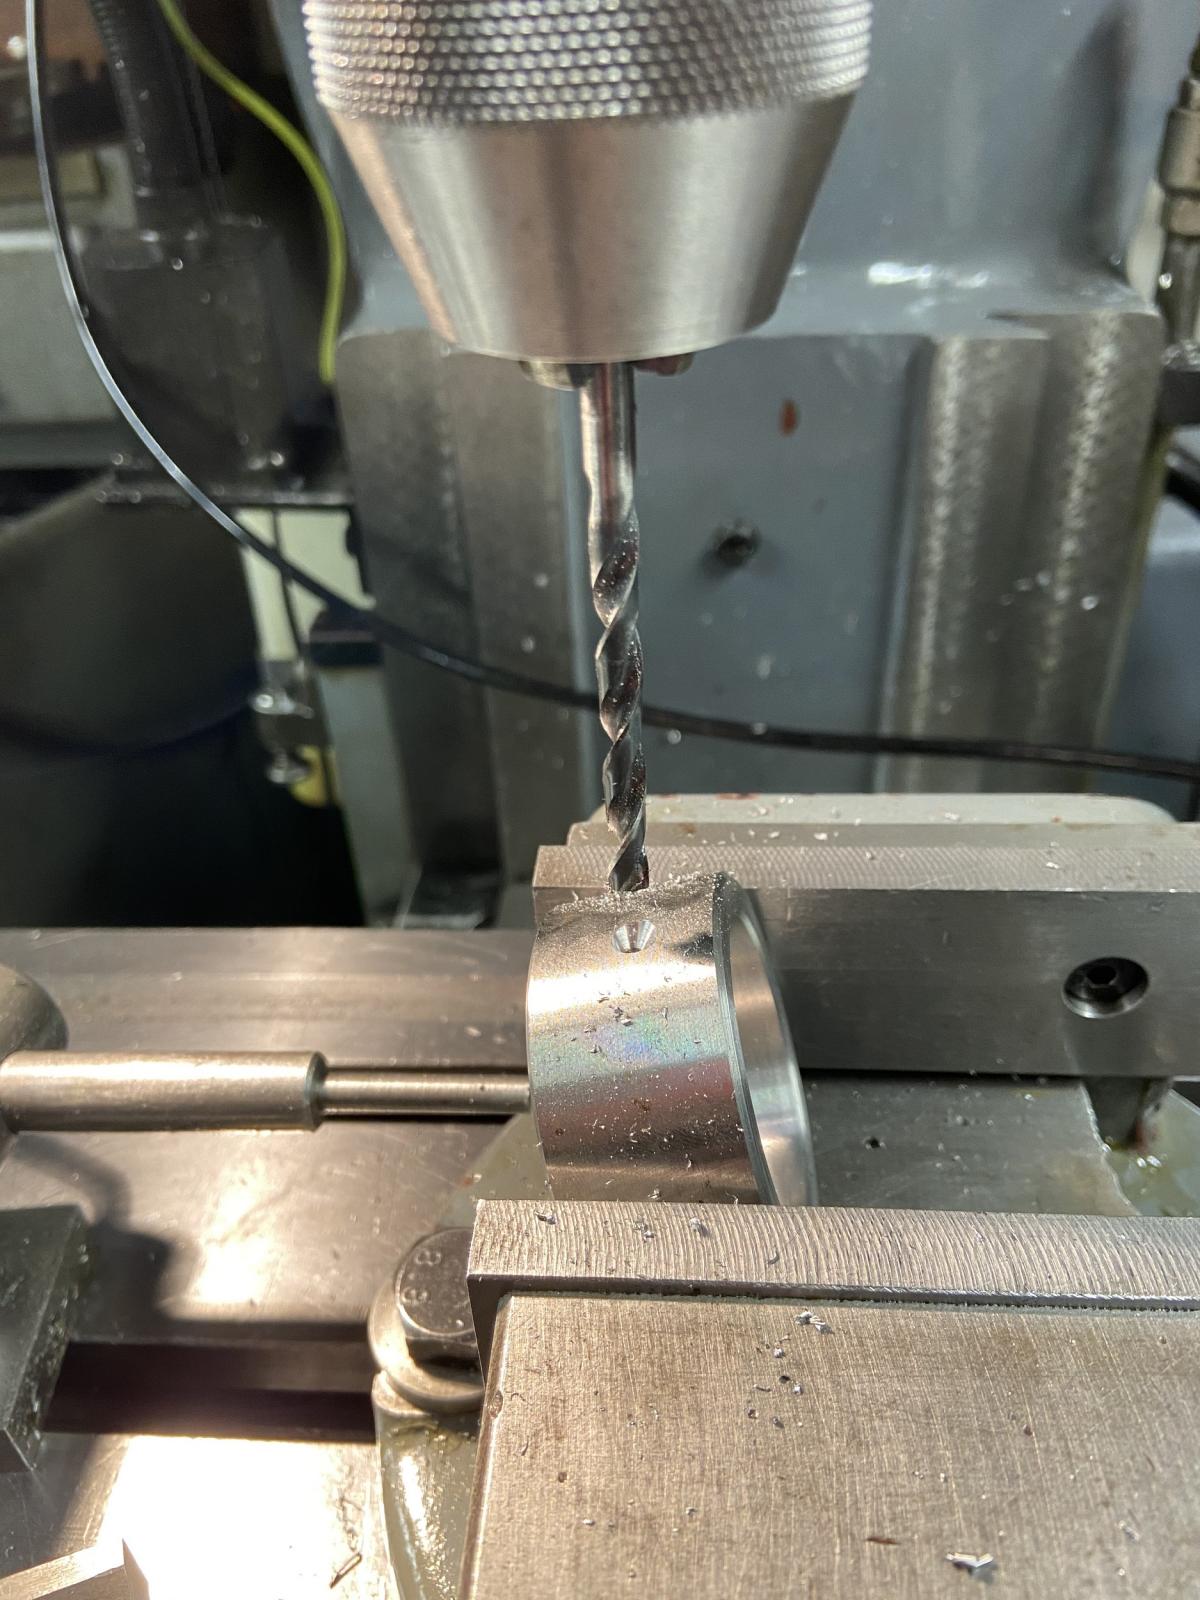
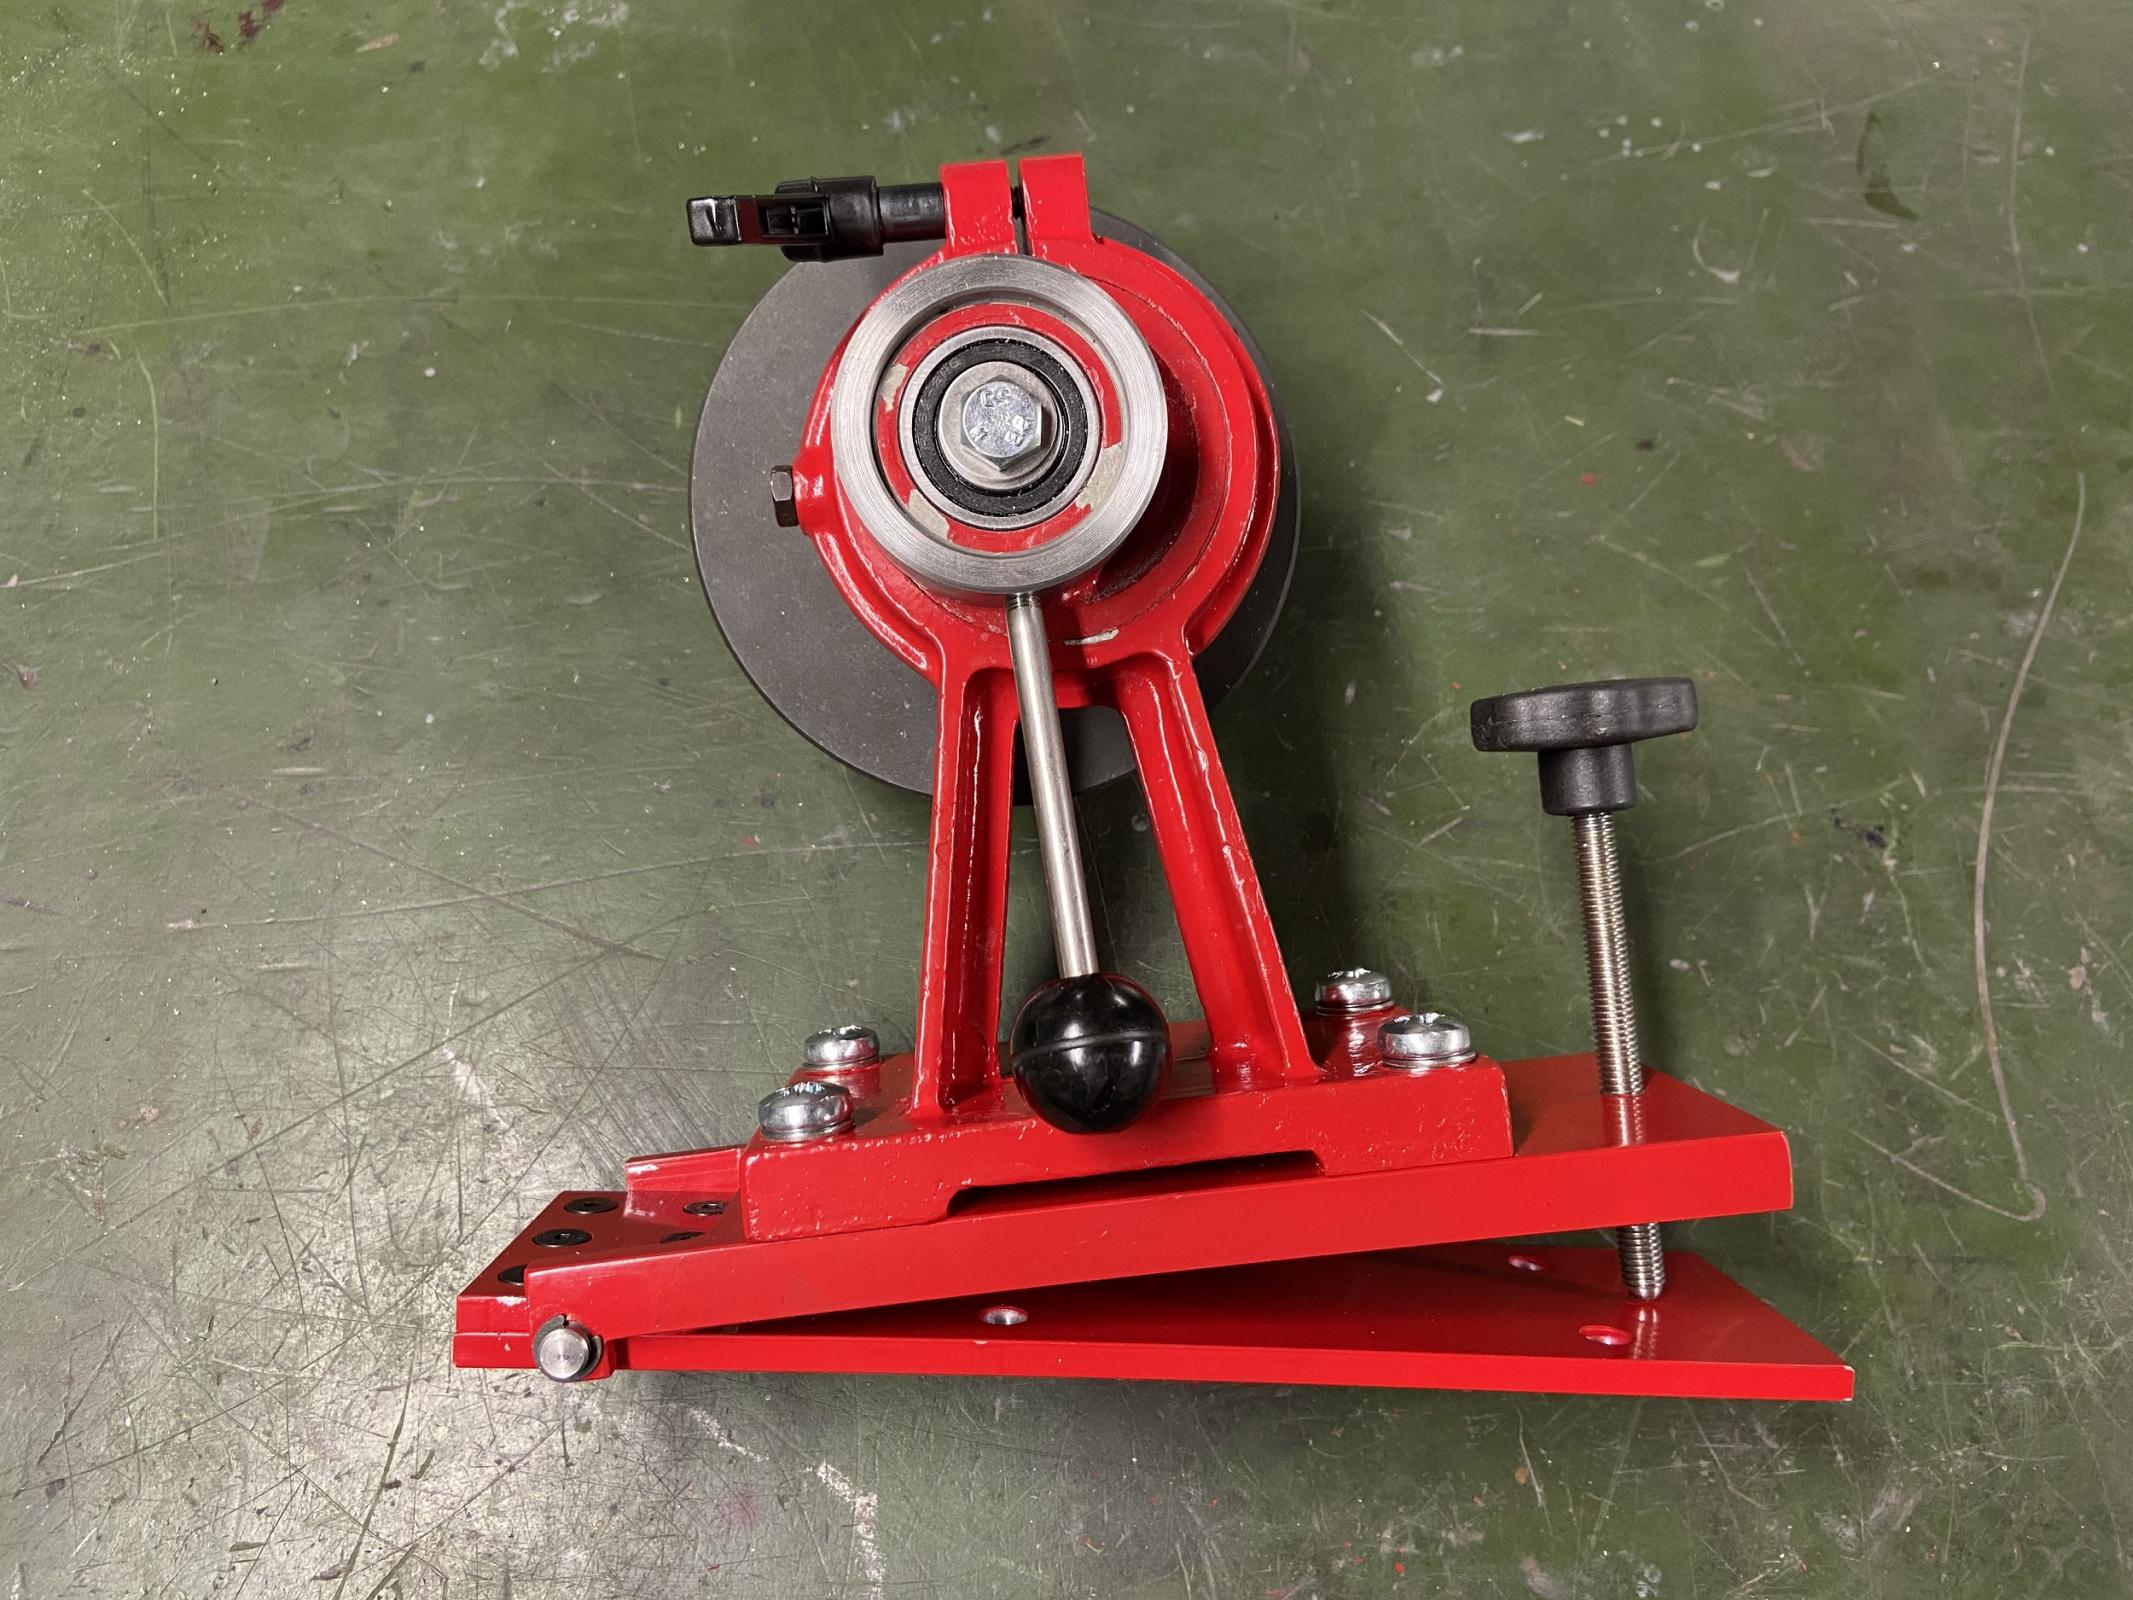
    I decided to manufacture a hinge plate the plummer block could be bolted too and operated via a single screw to tension the belts in conjunction with the motor adjustment and the eccentric plummer block. The eccentric was also difficult to adjust so a handle was made to rotate the shaft.

    Link to previous post.
    Powering homemade sheet metal tooling (Table and motor arrangement)

    The photos below show the solution.

    Click image for larger version. 

Name:	IMG_4382 painted.jpg 
Views:	352 
Size:	342.3 KB 
ID:	33271
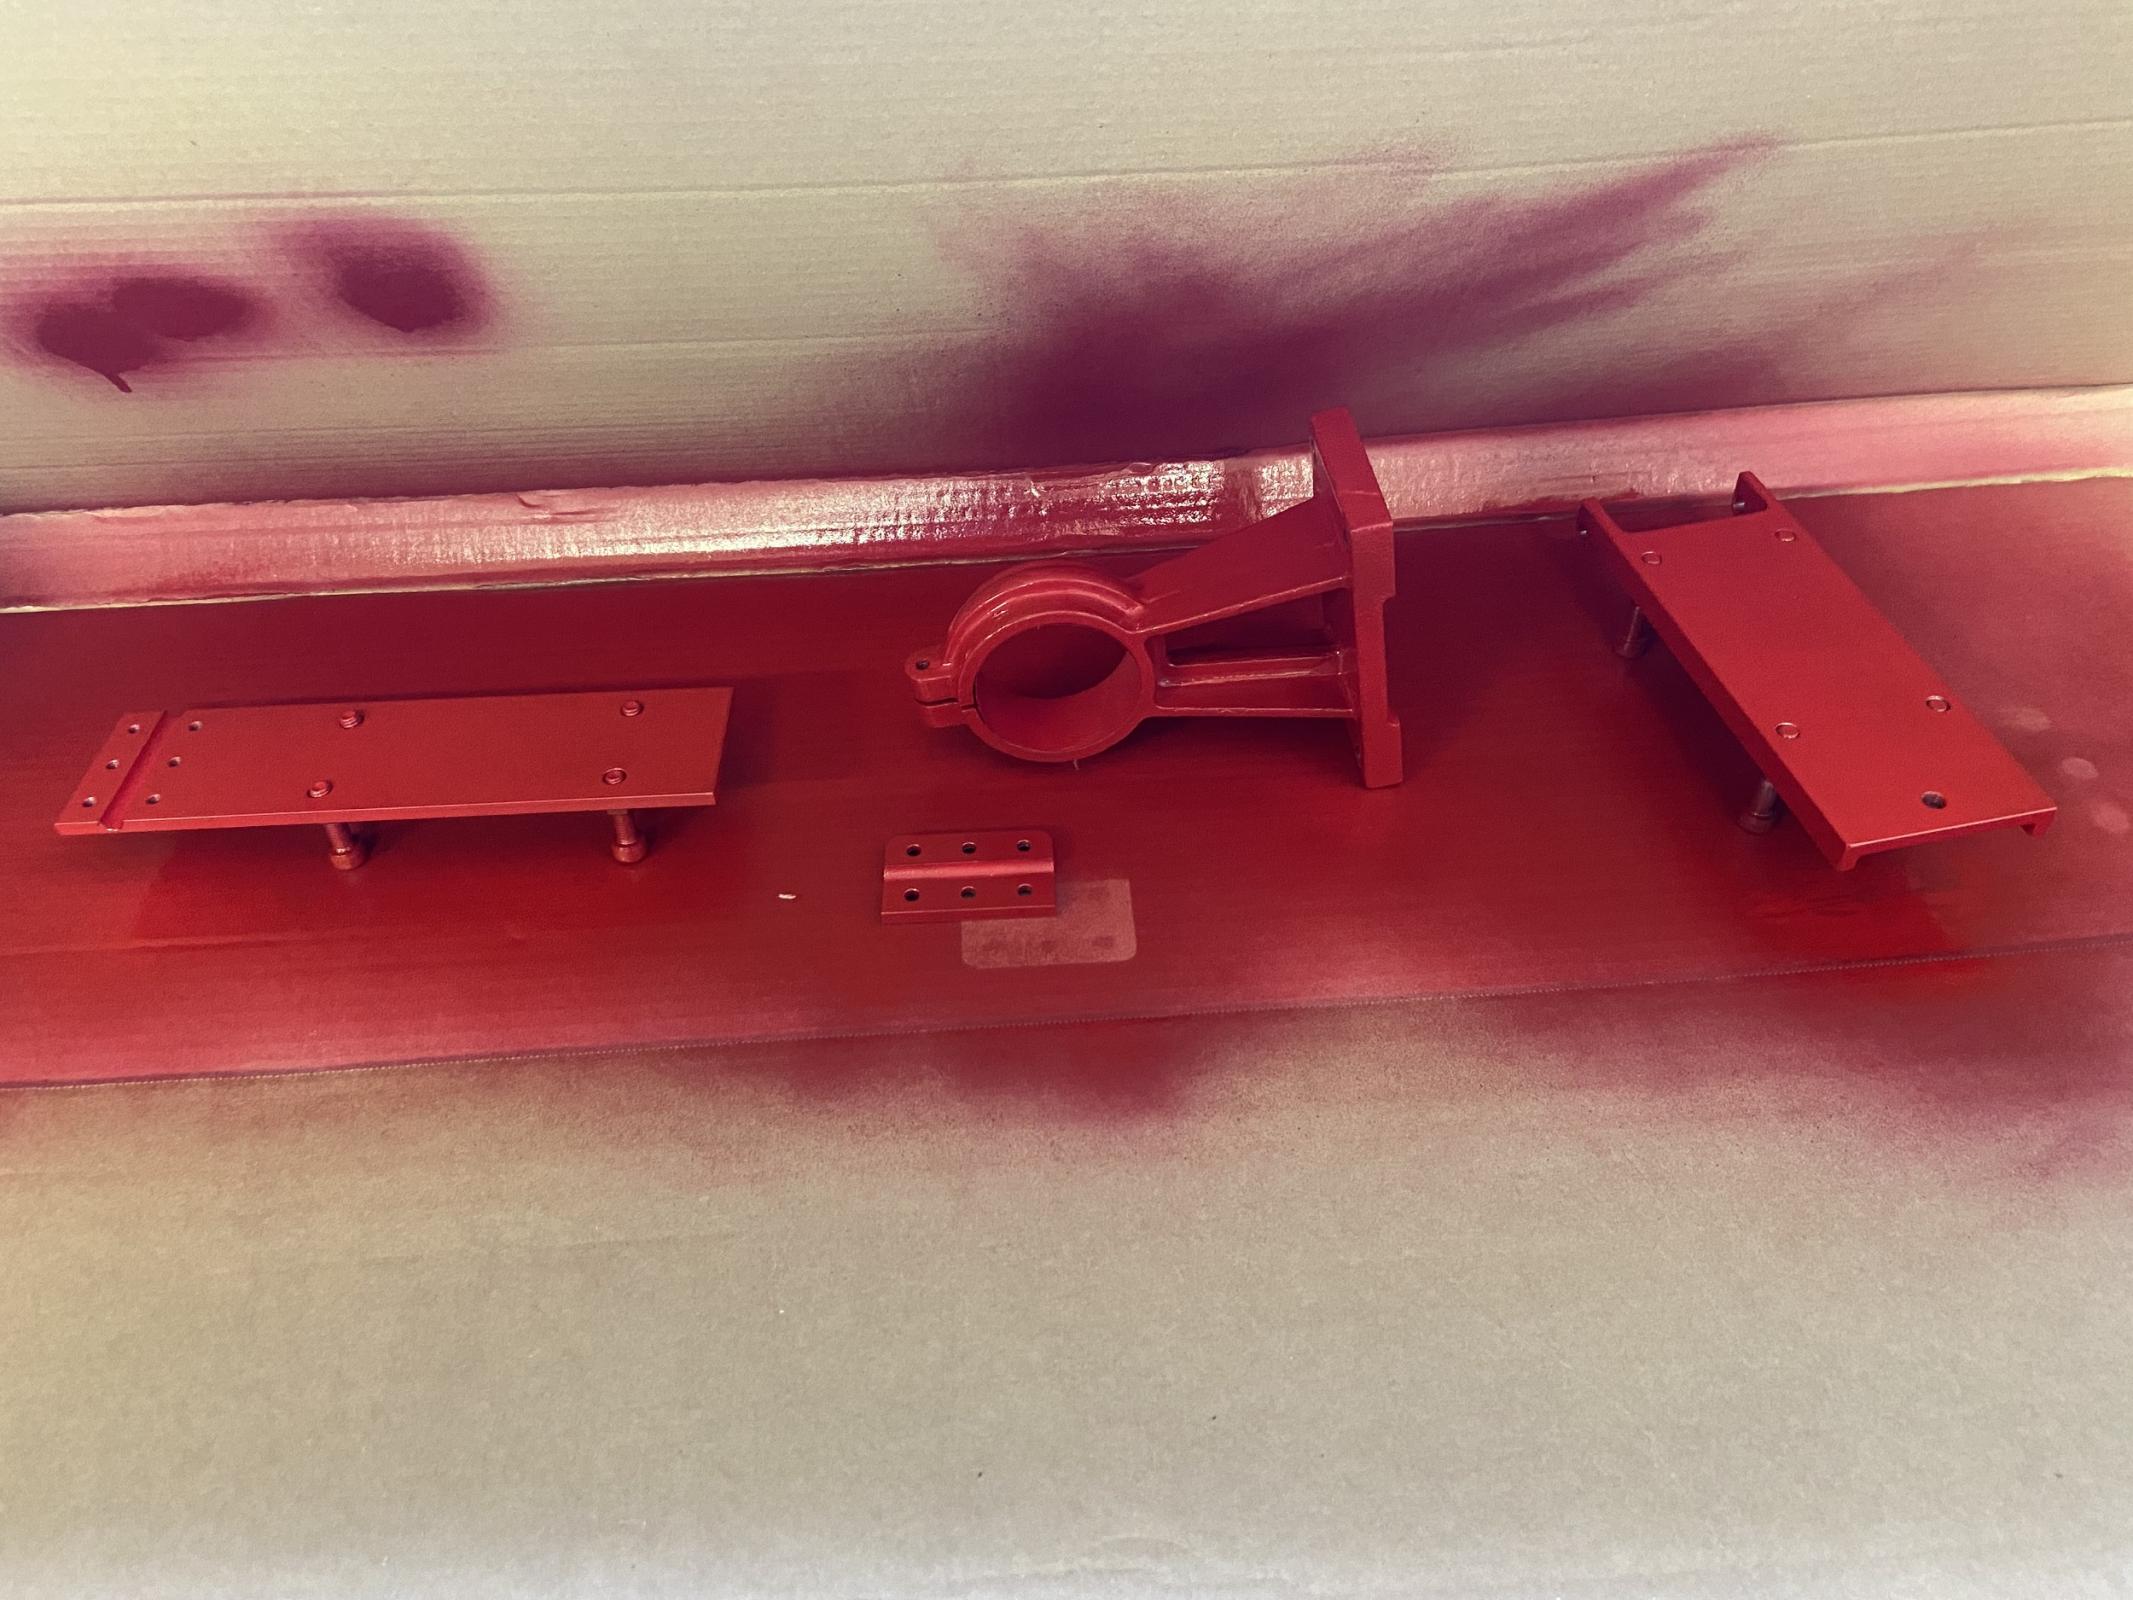
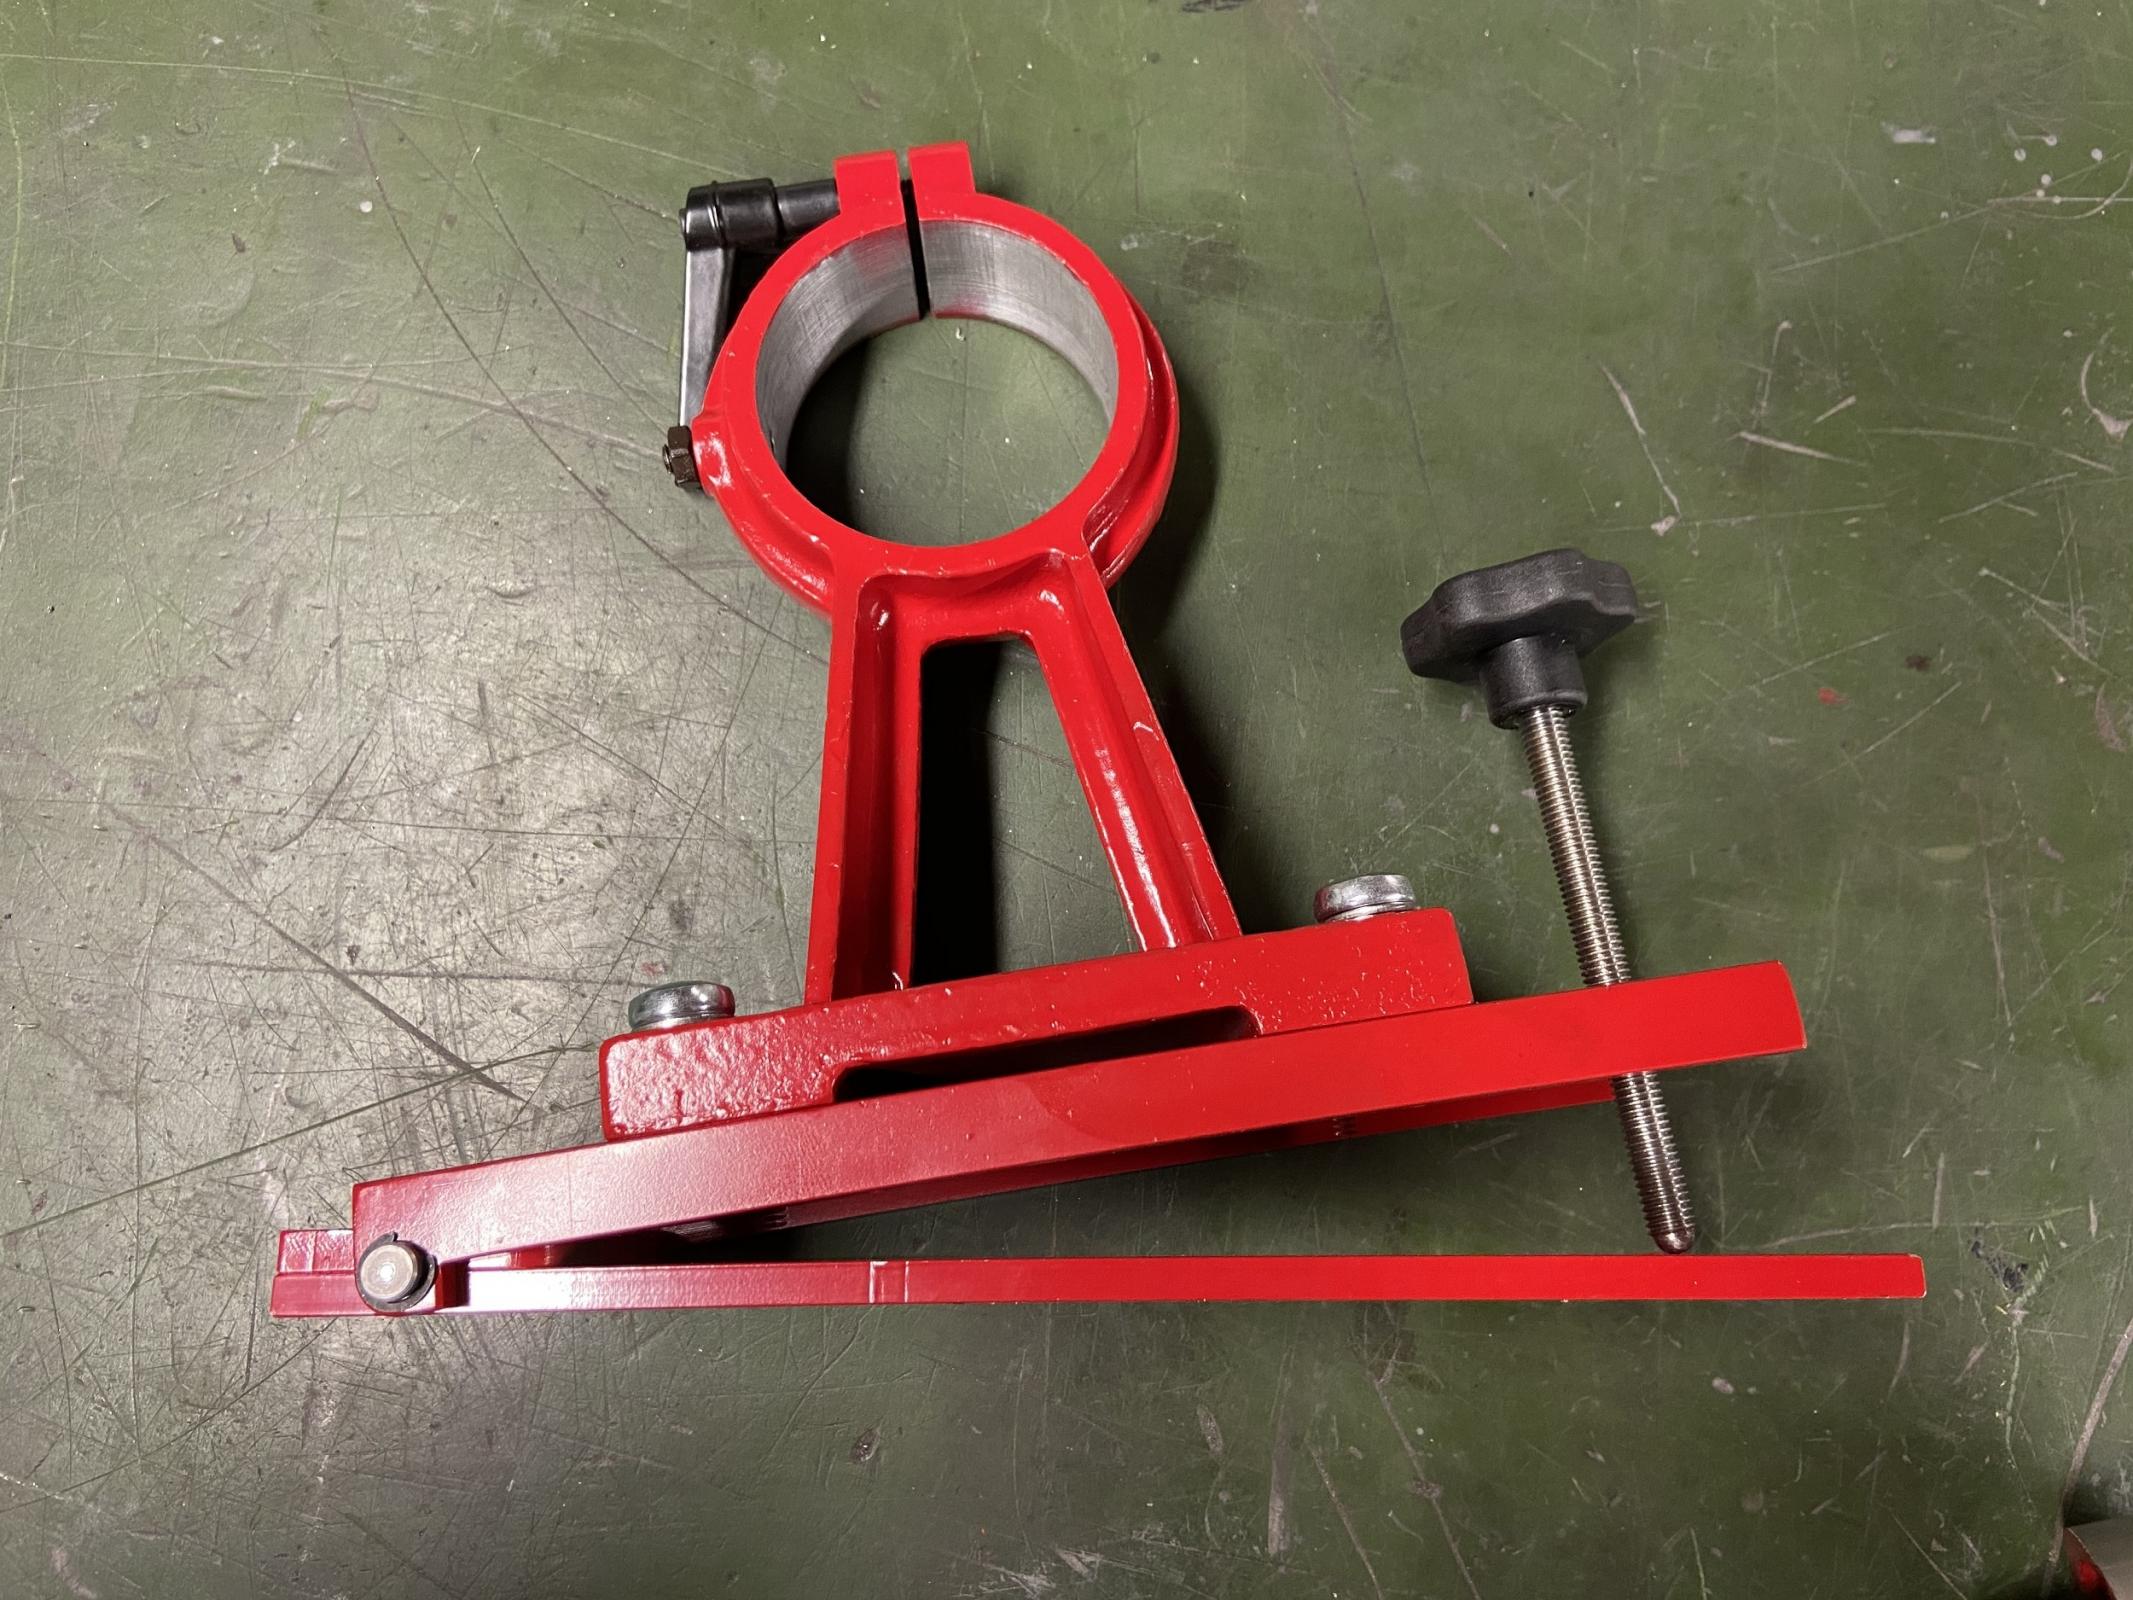
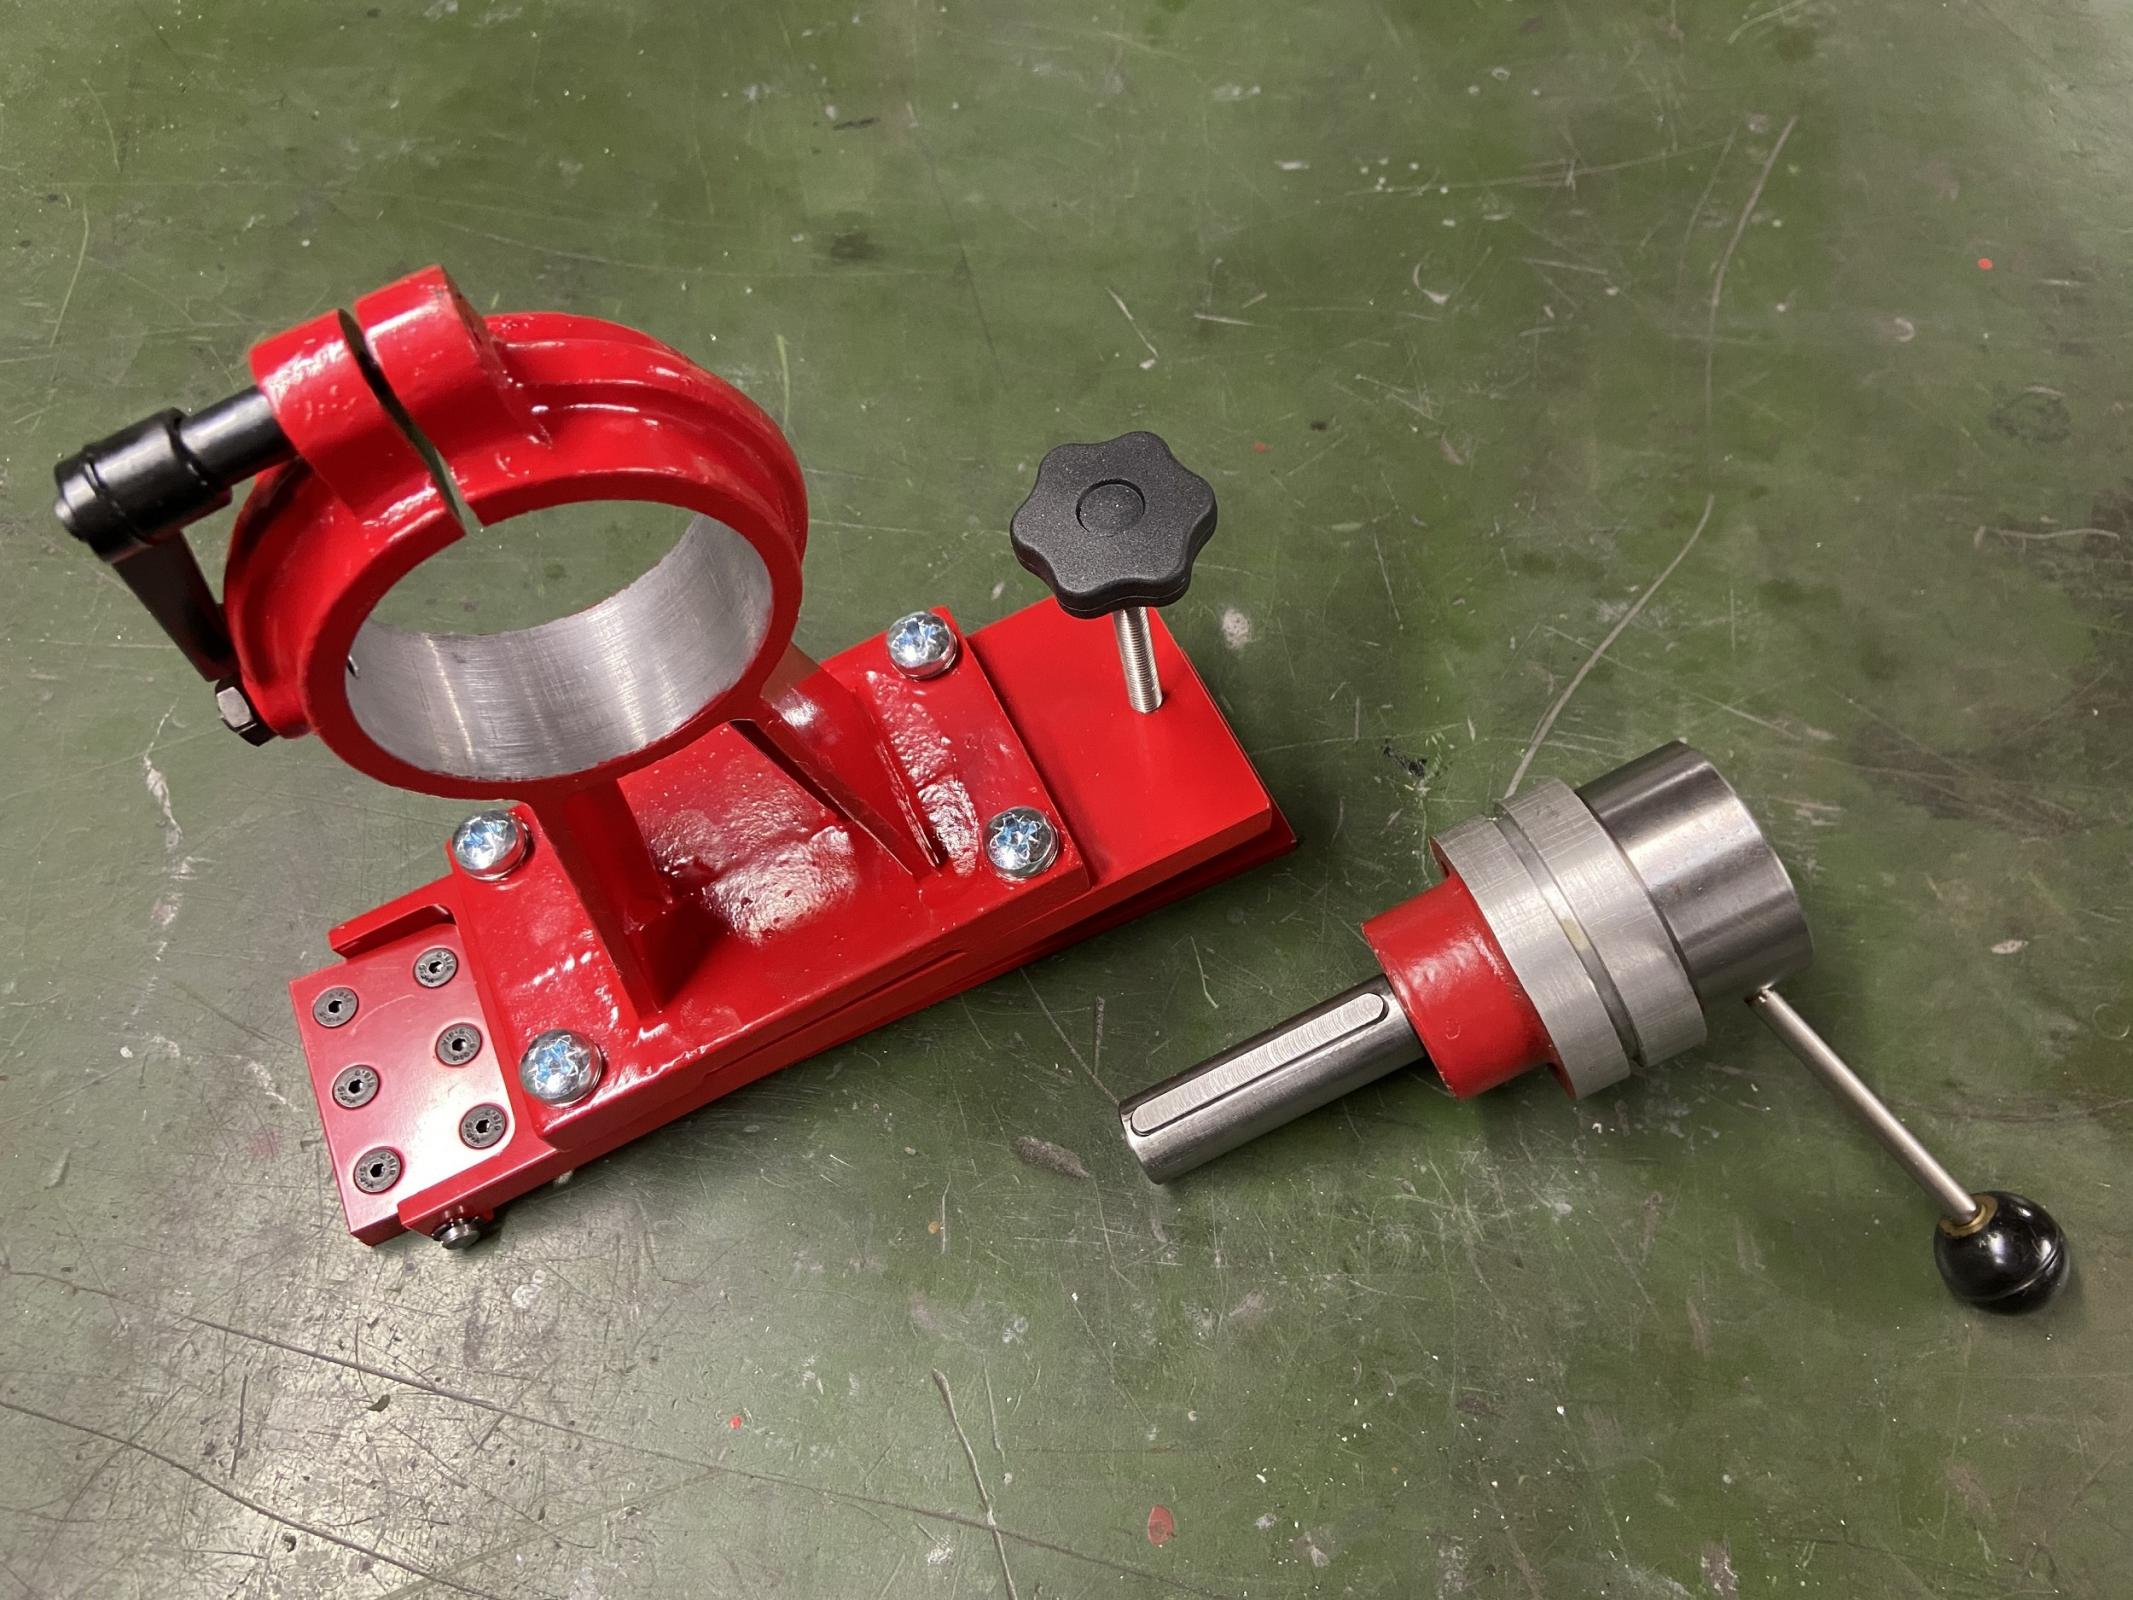
    Painted components ready for assembly

    Click image for larger version. 

Name:	IMG_4385 4 jaw setup.jpg 
Views:	362 
Size:	219.3 KB 
ID:	33272 Click image for larger version. 

Name:	IMG_4386 machined.jpg 
Views:	368 
Size:	260.0 KB 
ID:	33273
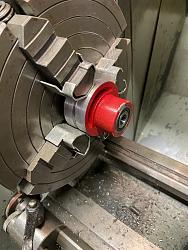
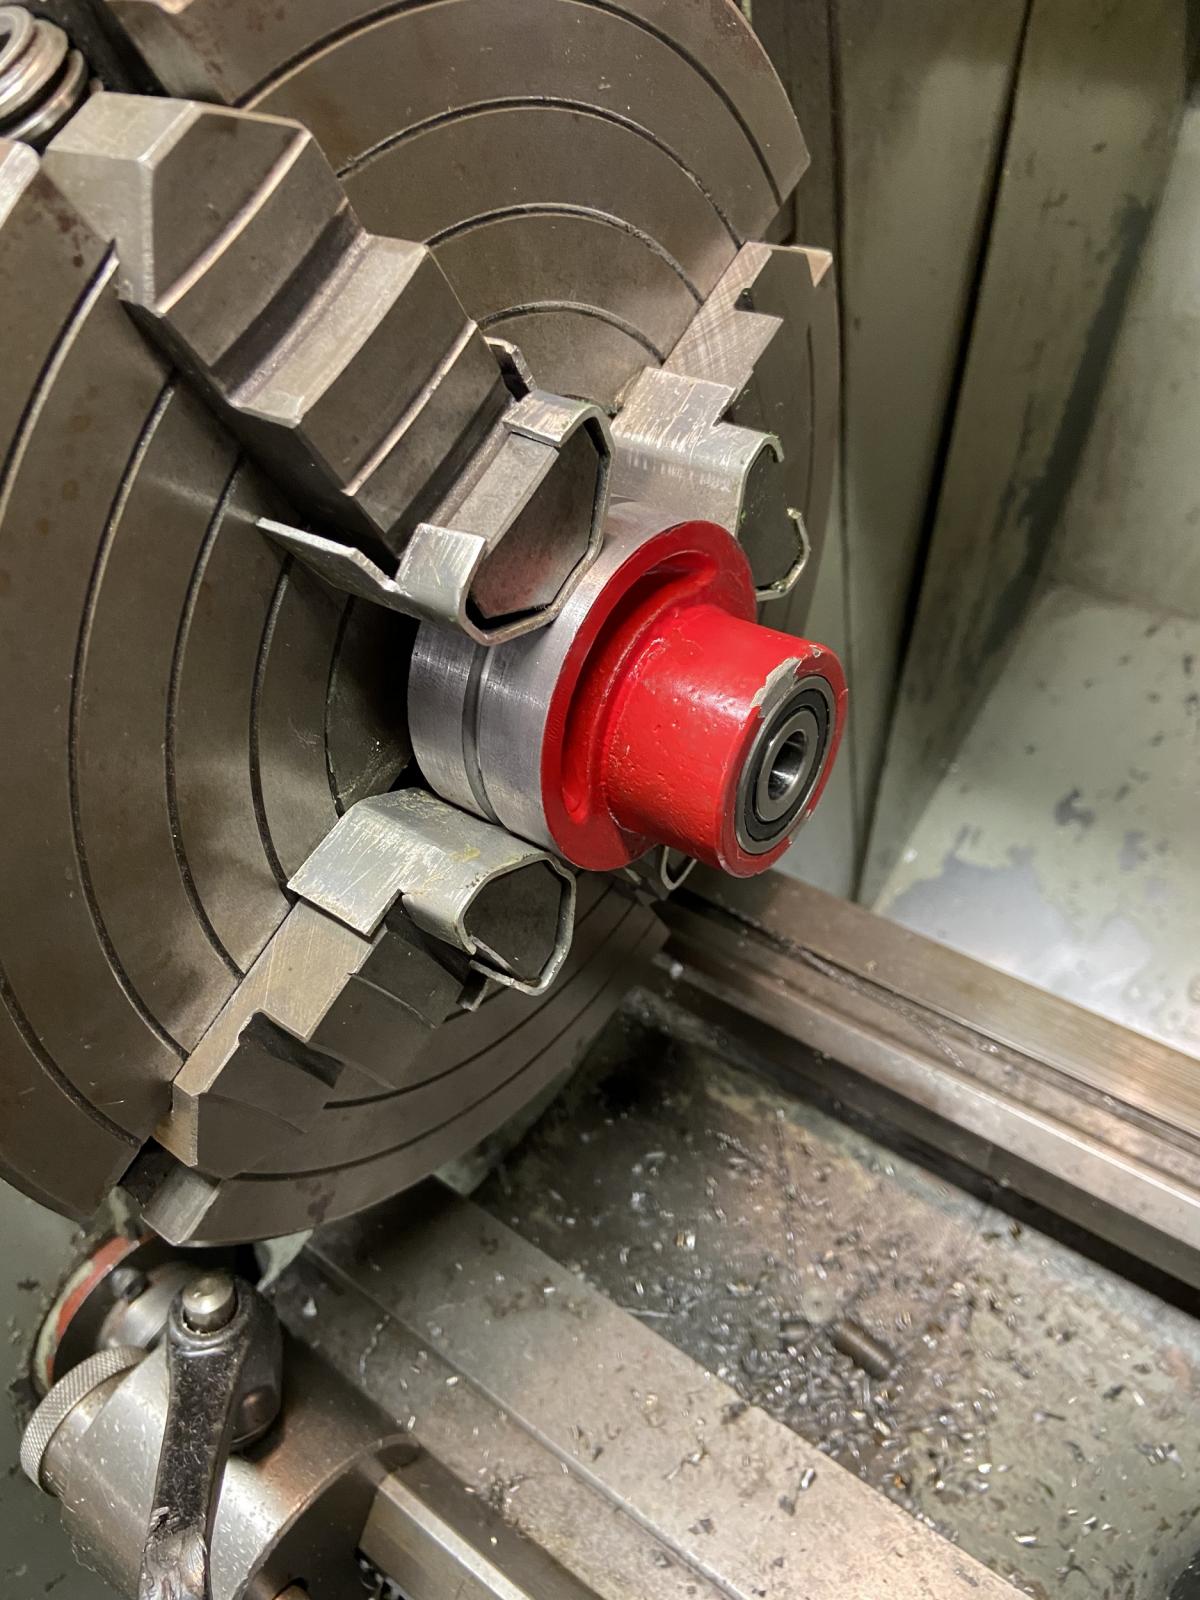
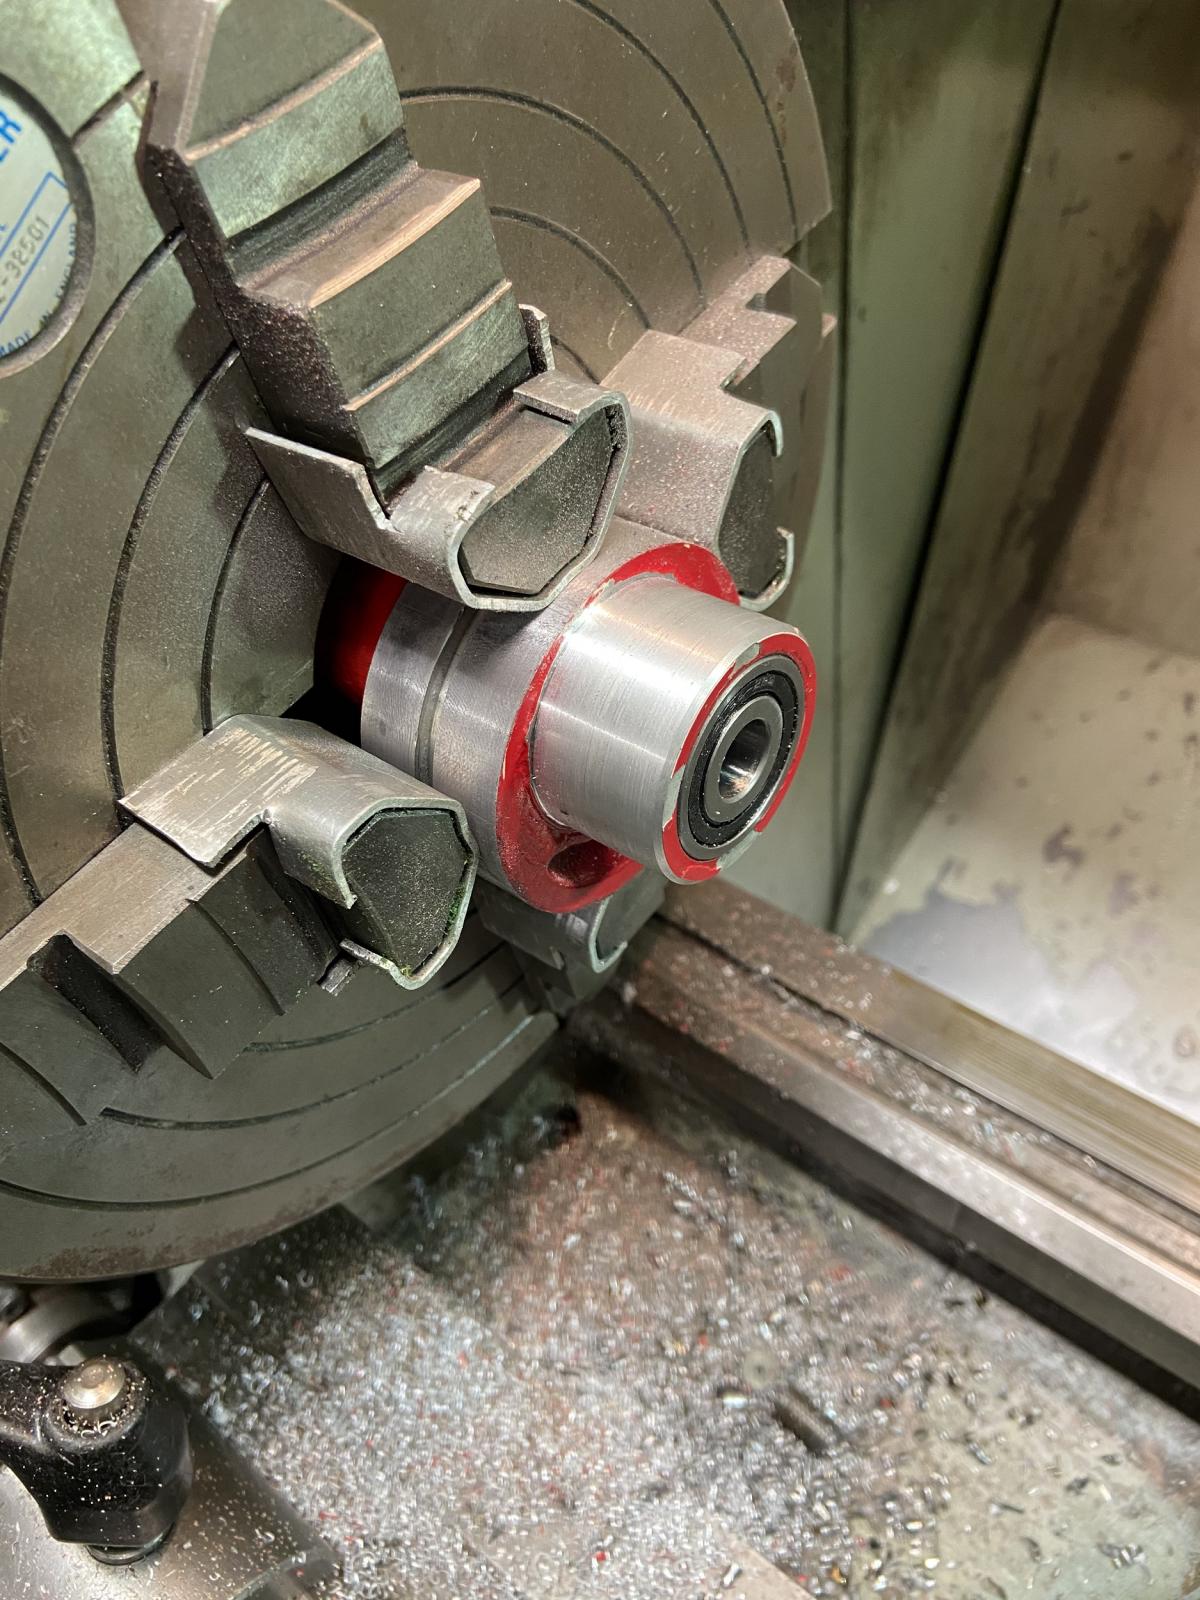
    Eccentric casting housing machined to accept operating lever.

    Click image for larger version. 

Name:	IMG_4387 drilling handle.jpg 
Views:	327 
Size:	211.6 KB 
ID:	33274
    handle drilled and tapped at angle to give clearance on plummer block body. This tapped hole also locks the handle to casting.

    Click image for larger version. 

Name:	IMG_4392 simple hinge.jpg 
Views:	341 
Size:	208.0 KB 
ID:	33275
    The base plate was made from 6mm aluminium and the hinge was made from another piece of 6mm plate bolted together and drilled on joint center line to accept 8mm pin.

    Click image for larger version. 

Name:	IMG_4389 part assembled.jpg 
Views:	361 
Size:	424.2 KB 
ID:	33277
    Screw showing additional adjustment

    Click image for larger version. 

Name:	IMG_4388 ready for eccentric.jpg 
Views:	362 
Size:	404.3 KB 
ID:	33276
    Ready for final assembly
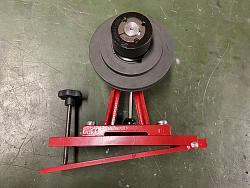
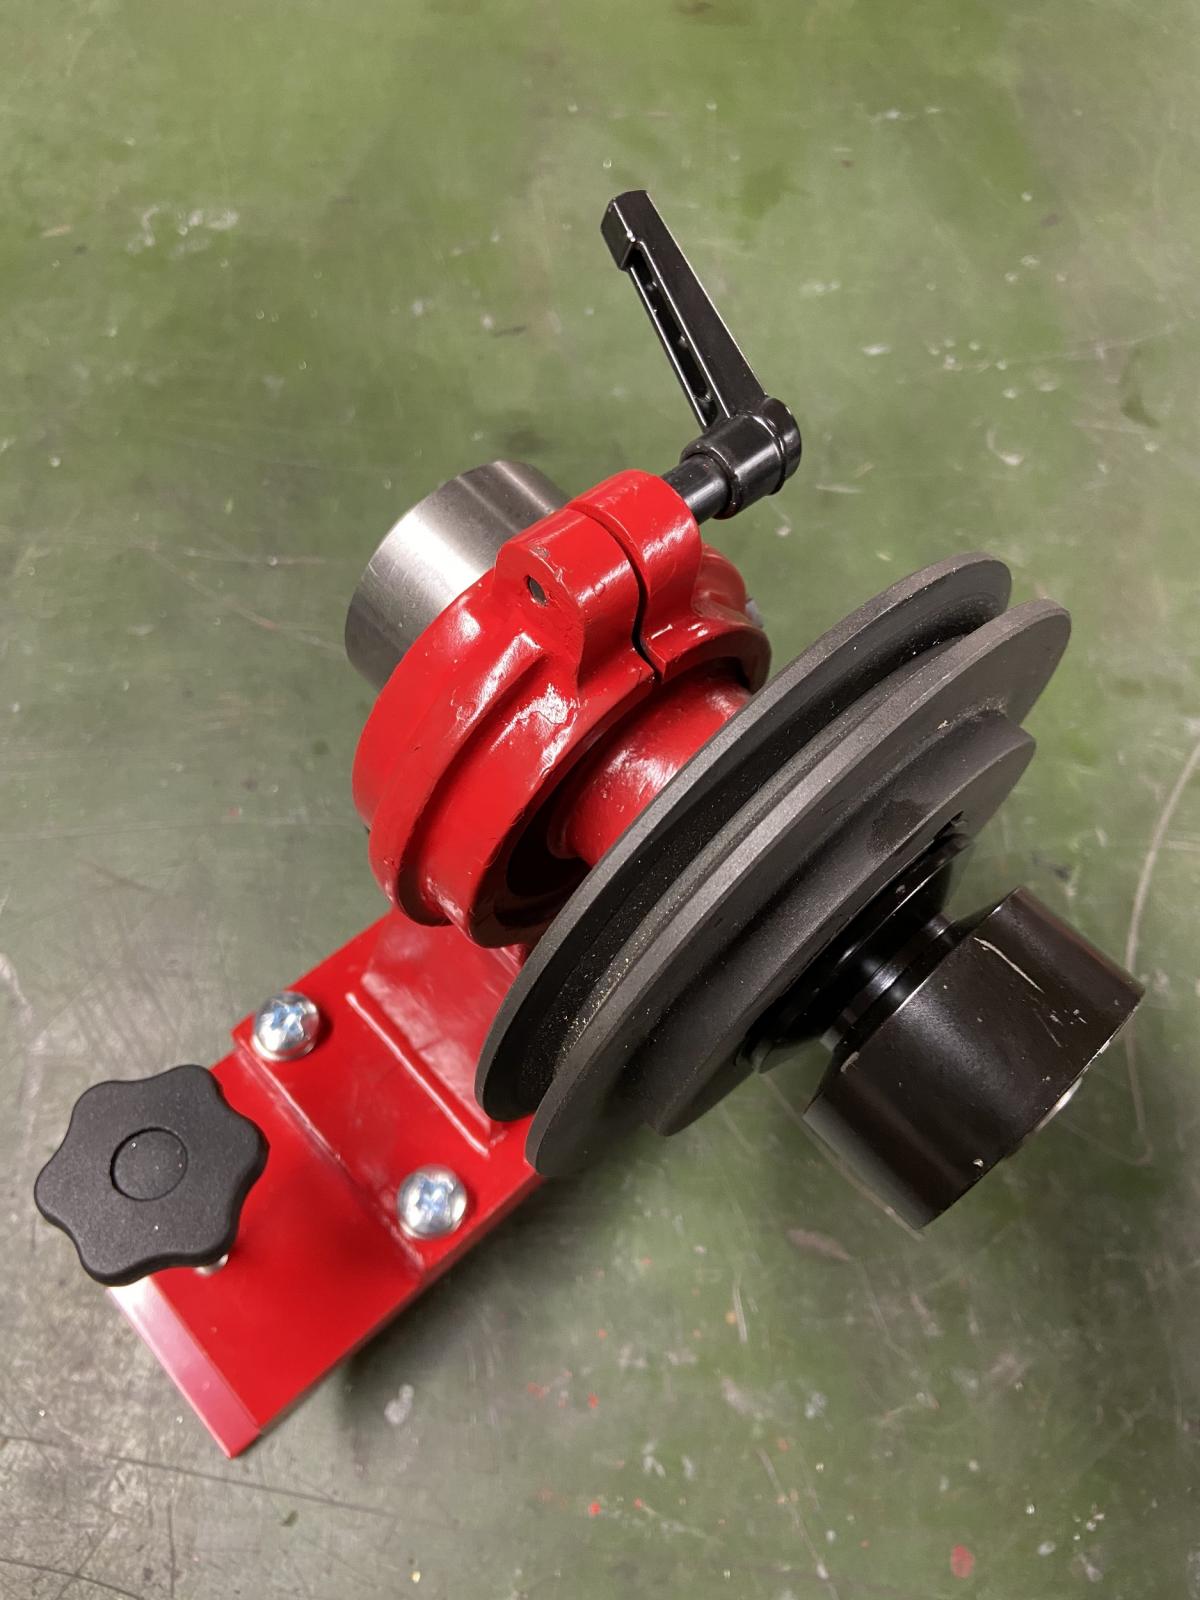
    Click image for larger version. 

Name:	IMG_4393 pulley side.jpg 
Views:	339 
Size:	441.5 KB 
ID:	33278 Click image for larger version. 

Name:	IMG_4394 eccentric lever side.jpg 
Views:	322 
Size:	418.5 KB 
ID:	33279Click image for larger version. 

Name:	IMG_4391 completed assembly.jpg 
Views:	356 
Size:	159.1 KB 
ID:	33280
    Fully assembled

    Click image for larger version. 

Name:	IMG_4396 in position.jpg 
Views:	363 
Size:	269.9 KB 
ID:	33281 Click image for larger version. 

Name:	IMG_4395 linked to motor.jpg 
Views:	425 
Size:	309.5 KB 
ID:	33282
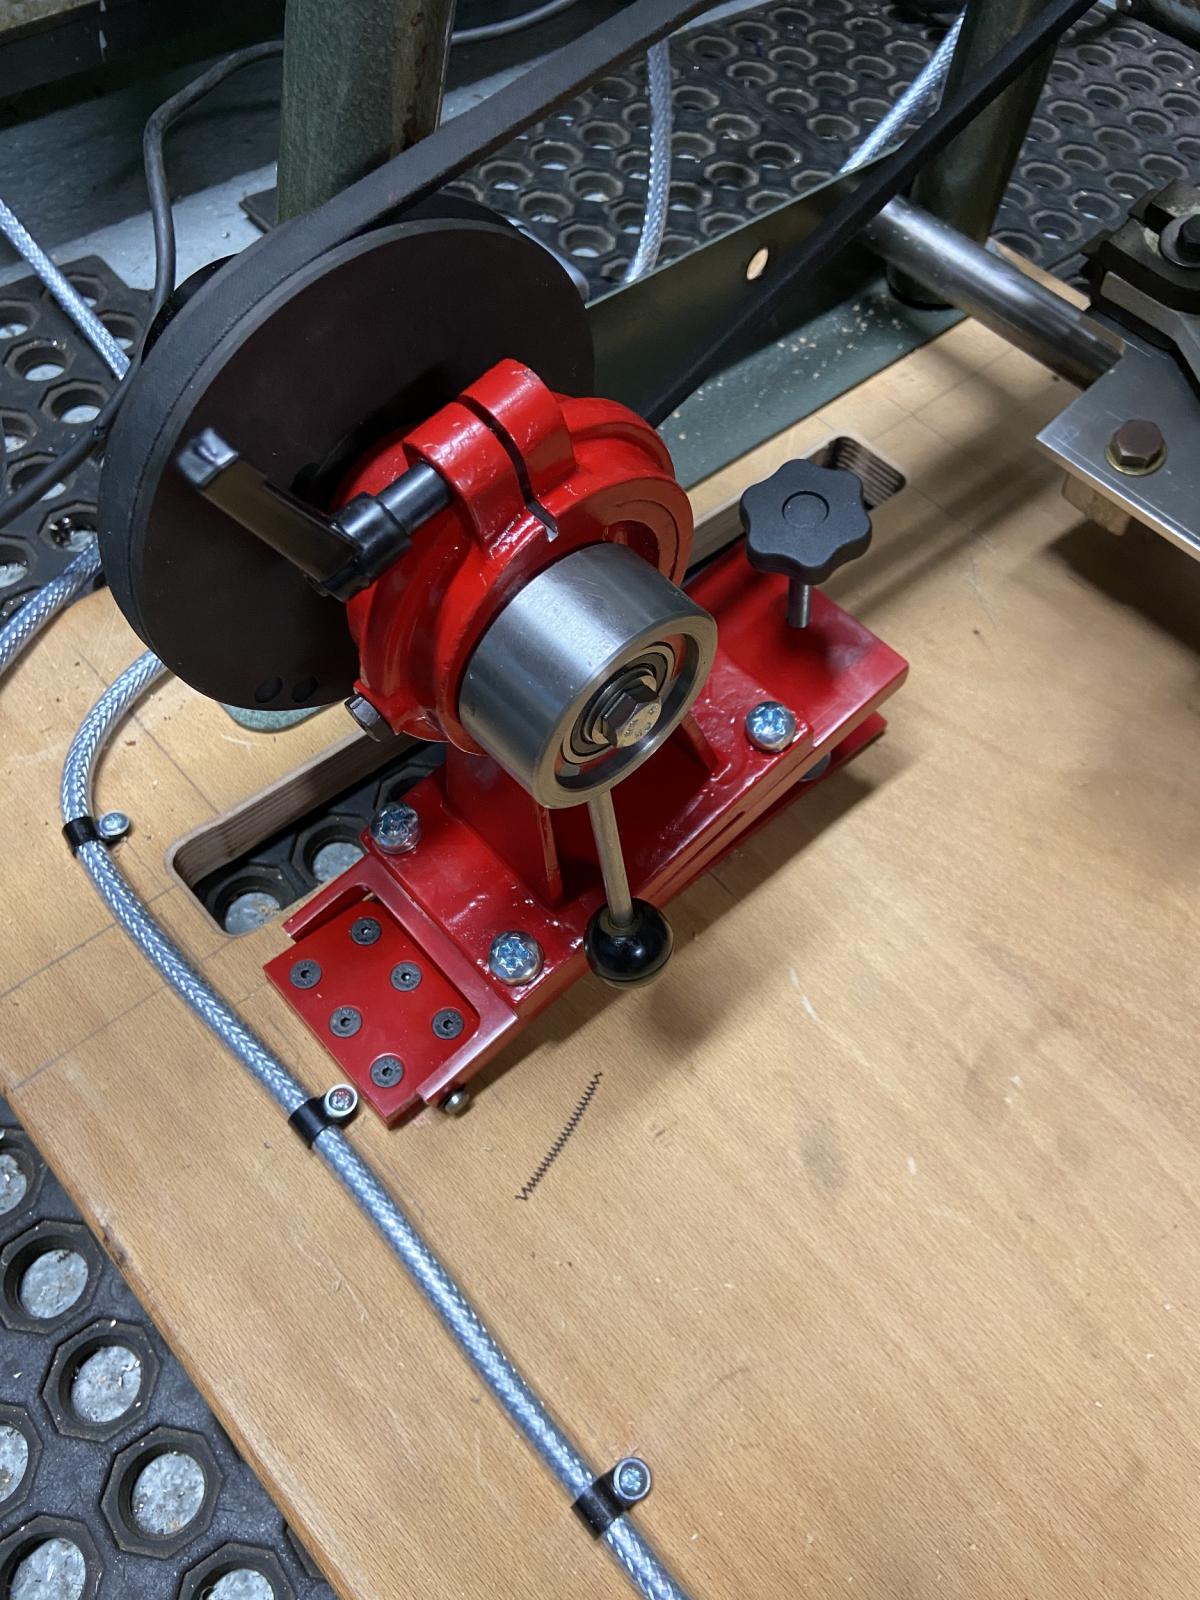
    Bolted to underside of table top

    After setting up, the belts can be tensioned relatively easy and a new length belt for the bead roller is need as the one i purchased is to short but the slip rolls worked out a treat and have had them rotating via the drive.

    New belt on order for bead roller.

    Thank you for viewing
    Thw Home Engineer

  2. The Following 8 Users Say Thank You to thehomeengineer For This Useful Post:

    baja (Jan 28, 2020), Christophe Mineau (Jan 27, 2020), emu roo (Oct 29, 2025), high-side (Jan 27, 2020), Jon (Jan 27, 2020), Philip Davies (Jan 28, 2020), Scotsman Hosie (Feb 2, 2020), threesixesinarow (Jan 27, 2020)

Thread Information

Users Browsing this Thread

There are currently 1 users browsing this thread. (0 members and 1 guests)

Bookmarks

Posting Permissions

  • You may not post new threads
  • You may not post replies
  • You may not post attachments
  • You may not edit your posts
  •