Free 186 More Best Homemade Tools eBook:  
Get 2,000+ tool plans, full site access, and more.

User Tag List

Results 1 to 8 of 8

Thread: Scroll Saw Key

  1. #1
    PJs
    PJs is offline
    Supporting Member PJs's Avatar
    Join Date
    Sep 2014
    Location
    Northern CA
    Posts
    1,841
    Thanks
    8,337
    Thanked 1,118 Times in 718 Posts

    PJs's Tools

    Scroll Saw Key

    This was a fun challenging project for my wood working Guru, friend. He had inherited a 21" Hegner Scroll saw from his Guru when he passed but the key for it was MIA. I just got a little Craftsman 16" scroll saw for my BD and he was all excited for me and gave me a lifetime supply of thin stuff he put together for me...beautiful stuff, Mahogany, Redwood, beautiful grained poplar, red/white Oak, Birch, etc...Oh My! On top of that 2 boxes the Grand Master had started with double inlay dove tails.

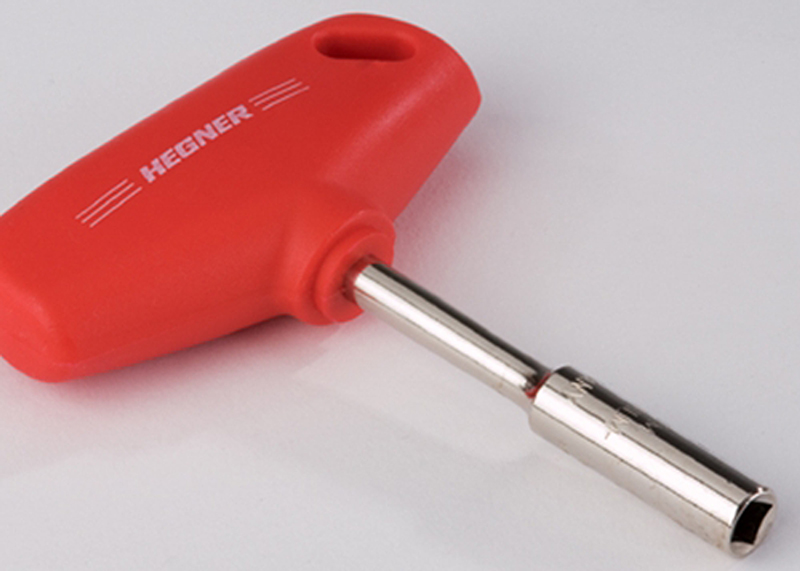
    His Hegner is a piece of artwork in machine tools, IMHO and he wanted an old style "Skate Key" for it. You can get a new fangled key for <$20 but has a plastic handle and it just doesn't cut it with a $2k saw, IMHO.

    Here is what the new fangled keys look like.

    Scroll Saw Key-hegner_new_style_key_web.jpg

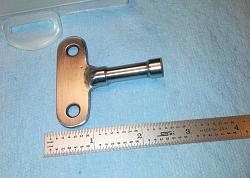
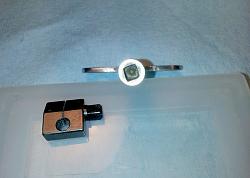
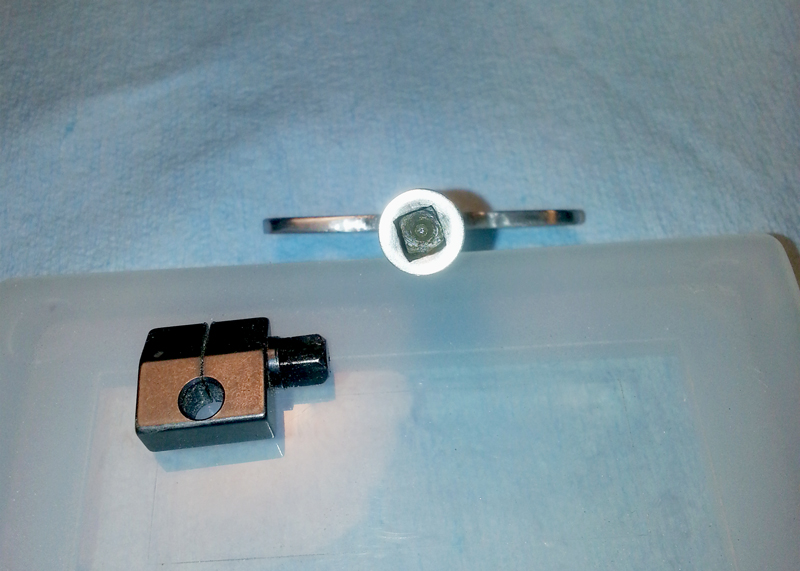
    I did some research and found some pictures of the old style and he gave me the head that it fits to match the square drive and Off I went.

    The shank is made from 1/2" W1 steel and turned the head down to about 7/16" (.44) then turned the center down to about 3/8". I mounted the 3/8 section in a tool holder on the lathe and used my cutoff arbor and a 3"x 3/64 cuttoff wheel to cut the notch for the key wings.

    Doing the broach was a bit more tedious! The square was odd size (.105 AF) which equates to .1485 across corners, so I used a number 38 drill (.1015) knowing I'd need to open it a skosh. I then tried to make a broaching tool form a piece of tool stock but the Peanut (Mini Lathe) just didn't have the spizeringtom to get it done from the tale stock or the cross slide/compound. So I punted and used the Dremel and some tiny engraving bits to whittle it out to size. It was a Real Nice fit when I got it done despite the slight vortex affect you see in the pics. I chucked it back up in the lathe and put a shallow crown to it so it would slip in nice without looking or fiddling.

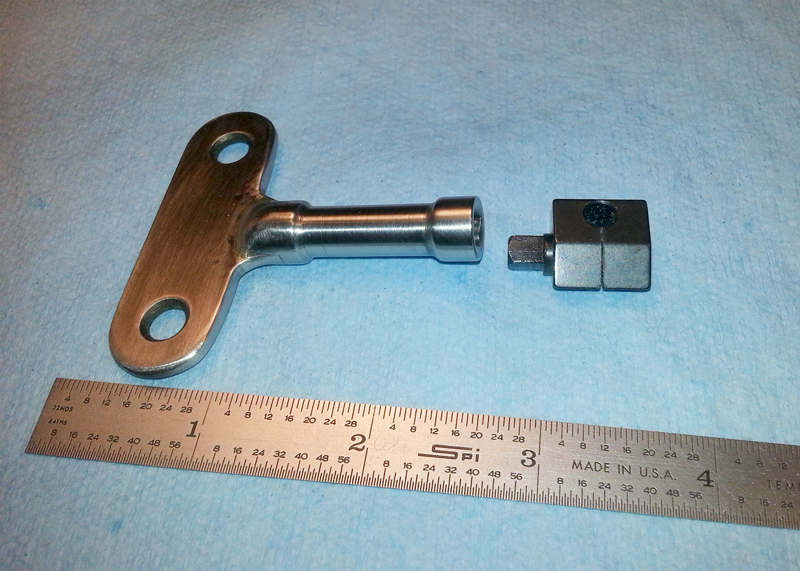
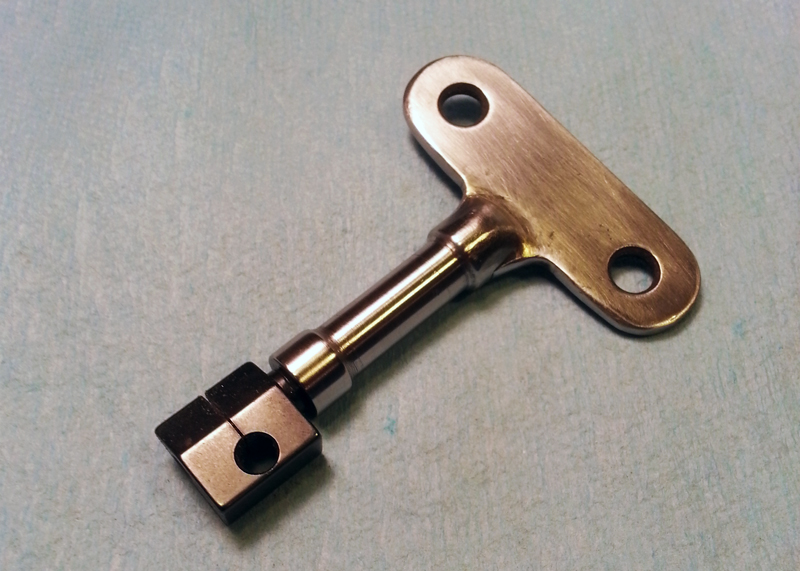
    Next I had a piece of 1" x 1/16" CRS and cut the rough length and shaped it mostly on the belt sander. Center punched the 2 holes an drilled them. Mostly a lot of hand work to get the shape and fit into the shaft slot right. Then just silver brazed them together....then a lot more hand work to get it looking right.

    The last thing I did was to heat treat the broached end to hold up to the hardened square head. Just heated it dark cherry with a Mapp torch and soaked it for a minute or two, then quenched in room temp water. A test with a file (All good) and little clean up and Whalah an old school Skate key for a Nice Scroll Saw and good friend!

    Scroll Saw Key-scrollsaw_key1_web.jpg Scroll Saw Key-scrollsaw_key2_web.jpg
    Scroll Saw Key-scrollsaw_key3_web.jpg Scroll Saw Key-scrollsaw_key4_web.jpg

    One minor issue occurred when I heat treated it that I didn't think of. That was that the broach opened up maybe a thou or two, so it was a little looser than I originally had it. Basically because all the ducks lined up (grains tightened) in the structure it shrank the material, thereby opening the hole a tad. It works fine and he loves it but I will remember that next time I heat treat W1 for a fit like this.

    Really enjoyed doing this project for a friend and hope others benefit from it here.

    ~PJ

    186 More Best Homemade Tools eBook
    Last edited by PJs; Oct 15, 2016 at 10:52 PM. Reason: My bad on the drill size...been a couple of weeks since I did it.
    ‘‘Always do right. This will gratify some people and astonish the rest.’’
    Mark Twain

  2. The Following 3 Users Say Thank You to PJs For This Useful Post:

    C-Bag (Oct 15, 2016), Jon (Oct 20, 2016), Paul Jones (Oct 15, 2016)

  3. #2
    Supporting Member Paul Jones's Avatar
    Join Date
    May 2014
    Location
    Del Mar, California
    Posts
    1,231
    Thanks
    5,810
    Thanked 1,441 Times in 655 Posts

    Paul Jones's Tools
    PJs,
    Nice finishing work. Did you use some sort of heat sink at the silver soldered end while heating the broached end to cherry red? The key looks like it has a great smooth feel with some heft when held in the hand.
    Thanks for the posting, Paul

    2000 Tool Plans

  4. The Following User Says Thank You to Paul Jones For This Useful Post:

    PJs (Oct 15, 2016)

  5. #3
    Supporting Member C-Bag's Avatar
    Join Date
    Aug 2015
    Location
    California, central coast
    Posts
    720
    Thanks
    689
    Thanked 876 Times in 471 Posts

    C-Bag's Tools
    Great work Wiz.

    It's telling you don't see things like this anymore. It costs too much. I dare say it looks like it came with the Hegner.

  6. The Following 2 Users Say Thank You to C-Bag For This Useful Post:

    Paul Jones (Oct 16, 2016), PJs (Oct 15, 2016)

  7. #4
    PJs
    PJs is offline
    Supporting Member PJs's Avatar
    Join Date
    Sep 2014
    Location
    Northern CA
    Posts
    1,841
    Thanks
    8,337
    Thanked 1,118 Times in 718 Posts

    PJs's Tools
    Quote Originally Posted by Paul Jones View Post
    PJs,
    Nice finishing work. Did you use some sort of heat sink at the silver soldered end while heating the broached end to cherry red? The key looks like it has a great smooth feel with some heft when held in the hand.
    Thanks for the posting, Paul
    Thank you Paul! Honestly I thought I could have done better with the finish work but that CRS is tough to get a nice finish on but it does have a nice feel and weight. I probably should have Silver soldered after treating but worried I might take it back because the mass of the other end. No actually I didn't heat sink it but 2 things helped I think. First I held the butterfly end with some flat vice grips and second I didn't actually heat it to bright cherry...more of a darker cherry red and held it so the flame was pointing toward the broached end away from even the main smaller diameter shank. Plus the Mapp heats it up pretty quick. I did have concerns about loosening the silver solder but this silver solder starts to go liquid at 1150 and bright cherry for W1 is around 1550. With a darker cherry I figure about 1480-1500 and the flame pointing away would help and the short soak too. Whatever happened the butterfly end never loosened up and I wasn't concerned with getting maximum HRC out of it just enough to handle the wear over a lot of years, hopefully.

    One old school trick is to use a magnet on it as it gets close to proper temp (Austenite) the magnet won't stick as well because it becomes allotropic iron/steel. At temp it won't stick.

    Bottom line a lot of earballing it. One of these days I'd love to find an oven or build one.

    Thanks for a great question! ~PJ
    Last edited by PJs; Oct 15, 2016 at 11:05 PM.
    ‘‘Always do right. This will gratify some people and astonish the rest.’’
    Mark Twain

  8. The Following User Says Thank You to PJs For This Useful Post:

    Paul Jones (Oct 16, 2016)

  9. #5
    PJs
    PJs is offline
    Supporting Member PJs's Avatar
    Join Date
    Sep 2014
    Location
    Northern CA
    Posts
    1,841
    Thanks
    8,337
    Thanked 1,118 Times in 718 Posts

    PJs's Tools
    Quote Originally Posted by C-Bag View Post
    Great work Wiz.

    It's telling you don't see things like this anymore. It costs too much. I dare say it looks like it came with the Hegner.
    Thanks C-Bag, That's exactly what I was shooting for. Appreciate you noticing!
    ‘‘Always do right. This will gratify some people and astonish the rest.’’
    Mark Twain

  10. #6
    Content Editor
    Supporting Member
    DIYer's Avatar
    Join Date
    Aug 2013
    Posts
    3,056
    Thanks
    772
    Thanked 1,852 Times in 1,653 Posts


    Thanks PJs! We've added your Scroll Saw Key to our Metalworking category,
    as well as to your builder page: PJs's Homemade Tools. Your receipt:


  11. The Following User Says Thank You to DIYer For This Useful Post:

    PJs (Oct 20, 2016)

  12. #7

    Join Date
    Jun 2016
    Posts
    4
    Thanks
    0
    Thanked 2 Times in 1 Post
    Looks good. I’ve used a Hegner. It’s price suggests it is top-notch and well made, but I thought it was short on features. I concluded it was appropriate for intarsia but not for fretwork...and I don’t do intarsia.
    Two differences between your skate key and the Hegner key in the pic: length and heft of the grip. Yours is a thumbscrew and some people get sore thumbs using them. The large plastic grip on Hegner’s fits in the palm and enables hand turning, with the longer shaft giving room for the fingers. It’s been years since I used the Hegner and I don’t recall the details, but something tells me they had the thumbscrew like yours back then, and their newer design might have been in response to users requests because of sore thumbs. (Or, in response to old folks with arthritic thumbs. )
    PS If you intend to do any fretwork on your Craftsman scroll saw, I hope it is one that allows you to use plain end blades. Those limited to pin-end blades just aren’t very useful for most of the great Scroll Saw projects out there. They aren’t useless, but fitting the pin through a hole requires drilling a fairly large hole even though the blades are capable of cutting fine lines. Scroll saws for only pin-end blades have limits to the patterns they can cut, while those that can use plain end blades are not limited.

    Spence
    Last edited by Bloom-Chicago; Dec 30, 2017 at 09:39 AM.

  13. The Following 2 Users Say Thank You to Bloom-Chicago For This Useful Post:

    Jon (Dec 30, 2017), PJs (Jan 1, 2018)

  14. #8
    PJs
    PJs is offline
    Supporting Member PJs's Avatar
    Join Date
    Sep 2014
    Location
    Northern CA
    Posts
    1,841
    Thanks
    8,337
    Thanked 1,118 Times in 718 Posts

    PJs's Tools
    Thanks Spence. I never got to use his Hegner and as a novice have never tried intarsia yet but will at some point. His machine is probably about 15 years old and pretty sure it came with the skate key originally...which is what he wanted. All I had to work from was an old picture I found of the original so the dimensions are likely off. The thing that I noticed is how little torque was required to hold the blade securely. I think the combination of the weight of mine and the design of the clamp helped with that and would not cause sore thumbs imho. T/palm-type handles are nice but think they would be harder to align without looking every time and on complex multi-hole projects would drive me crazier.

    I do prefer the plain end blades but on thick cuts or metal the pin type flex less I feel. However the plain end blades are much harder to remove and secure on my inexpensive machine because of the design and access to the holders. I've modified my holders with some TLC and new swivel pins to reduce the slop which helps but it's definitely Not a Hegner Quality of machine for 1/10 the price. I can live with that for what I do. Here is one of my early pieces I made for my Mrs.

    Scroll Saw Key-1474334723600.jpg

    Till Then, ~PJ


    186 More Best Homemade Tools eBook

Thread Information

Users Browsing this Thread

There are currently 1 users browsing this thread. (0 members and 1 guests)

Bookmarks

Posting Permissions

  • You may not post new threads
  • You may not post replies
  • You may not post attachments
  • You may not edit your posts
  •