Free 186 More Best Homemade Tools eBook:  
New: 300+ fresh build posts/day from 275 forums → BuildThreads.com

User Tag List

Results 1 to 1 of 1

Thread: Silver soldered rings

Threaded View

  1. #1
    Supporting Member thehomeengineer's Avatar
    Join Date
    Nov 2017
    Location
    Berkshire UK
    Posts
    763
    Thanks
    764
    Thanked 2,390 Times in 484 Posts

    thehomeengineer's Tools

    Silver soldered rings

    Hi All

    Not sure if this is posted in the correct category.

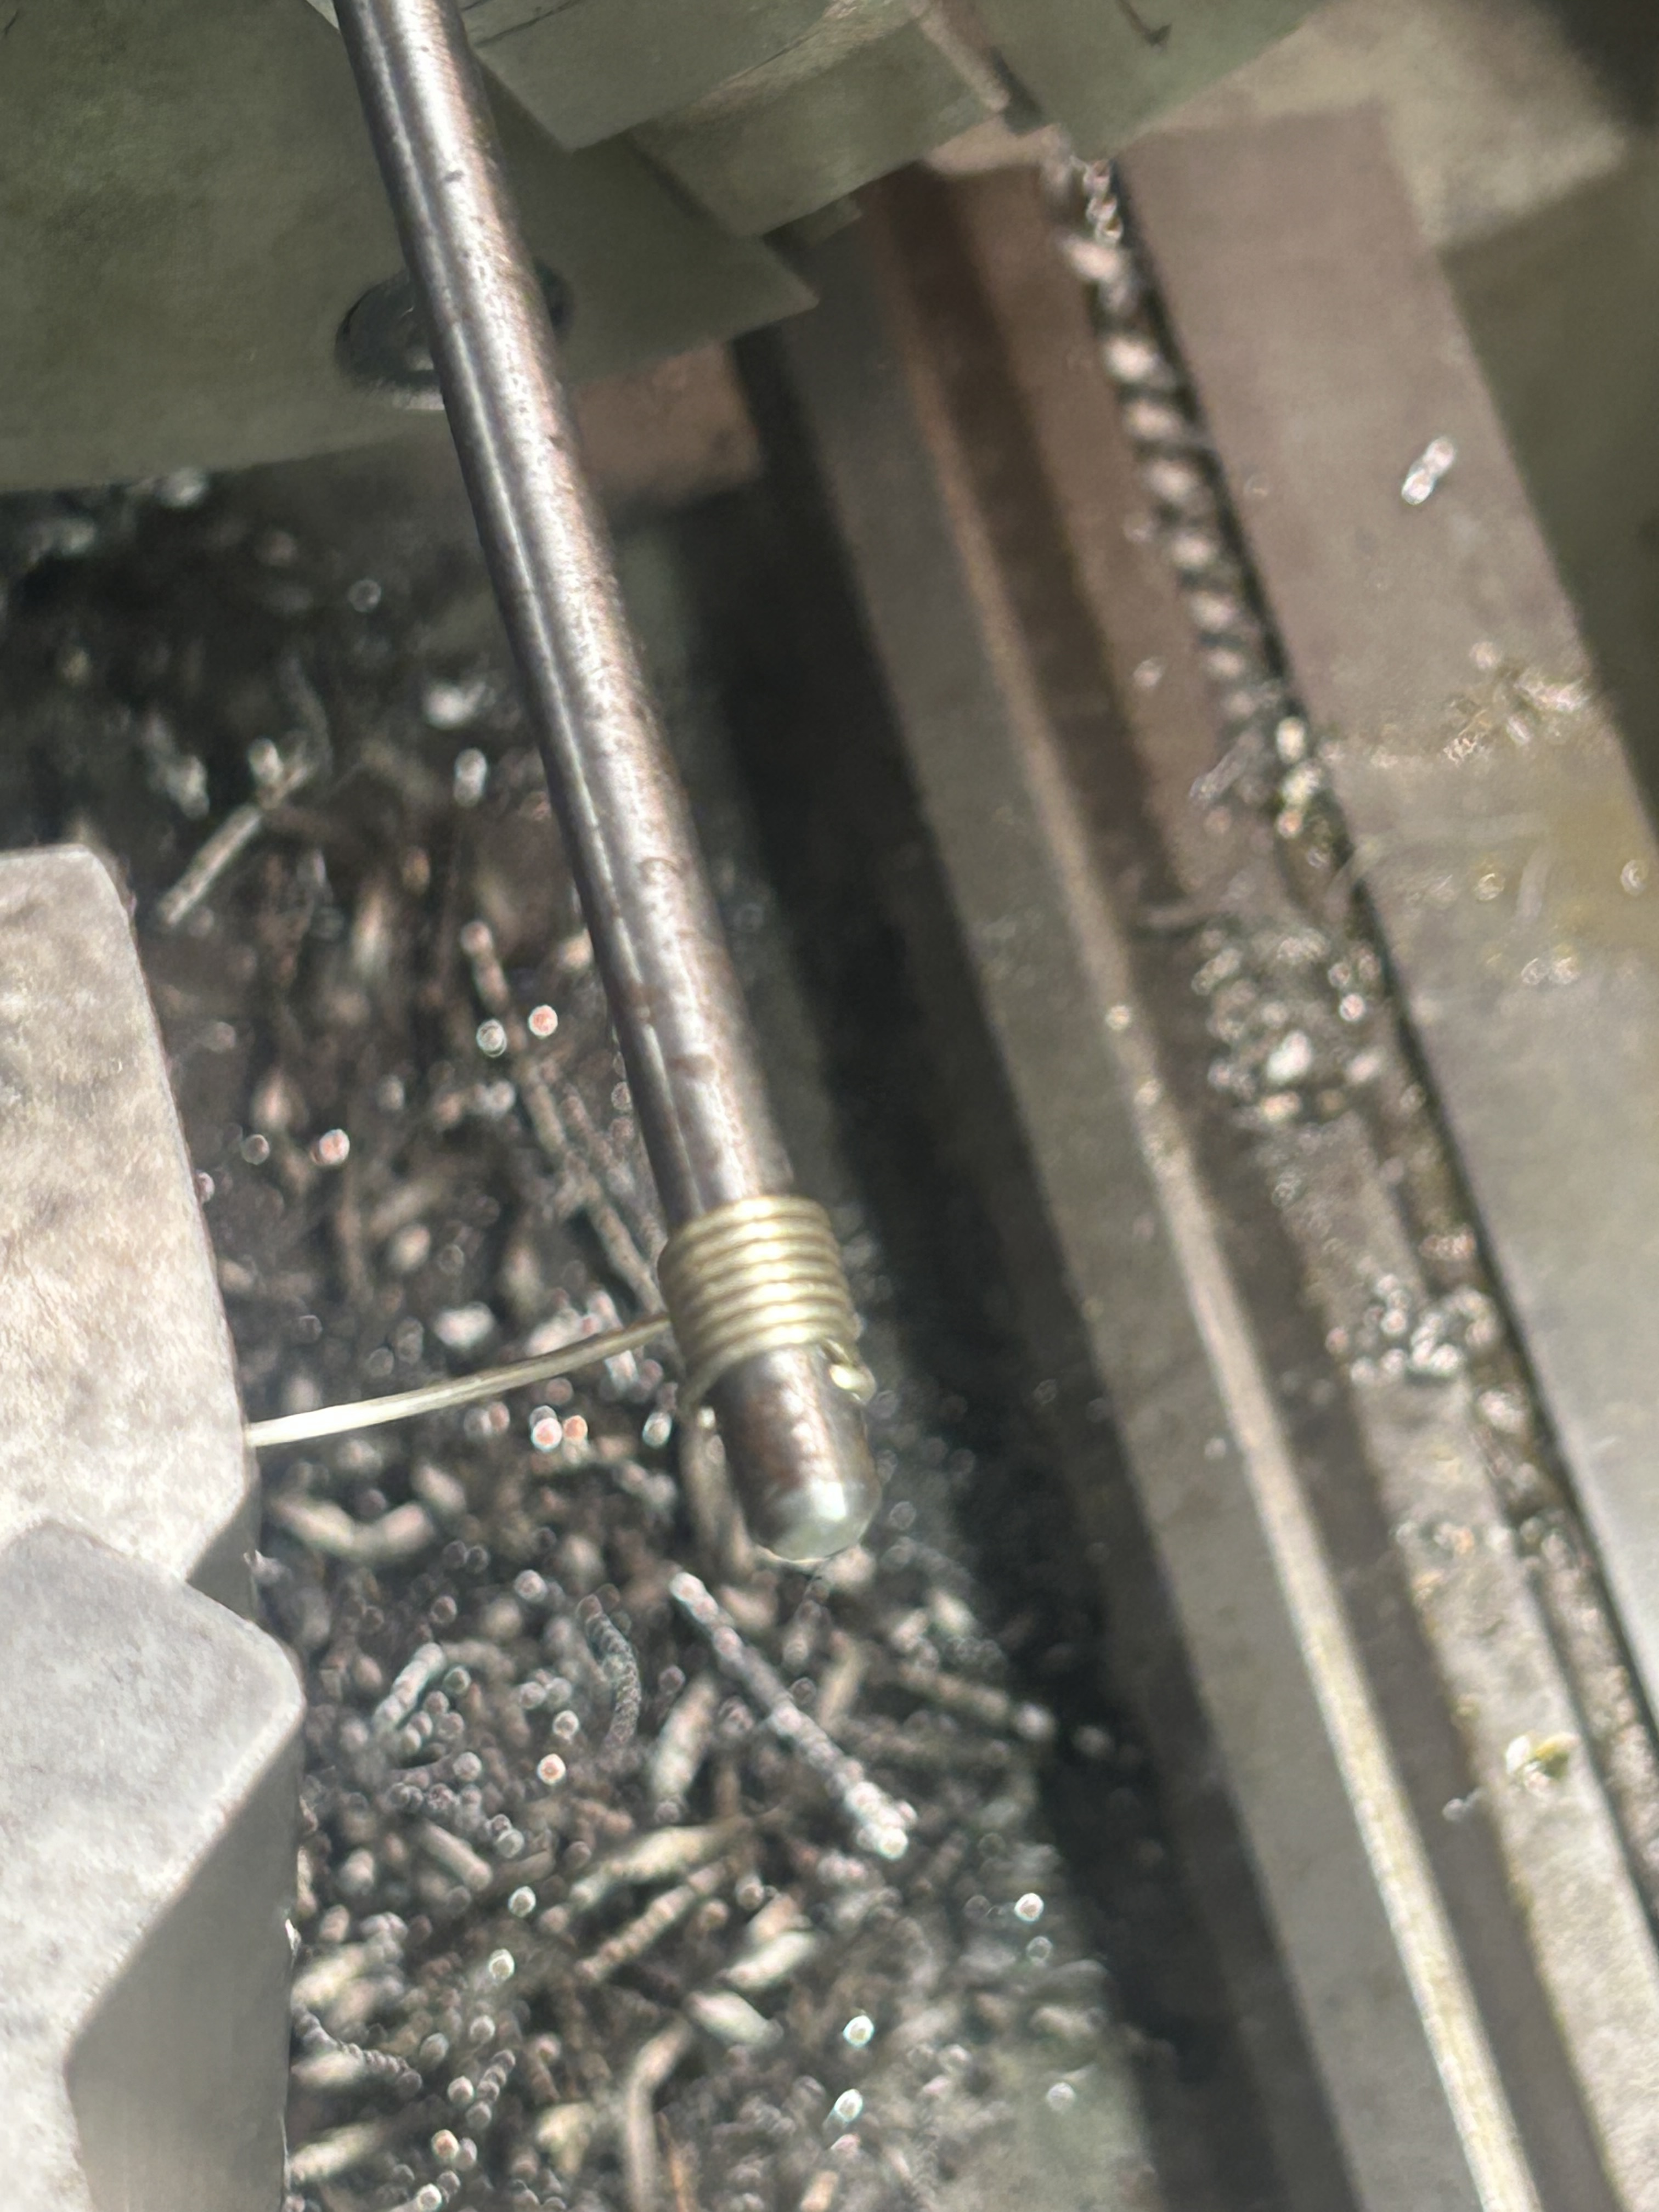
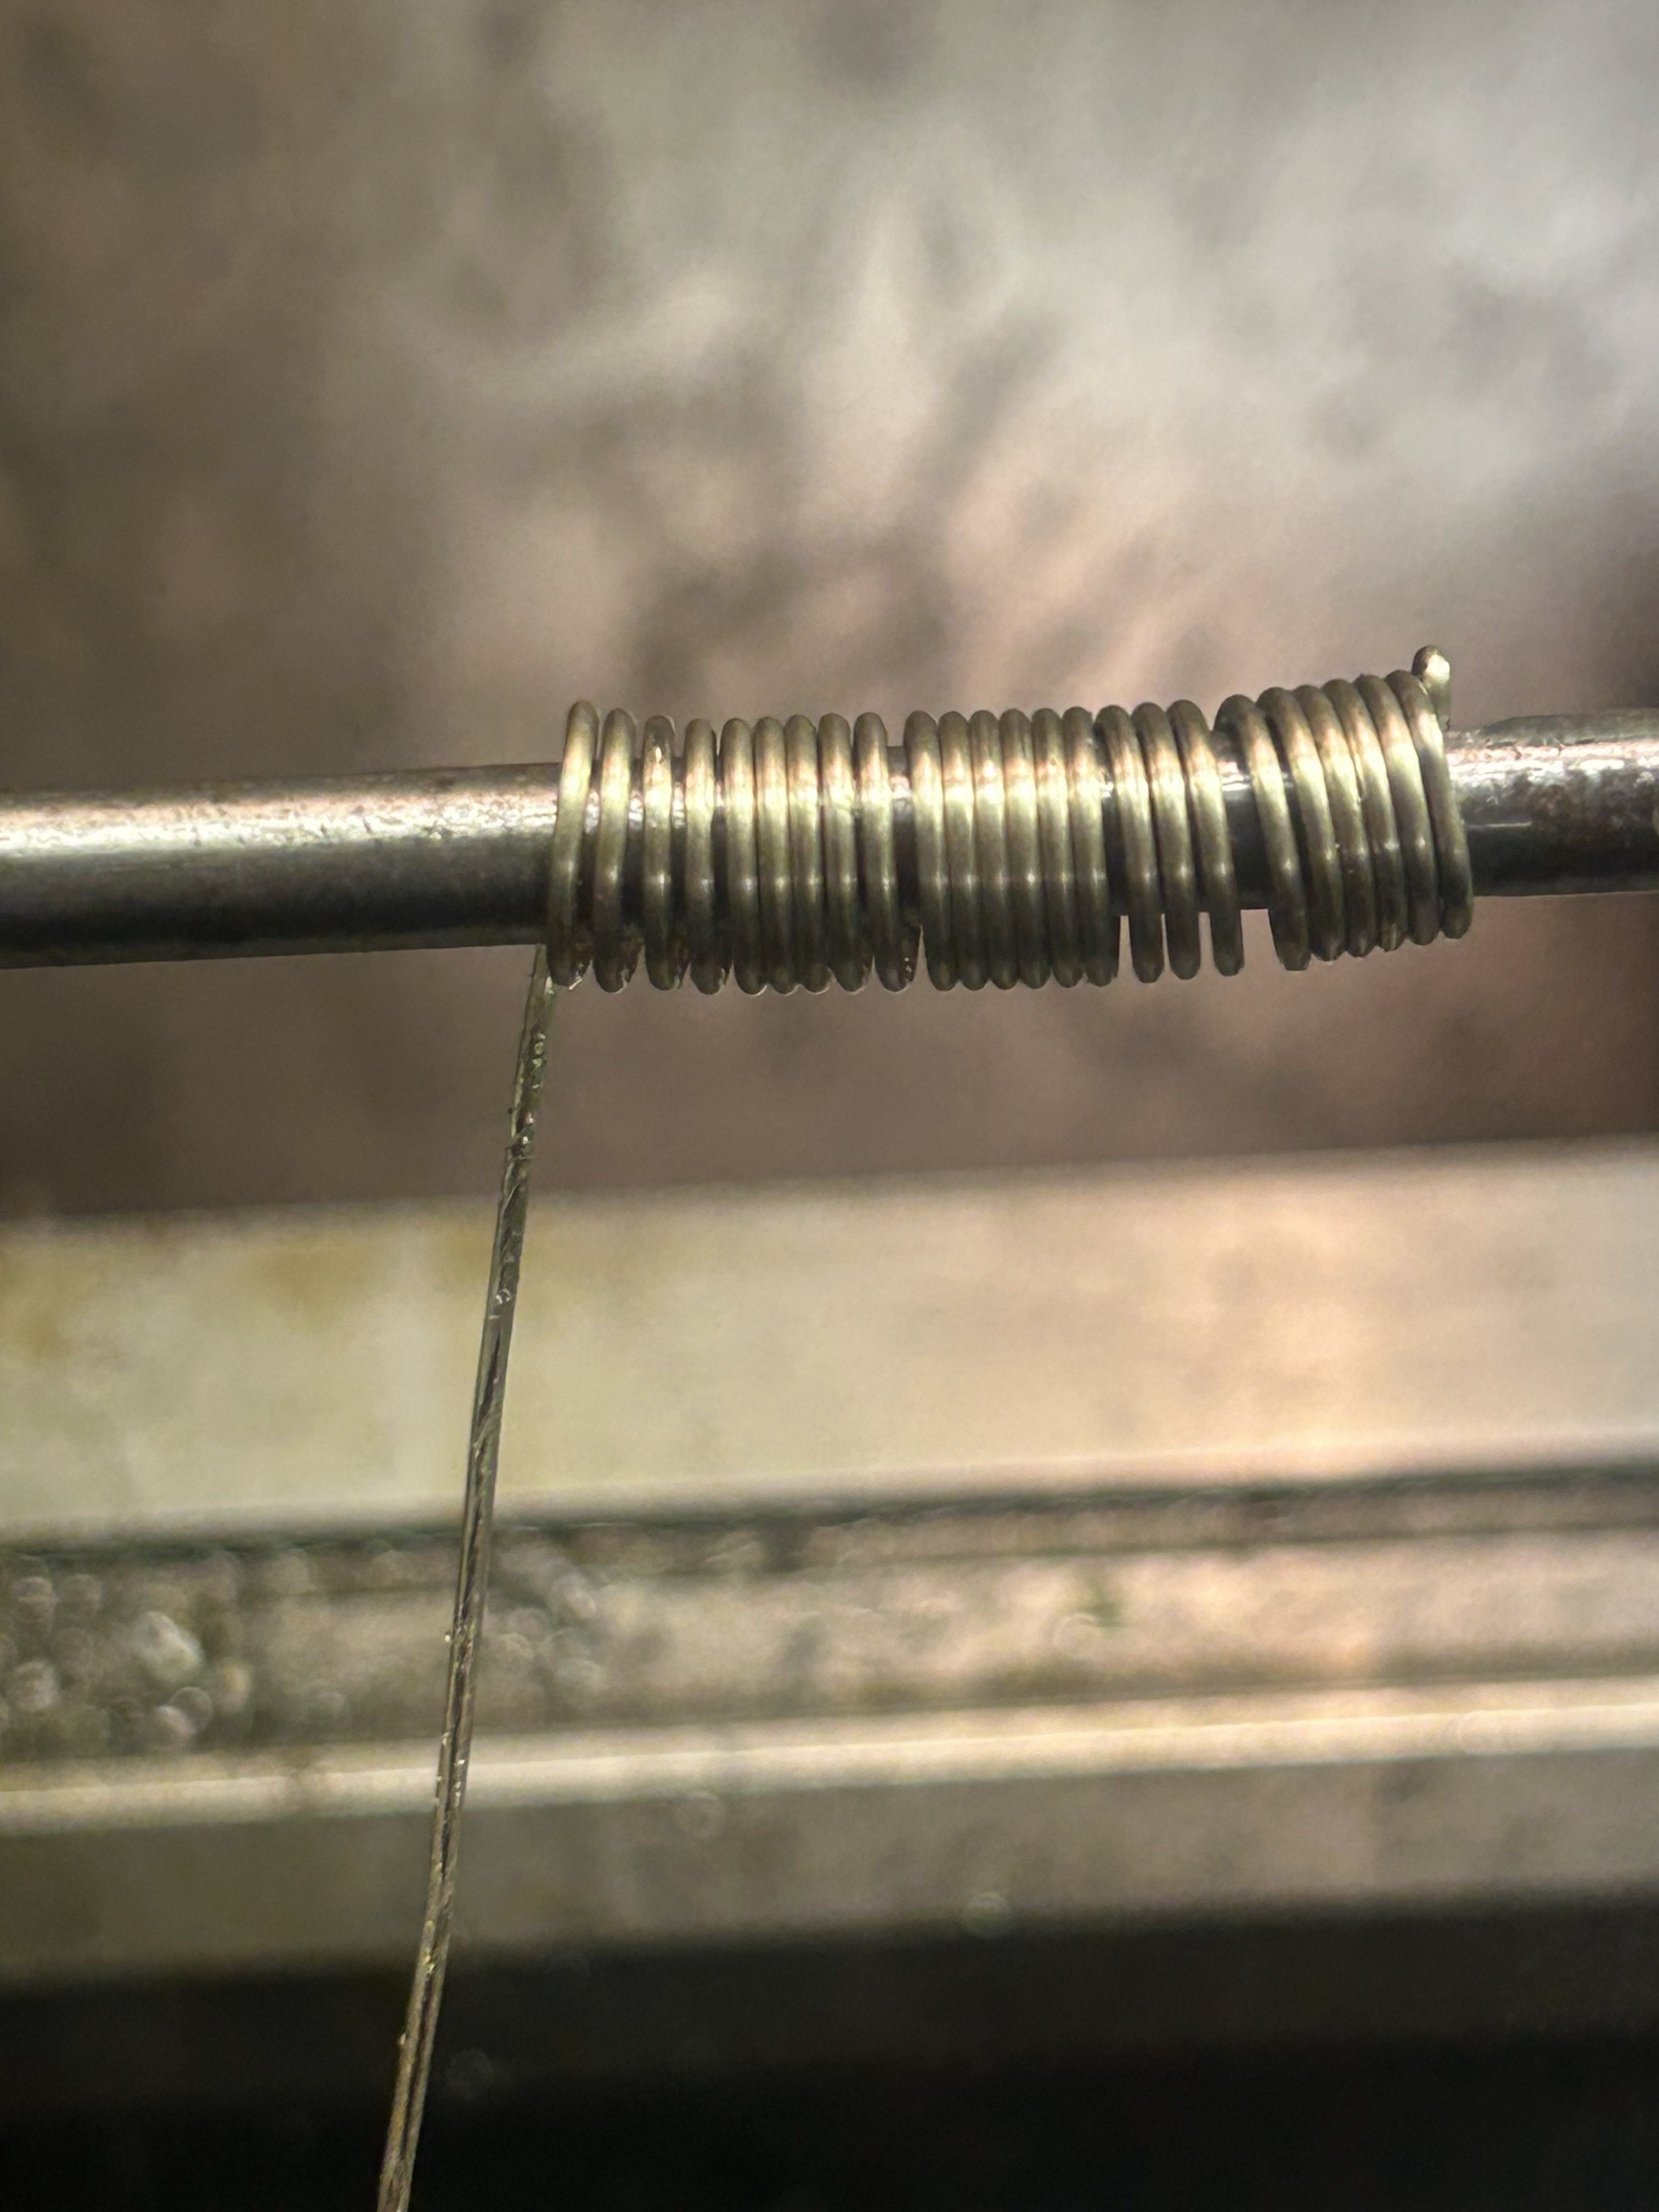
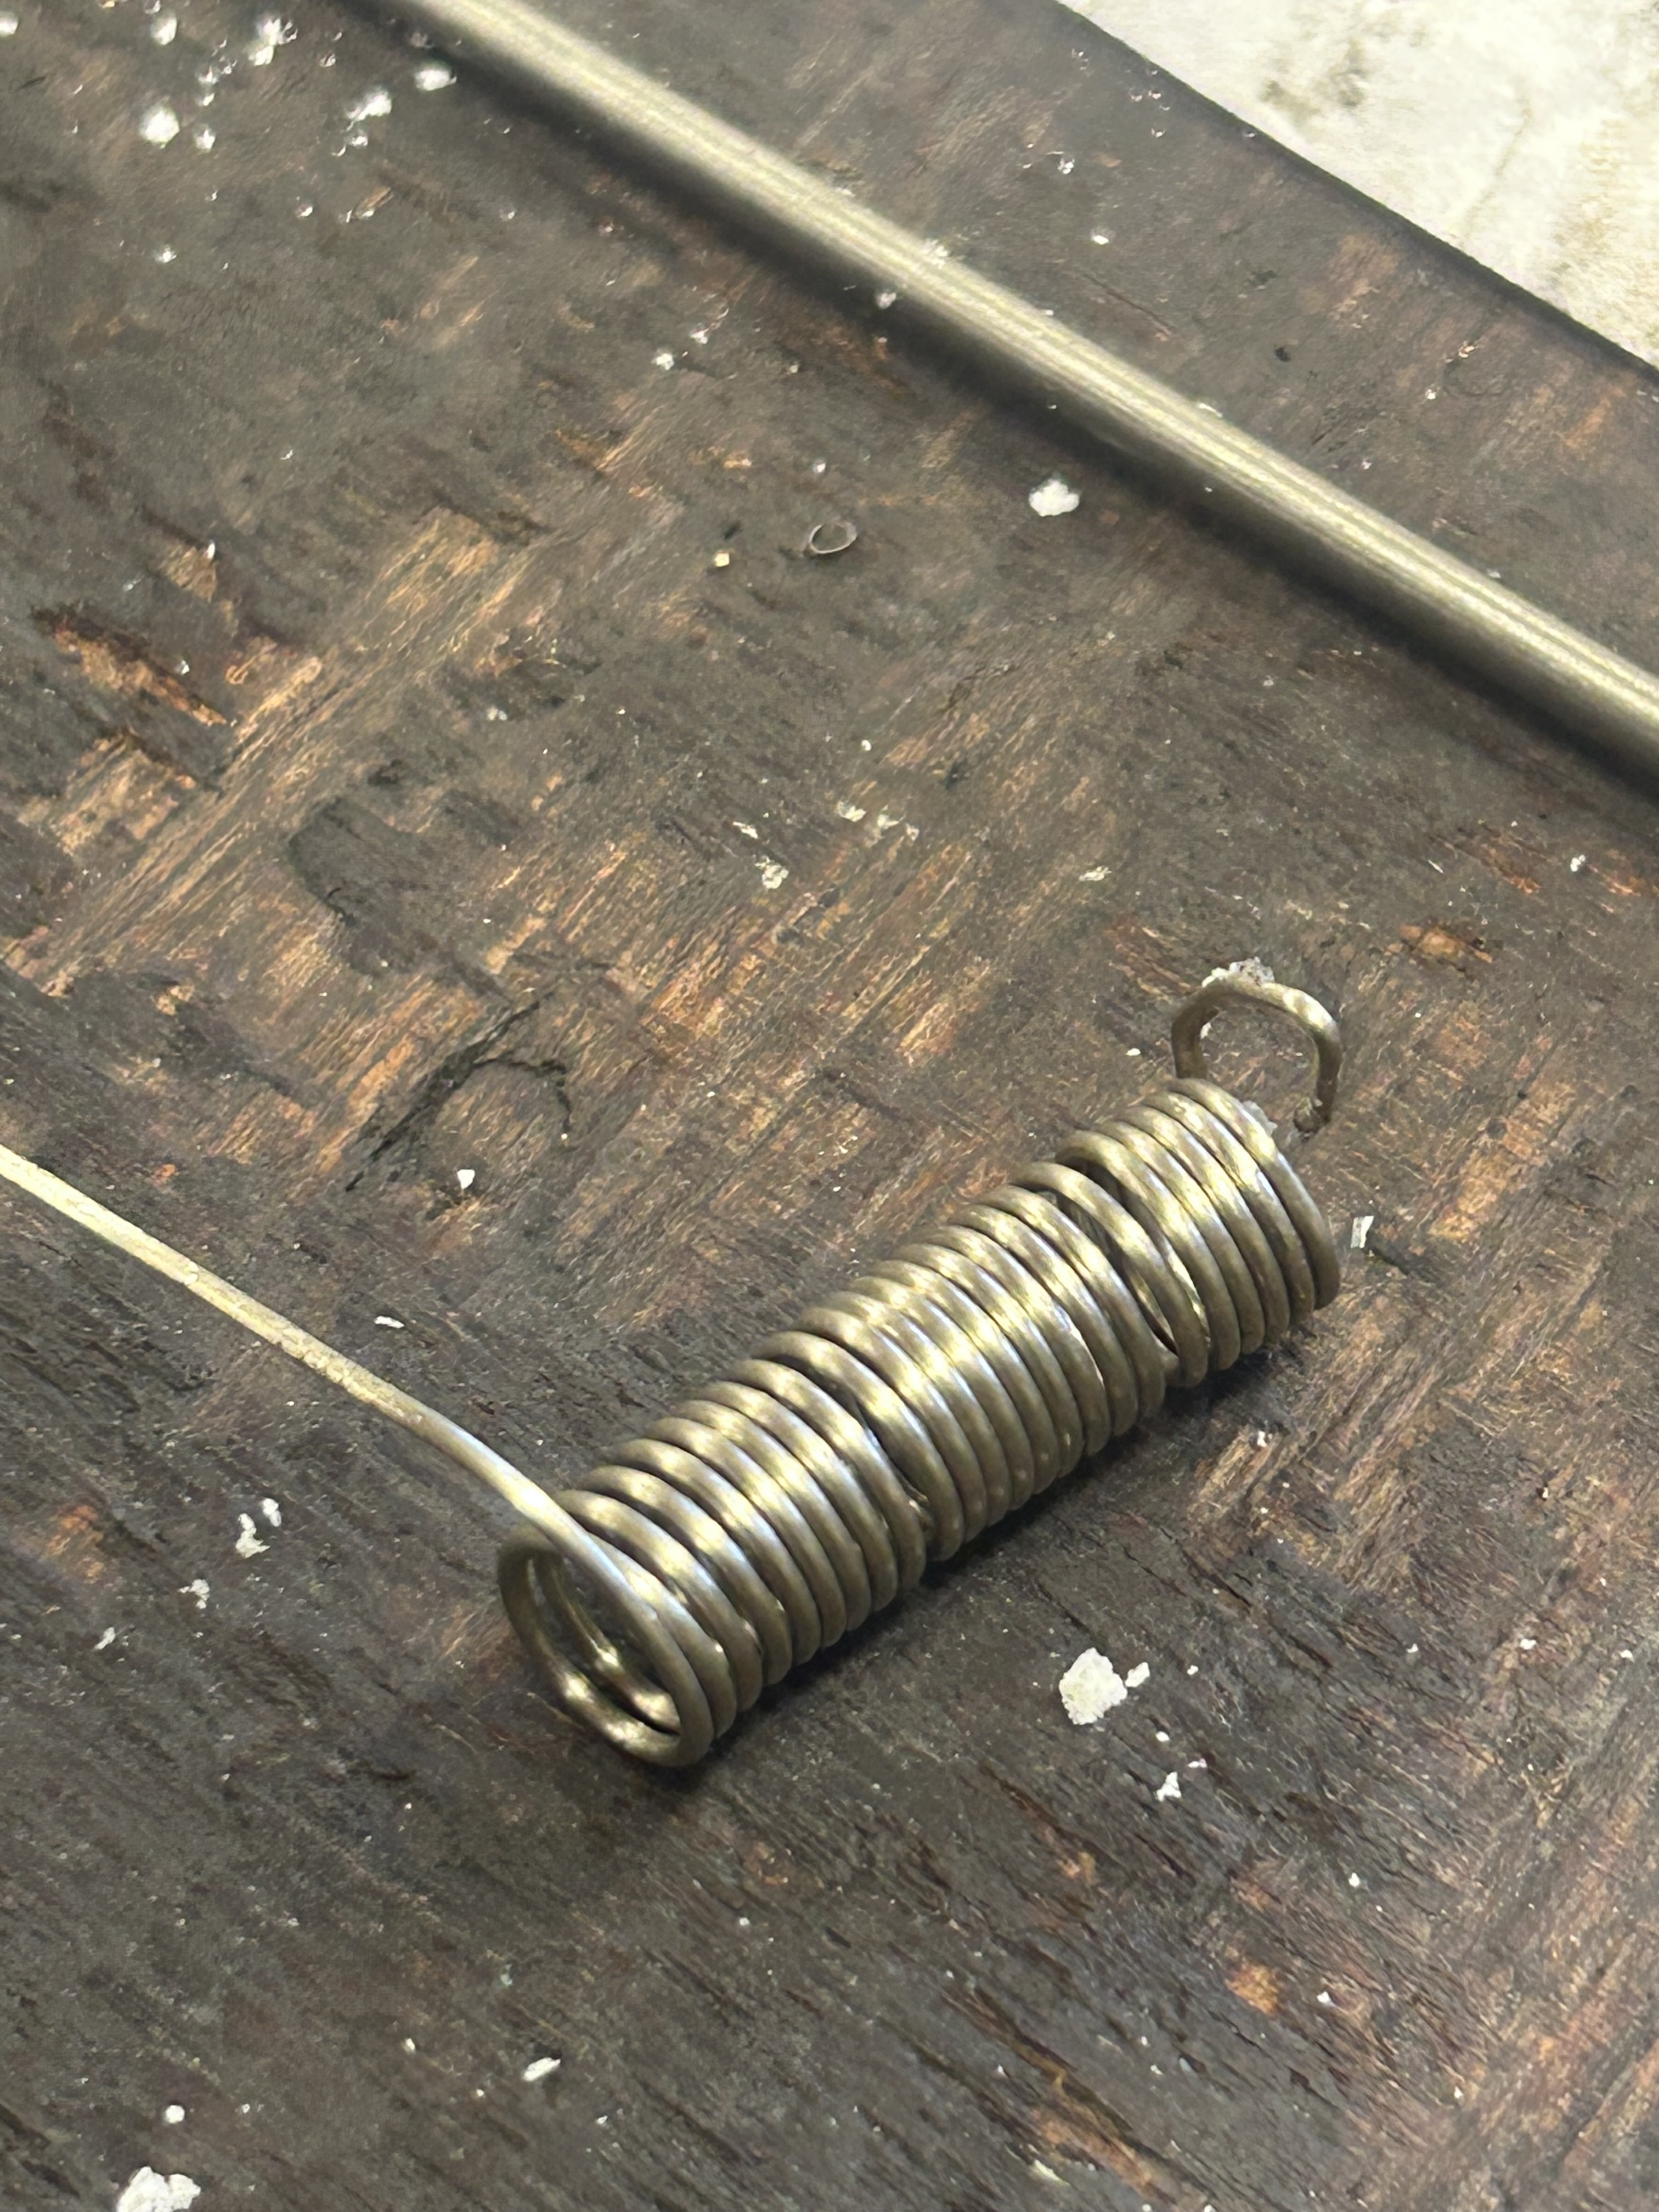
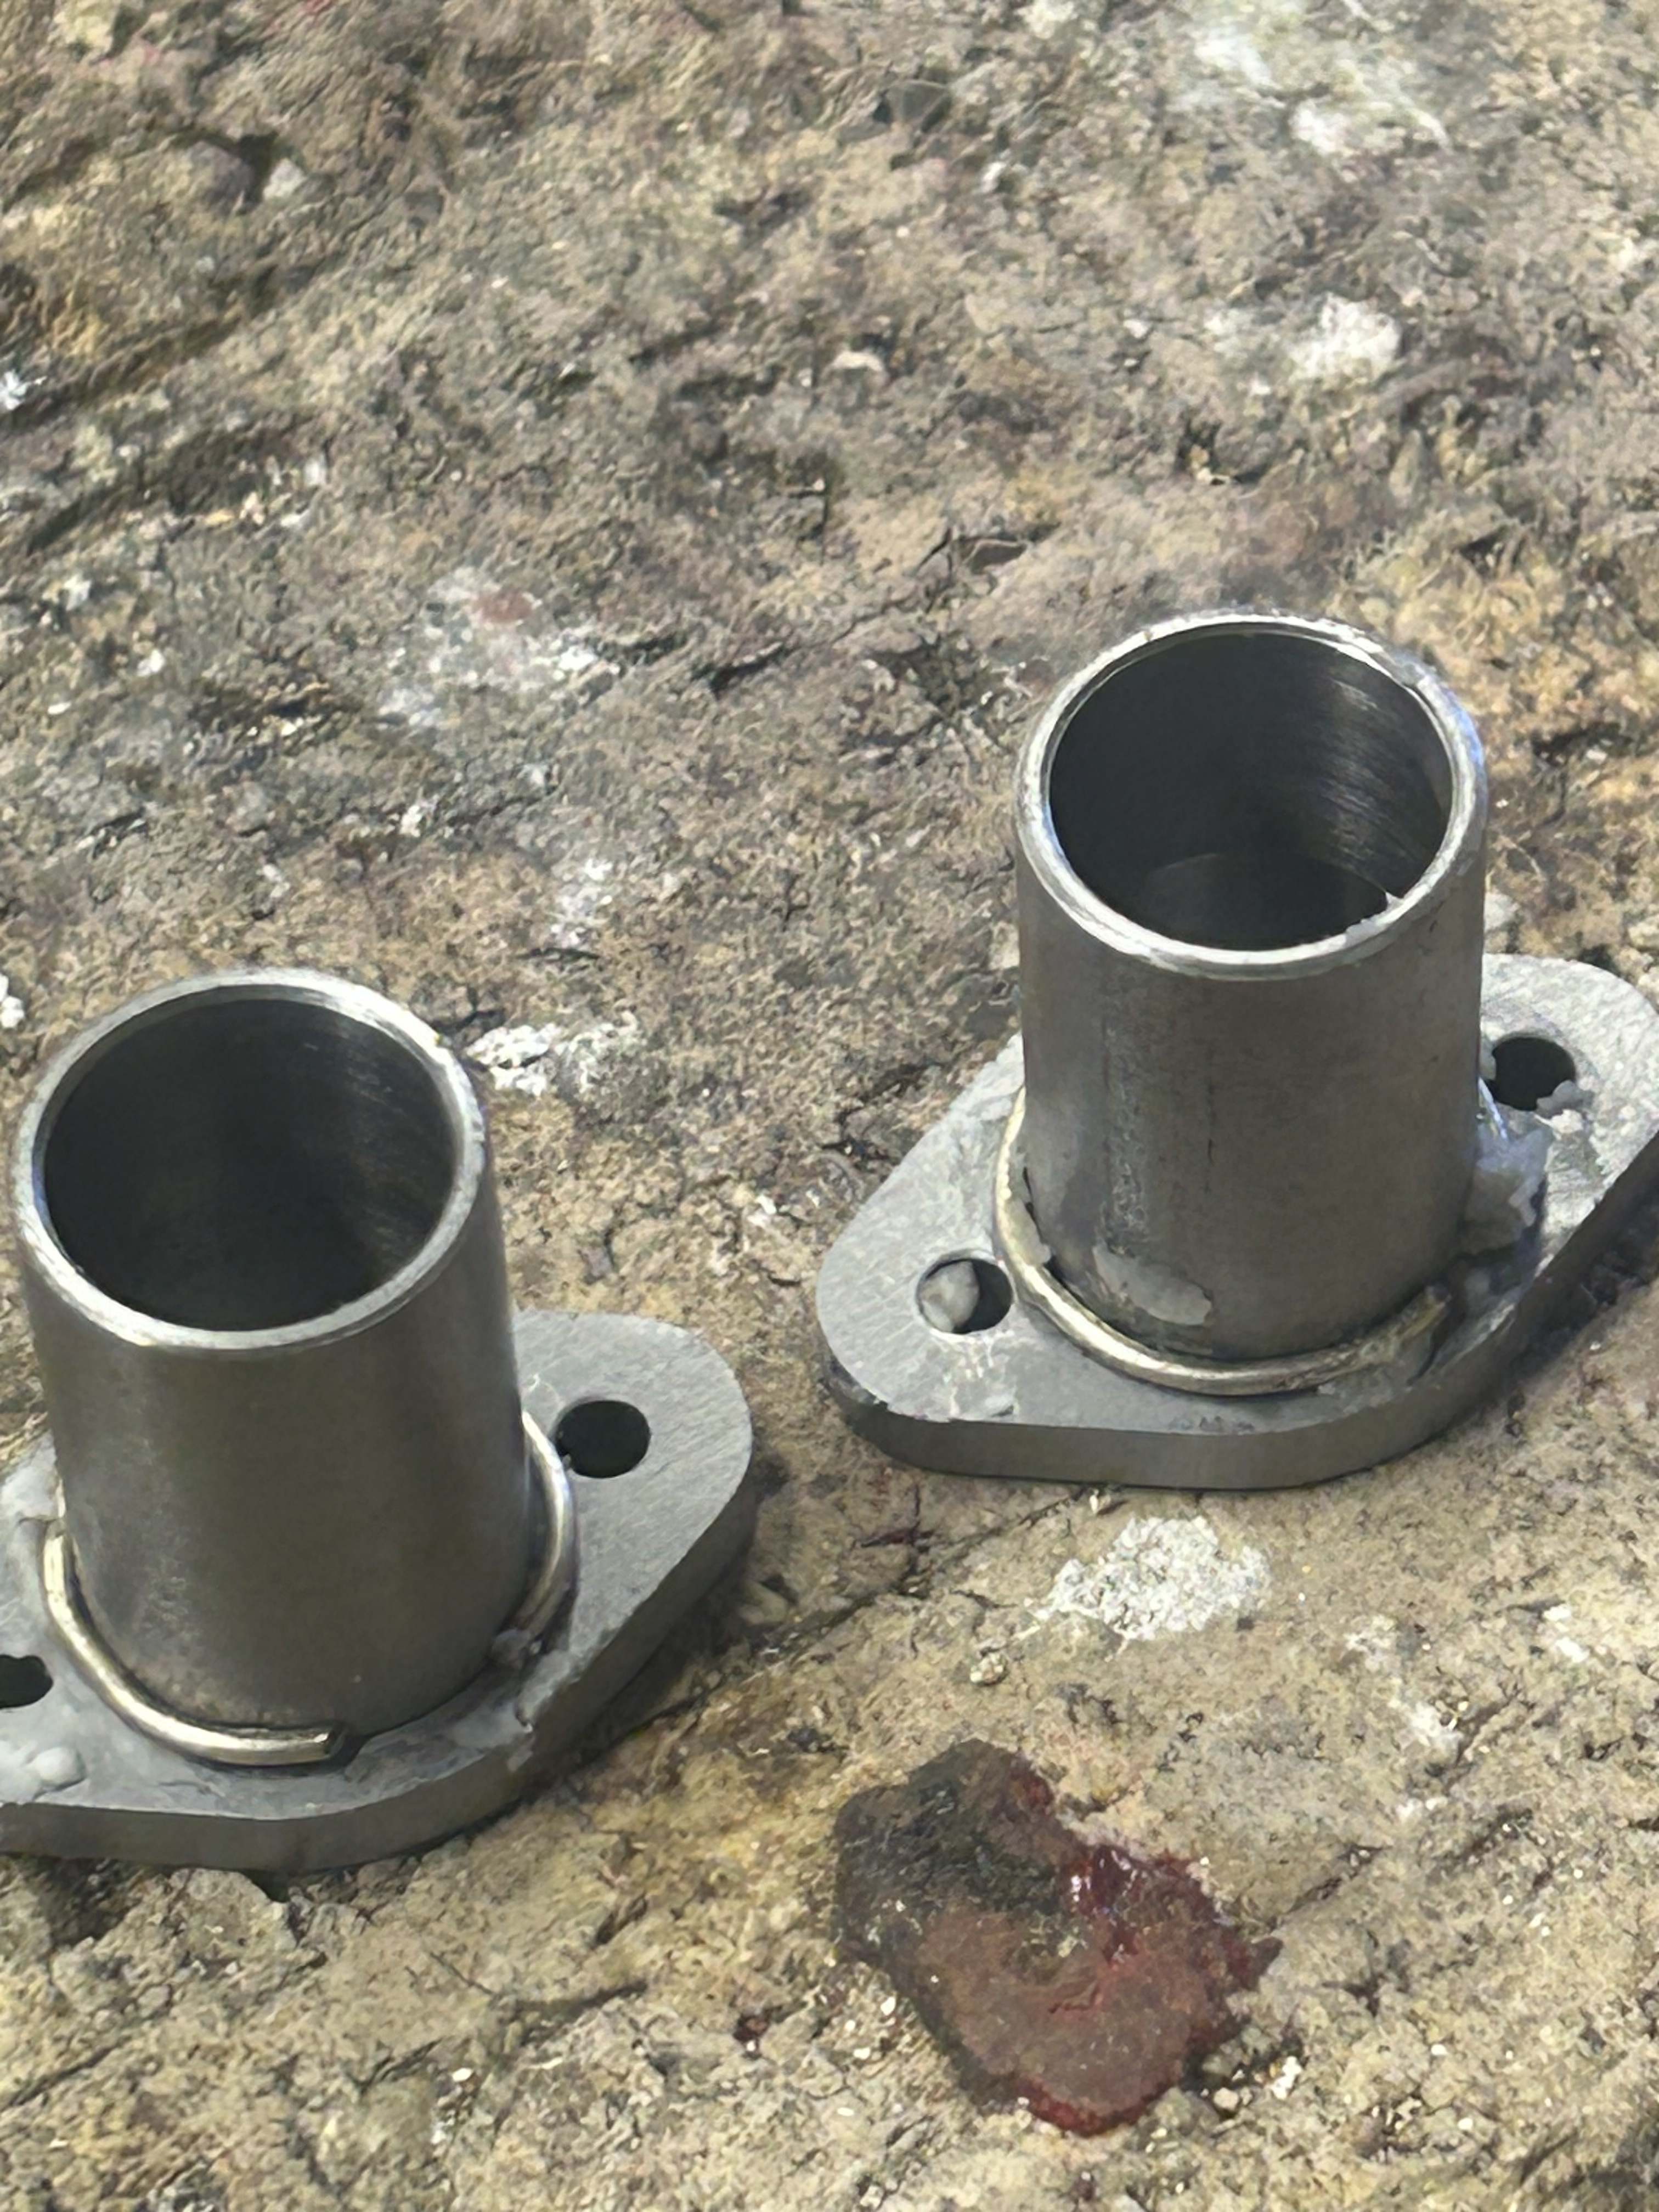
    When silver soldering I like to use rings wherever possible. This ensures the soldering can be placed exactly where you want it and just the right amount of solder is used for a tidy joint. To make the rings a piece of steel smaller than the ring needed is cross drilled at one end to accept the solder rod. Due to spring back the rings end up larger hence a smaller mandrel makes a tighter ring. The lathe placed in a low gear can the be used to coil the solder around the steel. For safety the solder is run through a tool holder and the end of the solder rod held with a pair of pliers while feeding onto the mandrel under power. Once complete the rings can be snipped to length and adjusted to fit snugly around the joint to to soldered.

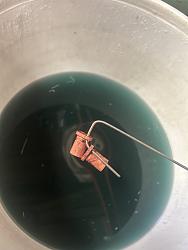
    The Mandrel are cleaned before cooling solder so the solder is not contaminated.

    Click image for larger version. 

Name:	IMG_9489.jpeg 
Views:	52 
Size:	2.48 MB 
ID:	50238
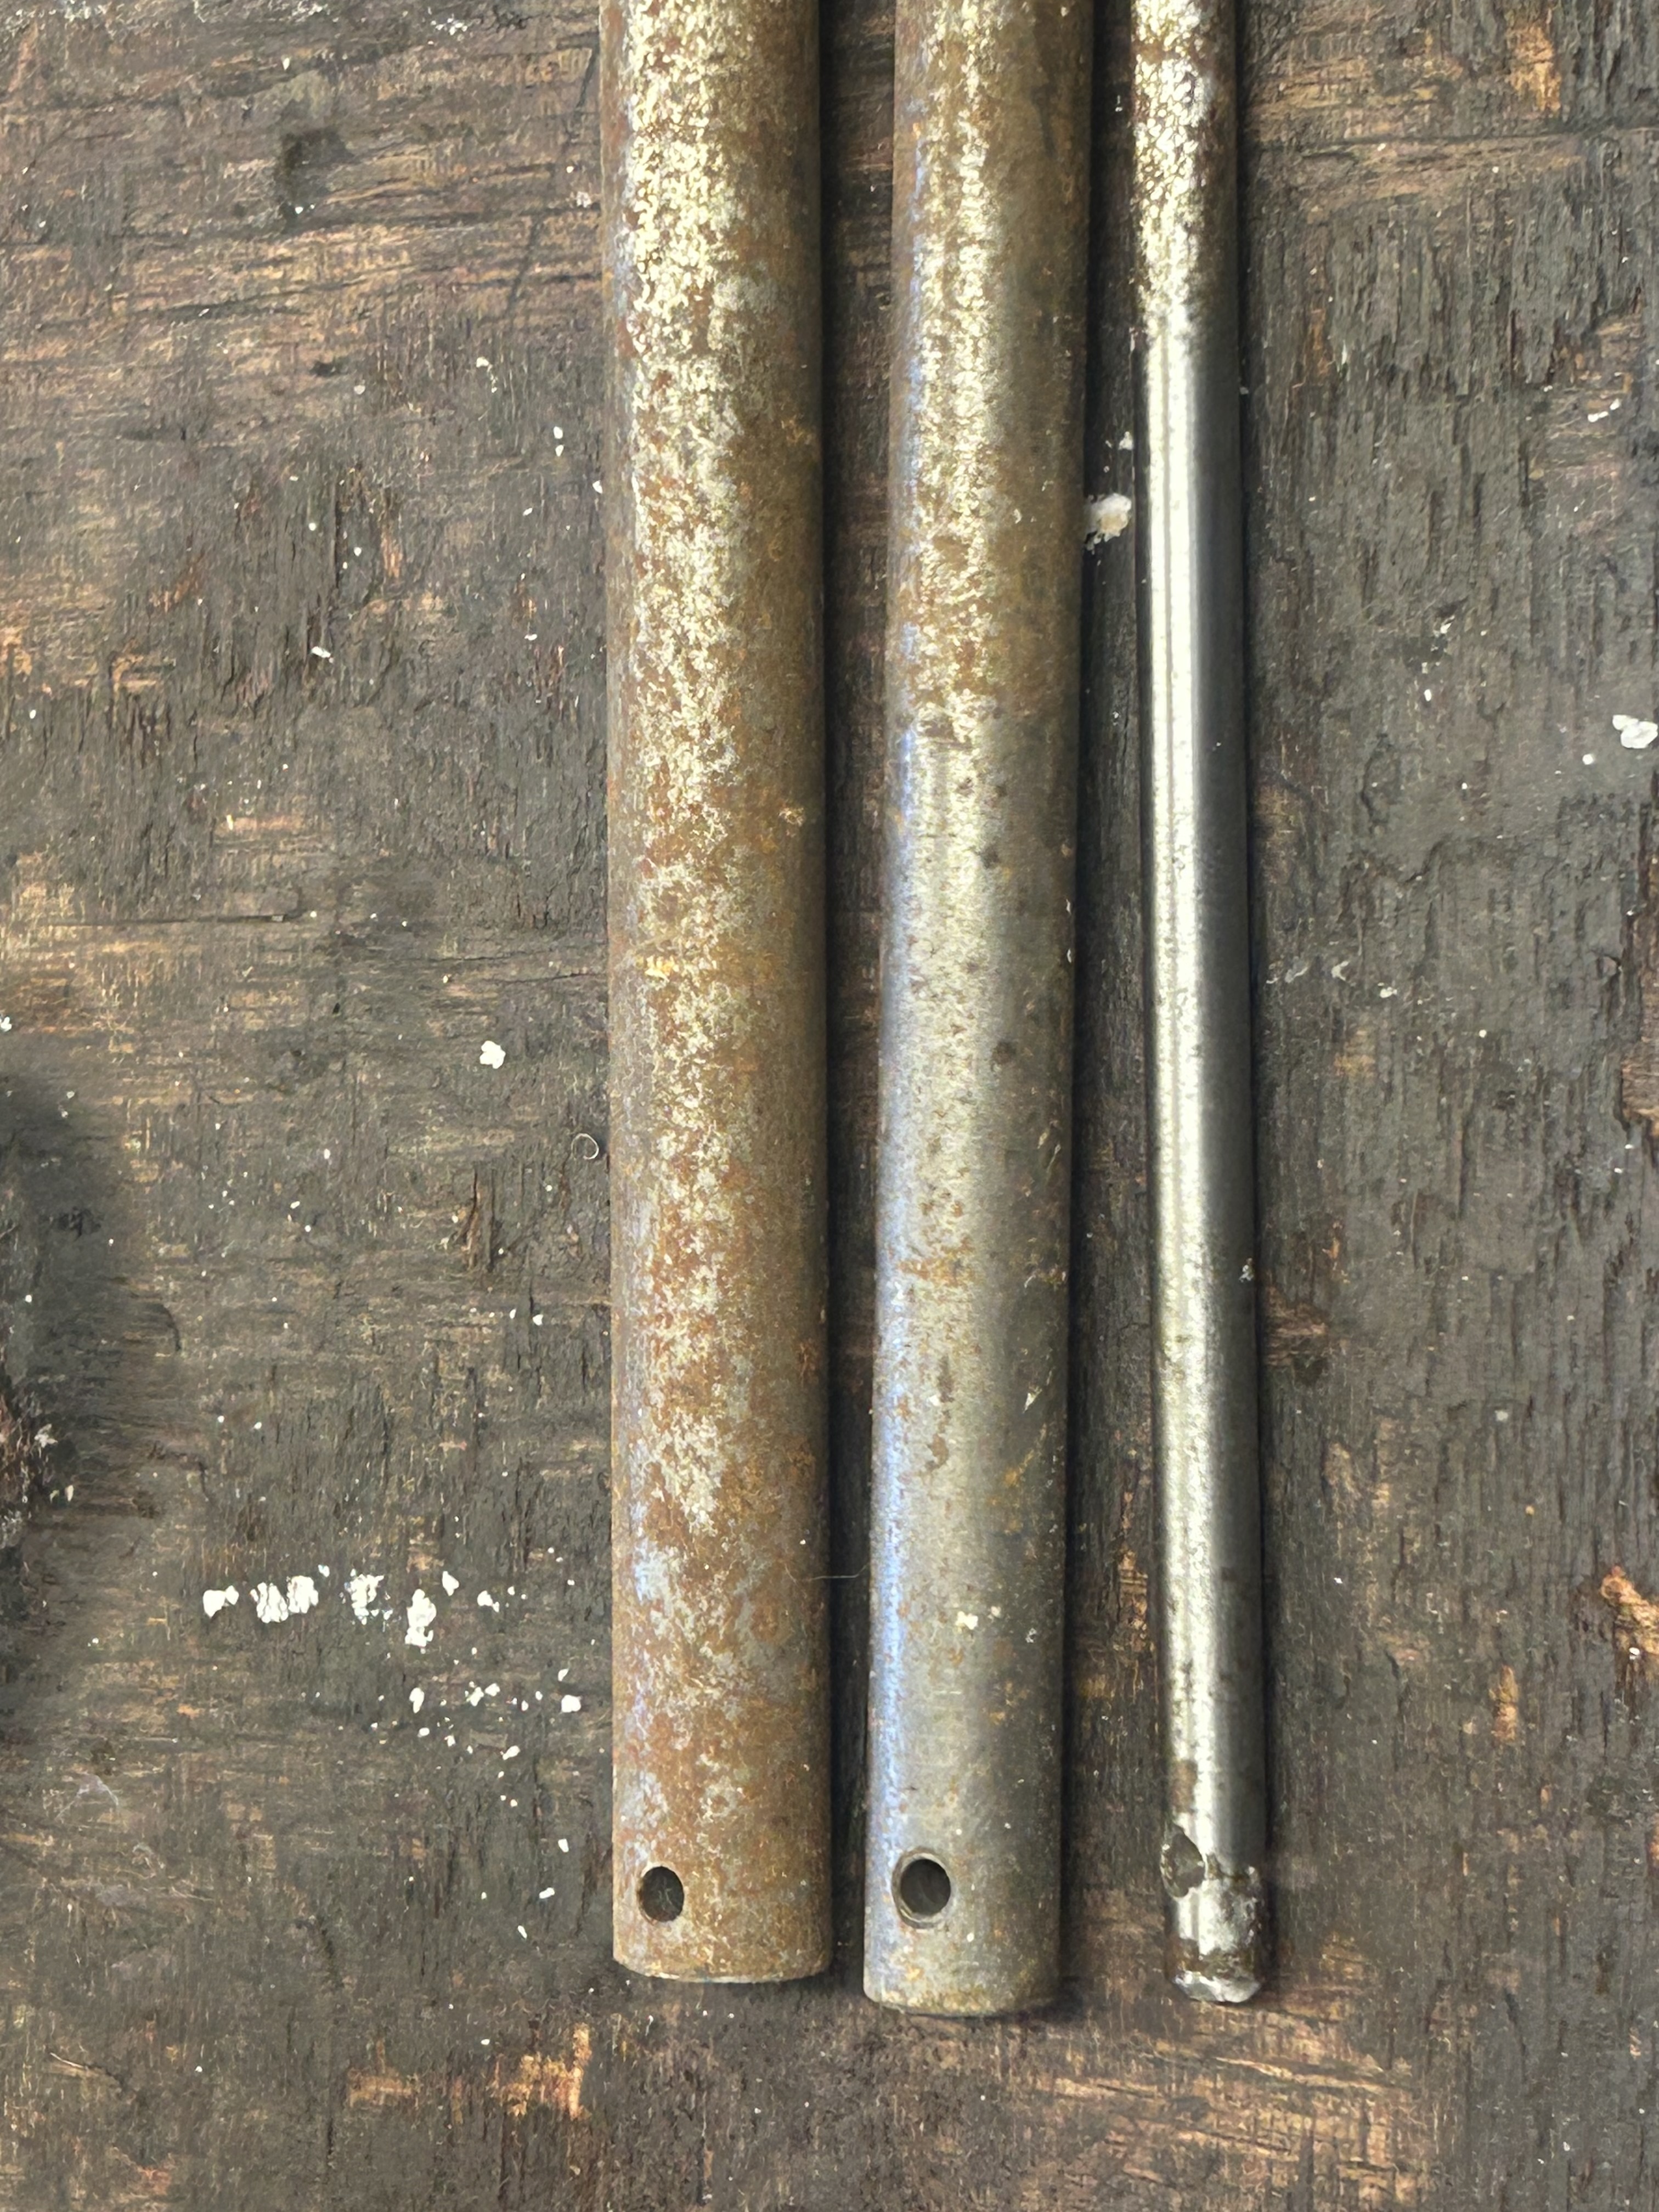
Different diameter ring mandrels.

    Click image for larger version. 

Name:	IMG_9485.jpeg 
Views:	41 
Size:	2.20 MB 
ID:	50239 Click image for larger version. 

Name:	IMG_9484.jpeg 
Views:	46 
Size:	2.58 MB 
ID:	50240
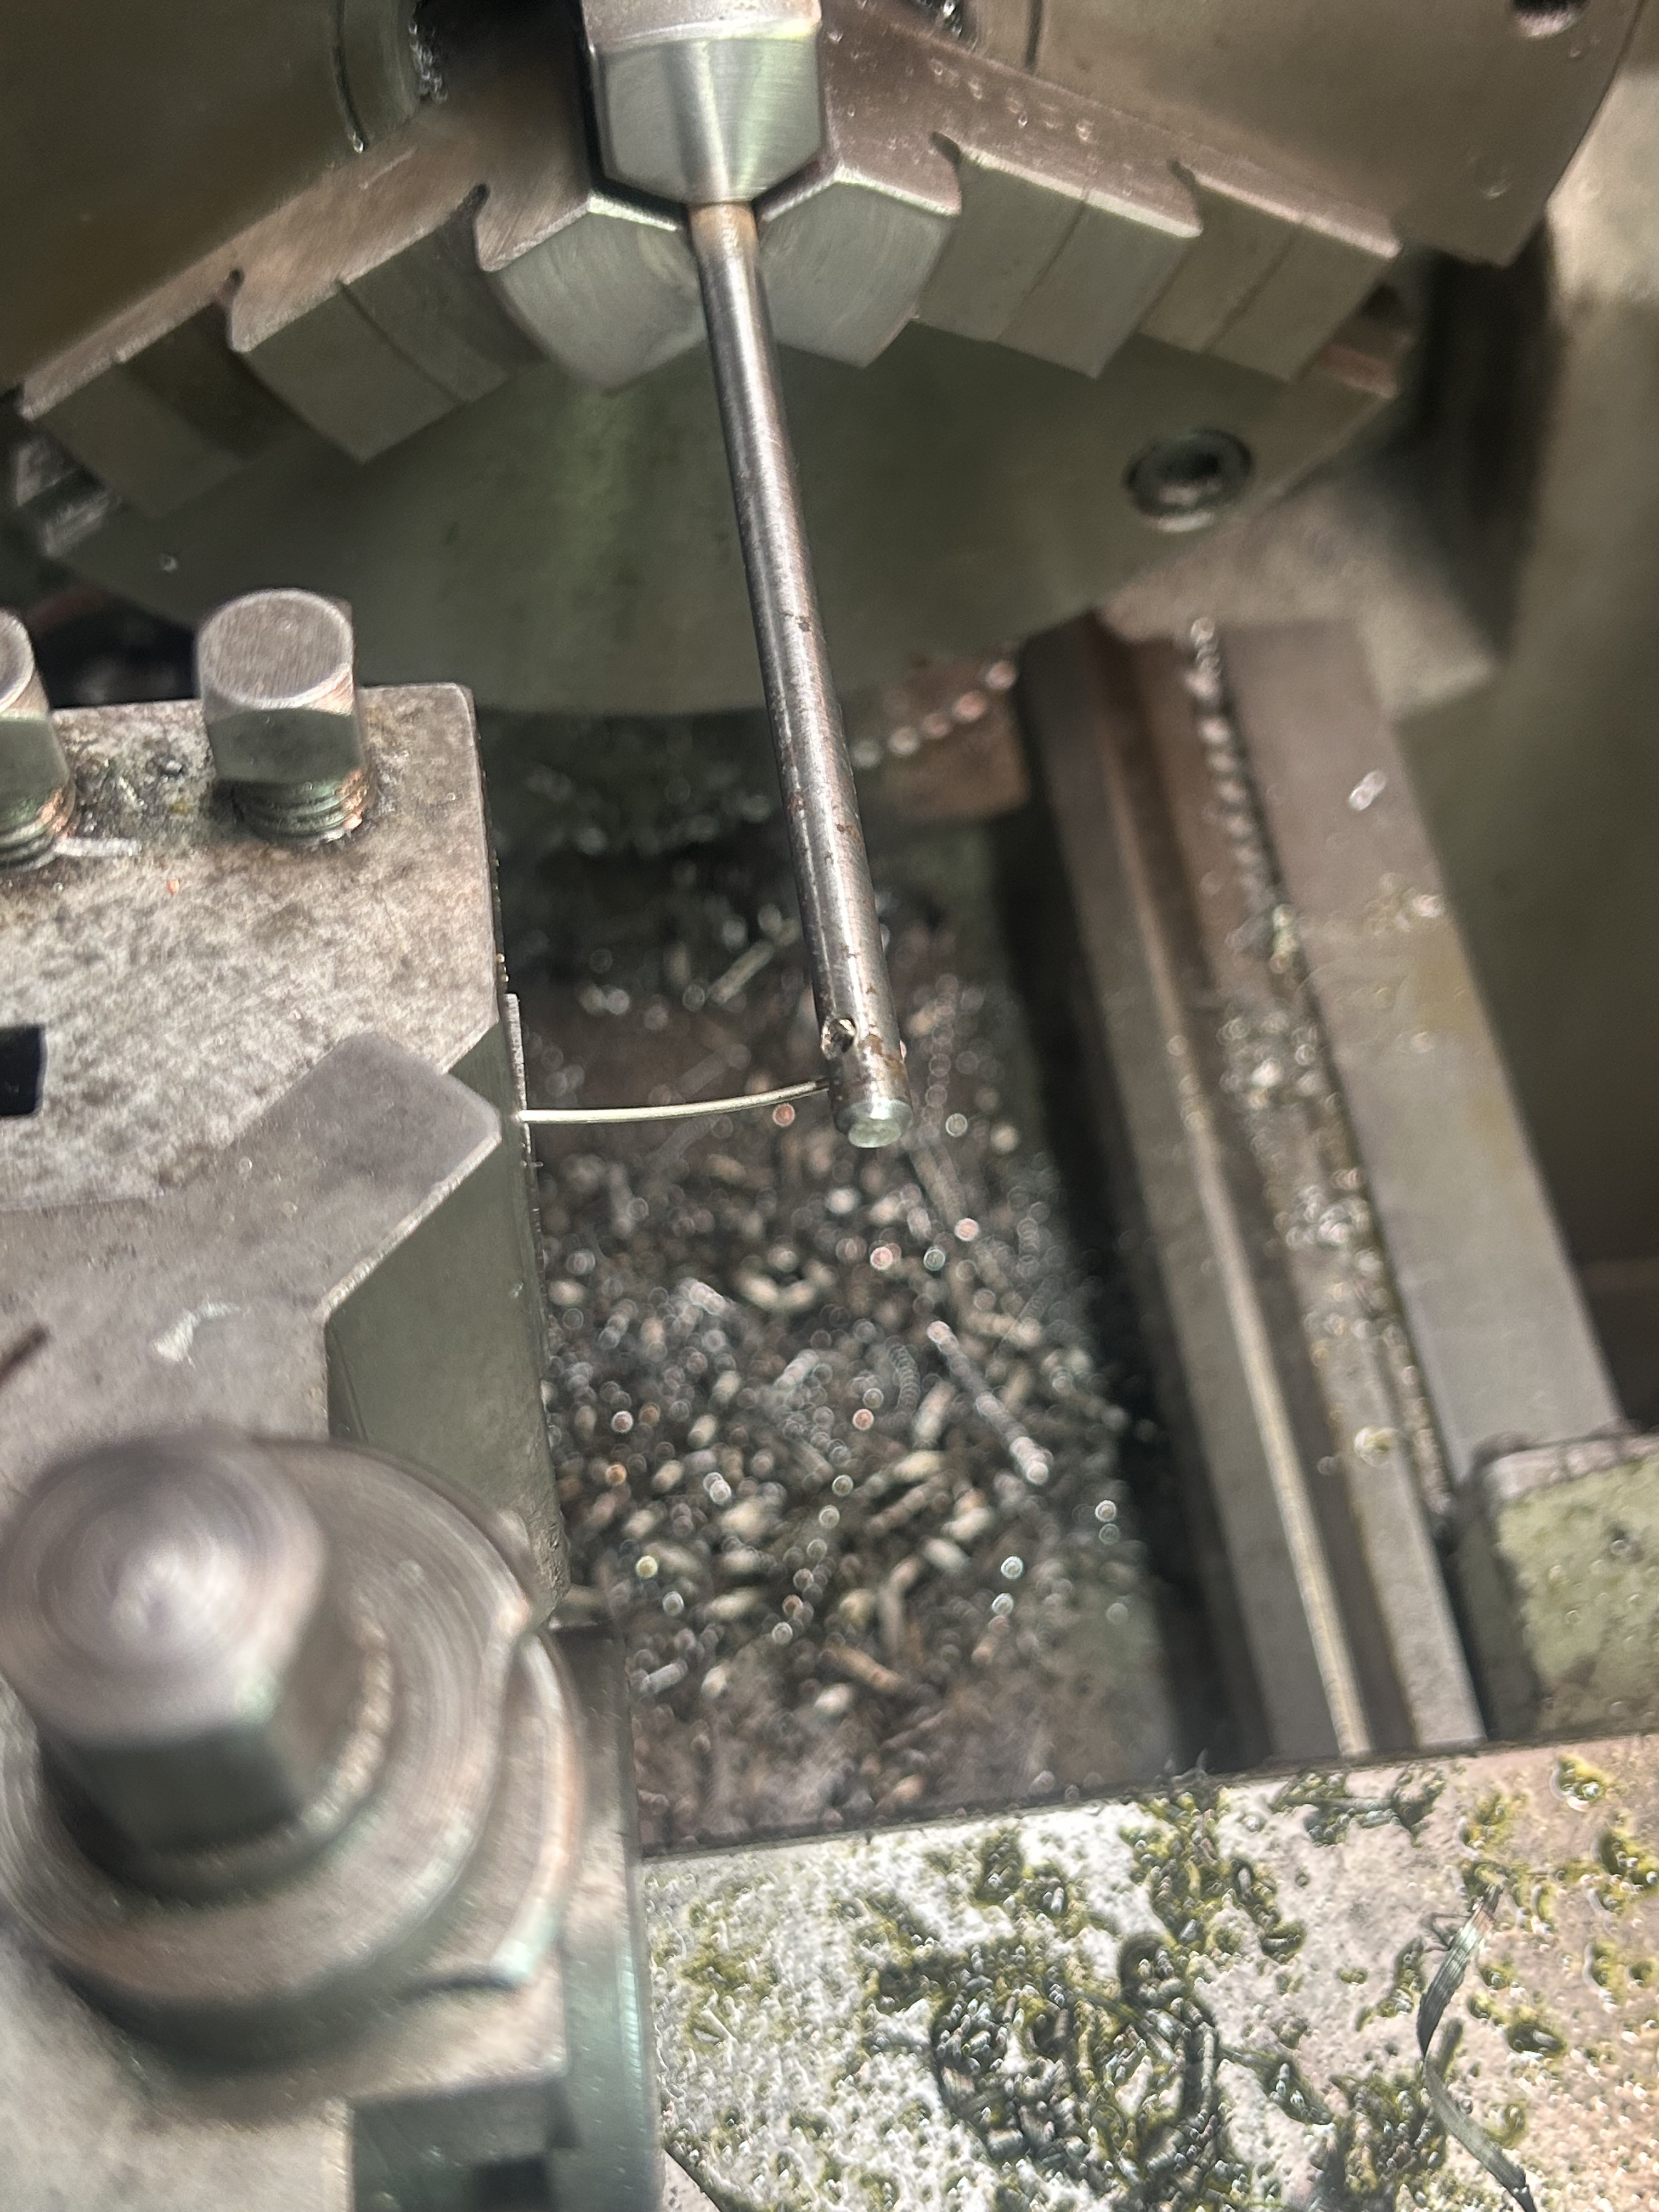
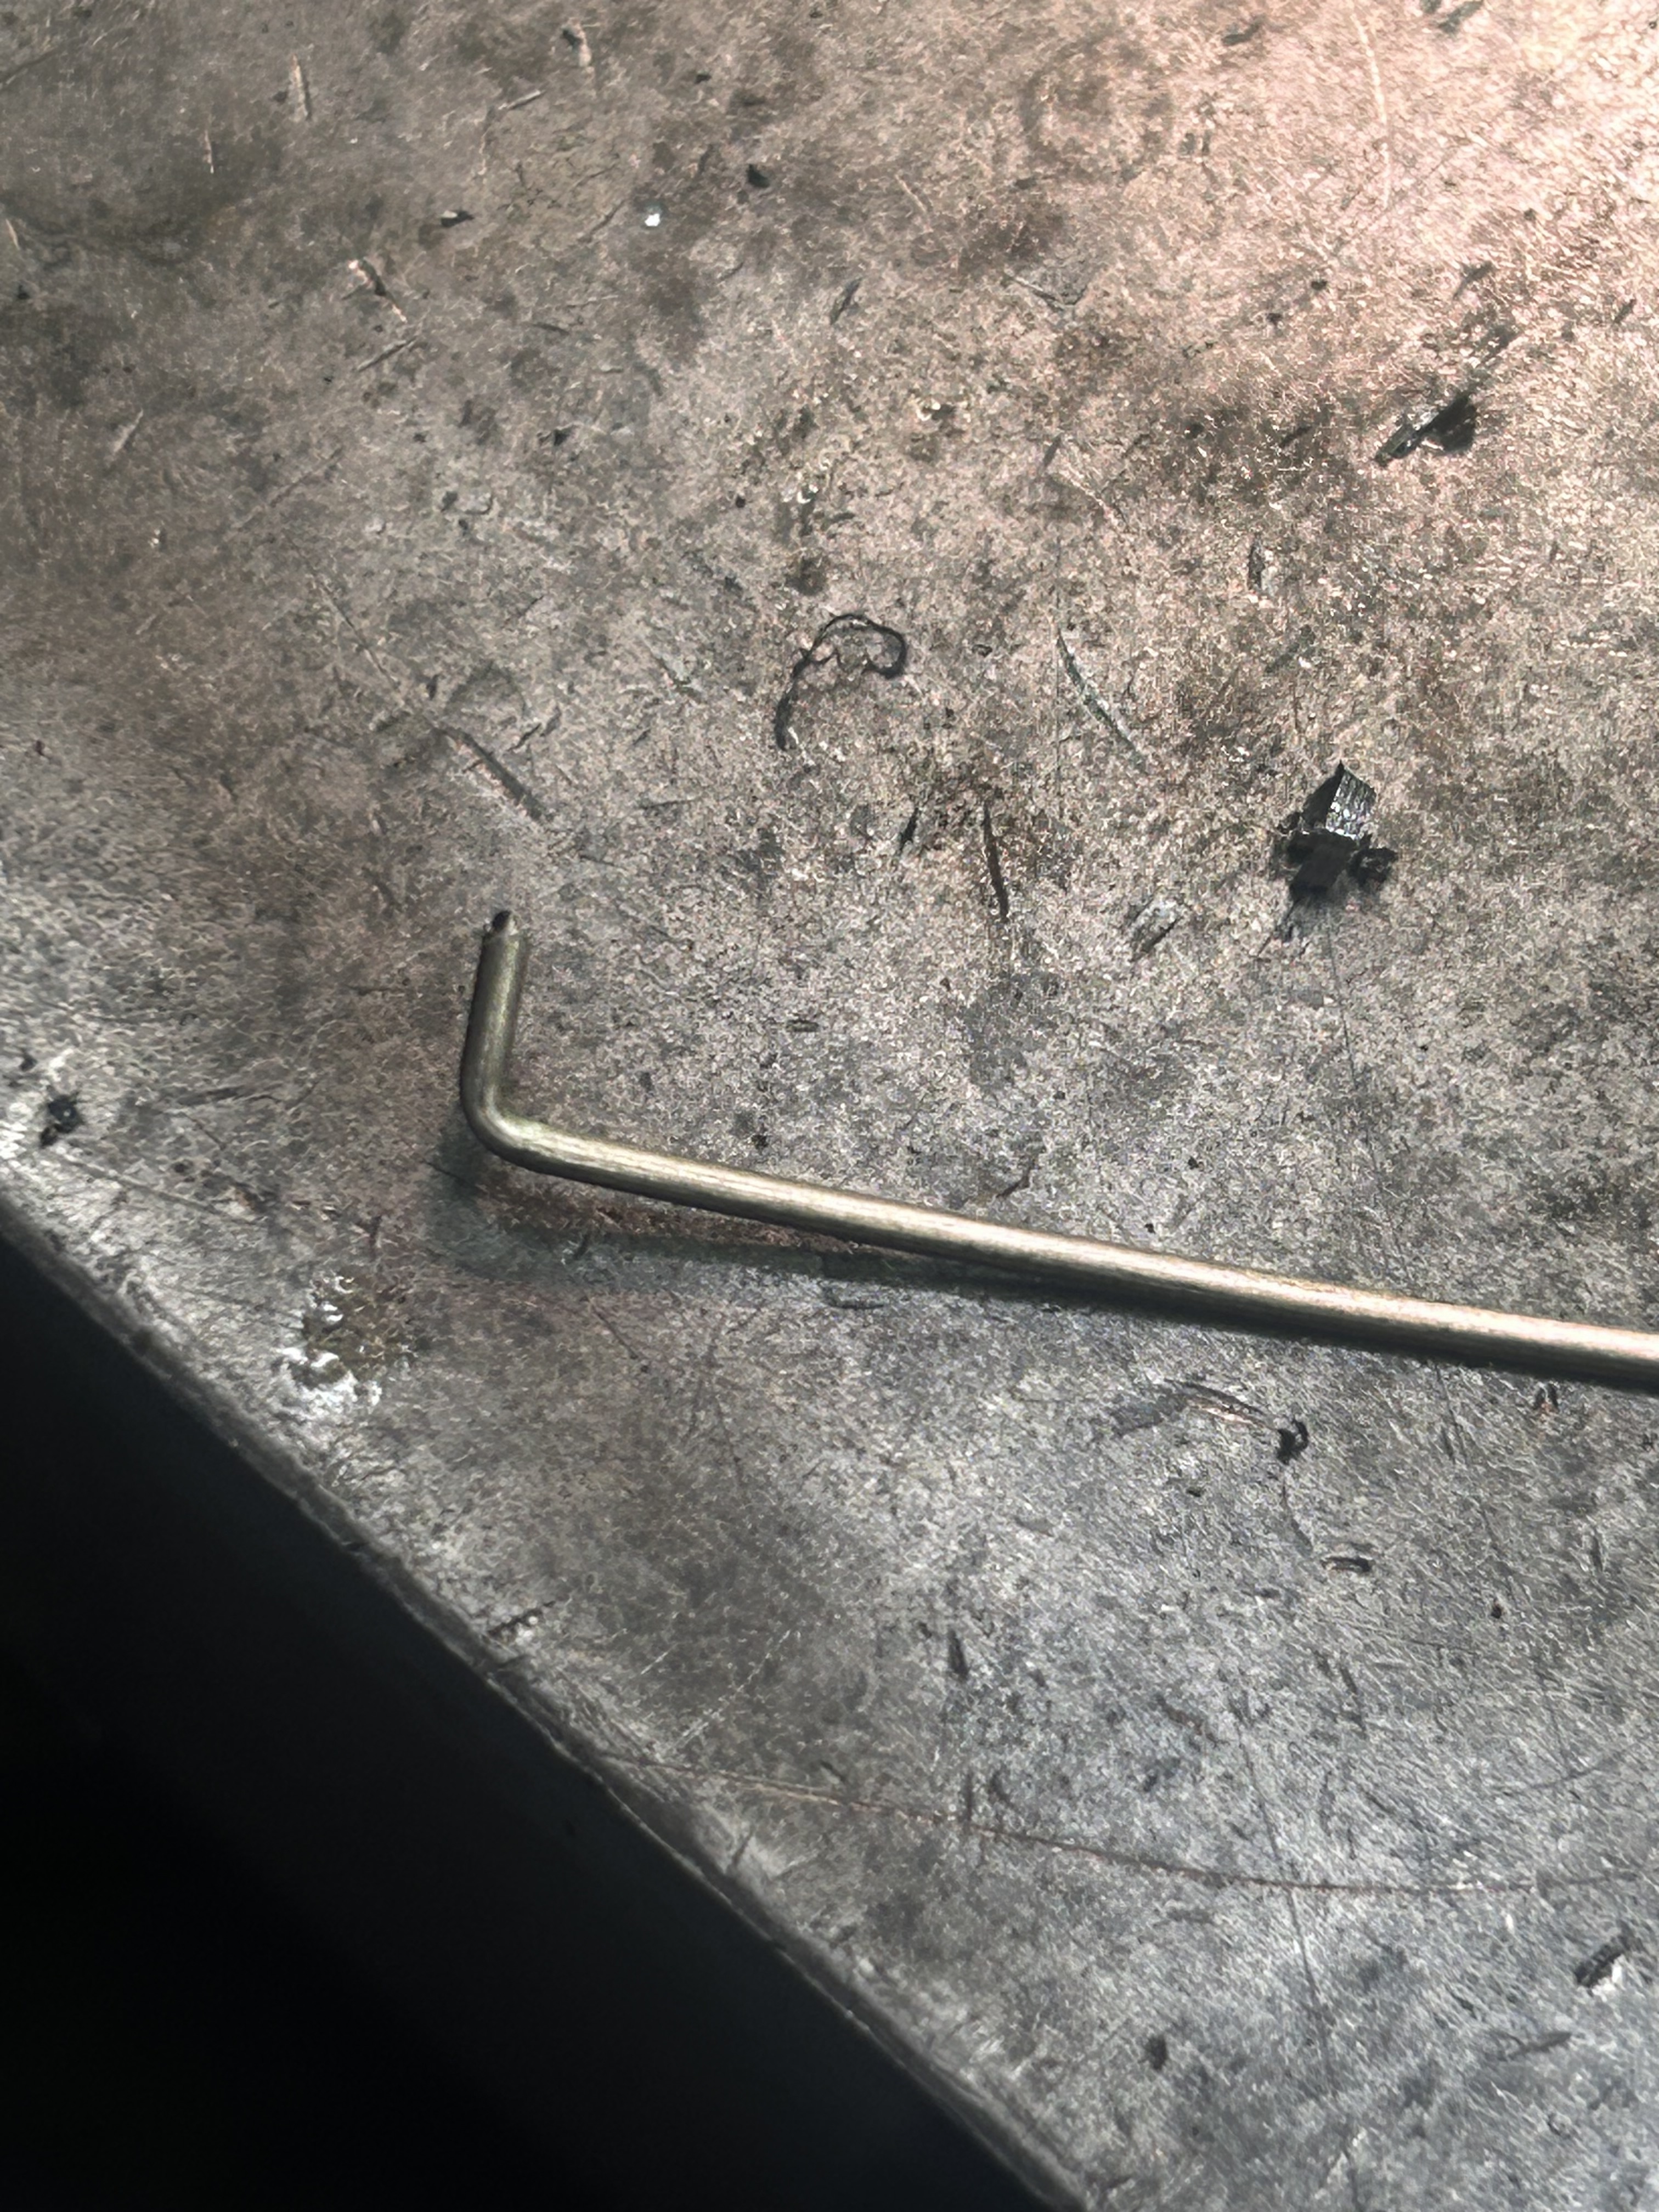
End of solder rod bent to aid the start of coiling.

    Click image for larger version. 

Name:	IMG_9486.jpeg 
Views:	42 
Size:	1.47 MB 
ID:	50241 Click image for larger version. 

Name:	IMG_9487.jpeg 
Views:	40 
Size:	1.14 MB 
ID:	50242 Click image for larger version. 

Name:	IMG_9488.jpeg 
Views:	57 
Size:	2.15 MB 
ID:	50243Ready for sniping into rings.

    Click image for larger version. 

Name:	IMG_9490.jpeg 
Views:	45 
Size:	1.94 MB 
ID:	50244 Click image for larger version. 

Name:	IMG_9491.jpeg 
Views:	48 
Size:	2.01 MB 
ID:	50245 Click image for larger version. 

Name:	IMG_9497.jpeg 
Views:	46 
Size:	2.04 MB 
ID:	50246The rings were purposely left short so there wasn’t any excess solder around joint.

    Click image for larger version. 

Name:	IMG_9495.jpeg 
Views:	51 
Size:	1.87 MB 
ID:	50247 
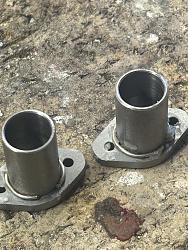
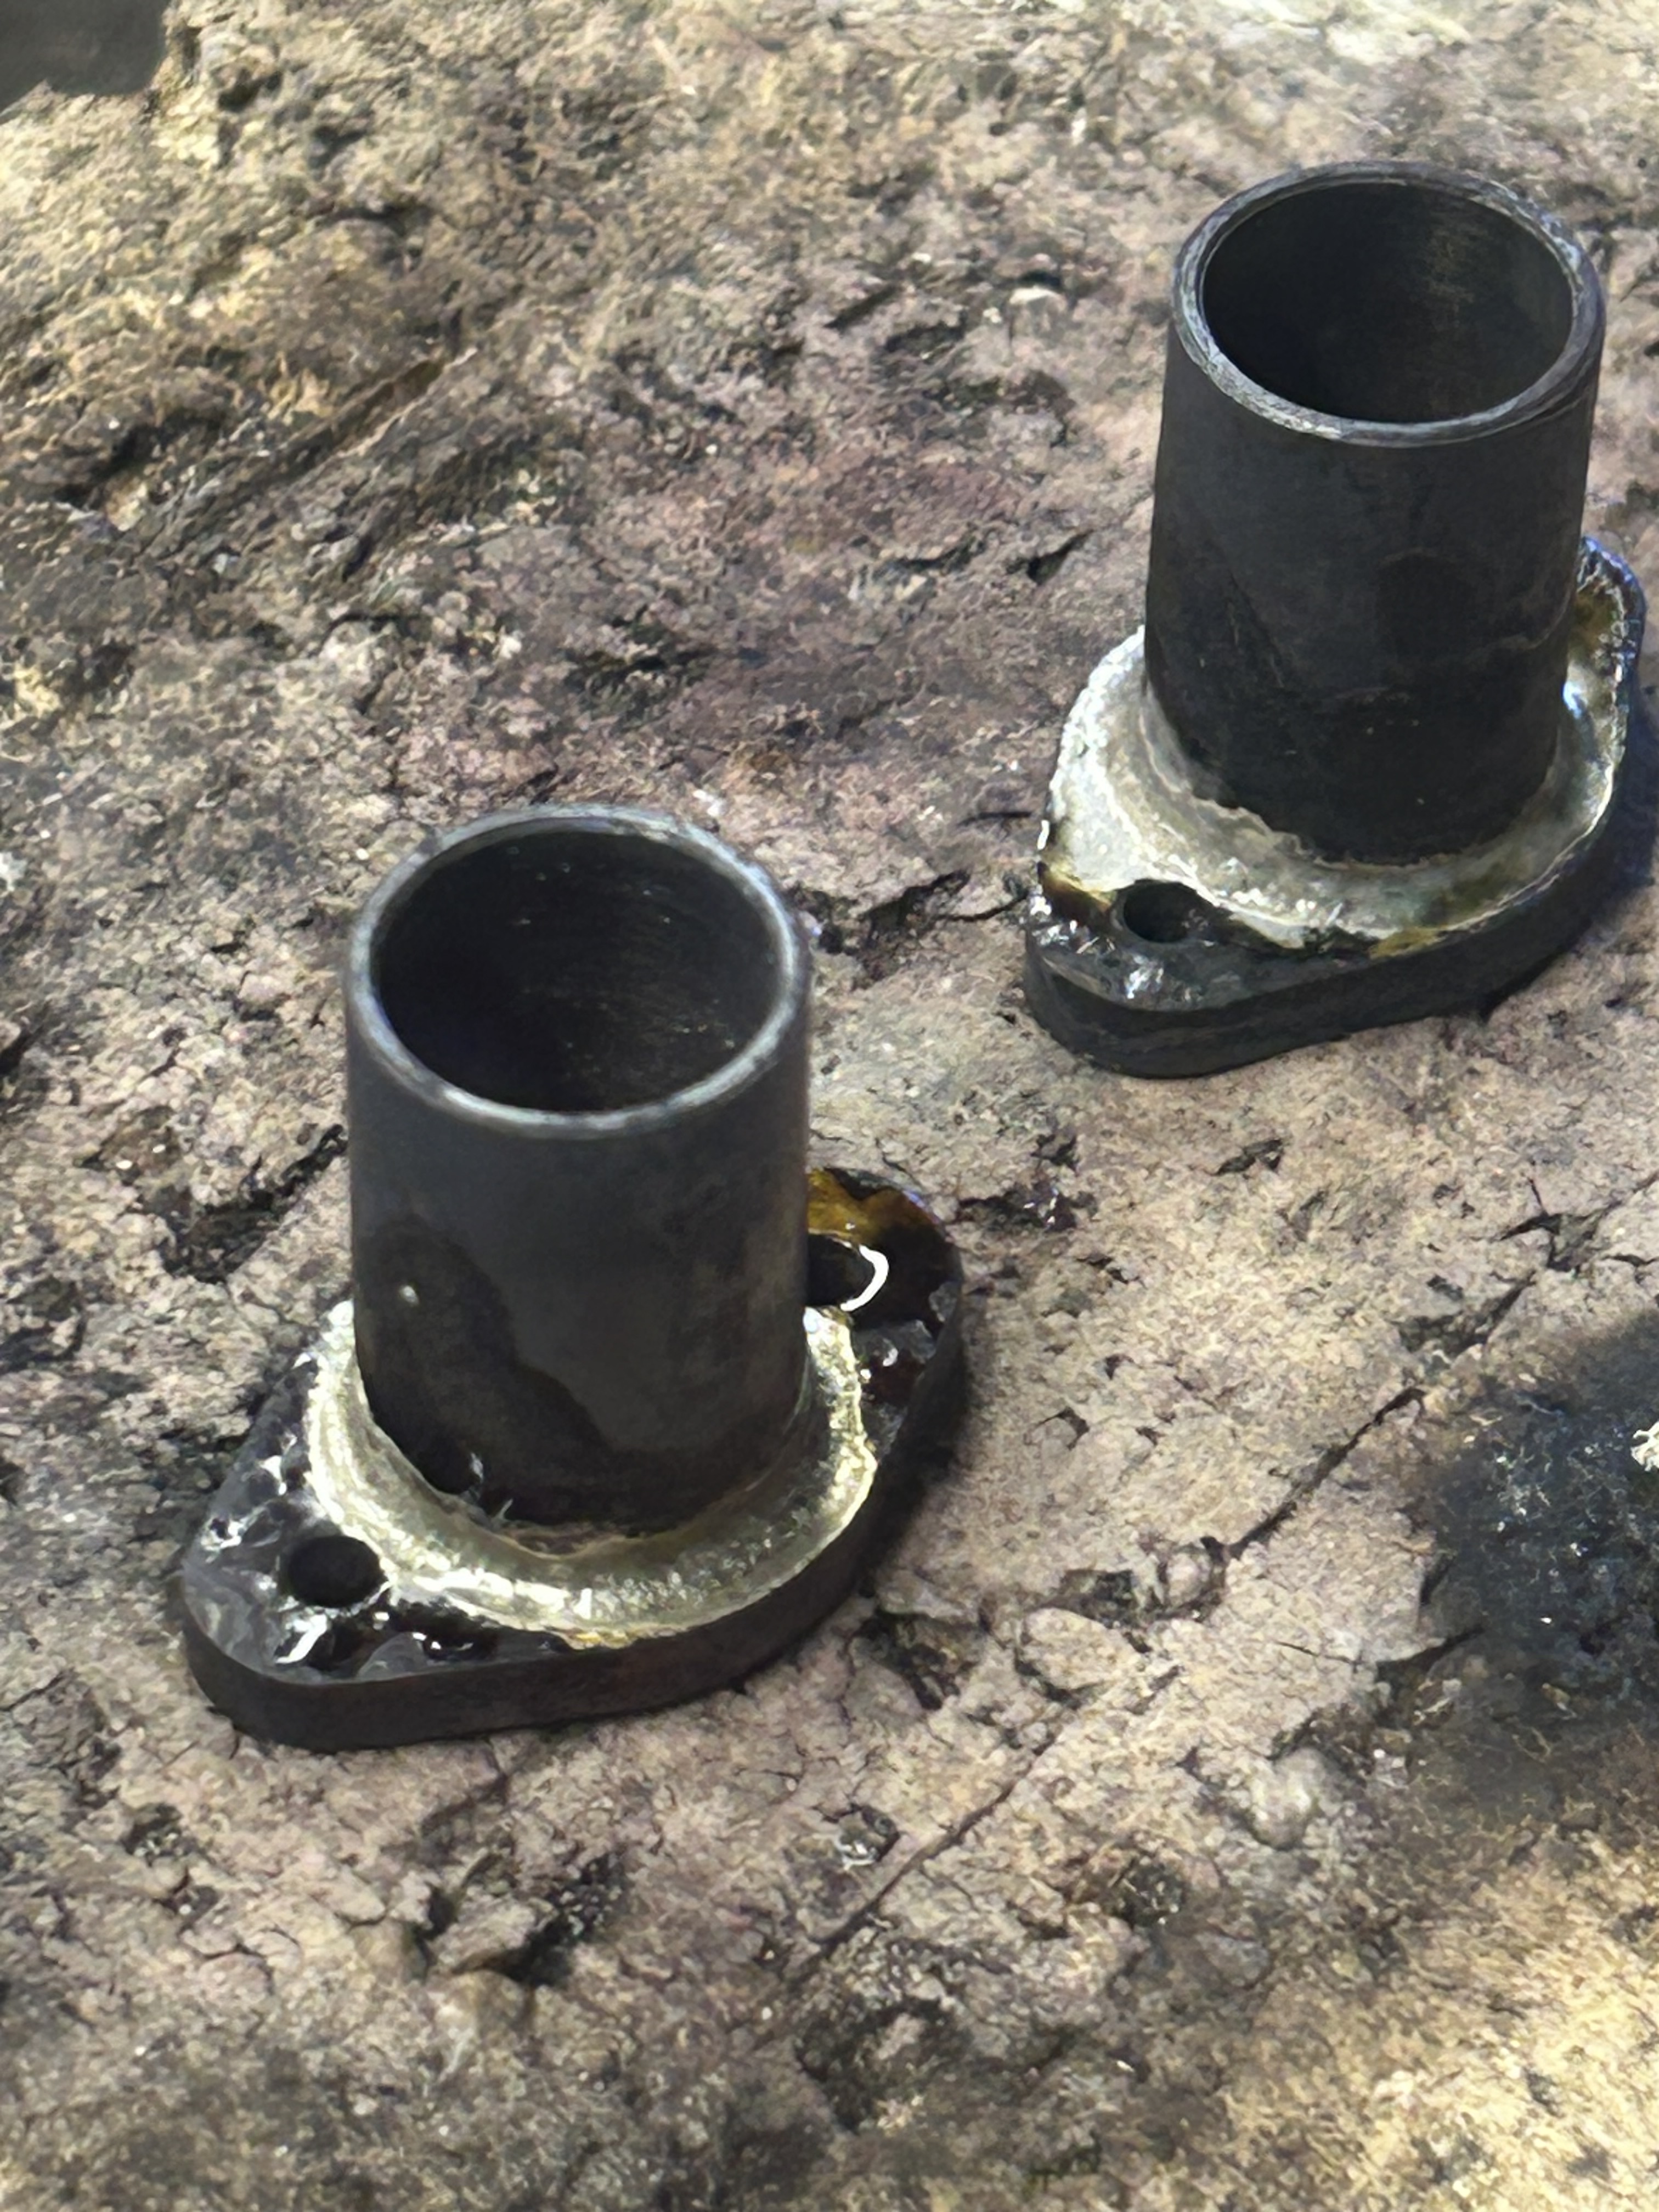
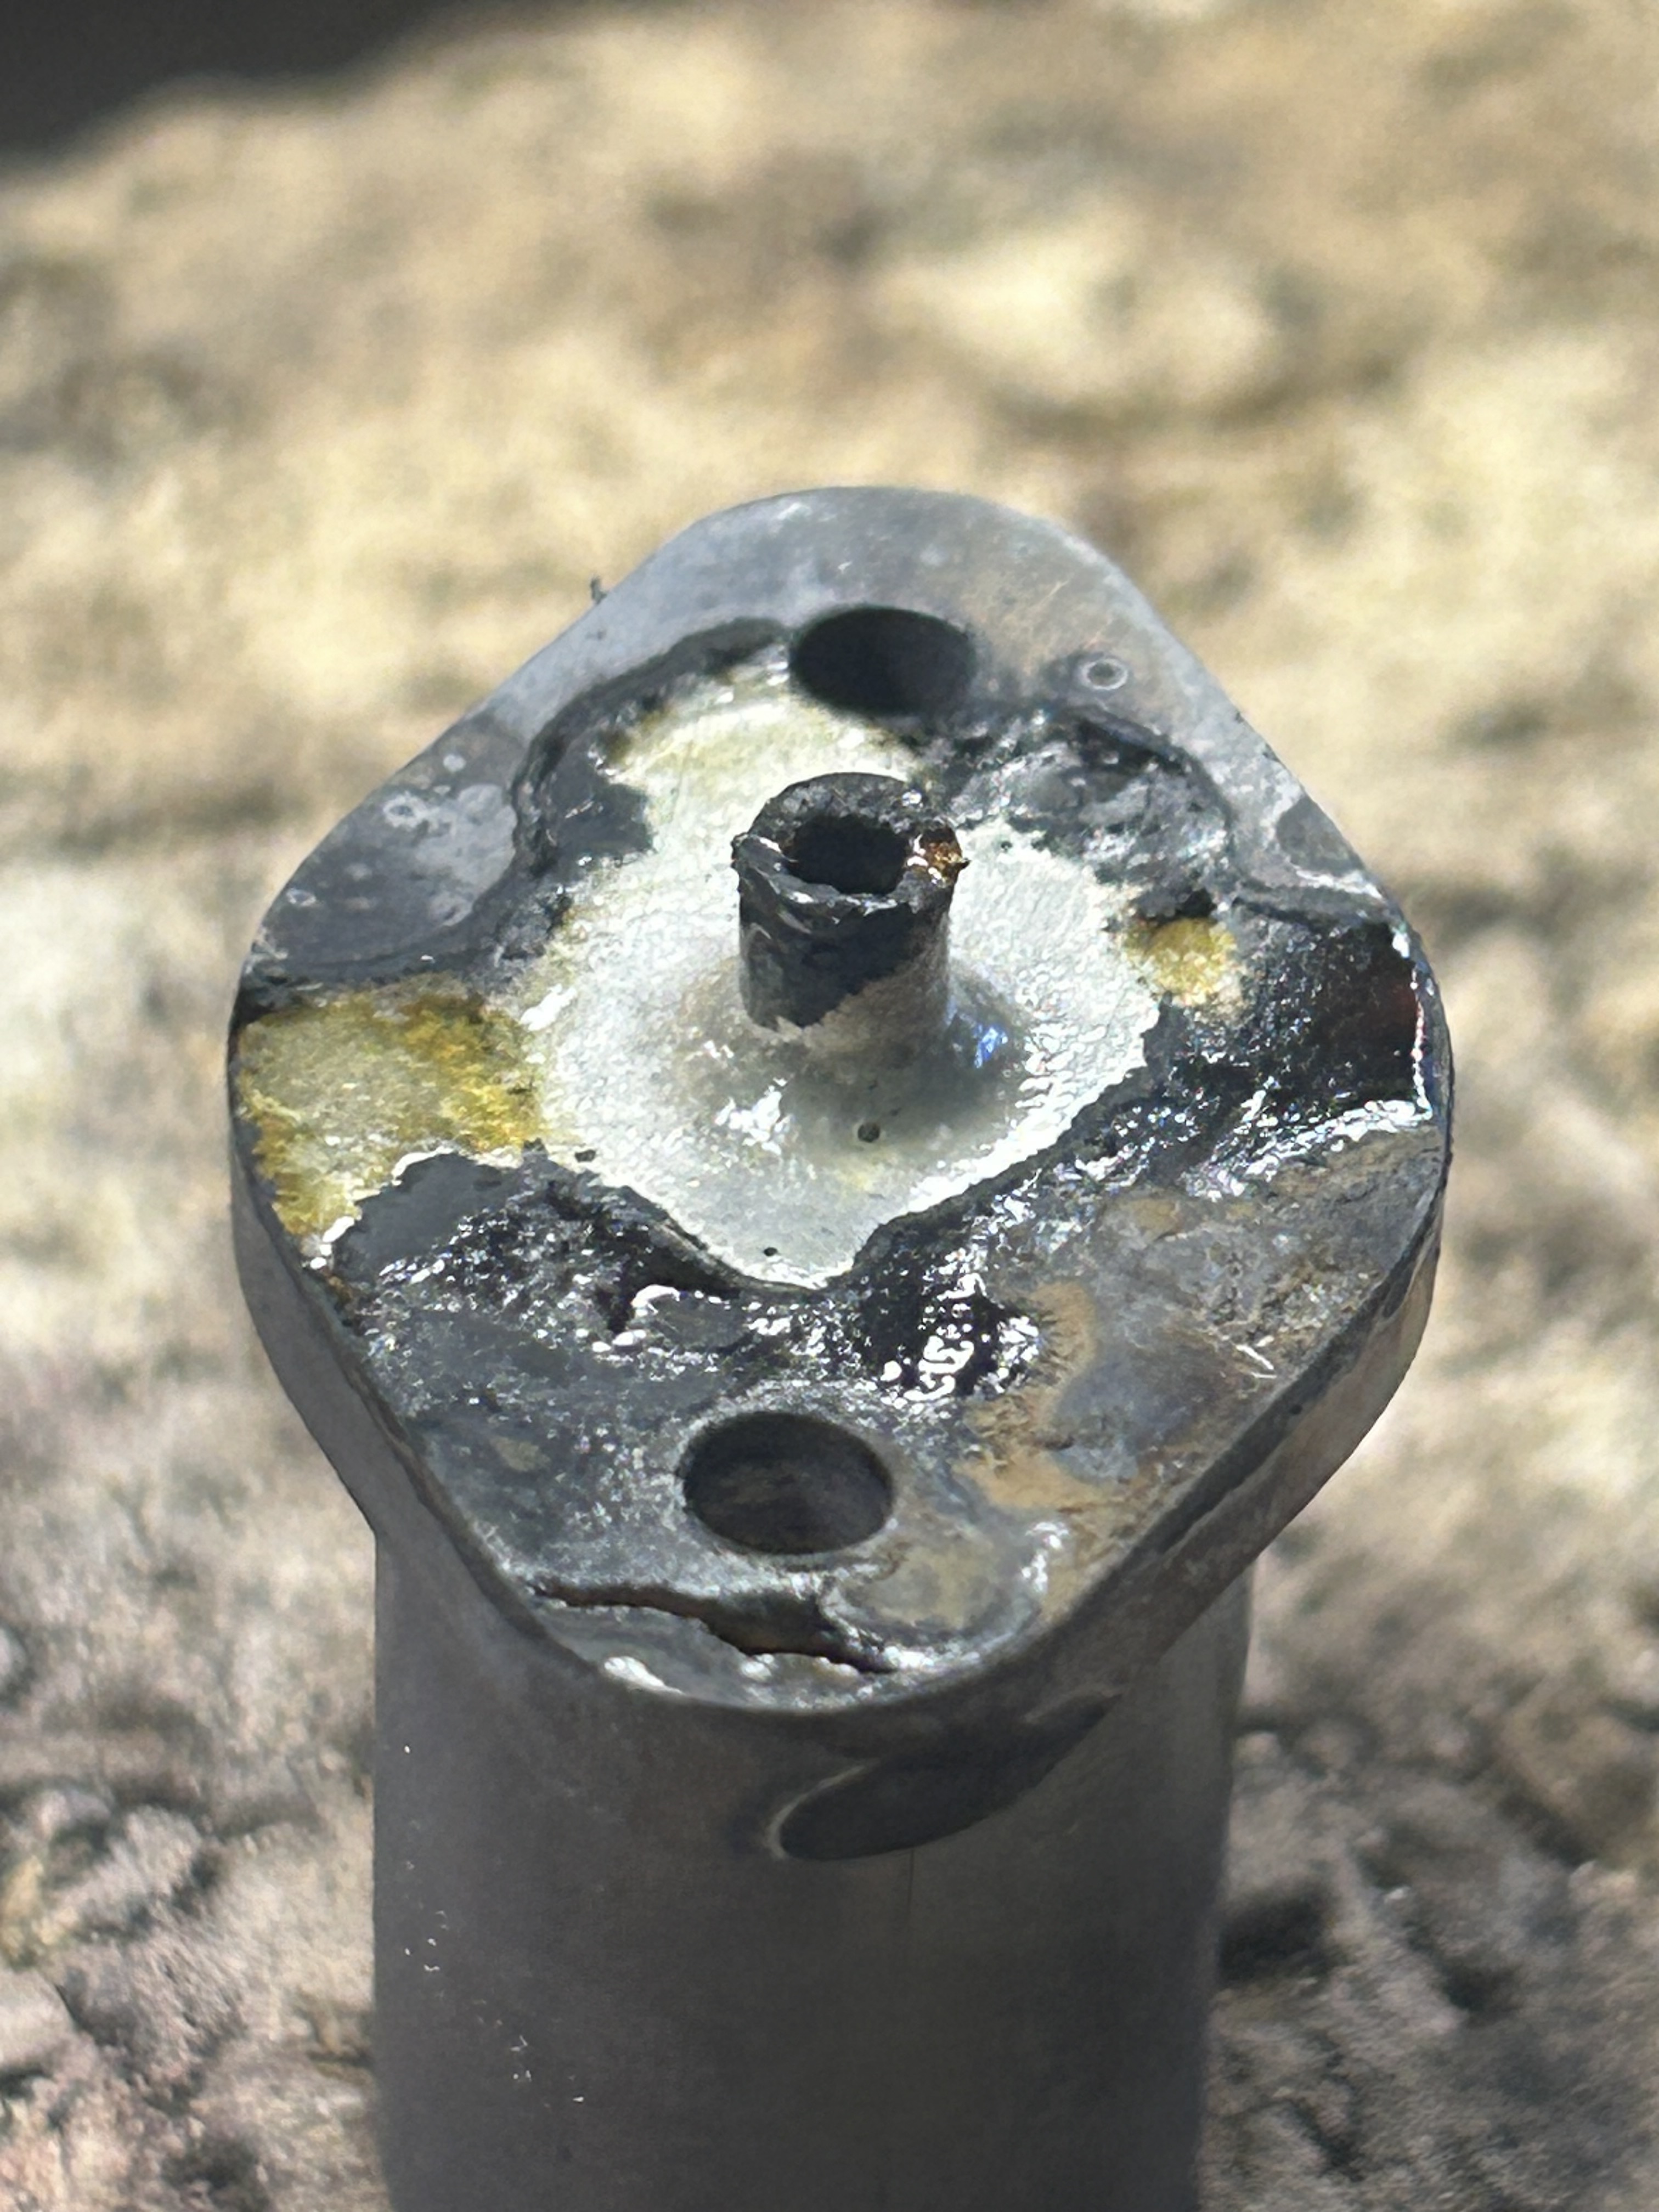
Components cleaned in sulphuric acid bath. As I solder a lot of copper the steel components come out copper plated which cleans off easily.

    Click image for larger version. 

Name:	IMG_9498.jpeg 
Views:	43 
Size:	1.44 MB 
ID:	50250 Click image for larger version. 

Name:	IMG_9499.jpeg 
Views:	47 
Size:	1.51 MB 
ID:	50251 
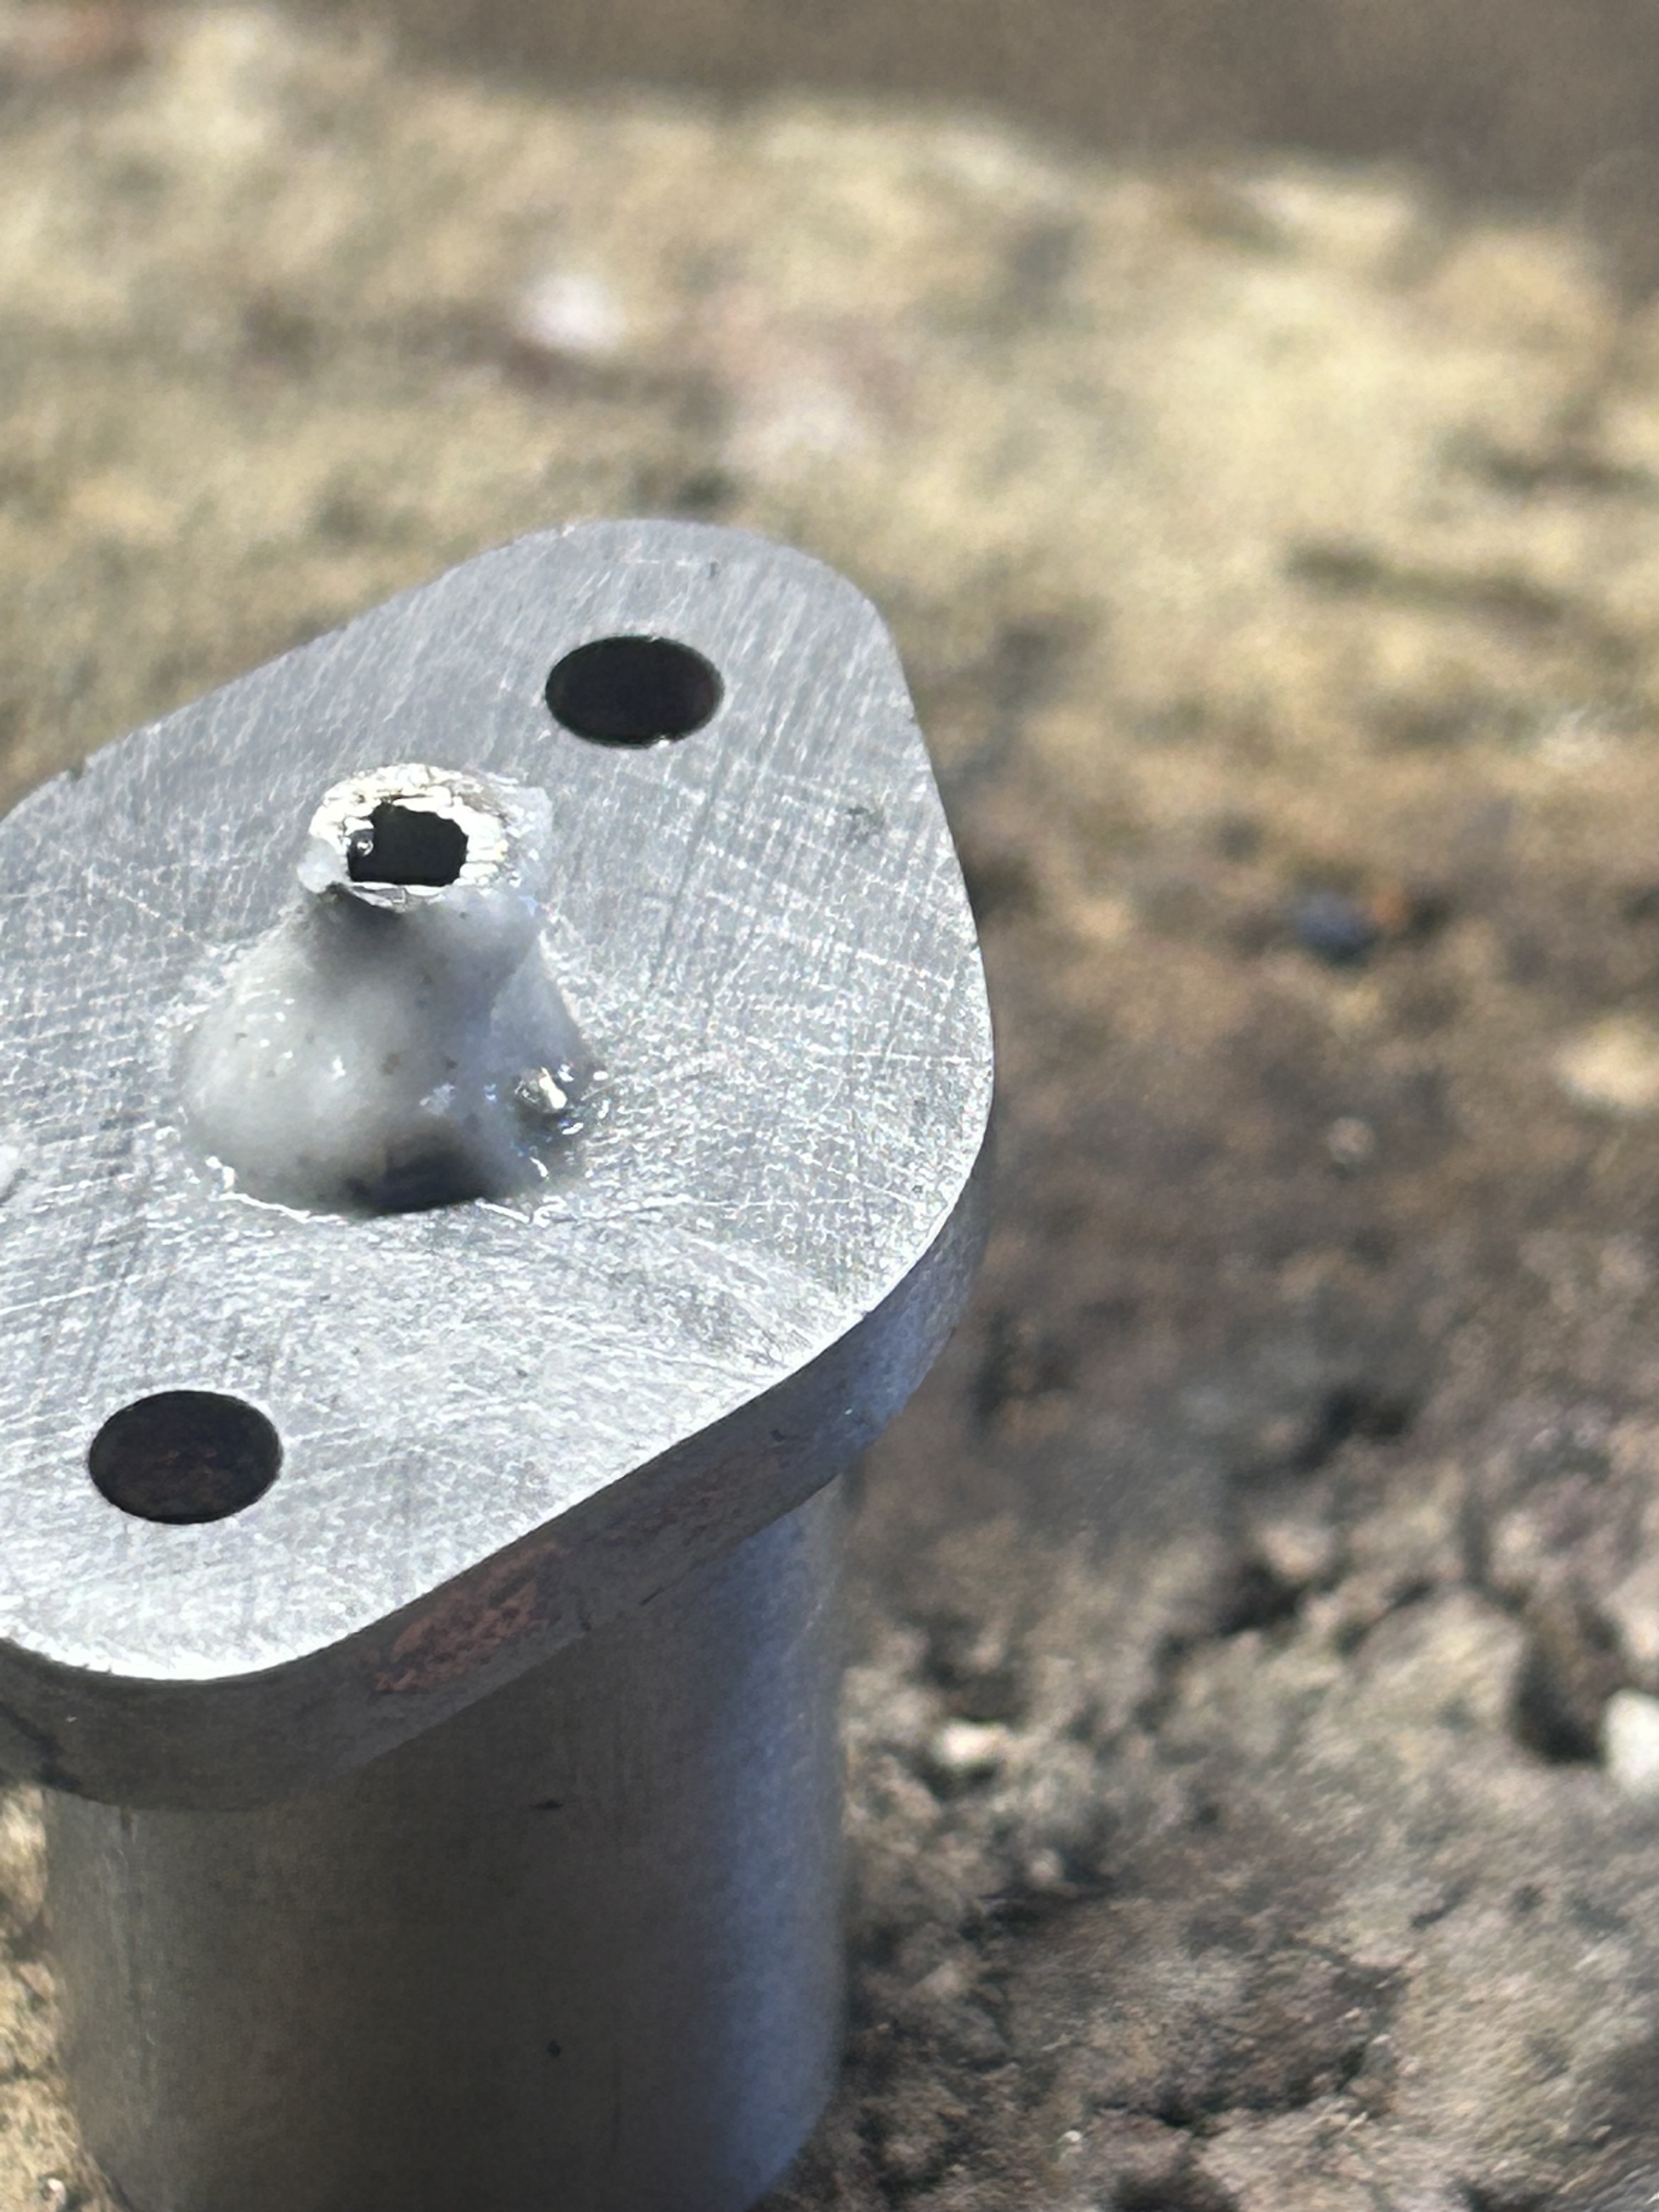
Just a tiny amount of solder was used to solder the 1/8” pipe to body.

    Click image for larger version. 

Name:	IMG_9500.jpeg 
Views:	45 
Size:	1.07 MB 
ID:	50249 
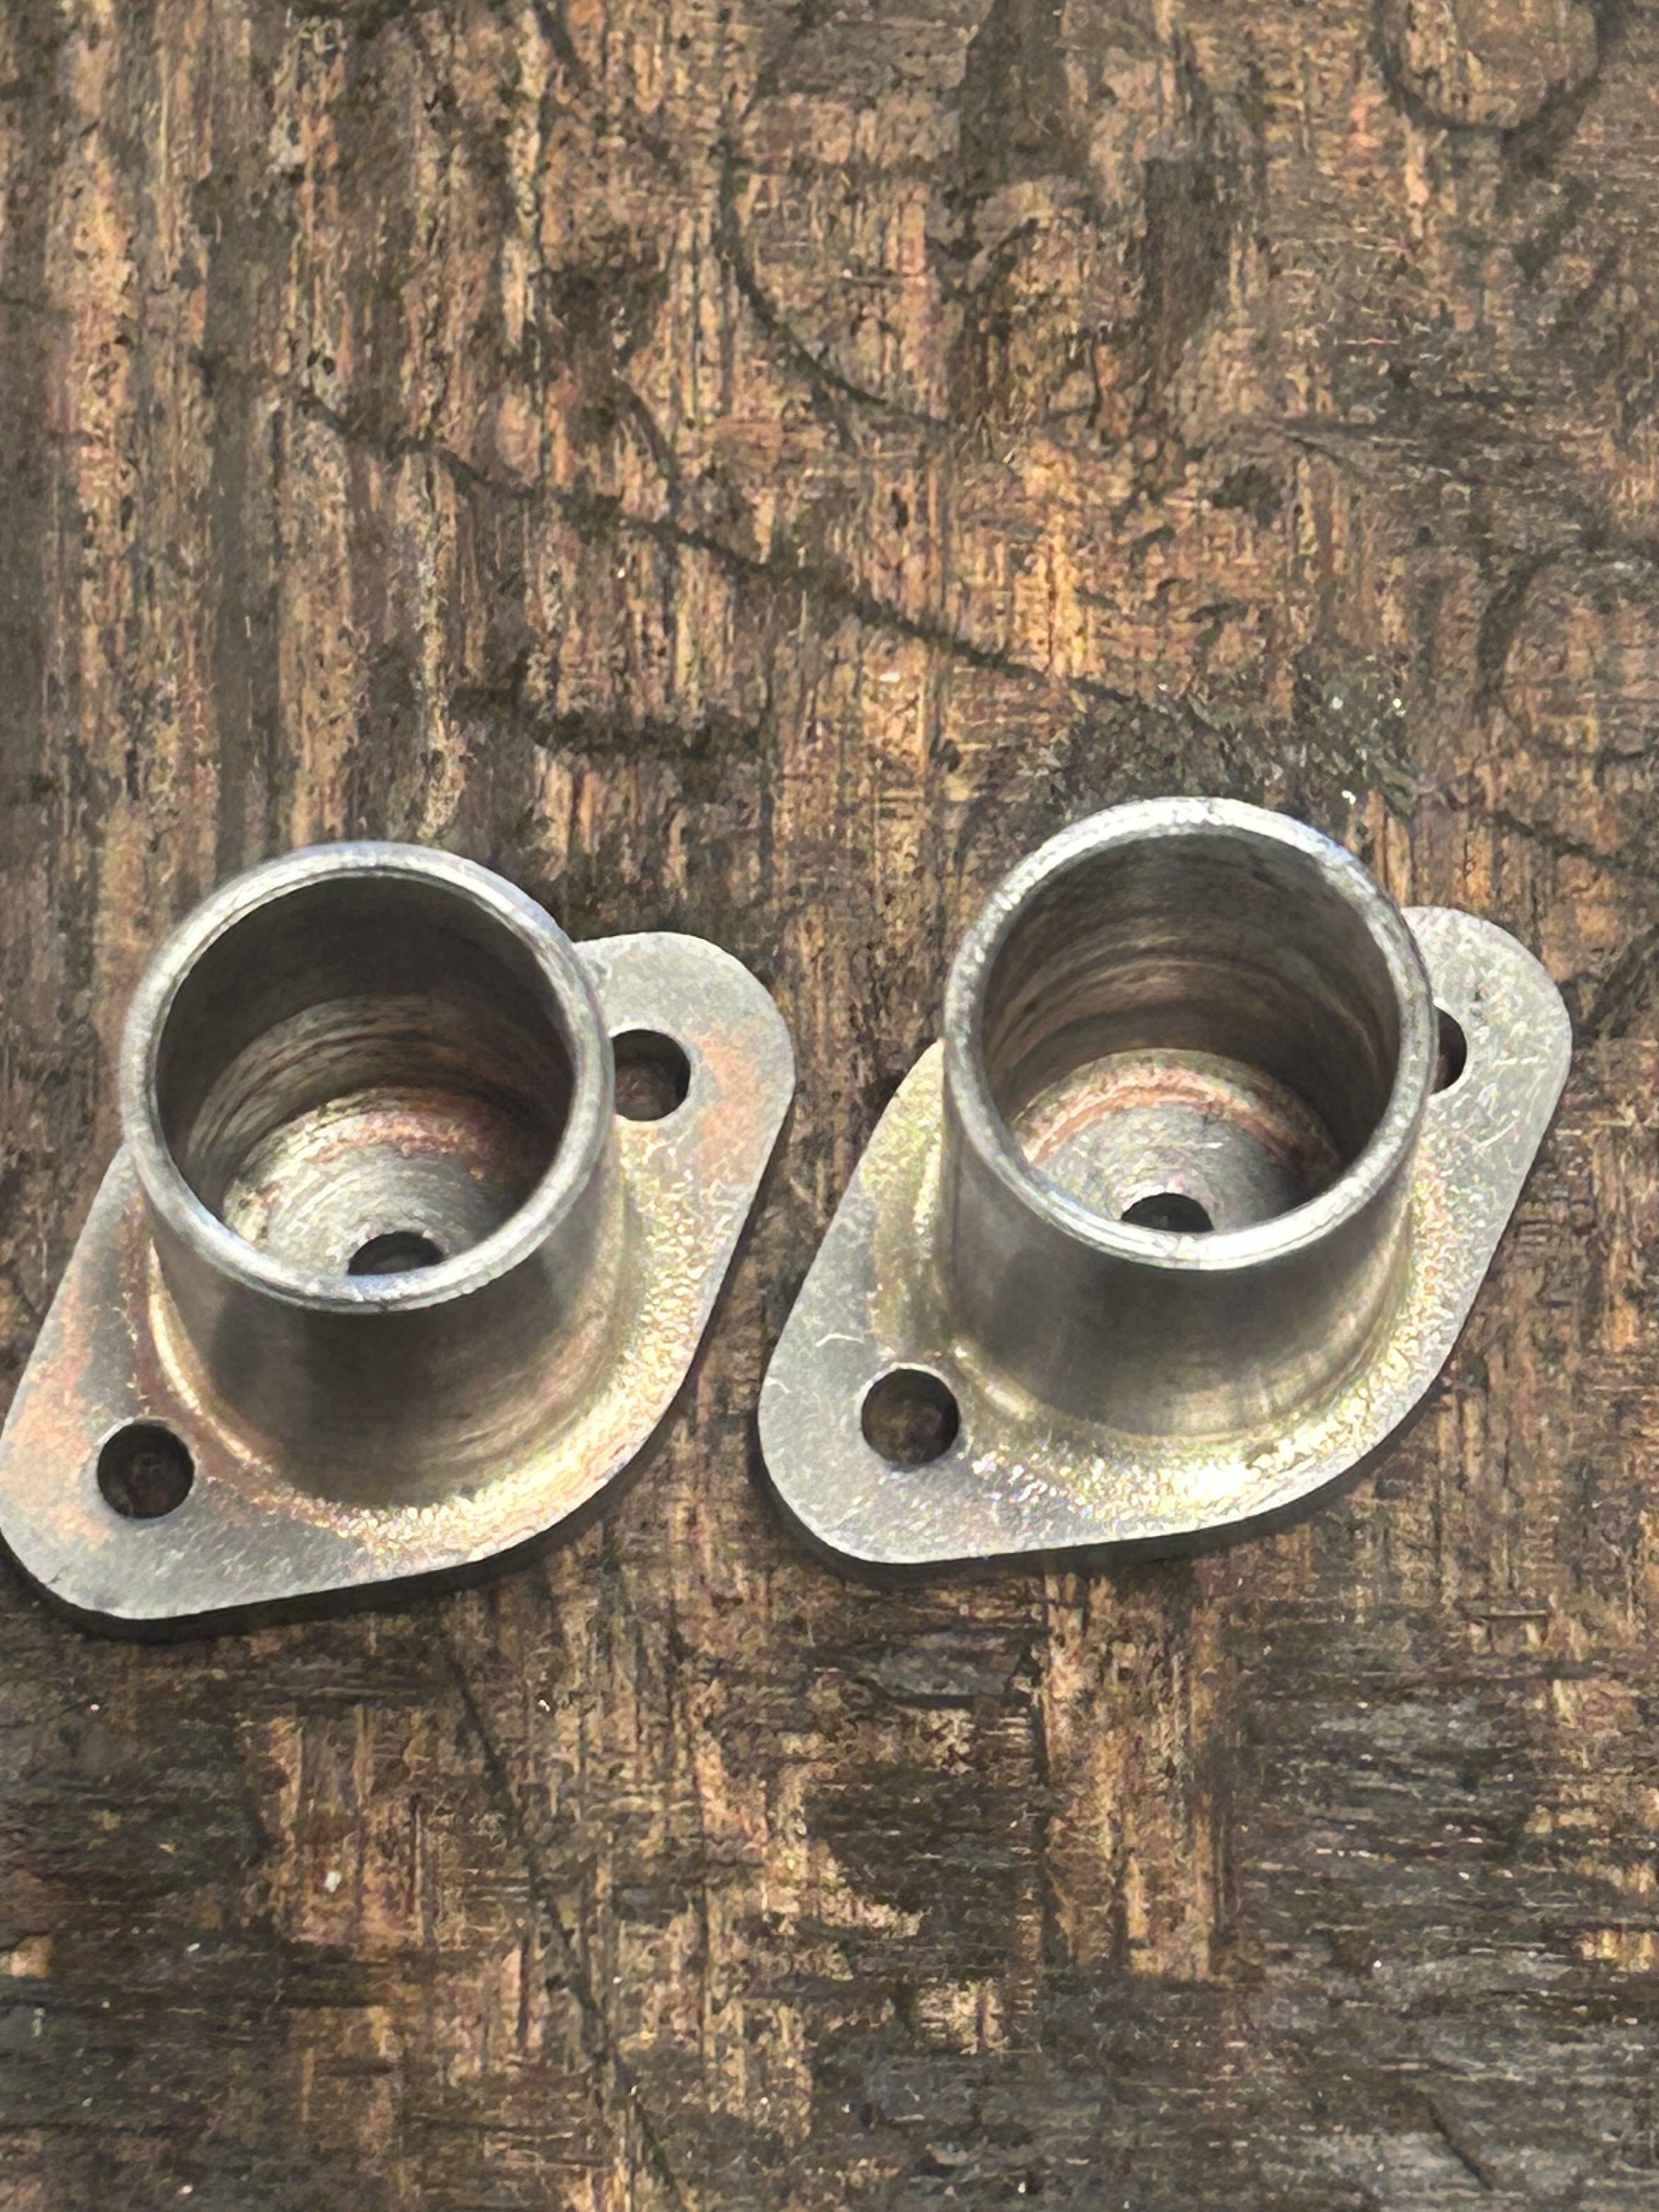
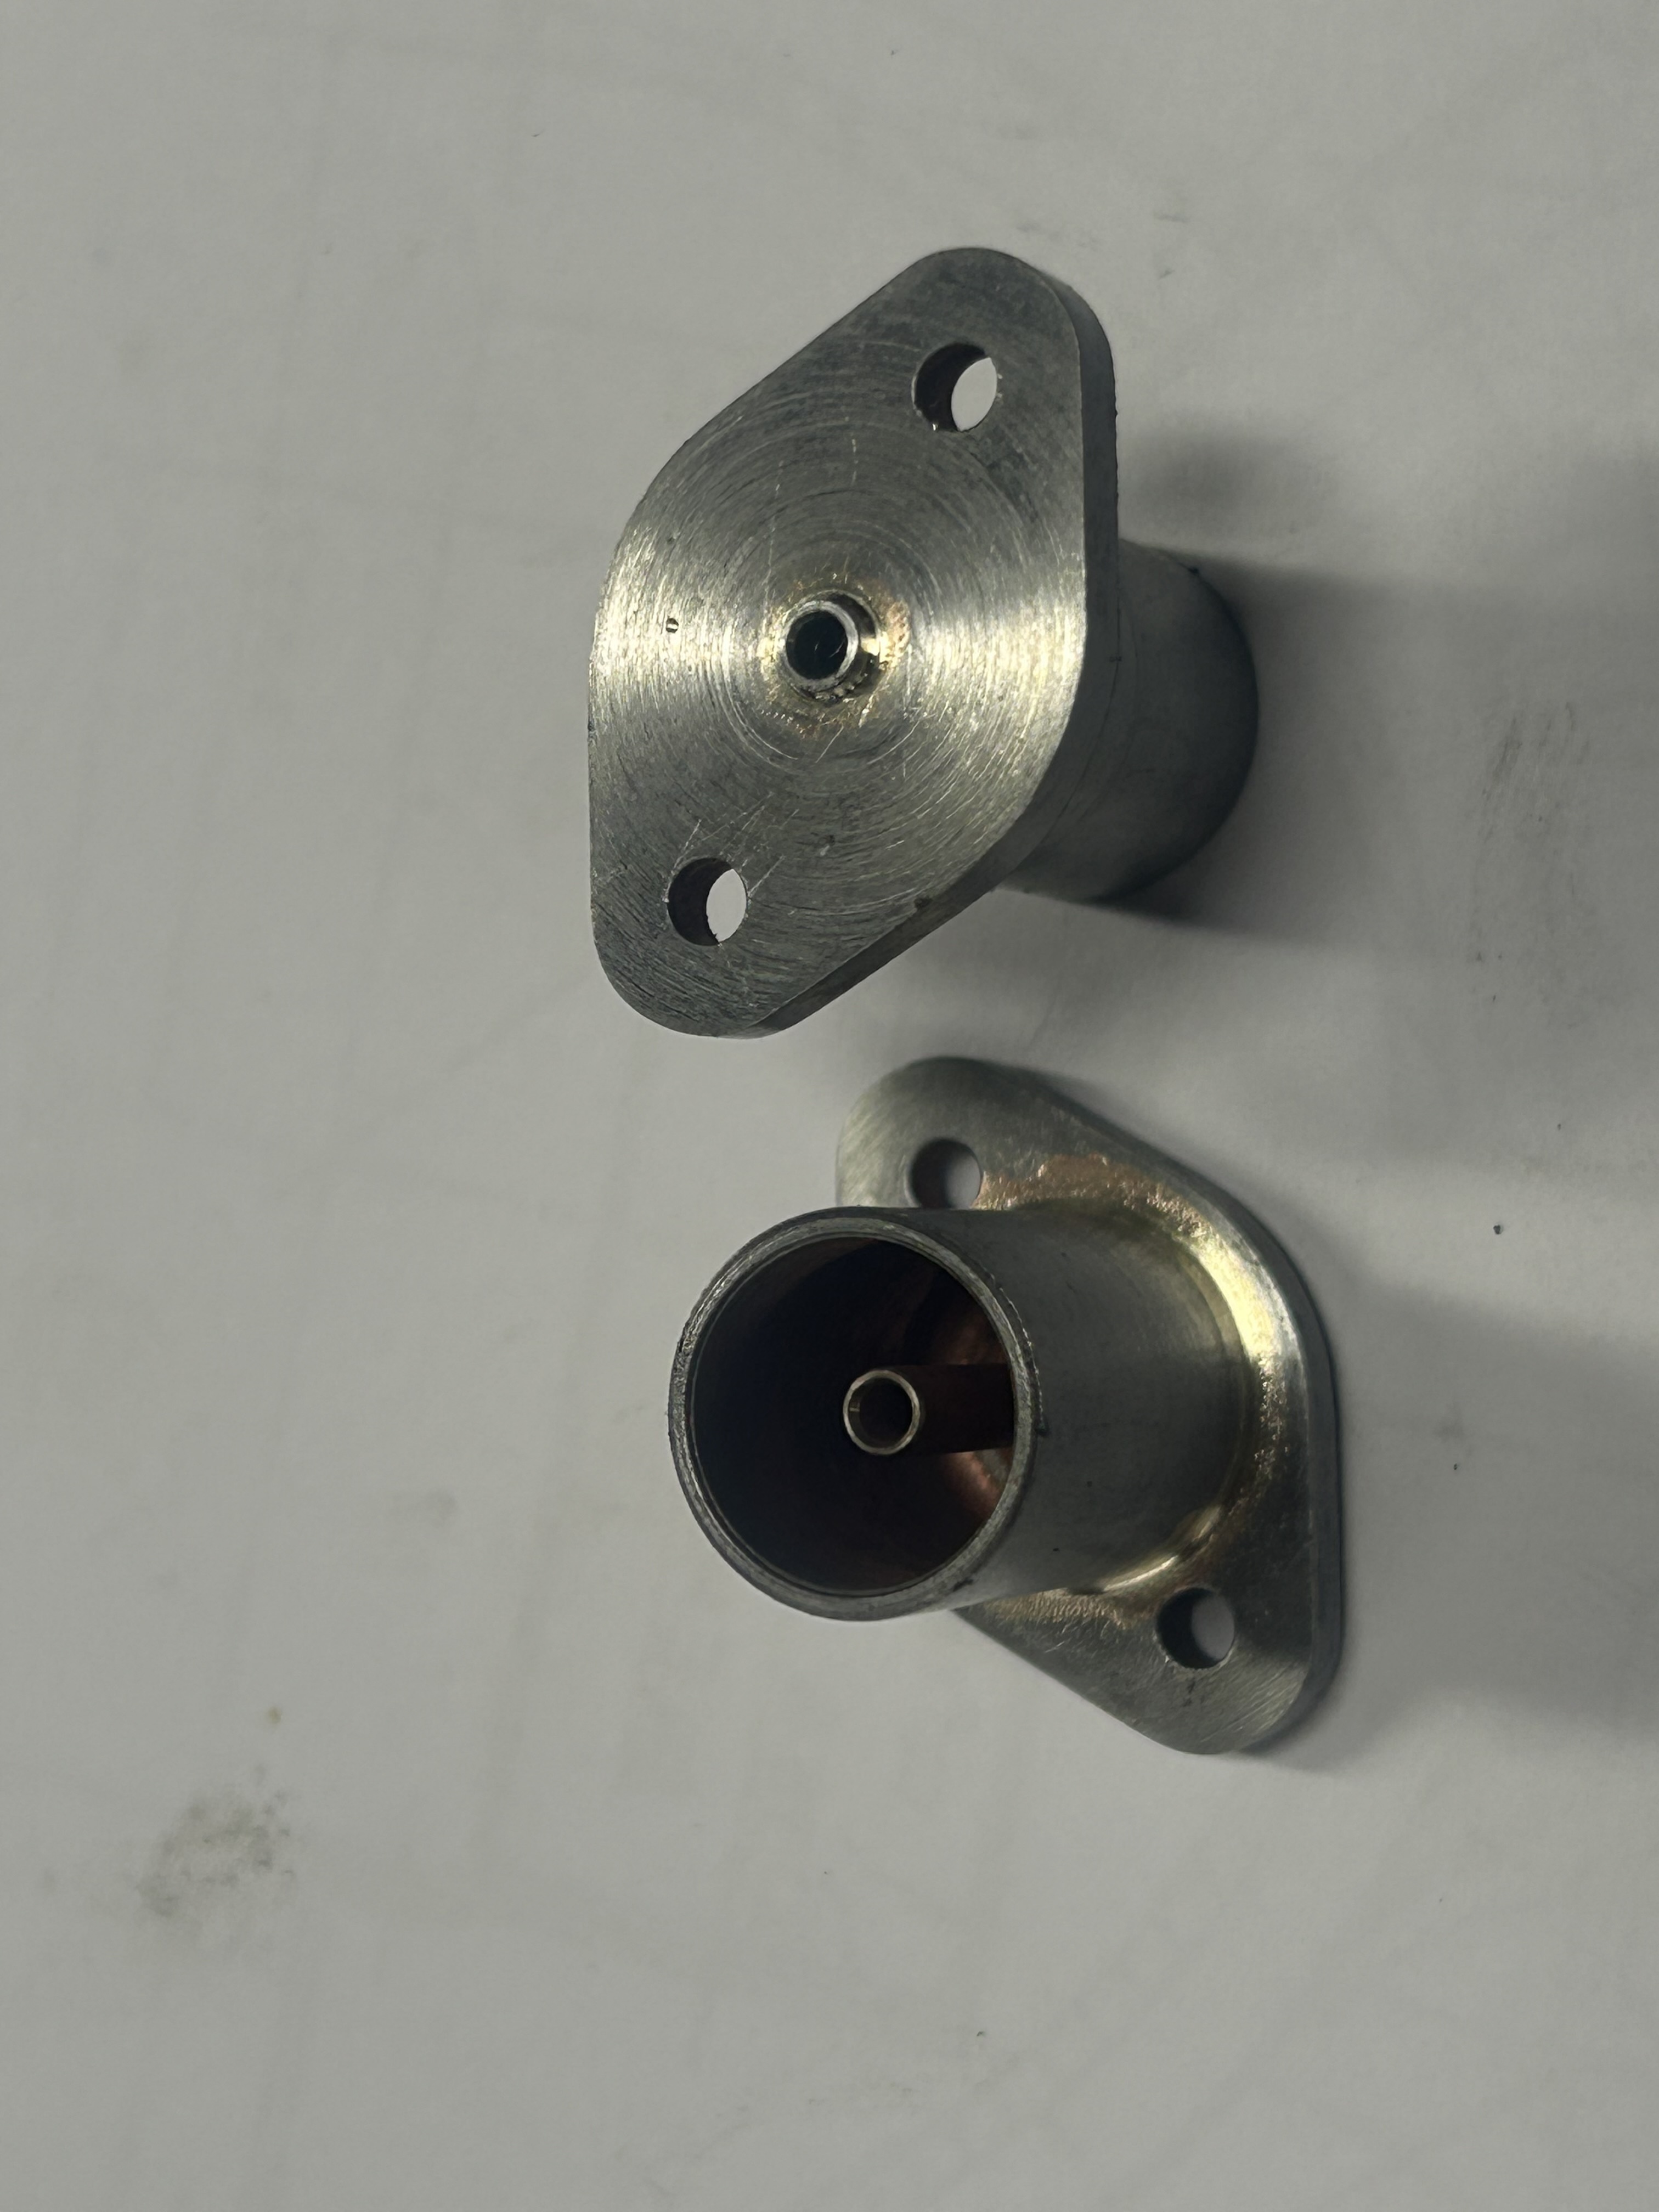
Completed lubricator bodies.

    I hope this helps and will be of interest
    The Home Engineer
    Attached Thumbnails Attached Thumbnails Click image for larger version. 

Name:	IMG_9496.jpeg 
Views:	38 
Size:	2.19 MB 
ID:	50248  
    Last edited by thehomeengineer; Jan 6, 2026 at 12:14 PM.

  2. The Following 3 Users Say Thank You to thehomeengineer For This Useful Post:

    emu roo (Jan 7, 2026), nova_robotics (Jan 7, 2026), thevillageinn (Jan 9, 2026)

Thread Information

Users Browsing this Thread

There are currently 1 users browsing this thread. (0 members and 1 guests)

Bookmarks

Posting Permissions

  • You may not post new threads
  • You may not post replies
  • You may not post attachments
  • You may not edit your posts
  •