
 LinkBack URL
 About LinkBacks


I need to make some engine pushrod ends with a ball shape. In the past I have done this with carefully ground form tools. There can be two problems with this approach. Firstly, form tools can cause chatter and secondly there is a question of how accurately the shape is.
I have been thinking of building a ball turning attachment for several decades but there has rarely been a real need. i only make tools when I have a current need.
My initial ideas centred around "conventional" devices but as I was searching for suitable lumps of metal a much simpler and minimal work idea emerged. Most/all systems that I have seen pictures of don't seem to have a means of fine diameter adjustment. This is an important requirement for me. I guess making door knobs or lathe handles doesn't need it. Then I thought that I needed something like a compound rest slide to mount the tool on for diameter adjustment. That idea led me to ask why build something else when the cross slide can be rotated and is probably more securely held than the small pivots used by many designs of ball turners? So this meant that I only had to make a single piece, a tool holder that would put the cutting edge near the rotation axis of the compound rest. Job done.
Before use I'll need to clock up the the hole that the compound rest pivots on to centralize that using the cross slide and then lock it in place. That will put the rotational axis on the same longtitudinal vertical plane as the centre of the work piece, ensuring a circular ball rather than a distorted circle with pointed ends as is often seen on winding handles. Perhaps I should make some form of stop to eliminate the clocking each time.
There is one principal disadvantage with this design. The cutting edge of the tool is set a fair way back and the saddle can't get close enough to a chuck without a lot of workpiece overhang. There is also a compound rest rotational clearance problem with a normal chuck. Not so much of a problem with 25 mm and above material if the work piece is long enough to give enough overhang. For smaller diameters I have found that an ER25 collet chuck with a 5C shank held in a chuck on the parallel section works well. This ball turner is suitable for a wide range of ball diameters up to around 40 mm diameter, which is far larger than any anticipated work.
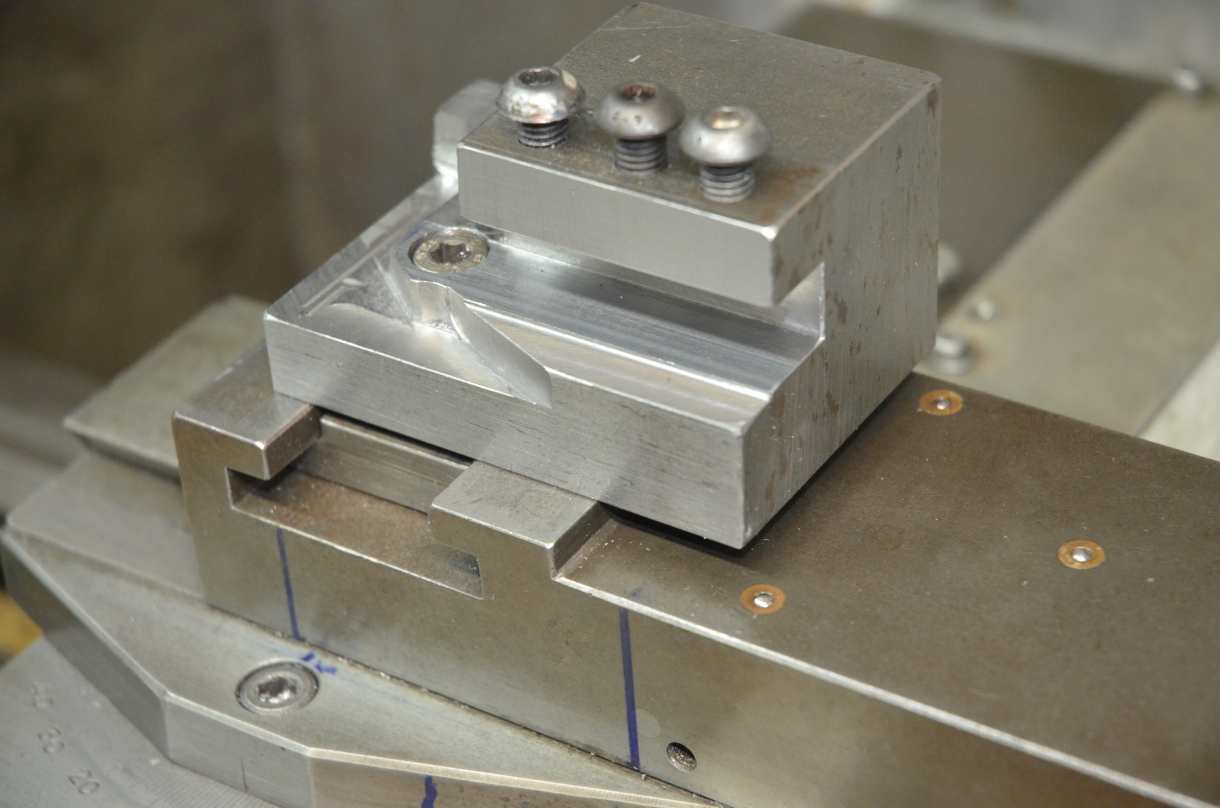
So i dug out a suitable steel block from the scrap bin and did the minimum amount of milling to enable tool holding and to give work piece and collet chuck clearance. I like to leave the maximum amount of metal in place for rigidity and general mass. I decided to build it to take 1/2" square insert lathe tools because it will give me great flexibility in the choice of cutting tool shapes. I machined the height of the floor of the tool mounting to put the cutting edge at the centre height of the work piece.

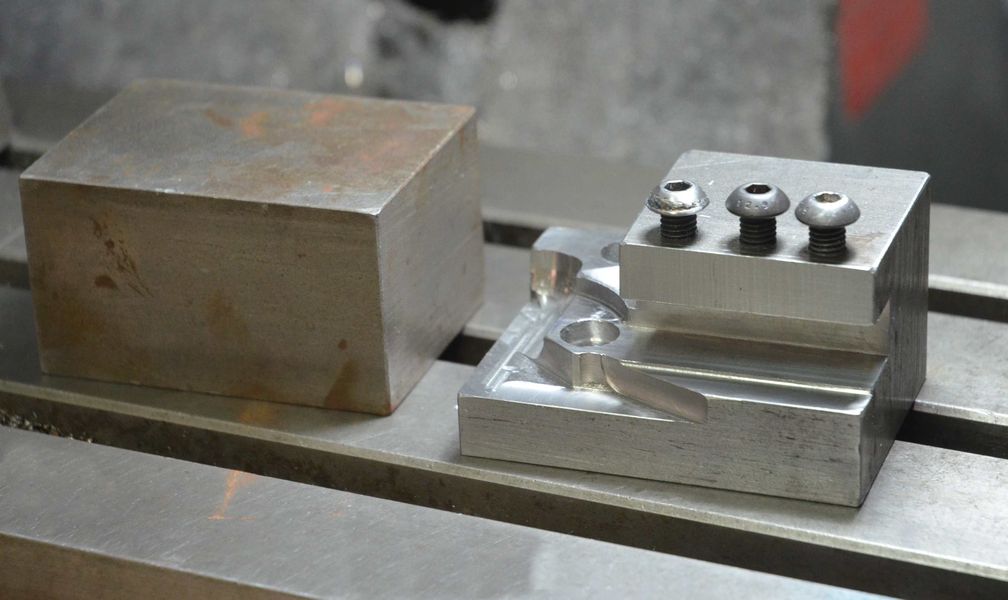
The machined tool holder block compared to the original lump of steel.
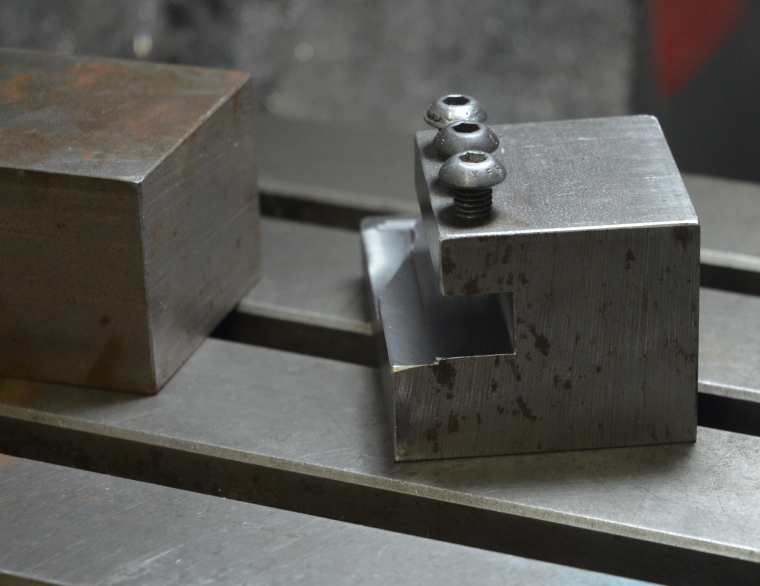
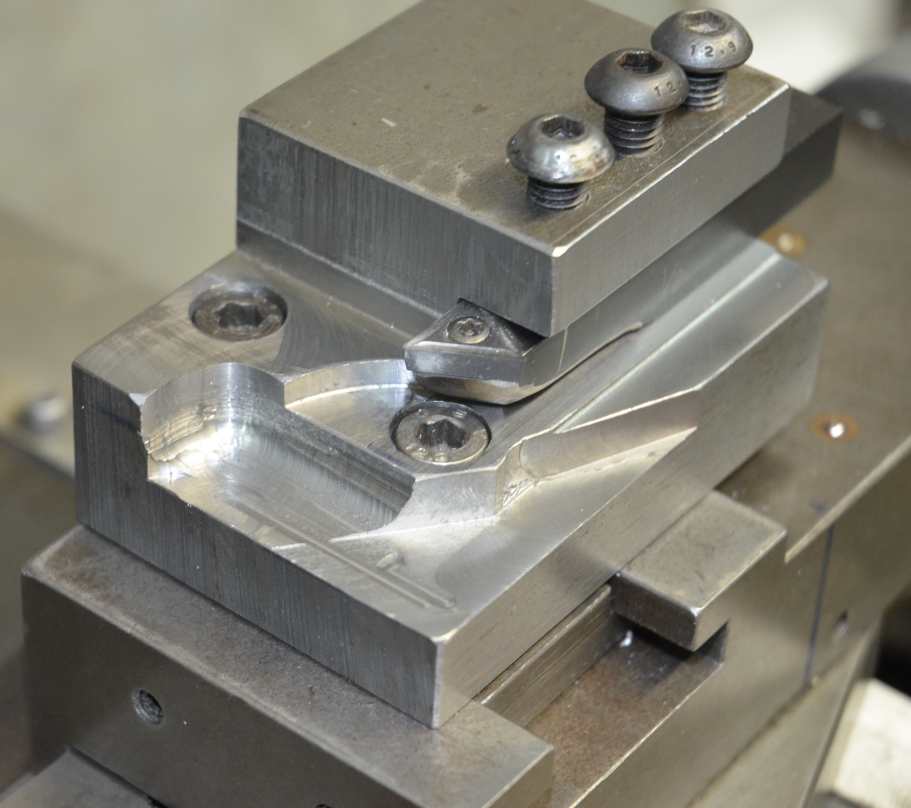
The block bolted in place on the compound slide in place of the usual tool post. The odd shapes milled away are for clearance as the compound rest is rotated.

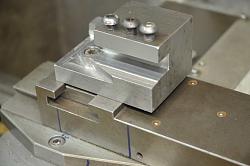
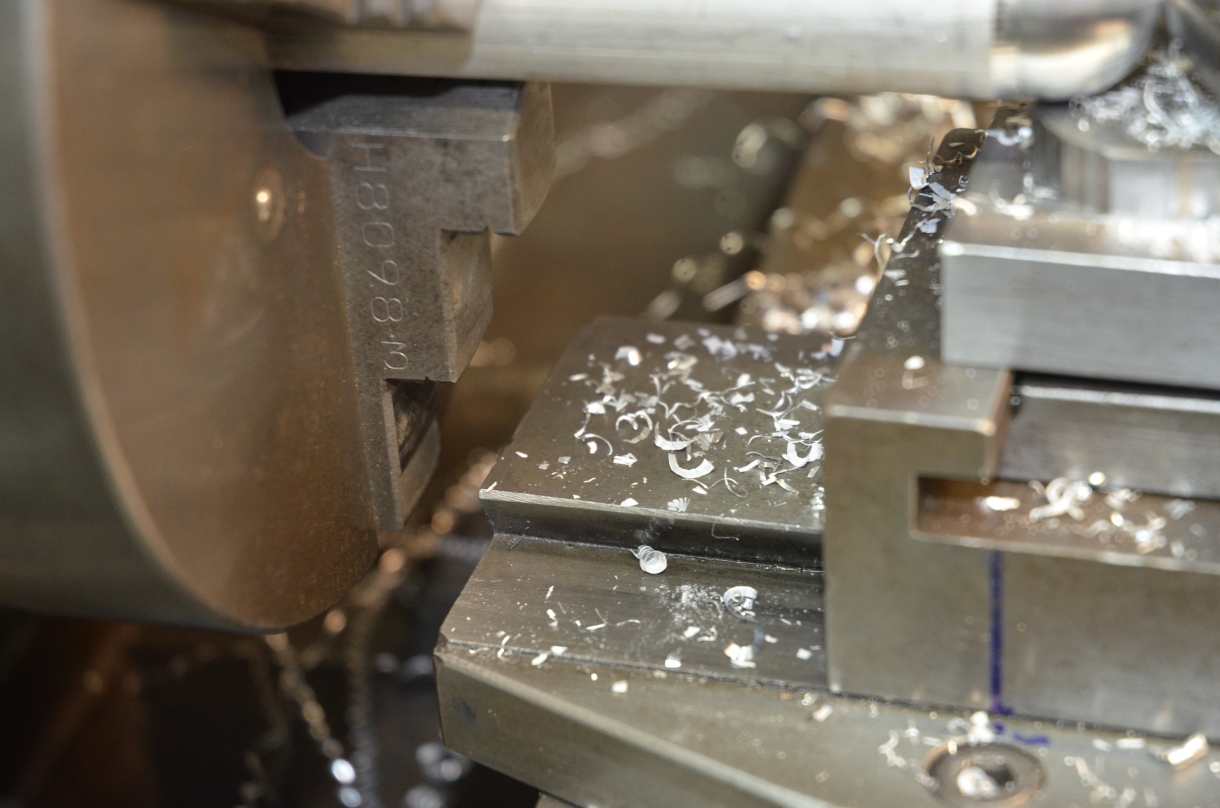
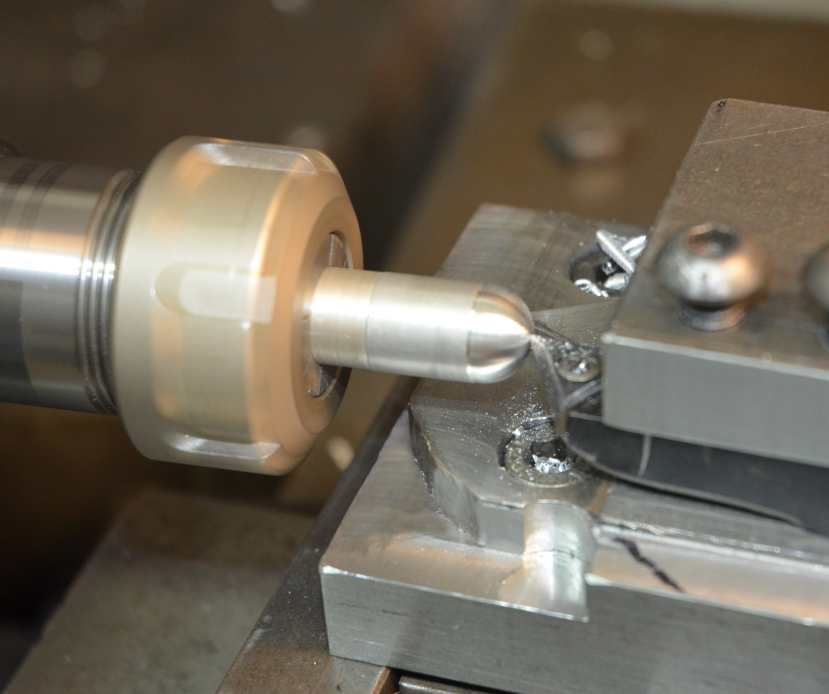
Machining a 25 mm diameter ball end. Note the required overhang and the closeness of the fixed section of the slide to the chuck.
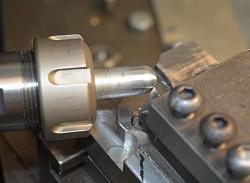
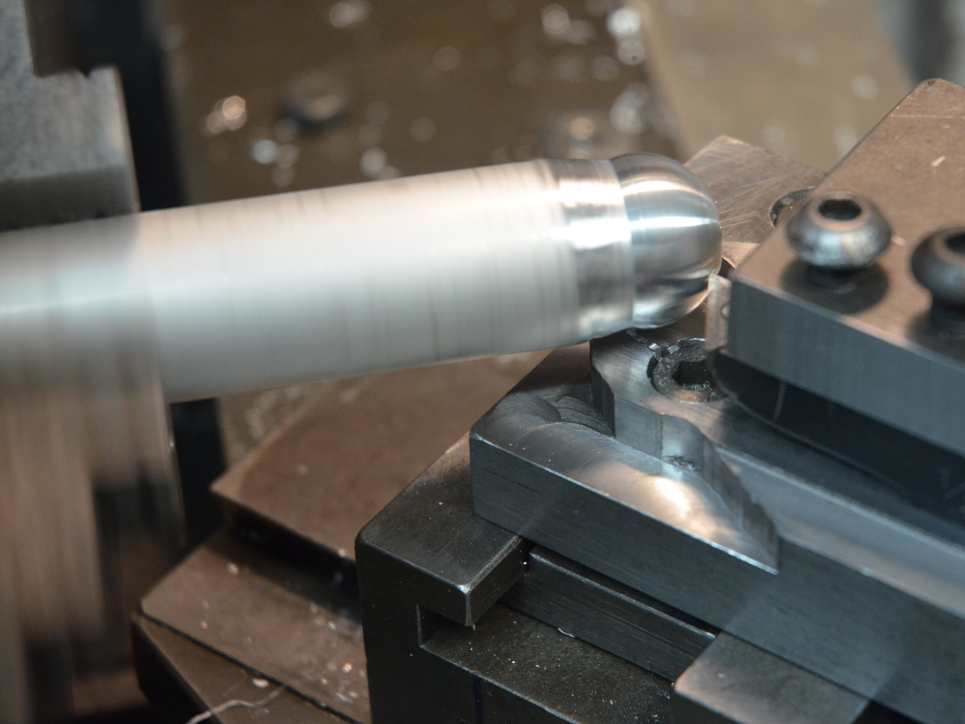
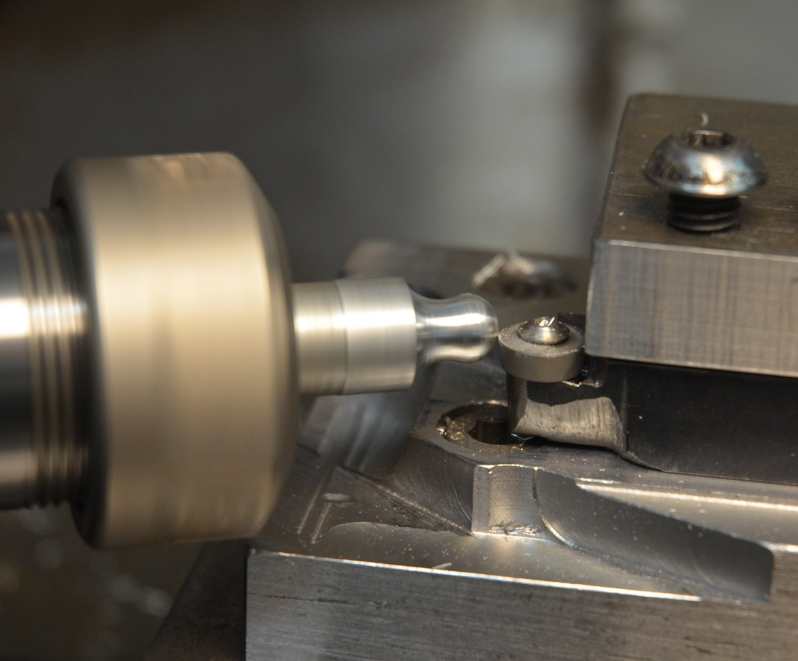
Machining a 12 mm ball end held in the ER25 collet. Since this photo was taken, more clearance material has been machined away and the overhang from the collet has been greatly reduced.
I don't claim that this is anywhere near the best ball turner out there but it does a great job and it must be one of the simplest to make and it is a solid and rigid implementation. I love simplicity and minimum work.


 Reply With Quote
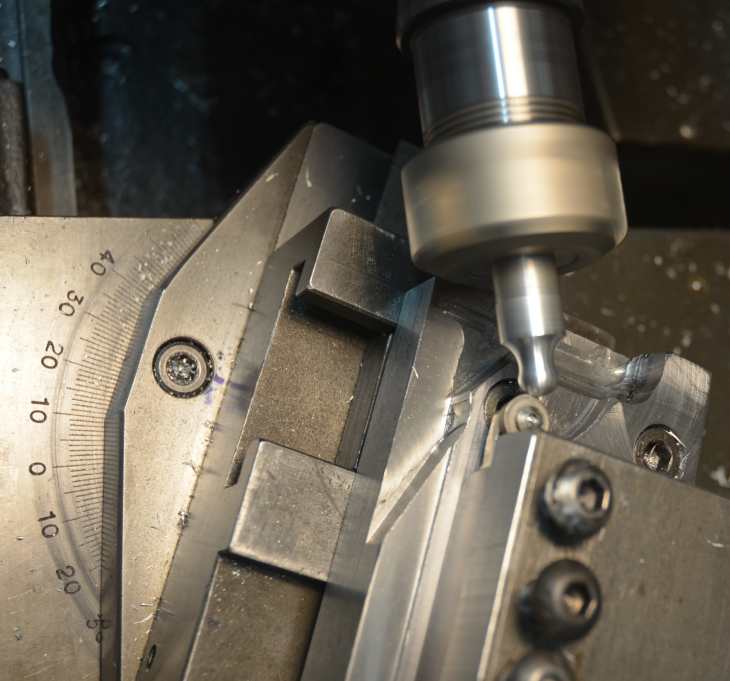


Bookmarks