-
5 Attachment(s)
Sod removal sled.
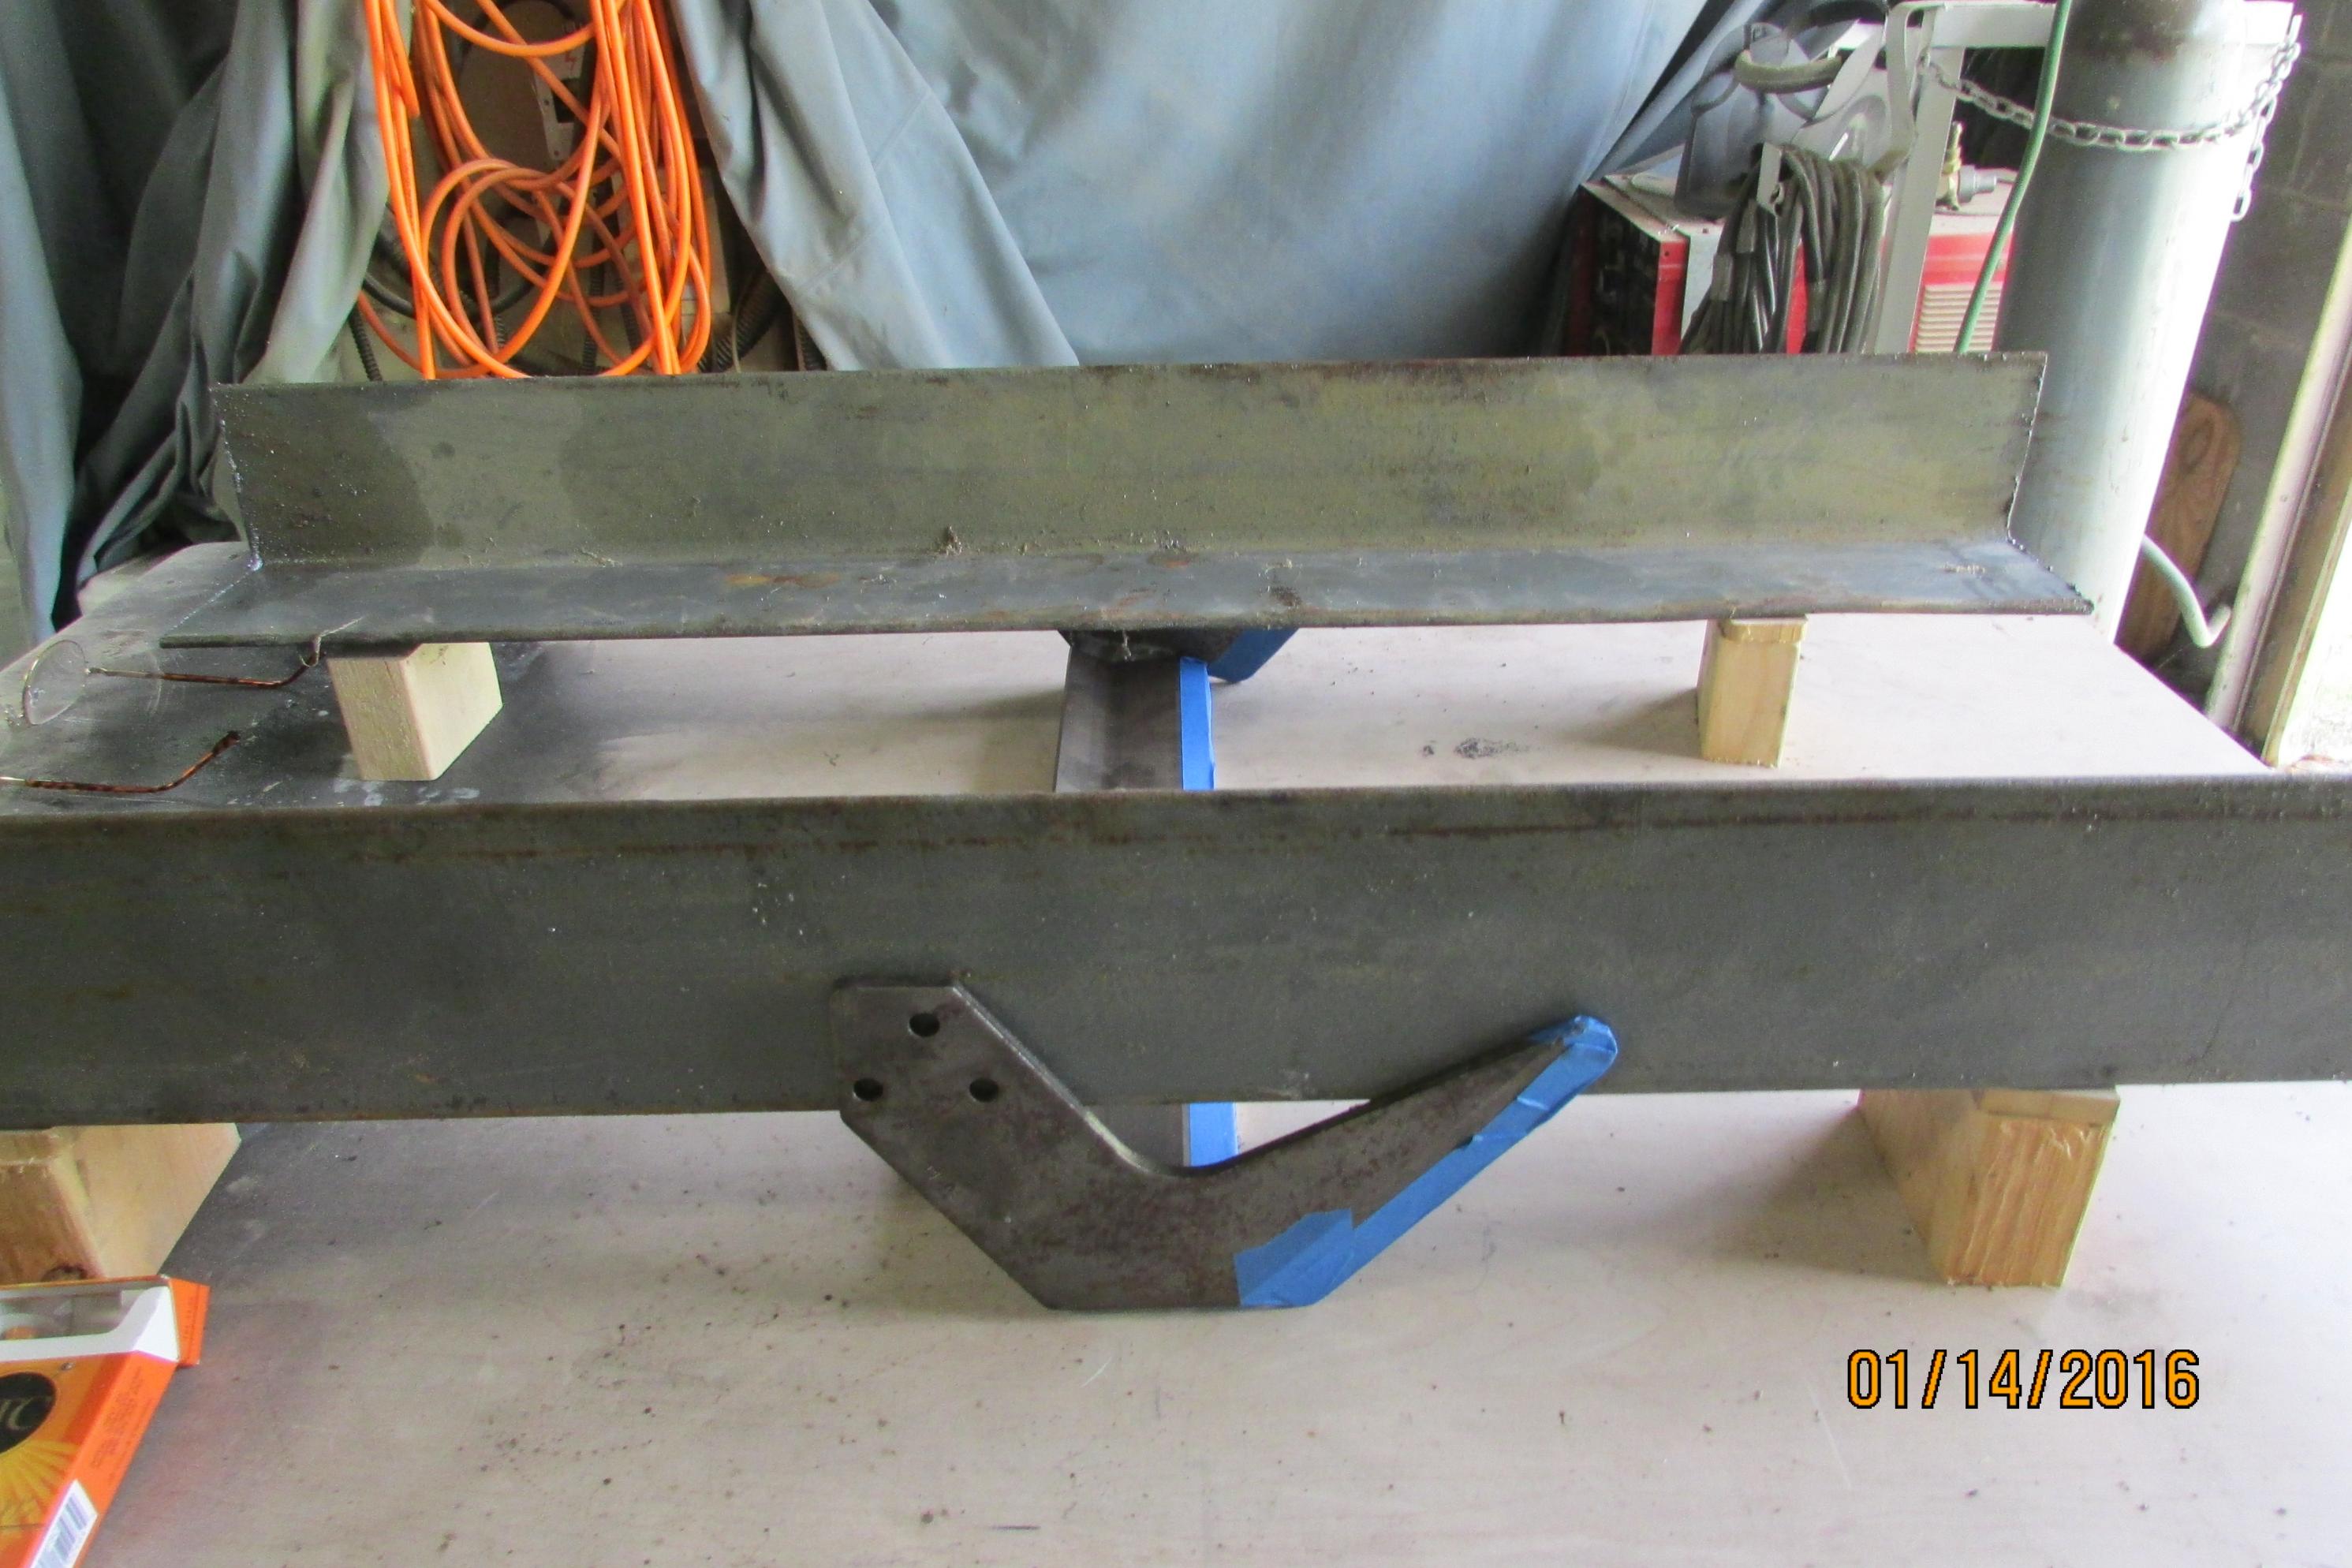
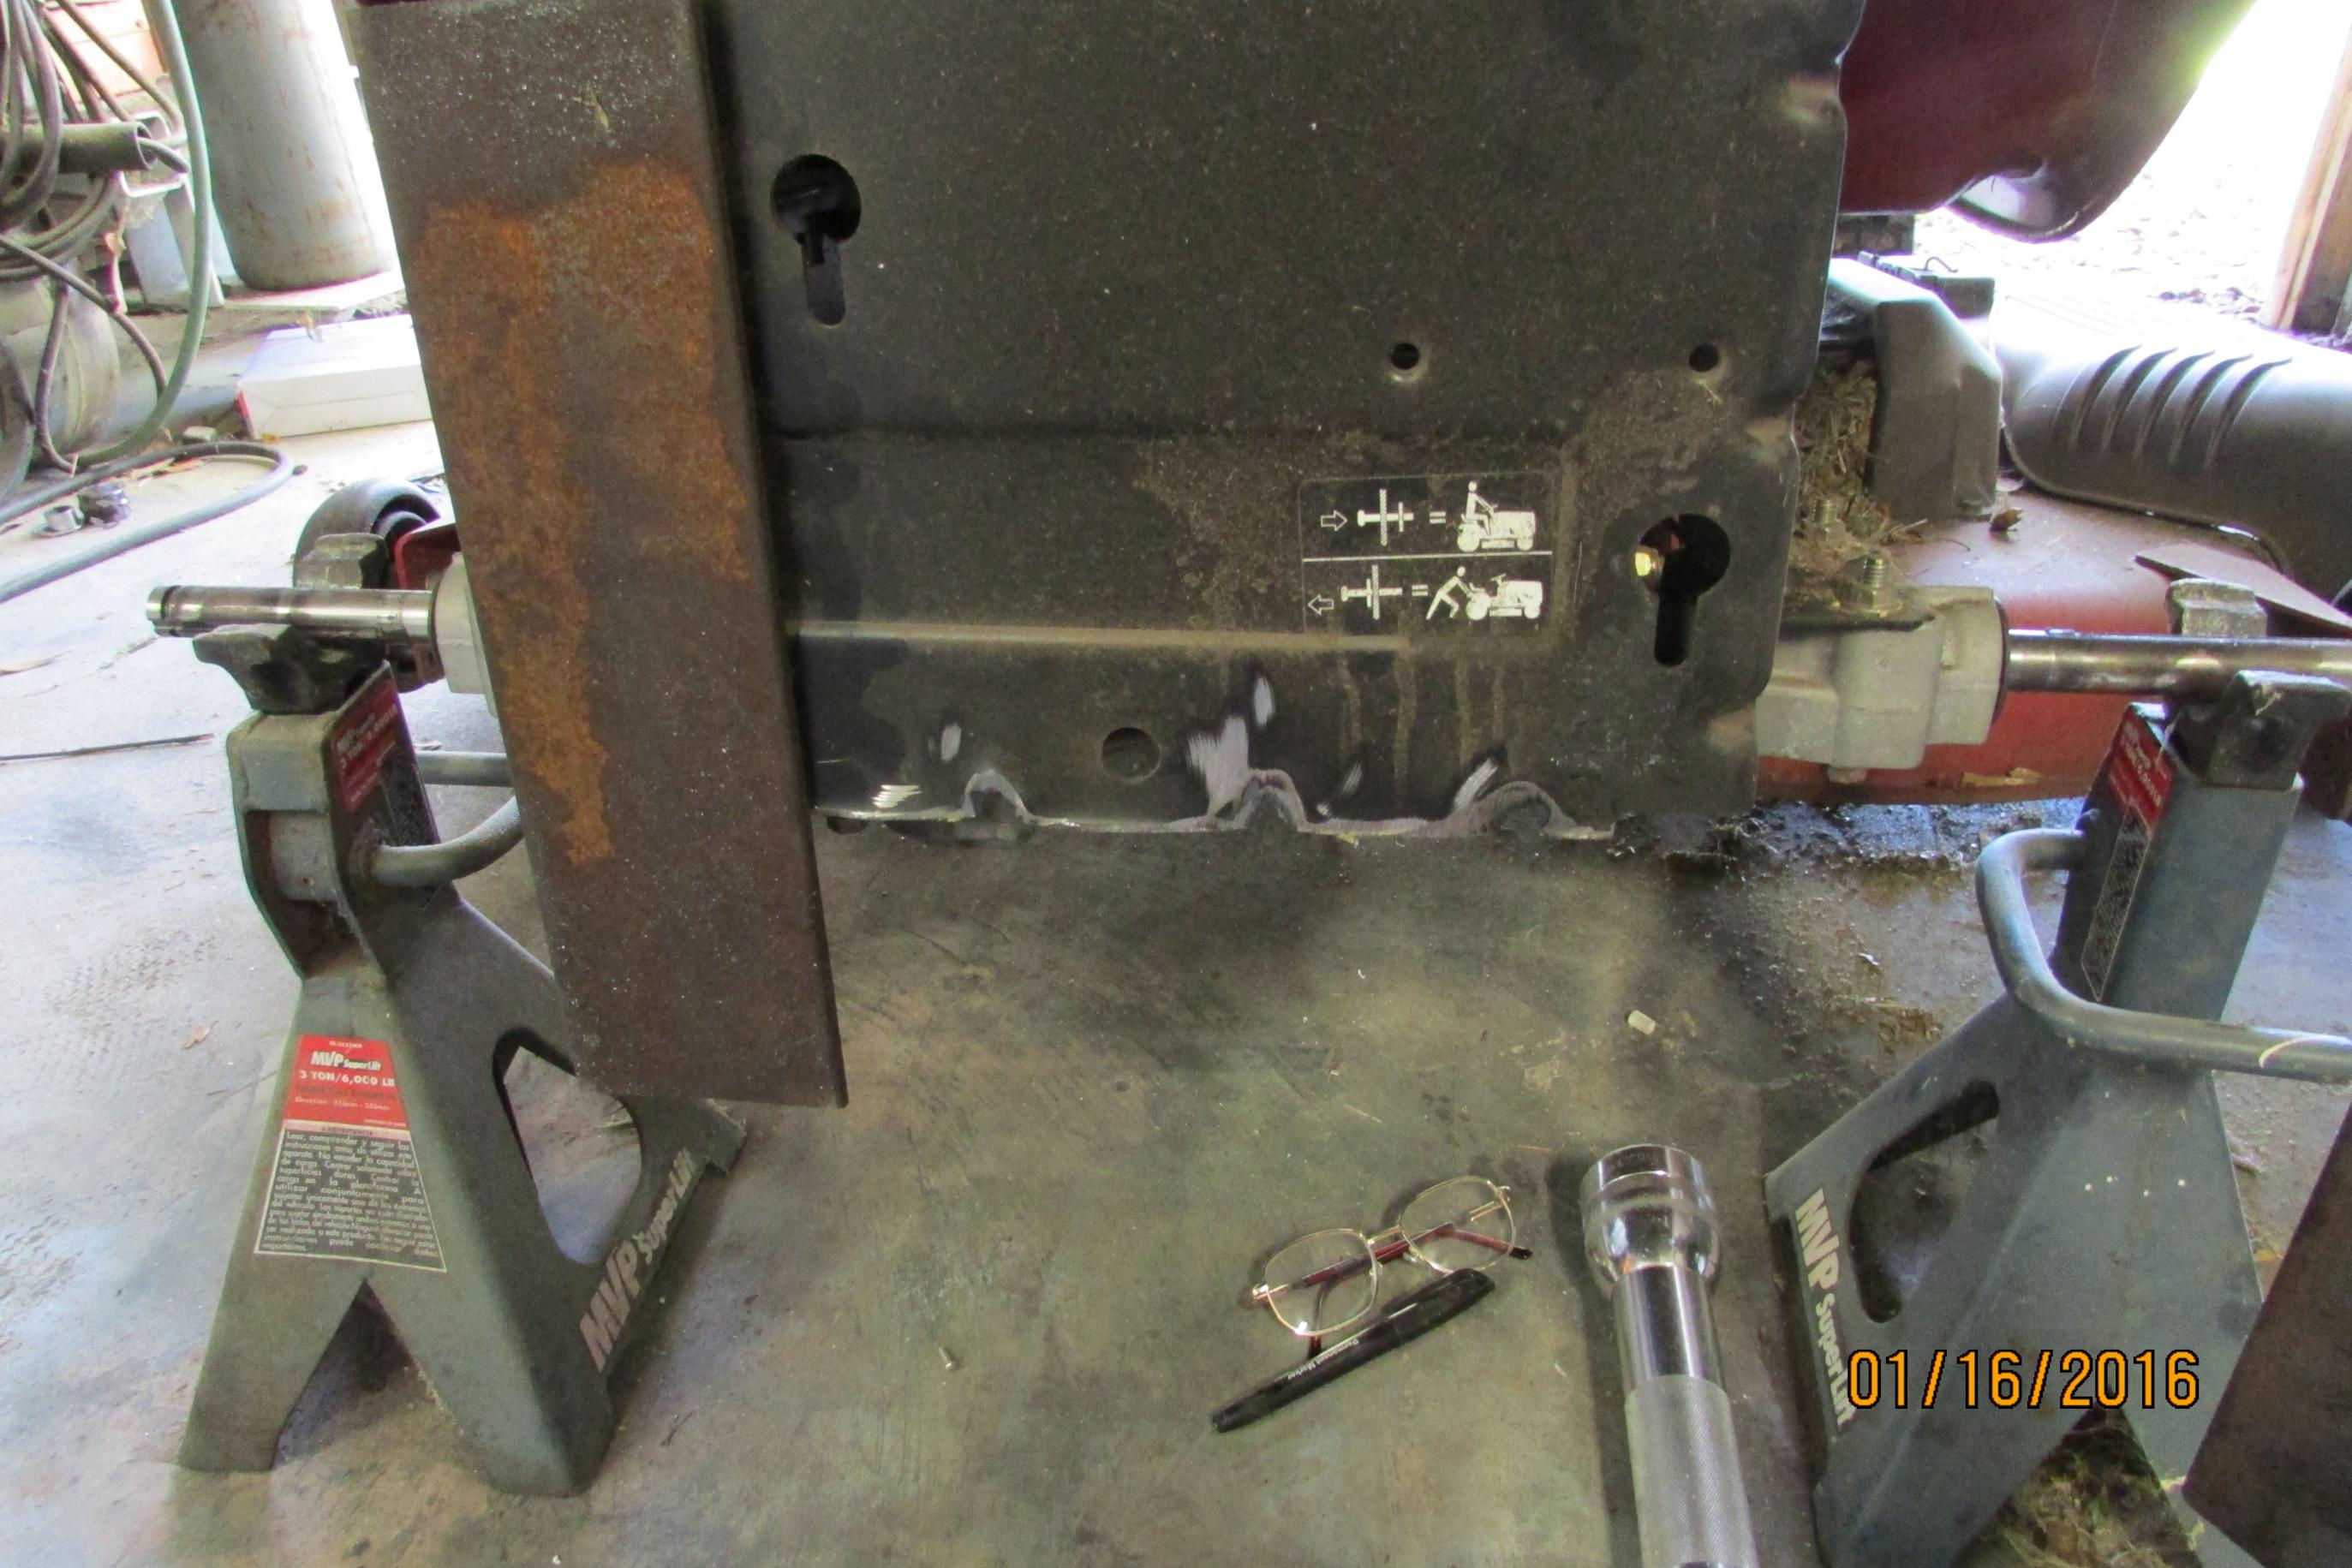
Well, here I go again, trying to save some money and the main thing to keep me busy. Many of you know that I am going to install an outdoor railroad and patio, so the sod has to be removed. A powered sod remover can be expensive, so by looking on the web I have seen some sod sleds pulled behind a garden lawnmower and that is what I am attempting. Of course, mine will be different. The two successful sleds that I saw in action required some extra weight to bury the 2 1/2 inch blade and they did it by having a neighbor ride on the sled for the additional weight. I will attempt to add the weight by adding concrete blocks and tying them down to the sled. In order to make one of these sleds work, there are two variables, one weight, two, enough power to pull the sled once the blade is buried. One can be satisfied by adding blocks, the other is, does my tractor have enough power to pull the sled once the blade is buried, this remains to be seen and you will find out along with me, when the sled is finished. The sled is mainly completed, but I still have to add some wheels to it to drag it around with the blade is out of the turf. Also, I had to reinforce the hitch on the tractor, as the sheet metal that came with the tractor would probably caused me some problems and also the height of the hitch was too high for the center of pull of the sled, so I am correcting that also. I cut off the old hitch because it was in the way and adding angle to the mix for a stronger hitch, here are some pictures and I will add more when I advance further into the project. Bob.Attachment 7507Attachment 7508Attachment 7509Attachment 7510Attachment 7511
-
4 Attachment(s)
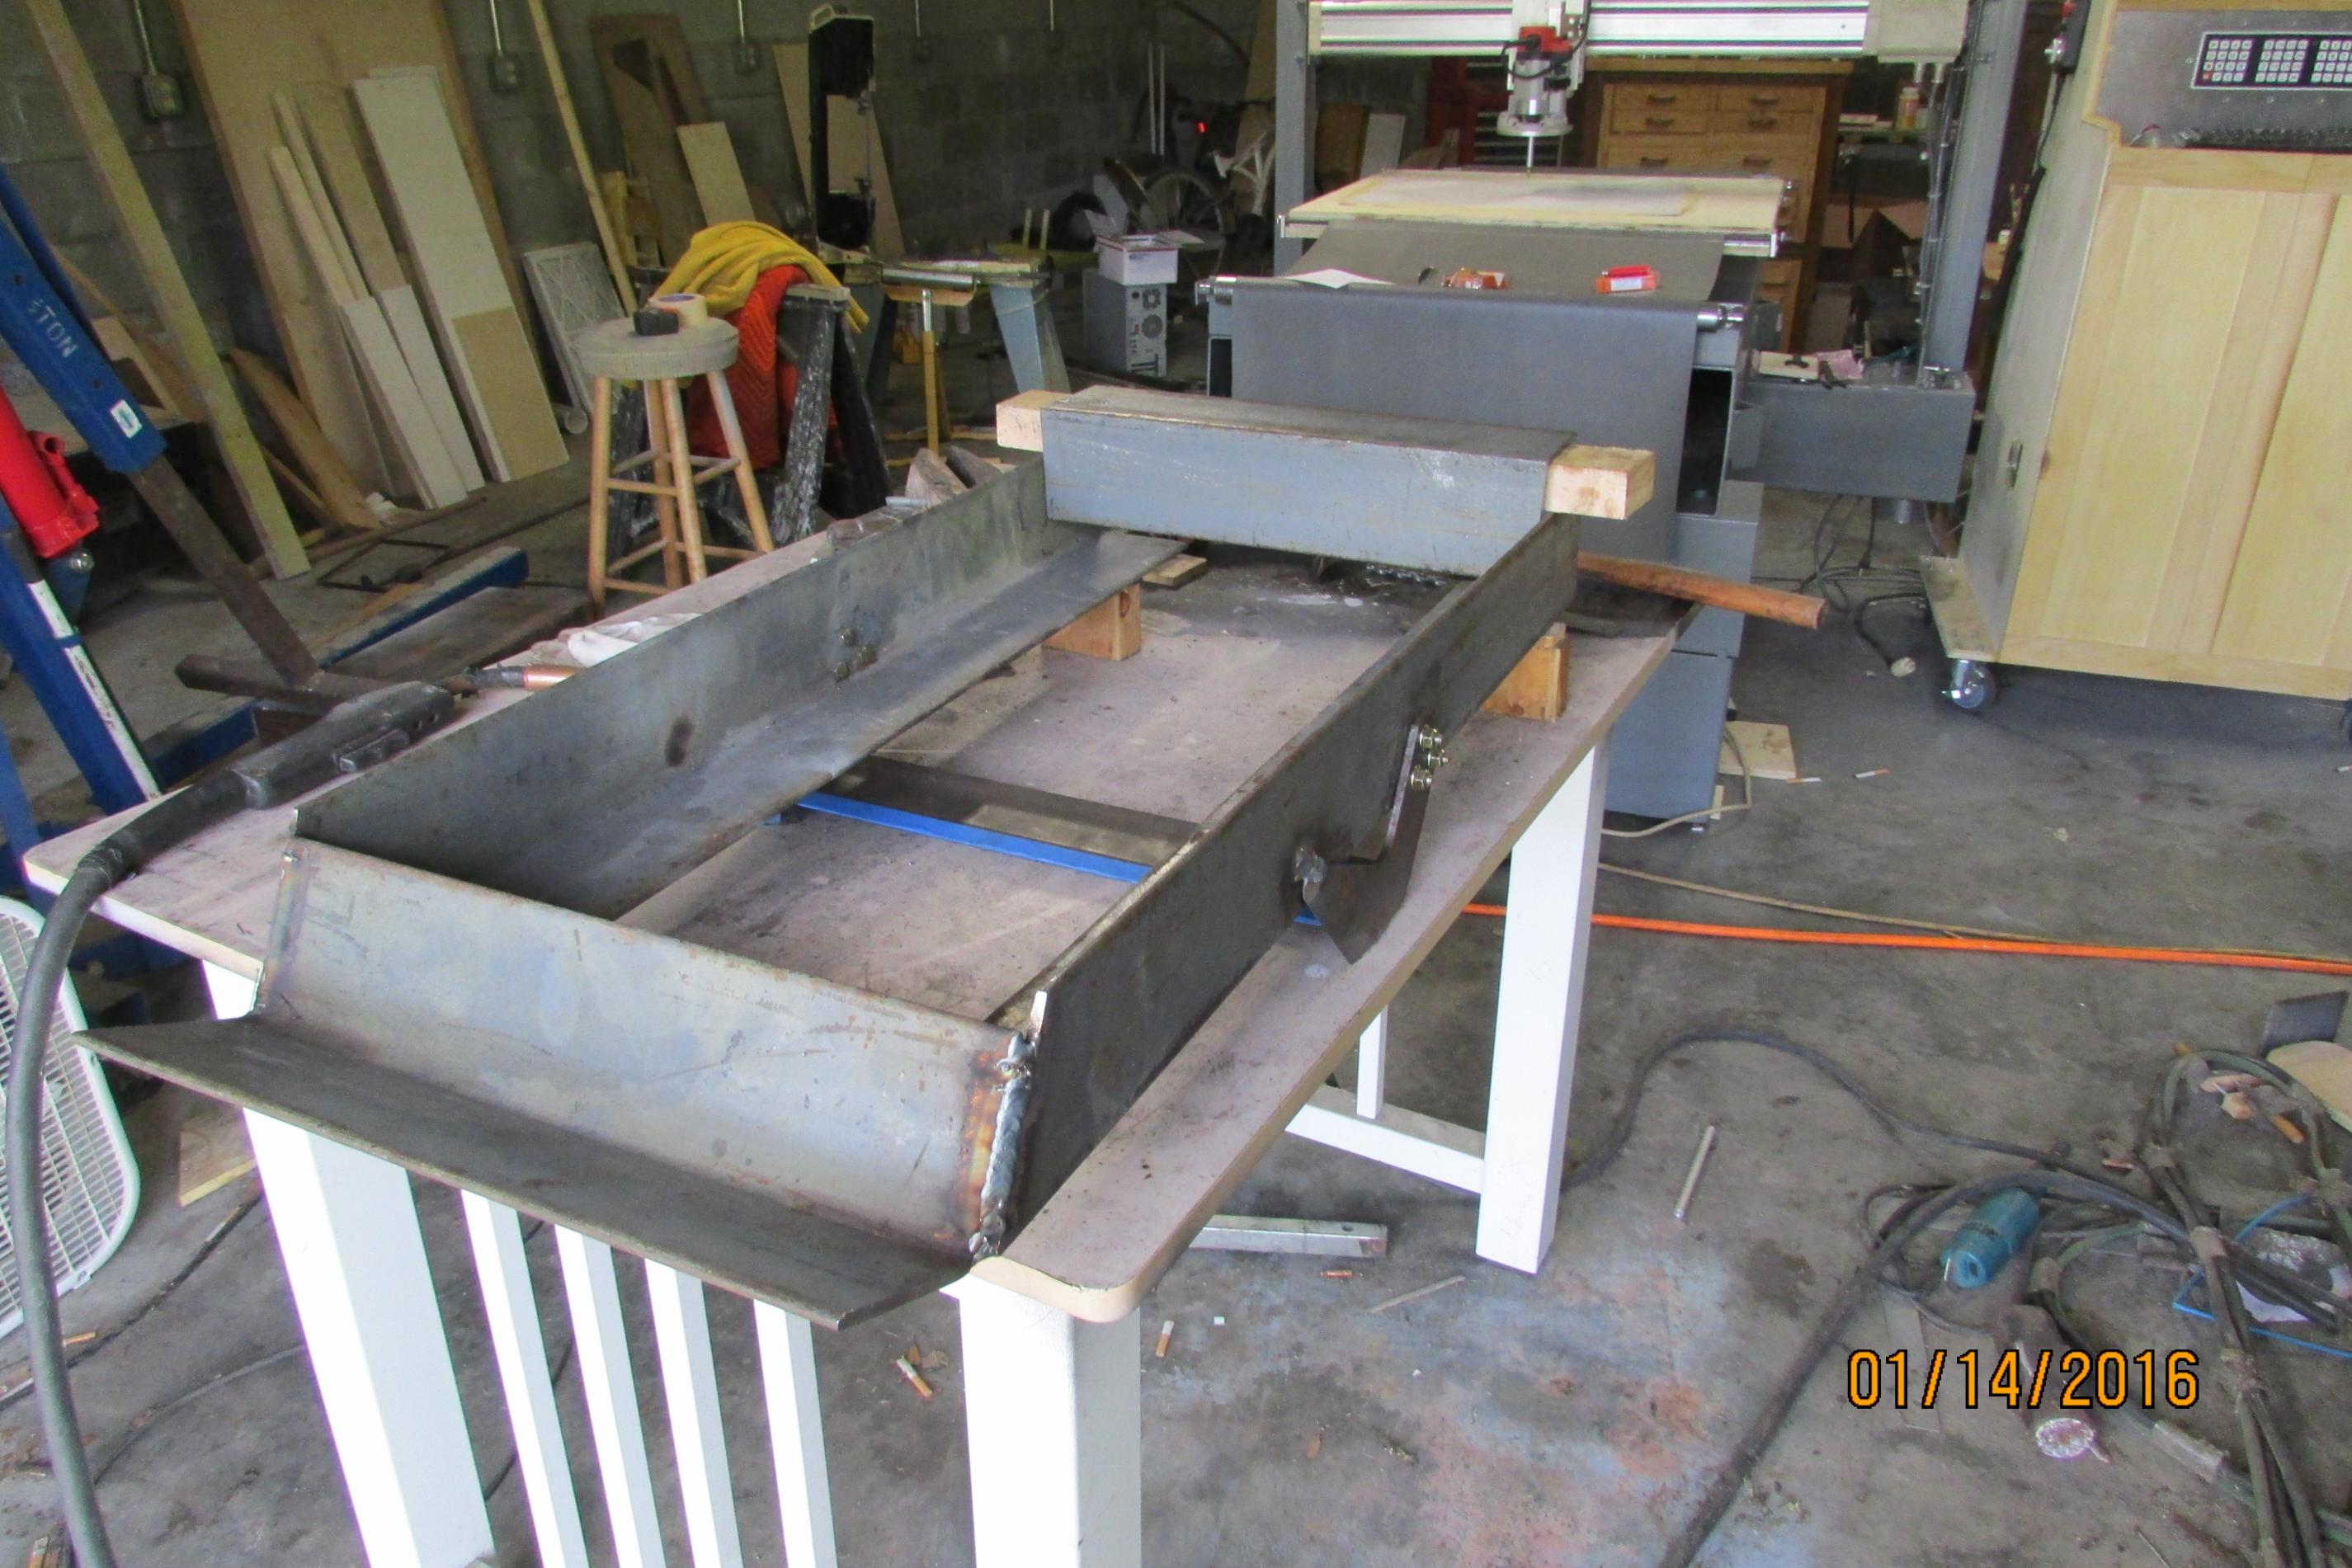
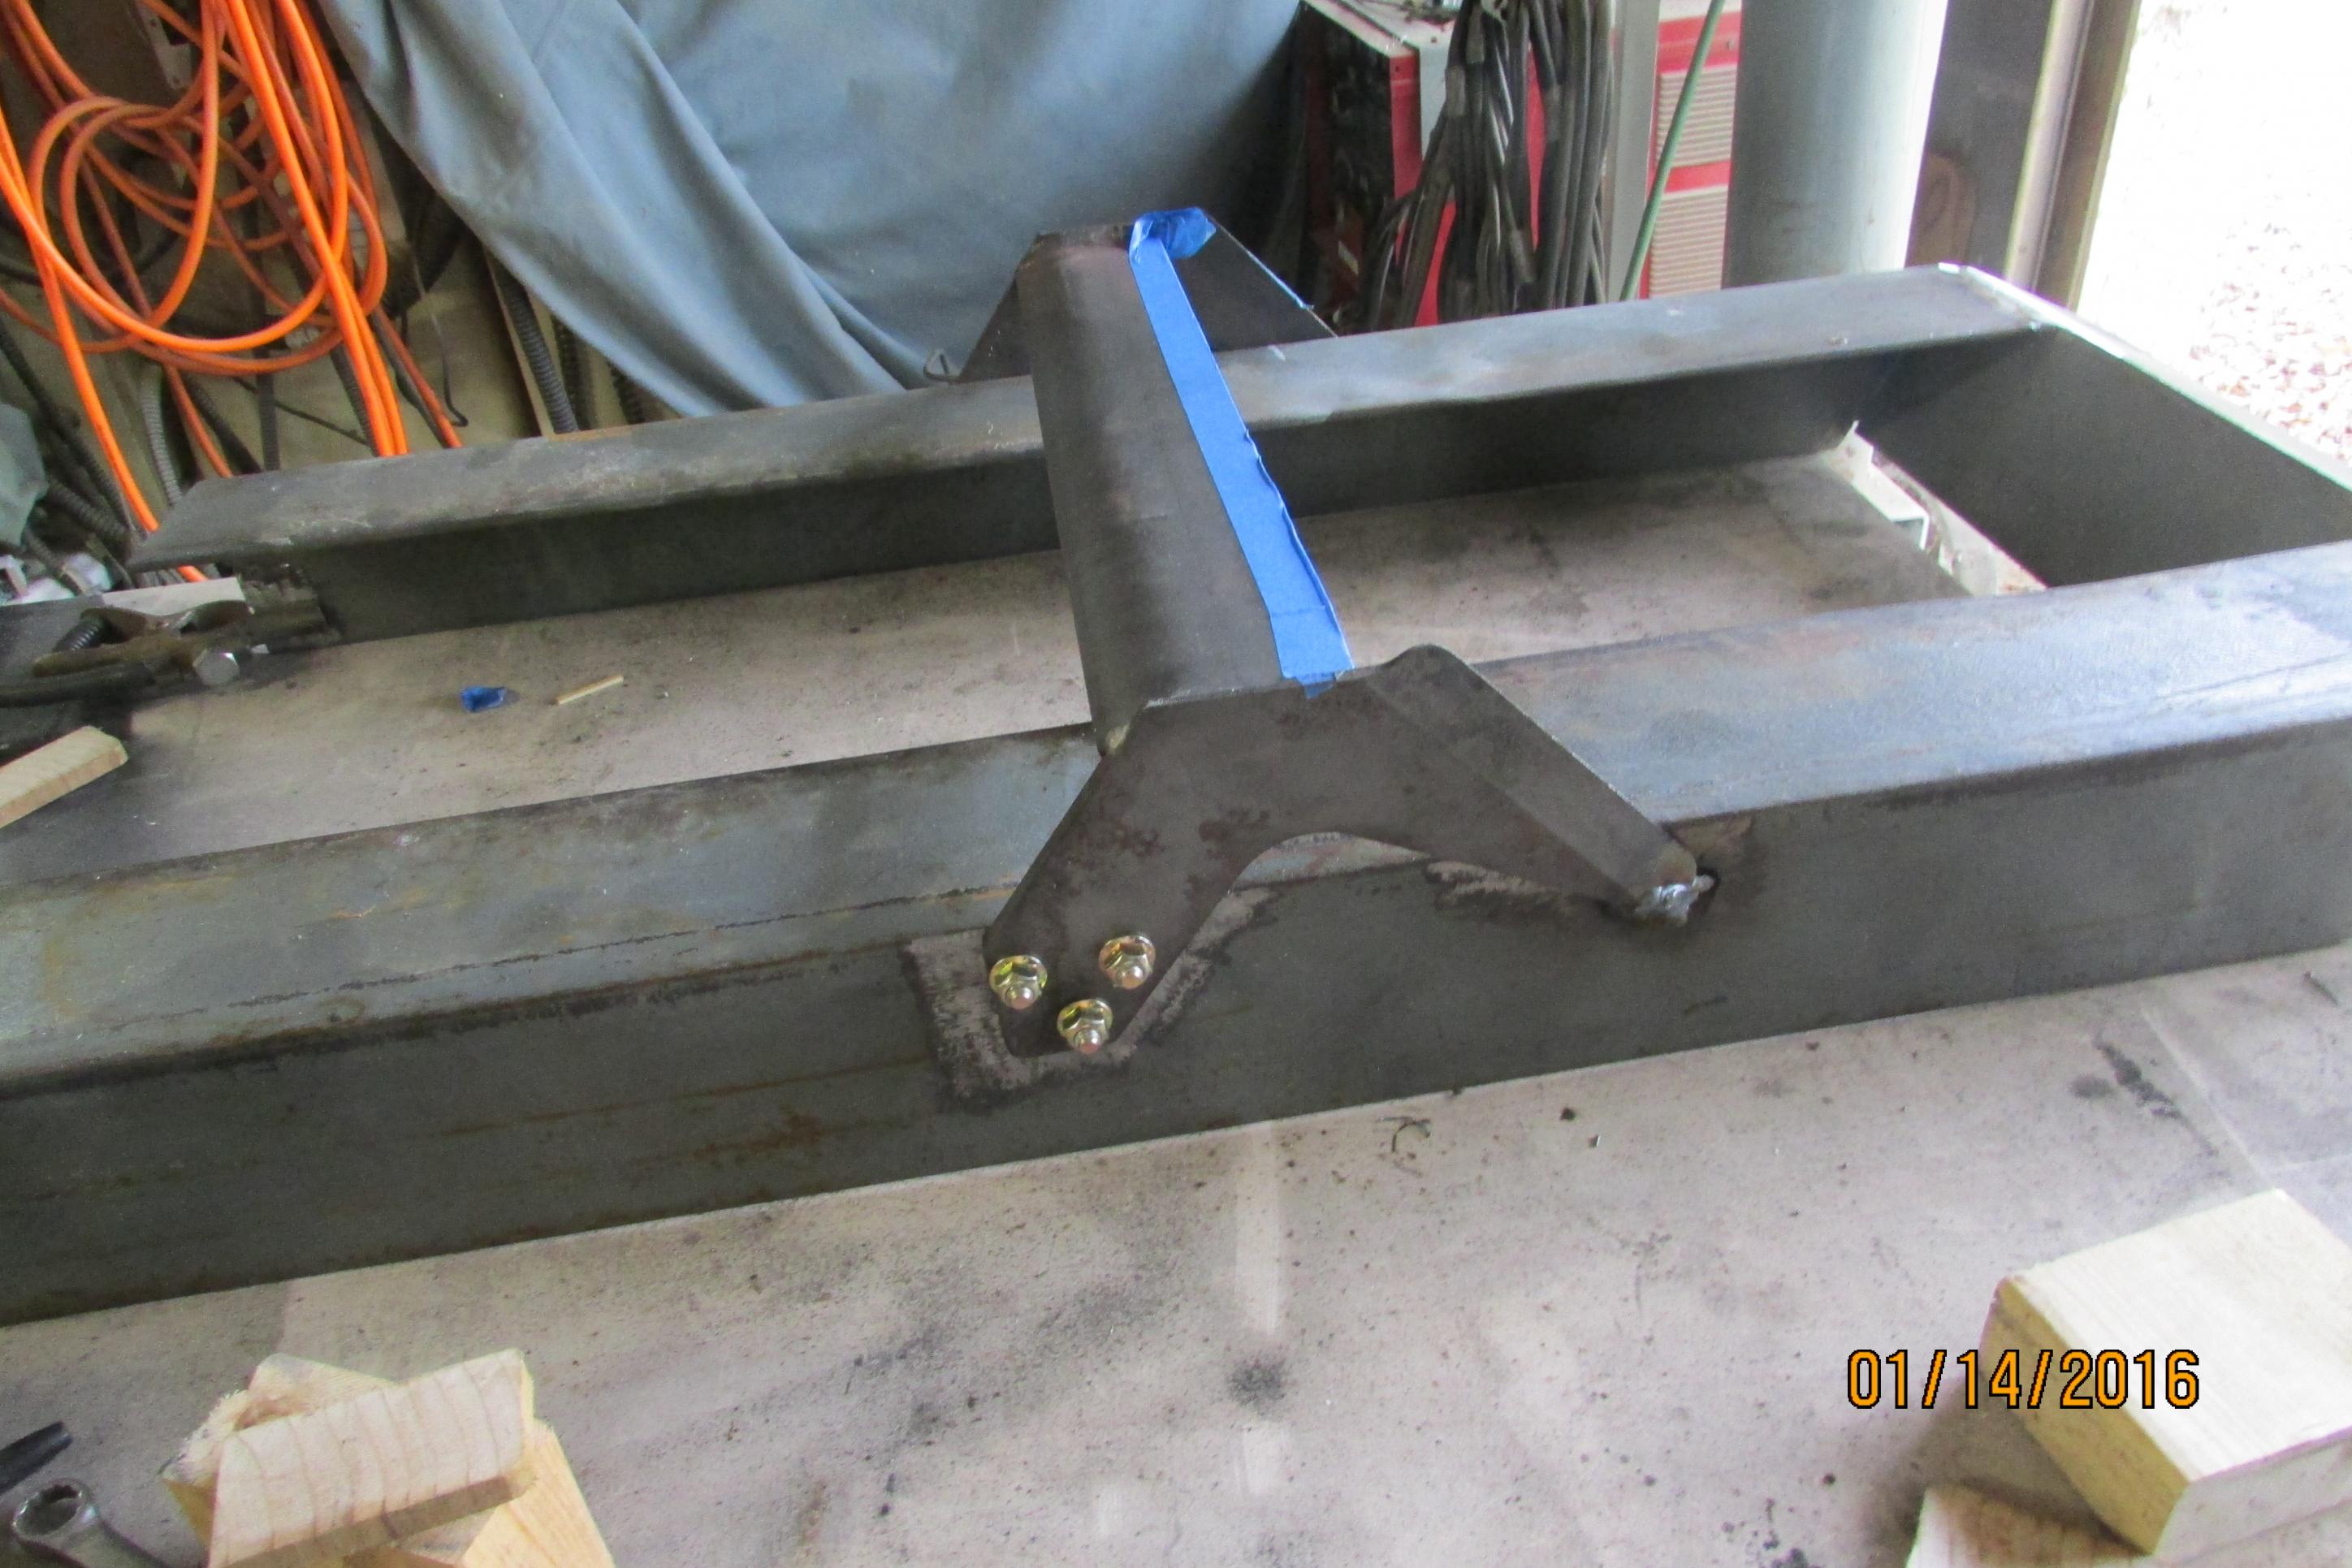
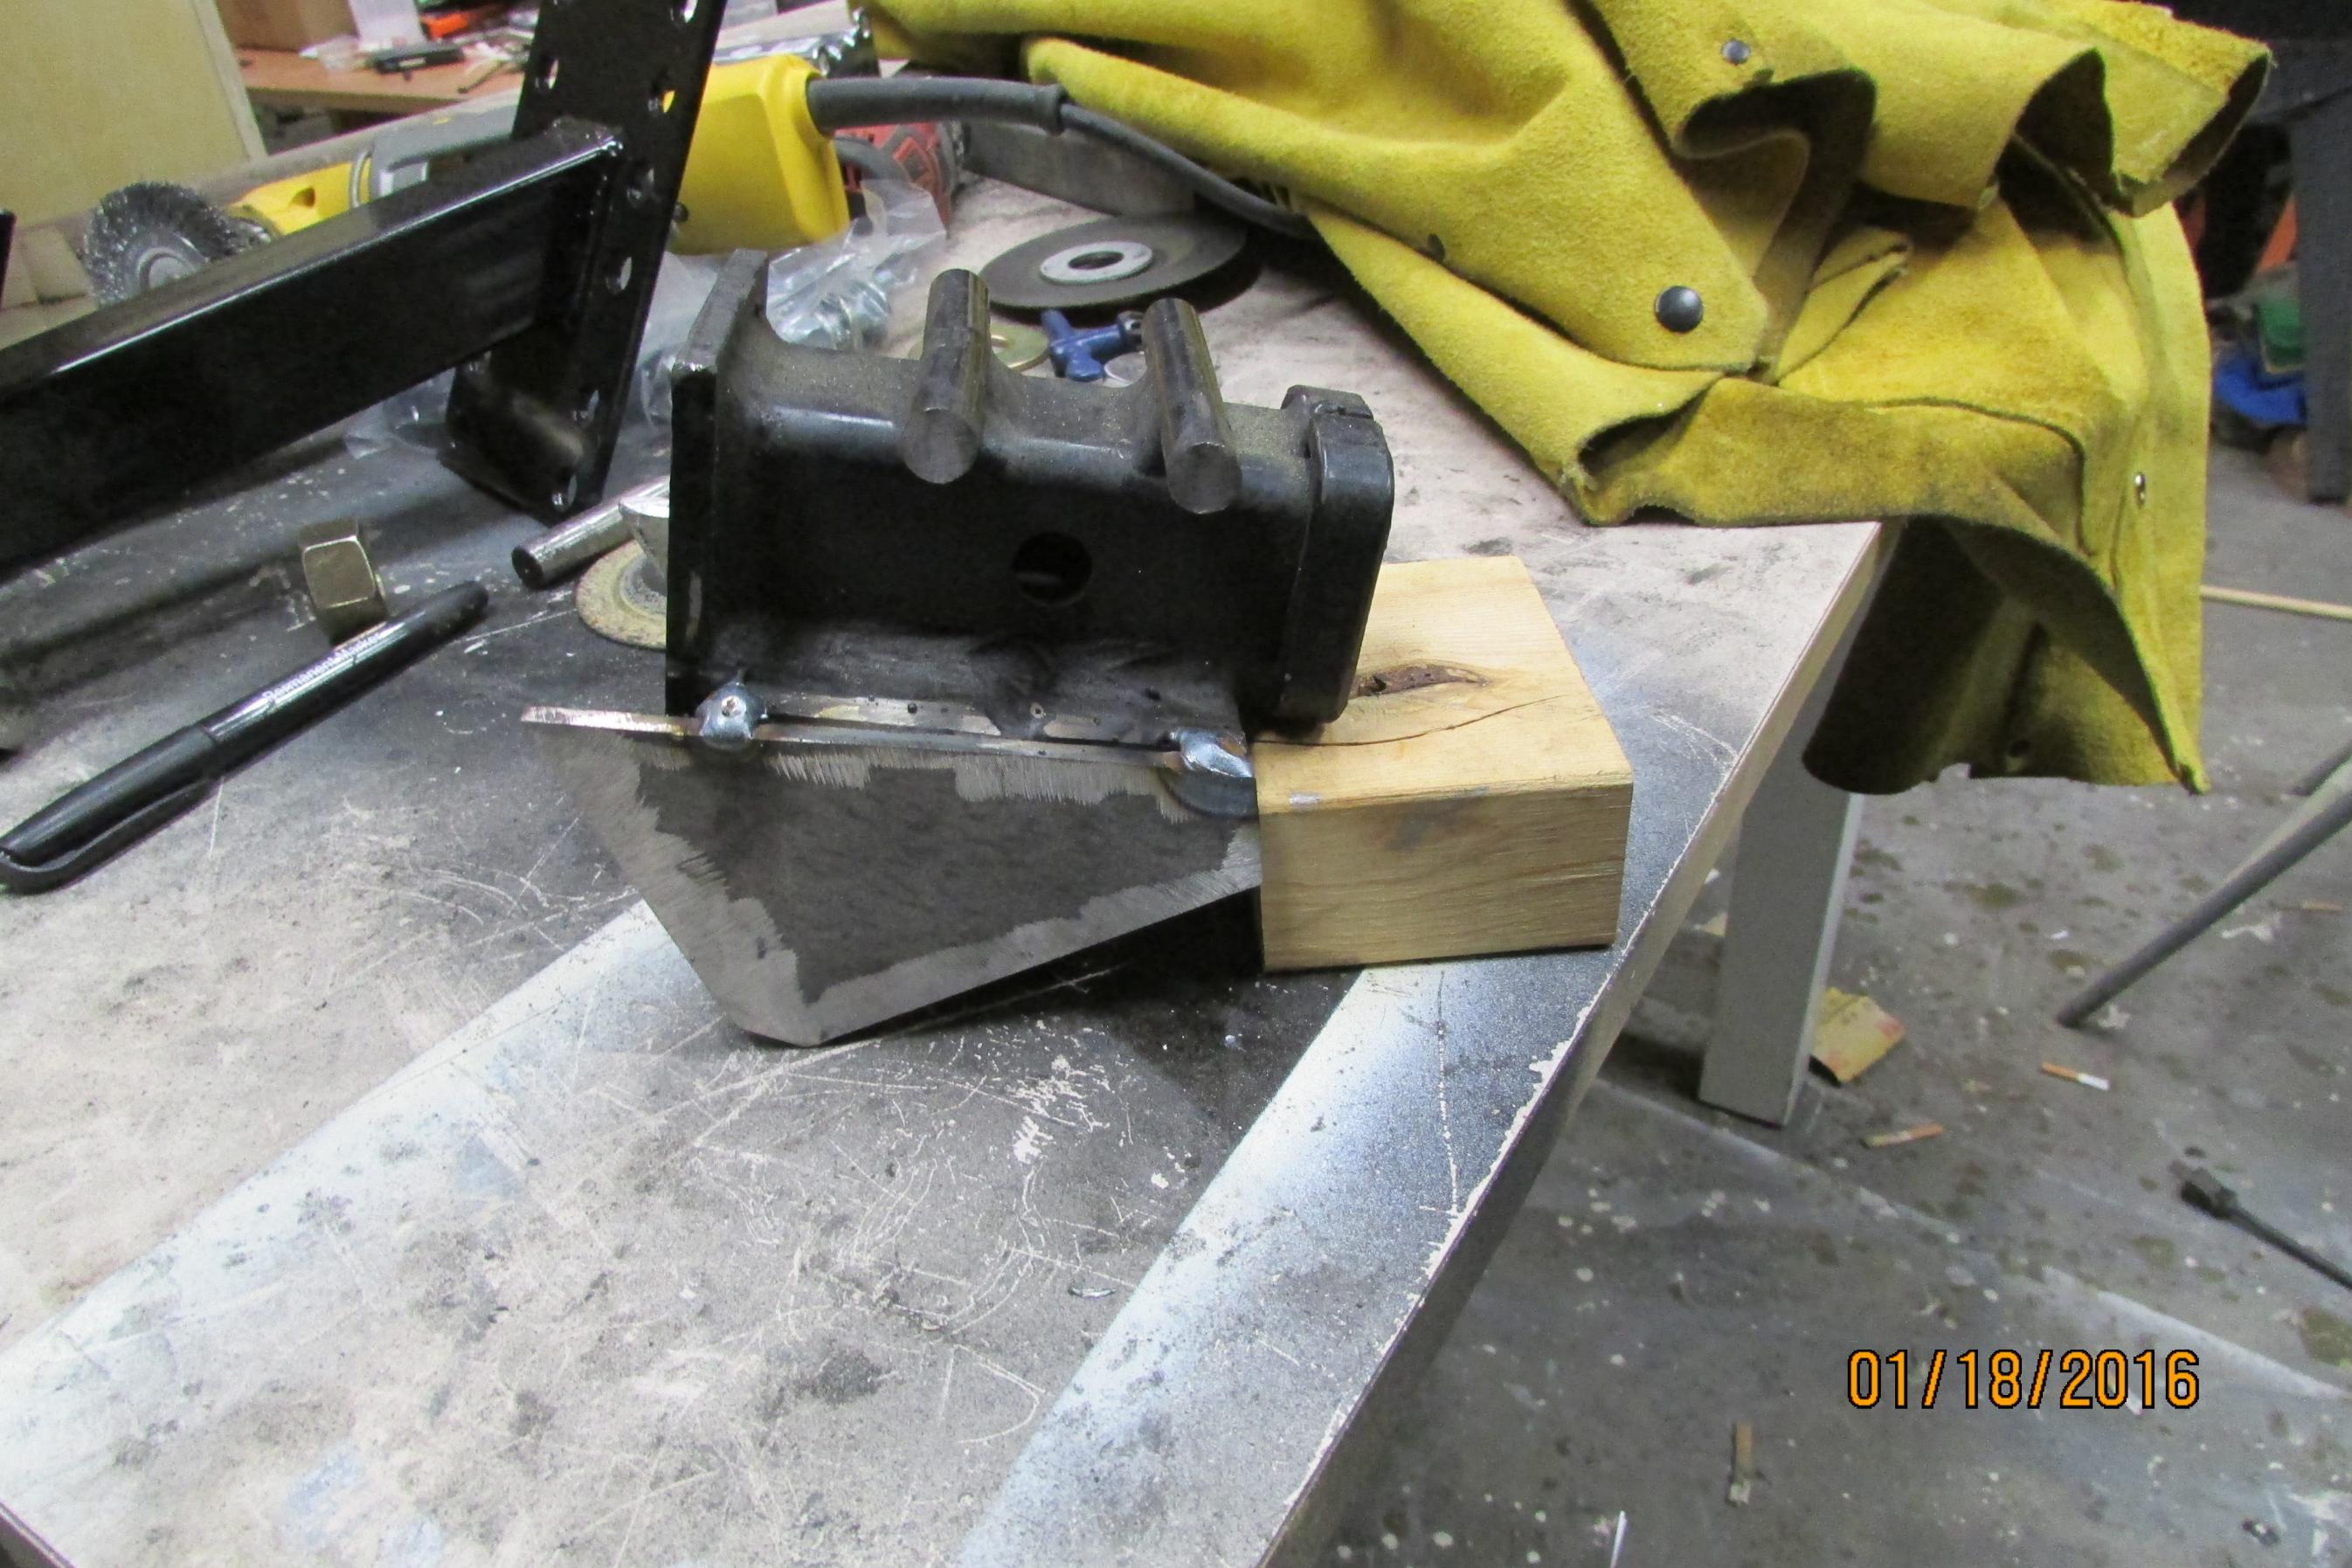
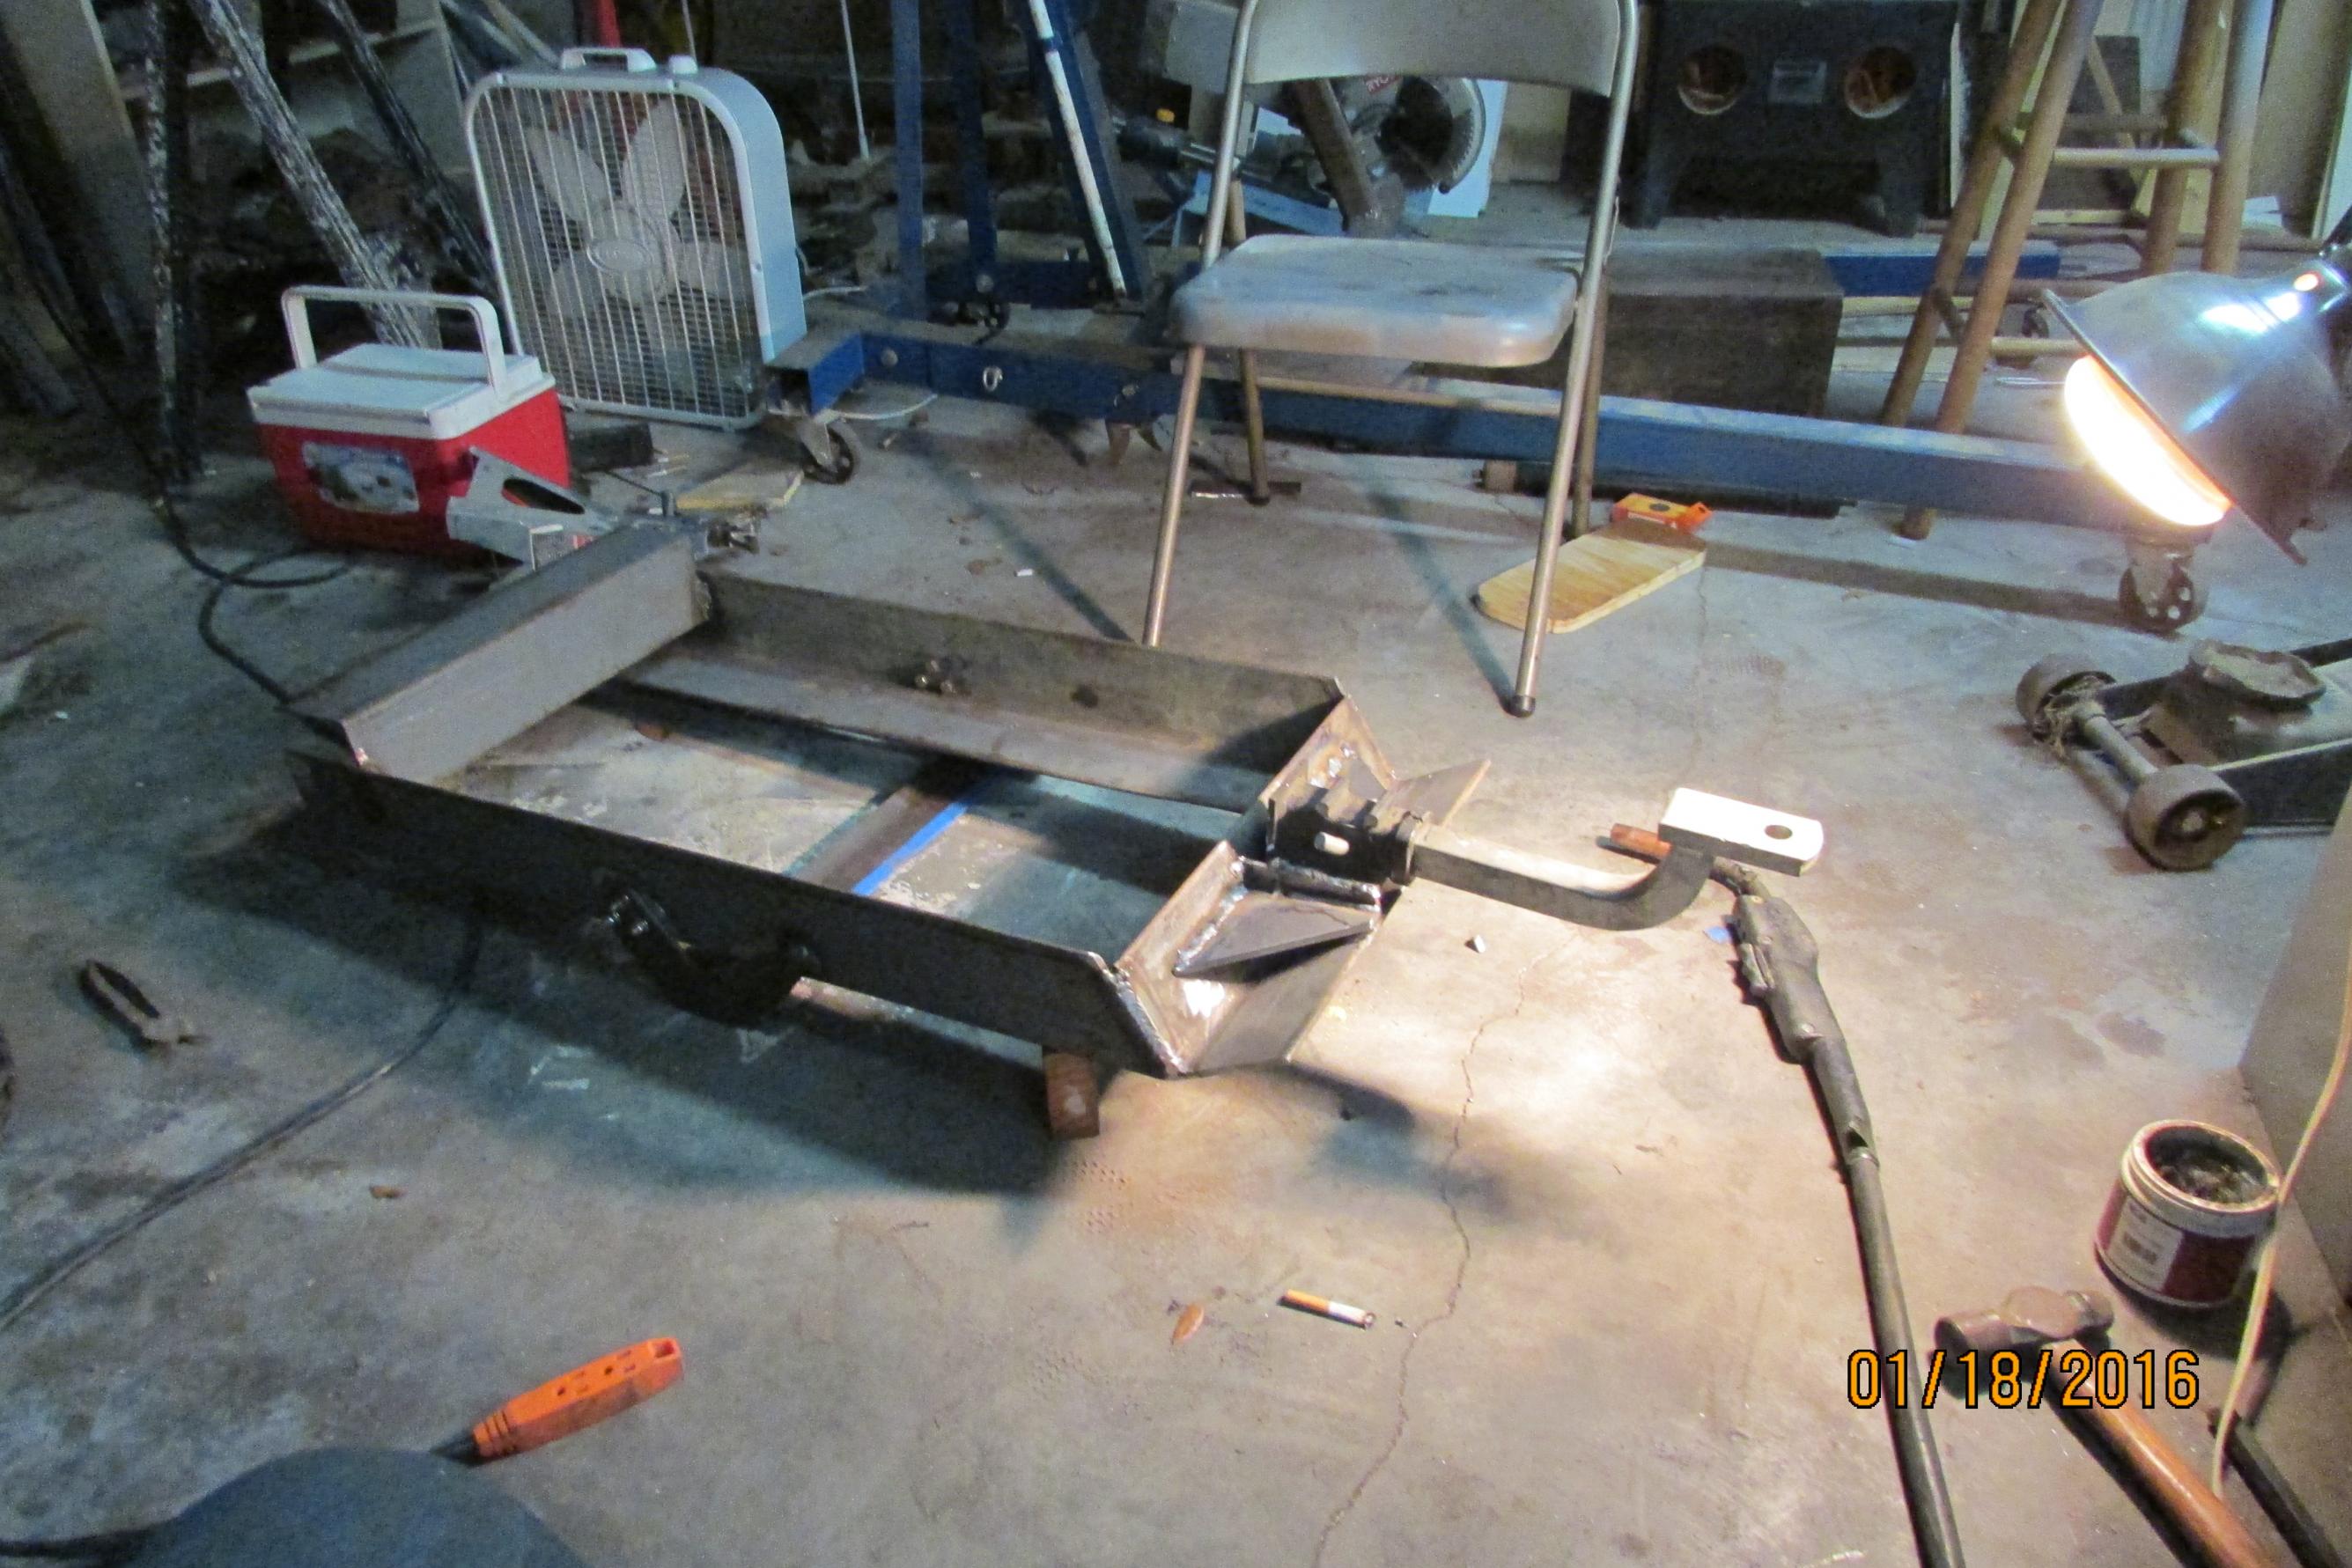
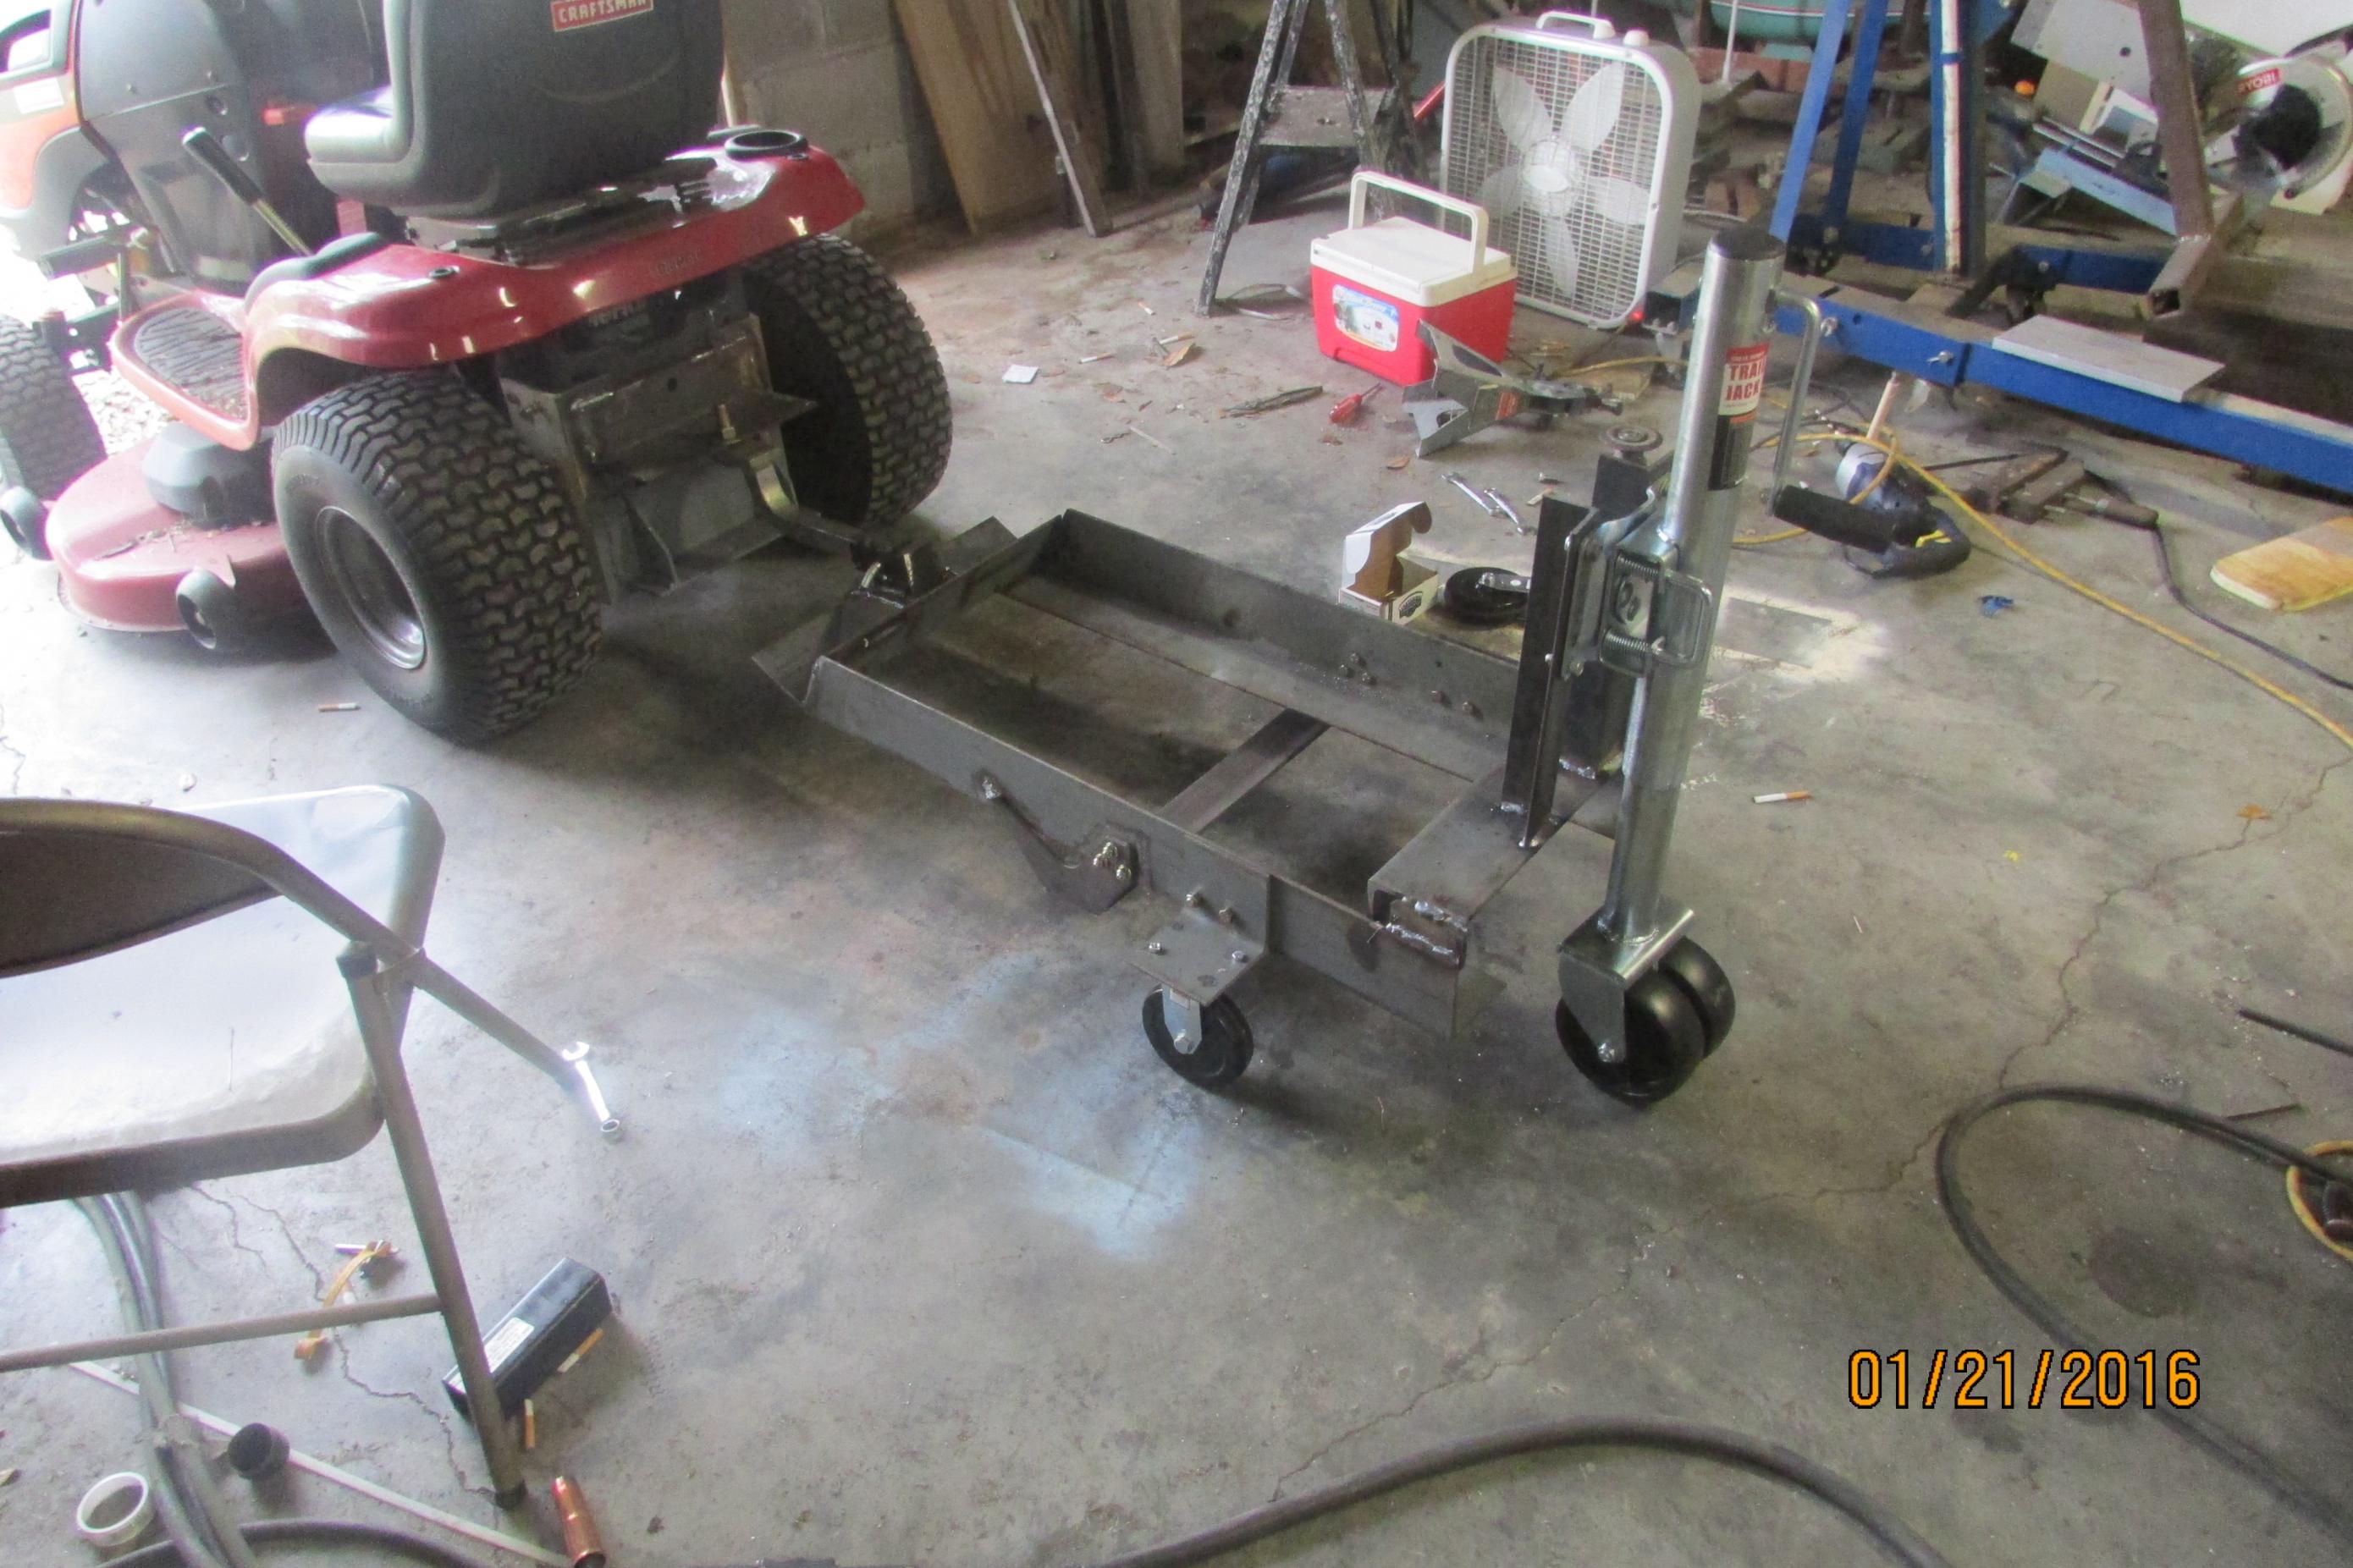
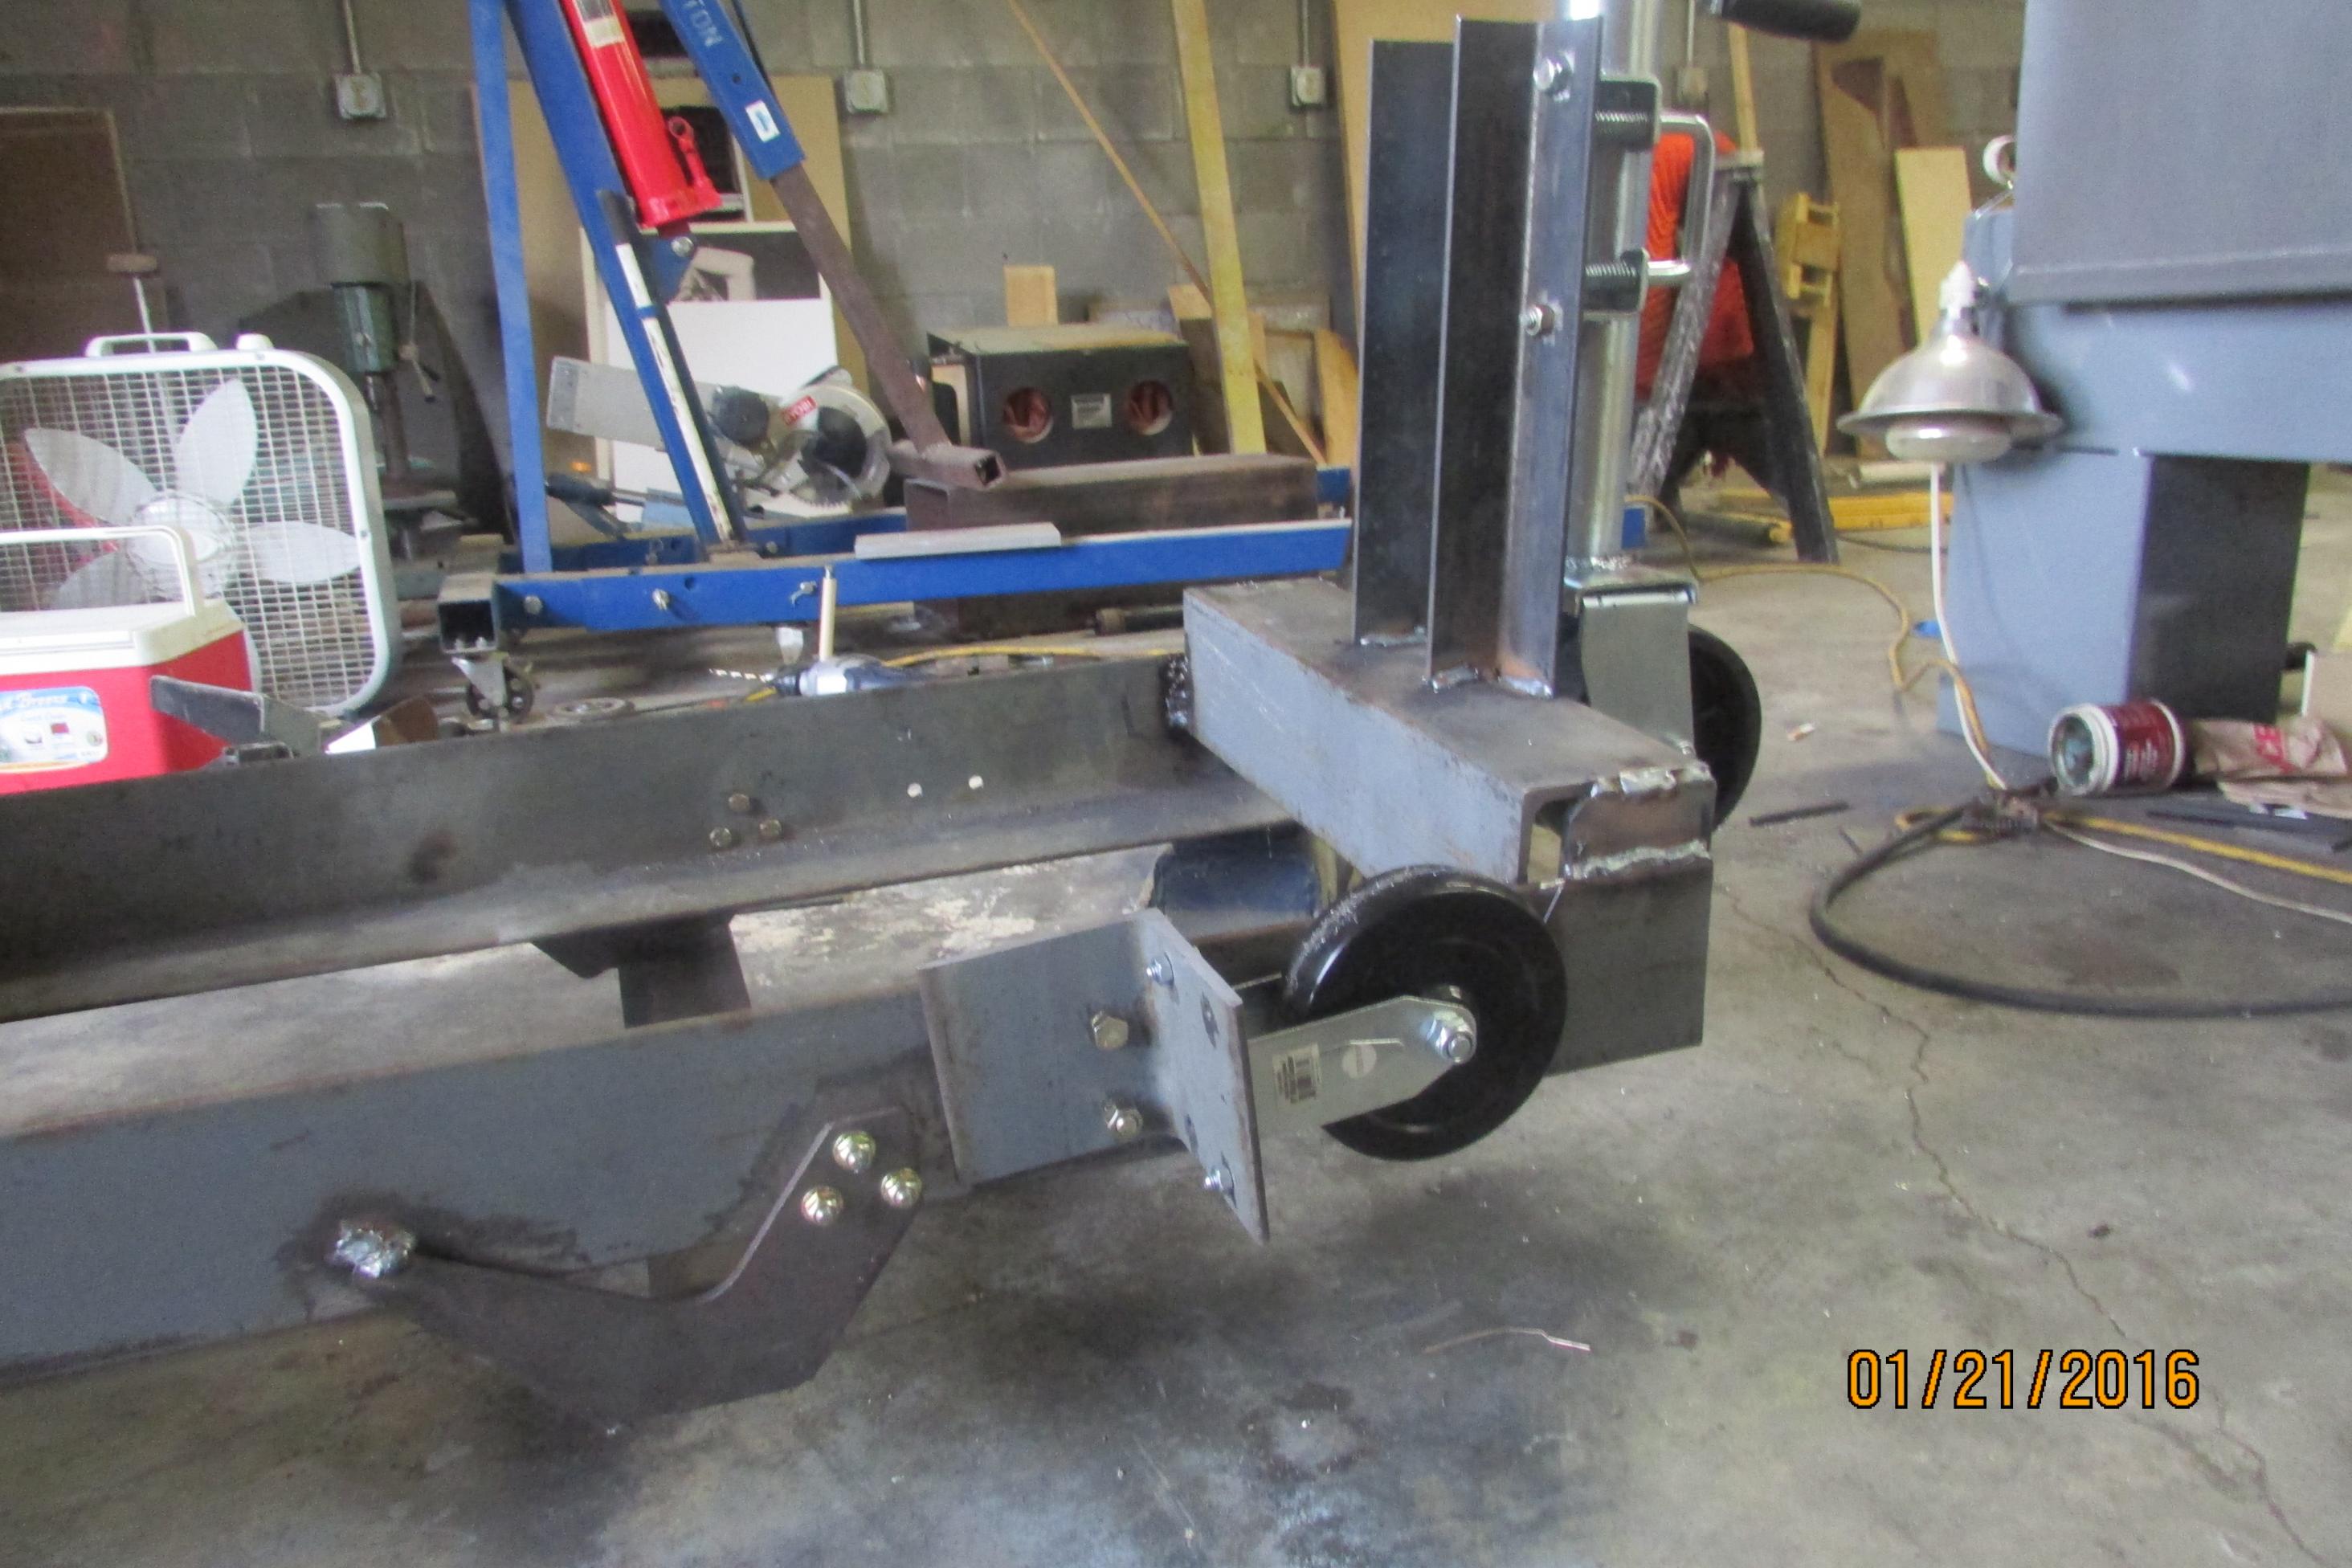
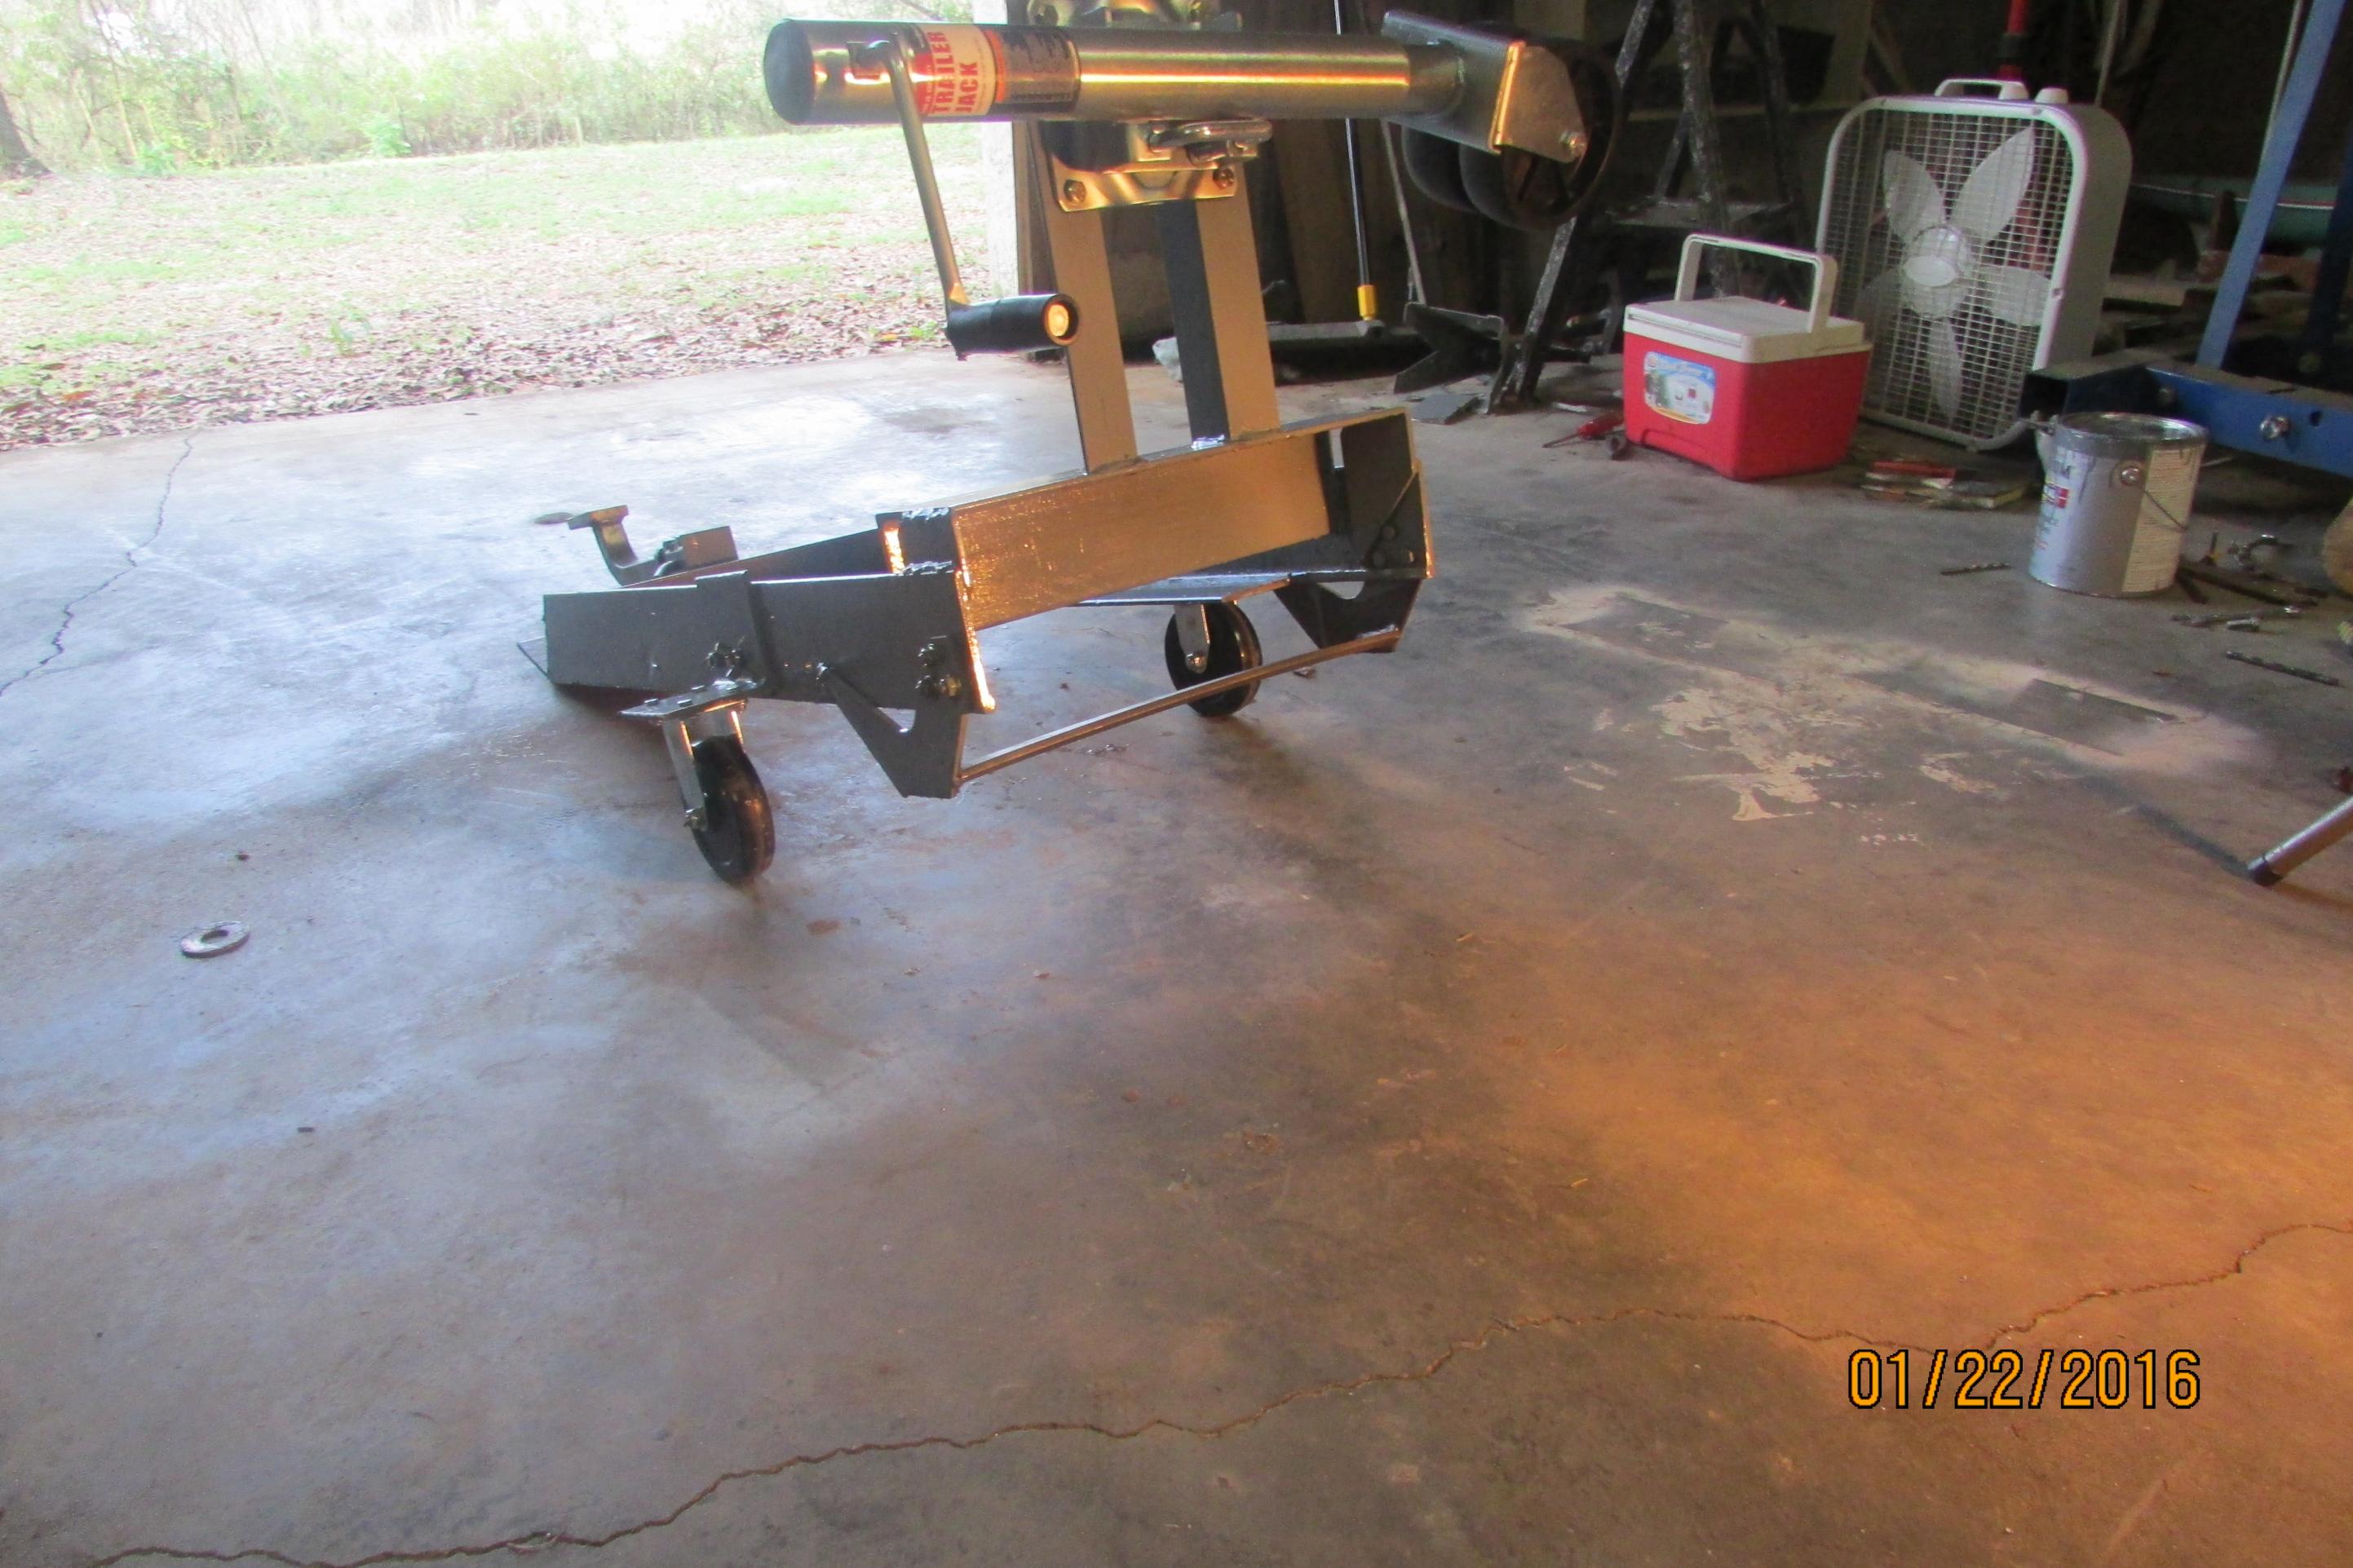
OK, today I bolted the new brackets for the new hitch, and I will weld on the hitch tomorrow. Bob.Most of it is done except the installation of some wheels. This thing will be heavy, and that is what I want, but to move it around after shaving the sod, I have to have a way to move it, that is where the wheels come in. I will use one wheel on each side and a trailer tongue jack on the end to lift the blade out of the cutting position and then tow the sled to storage. Bob. Also, don't thank me too soon because this thing might not work, I have my concerns, but thanks anyway.Attachment 7597Attachment 7598Attachment 7599Attachment 7600
-
3 Attachment(s)
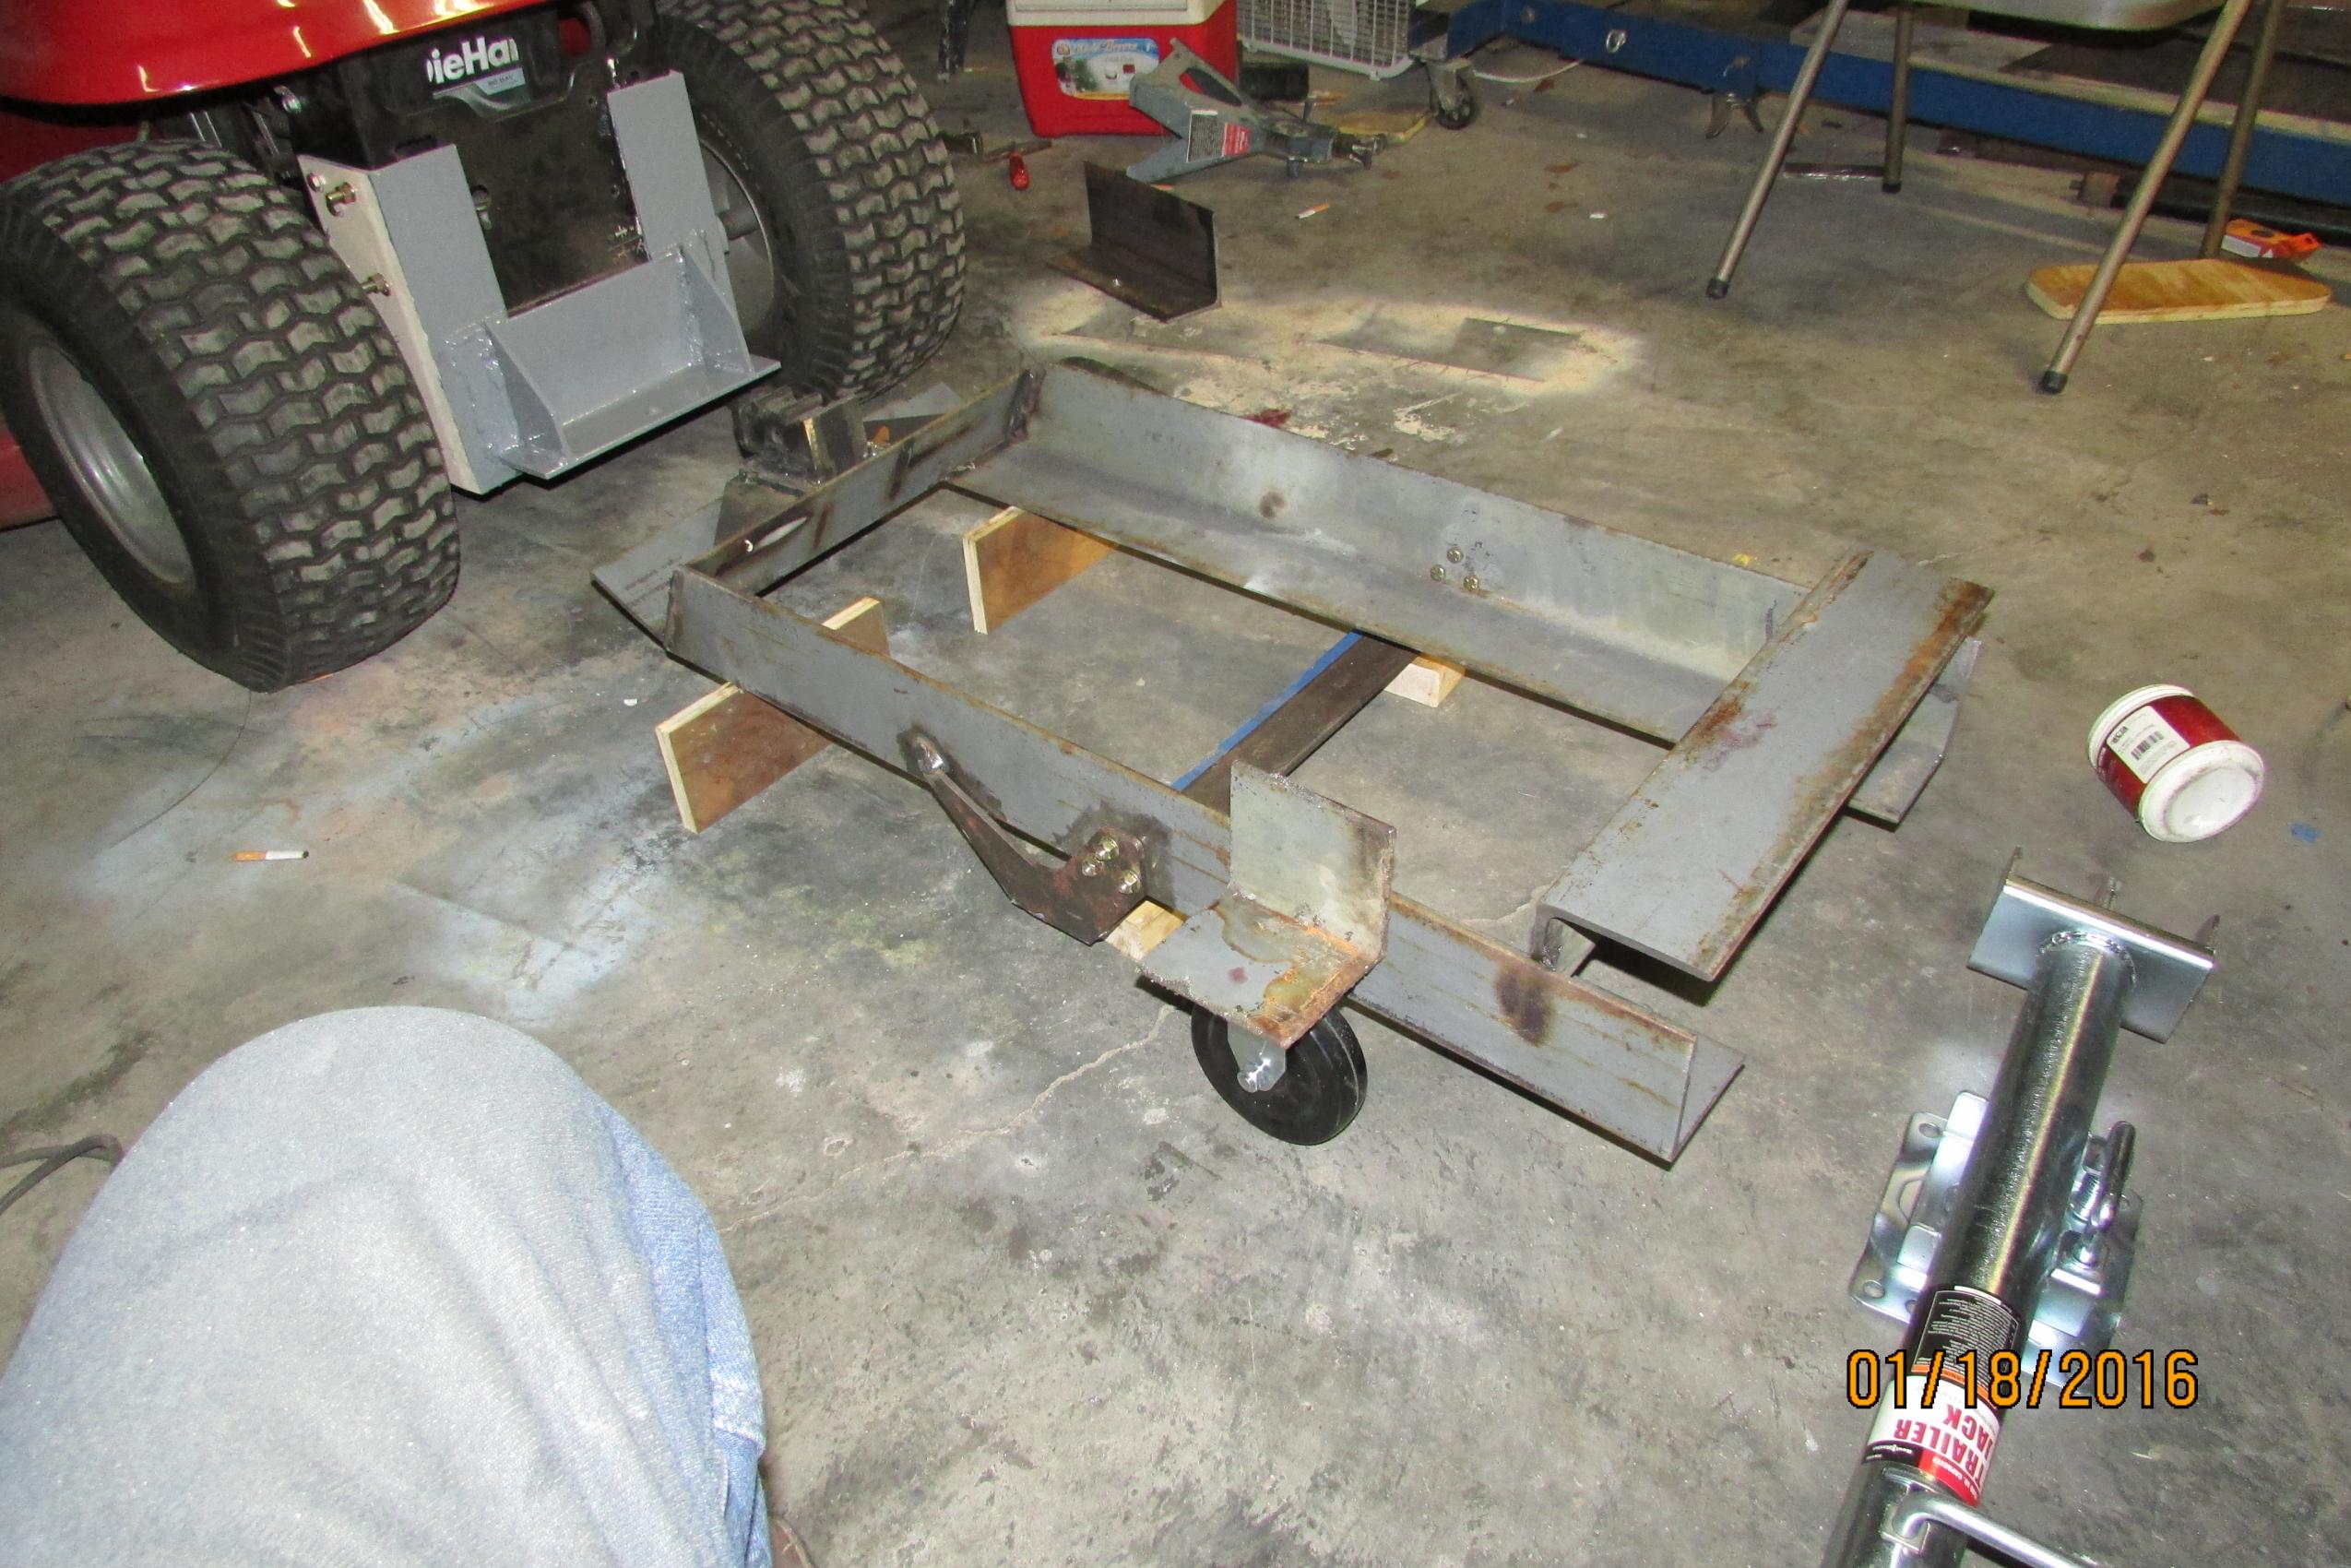
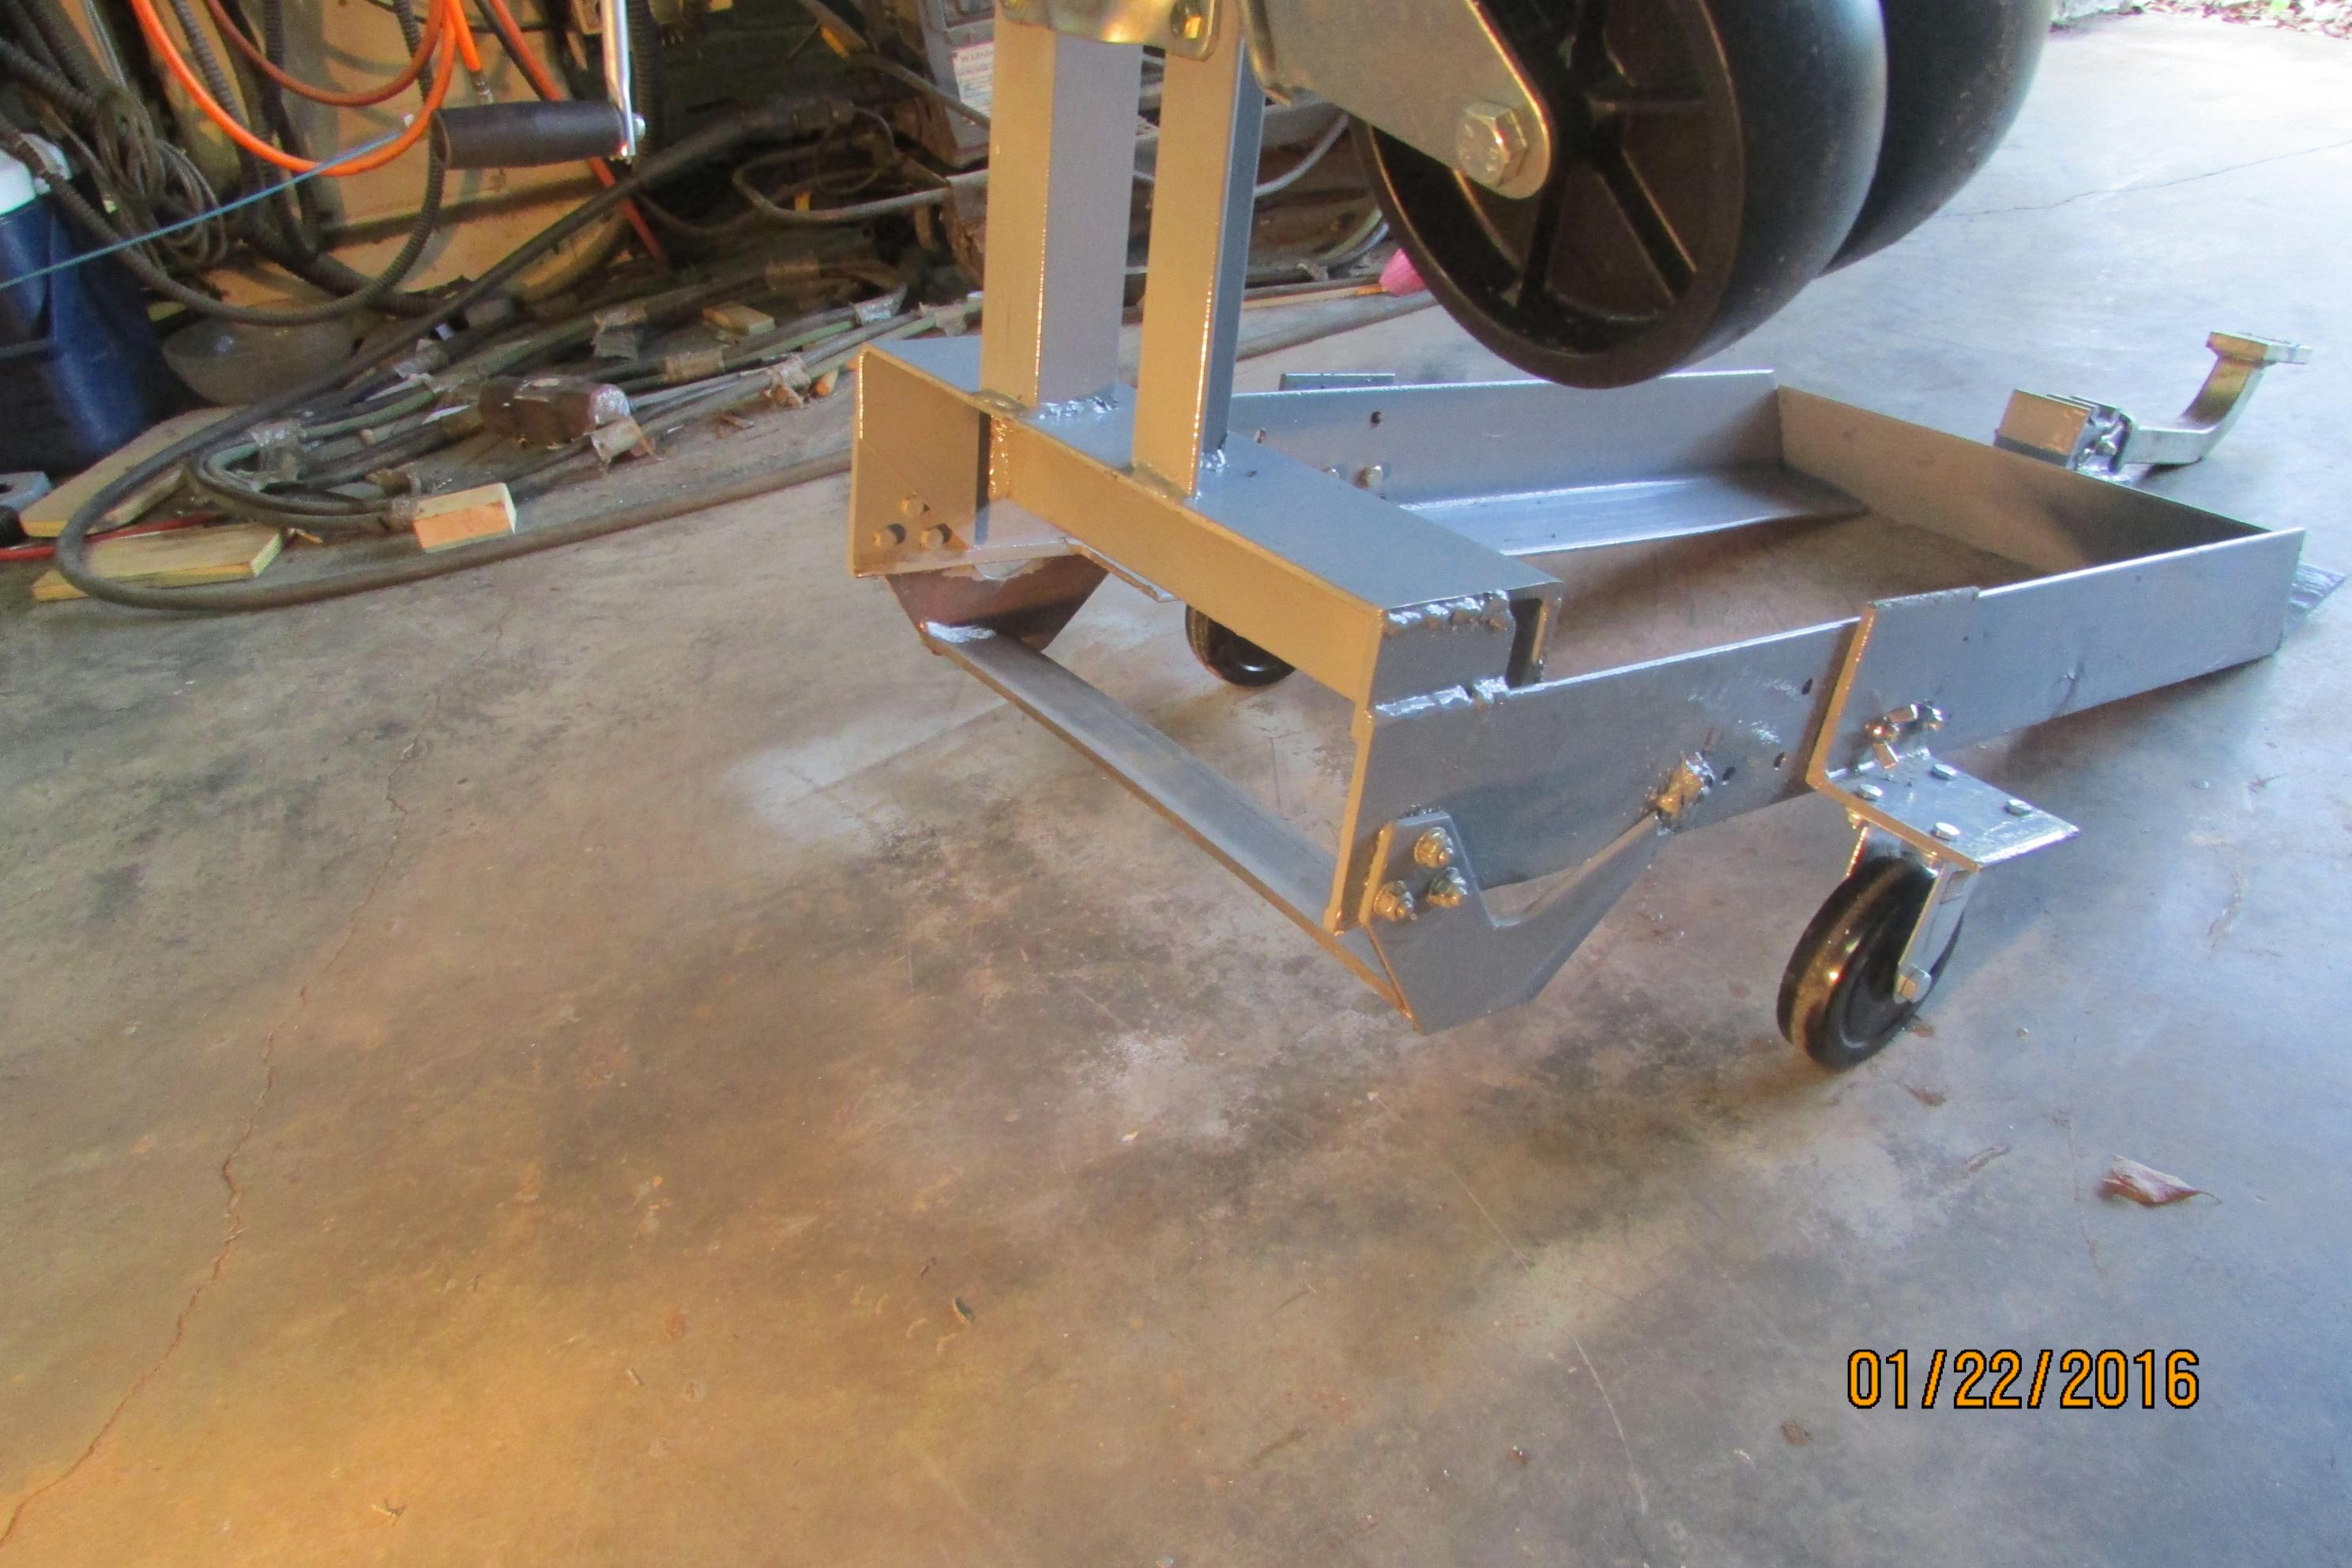
OK, today I mounted the landing gear and painted it, pretty optimistic huh? Tomorrow, I will add some weight in the form of concrete blocks and plywood for the blocks to sit on. I have thought about lining the skids with the same material that they install on airboats to decrease drag, but I will try it without it at first. Here are some pictures of the finished rig and tomorrow or the next day, I will make a video of either the failure or success of this endeavor. I still had trouble with my welder, come to find out that I was using .030 wire and the Tweeco gun uses minimum of .035 wire and the channel that the wire runs in was worn out, so I replaced that and ran .035 and what a difference. It now welds as it should. Bob.Attachment 7640Attachment 7641Attachment 7642
-
2 Attachment(s)
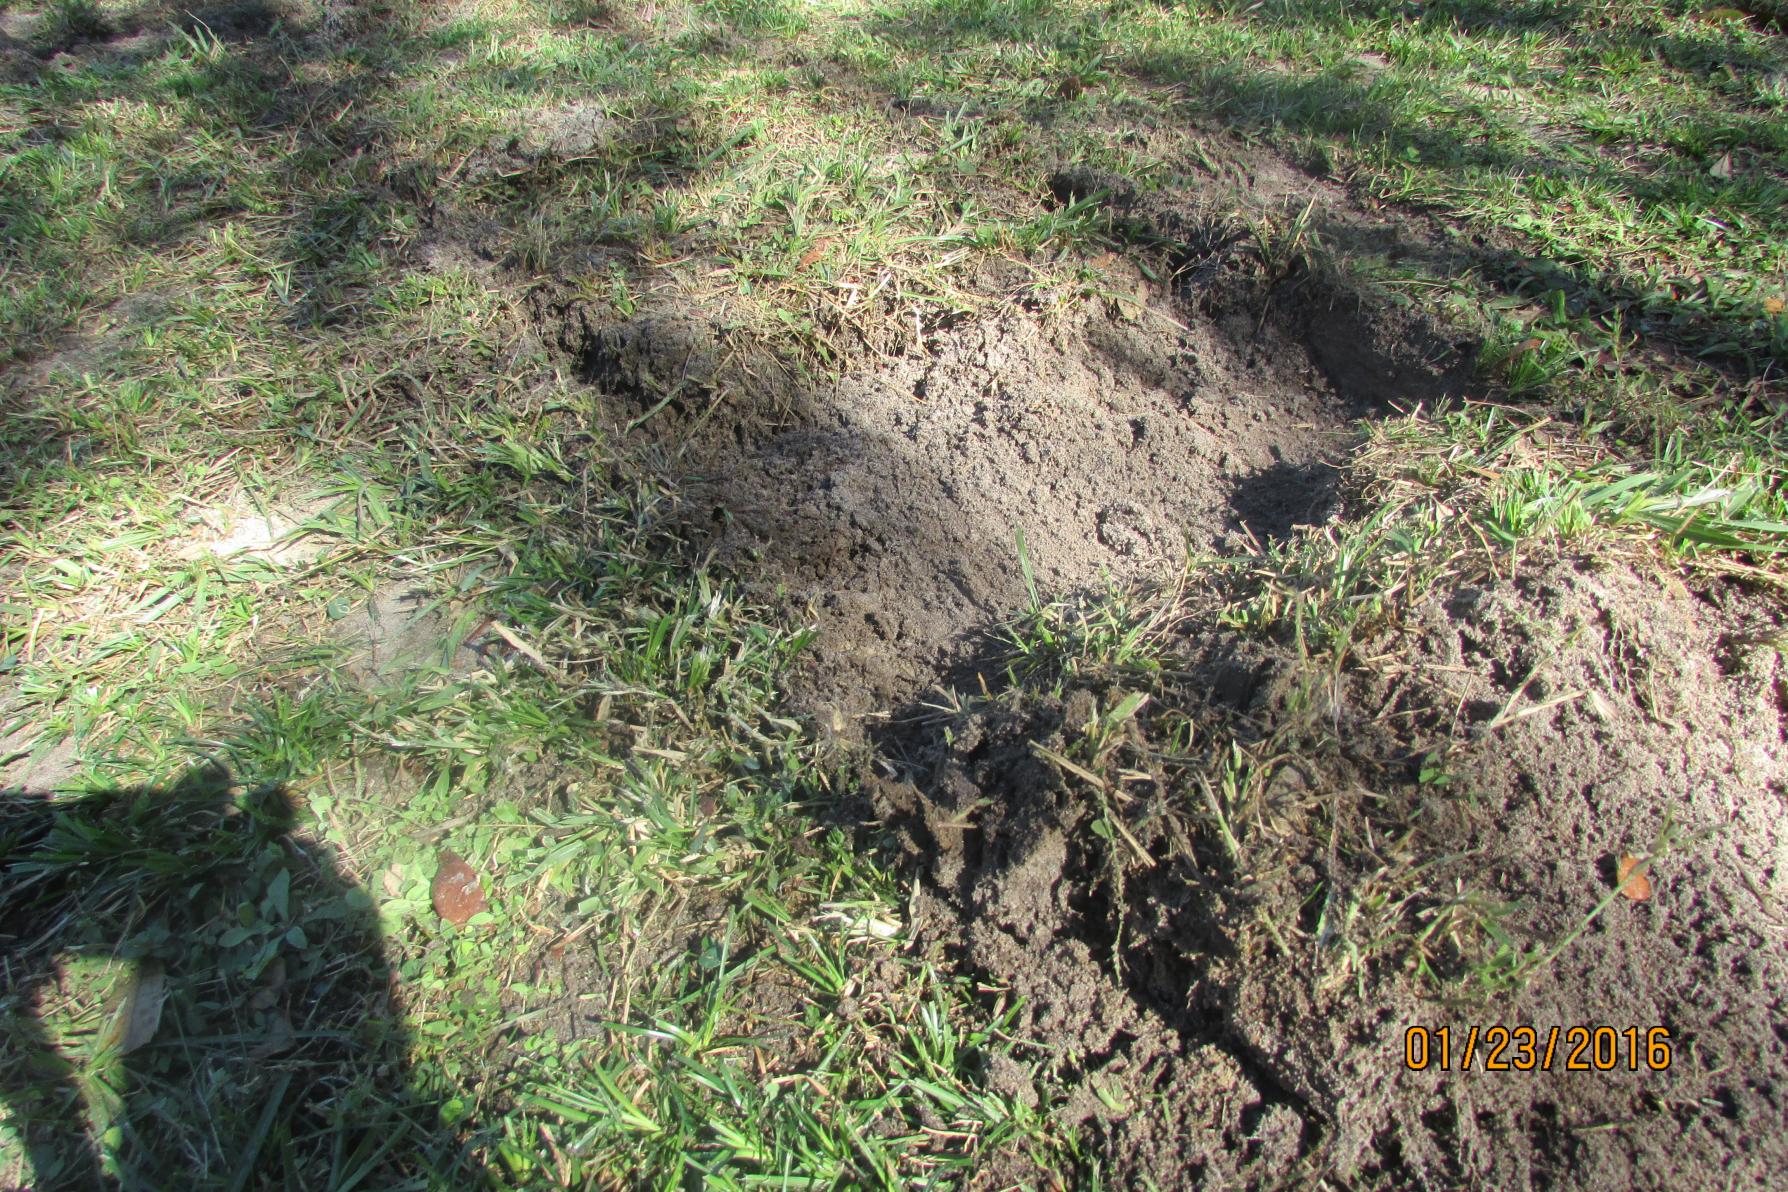
Failure!,failure!-- I started pulling the sled and it seemed to start to cut, for about 4 feet, until the space between the blade and the sled rail filled up with compacted dirt and grass. There can't be anything over the blade, it has to have complete space so that nothing can build up and stop the movement. As soon as that space filled and compacted, it stopped the motion, so I am going to relocate the blade all the way to the end of the sled where there won't be any restriction or build up. I also have a feeling that I will have to figure out a way for more traction, or buy a bigger tractor, or buy a real sod cutter. Here is a picture of the area that the debris built up and stopped the tractor. Bob. Thanks Paul Jones.Attachment 7655Attachment 7656
-
That is the cool thing about experimentation. The failures lead to and produce the breakthrough solutions. You will figure it out. Good luck.
-
3 Attachment(s)
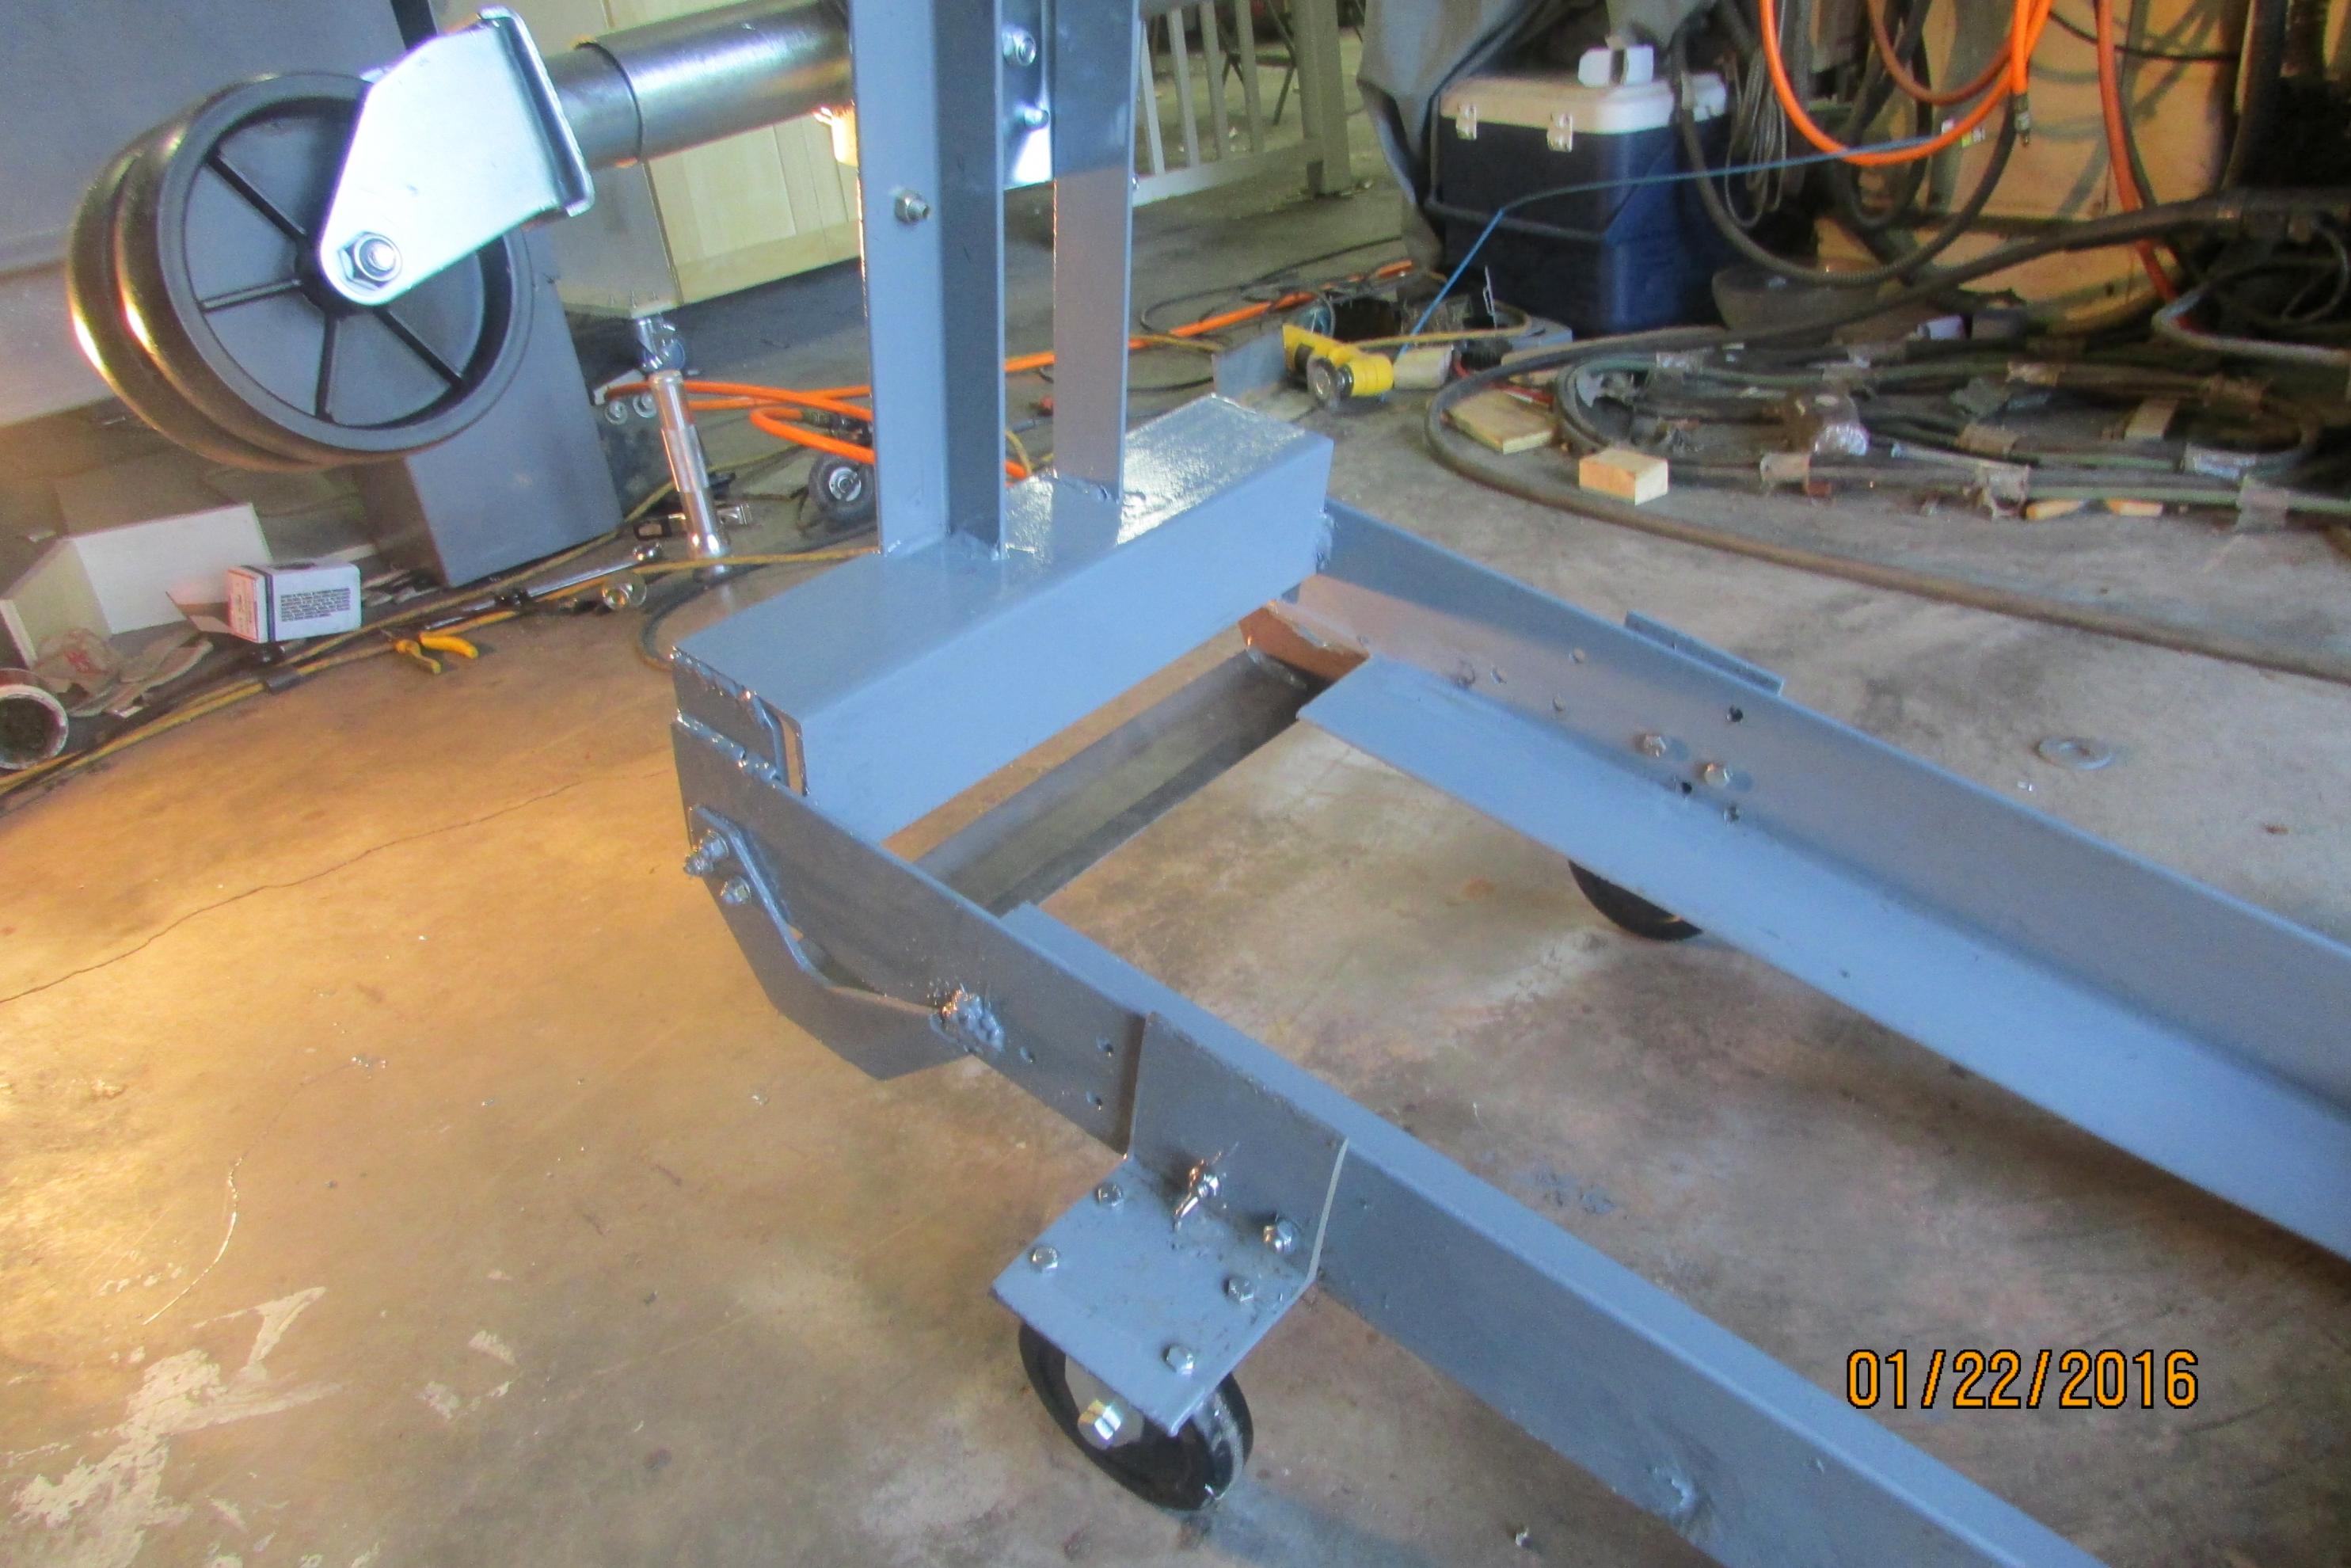
Yes Paul, I solved the building up of dirt and sod wall, but what remains is if my tractor has enough traction to pull it with the blade buried. I will try again tomorrow with the blade in the new position, at the end of the sled and with no rail blocking the sod. Here are some pictures. Bob.Attachment 7692Attachment 7693Attachment 7694
-
OK, no pictures today, but I have made some progress. By the looks of things, I will have to increase the angle of the blade and sharpen it. The blade is not going deep enough and not lowering enough to contact the sled runners. I added three concrete blocks for weight and I think I will have to move some weight to the rear. Traction does not seem to be a problem, as the it will pull forward with it being just above idle, so I believe that I can add much more weight and when I sharpen the blade and get it to go below the roots, it will behave like a sod cutter, we shall see. I will do that tomorrow and try it out again. Moving the blade to the rear solved the problem of sod build up and when the cutter goes deeper, that won't be a problem. Bob.
-
2 Attachment(s)
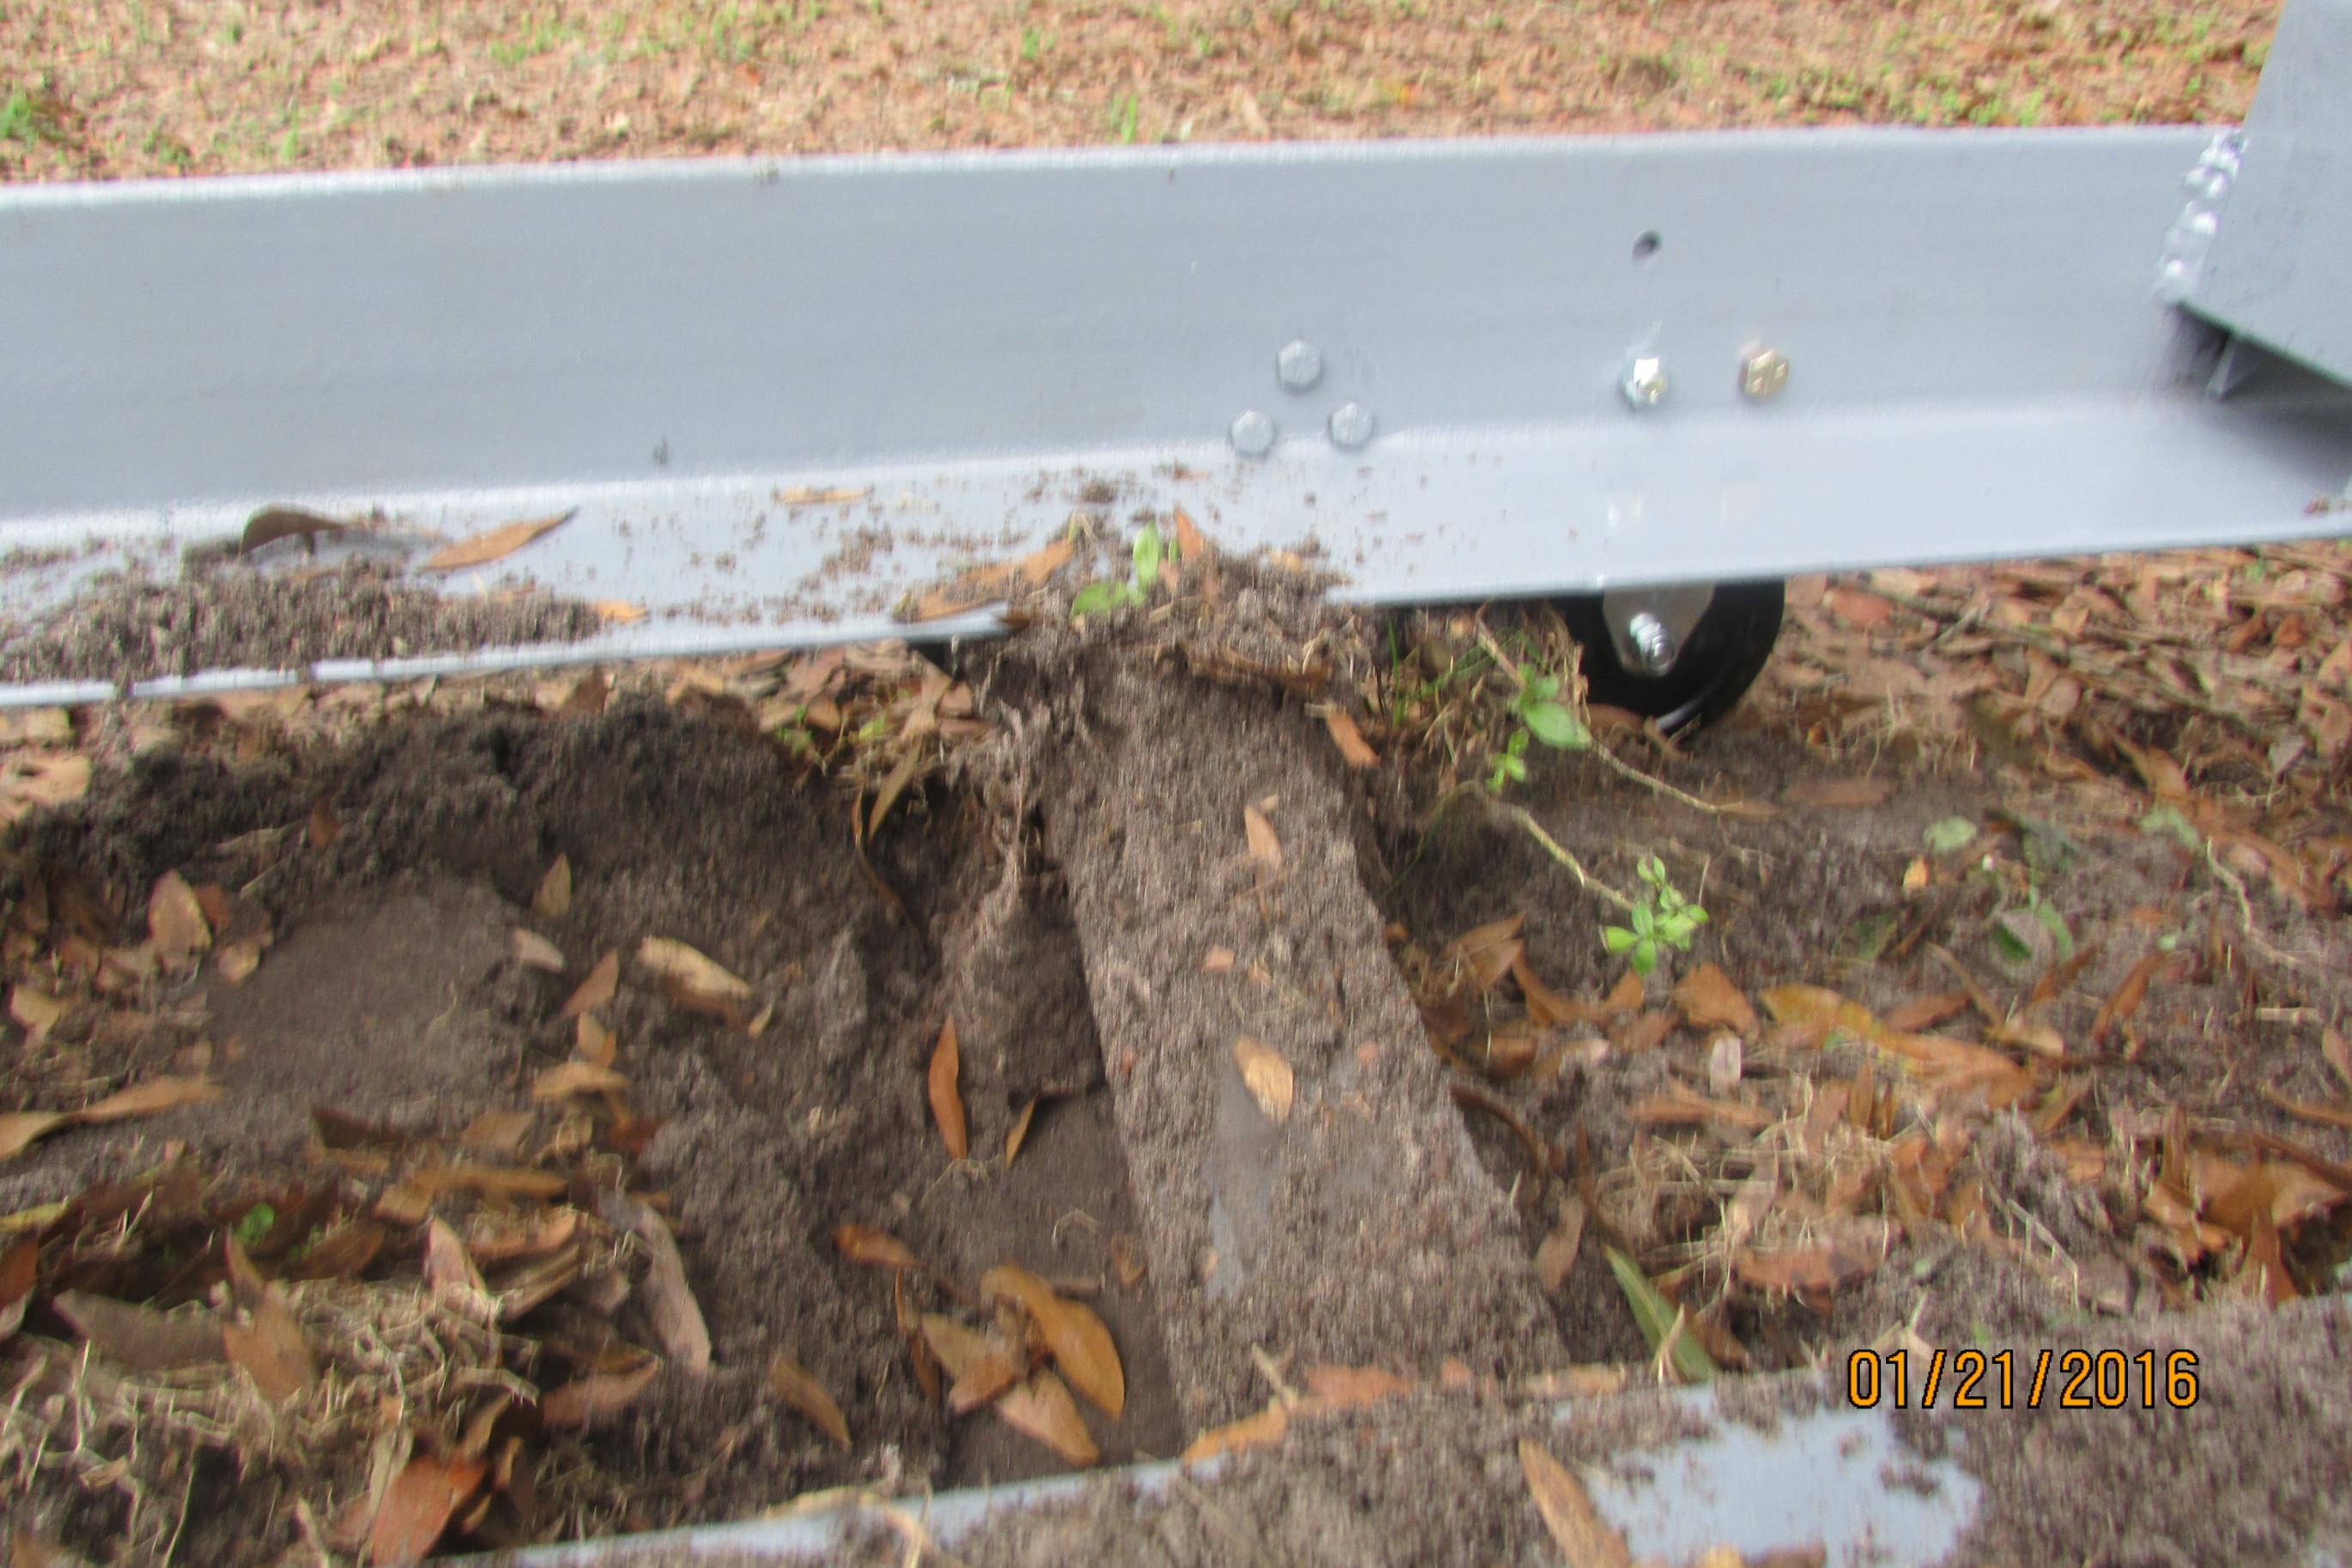
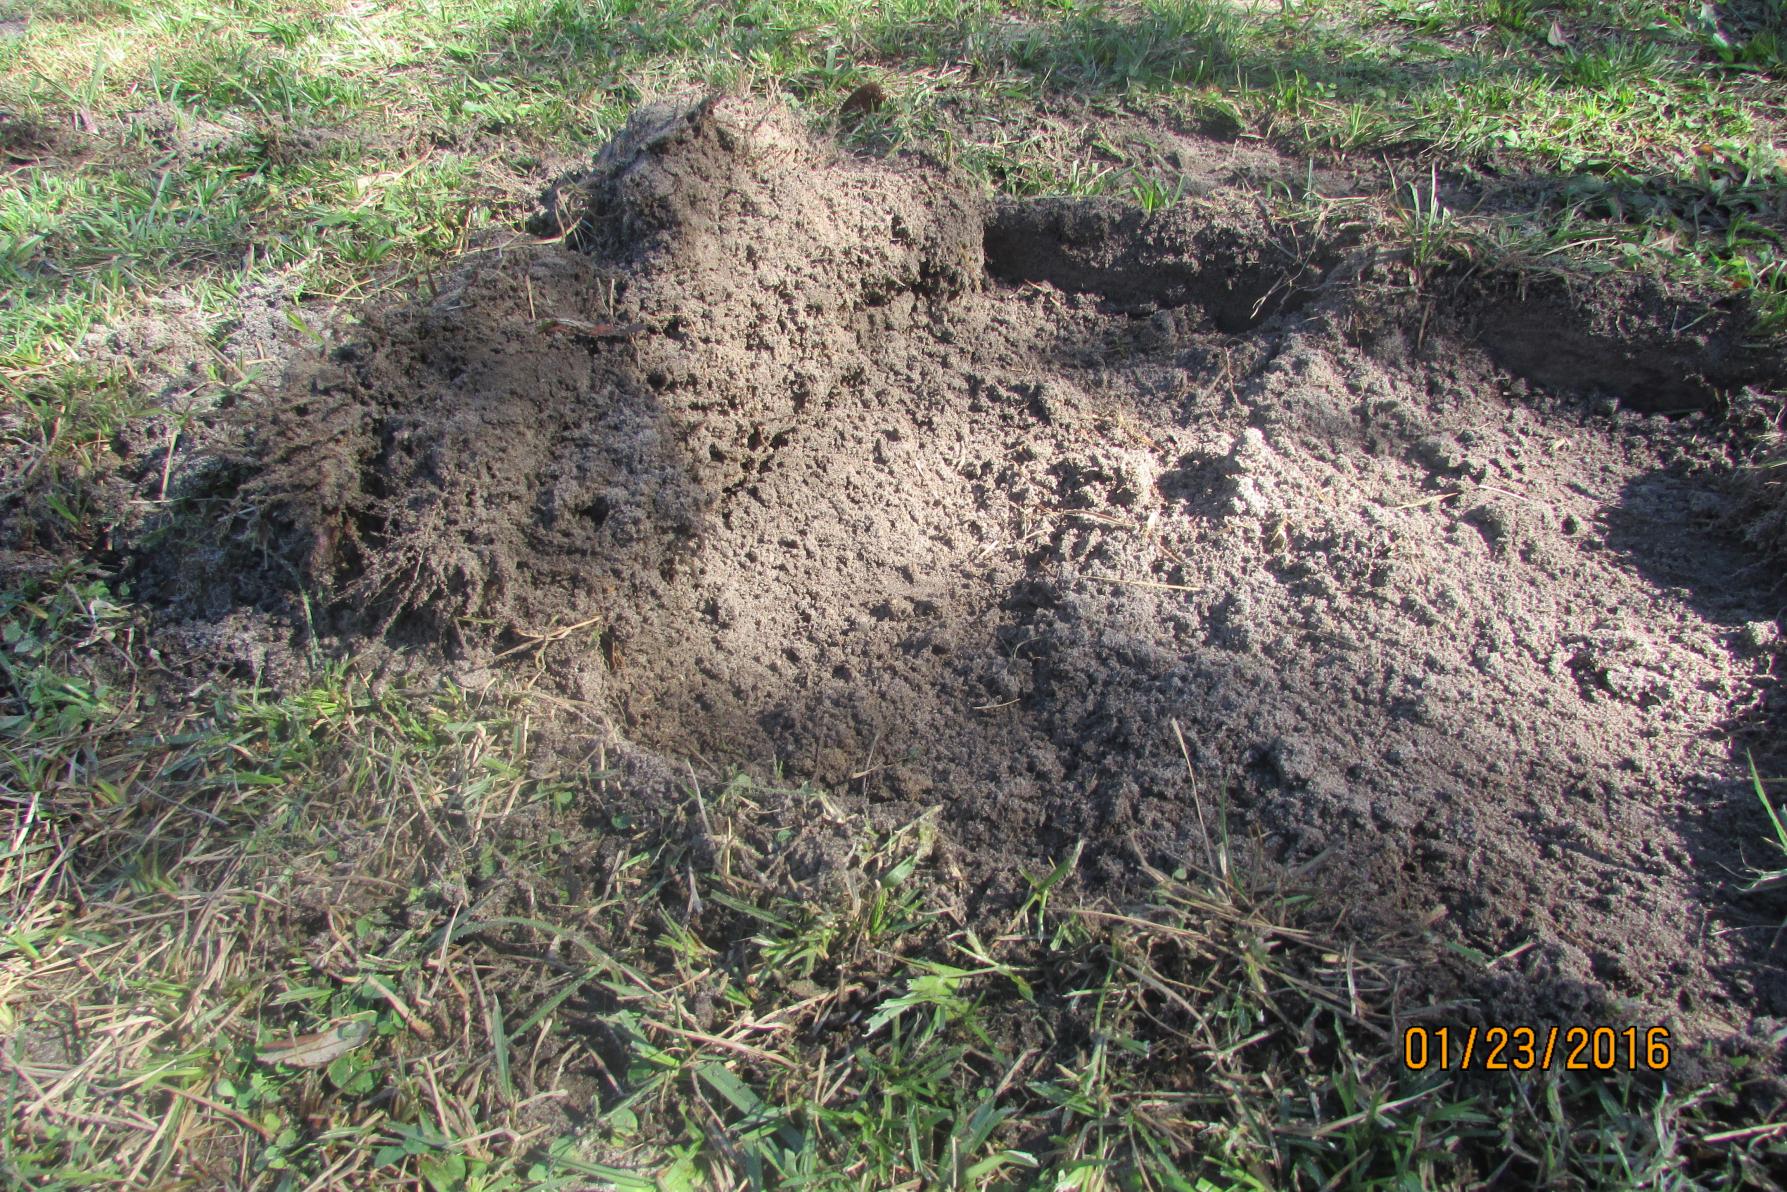
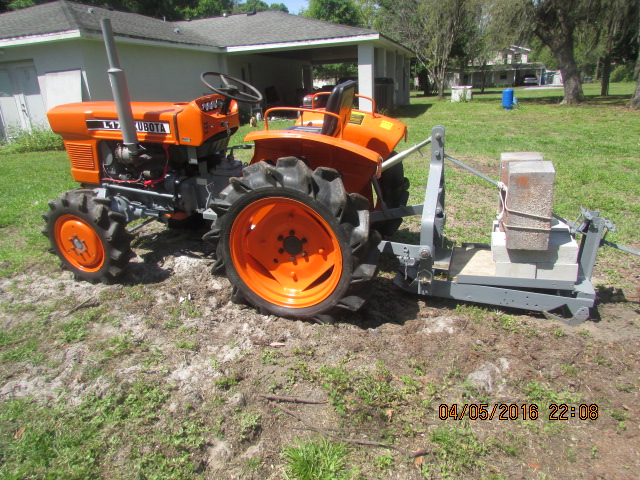
Well, I have some good news and some bad news. The good news is that the sled functions as it should, and the bad news is that my lawnmower hasn't enough guts to pull it. It pulled it for about 6 ft. and I could hear the bypass screaming in the hydro trans. and that isn't good, so even if I put chains on it, that would not solve the lack of power with my lawnmower, so to pull this thing, one would need a geared tractor with a little more weight and guts, but I still consider the sled a success and here are some pictures of the sod that it lifted. You can see in the second picture that it did indeed get under the roots a lifted the sod. I folded back some sod so that you could see the depth. I started the cut by digging down to the blade depth to sink the blade, sharpened the blade, also I increased the blade angle to about 6 degrees, added about 100 lbs. near the rear of the sled and kept the front of the sled about 1/2 inch above grade, and that is when it cut properly. I can see that a tractor with a three point hydraulically controlled hitch would be ideal for raising and lowering the sled for cutting, I will look for one. I need a tractor anyway. Bob.Attachment 7706Attachment 7707
-
Bob,
The soil looks pretty dry and I am use to seeing sod removed when there is a more moisture in the soil which probably acts as a lubricant. That may reduce the force needed to slide under the roots. Maybe there could be a way to inject some water around the cutting edge? Thanks for the updates.
Paul
-
You are right. The soil here where I am in Florida is 70% sand. Moisture disappears rapidly. There is really no problem, except that I don't want to burn my hydrostatic transmission up, it is not made for this type of strain. I am looking for a tractor with a geared type transmission and that will solve the pulling problem. My tractor pulls it, I can hear the thing is really working overtime. I was told by a lawnmower guy that I will soon burn it up if I use it for this type of job. Thanks for your input, and I appreciate it. Well, back to the making of my viaduct molds, Bob.
-
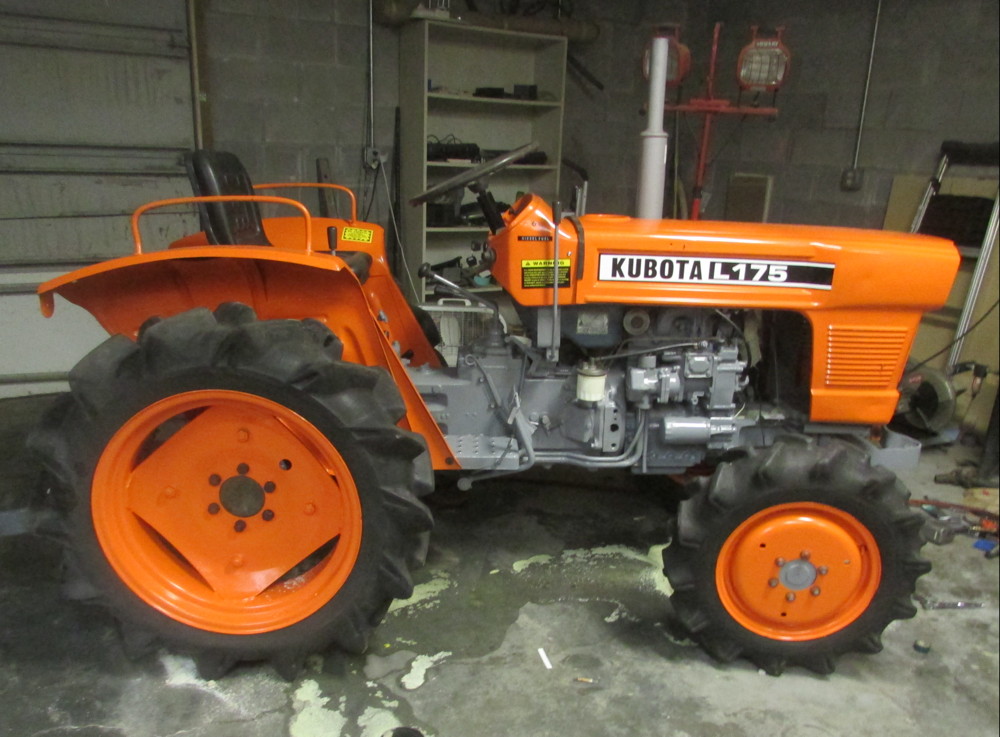
Well, I solved my problem of not having enough power to pull the sled. I found a Kubota tractor on Craigslist. It is a 4 wheel drive and has a granny gear that will pull my house off of its foundation. I got it for 900., and the only problem is that it doesn't have reverse gear, but I got on a tractor forum and found out that it is a simple fix, so I will get started on this job tomorrow. It is diesel and has a three point hitch. I am happier than heck with this tractor, so it will certainly do the job. Bob.
-
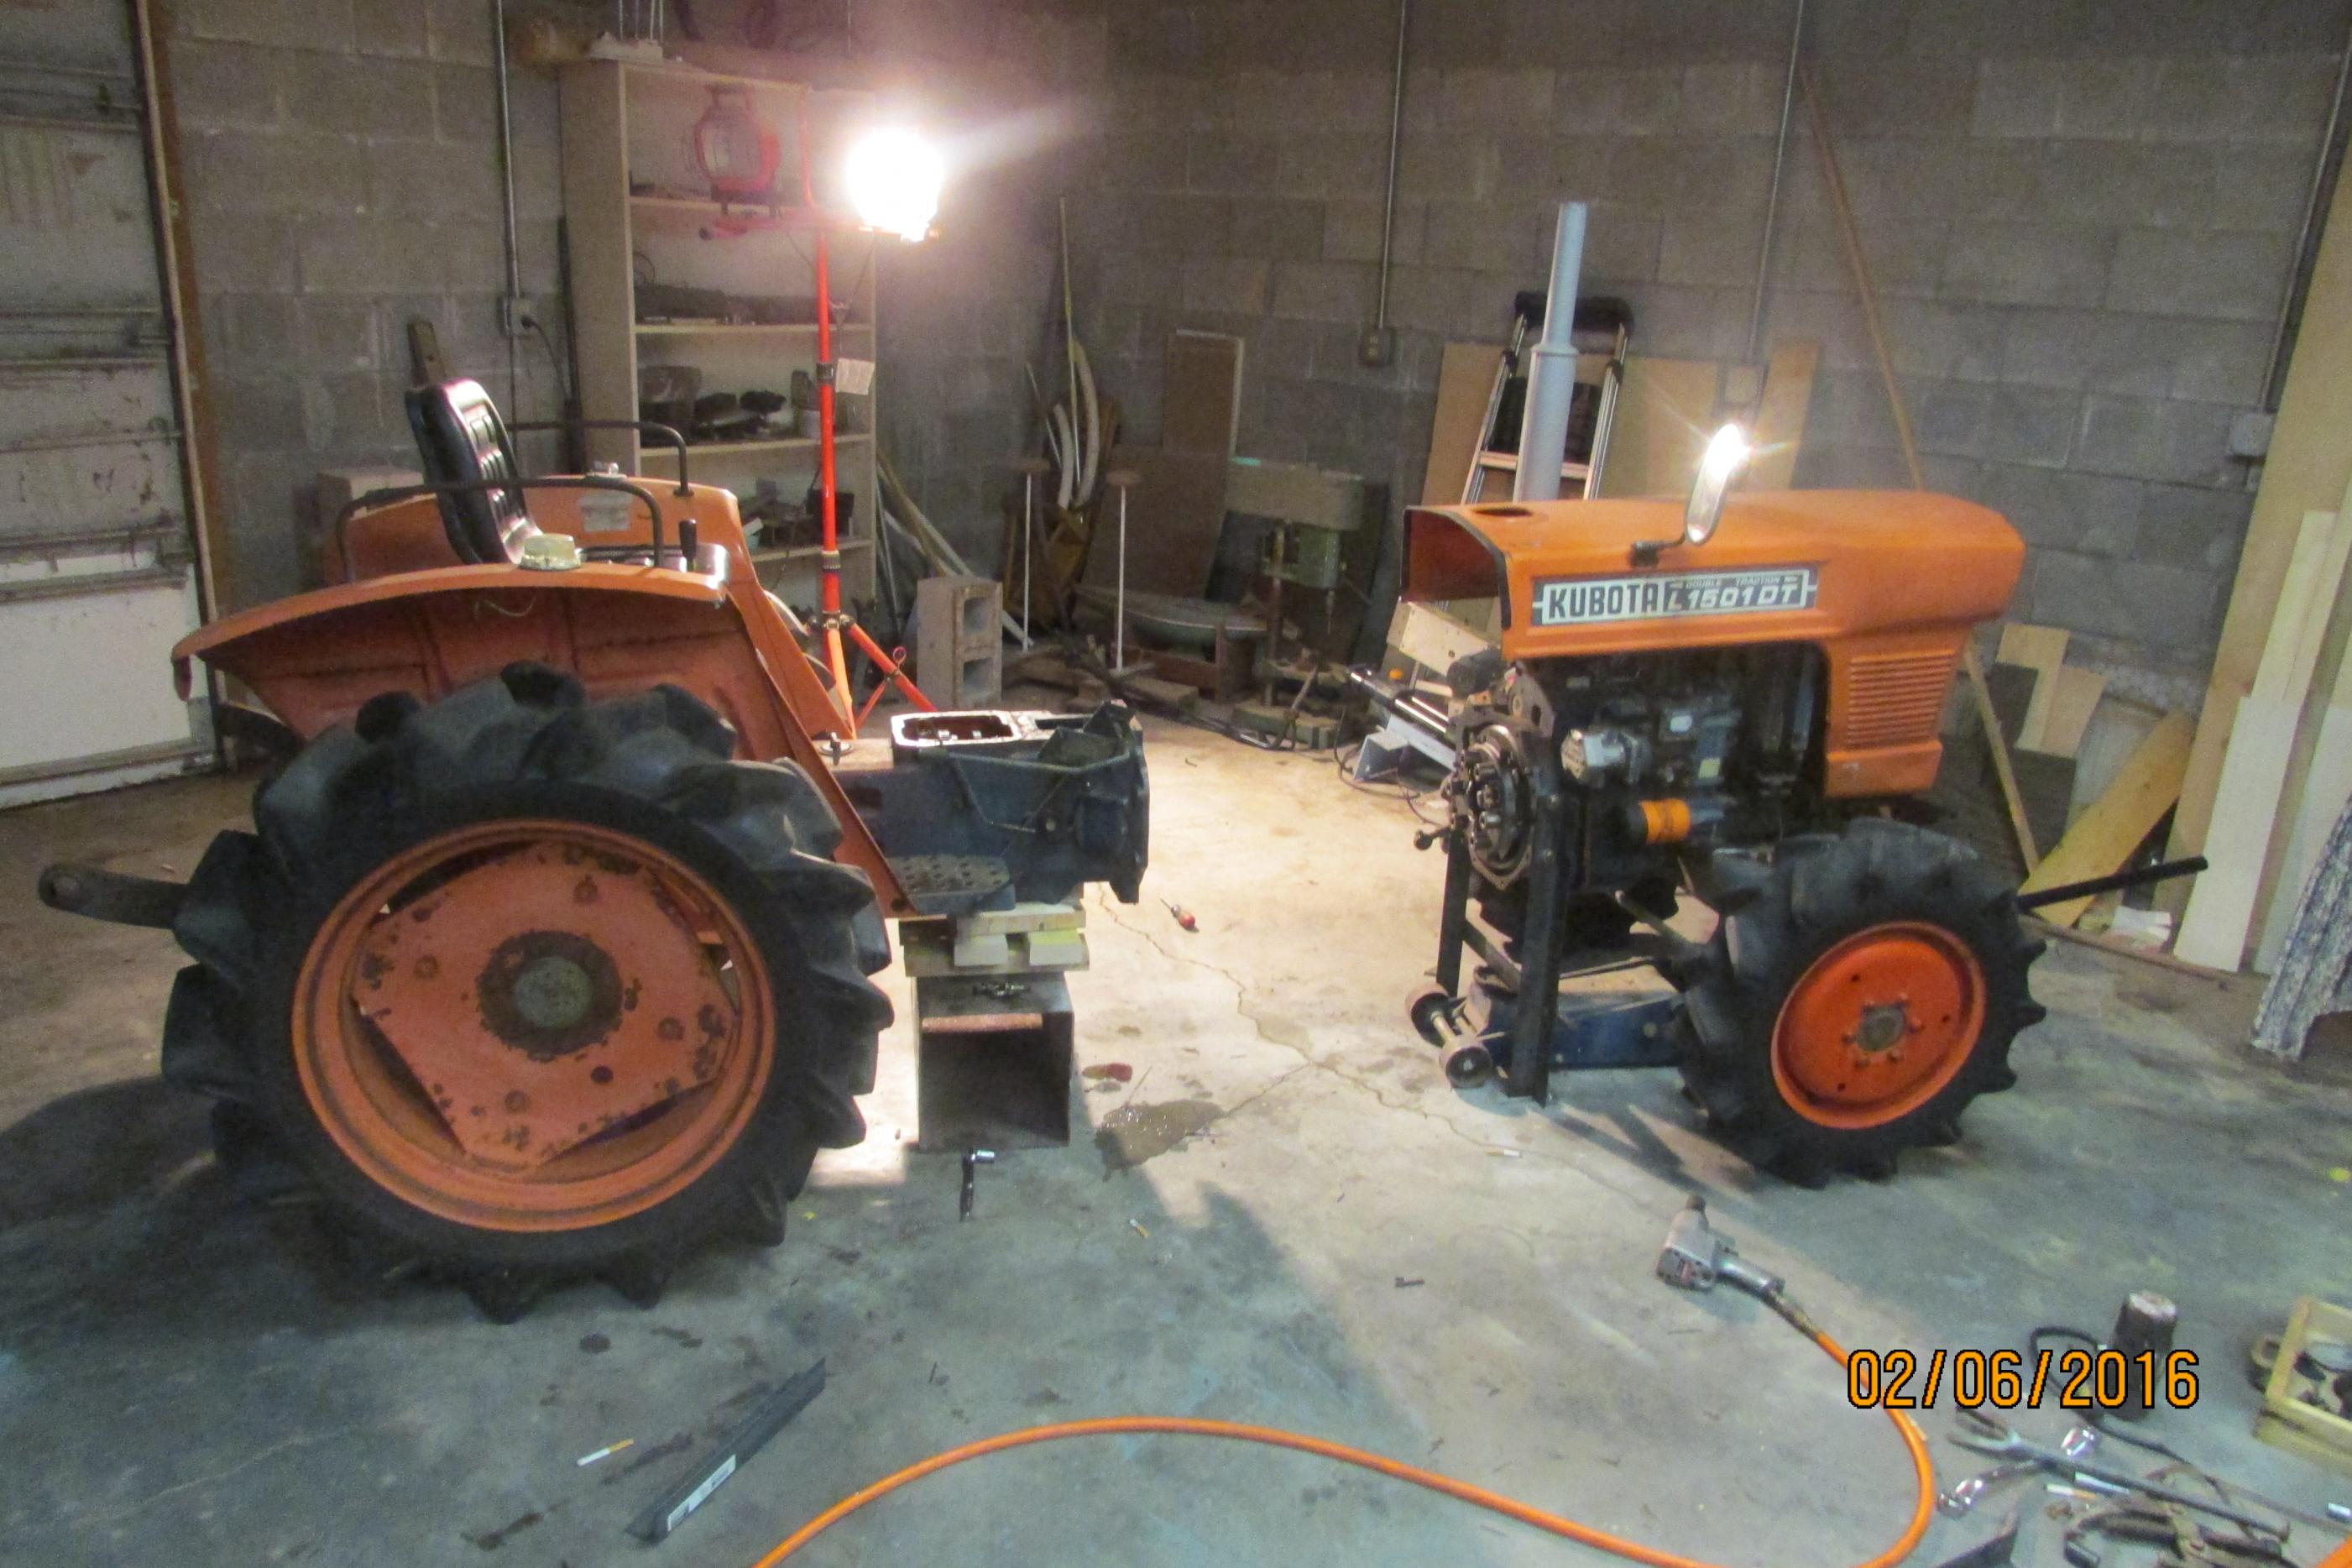
2 Attachment(s)
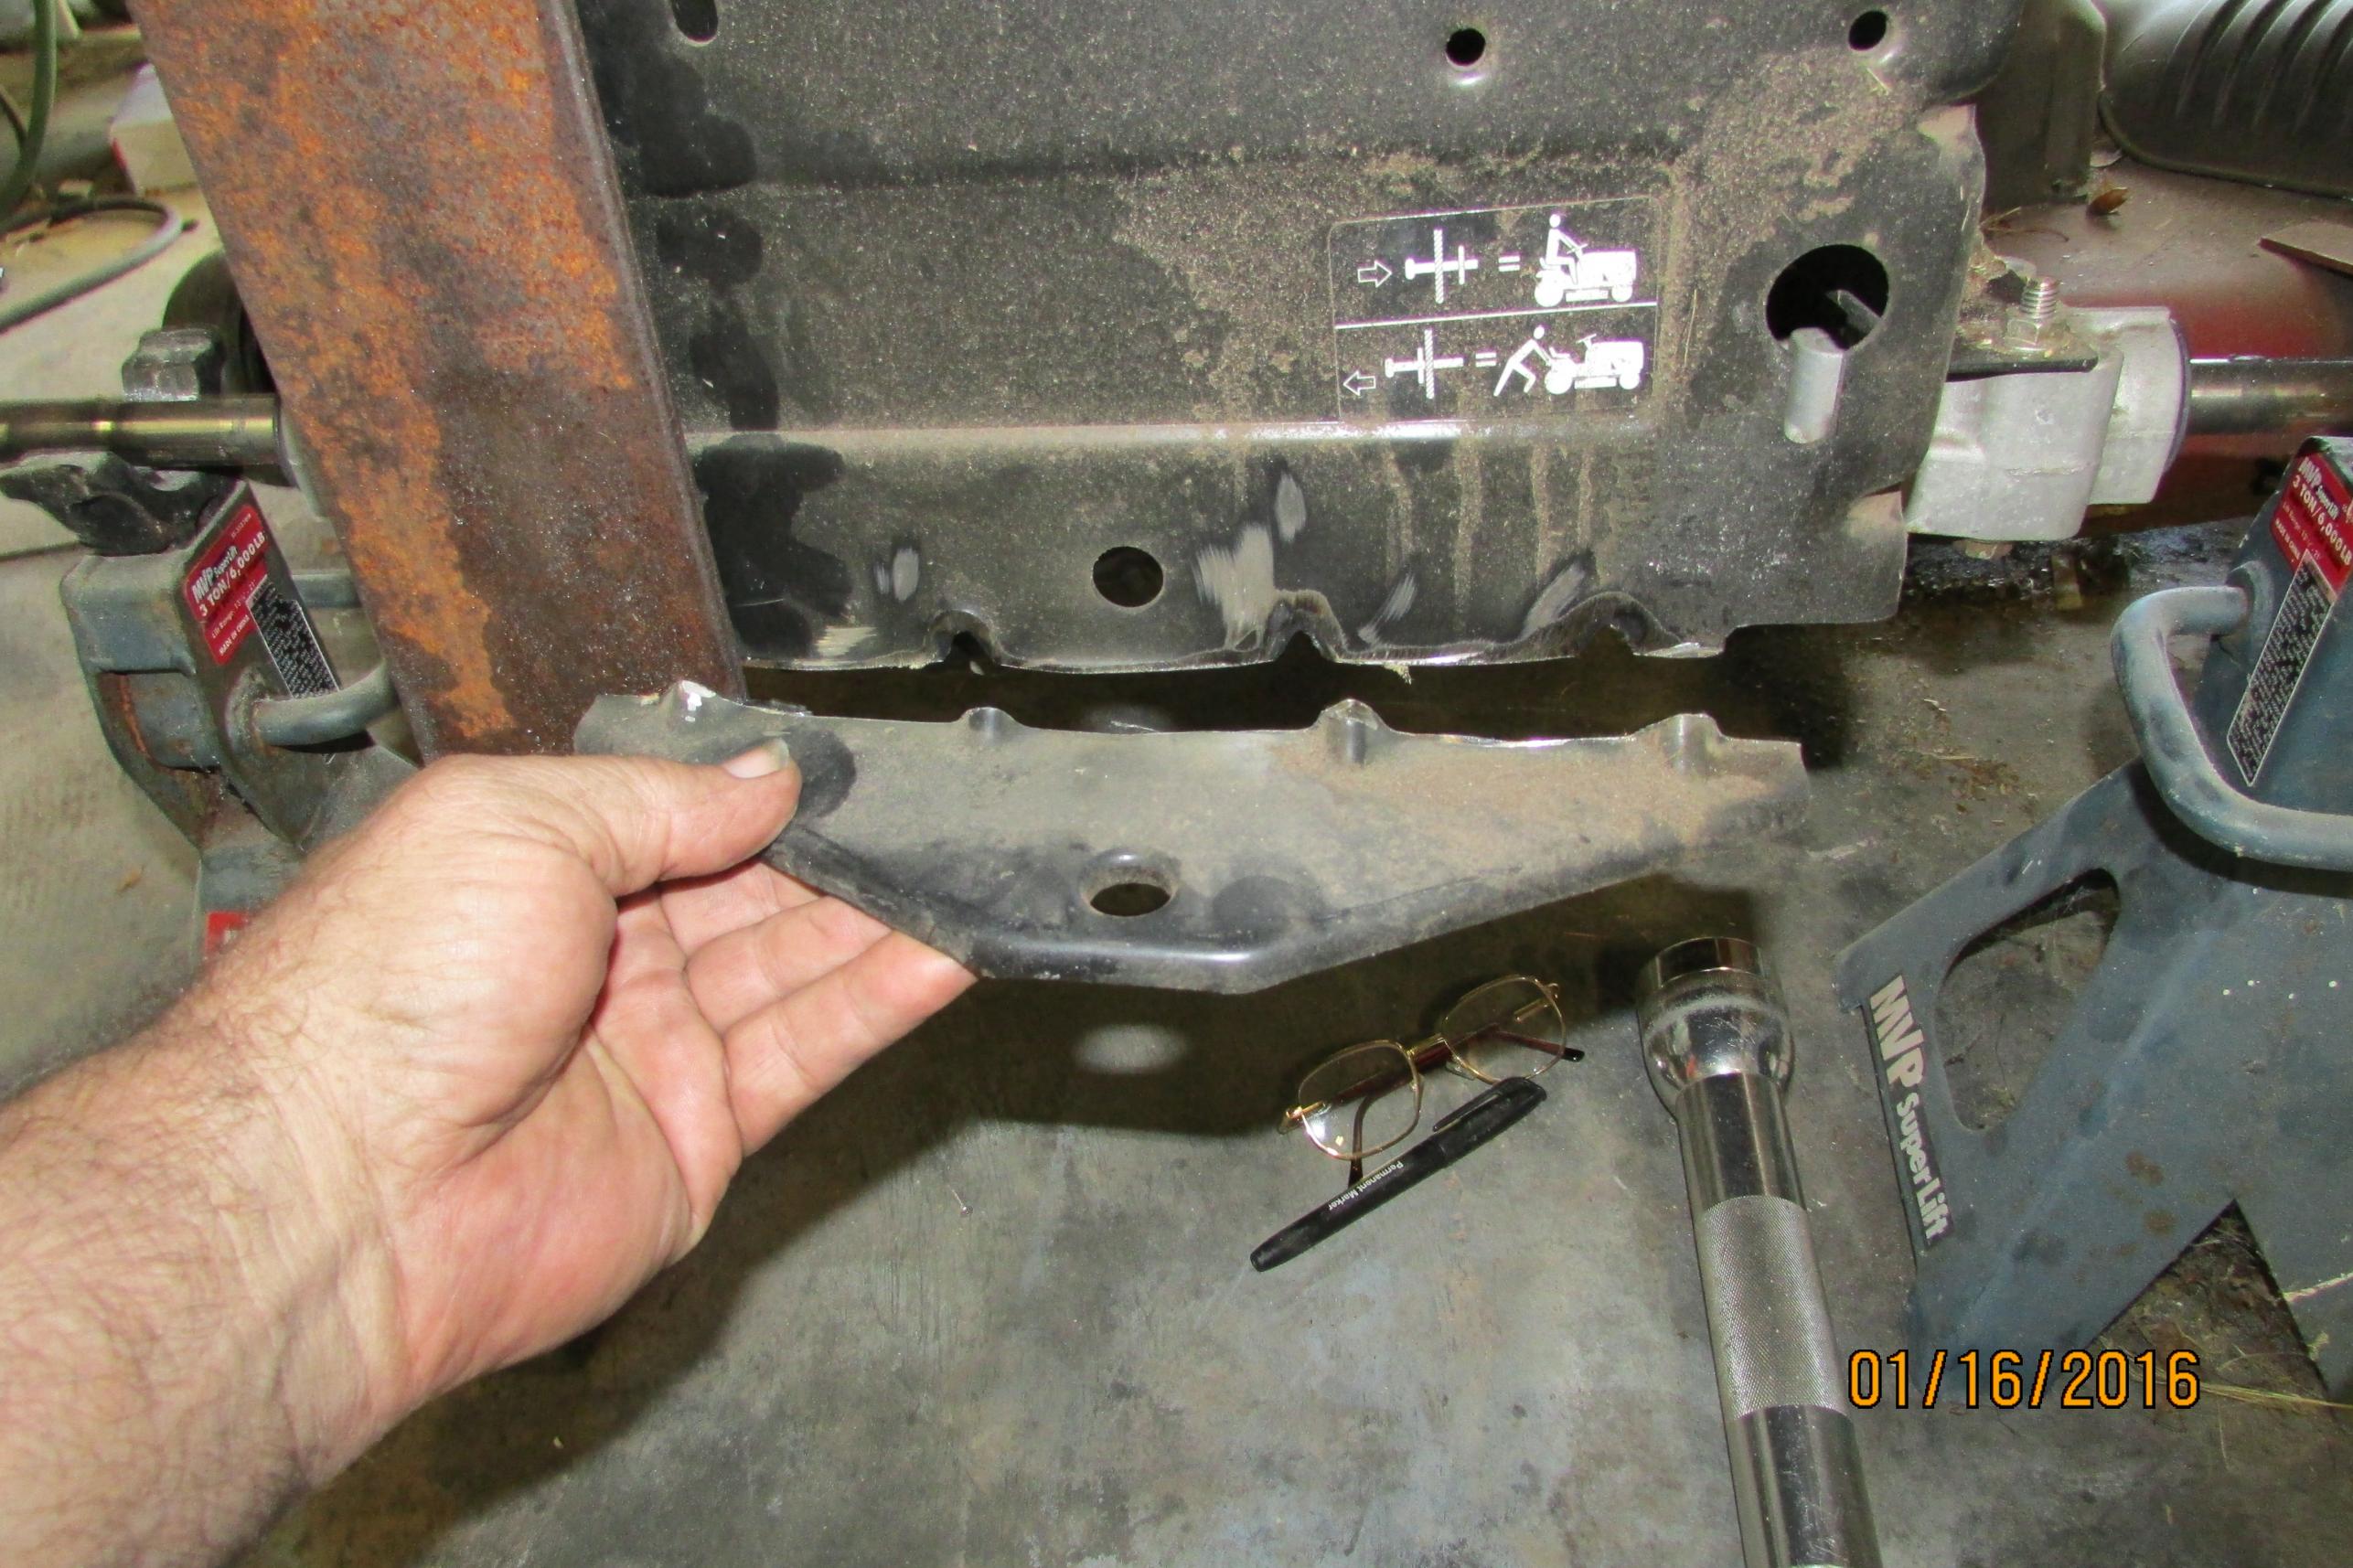
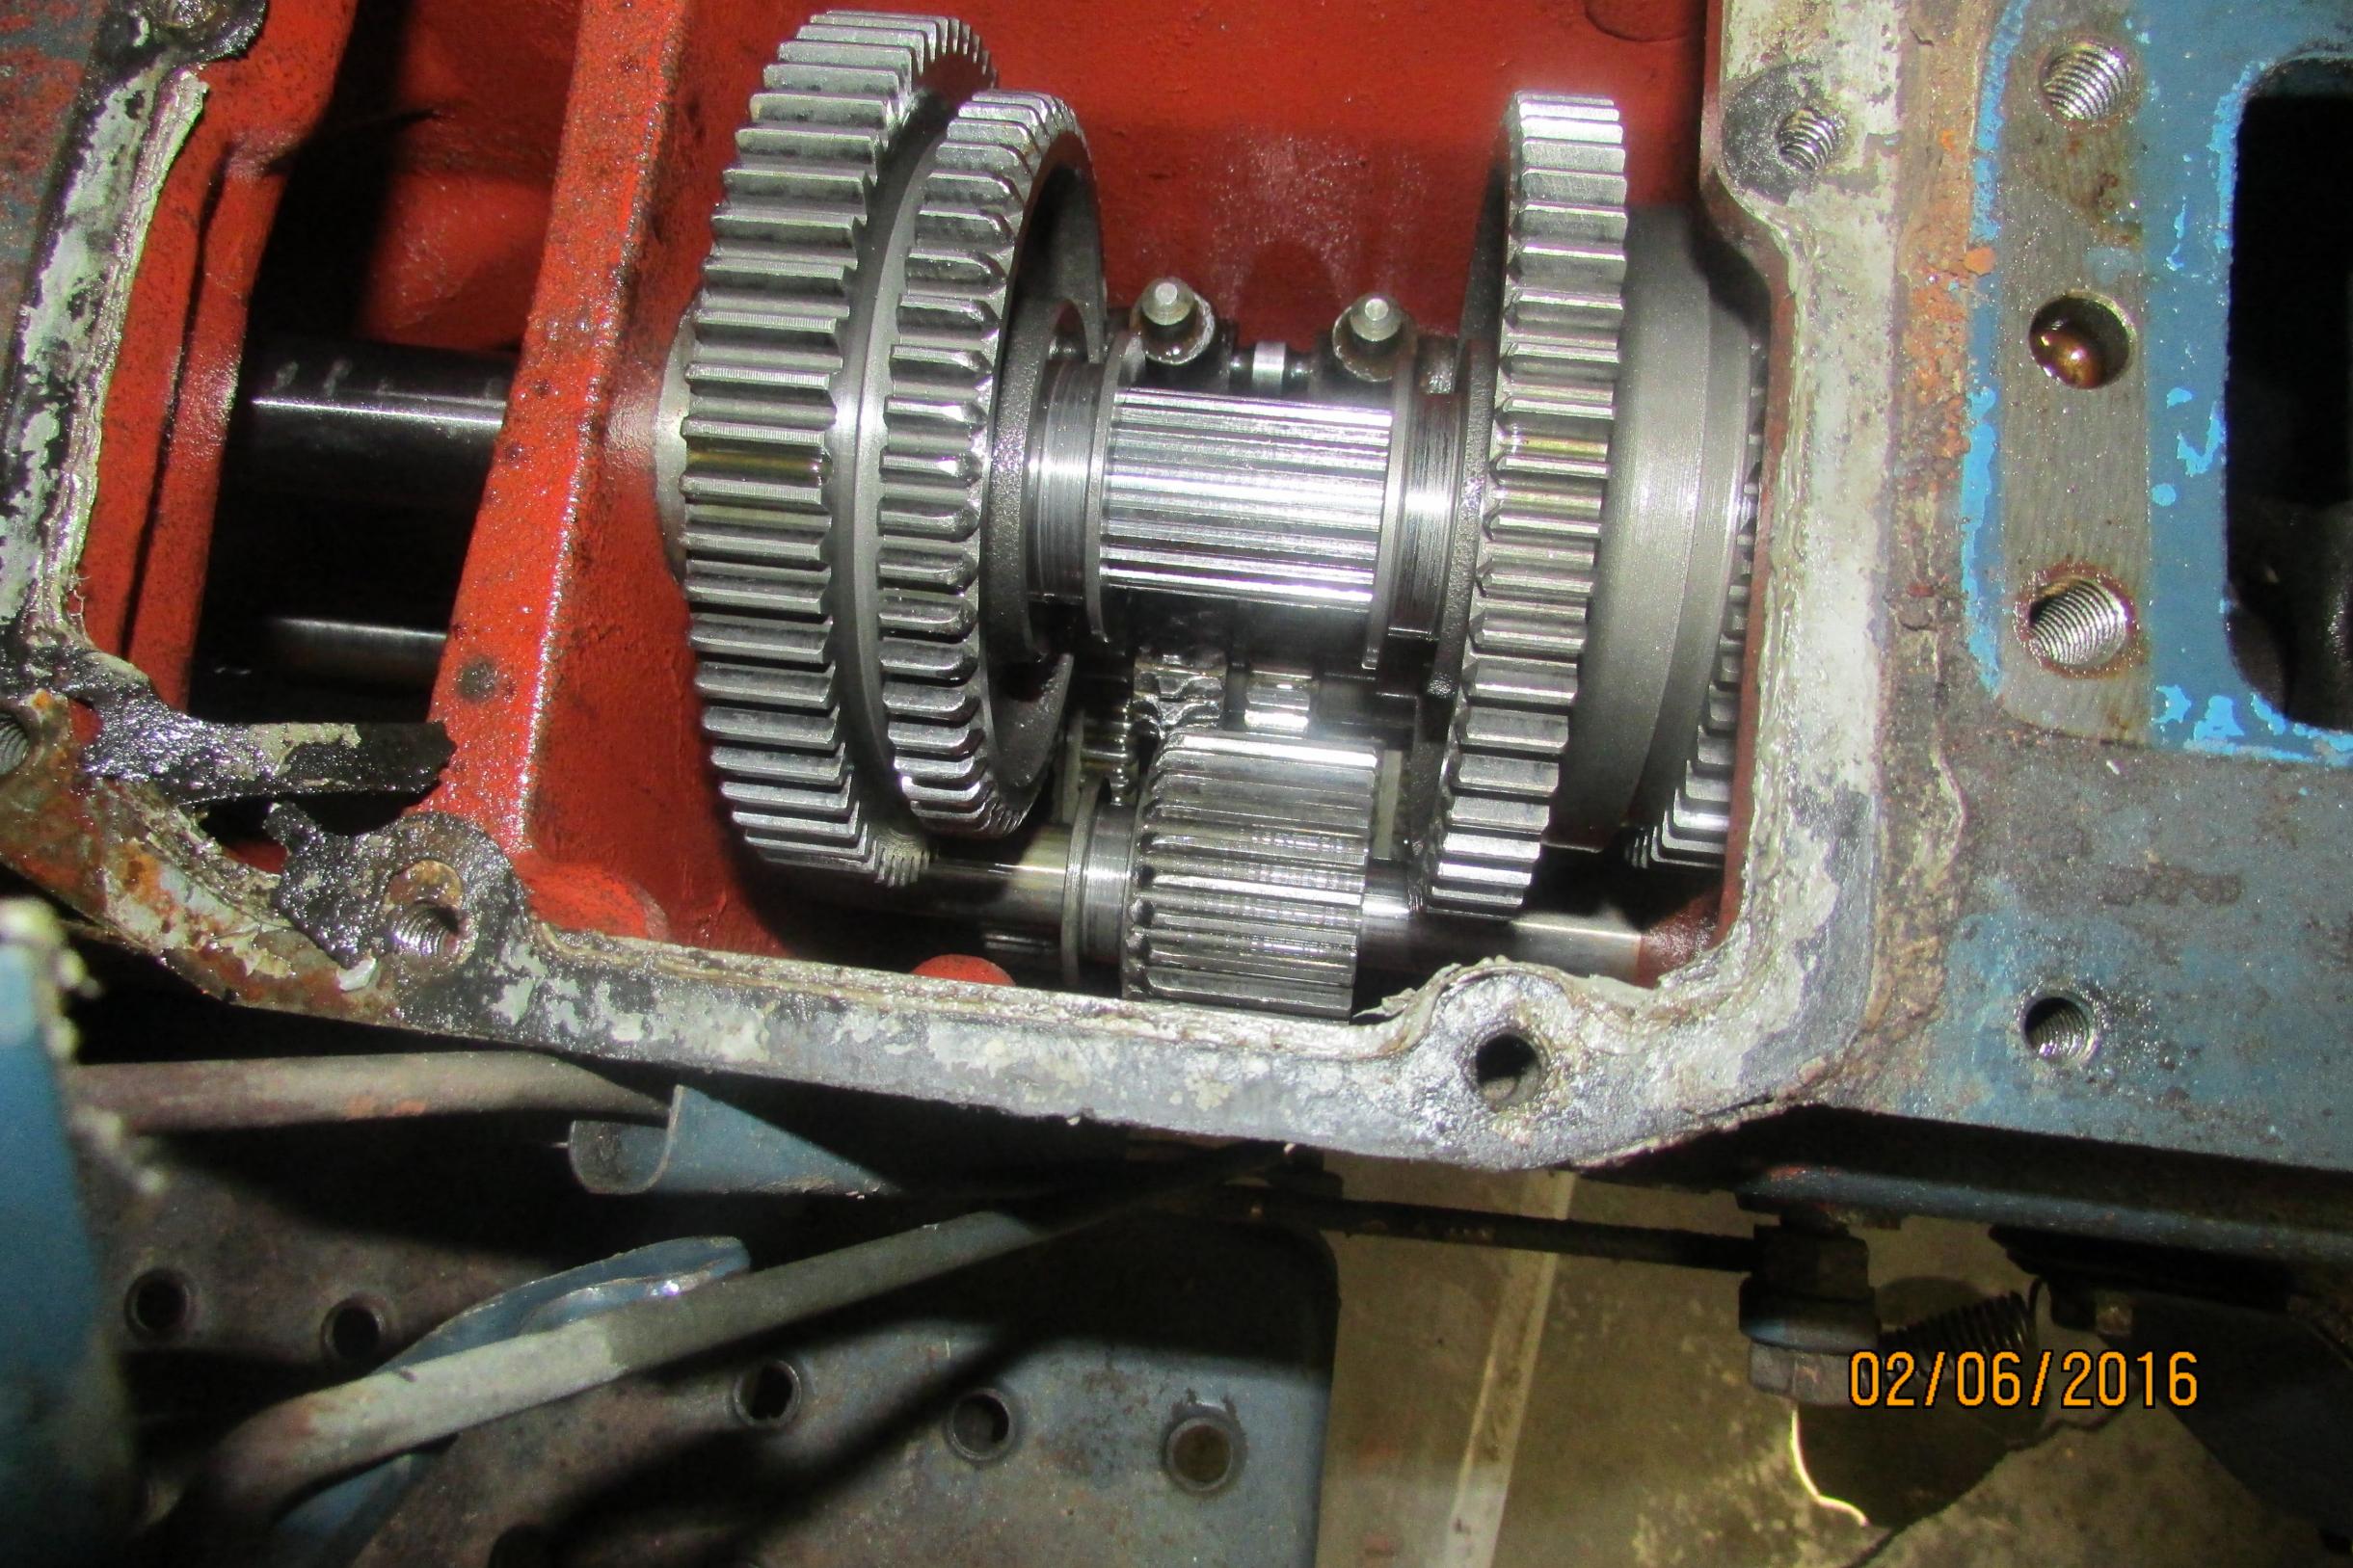
Well, I found a tractor. It is a Kubota l1501 4wd diesel, so this should do the job. I got it for a song, 900., but the only thing wrong is, no reverse. I knew that when I bought it. It would have been an easy fix, if it were only the reverse idler gear, but both that gear and the main shaft gear is wiped out, so that meant that I will have to split the case. I made an angle iron stand for the front part of the tractor, so it will make the parting easier. I will check out the clutch and pressure plate when the transmission is separated from the engine. In the one picture, you can see the two wiped out gears. After saying that, I took a closer look at the picture and found another gear that is trashed, so that makes three gears to replace. Here are some pictures of this endeavor. Bob.Attachment 8047Attachment 8048
-
2 Attachment(s)
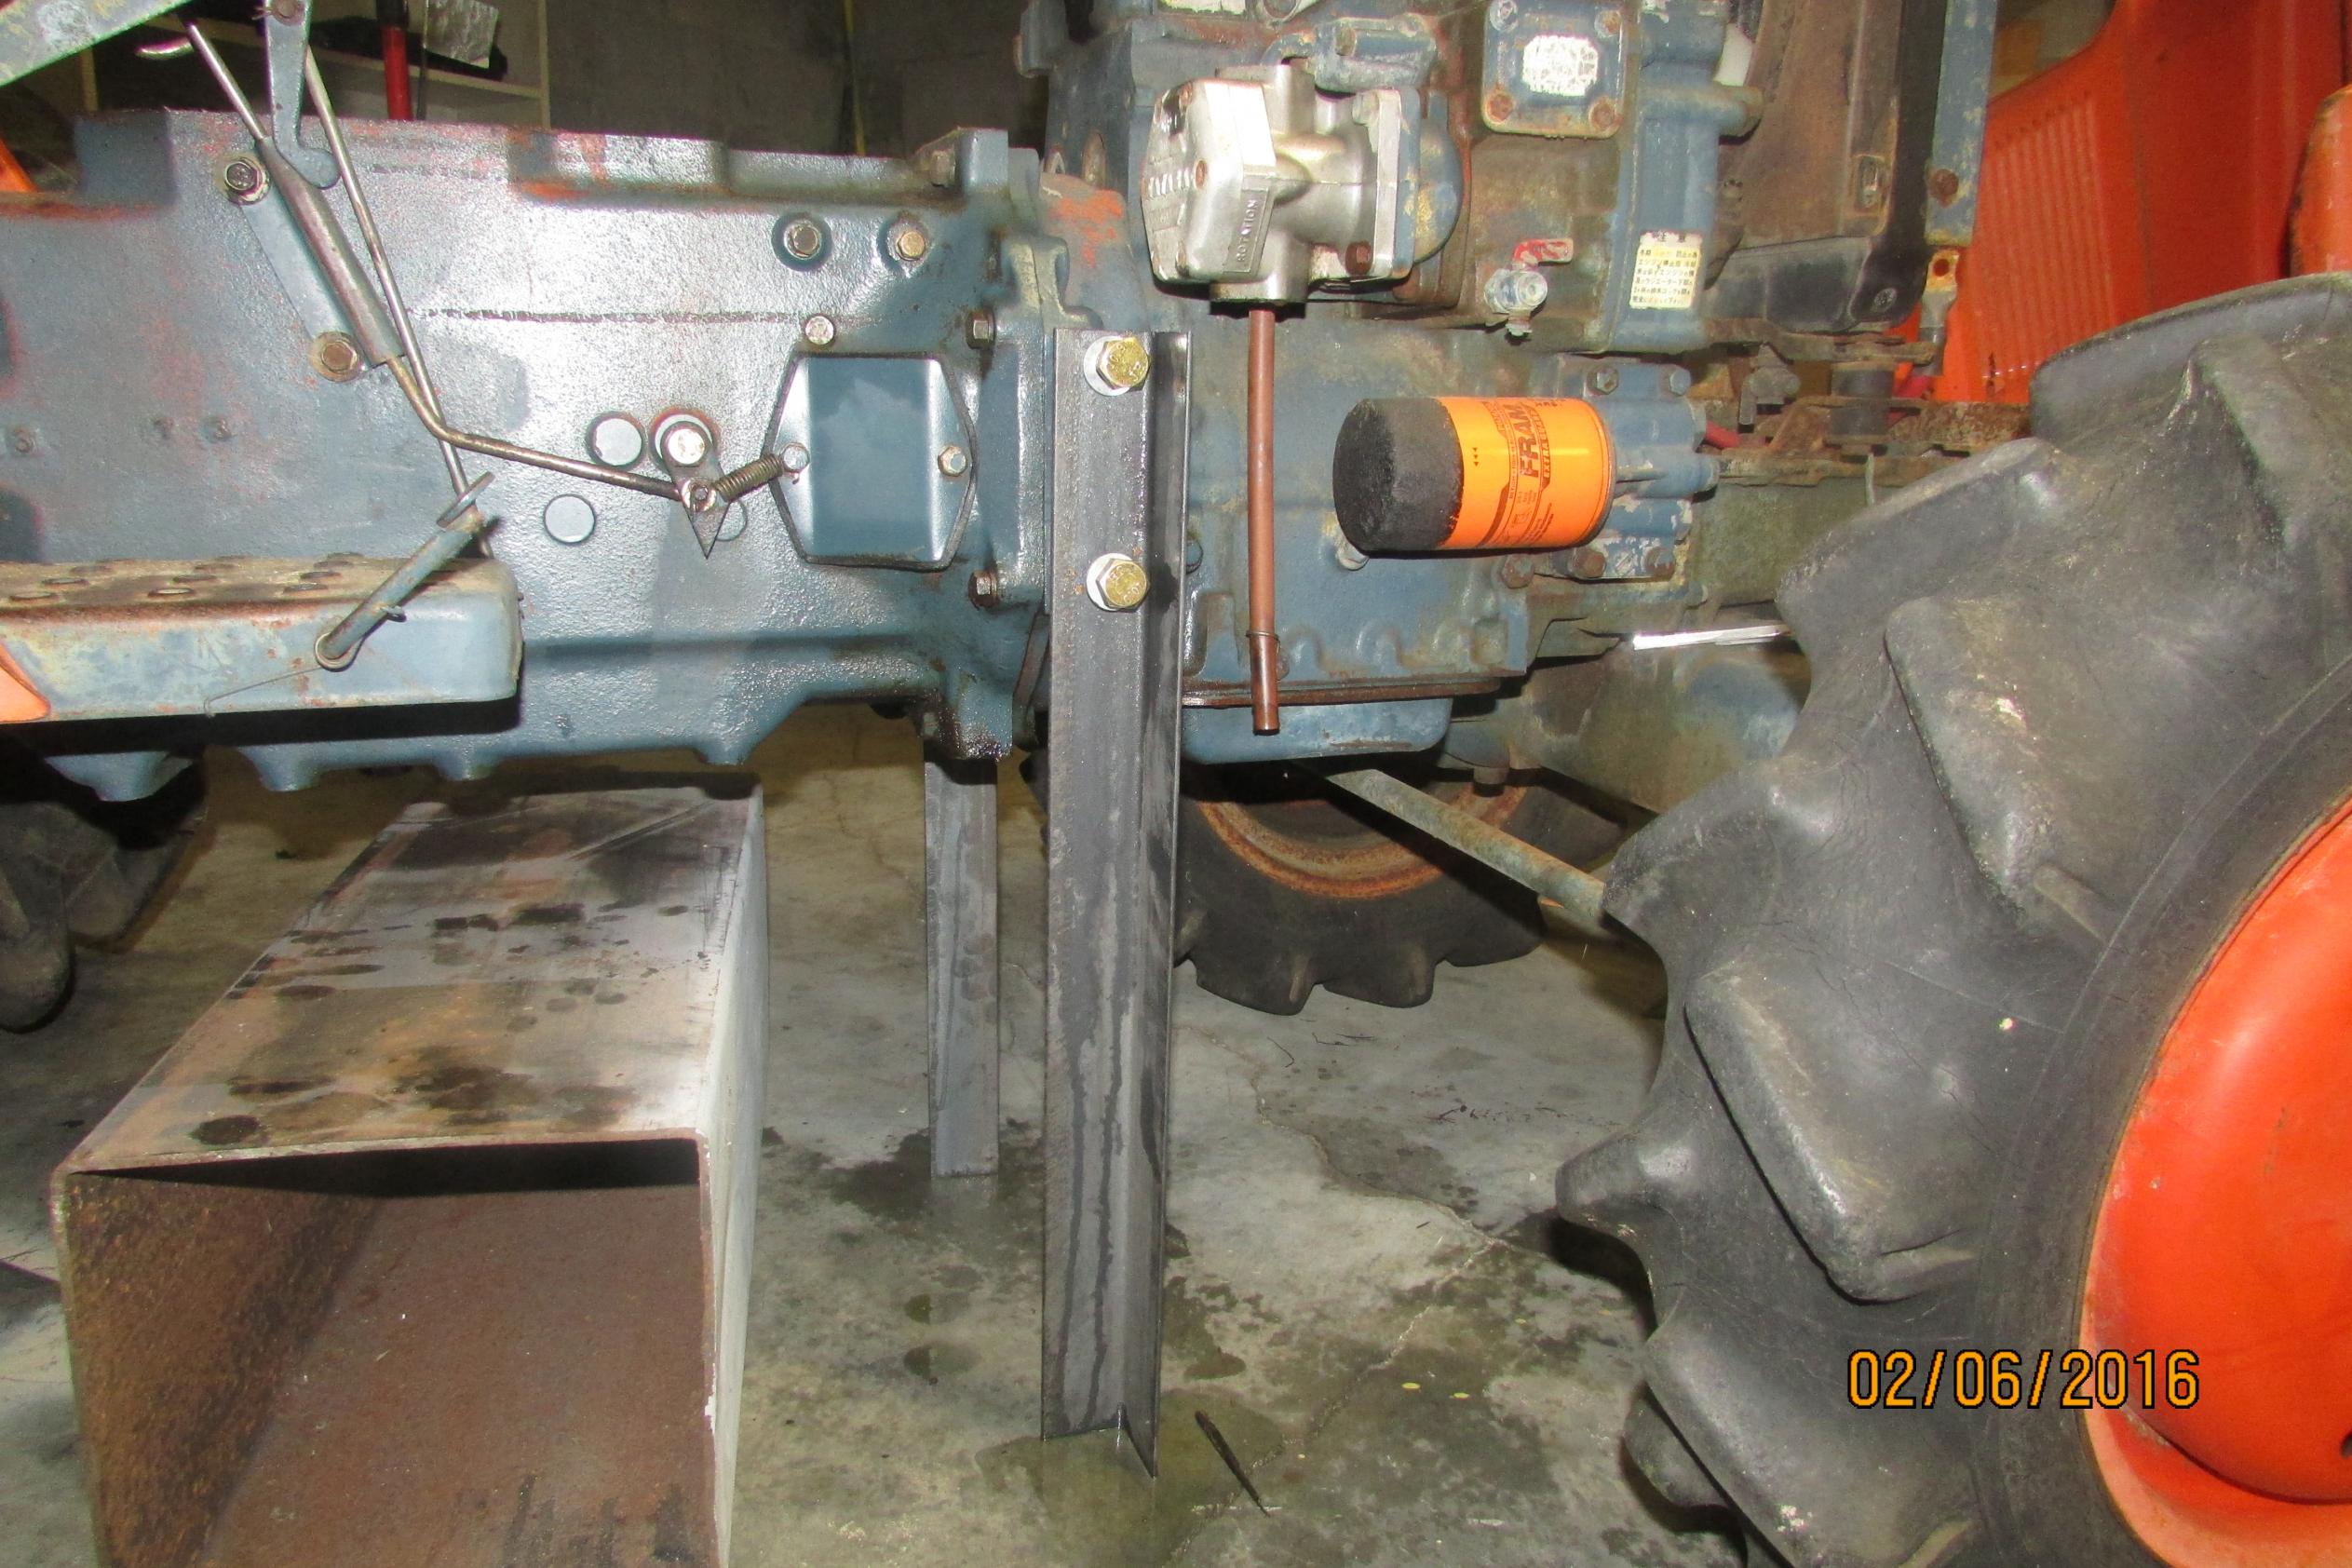
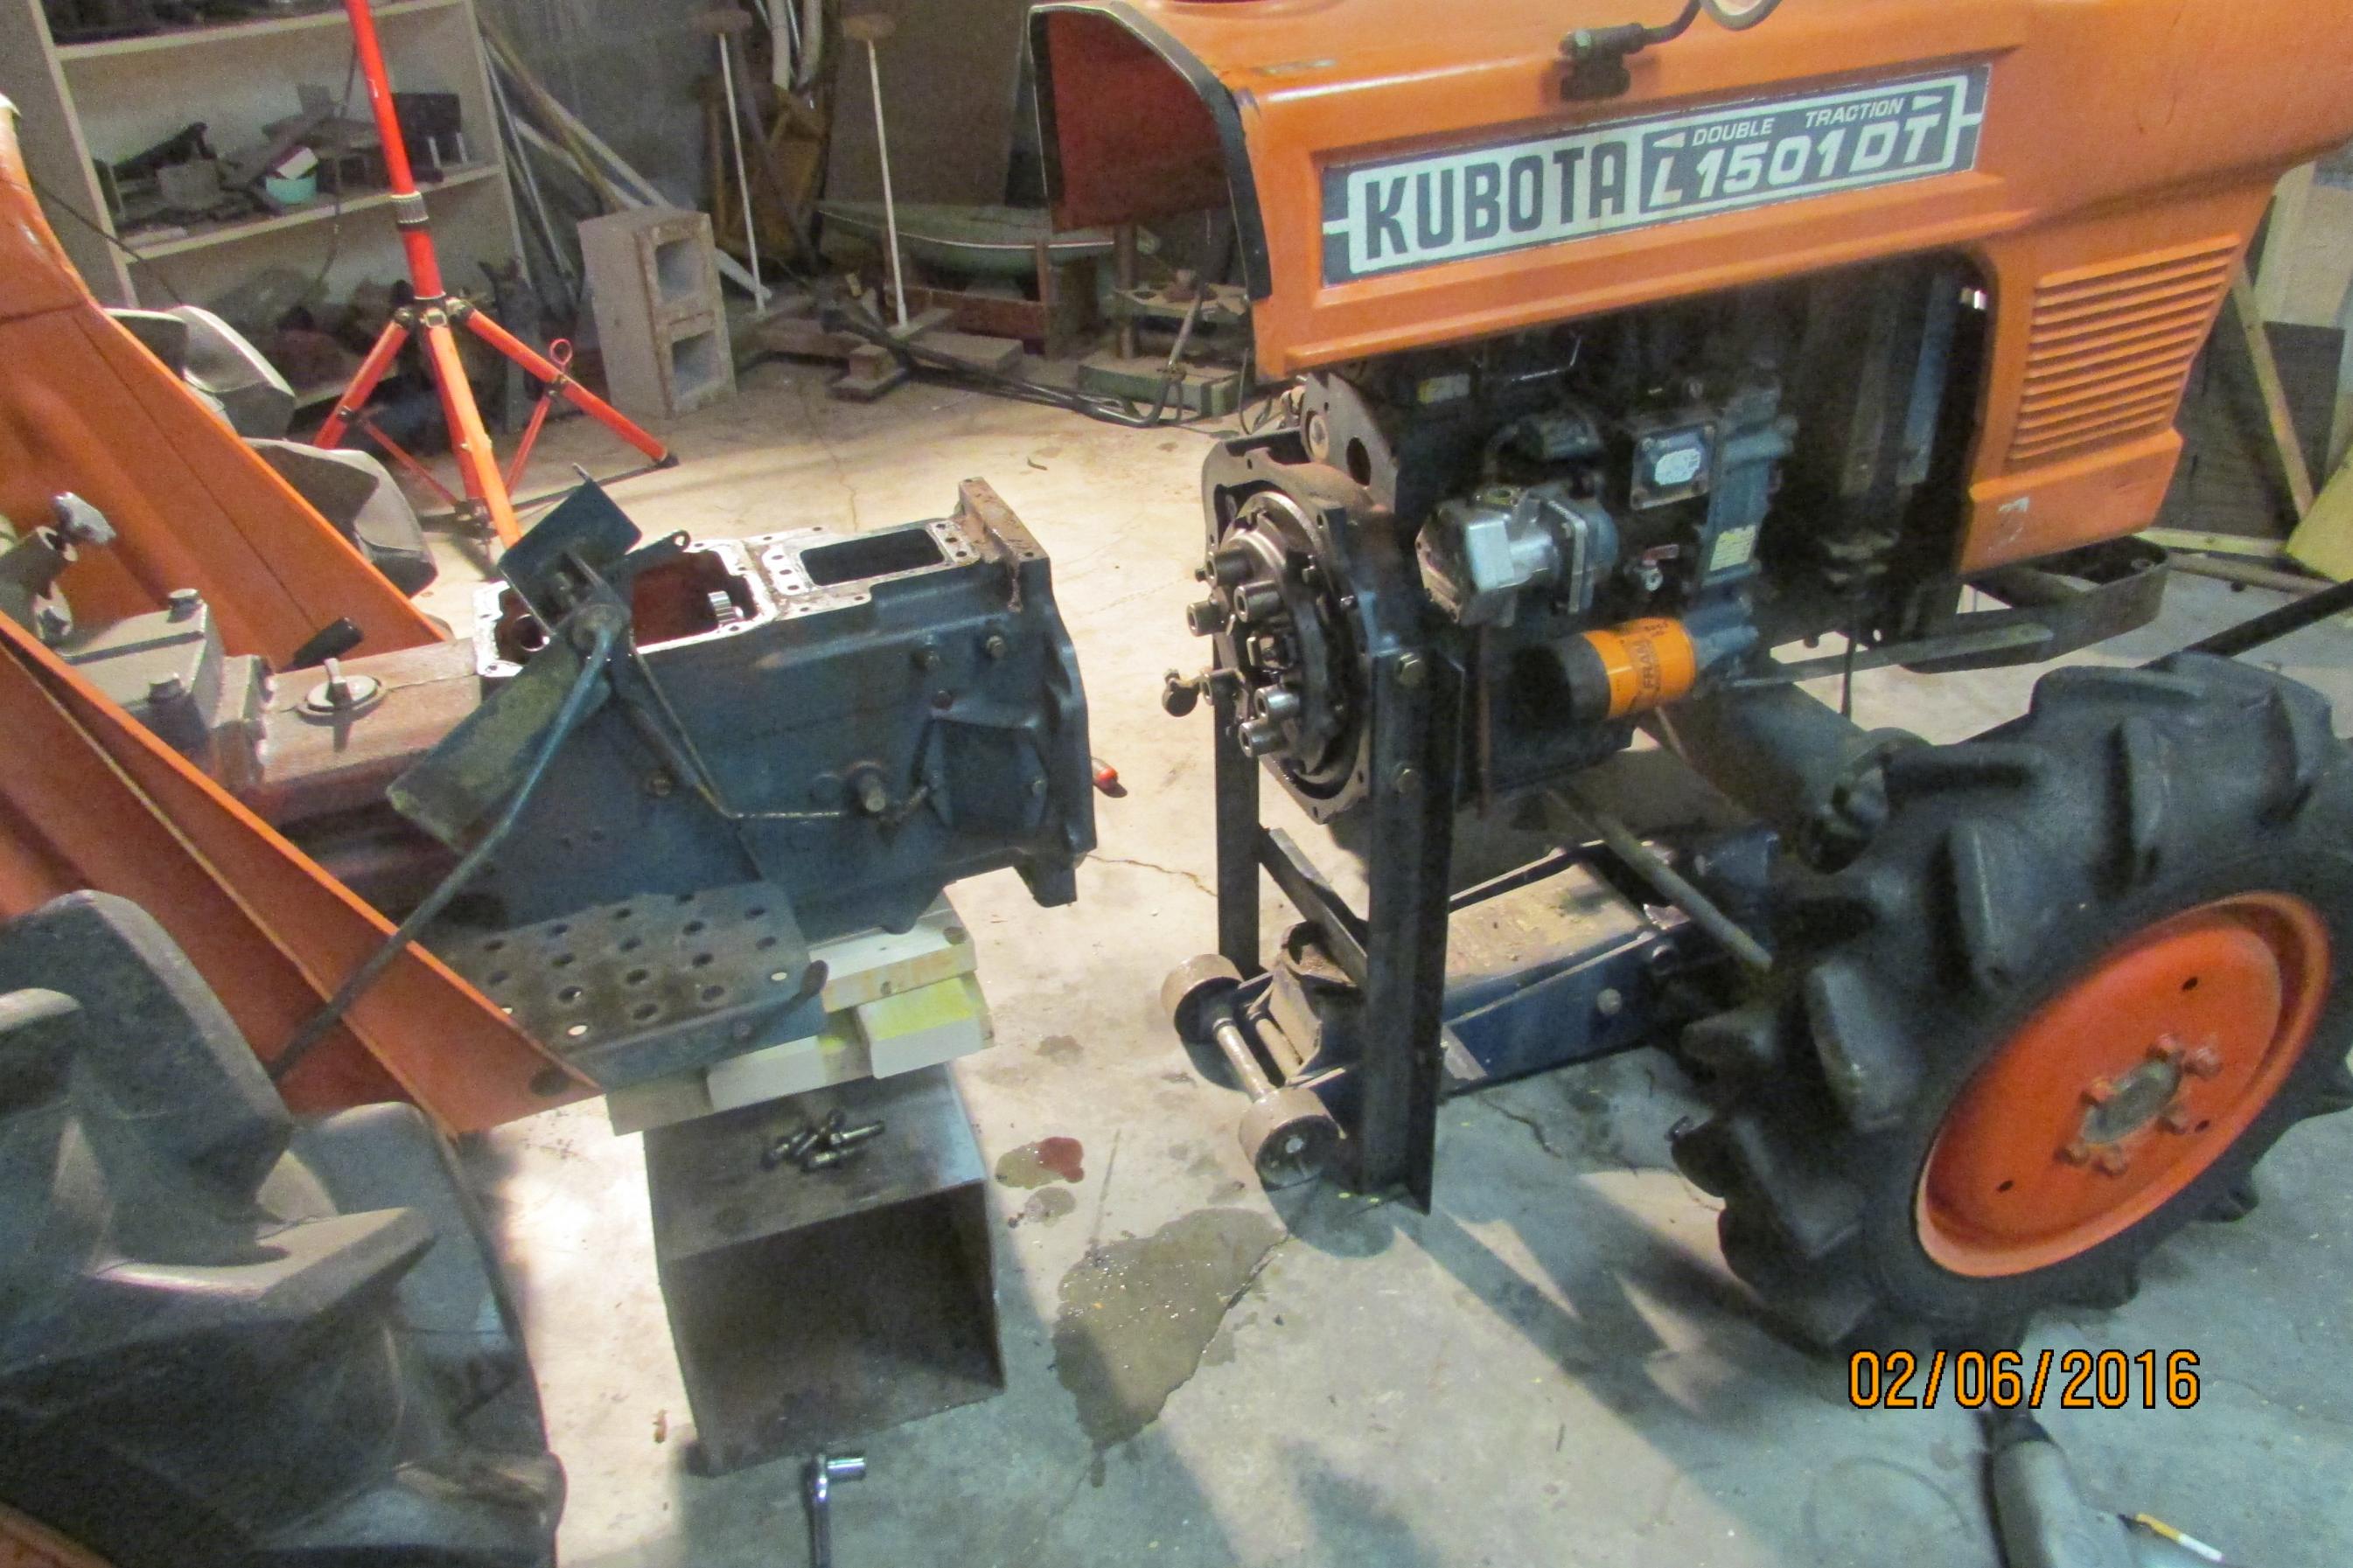
Today I split the case and finished the engine stand and jack tool out of angle. The tractor came apart easily with no problems. Here is what it looks like, Bob.Attachment 8058Attachment 8059
-
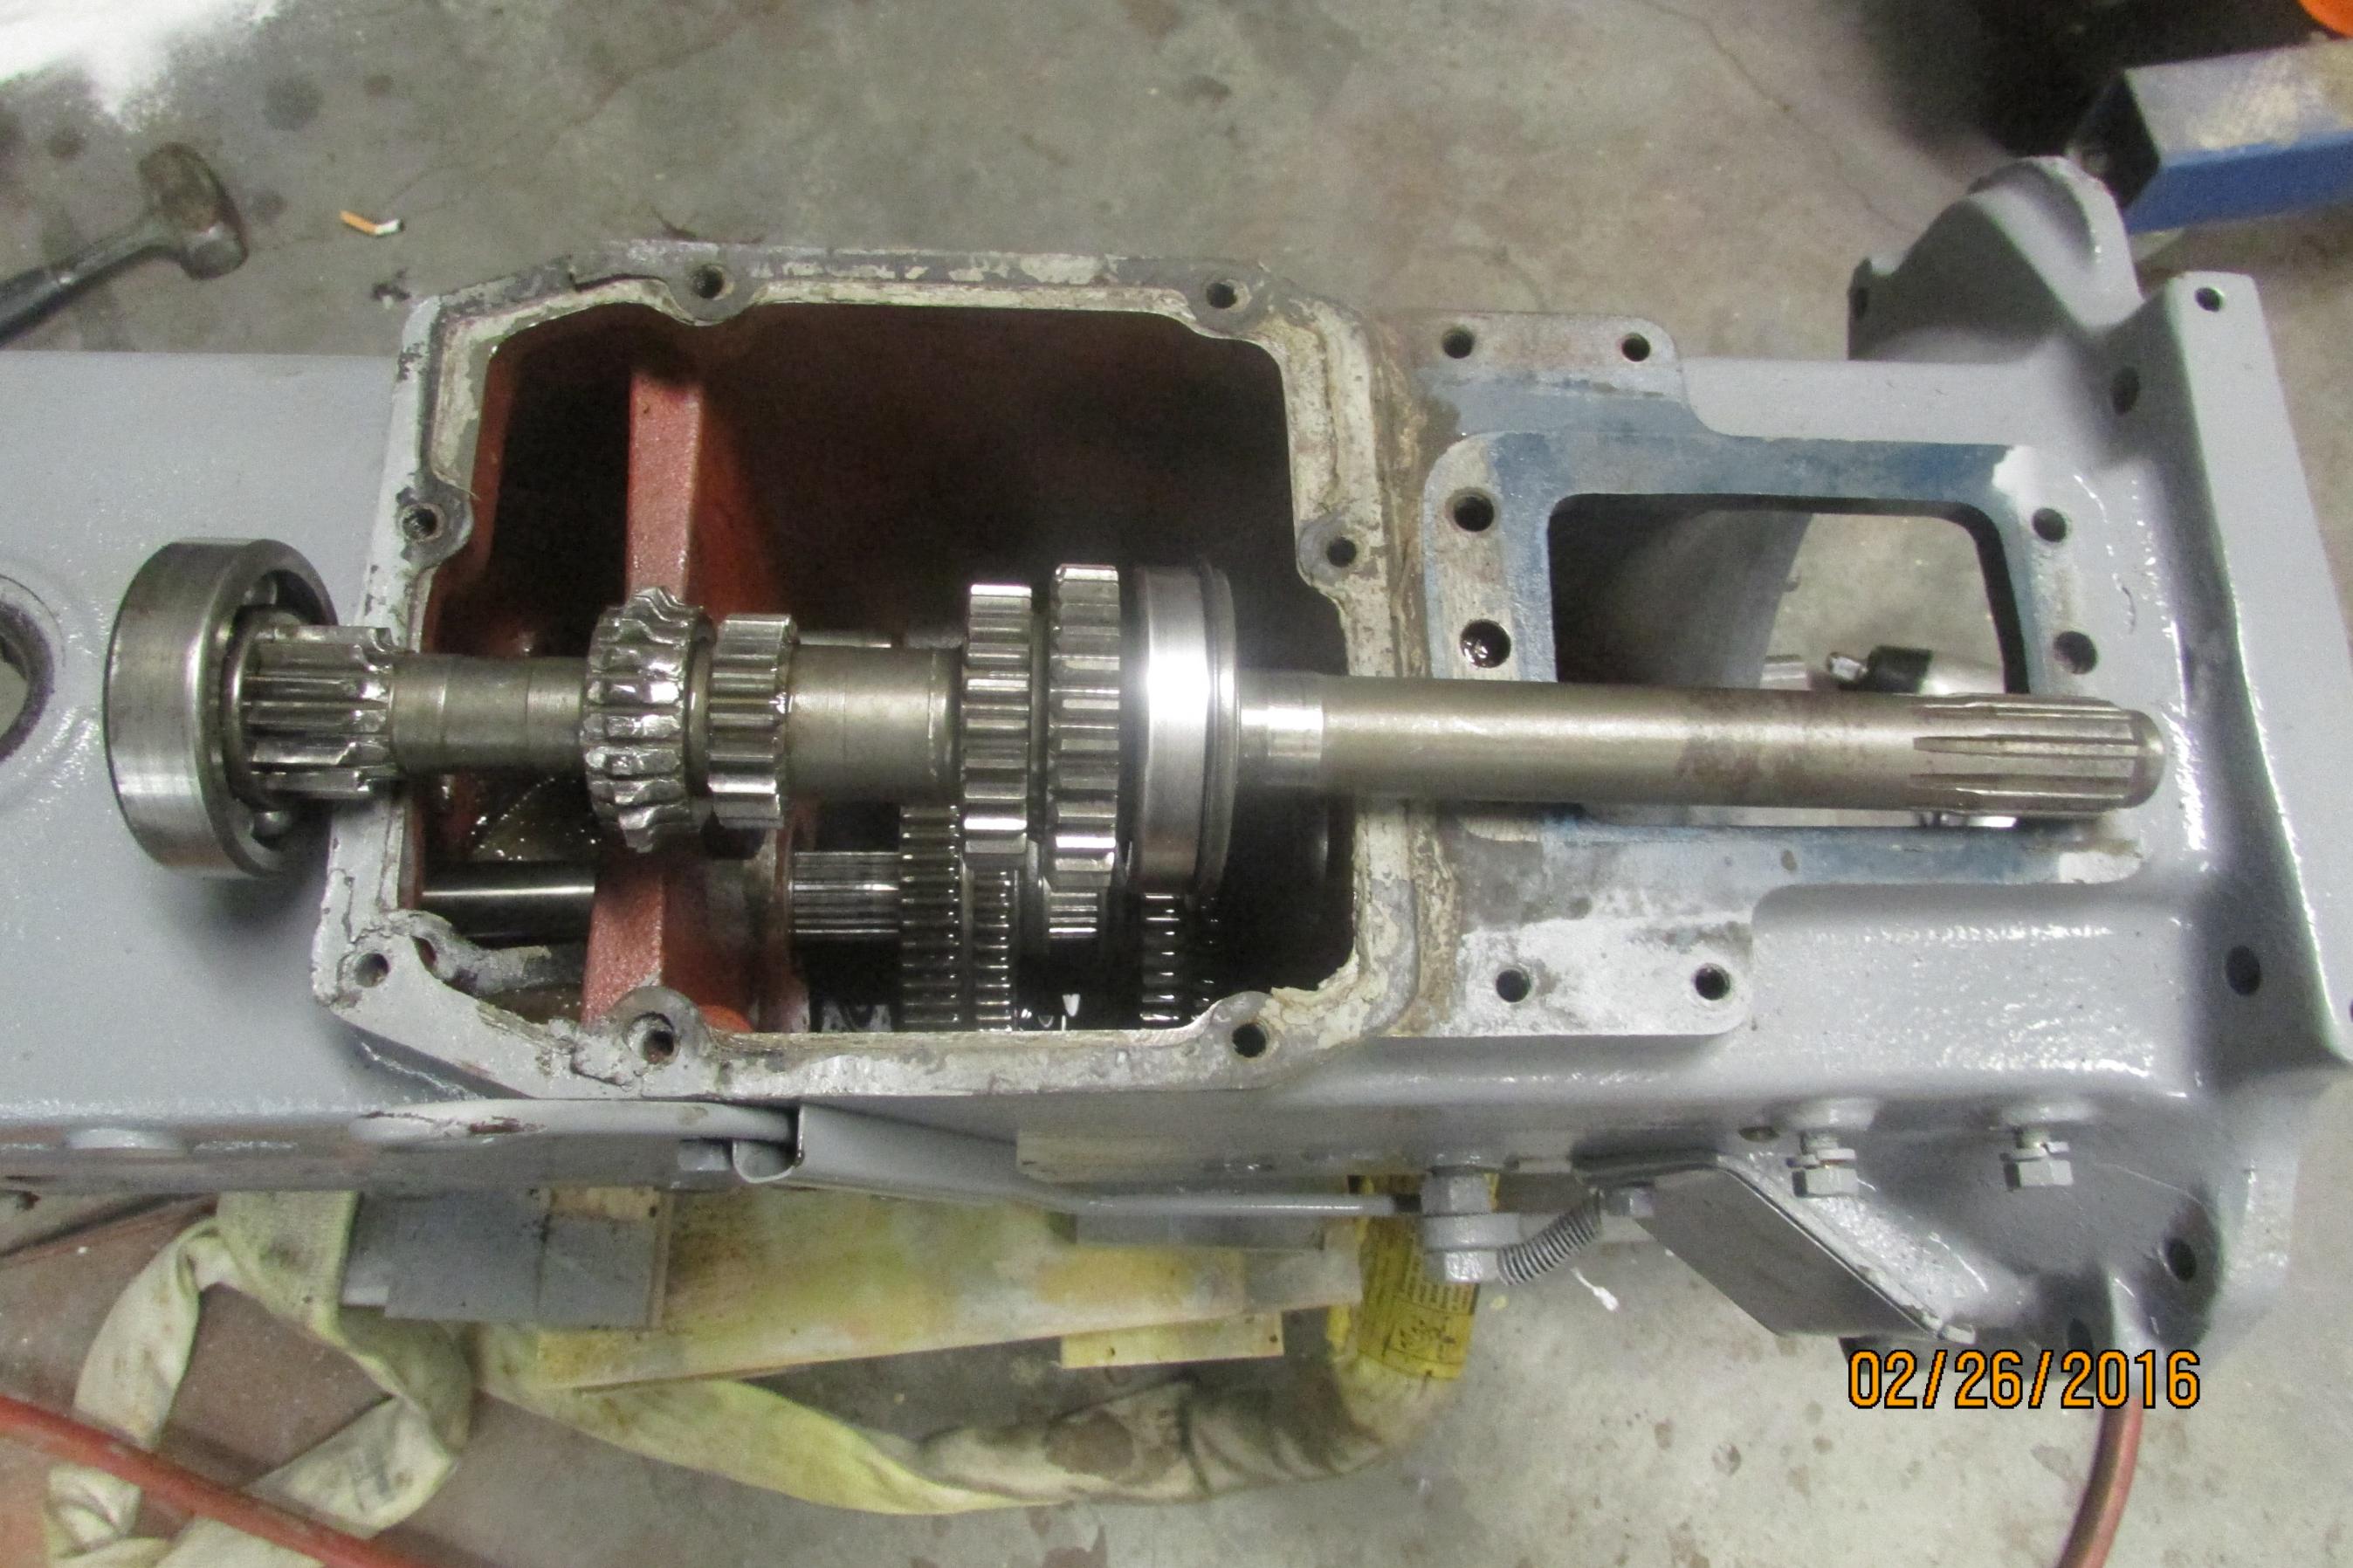
2 Attachment(s)
Here is the continuing saga of my tractor repair. I am painting the whole tractor while waiting for parts. I found out that in order to replace the mainshaft, I had to separate the transmission from the rear end. I now have the gears out that I am replacing, in turns out to be two, the mainshaft and the reverse gear. While I have it apart, I think I will also replace the clutch and pressure plate and throw out bearing. Here are some pictures. You can see how the one gear on the mainshaft is wiped out on both sides. Bob.Attachment 8614Attachment 8615
-
2 Attachment(s)
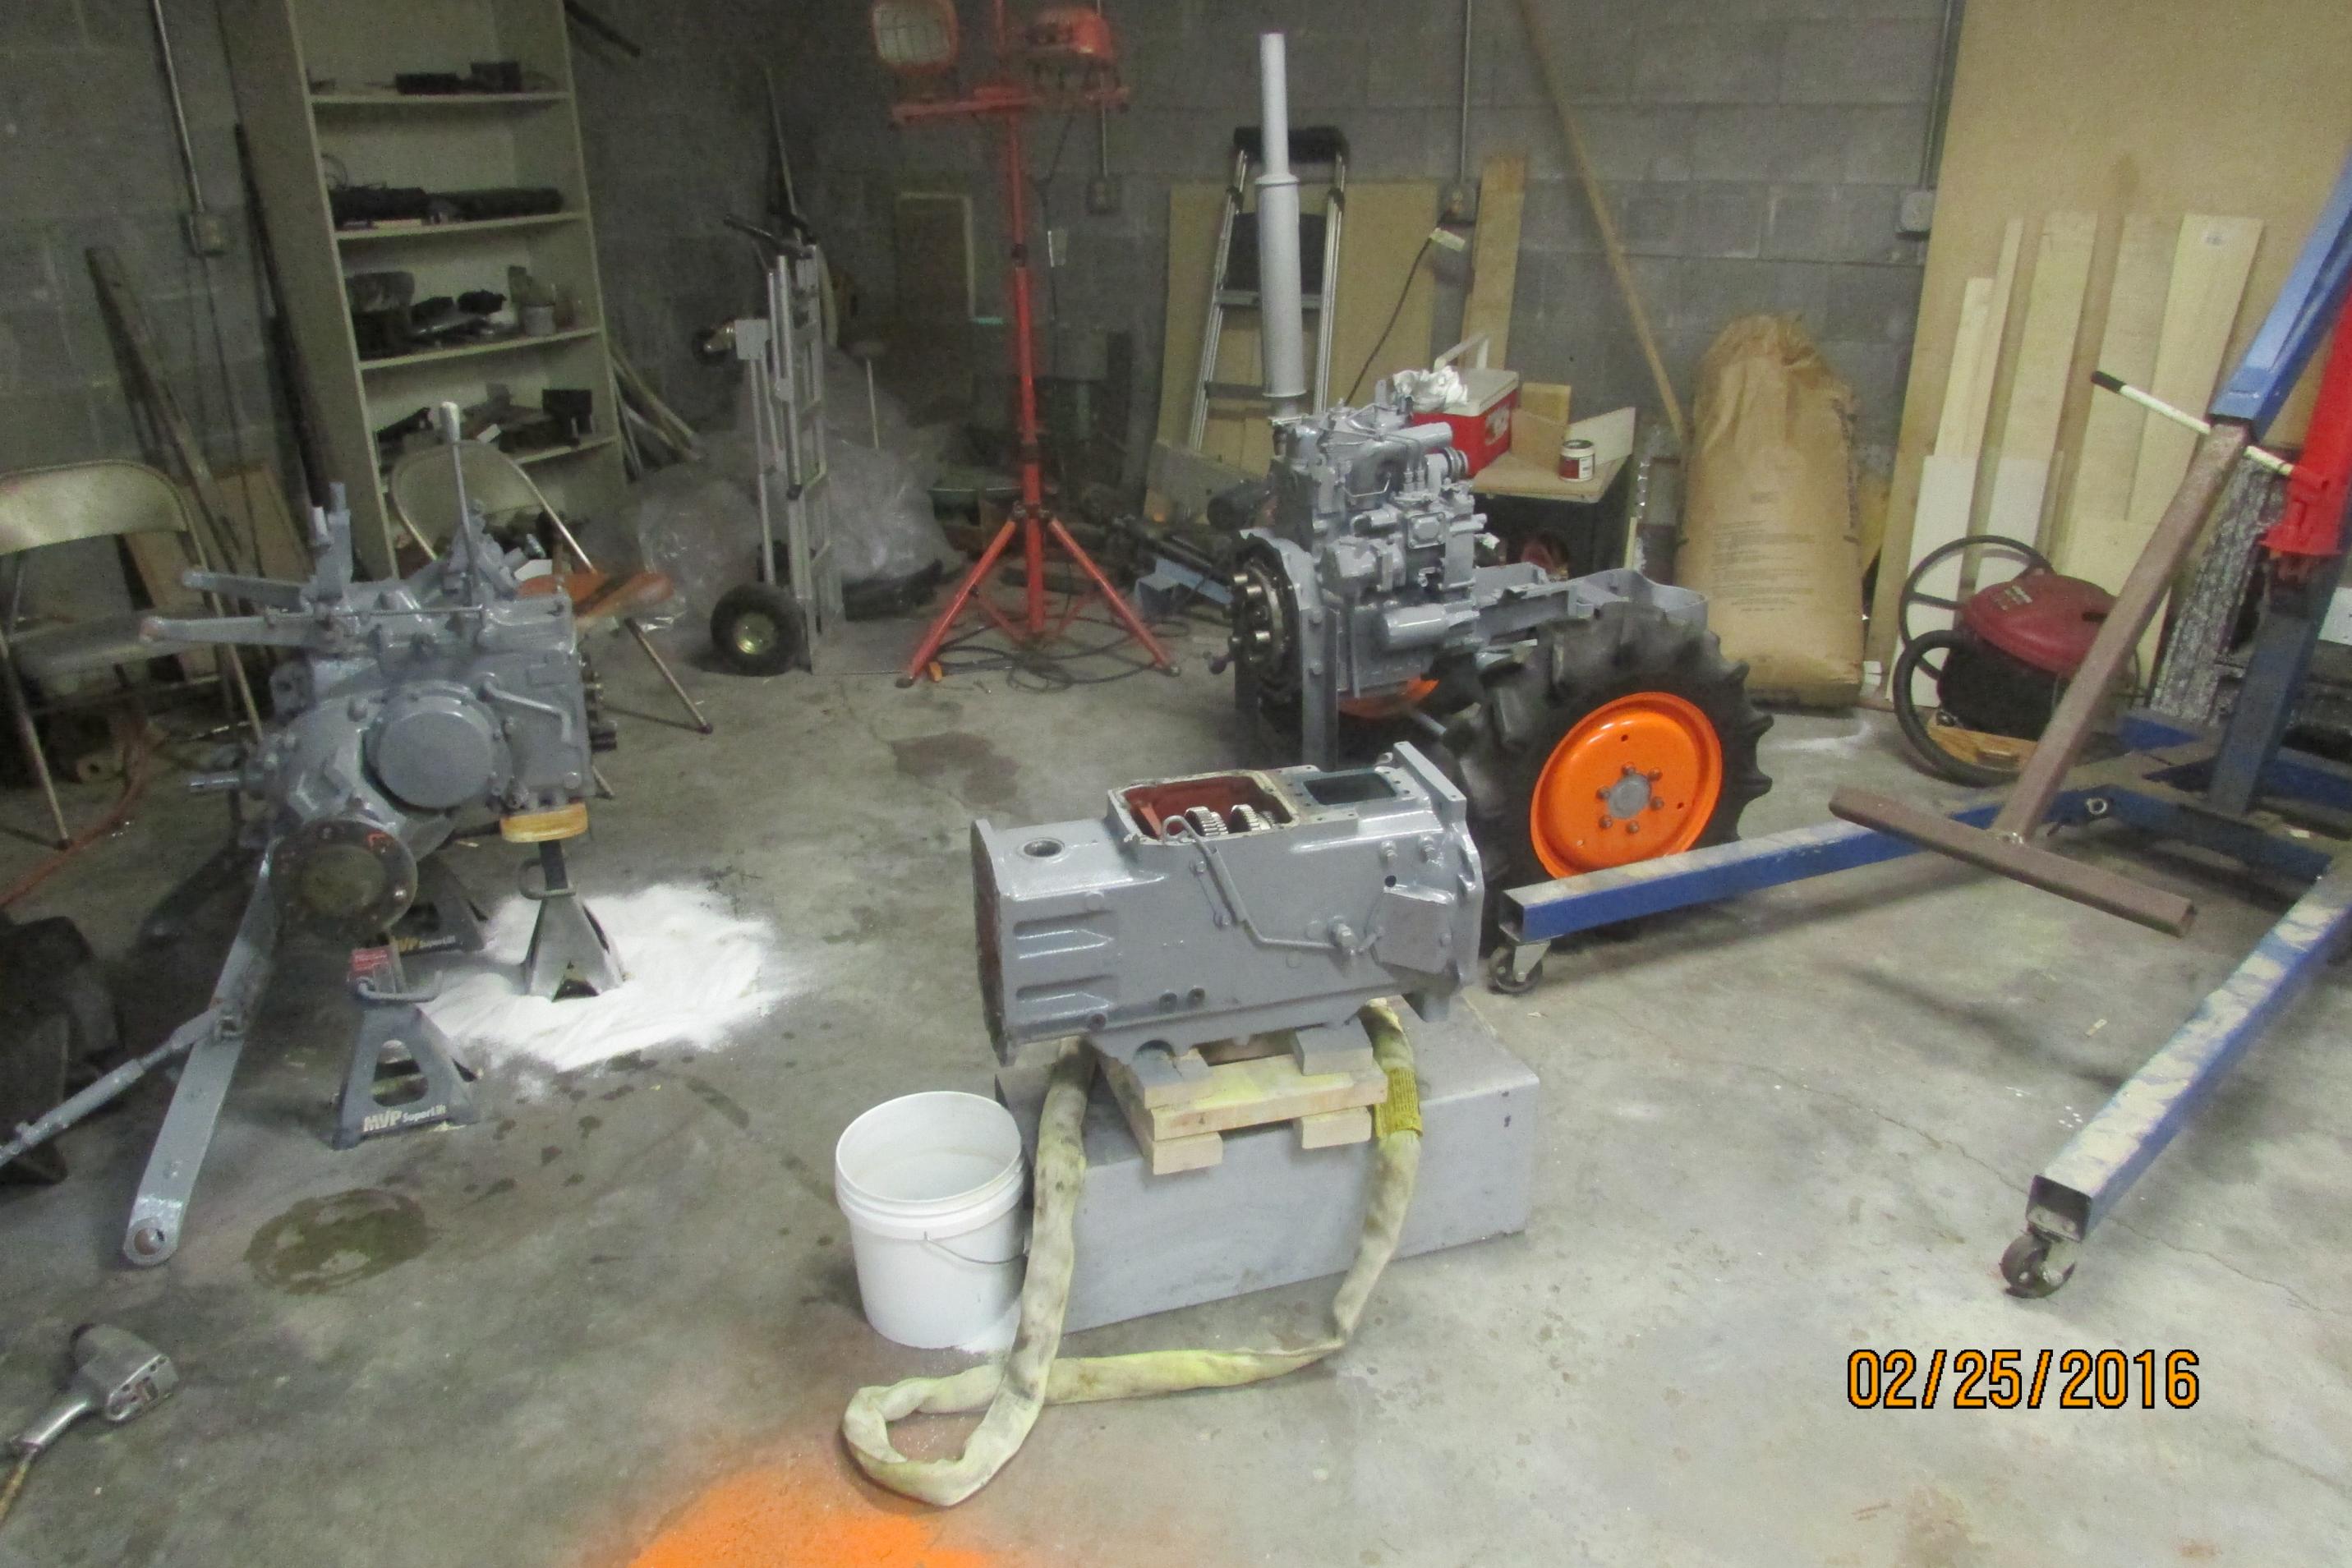
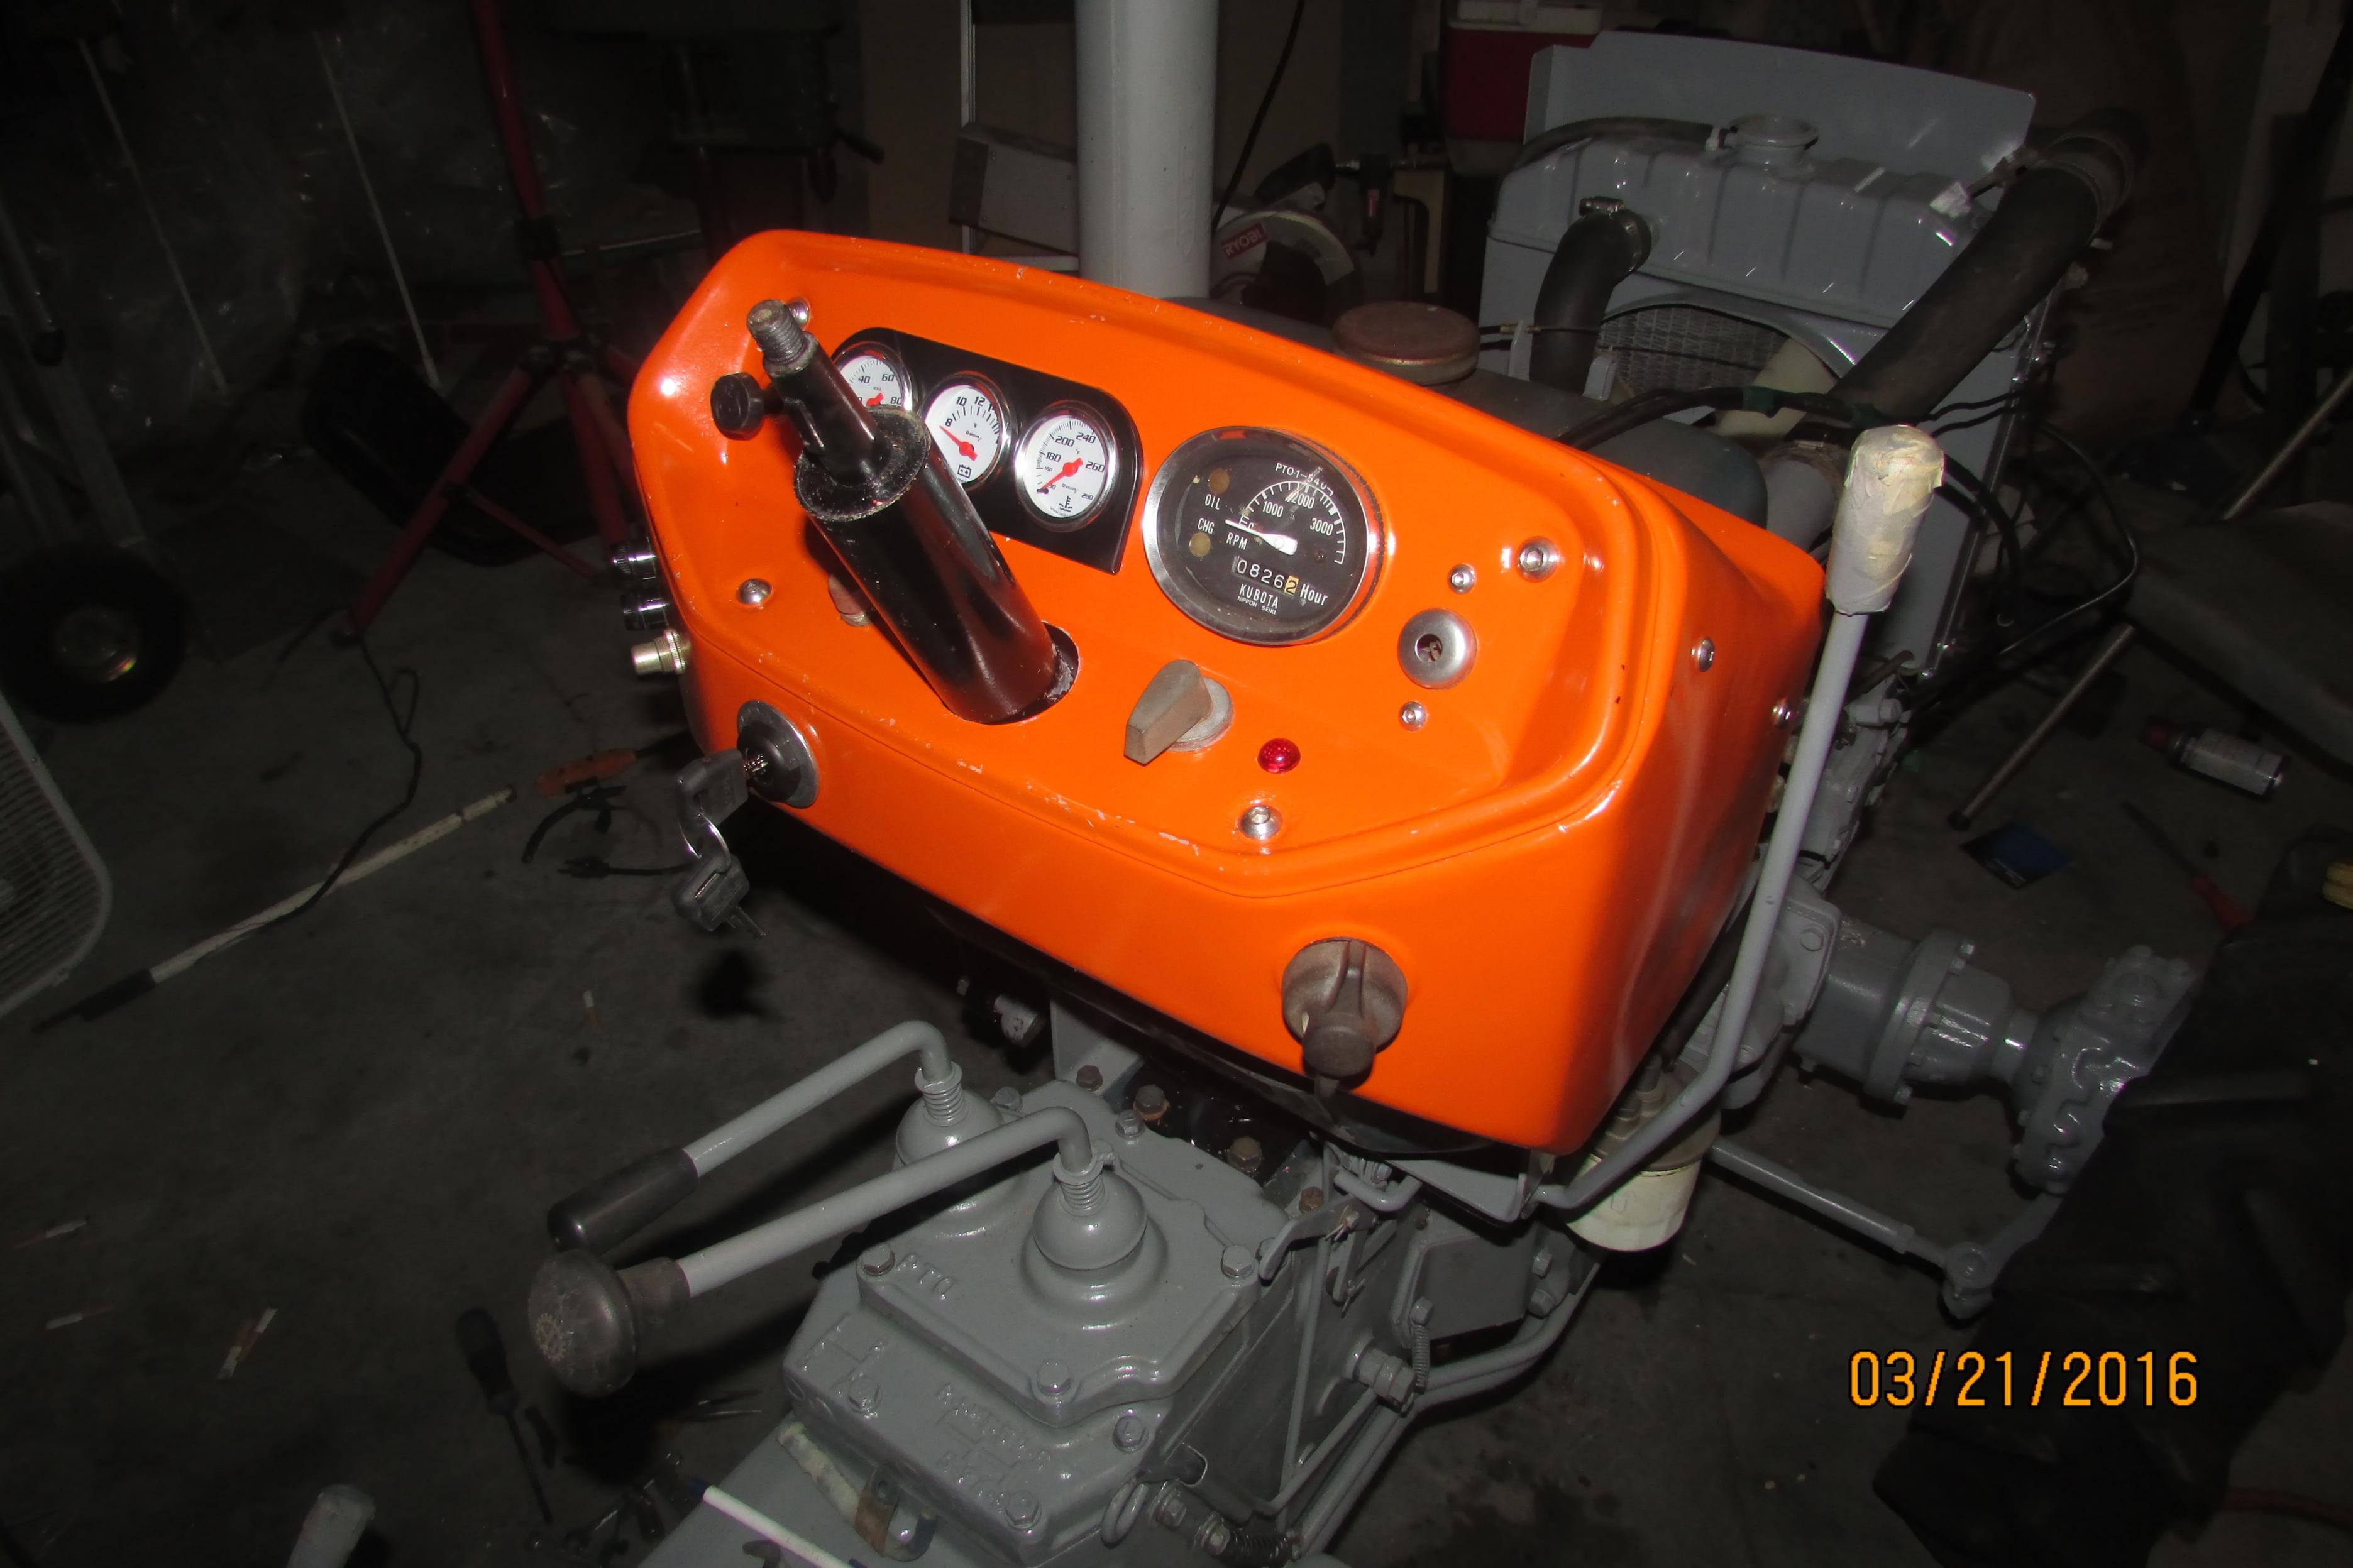
OK, here is an update on where I am with the tractor repair. The gears are in the trans and most of the components are re-installed, so tomorrow I hope to have it running and finished. I added 3 gauges, two gears, clutch, pressure plate, throw out bearing, seals and paint. Here are some pictures to date. OK, evidently, the pictures that I tried to upload are too large, so I will try again tomorrow and try to downsize my pictures. Bob.Attachment 9408Attachment 9463
-
Well, this thread started out as a sod removal tool and morphed into rebuilding a Kubota tractor that I bought. As it turned out, this is part of my sod removal tool, because my garden tractor wouldn't pull it properly, so I found this Kubota tractor on Craigslist for 900 and so far, I have 1800 into it. If I had bought a sod cutter, the price would be about 2000 used, so, I am 200 ahead and will be able to use this for more than cutting sod. I tried it out and this thing pulls and cuts through the sod like it isn't there. I am very happy with it, so there you are, a Rube Goldberg sod cutter. Bob.
-
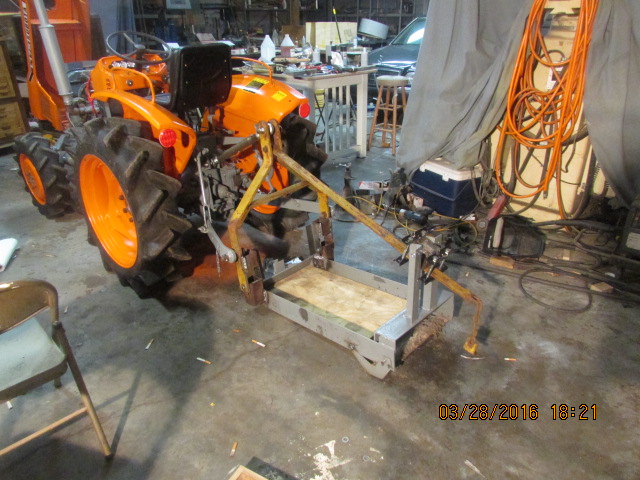
The last few days, I have been mounting the sod sled on a 3 point hitch on the Kubota. Tomorrow I will do some more adjusting on the angle of cut and I think it will cut better. I am using the weight of the 3 concrete blocks to keep the blade buried and by machining slots in the sled attach point the sled can ride up and down as the ground does. The hitch doesn't push the sled down, the weight of the blocks do the work, the only thing the tractor does is pull it. I will post some pictures when I figure out how to post some smaller pictures, can' t figure this camera out. Bob.
-
1 Attachment(s)
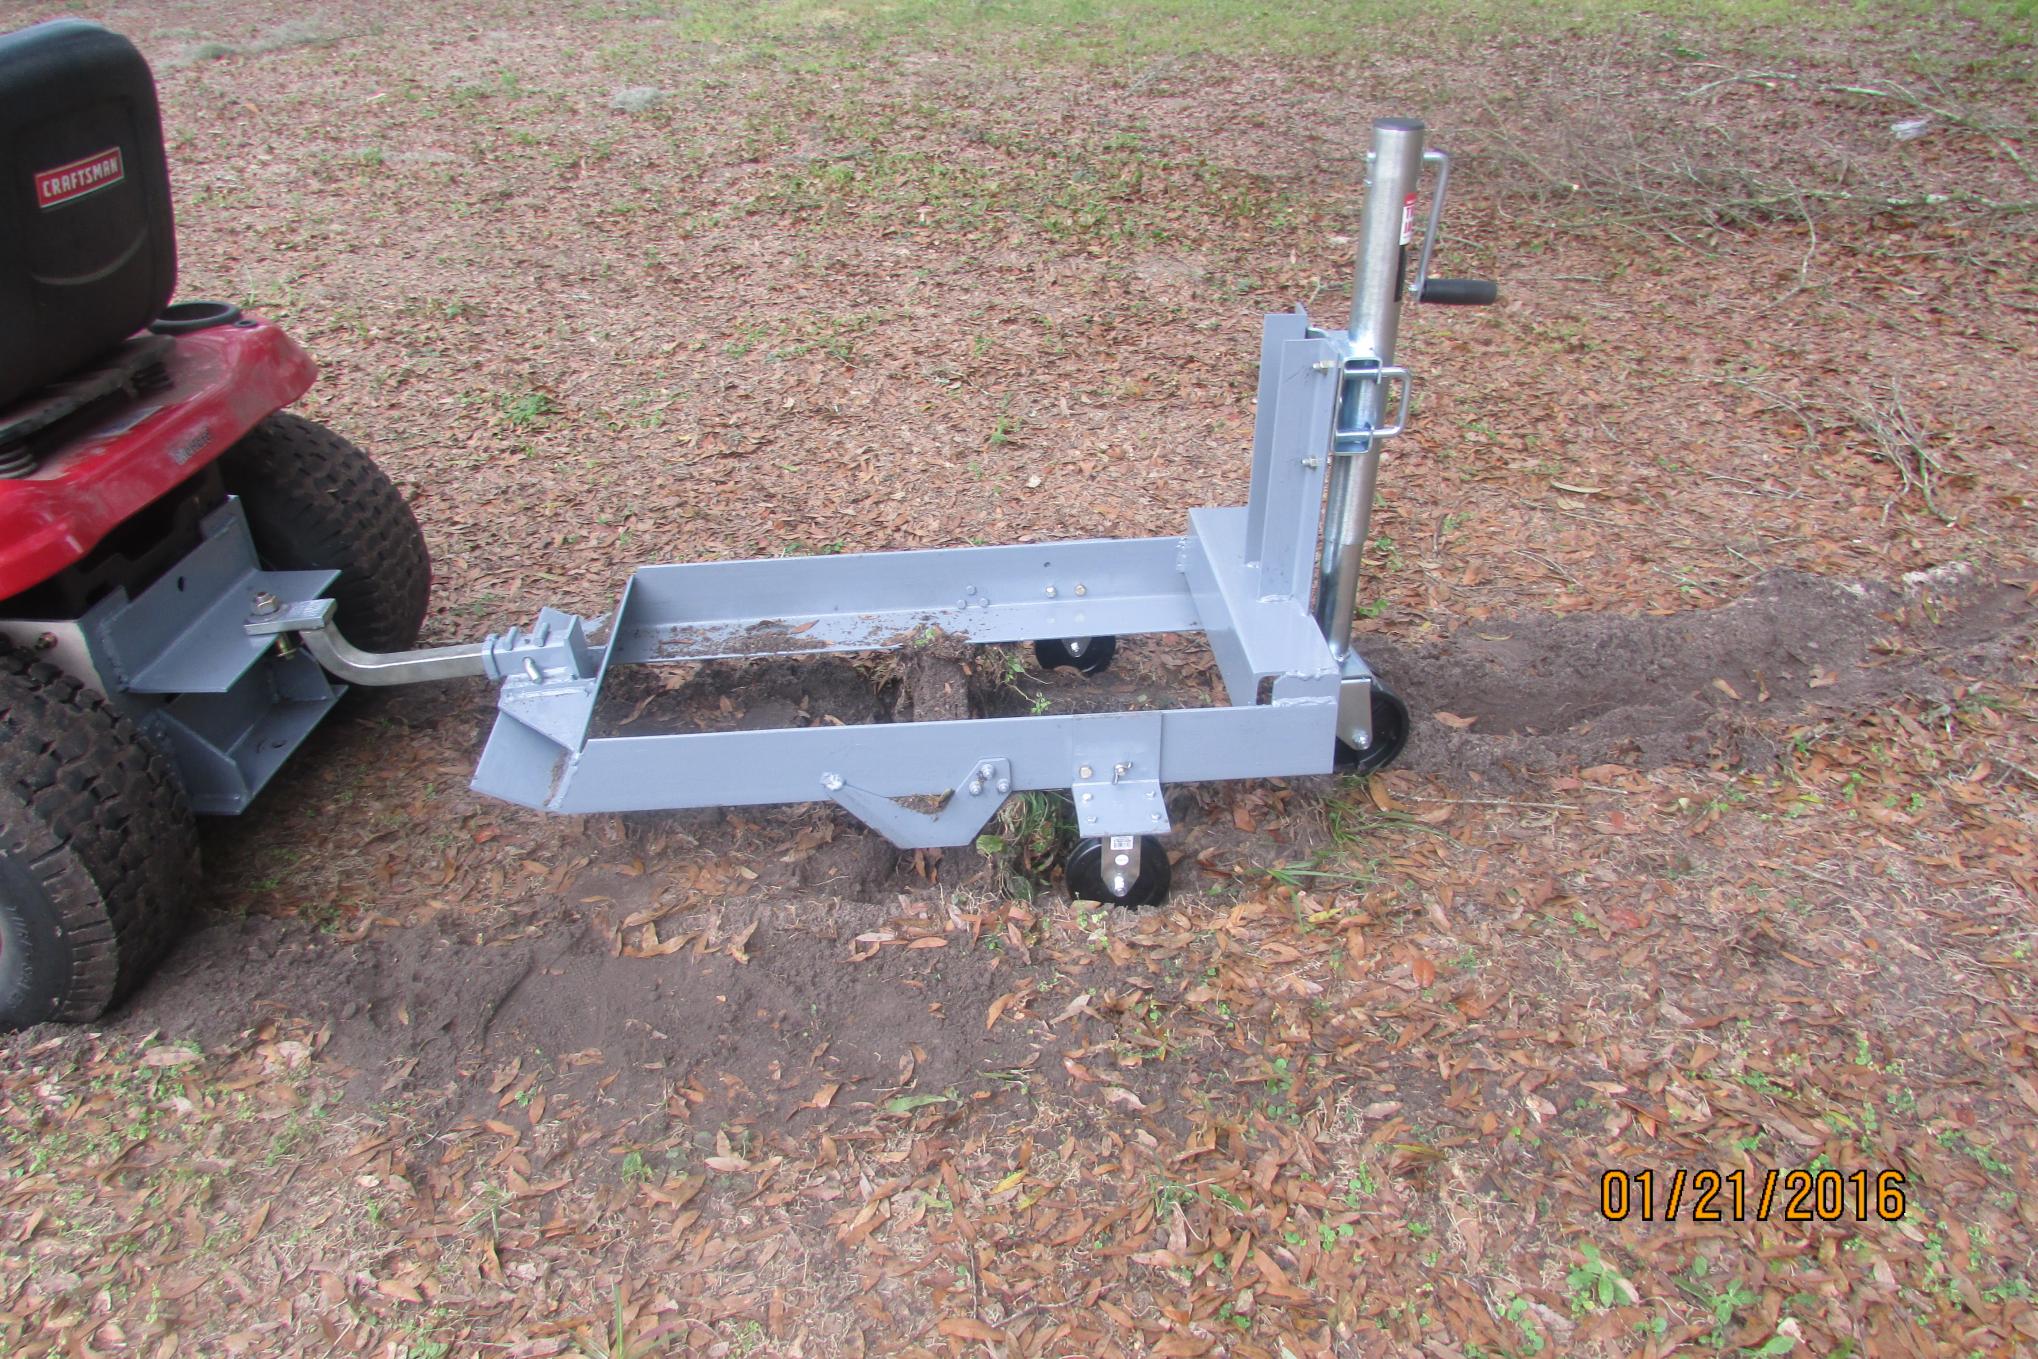
OK, finally like magic, a menu that I had never seen appeared on my camera menu. It allowed me to adjust the size of the pictures. Here is the revamped sled on the 3 point hitch. Bob.Attachment 9545
-
Bob,
Great photo. I had to review your earlier photos of this project because I remembered the sod sled seemed to be a little larger. The larger Kubota tractor makes your sod sled look like it shrank. Hopefully with this tractor you will be able to get back to building your outdoor railroad.
Good luck, Paul
-
<!-- BEGIN /var/www/html/homemadetools/protected/modules/zeus/views/tool/postUpdate.php -->
Thanks machiningfool! We've added your Sod Removal Sled to our Farm and Garden category,
as well as to your builder page: machiningfool's Homemade Tools. Your receipt:
<div id="blocks">
<div class="block b1 pngfix">
<div class="bimg">
<div>
<a href="http://www.homemadetools.net/sod-removal-sled">
<img src="/uploads/146007/sod-removal-sled.jpeg"/>
</a>
</div>
</div>
<div class="head pngfix"></div>
<div class="left pngfix"></div>
<div class="right pngfix"></div>
<div class="blockover b1 pngfix">
<div class="title">
<a href="http://www.homemadetools.net/sod-removal-sled">Sod Removal Sled</a>
<span> by <a href="http://www.homemadetools.net/builder/machiningfool">machiningfool</a></span>
</div>
<div class="tags">tags:
<a href='http://www.homemadetools.net/tag/tractor'>tractor</a>, <a href='http://www.homemadetools.net/tag/farm-tools'>farm tools</a>, <a href='http://www.homemadetools.net/tag/sled'>sled</a> </div>
</div>
</div>
</div>
<!-- END /var/www/html/homemadetools/protected/modules/zeus/views/tool/postUpdate.php -->
-
Well thanks Paul. Actually the sod sled is a big part of the 1:32 railroad, have to remove the sod to be able to add soil and grade the area. I am still having problems keeping the cutting blade, so today I am adding more weight, I think that will do the trick. Bob.
-
1 Attachment(s)
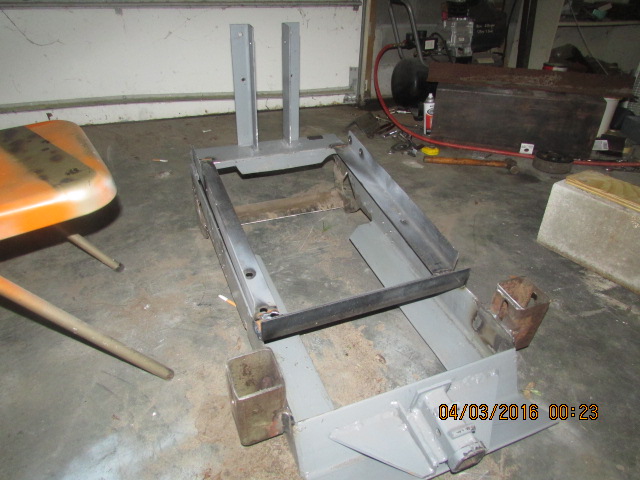
I am adding a picture of the final version. I kept having trouble with the rear of the sled climbing on top of the sod, so I made some changes. I had the wood on the bottom of the rails and the sod would ball up and lift the sled, so I raised the platform and cut back some of the bottom rails and it cuts like it should now, so here is the final version. Bob.Attachment 9696
-
1 Attachment(s)
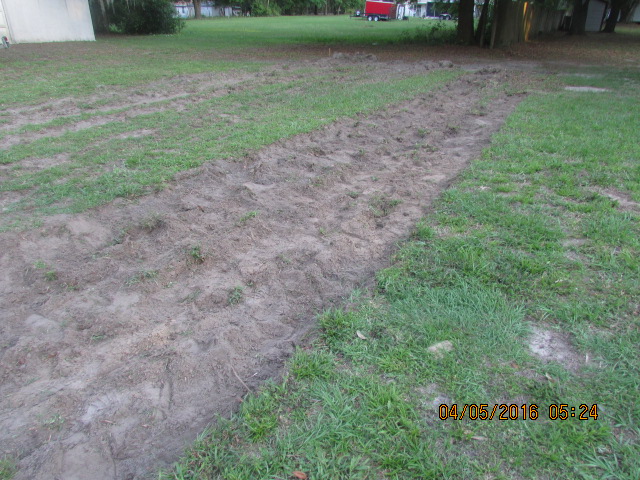
Here is a picture after the cutting and sod removal, worked out very well. Had to add about 140 lbs. to cut properly. Bob.Attachment 9804
-
Bob,
Looks like you worked out all the design issues using your neighbor's lawn so when do you use it on your lawn? Just kidding. So when will you begin sod removal for laying track and what do you use for track subroadbed over the sandy soil?
Thanks for the series.
Paul
-
3 Attachment(s)
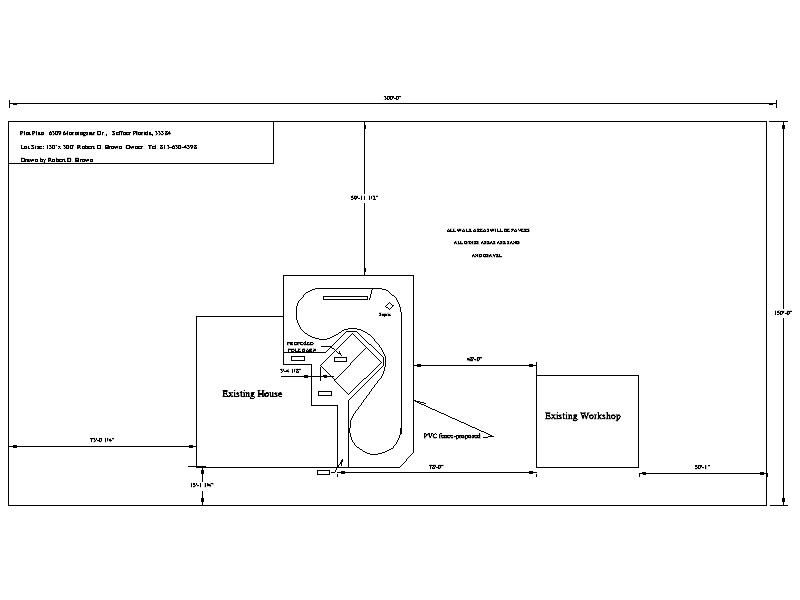
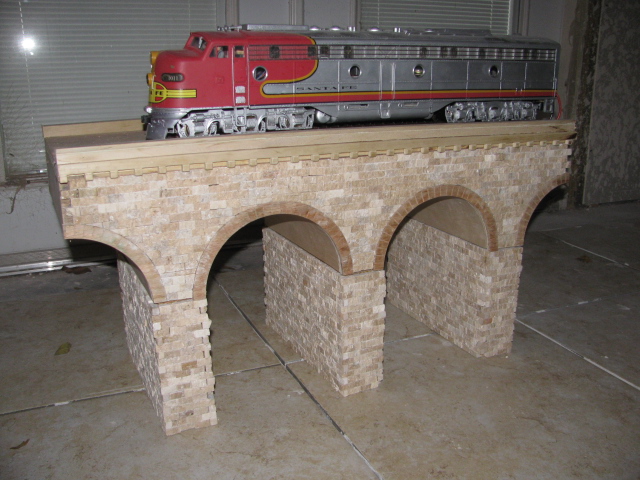
As it turns out, I put an ad on Craigslist and am giving this sod away for free. It is amazing what will happen when you use the word "free". This way, I don't have to pay to get rid of the sod. The under layment for the viaducts will be concrete. It will look like a 200 ft. walkway and then the viaduct sections will be laid on top of that.Here are some pics. one, of the viaduct that will be used on the entire layout and a plot plan. The viaduct that you see is a pattern for the concrete molds. Bob.Attachment 9812Attachment 9815Attachment 9816