Free 186 More Best Homemade Tools eBook:  
New: 300+ fresh build posts/day from 275 forums → BuildThreads.com

User Tag List

Results 1 to 4 of 4

Thread: Takeuchi bearing puller and setting tool

Threaded View

  1. #1
    Supporting Member thehomeengineer's Avatar
    Join Date
    Nov 2017
    Location
    Berkshire UK
    Posts
    762
    Thanks
    764
    Thanked 2,388 Times in 483 Posts

    thehomeengineer's Tools

    Takeuchi bearing puller and setting tool

    Hi All
    Another one for Frank S

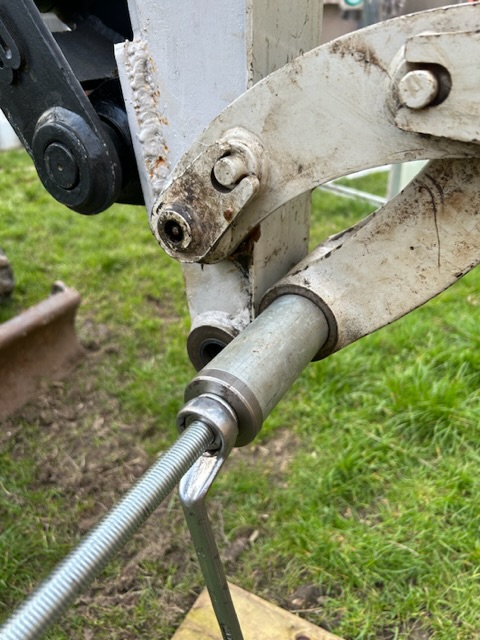
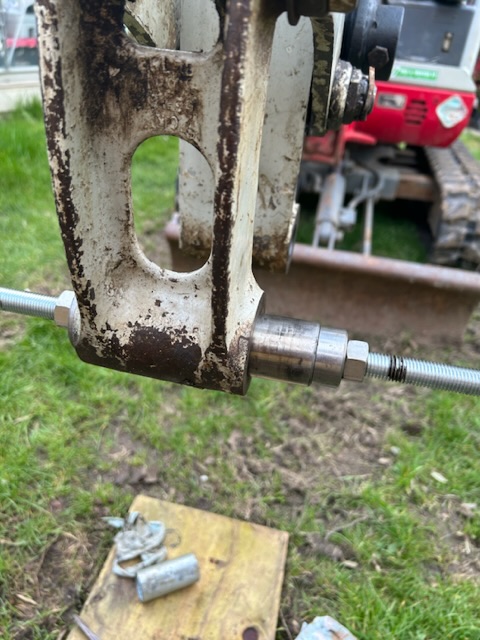
    The quick hitch on my digger needed a bit of tlc so was removed. Luckily I decided to do this as the seals had disintegrated and the bearings hadn’t been fitted correctly by the previous owner. So first things first new seals, shims and o rings were ordered. The quick hitch was then overhauled. Attention to the bearings was next. Watching several Youtube videos of people removing these bearings was quite frightening. Oxy/Acetylene, die grinders and even sledgehammer. I thought there must be an easier solution.

    I decided to make a purpose built puller and setting tool. Which took about an hour to make. Then outside to the digger to see if it would work. I was so relieved that it easily moved the bearings so they could be set correctly.

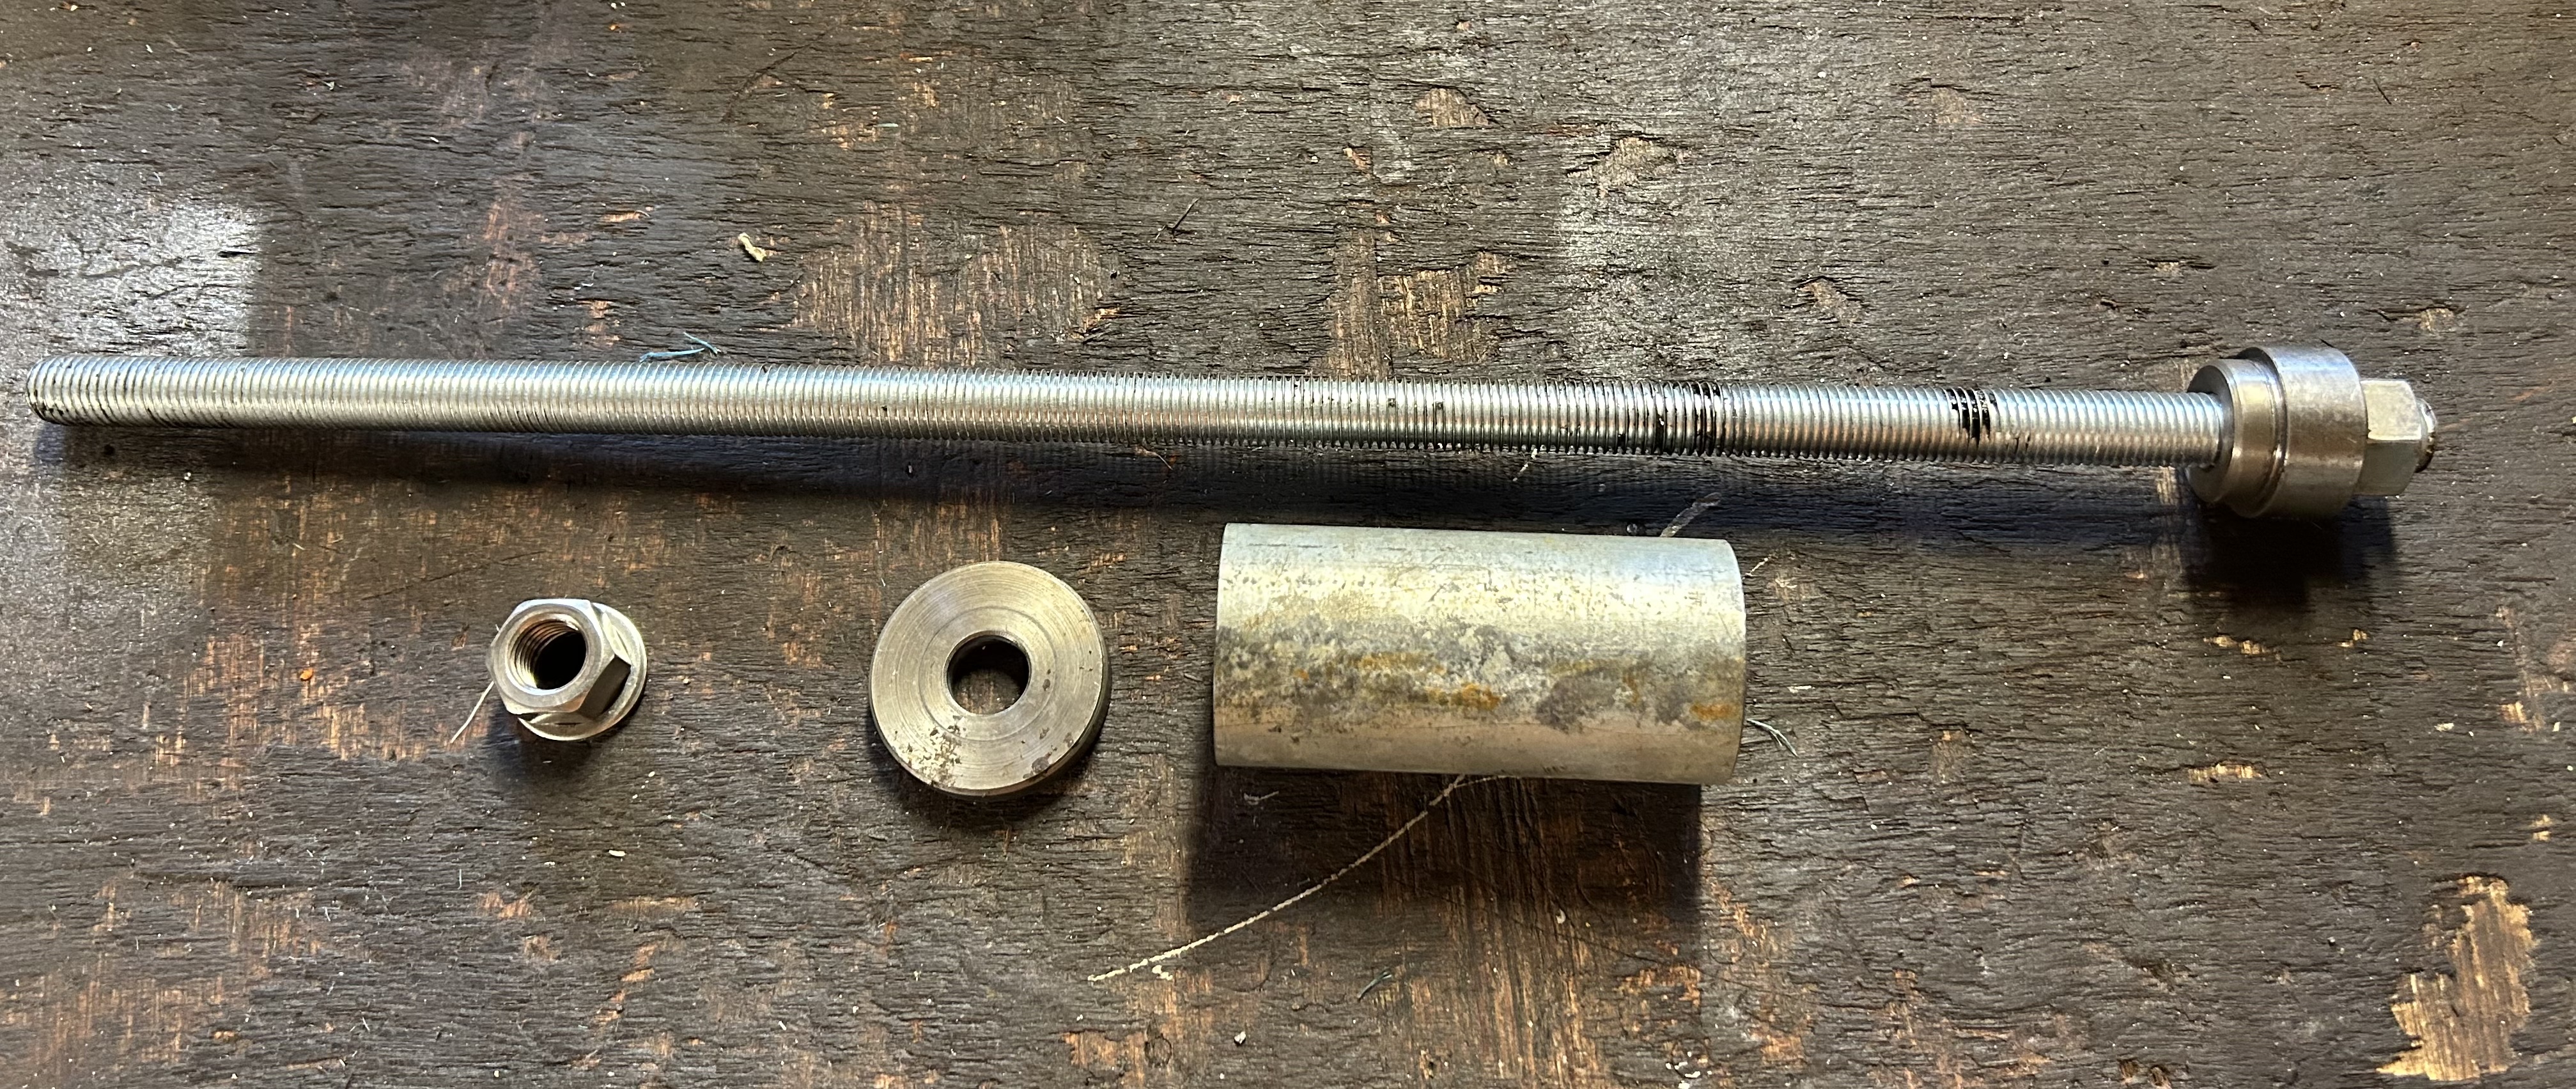
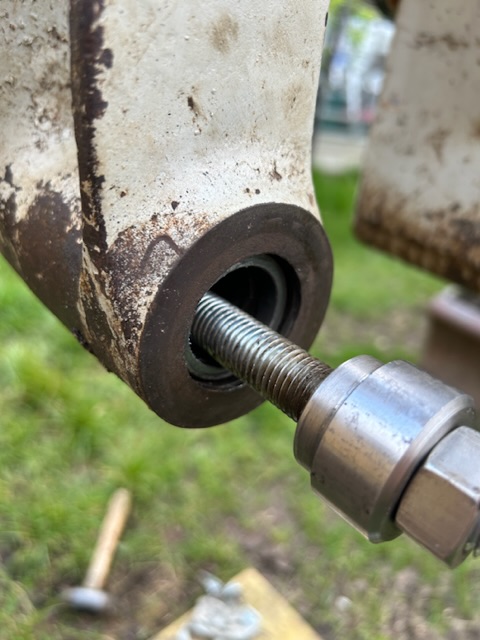
    The puller was made from a piece of M16 (Approximately 5/8”) studding with a top hat bush thread the same size and turned with a slide fit in the bearings. The other end consisted of a piece of scaffold tube faced off each end and a thick 50mm diameter washer with a couple of M16 nuts to draw the bearings out.

    The photos will hopefully show how the tool works.

    I would normally chuck the used material back in the scrap box for the next project but as this worked so well it has made it into the tool box for future use.

    Click image for larger version. 

Name:	5FA9EB91-B890-4ECA-98A5-382FB47C3B5C.jpeg 
Views:	217 
Size:	3.08 MB 
ID:	45308
    Completed tool

    Click image for larger version. 

Name:	BF506DE4-EB0A-4269-945E-7A141937A58B.jpeg 
Views:	193 
Size:	134.2 KB 
ID:	45309
    Pulling bearing out

    Click image for larger version. 

Name:	DAE7AA5A-A436-4459-8641-53ED5B5D4EF5.jpeg 
Views:	158 
Size:	122.6 KB 
ID:	45314
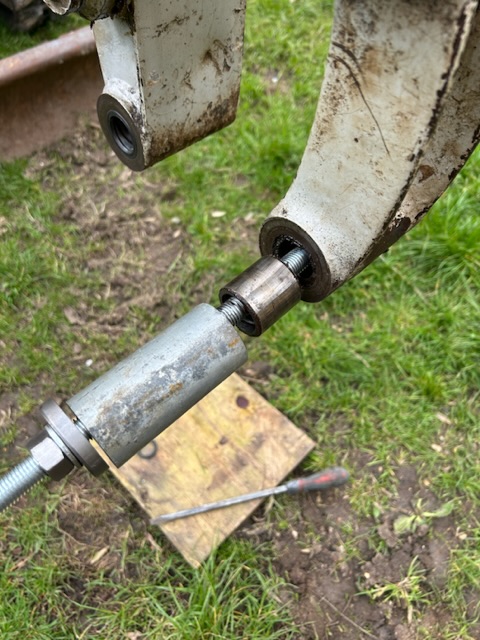
    Puller being drawn through housing.

    Click image for larger version. 

Name:	3A6B593F-D8BE-43A8-9A6A-181DDEF9149D.jpeg 
Views:	170 
Size:	144.8 KB 
ID:	45310
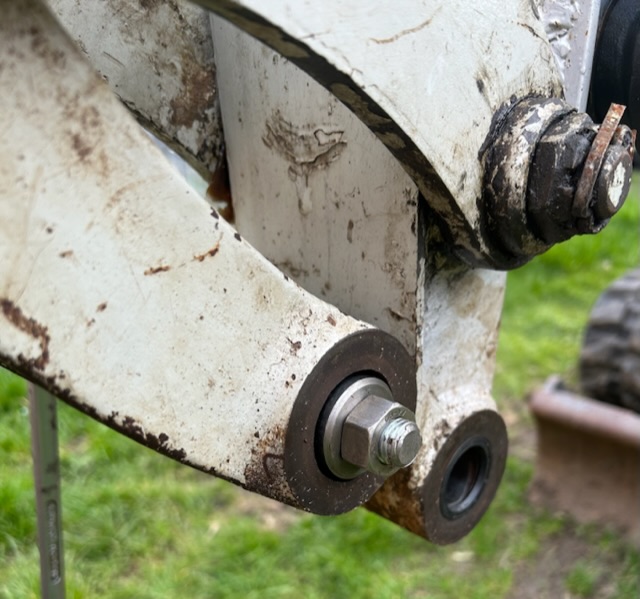
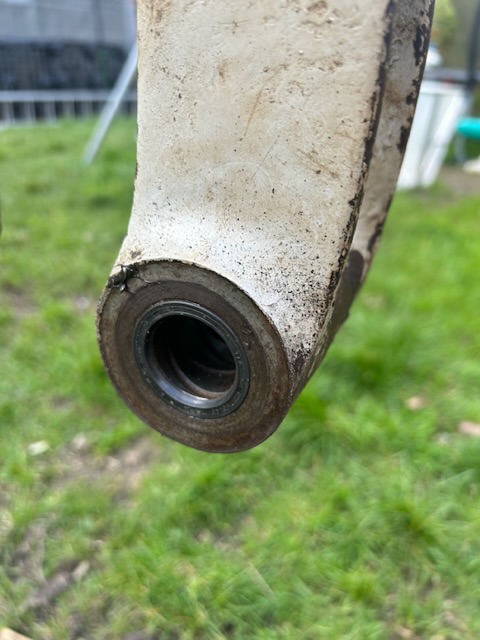
    First bearing removed

    Click image for larger version. 

Name:	B2A1DCA4-D53A-4CBB-998A-FFC3ACC1EB2D.jpeg 
Views:	157 
Size:	131.4 KB 
ID:	45311
    Setting the bearing to correct depth

    Click image for larger version. 

Name:	10240FF8-5CC7-451E-A4C6-72FC16344610.jpeg 
Views:	162 
Size:	99.0 KB 
ID:	45312
    Ready for seal.

    Click image for larger version. 

Name:	46DEDFC7-A22E-4A1B-B648-834531E9082C.jpeg 
Views:	147 
Size:	96.8 KB 
ID:	45313
    Seal in place ready for quick hitch to be re-fitted.

    Not sure if I just got lucky not having to resort to burning, grinding or the good old sledgehammer method to get the bearings out.

    Thank you for viewing
    The Home Engineer
    Attached Thumbnails Attached Thumbnails Click image for larger version. 

Name:	065C280E-C5D7-44BD-A277-FCB5E962B952.jpeg 
Views:	127 
Size:	82.0 KB 
ID:	45307  

  2. The Following 5 Users Say Thank You to thehomeengineer For This Useful Post:

    Frank S (Apr 22, 2023), Jon (Apr 26, 2023), nova_robotics (Apr 24, 2023), trevor_60_r (Apr 30, 2023), wolfpaak (May 1, 2023)

Thread Information

Users Browsing this Thread

There are currently 1 users browsing this thread. (0 members and 1 guests)

Bookmarks

Posting Permissions

  • You may not post new threads
  • You may not post replies
  • You may not post attachments
  • You may not edit your posts
  •