-
11 Attachment(s)
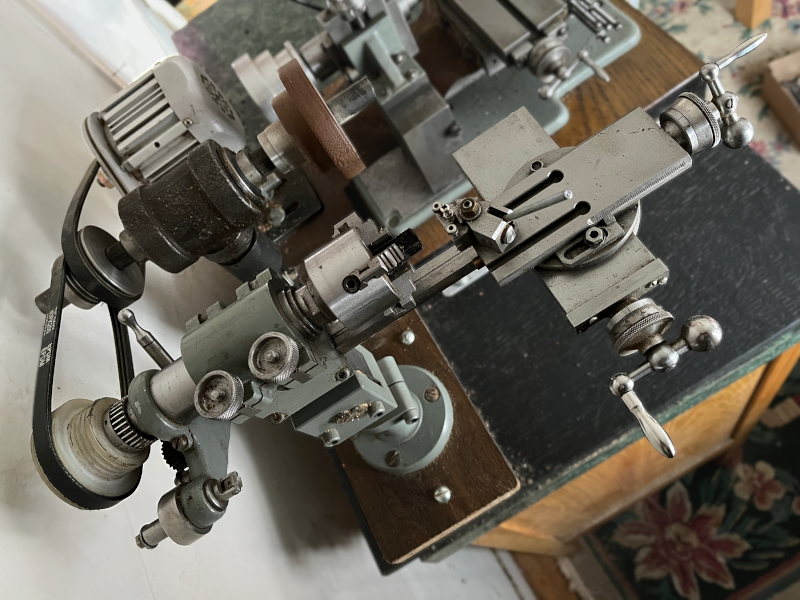
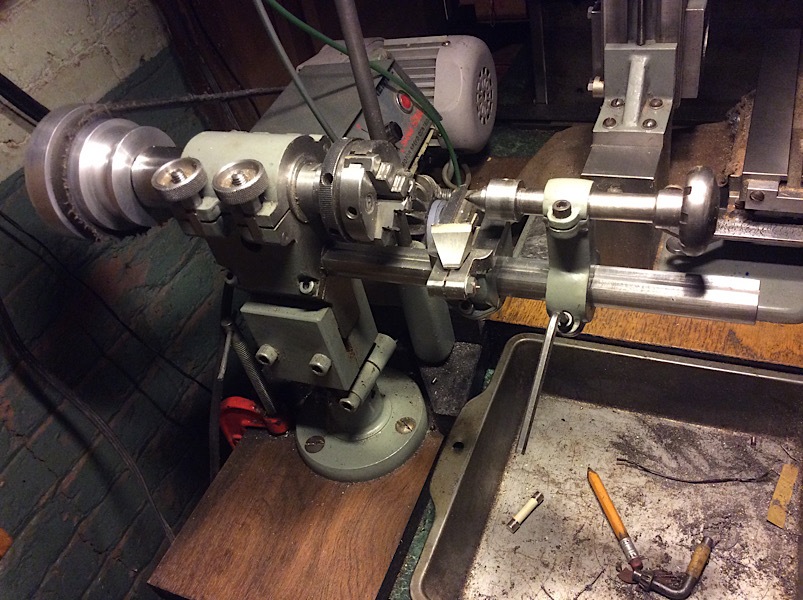
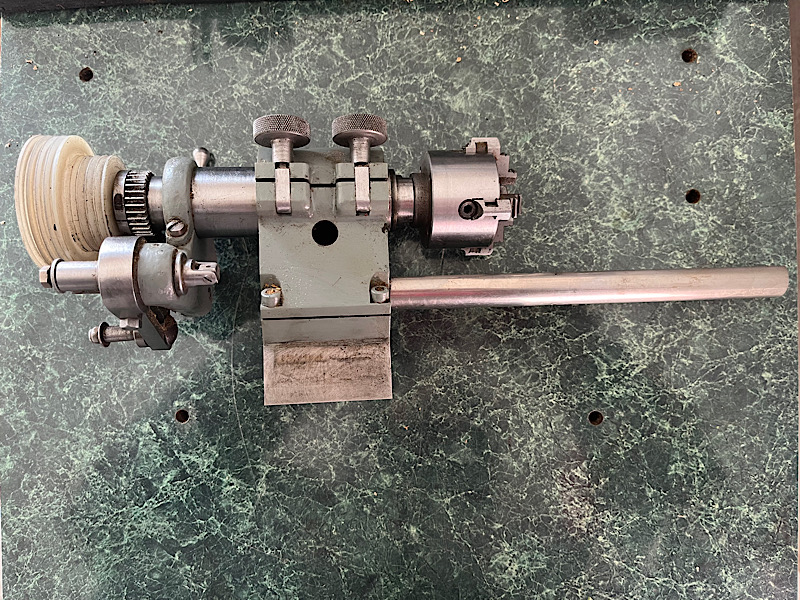
Three inch lathe
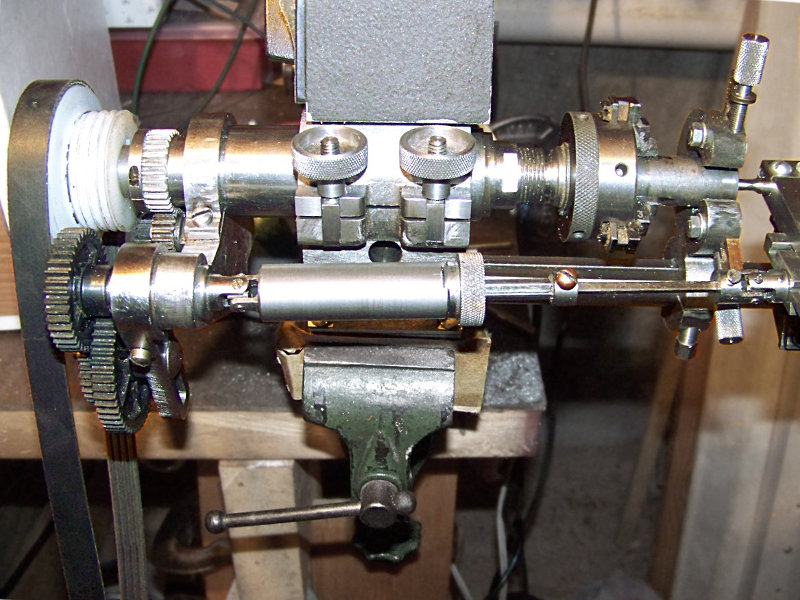
I finally got my little homemade lathe out of storage and set up, and took some more up to date pictures.
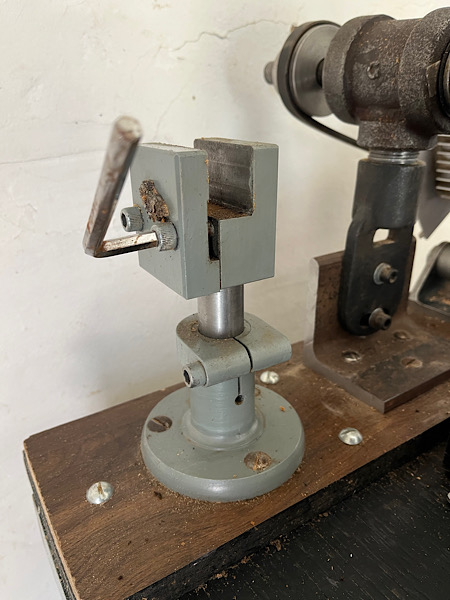
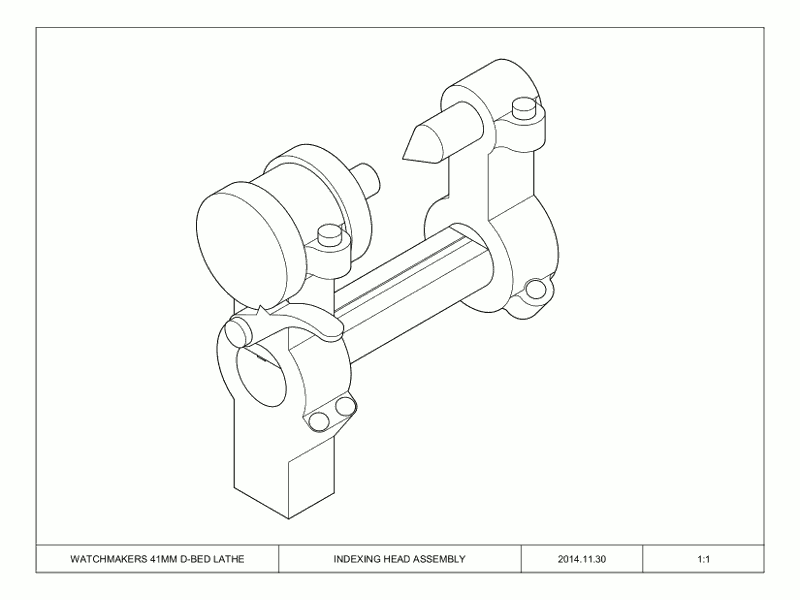
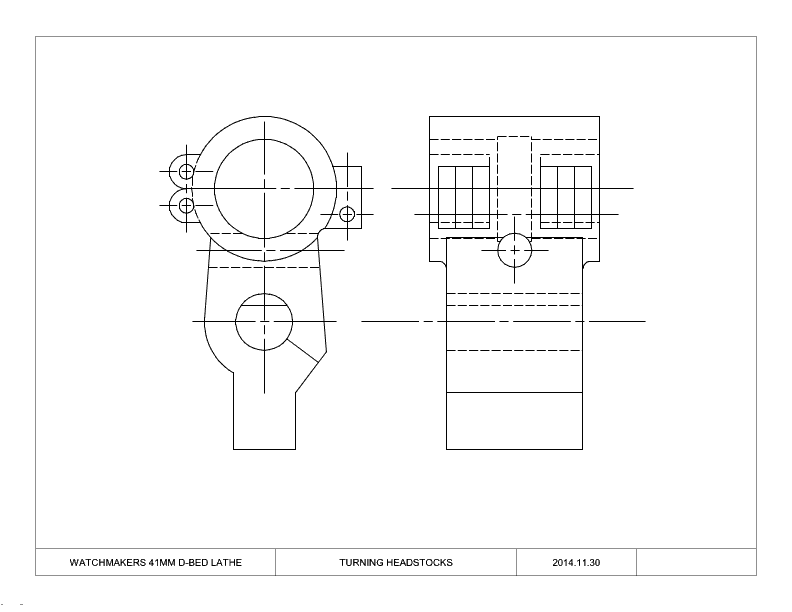
It's a heavy D-bed watchmaker-type lathe. I copied many of its main parts from Schaublin, but scaled them down to Unimat size.
Like the old Unimats, it can be reconfigured for different tasks, but unlike with those the tool rests and tailstocks are also easily removable, and the entire lathe can be removed from the base it shares with my small mill for more temporary setups.
It's not a great general purpose lathe. A regular American style watchmaker lathe would be much more rigid and a slightly bigger, more usable size, and those have many more accessories.
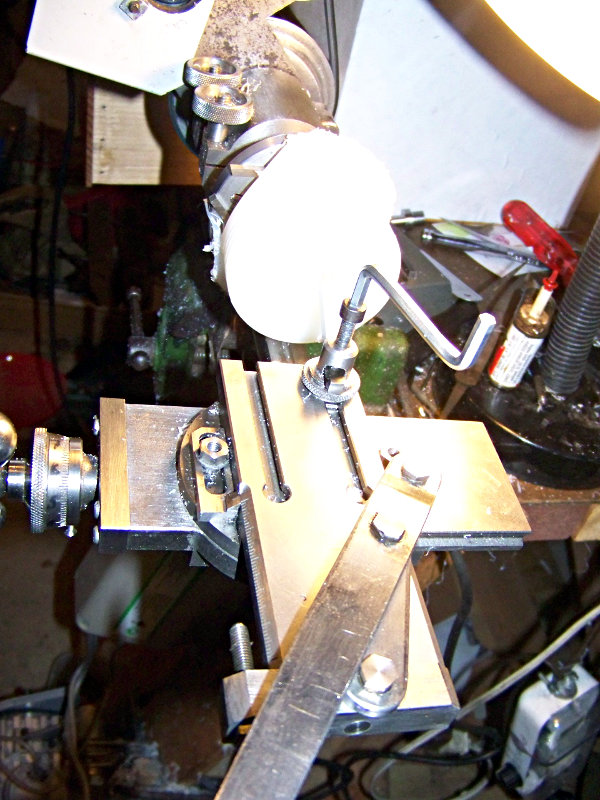
It's surprisingly capable, though! It has 3-3/8" swing and about 6" between centers, with maybe 1" clearance over the cross slide. The toolpost takes 1/8" tools.
Attachment 50318 Attachment 50319
Attachment 50320 Attachment 50321
Attachment 50322 Attachment 50323
Attachment 50324 Attachment 50325
Attachment 50326
Attachment 50327 Attachment 50328
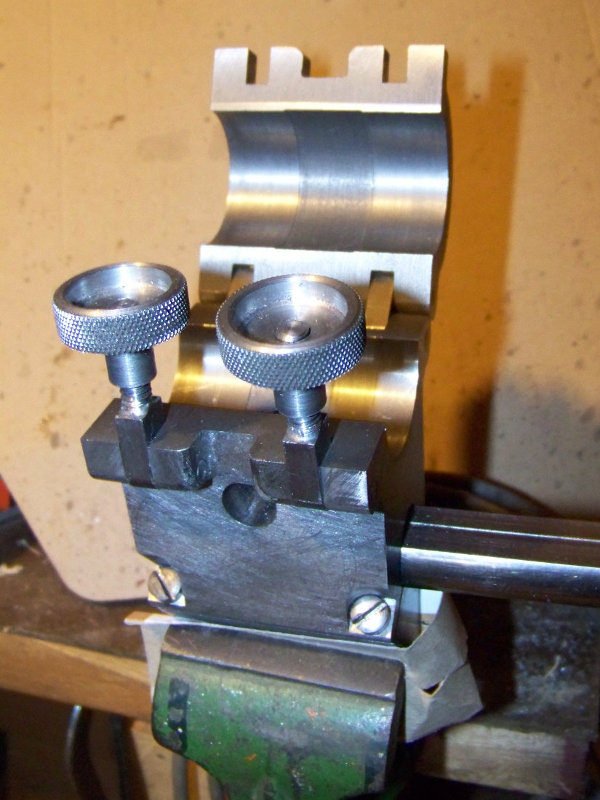
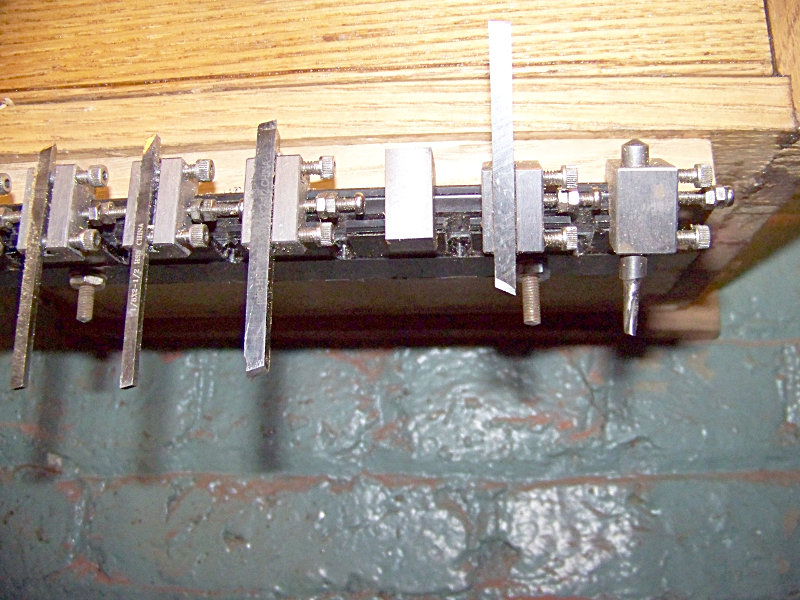
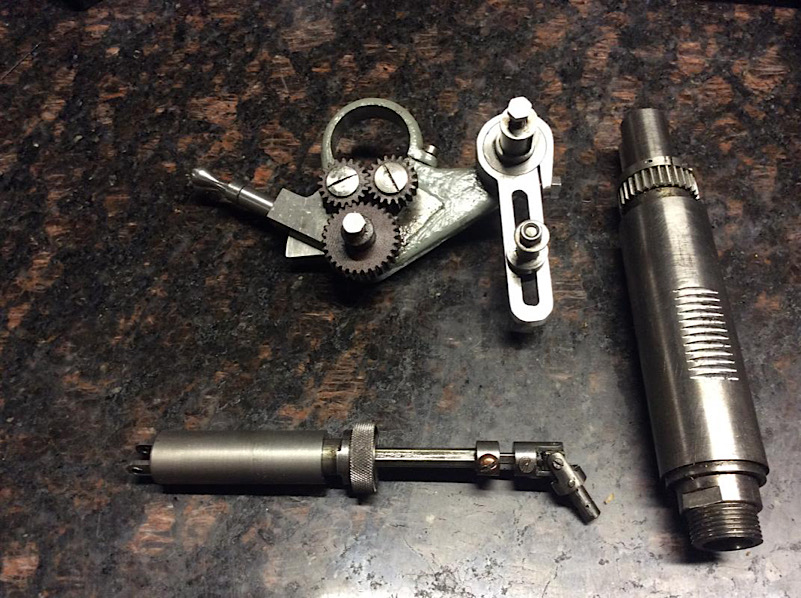
I've made a lot of accessories for it. Some of them are already here:
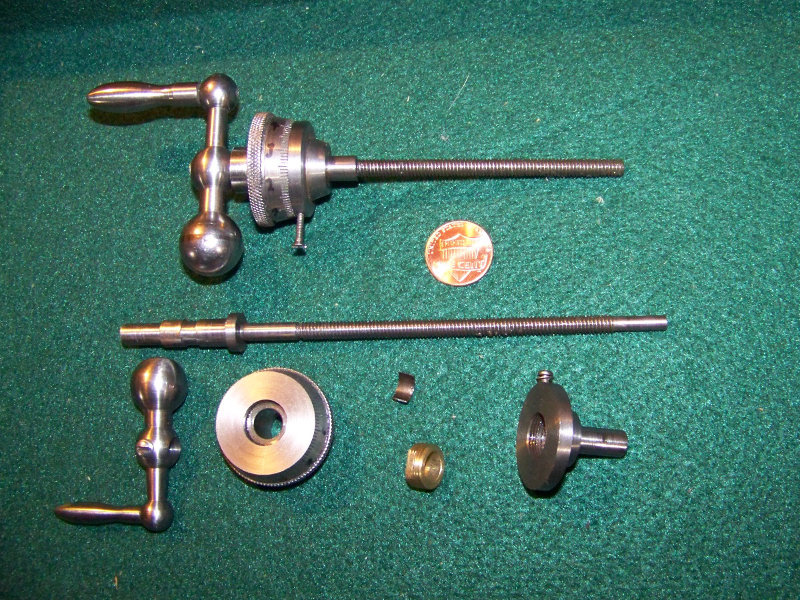
Unimat size quills
Steady rest
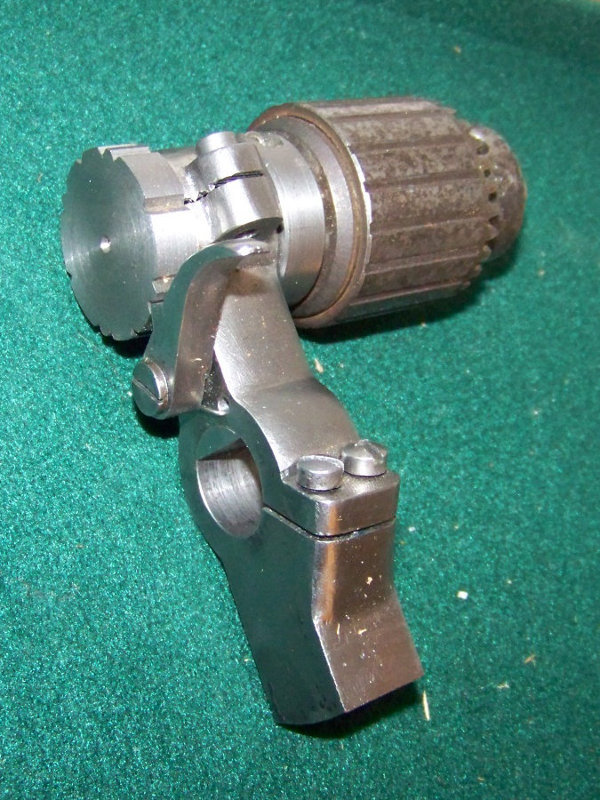
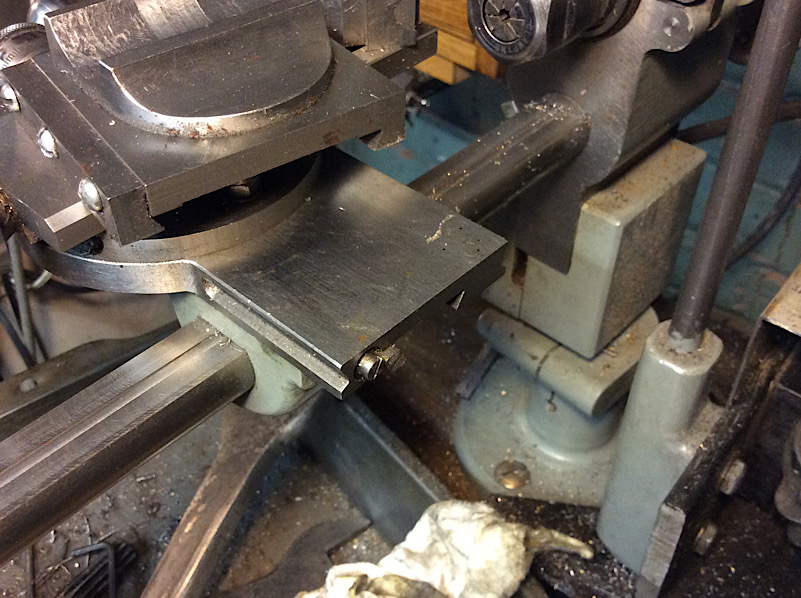
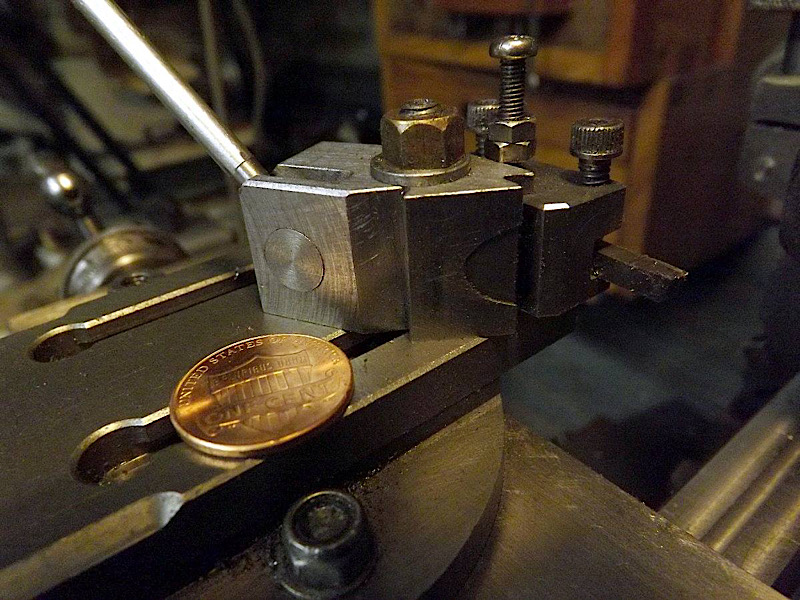
Rocker cutoff and forming slide
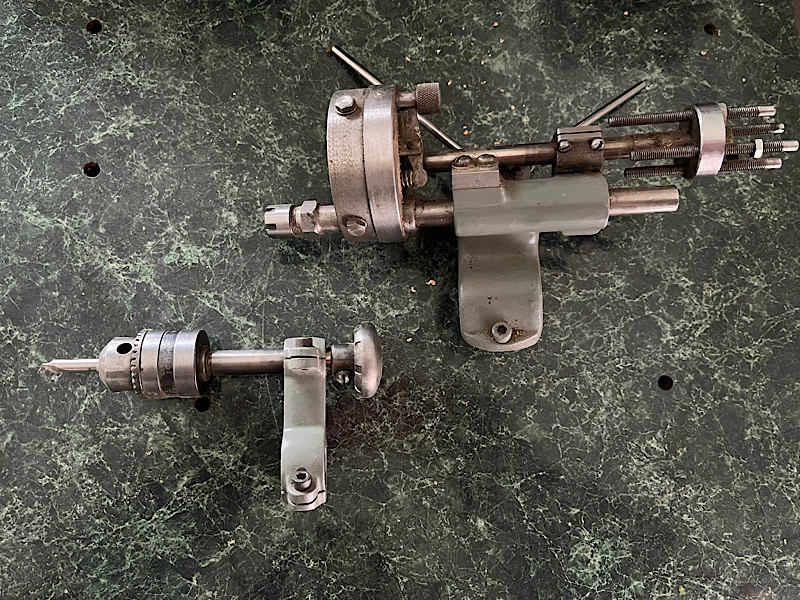
Tailstock turret
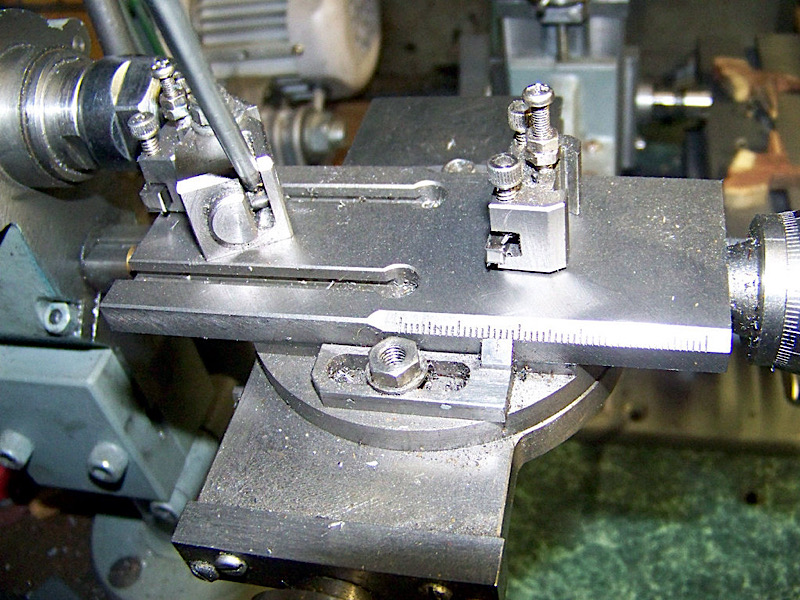
Threading slide
-
<!-- BEGIN /var/www/html/homemadetools/protected/modules/zeus/views/tool/postUpdate.php -->
Thanks threesixesinarow! We've added your Three-Inch Lathe to our Lathes category,
as well as to your builder page: threesixesinarow's Homemade Tools. Your receipt:
<div id="blocks">
<div class="block b1 pngfix">
<div class="bimg">
<div>
<a href="https://www.homemadetools.net/homemade-three-inch-lathe">
<img src="/uploads/276914/homemade-three-inch-lathe.jpeg"/>
</a>
</div>
</div>
<div class="head pngfix"></div>
<div class="left pngfix"></div>
<div class="right pngfix"></div>
<div class="blockover b1 pngfix">
<div class="title">
<a href="https://www.homemadetools.net/homemade-three-inch-lathe">Three-Inch Lathe</a>
<span> by <a href="https://www.homemadetools.net/builder/threesixesinarow_2">threesixesinarow</a></span>
</div>
<div class="tags">tags:
<a href='https://www.homemadetools.net/tag/lathe'>lathe</a> </div>
</div>
</div>
</div>
<!-- END /var/www/html/homemadetools/protected/modules/zeus/views/tool/postUpdate.php -->
-
Congratulations threesixesinarow - your 3-Inch Lathe is the Homemade Tool of the Month for February 2026!
Another difficult month to win, but this is an epic little build, complete with multiple useful accessories.
Some more good builds from February:
Excavator Drive by Made in Garage
Vertical File Storage by mklotz
Boring Head DTI Mount by Improvised DIY
Machine Tool Skates by The Outback Shed
Height Adjuster by Mook
Rope Pulleys by Improvised DIY
Electric Cargo Trolley by fawabros
Lathe Tool Holder by Improvised DIY
Bandsaw Vise Alignment Tool by ironwrx
Rotating Tailstock Chucks by The Outback Shed
Drill Press Table Lift by dpastuck
threesixesinarow - You'll be receiving a $250 cash prize, in your choice of Amazon, PayPal, or bitcoin. Please PM me your current email address and prize choice and I'll get it sent over right away.
And, you'll now notice the four-column award in the awards showcase in your postbit, visible beneath your username:
https://www.homemadetools.net/forum/...fTheMonth1.pnghttps://www.homemadetools.net/forum/...MonthIcon1.png
Nice work :thumbsup:
-
8 Attachment(s)
Here's some other parts and details that might not be clear from the first post.
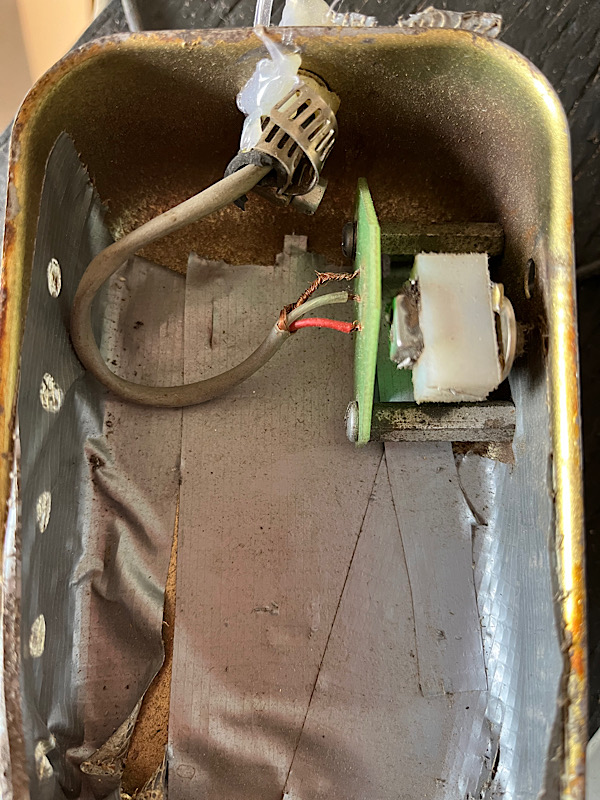
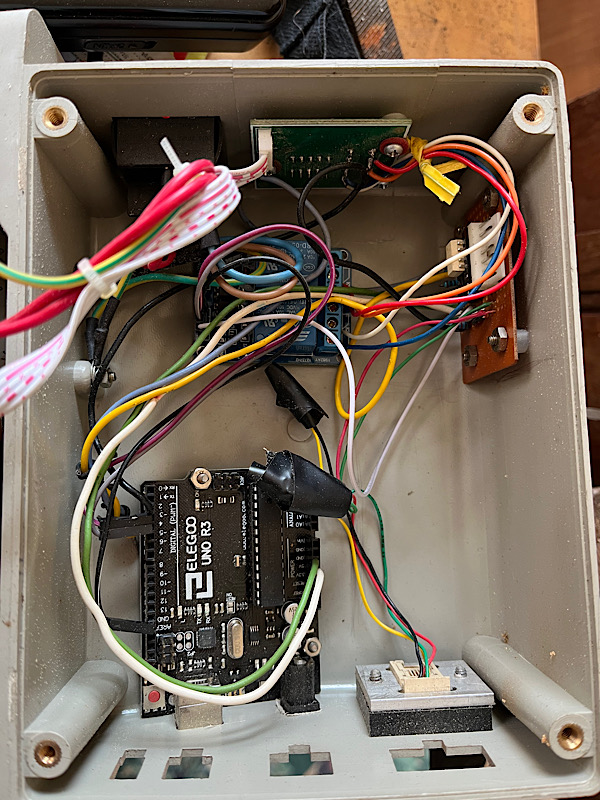
It's powered by a cheap brushless sewing machine motor. I use the variable speed sensor inside an old rheostat pedal, and added relays and an Arduino knockoff to the controller so I can reverse quickly with a second pedal.
Attachment 50424 Attachment 50425
Attachment 50426 Attachment 50427
Attachment 50428 Attachment 50430
Attachment 50431 Attachment 50432
https://youtu.be/Yd53_Qge_PM
-
-
6 Attachment(s)
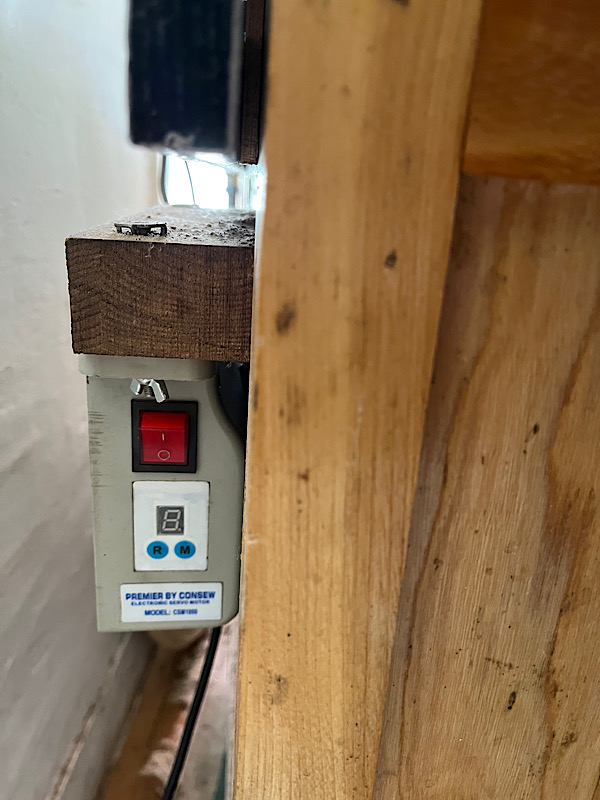
Some pictures of the motor control unit.
It's an older two-button 500w brushless Consew. They are affordable and were popular retrofits for small machine tools a few years ago. Mine has been reliable so far.
The variable speed foot pedal works great in combination with the built in top speed settings on the menu. It allows ramping up or down as well as running at approximate intermediate speeds the same way as on a sewing machine.
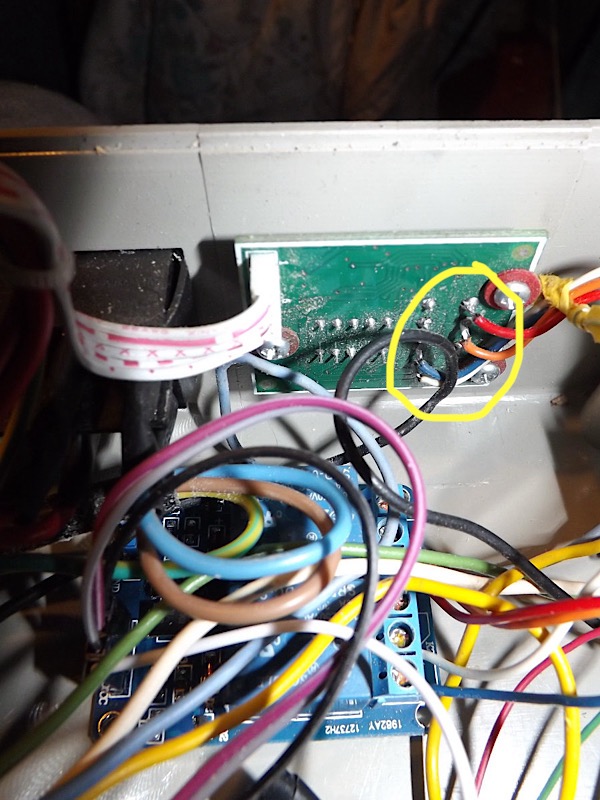
The pushbutton menu used to set top speed and direction is easy to operate but slow for reversing for things like running out taps. With the Arduino Uno copy controlling relays wired to the menu buttons I was able to speed things up a lot.
Front and rear views
Attachment 50448 Attachment 50449
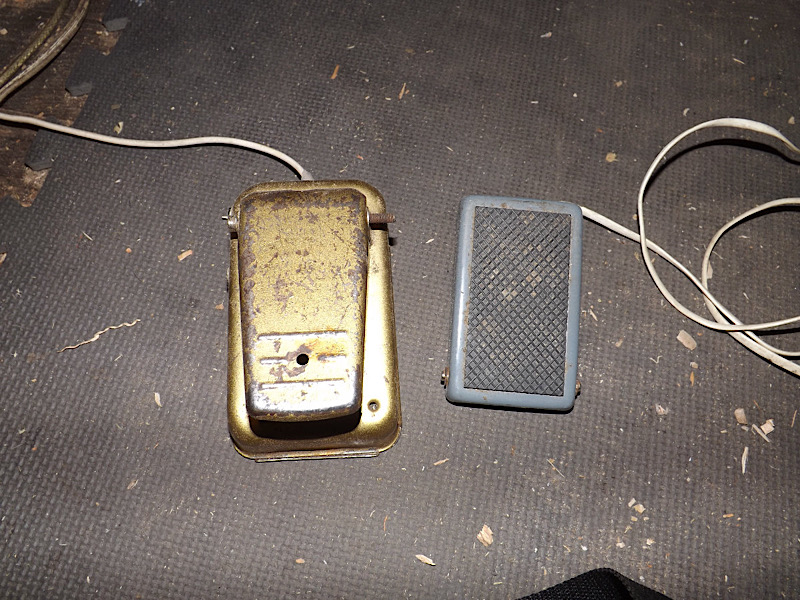
Both pedals, and hall effect speed control sensor inside sewing machine pedal
Attachment 50450 Attachment 50451
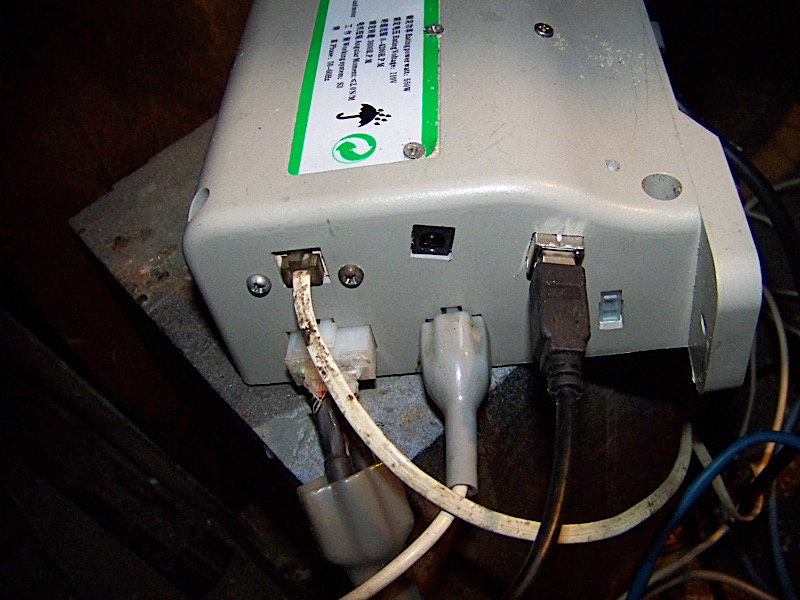
New parts inside controller box and closeup of how relay board is wired to back of menu buttons
Attachment 50452 Attachment 50453