Free 186 More Best Homemade Tools eBook:  
New: 300+ fresh build posts/day from 275 forums → BuildThreads.com

User Tag List

Results 1 to 9 of 9

Thread: Tractor tire Bead breaker

Threaded View

  1. #1
    Supporting Member Frank S's Avatar
    Join Date
    Aug 2015
    Location
    Peacock TX
    Posts
    12,611
    Thanks
    2,677
    Thanked 11,100 Times in 5,384 Posts

    Frank S's Tools

    Tractor tire Bead breaker

    OH NO! not another bead breaker. There are probably no less than 25 bead breakers published Here on Homemade tools.net, but I didn't have one.
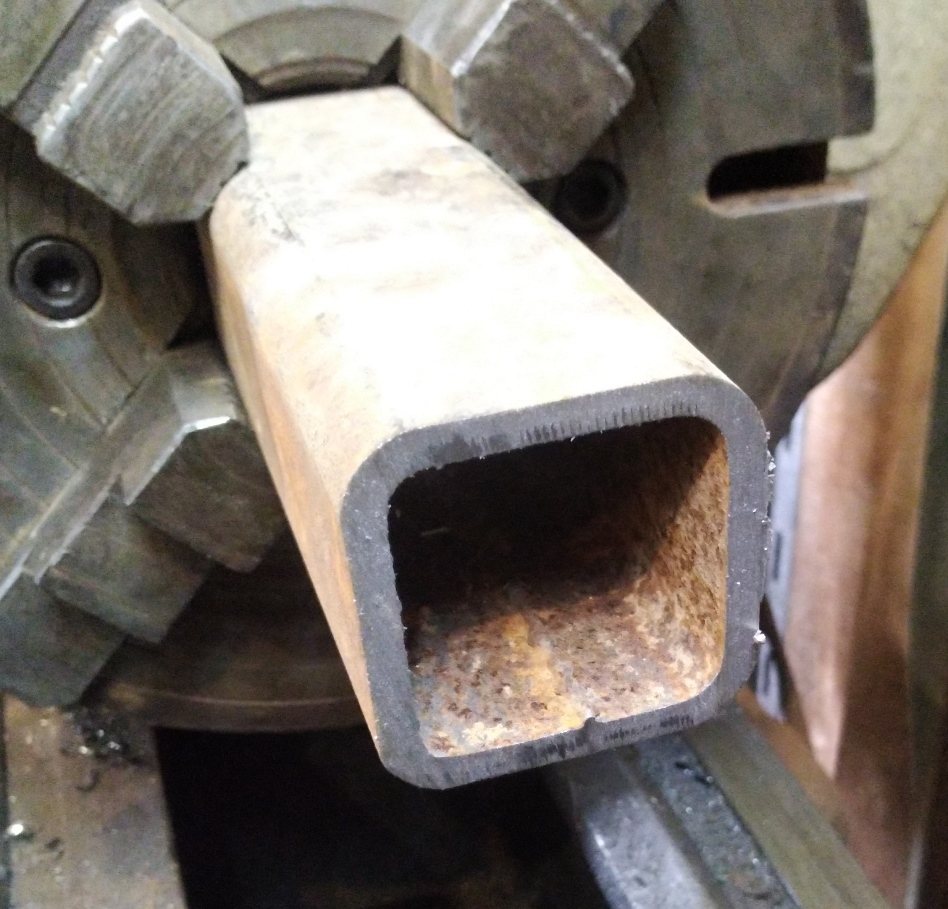
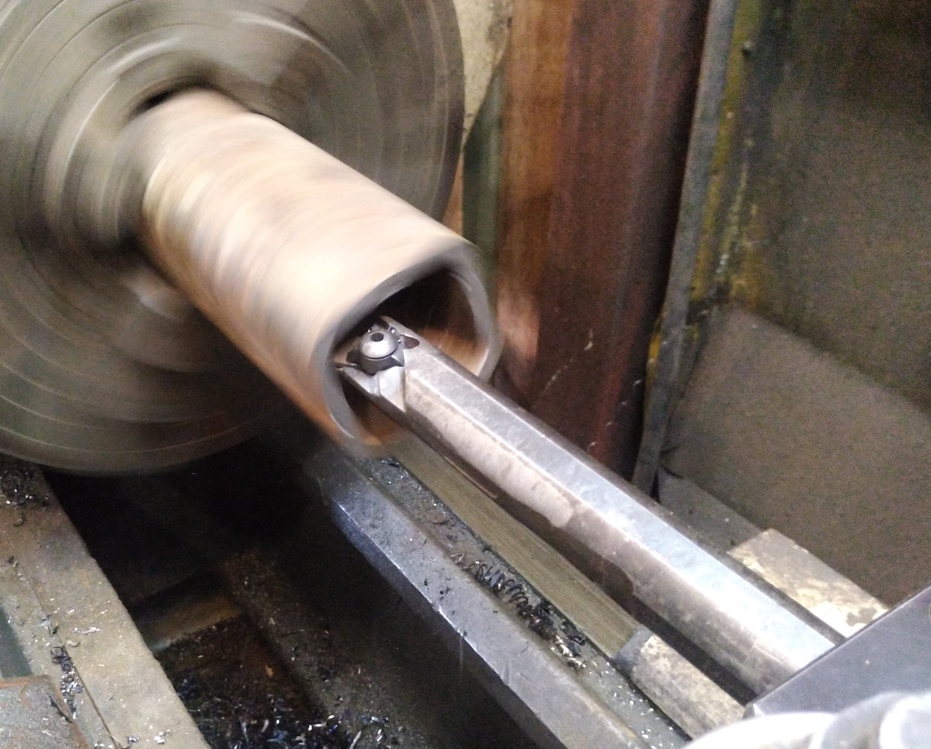
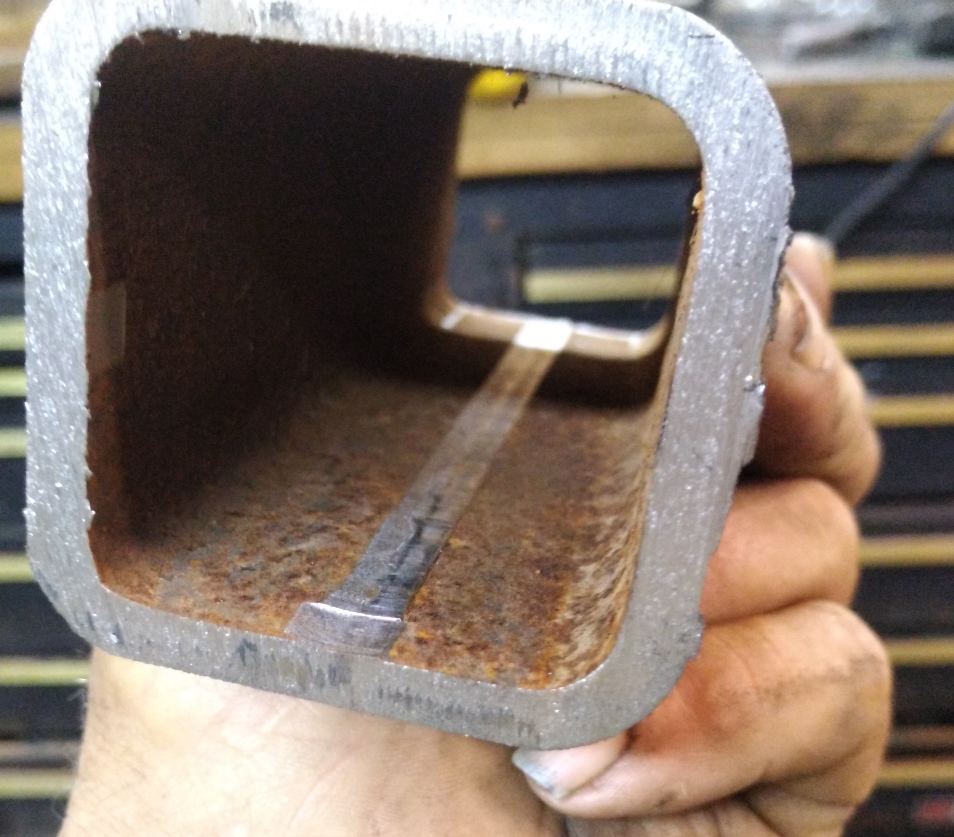
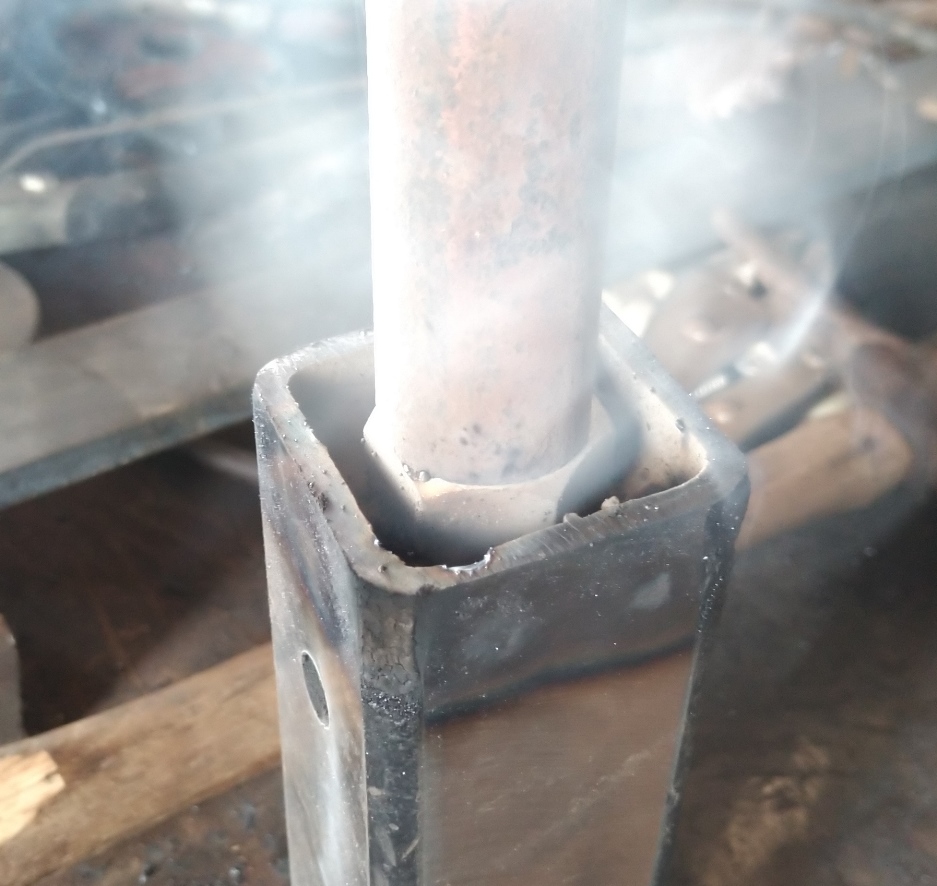
    Which is hard to believe as many of my own tractor and semi tires I've replaced or repaired in the past several years. Until now I mostly just used the backhoe, but sometimes it is just not convenient to use. I had a flat on my case tractor and decided it was past time to replace the old dry rotted rear tires with new ones. Time to make a bead breaker. SO IO cut a length of 2 1/2" sq. tubing and a piece of 2" sq tubing both having 1/4" wall thickness, this meant I was either going to have to grind a deep grove in 1 side of the 2" tube or remove the weld seam from the inside of the larger tube. I chucked it in my 4 jaw then with a 12" long boring bar I removed the weld
    Click image for larger version. 

Name:	IMG_20220416_130903bb.jpg 
Views:	259 
Size:	346.2 KB 
ID:	42517
    Click image for larger version. 

Name:	IMG_20220416_141611bb.jpg 
Views:	219 
Size:	301.3 KB 
ID:	42518

    Click image for larger version. 

Name:	IMG_20220416_144512bb.jpg 
Views:	204 
Size:	314.9 KB 
ID:	42519
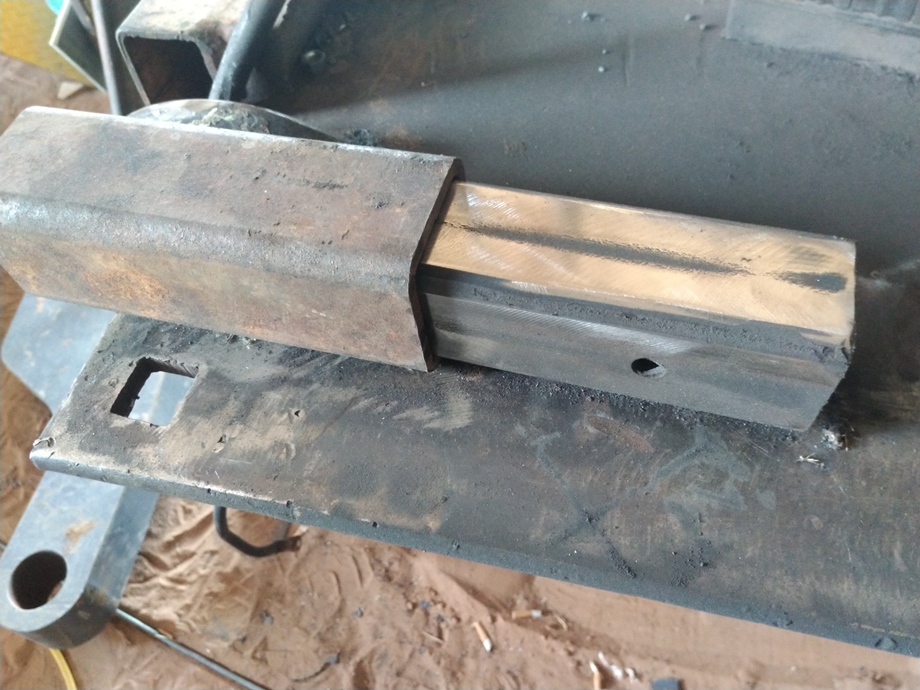
    Then sanded the paint off of the 2" tubing to get it to fit inside
    Click image for larger version. 

Name:	IMG_20220416_150257bb.jpg 
Views:	201 
Size:	285.8 KB 
ID:	42520
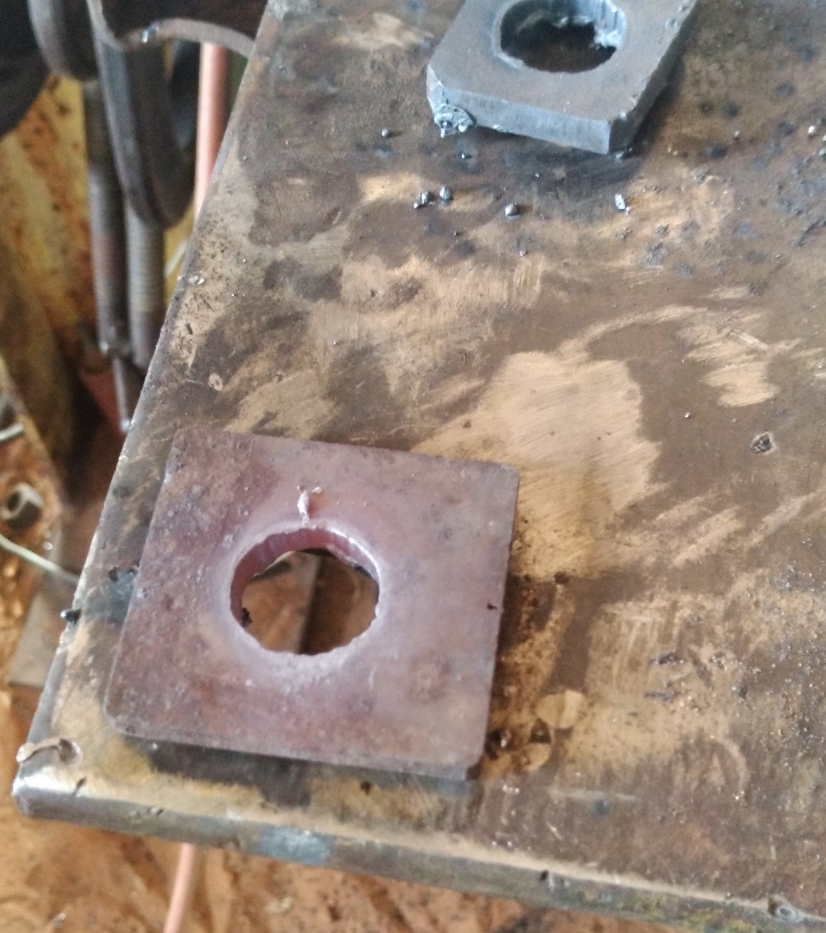
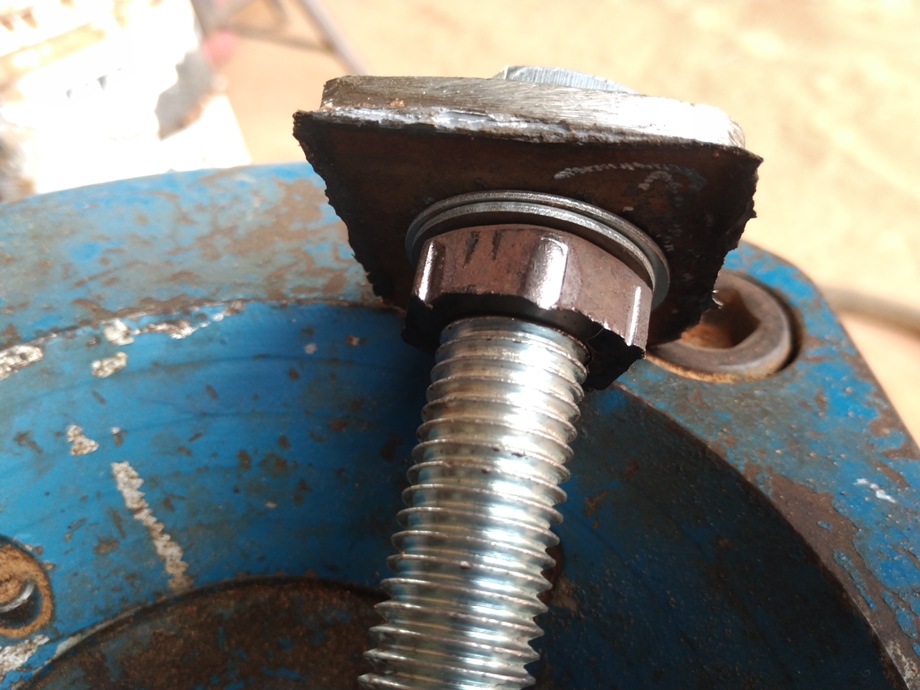
    Since it looked like I was going to spend way too much time on something I could probably buy for under 100 dollars I torched the holes in the cap plates that the forcing bolt was going to pass through, and the weld the nut on the ram foot
    Click image for larger version. 

Name:	IMG_20220416_160941bb.jpg 
Views:	194 
Size:	320.4 KB 
ID:	42521
    The pipe sleeve is just to protect the threads while welding
    Click image for larger version. 

Name:	IMG_20220416_163130bb.jpg 
Views:	205 
Size:	271.5 KB 
ID:	42522
    Click image for larger version. 

Name:	IMG_20220416_163555bb.jpg 
Views:	192 
Size:	246.9 KB 
ID:	42523
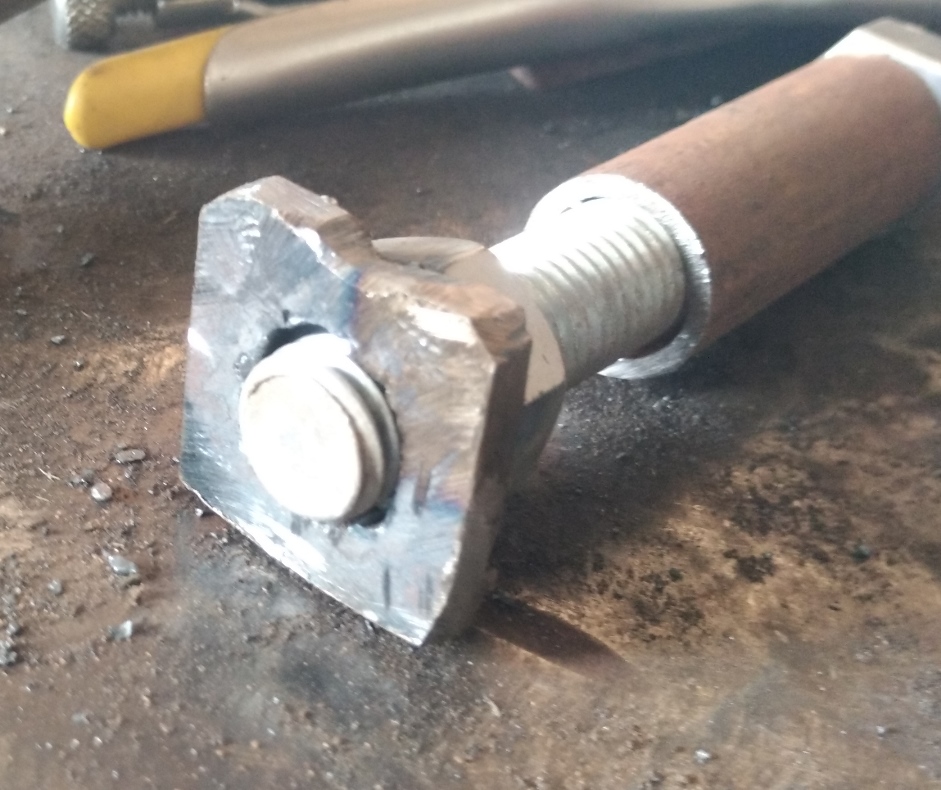
    I used my hose crimper to squeeze a nut onto the forcing bolt for it to be able to force the ram out against the tire
    Click image for larger version. 

Name:	IMG_20220416_170512hc.jpg 
Views:	210 
Size:	260.5 KB 
ID:	42524
    Click image for larger version. 

Name:	IMG_20220416_170650bb.jpg 
Views:	217 
Size:	224.7 KB 
ID:	42525
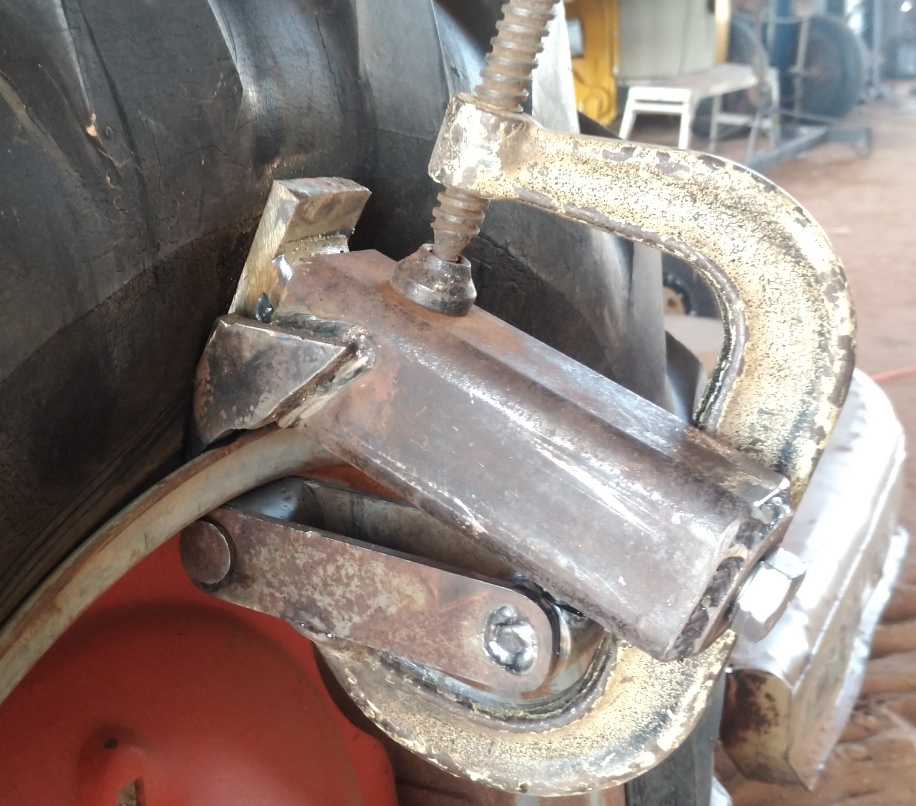
    I wasn't going to spend anymore time one it until I was sure it was going to work
    Click image for larger version. 

Name:	IMG_20220417_163516bb.jpg 
Views:	779 
Size:	326.7 KB 
ID:	42526
    Click image for larger version. 

Name:	IMG_20220417_164741bb.jpg 
Views:	449 
Size:	233.4 KB 
ID:	42527
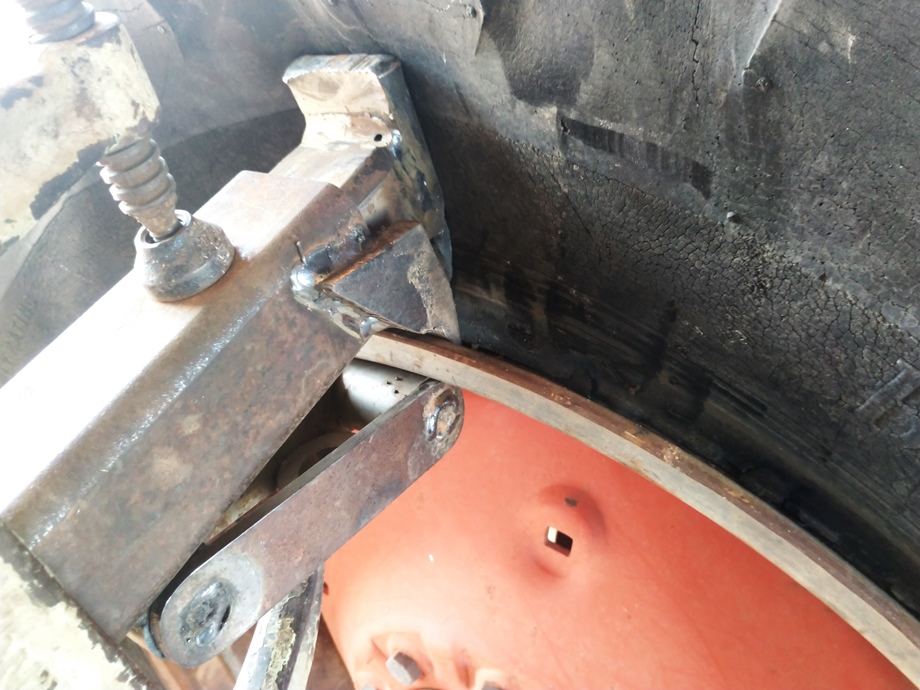
    It works just fine awkward with the c clamp so now that I know it works I will refine it with a pressure screw to secure it to the rim
    Never try to tell me it can't be done
    When I have to paint I use KBS products

  2. The Following 8 Users Say Thank You to Frank S For This Useful Post:

    baja (Apr 21, 2022), clydeman (Yesterday), emu roo (Jun 1, 2026), Jon (Apr 21, 2022), lonestarr007 (Apr 19, 2022), mwmkravchenko (Apr 18, 2022), NortonDommi (Apr 19, 2022), sossol (Apr 18, 2022)

Thread Information

Users Browsing this Thread

There are currently 1 users browsing this thread. (0 members and 1 guests)

Bookmarks

Posting Permissions

  • You may not post new threads
  • You may not post replies
  • You may not post attachments
  • You may not edit your posts
  •