Free 186 More Best Homemade Tools eBook:  
Get 2,000+ tool plans, full site access, and more.

User Tag List

Results 1 to 5 of 5

Thread: Watchmaker lathe t-rest (graver rest)

  1. #1
    Supporting Member mars-red's Avatar
    Join Date
    Aug 2015
    Posts
    21
    Thanks
    0
    Thanked 57 Times in 17 Posts

    mars-red's Tools

    Watchmaker lathe t-rest (graver rest)

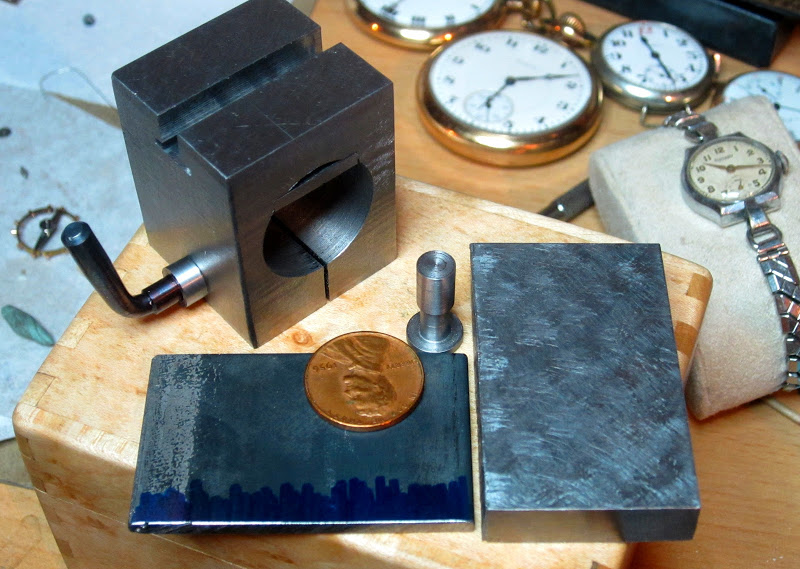
    As I mentioned in my post about the t-slot base for my watchmakers lathe, the first attachment I made to fit it was a t-rest (graver rest), for turning using a hand-held graver.

    I started by turning a pin to fit the t-slot base I made previously, and cutting a couple of pieces of steel bar stock that would make up the hinged bottom section of the t-rest. The mating sides of the hinged part were quickly and roughly scraped to be a good, solid fit against one another:
    Watchmaker lathe t-rest (graver rest)-base%25u0025252520parts%25u0025252520roughed.jpg

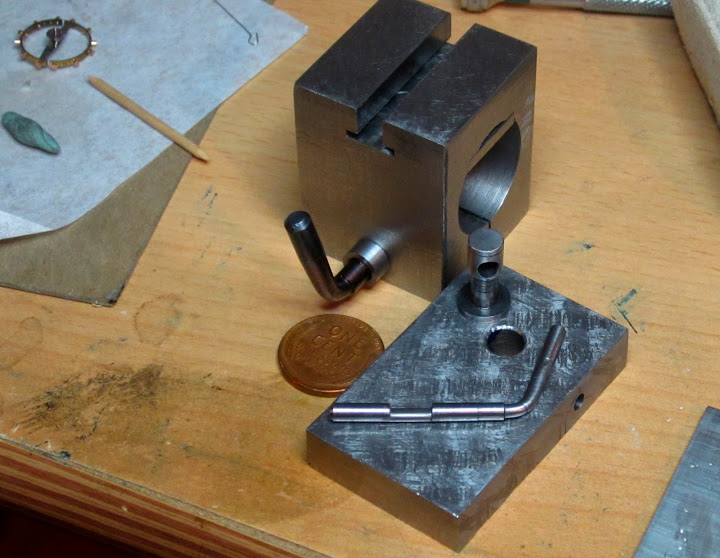
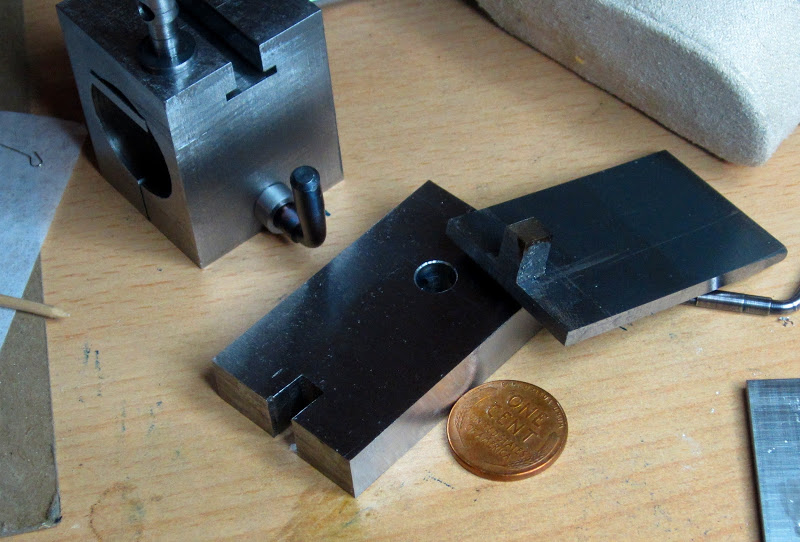
    Now the tricky part, locating and cross drilling the base and the t-slot pin so that it could be locked in place with a small lever with an eccentric cam. I started by drilling the hole to fit the body of the t-slit pin. Then I put the pin into the t-slot of the mounting base, and wedged it so that it was firm against the top of the t-slot. Now the t-slot base, with the pin still wedged into it, was clamped onto the bottom plate of the t-rest, with the pin going through that hole I had drilled for it, and that bottom plate was cross drilled right through the middle of the t-slot pin and into the other side of the plate. This gave me an arrangement that would bind the pin in the t-slot nicely with an eccentric recessed lobe turned into a locking shaft of the same diameter as the hole. In theory. Well, in practice something went a bit wrong and I ended up gradually opening up the hole to get the final fit I wanted. Here are the parts, after achieving a good locking fit:
    Watchmaker lathe t-rest (graver rest)-locking%25u0025252520lever%25u0025252520and%25u0025252520t%25u0025252520clamp.jpg

    Watchmaker lathe t-rest (graver rest)-locking%25u0025252520test%25u0025252520fit.jpg

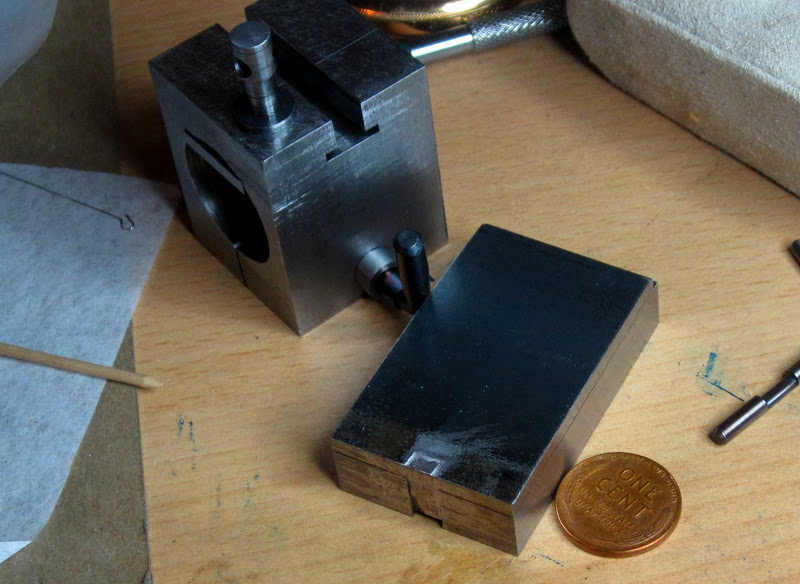
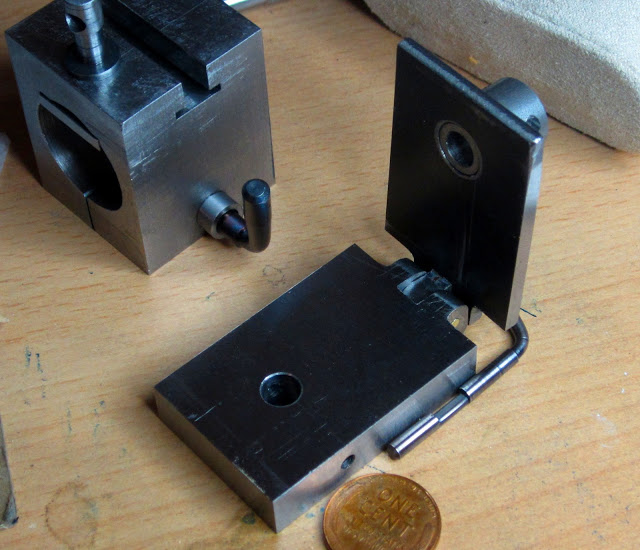
    That thinner plate, to act as the top of the hinged arrangement, needed to have a lug attached to it. The lug needed to fit into a notch milled into the lower, thicker plate, then a pin put through them to pivot. I started by clamping them together, and milling a notch through both of them. Then I silver soldered a rectangular lug into the top notch. The next photo I took was after reassembling them with the snug fit of the lug keeping them located against one another, and then milling the sides to true everything up:
    Watchmaker lathe t-rest (graver rest)-milling%25u0025252520sides.jpg

    Here is a better view of the lug, before being hinged:
    Watchmaker lathe t-rest (graver rest)-sides%25u0025252520milled%25u0025252520and%25u0025252520swing%25u0025252520lug%25u0025252520fitted.jpg

    Watchmaker lathe t-rest (graver rest)-swing%25u0025252520lug%25u0025252520showing.jpg

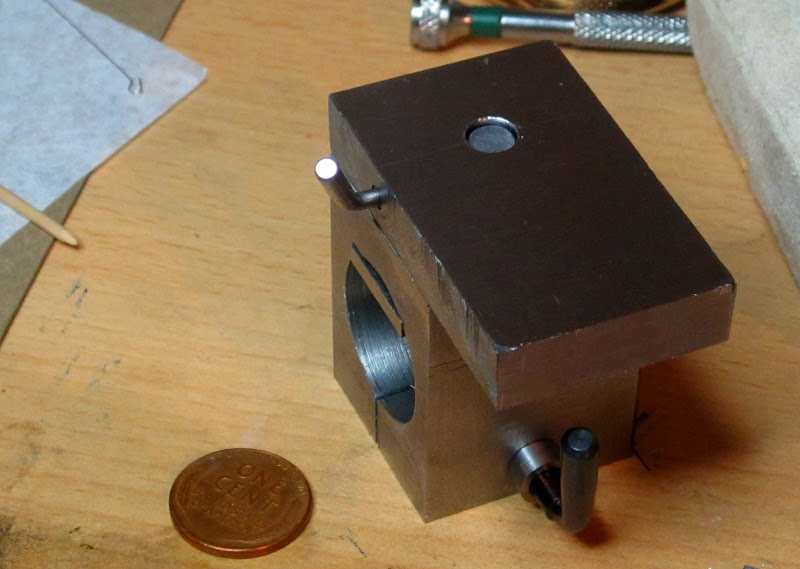
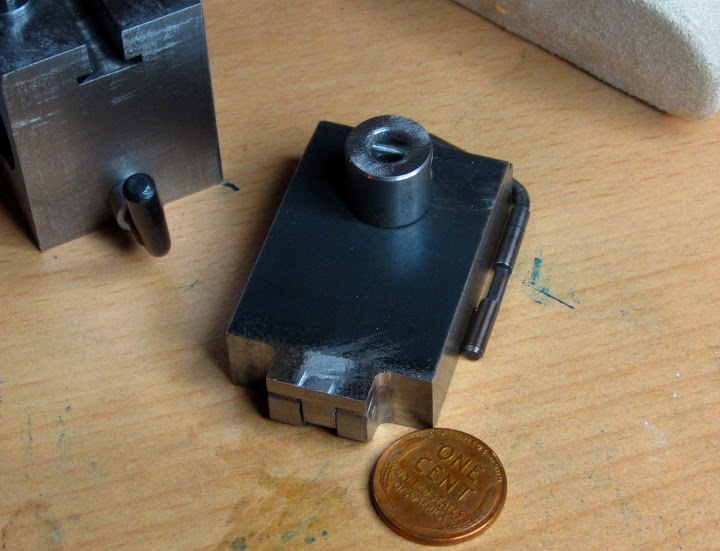
    The corners were then milled out, and the resulting "ears" were cross drilled with the lug in place, the bottom of the lug and the tops of the ears were rounded for clearance, and then a brass pin pushed through. The top plate was also drilled at one end, and a steel bushing pressed in place, that would receive the actual "T" part of the rest:
    Watchmaker lathe t-rest (graver rest)-hinged%25u0025252520base%25u0025252520assembled.jpg

    Watchmaker lathe t-rest (graver rest)-hinged%25u0025252520base%25u0025252520opened.jpg

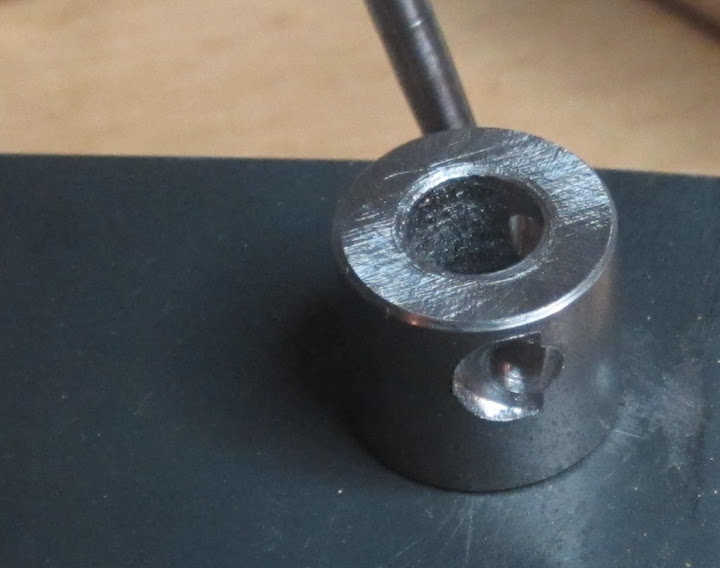
    Here is a closeup of the off-center hole that was milled through the t-rest post:
    Watchmaker lathe t-rest (graver rest)-cross%25u0025252520drilled%25u0025252520post%25u0025252520closeup.jpg

    Watchmaker lathe t-rest (graver rest)-cross%25u0025252520drilled%25u0025252520post%25u0025252520closeup%25u00252525202.jpg

    Continued in the next post...

    186 More Best Homemade Tools eBook

  2. The Following 3 Users Say Thank You to mars-red For This Useful Post:

    kbalch (Sep 9, 2015), Paul Jones (Sep 9, 2015), PJs (Sep 10, 2015)

  3. #2
    Supporting Member mars-red's Avatar
    Join Date
    Aug 2015
    Posts
    21
    Thanks
    0
    Thanked 57 Times in 17 Posts

    mars-red's Tools
    Next up was to make the actual "T" part of the t-rest... the part the graver rests against while turning.

    I started with some 1" diameter O1 steel, and turned the profile. I had something wrong, as you can see the finish was horrible, but I didn't sweat it because this was all going to have to be hand finished anyway:
    Watchmaker lathe t-rest (graver rest)-graver%25u0025252520rest%25u0025252520blank.jpg

    I marked out the top of the part, for sawing:
    Watchmaker lathe t-rest (graver rest)-graver%25u0025252520rest%25u0025252520marked%25u0025252520for%25u0025252520sawing.jpg

    From there it was filed to shape:
    Watchmaker lathe t-rest (graver rest)-graver%25u0025252520rest%25u0025252520filing.jpg

    Watchmaker lathe t-rest (graver rest)-graver%25u0025252520rest%25u0025252520roughed%25u00252525201.jpg

    Watchmaker lathe t-rest (graver rest)-graver%25u0025252520rest%25u0025252520roughed%25u00252525202.jpg

    And then the top surface was polished:
    Watchmaker lathe t-rest (graver rest)-graver%25u0025252520rest%25u0025252520polished.jpg

    After hardening the rest, I gave it a test run (I guess somewhere along the way I made a locking lever for the post, as well, haha):
    Watchmaker lathe t-rest (graver rest)-trial%25u0025252520run%25u00252525201.jpg

    Watchmaker lathe t-rest (graver rest)-trial%25u0025252520run%25u00252525202.jpg

    After a little more cosmetic milling, I called it done!
    Watchmaker lathe t-rest (graver rest)-completed%25u00252525201.jpg

    Watchmaker lathe t-rest (graver rest)-completed%25u00252525202.jpg

    2000 Tool Plans

  4. The Following 2 Users Say Thank You to mars-red For This Useful Post:

    Paul Jones (Sep 9, 2015), PJs (Sep 10, 2015)

  5. #3
    kbalch's Avatar
    Join Date
    Jun 2012
    Location
    Clermont, FL
    Posts
    5,034
    Thanks
    2,275
    Thanked 531 Times in 383 Posts
    Thanks mars-red! I've added your Watchmaker's Lathe T-Rest to our Lathe Accessories category, as well as to your builder page: mars-red's Homemade Tools. Your receipt:


  6. #4
    Content Editor
    Supporting Member
    DIYer's Avatar
    Join Date
    Aug 2013
    Posts
    3,056
    Thanks
    772
    Thanked 1,852 Times in 1,653 Posts
    Great post! That set of pictures (and descriptions) made me appreciate the work you did on that deceptively simple-looking rest.

  7. #5
    PJs
    PJs is offline
    Supporting Member PJs's Avatar
    Join Date
    Sep 2014
    Location
    Northern CA
    Posts
    1,841
    Thanks
    8,337
    Thanked 1,118 Times in 718 Posts

    PJs's Tools
    Beautiful workmanship and well thought out, Mars-Red. The finish you got on the rest and on the base block (looked to be hand scraped) were phenomenal! Thanks for all the details and pics...wonderful & useful build! ~PJ


    186 More Best Homemade Tools eBook
    ‘‘Always do right. This will gratify some people and astonish the rest.’’
    Mark Twain

Thread Information

Users Browsing this Thread

There are currently 1 users browsing this thread. (0 members and 1 guests)

Bookmarks

Posting Permissions

  • You may not post new threads
  • You may not post replies
  • You may not post attachments
  • You may not edit your posts
  •