-
1 Attachment(s)
What about the master cylinder?
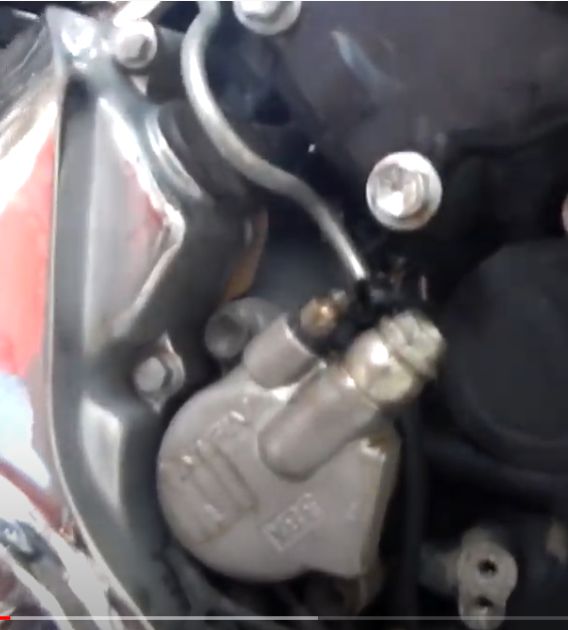
I have not seen a slave cylinder like the one that you have. 12/14 mm bore does seem small if it was direct acting but it looks like it retains the original Yamaha actuating scroll. I was expecting something like this
Attachment 42103
That is why in a previous message I expressed an interest in how you would mount it.
-
I doubt I'll be using this slave cylinder, it's just something to experiment with.
-
3 Attachment(s)
I've designed and put together a couple of much simplified harness' one for lights, the other for ignition, minus stuff I don't require, neutral light and so on. But still the spaghetti bucket lived up to it's name. I dislike untidy with a vengeance so made a bracket that sits inside the spaghetti bucket to try and keep things neat and make it easier to find and connect the wires.
Two grommets sit in the middle for routing earth wires through to earth connections and a couple of linked, Delrin, insulated terminal bridges sit either side of them for power connections. Mostly connected up, but still have to connect the headlight cables and speedo light cables, not sure about adding idiot lights, more procrastination needed there me thinks! The cables emanating from the switchgear are very, very light gauge, not sure if they'll handle the current, even though all lights are LEDs, so I may have to either solder in heavier gauge cables or change the switchgear.
-
-
3 Attachment(s)
Finished off the front wiring and spaghetti bucket. Still looks a little untidy, but neater than most I think. I even mounted the lens on a couple of wire safety straps to stop it pulling on the harness. I had, to buy these double female bullet connectors from China, couldn't find anyone in OZ who stocks them. Trying to find sub 6mm eye terminals was a job, same with 3mm blade terminals, they stock female blades but not males. And they complain that everyone is turning to online shopping - no bloody wonder.
Got to attack the back end now, mount the indicators and plug them and the tail light into the lighting harness.
-
3 Attachment(s)
The indicators I bought don't have a long enough threaded section to go through the guard bracket, so I made these extension brackets to mount the indicators on. The V shaped cut out at the rear of the brackets fits around the frame tab protrusion, thus stopping the brackets from moving.
-
1 Attachment(s)
Nup, binned them. Looking at the picture I noticed the line on the top the aluminium bracket doesn't follow the line on the top of the frame tab. So I made a new pair. Not a lot I could do with the bottom line as the tab angle is different to the guard angle, so I followed the tab angle down to the bottom of the guard then followed the arch of the guard. I might have to thin it down a bit though, looks a bit too big???
-
The thinner bottom part of the first bracket look better. The pointed end of the upper part looks akward. Perhaps a rounded end ?
-
1 Attachment(s)
What if you added a radius to the bottom edge of the bracket similar to the radius of the fender lip. Not that anyone would notice it unless they looked directly at it from the side, but it keeps the lines smooth and consistent.
Attachment 42326
-
Nope, if I did that then the lower fork would be horrendously thick. That's why I followed the line on the bottom of the tab down to the guard then followed the line of the guard.