
 LinkBack URL
 About LinkBacks


The main project I am working on requires several #35 pitch chains to synchronize and move a number of members in 2 directions
the ends of 2 chains are dead manned to the same tab each extending over a sprocket in the opposite direction the sprockets are both fixed to a single member the other ends of the chains are also dead manned together on yet a 3rd but fixed member all of this is duplicated on the opposite side of the machine and both sides must move and be positioned relative to each other.
the issue was how to accomplish the adjusting of 4 chains and 6 members with the minimum amount of parts and adjustments.
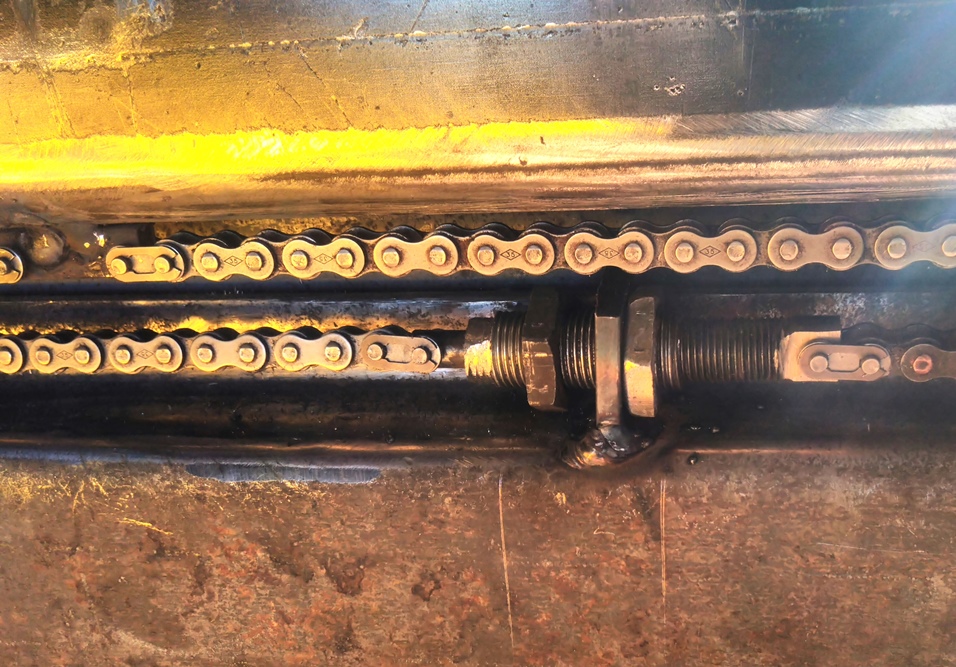
My solution was to make 2 single ended floating turn buckles of sorts with 1 end of them being a swivel connection then using the body of tghe buckles as the synchronizing pieces
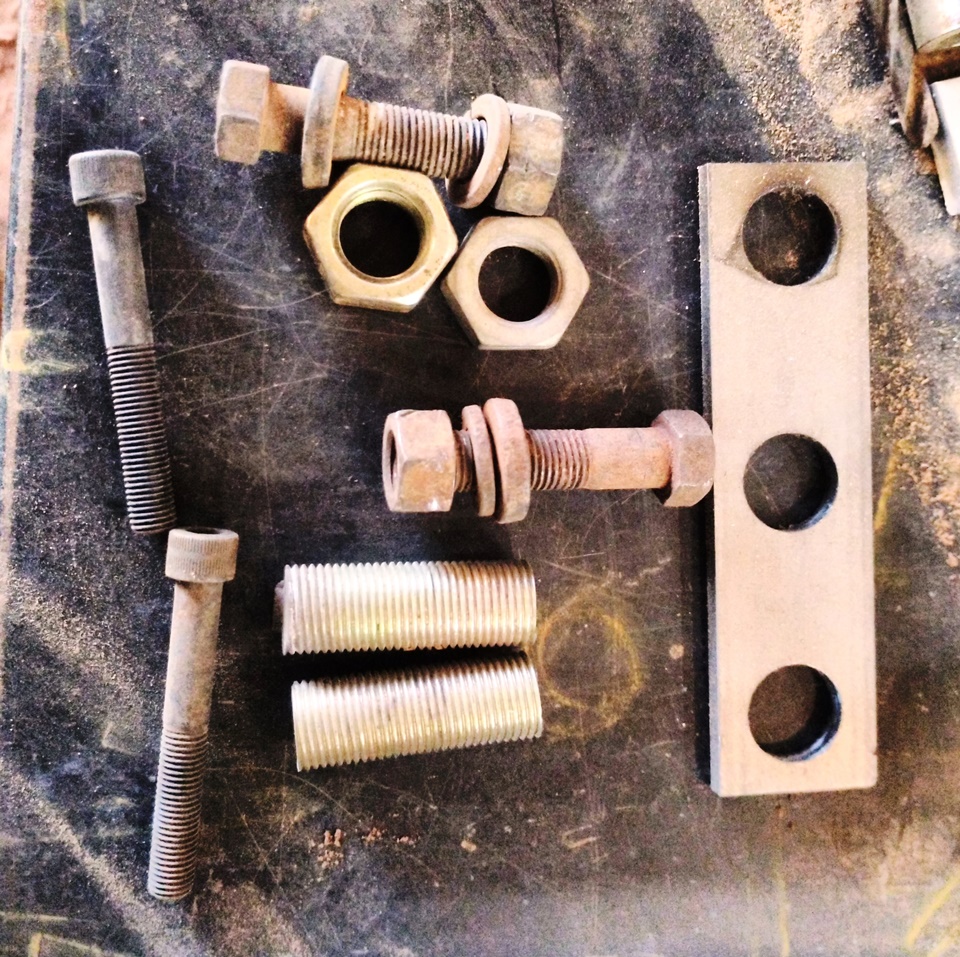
here is what I did I stated with 2 pieces of 5/8" fine threaded rods . the rods were the cut offs of semi truck air brake chambers so they are hardened grade 8 to start out with. and 2 5/16 socket head bolts a pair of fine thread 5/8 nuts and a pair of 1/2" fine thread bolts I wound up not using the 2 in the picture because I found a pair of 1/2" socket head bolts with better threads
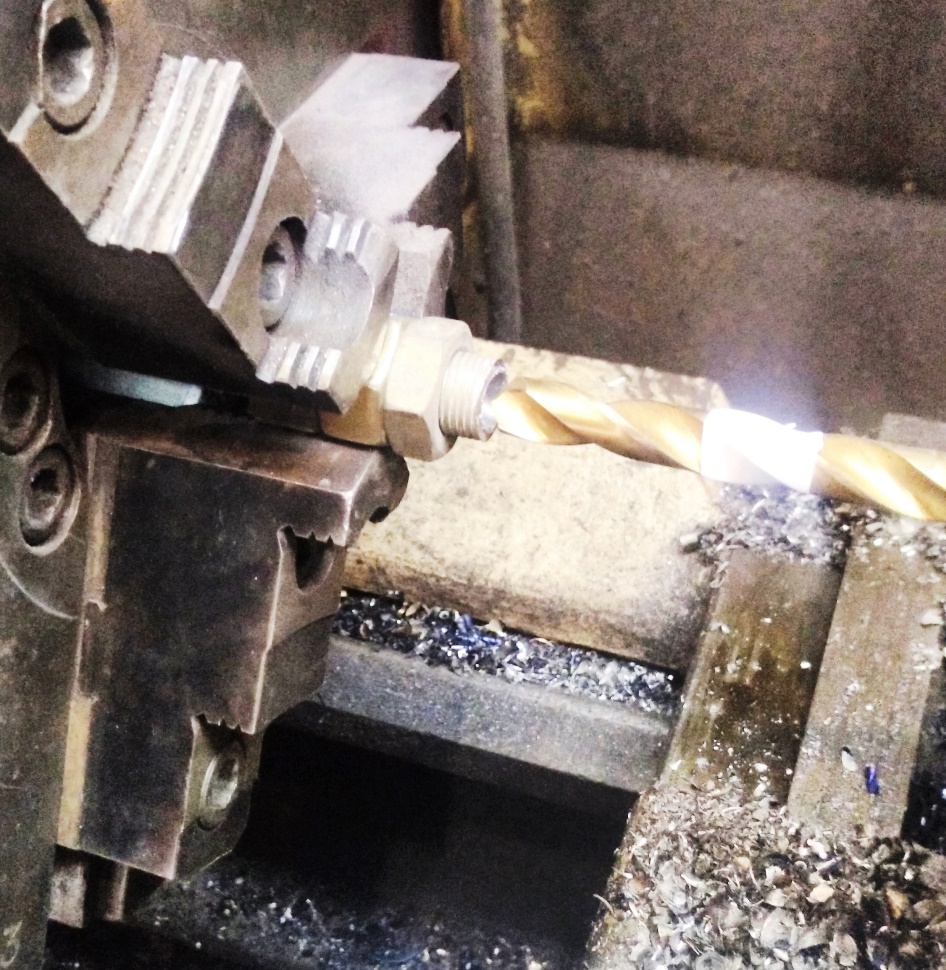
I drilled the rods with a 5/16" drill bit then counter drilled with a 29/64" to the depth of the white tape then threaded the inside to 1/2-20 TPI then filed flats on 1 end to fit a 9/16" wrench
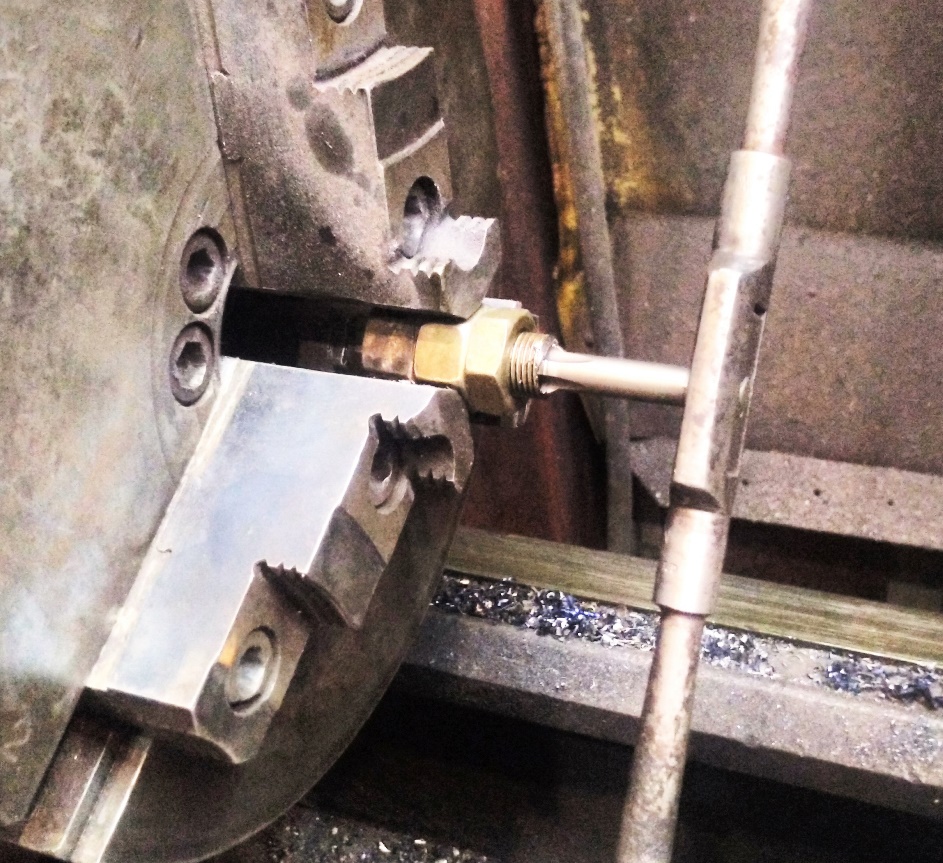
turned down and off most of the head on the 5/16 bolts cross drilled to the chain pin size and parted them off. cross drilled the 1/2" bolts and parted them off as well and ground flats on them to the thickness of a chain link. then sawed the 5/8' nuts in half to make 4 jam nuts
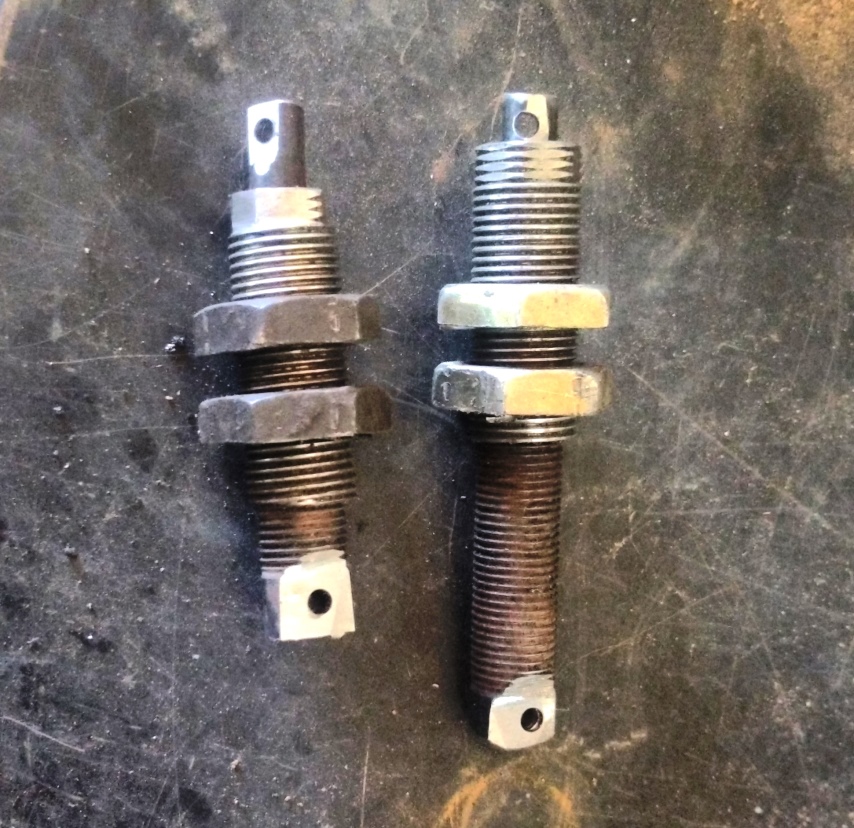
this is how they turned out.
you can see all 4 ends of the 2 chains once the chains are tight it is just a matter of moving the jam nuts one way or the other on either side of the machine to achieve the correct position for the part they are connected to


 Reply With Quote


Bookmarks