-
CNC Router
Hi All,
Building a small traction engine and I wanted to engrave the words around the smokebox door and for the main badge, so thought I would dip my toe into the world of CNC and bought a CNC engraver/router. OK it is very cheap and might not be up to the job, but this is a steep learning curve for me as only ever used manual machines before this point. I bought a Sain Smart CNC Router 3018-Pro.
So, here is a video of the kit arriving and me assembling the machine. Will share more as I learn.
https://youtu.be/6hUCt7NqRm0
Now I'm learning about G-Code, tool paths and how to set up the machine for different materials.
-
1 Attachment(s)
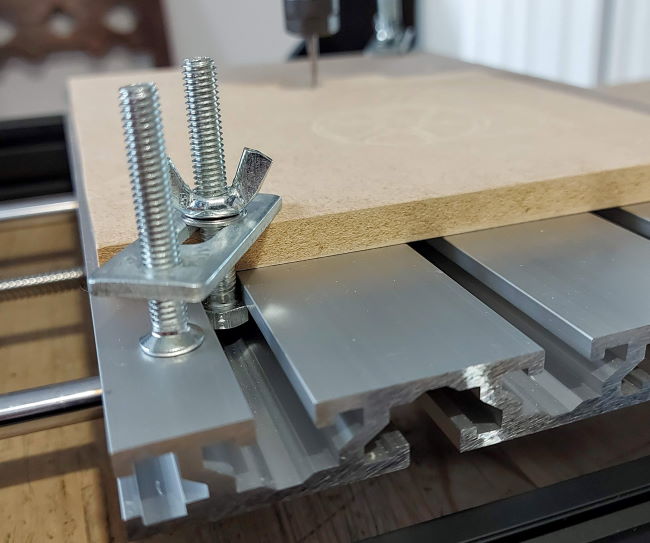
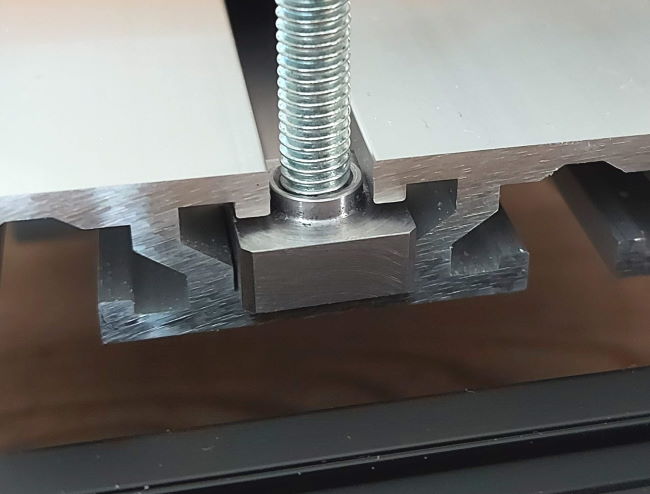
The only thing I've found lacking with the package are the table clamps, the extruded aluminium table is lovely. The T-nut is the head of a bolt that will damage the grooves over time and just don't seat that well. My thoughts are to make a set of brass T-nuts that engage with the underside of the groove, spread the load and don't over time dig into the surface.
Attachment 35891
-
4 Attachment(s)
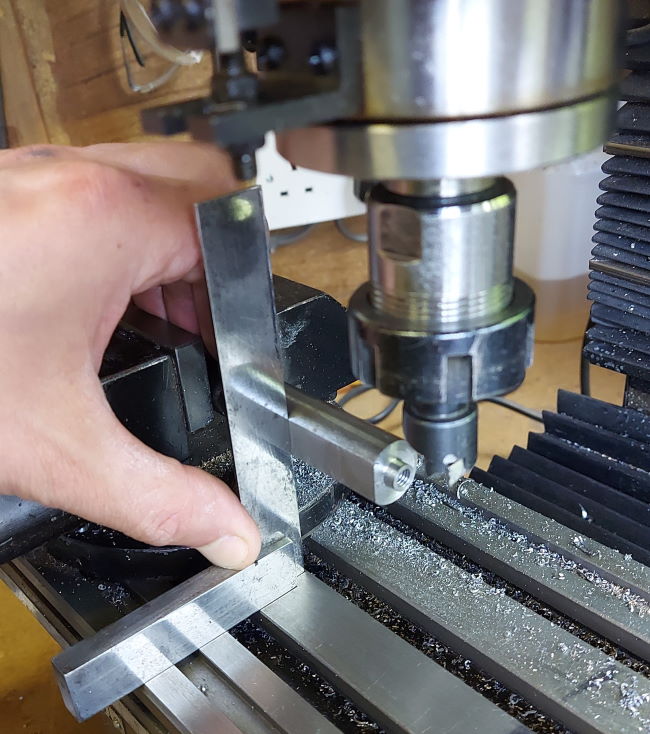
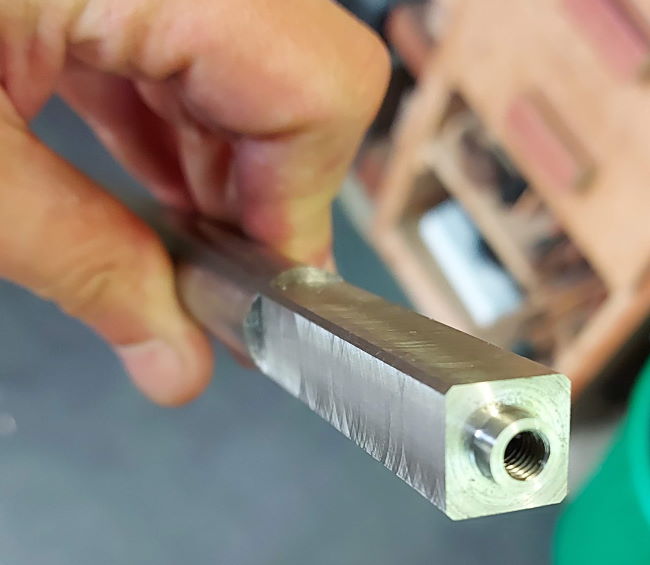
So, I've made T-nuts (a recurring theme here) for the Sain Smart Genmitsu 3018-Pro engraver/Router.
Trouble was I didn't have the right size square bar...so I machined 3/4 inch diameter mild steel round bar into square:
Attachment 35922
and eventually got to square
Attachment 35923
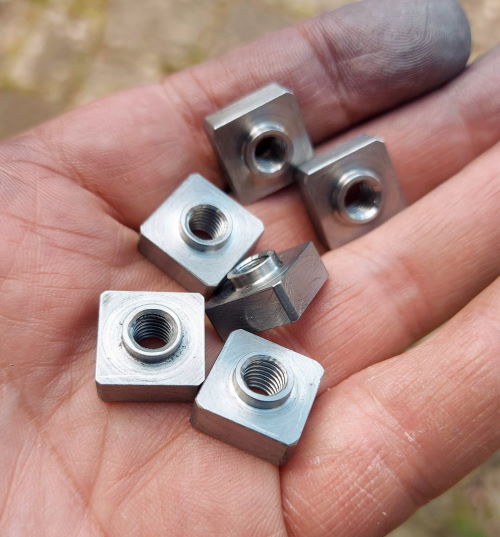
and I ended up with six 14.4mm square nuts
Attachment 35924
and they fit superb, will have to create a quick drawing for others to use
Attachment 35925
The drawings might not happen, hence dimensions: The T-nuts are 14.4mm across, the square nut is 6mm high and has an 8mm diameter boss protruding 2mm from the top. The nut is threaded 6x1mm. They are threaded the whole way through the nut.
-
<!-- BEGIN /var/www/html/homemadetools/protected/modules/zeus/views/tool/postUpdate.php -->
Thanks editor at glue-it.com! We've added your CNC Router Table Clamps to our CNC category,
as well as to your builder page: editor at glue-it.com's Homemade Tools. Your receipt:
<div id="blocks">
<div class="block b1 pngfix">
<div class="bimg">
<div>
<a href="https://www.homemadetools.net/homemade-cnc-router-table-clamps">
<img src="/uploads/234760/homemade-cnc-router-table-clamps.jpeg"/>
</a>
</div>
</div>
<div class="head pngfix"></div>
<div class="left pngfix"></div>
<div class="right pngfix"></div>
<div class="blockover b1 pngfix">
<div class="title">
<a href="https://www.homemadetools.net/homemade-cnc-router-table-clamps">CNC Router Table Clamps</a>
<span> by <a href="https://www.homemadetools.net/builder/editor+at+glue-it.com">editor at glue-it.com</a></span>
</div>
<div class="tags">tags:
<a href='https://www.homemadetools.net/tag/clamp'>clamp</a> </div>
</div>
</div>
</div>
<!-- END /var/www/html/homemadetools/protected/modules/zeus/views/tool/postUpdate.php -->
-
1 Attachment(s)
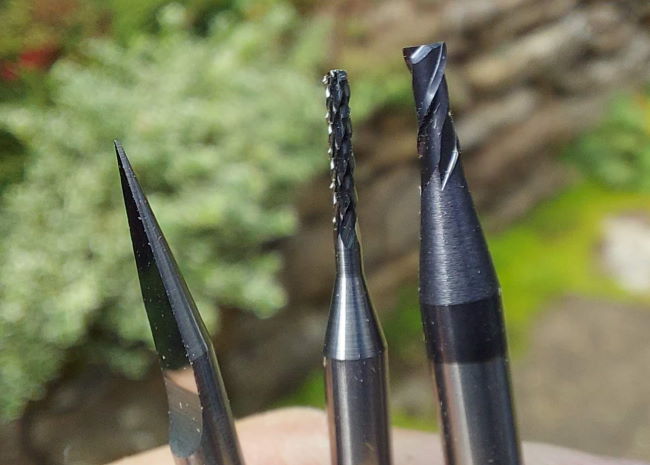
Spent some time yesterday using different cutting bits to see if I could engrave brass
Attachment 36094
At the moment I don't have a solution that allows me to engrave brass with the Genmitsu 3018-Pro. I might try some smaller bits, but spindle stiffness and runout appears to be a fundamental weakness.
-
2 Attachment(s)
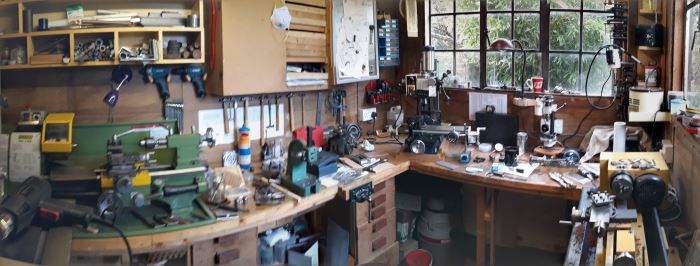
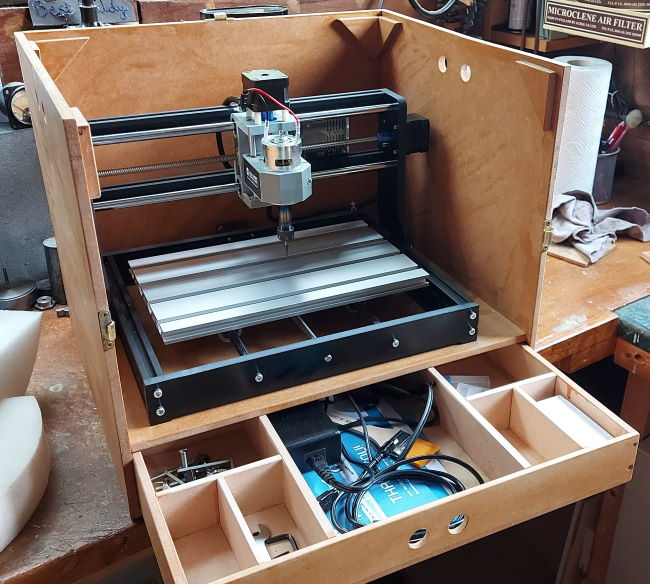
My workshop is really small
Attachment 36153
so I made a box for the CNC so it can tuck under the workbench safely
Attachment 36154
just lift the cover, plug it in and it works.
-
<!-- BEGIN /var/www/html/homemadetools/protected/modules/zeus/views/tool/postUpdate.php -->
Thanks editor at glue-it.com! We've added your CNC Router Storage Box to our Storage and Organization category,
as well as to your builder page: editor at glue-it.com's Homemade Tools. Your receipt:
<div id="blocks">
<div class="block b1 pngfix">
<div class="bimg">
<div>
<a href="https://www.homemadetools.net/homemade-cnc-router-storage-box">
<img src="/uploads/235019/homemade-cnc-router-storage-box.jpeg"/>
</a>
</div>
</div>
<div class="head pngfix"></div>
<div class="left pngfix"></div>
<div class="right pngfix"></div>
<div class="blockover b1 pngfix">
<div class="title">
<a href="https://www.homemadetools.net/homemade-cnc-router-storage-box">CNC Router Storage Box</a>
<span> by <a href="https://www.homemadetools.net/builder/editor+at+glue-it.com">editor at glue-it.com</a></span>
</div>
<div class="tags">tags:
<a href='https://www.homemadetools.net/tag/cnc'>CNC</a>, <a href='https://www.homemadetools.net/tag/storage'>storage</a>, <a href='https://www.homemadetools.net/tag/router'>router</a> </div>
</div>
</div>
</div>
<!-- END /var/www/html/homemadetools/protected/modules/zeus/views/tool/postUpdate.php -->
-
2 Attachment(s)
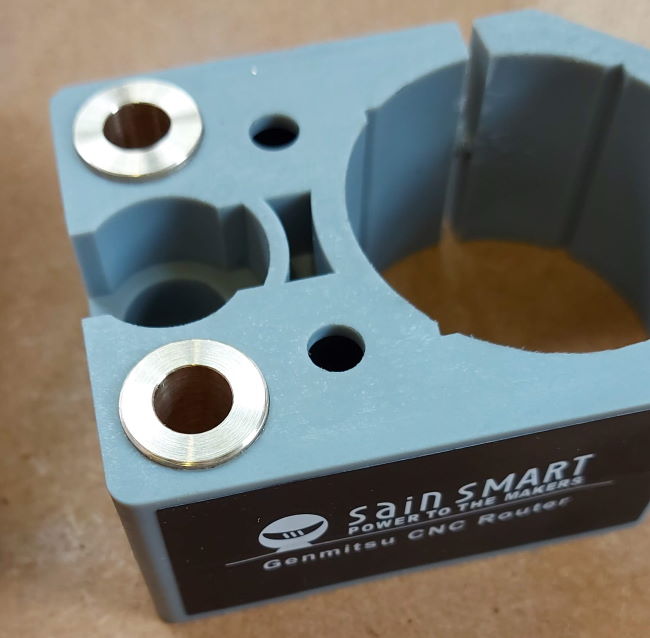
What is it about buying a cheap machine, you always end up modifying it to correct all of the issues....
The first thing on the Genmitsu 3018-pro were the linear bearings on the z-axis
Attachment 37258
I replaced them with simple plain brass bearings.
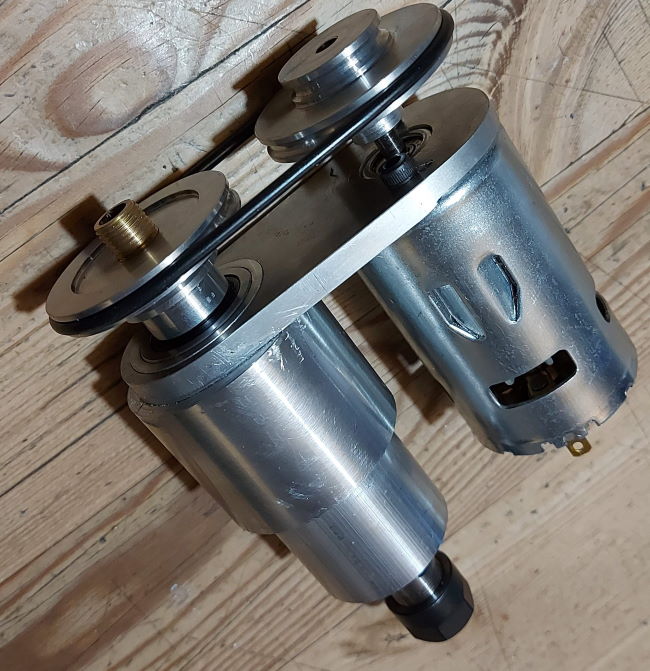
Then there is the spindle that comprised an ER11 chuck fixed to the end of the motor, didn't run true and resulted in lots of vibration. So I sketched out a spindle with a belt drive, this is a major improvement.
Attachment 37259
The belts are o-rings, so some trigonometry and a simple spreadsheet (free to download).
Just tried this new setup machining hardwood with a 1.2mm end mill and the improvement is well worth the few days invested in making parts.
-
I bought a new CNC router for our new shop, when it showed up it turns out some pieces are 1/2" thick PVC instead of aluminum. Grump!
-
The build of the spindle has turned out rather well, a video of the build steps, spinning it up and then showing it in action.
https://youtu.be/uTBBPLxKeXs
I'm just waiting for some slightly smaller belts so I can use the 2:1 ratio. Plus need to have a play with different milling/engraving bits.