"What is it about buying a cheap machine, you always end up modifying it to correct all of the issues."
They're called "Semi built kits" for a reason :-) I like that spindle solution, gonna tuck that in my mental back pocket...
Printable View
"What is it about buying a cheap machine, you always end up modifying it to correct all of the issues."
They're called "Semi built kits" for a reason :-) I like that spindle solution, gonna tuck that in my mental back pocket...
PurpleHeart is a tough as nails hardwood too.
<!-- BEGIN /var/www/html/homemadetools/protected/modules/zeus/views/tool/postUpdate.php -->
Thanks editor@glue-it.com! We've added your CNC Router Spindle to our CNC category,
as well as to your builder page: editor@glue-it.com's Homemade Tools. Your receipt:
<div id="blocks"> <div class="block b1 pngfix"> <div class="bimg"> <div> <a href="https://www.homemadetools.net/homemade-cnc-router-spindle"> <img src="/uploads/238003/homemade-cnc-router-spindle.jpeg"/> </a> </div> </div> <div class="head pngfix"></div> <div class="left pngfix"></div> <div class="right pngfix"></div> <div class="blockover b1 pngfix"> <div class="title"> <a href="https://www.homemadetools.net/homemade-cnc-router-spindle">CNC Router Spindle</a> <span> by <a href="https://www.homemadetools.net/builder/editor%40glue-it.com">editor@glue-it.com</a></span> </div> <div class="tags">tags: <a href='https://www.homemadetools.net/tag/cnc'>CNC</a>, <a href='https://www.homemadetools.net/tag/router'>router</a>, <a href='https://www.homemadetools.net/tag/spindle'>spindle</a> </div> </div> </div> </div>
<!-- END /var/www/html/homemadetools/protected/modules/zeus/views/tool/postUpdate.php -->
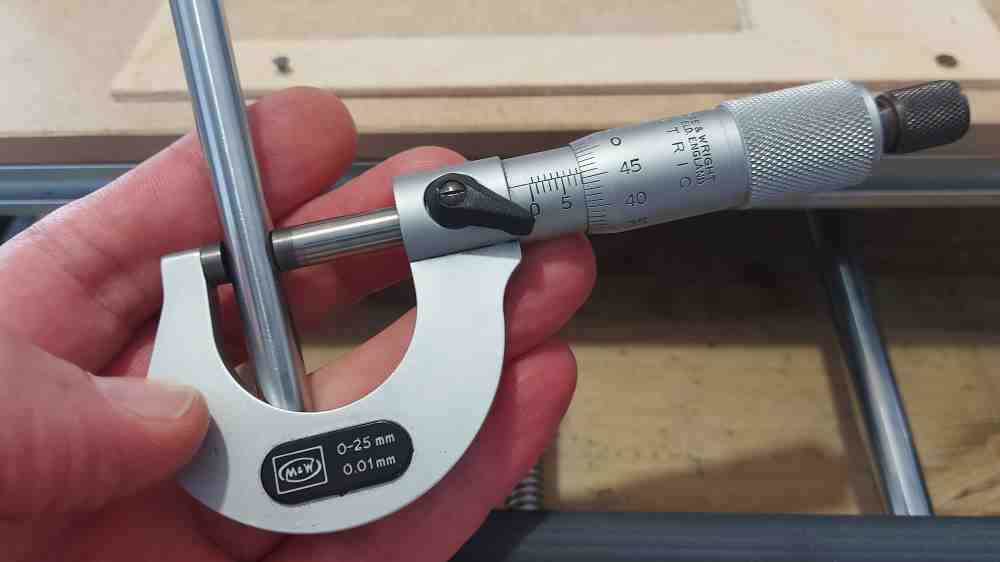
Sadly I'm still trying to improve this cnc. After spending some more time looking at the z-axis issues I made some measurements:
Attachment 40429
The Z-axis rails should be 8mm, previously I made some brass linear bearings to replace the originals that had too much play. I reamed them 8mm and they were better, but still had some play. This play is amplified by the distance from the tool tip to the bearings.
The original rails are 7.96mm
Luckily I had a piece of chrome rail saved from an old inkjet printer that is also 8mm, I measured this with the micrometer and got 7.995mm
After cutting and facing two rails to size I then re-assembled it all and used some longer linear ball races. I have to say this is all much stiffer.
Attachment 40430
Linear bearings need to have the correct rail size to operate without any slack.
My plan is to now run some tests and try to engrave brass and aluminium. That was the challenge originally and the machine failed in style.
ps: if you have a Genmitsu 3018 would be good to know the diameter of the z-axis rails. I wouldn't be surprised a lot have been made with the incorrect material.
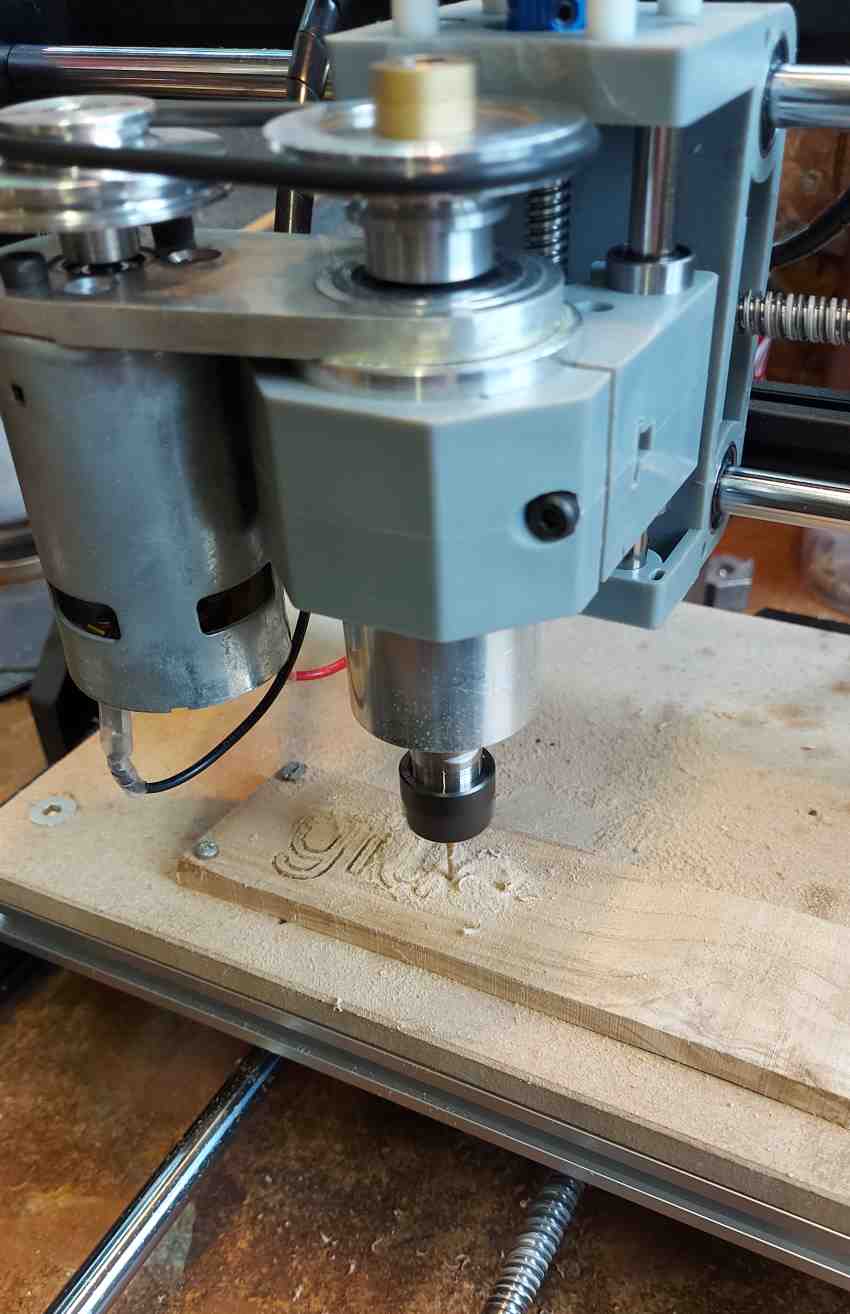
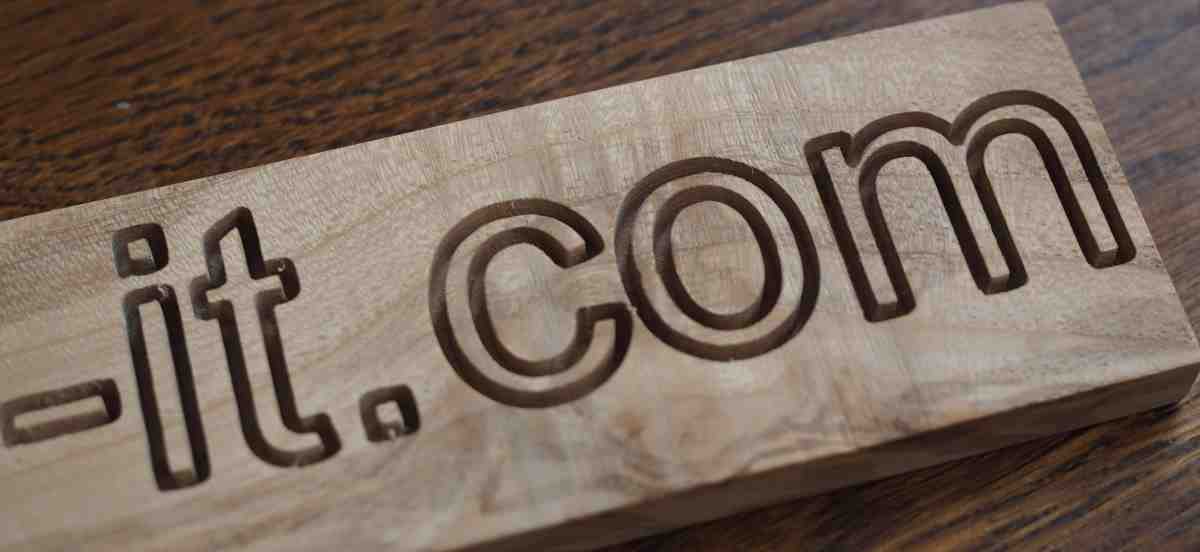
After changing the z-axis rails and increasing the stiffness of the x and y backlash I now have a Genmitsu 3018-pro that can accurately engrave hardwood.
Attachment 40448
OK, quite a few upgrades. But the lettering is 22mm high and 4mm deep, using a 1.3mm diameter end mill/burr.
Attachment 40449
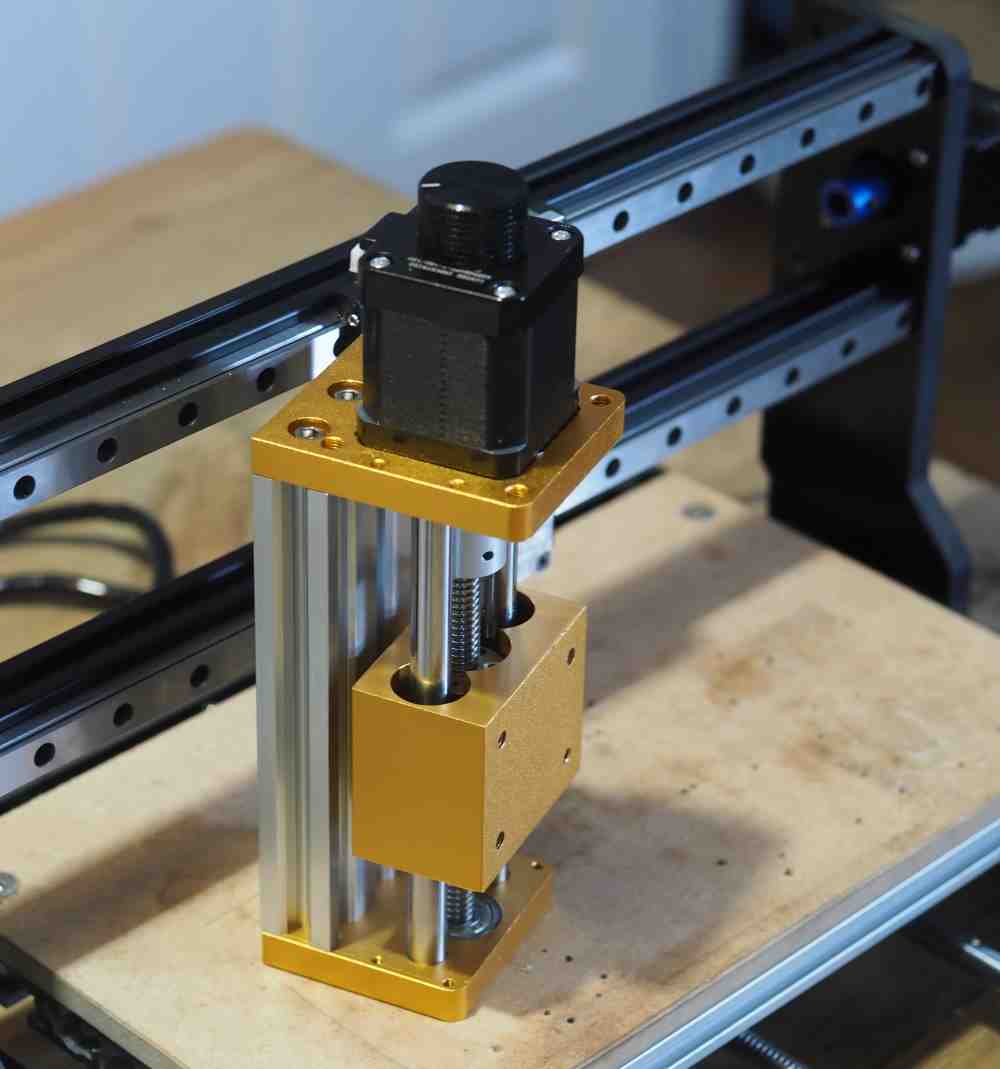
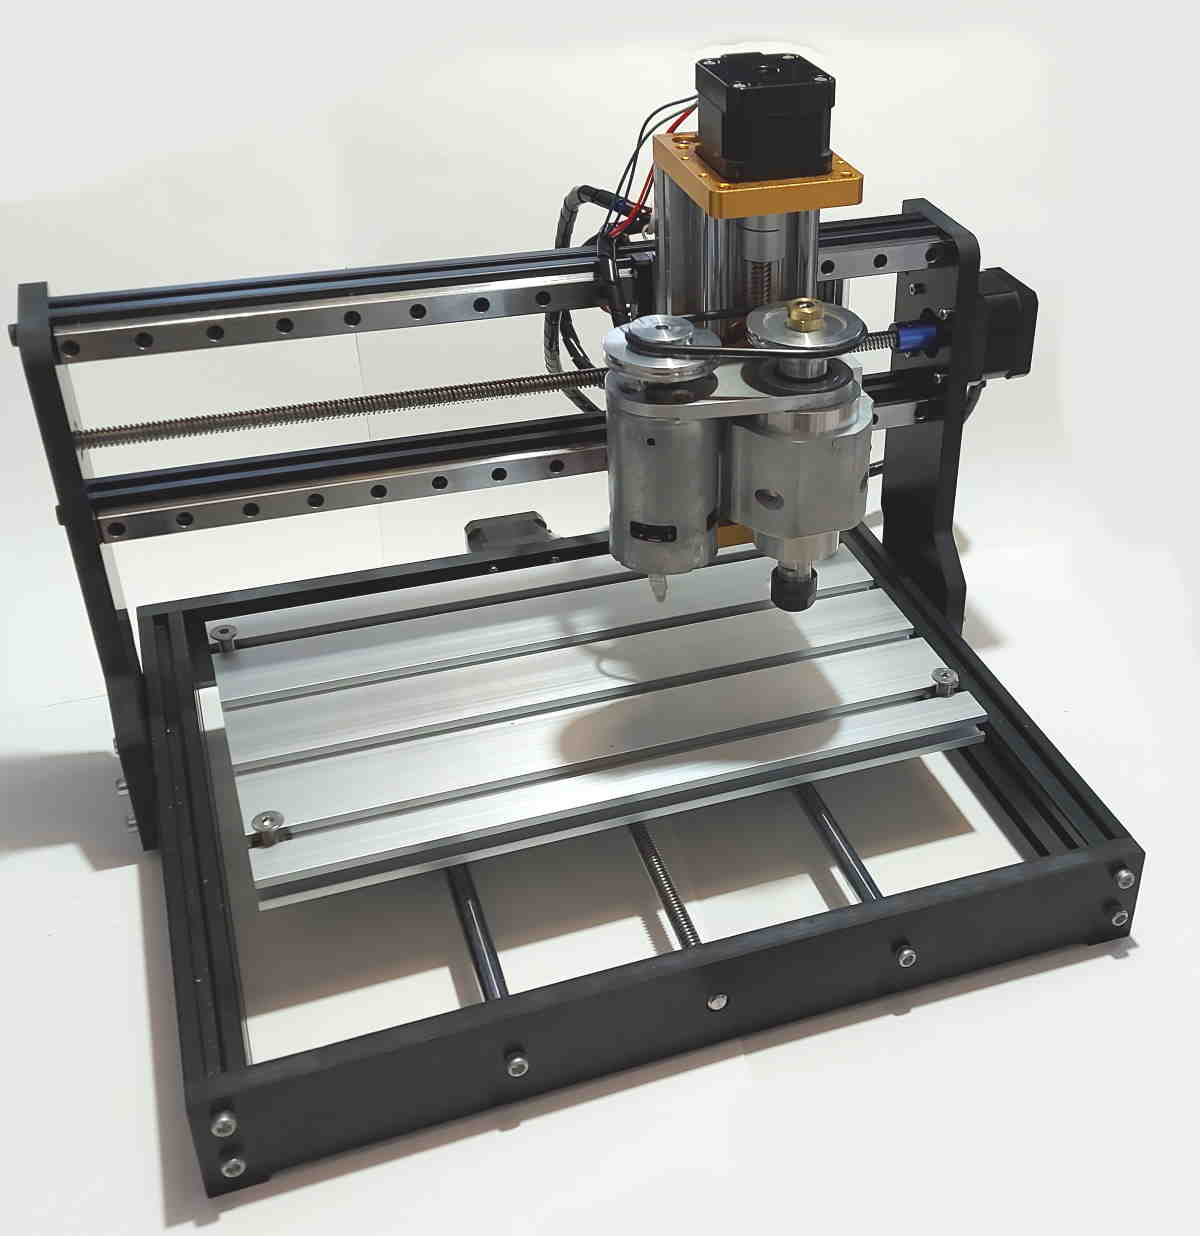
I looked at the new Genmitsu 3020-pro Max and thought that a lot of the upgrades were things I was considering. So, I thought I would upgrade the x-axis rails and bolt them to the much more substantial beams on the 3018. I looked at the z-axis and was going to upgrade it. Then I saw a Tiamu (who are they, no idea) Z-axis and as it looked perfect I bought one.
So, here it is arranged together: Genmitsu 3018-pro, new x-axis rails and new Tiamu z-axis.......however, I need to work out a few fixings and a spindle mount.
Attachment 40683
Finally made all of the parts to assemble my version of a Genmitsu 3020-pro max - well a 3018 to 3020 upgrade
Attachment 40729
I actually think the spindle I made with a belt drive is better that the 3020 based on the fact that it has proper bearings at each end of a decent ER spindle. Thus making it rigid and run more accurately.
Attachment 40730
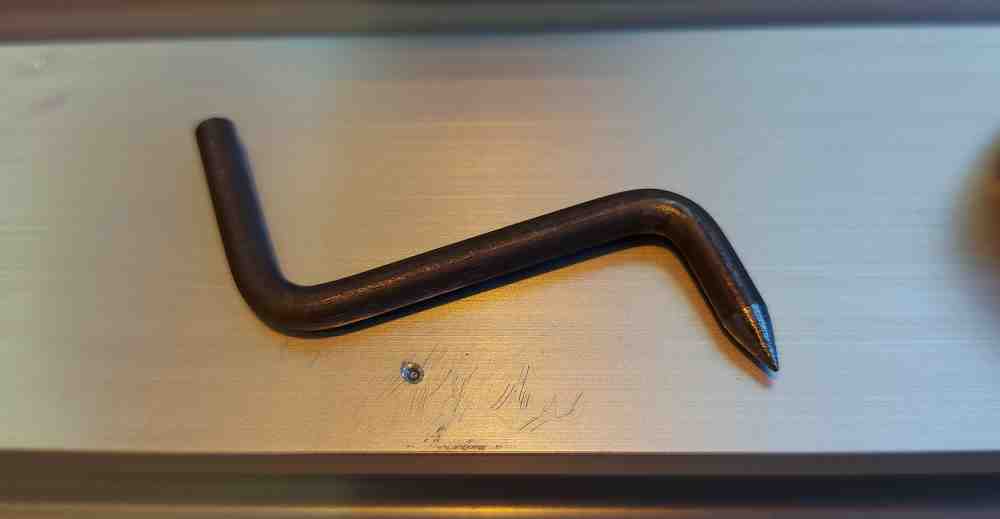
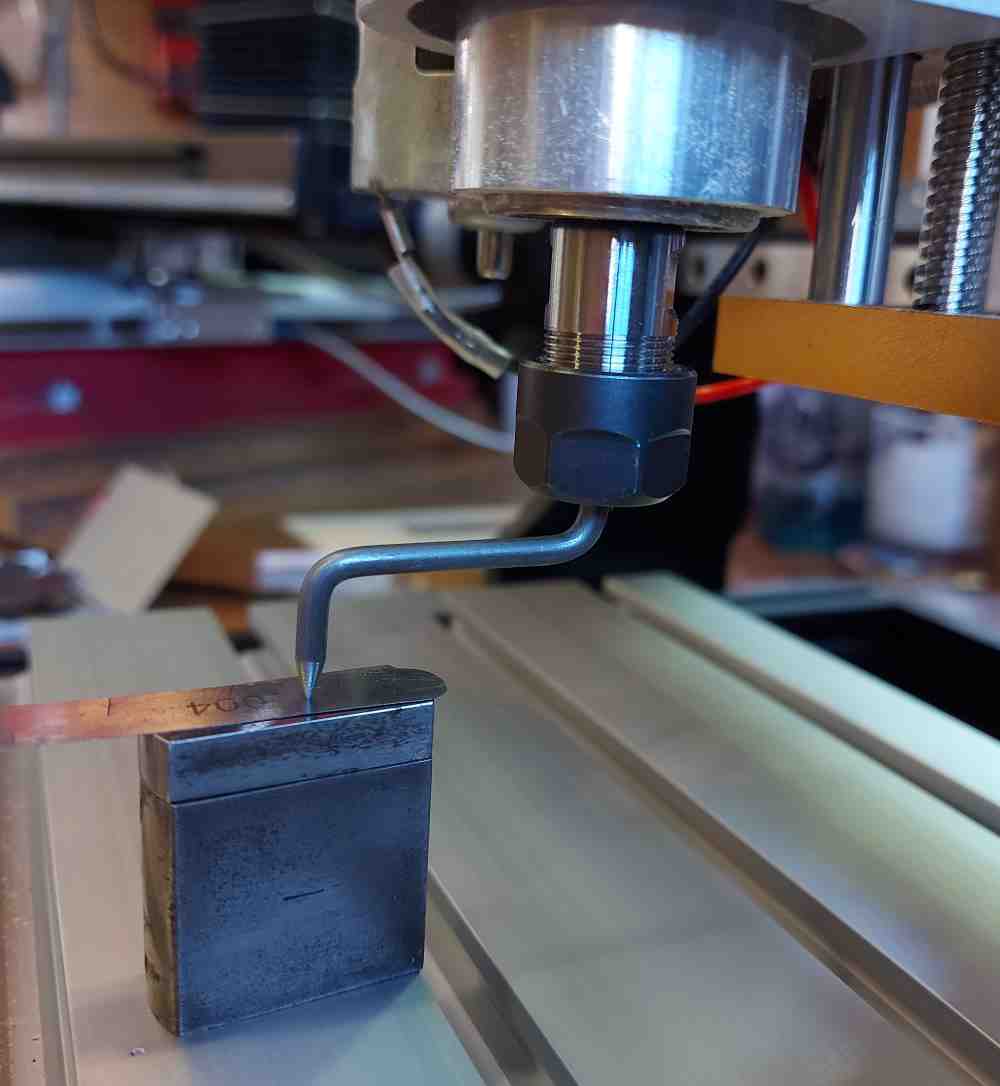
After all these modifications I needed to square up the head on this tiny cnc. I couldn't use a DTi as it was just too big to fit. So I resorted back to the old fashioned method of using a dog-leg pointer and some feeler gauges.
Attachment 40736
The point was machined onto the bar before I then bent it to shape. The shape doesn't have to be perfect. It's made from 1/8" mild steel.
The length of the leg is around 1.25" and so the total span side to side is 2.5" - that combined with a 1 thou feeler gauge gets the head very square.
Attachment 40737
Just then rotate front to back and get the heights exactly the same, then do left to right.
You could use this method to square up the head on a milling machine or pillar drill.
Tried tested and true!