Turning die grinder to dremel like multitool. - Part 1 -
Making routing / shaping platform.
Preview:
https://youtu.be/hqy0BBseOic
Actual making:
https://youtu.be/Qu6pr7cM4zo
This Part also works as a base, for other attachments on the Part 2.
Printable View
Turning die grinder to dremel like multitool. - Part 1 -
Making routing / shaping platform.
Preview:
https://youtu.be/hqy0BBseOic
Actual making:
https://youtu.be/Qu6pr7cM4zo
This Part also works as a base, for other attachments on the Part 2.
Name of the tool in English is a router. Watching you grind steel is nothing short of amazing! A real artist.
Thanks.Quote:
Originally Posted by NortonDommi
It has a drill chuck that allows to use bits with 2-8mm shank. And variable speed 2000- 14.000 rpm, that allows to use grinding, filing, sanding bits too.
It can be used as a router, but its not just a router attachment. More like, shaping & routing platform / attachment?
This was a Part 1. Kind of making the "base".
Wip with the part two.
Attachment 36892
Just some finishing ( choosed to polish it ),
And part 2 is done.
Attachment 36896
Video comes later.
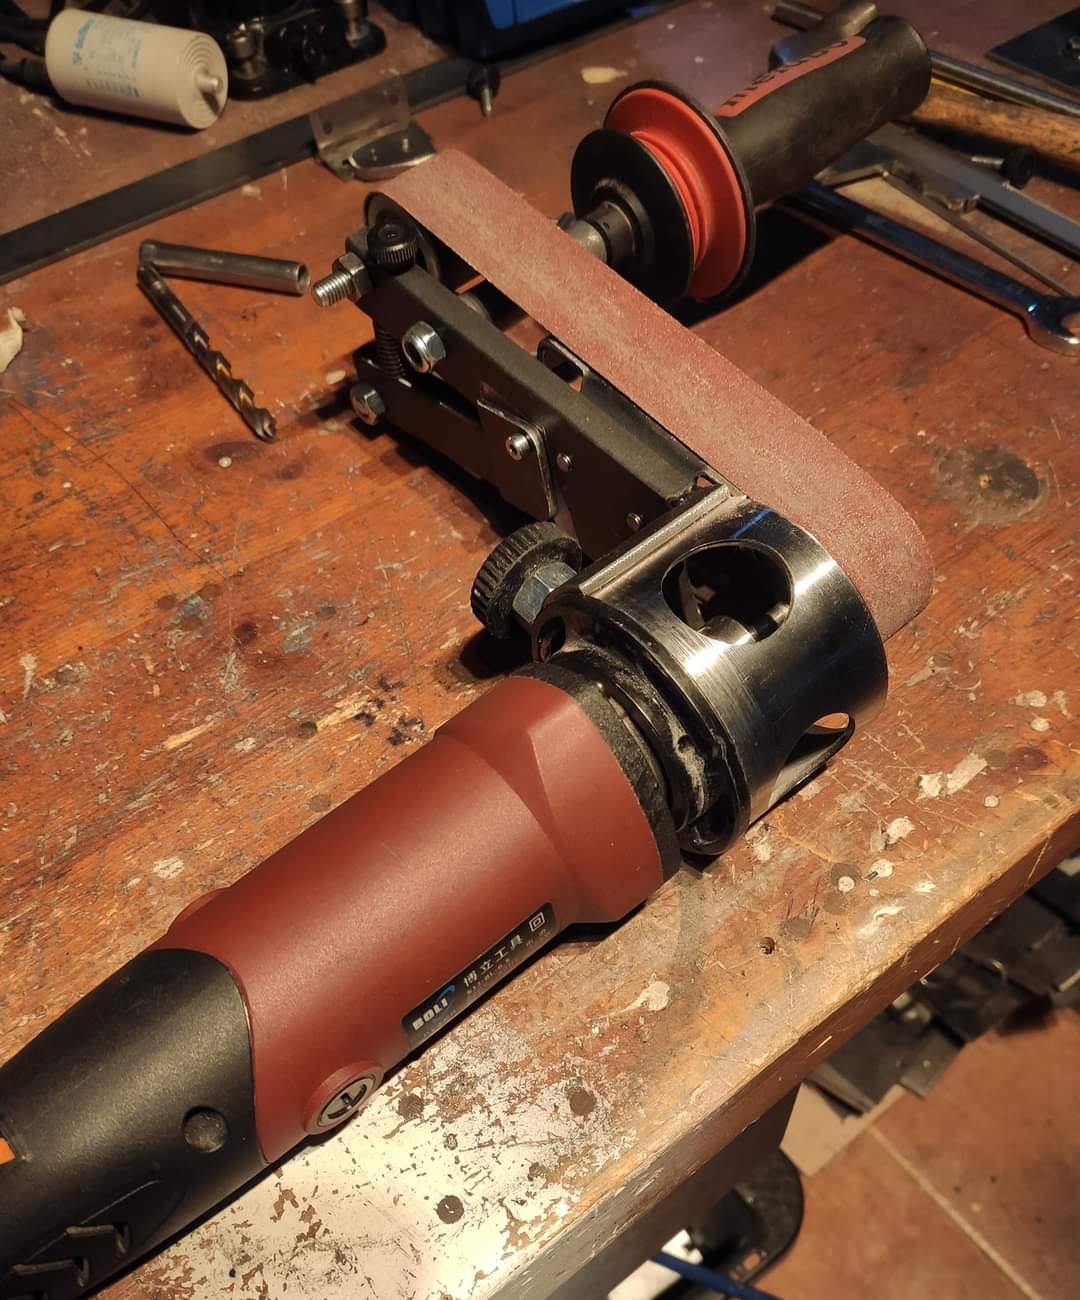
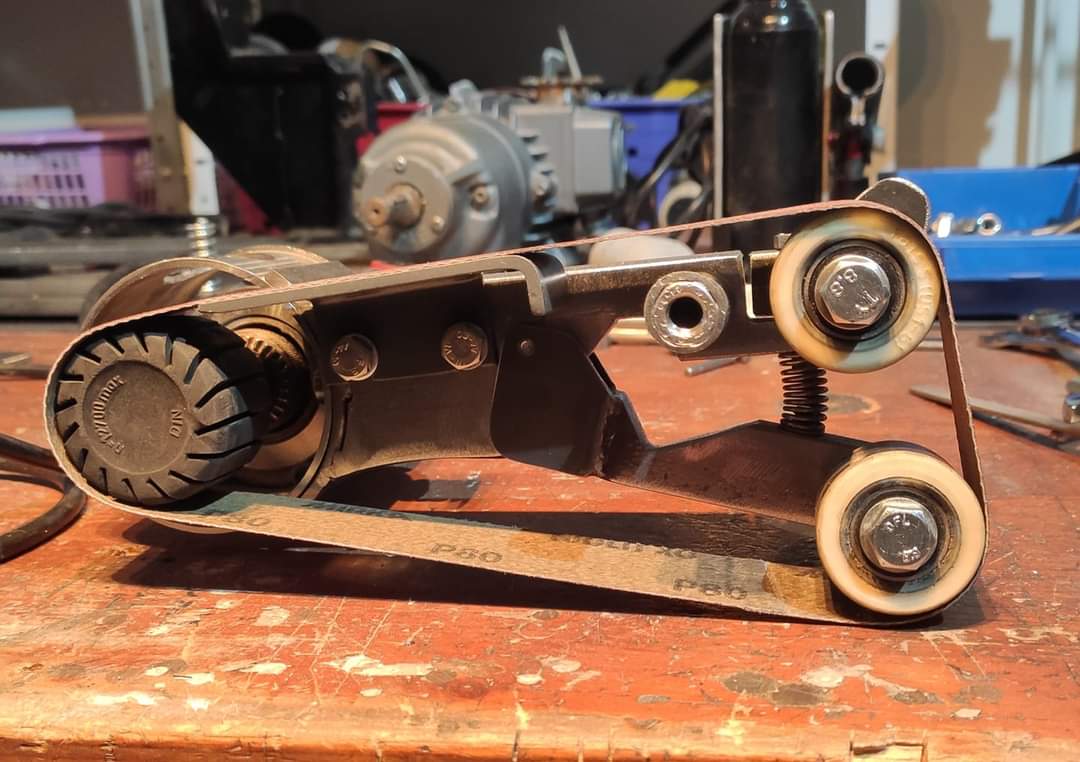
Finished belt sander attachment.
Attachment 36932
Preview:
https://youtu.be/NRLW5jcq23c
Video about making the part 2: Belt sander attachment
https://youtu.be/1_DC3-UFmeI
This build is now ready.
<!-- BEGIN /var/www/html/homemadetools/protected/modules/zeus/views/tool/postUpdate.php -->
Thanks Tuomas! We've added your Router Sander and Linisher Attachment to our Metalworking category,
as well as to your builder page: Tuomas's Homemade Tools. Your receipt:
<div id="blocks"> <div class="block b1 pngfix"> <div class="bimg"> <div> <a href="https://www.homemadetools.net/homemade-router-sander-and-linisher-attachment"> <img src="/uploads/236231/homemade-router-sander-and-linisher-attachment.jpeg"/> </a> </div> </div> <div class="head pngfix"></div> <div class="left pngfix"></div> <div class="right pngfix"></div> <div class="blockover b1 pngfix"> <div class="title"> <a href="https://www.homemadetools.net/homemade-router-sander-and-linisher-attachment">Router Sander and Linisher Attachment</a> <span> by <a href="https://www.homemadetools.net/builder/Tuomas">Tuomas</a></span> </div> <div class="tags">tags: <a href='https://www.homemadetools.net/tag/belt-sander'>belt sander</a>, <a href='https://www.homemadetools.net/tag/linisher'>linisher</a> </div> </div> </div> </div>
<!-- END /var/www/html/homemadetools/protected/modules/zeus/views/tool/postUpdate.php -->
You turn a palm router into a very versatile tool. Pretty amazing work!
Thanks.
But, like mentioned. Its actually a die grinder:
https://tinyurl.com/yynhlery
These are palm routers, or in Finland "edge routers": https://tinyurl.com/y2te572d
Part 1 is about turning die grinder to palm router kind of tool.
Part 2 uses casing made in Part 1 as an connection piece and Chuck guard.
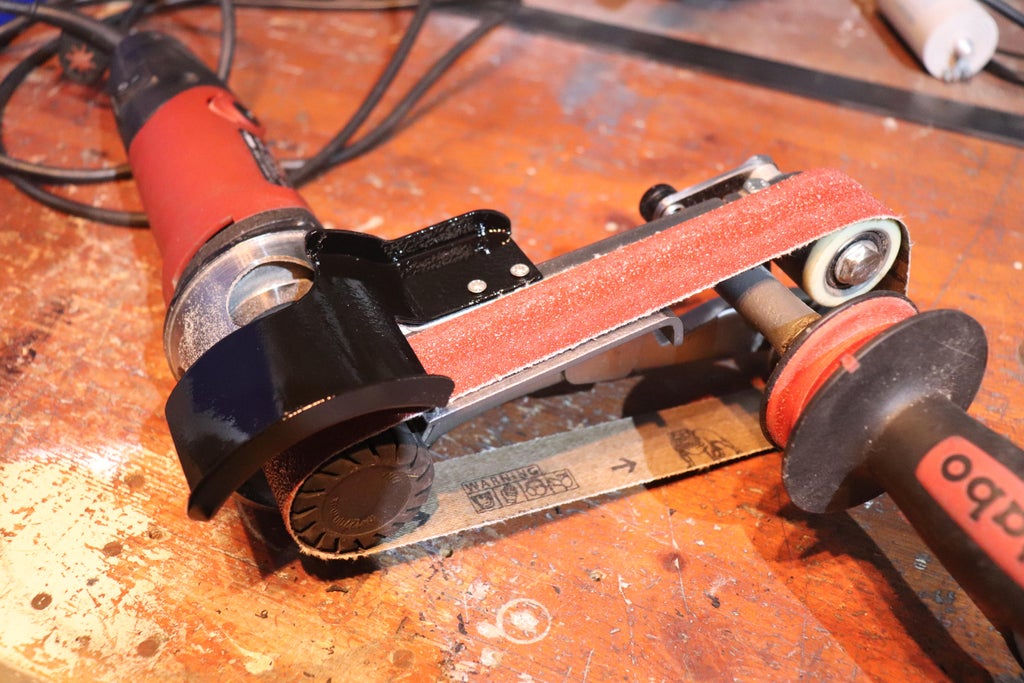
Made a belt guard too.
Its fastened to the belt sander body with two m3 screws.
Attachment 36962
Attachment 36963
More detailed info about making: https://www.instructables.com/Die-Grinder-to-Multitool/
<!-- BEGIN /var/www/html/homemadetools/protected/modules/zeus/views/tool/postUpdate.php -->
Thanks Tuomas! We've added your Belt Grinder Guard to our Safety category,
as well as to your builder page: Tuomas's Homemade Tools. Your receipt:
<div id="blocks"> <div class="block b1 pngfix"> <div class="bimg"> <div> <a href="https://www.homemadetools.net/homemade-belt-grinder-guard"> <img src="/uploads/237053/homemade-belt-grinder-guard.jpeg"/> </a> </div> </div> <div class="head pngfix"></div> <div class="left pngfix"></div> <div class="right pngfix"></div> <div class="blockover b1 pngfix"> <div class="title"> <a href="https://www.homemadetools.net/homemade-belt-grinder-guard">Belt Grinder Guard</a> <span> by <a href="https://www.homemadetools.net/builder/Tuomas">Tuomas</a></span> </div> <div class="tags">tags: <a href='https://www.homemadetools.net/tag/belt-grinder'>belt grinder</a>, <a href='https://www.homemadetools.net/tag/guard'>guard</a> </div> </div> </div> </div>
<!-- END /var/www/html/homemadetools/protected/modules/zeus/views/tool/postUpdate.php -->
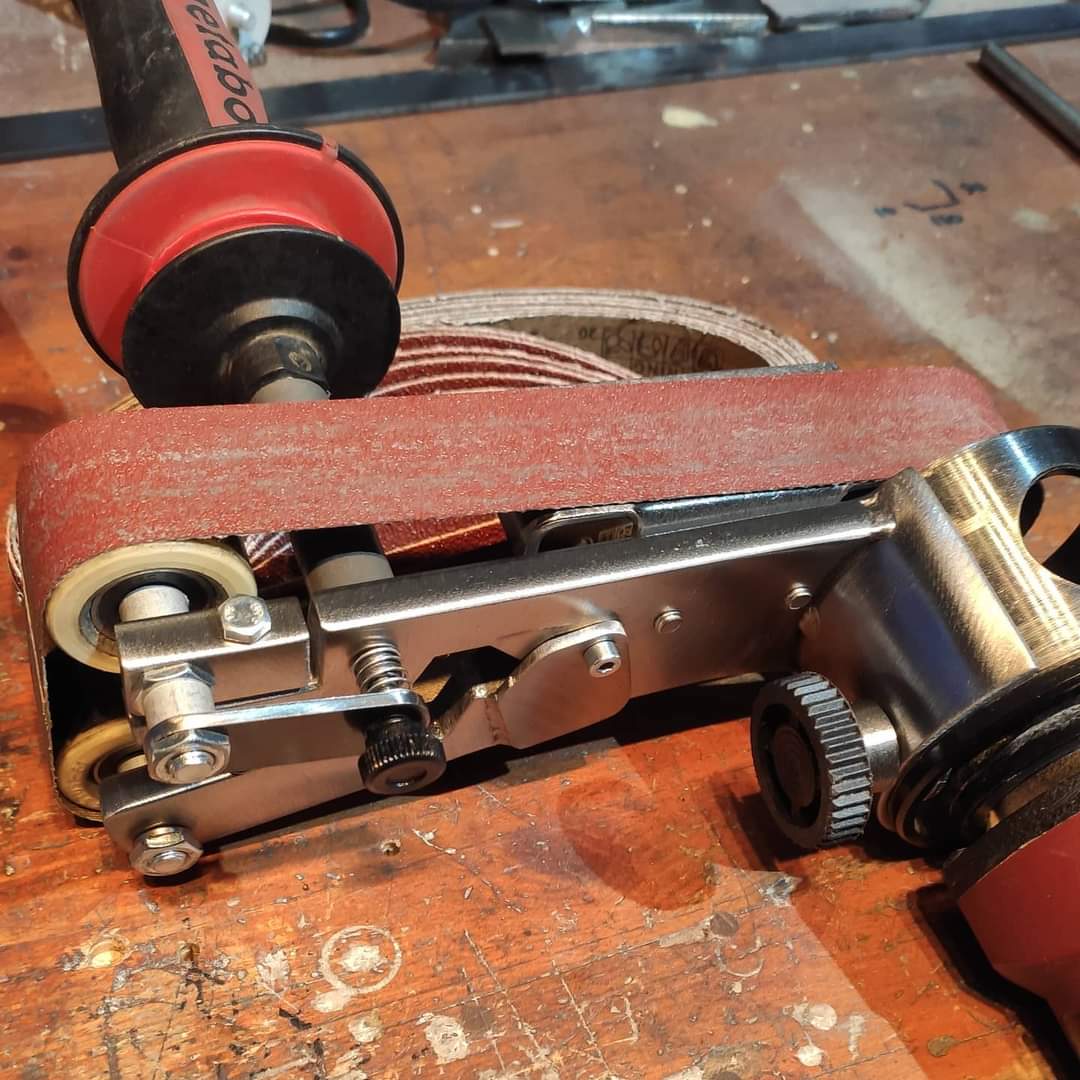
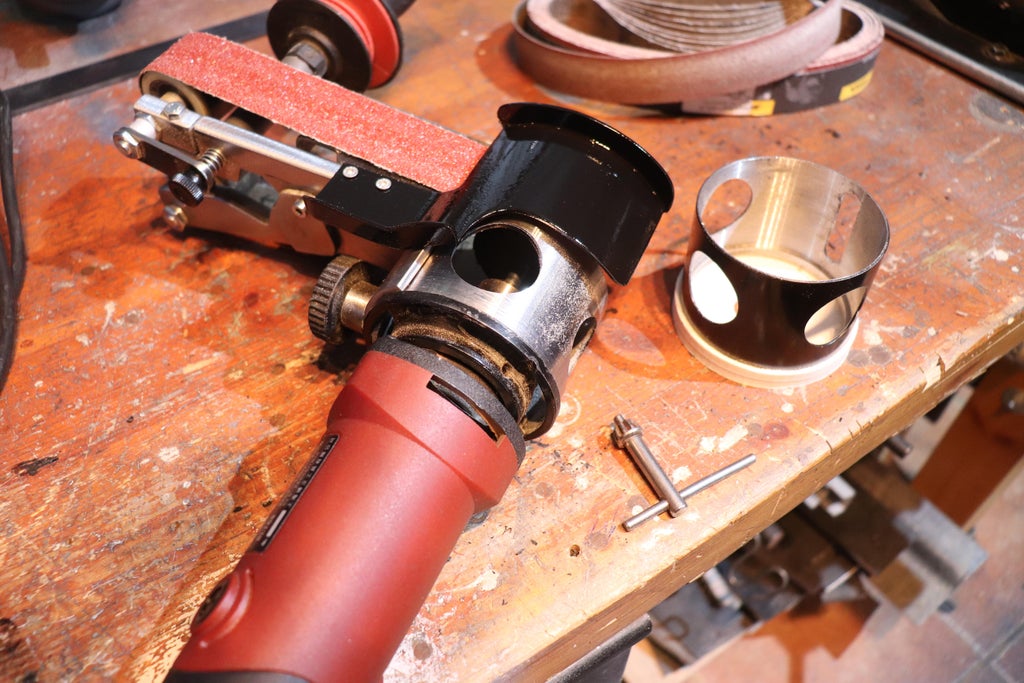
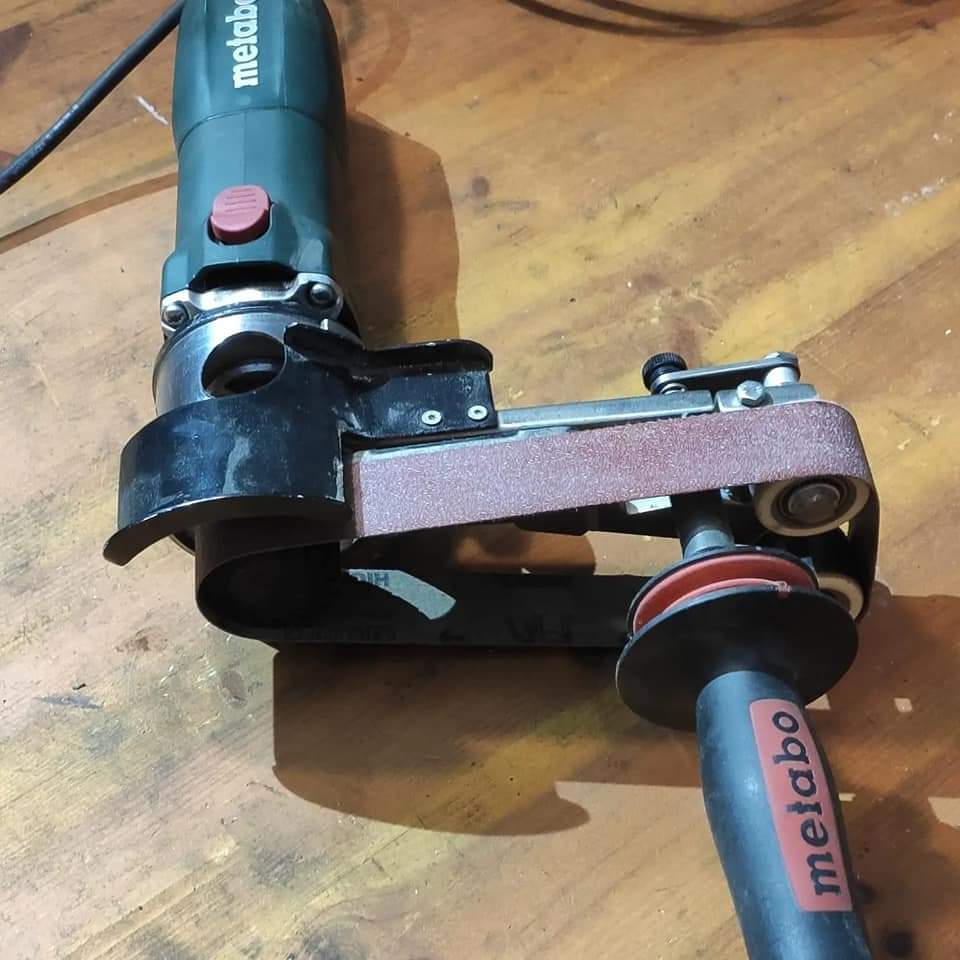
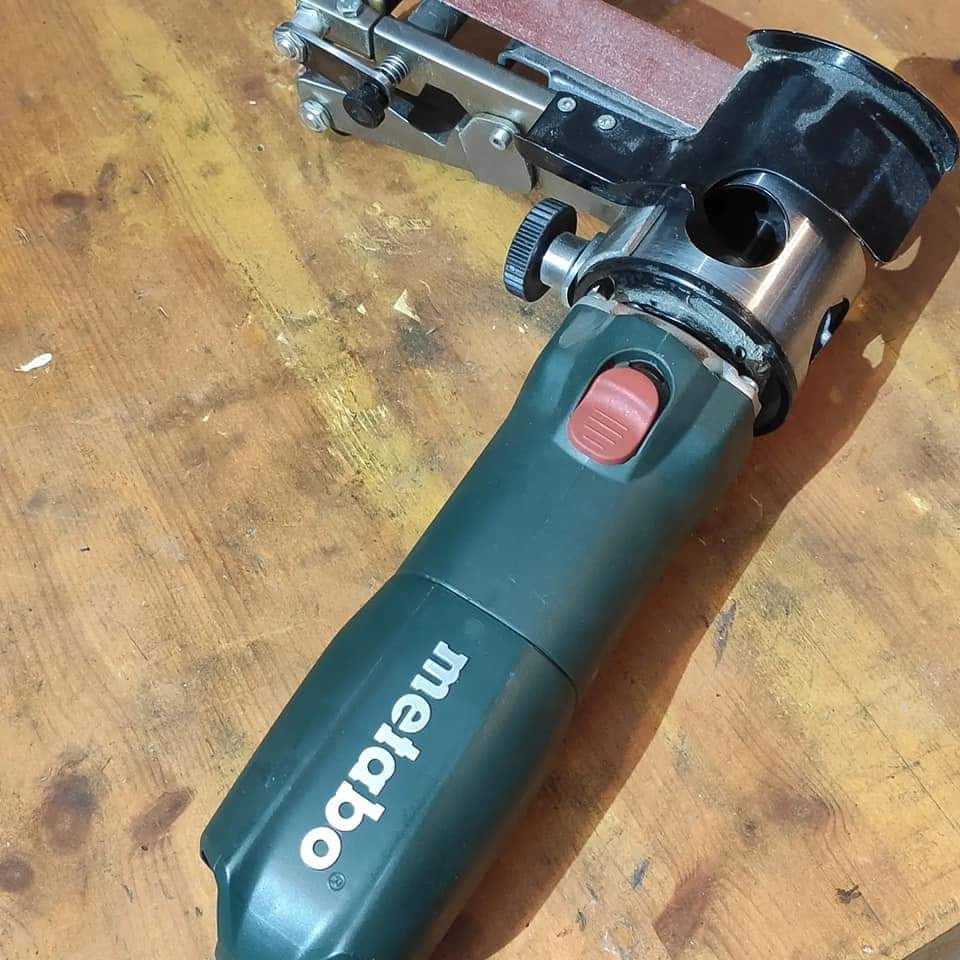
Modified it to fit 710w Metabo. More power makes it more useful.
Attachment 40924
Attachment 40925
Short clip about use: https://www.instagram.com/p/CU72VRuj...dium=copy_link
A very simple yet ingenious at the same time. It looks like it is reasonably easy to assemble. Thanks so much for posting this one.
Yes. Its very easy & fast to assemble. That Metabo has groove in the neck. Locking screw is located to that groove.Quote:
Originally Posted by blkadder
Attachment 40930
It takes less than ten seconds to attach or deattach attachment.