Free 186 More Best Homemade Tools eBook:  
Get 2,000+ tool plans, full site access, and more.

User Tag List

Page 1 of 2 1 2 LastLast
Results 1 to 10 of 19

Thread: Drill-mill fixure for central Dremel mounting

  1. #1
    Supporting Member
    Join Date
    Sep 2018
    Location
    Groningen, NL
    Posts
    44
    Thanks
    318
    Thanked 32 Times in 11 Posts

    Carnel's Tools

    Drill-mill fixure for central Dremel mounting

    I want to mill printed circuits boards (PCB’s). The required small mills demand for a high speed. So a Dremel with 30000 tpm is an adequate tool. The cross table of my drill-mill is very useful when the copper traces are orthogonal or under 45 degrees.
    I don’t have a CNC mill but a simple hand controlled drill-mill.
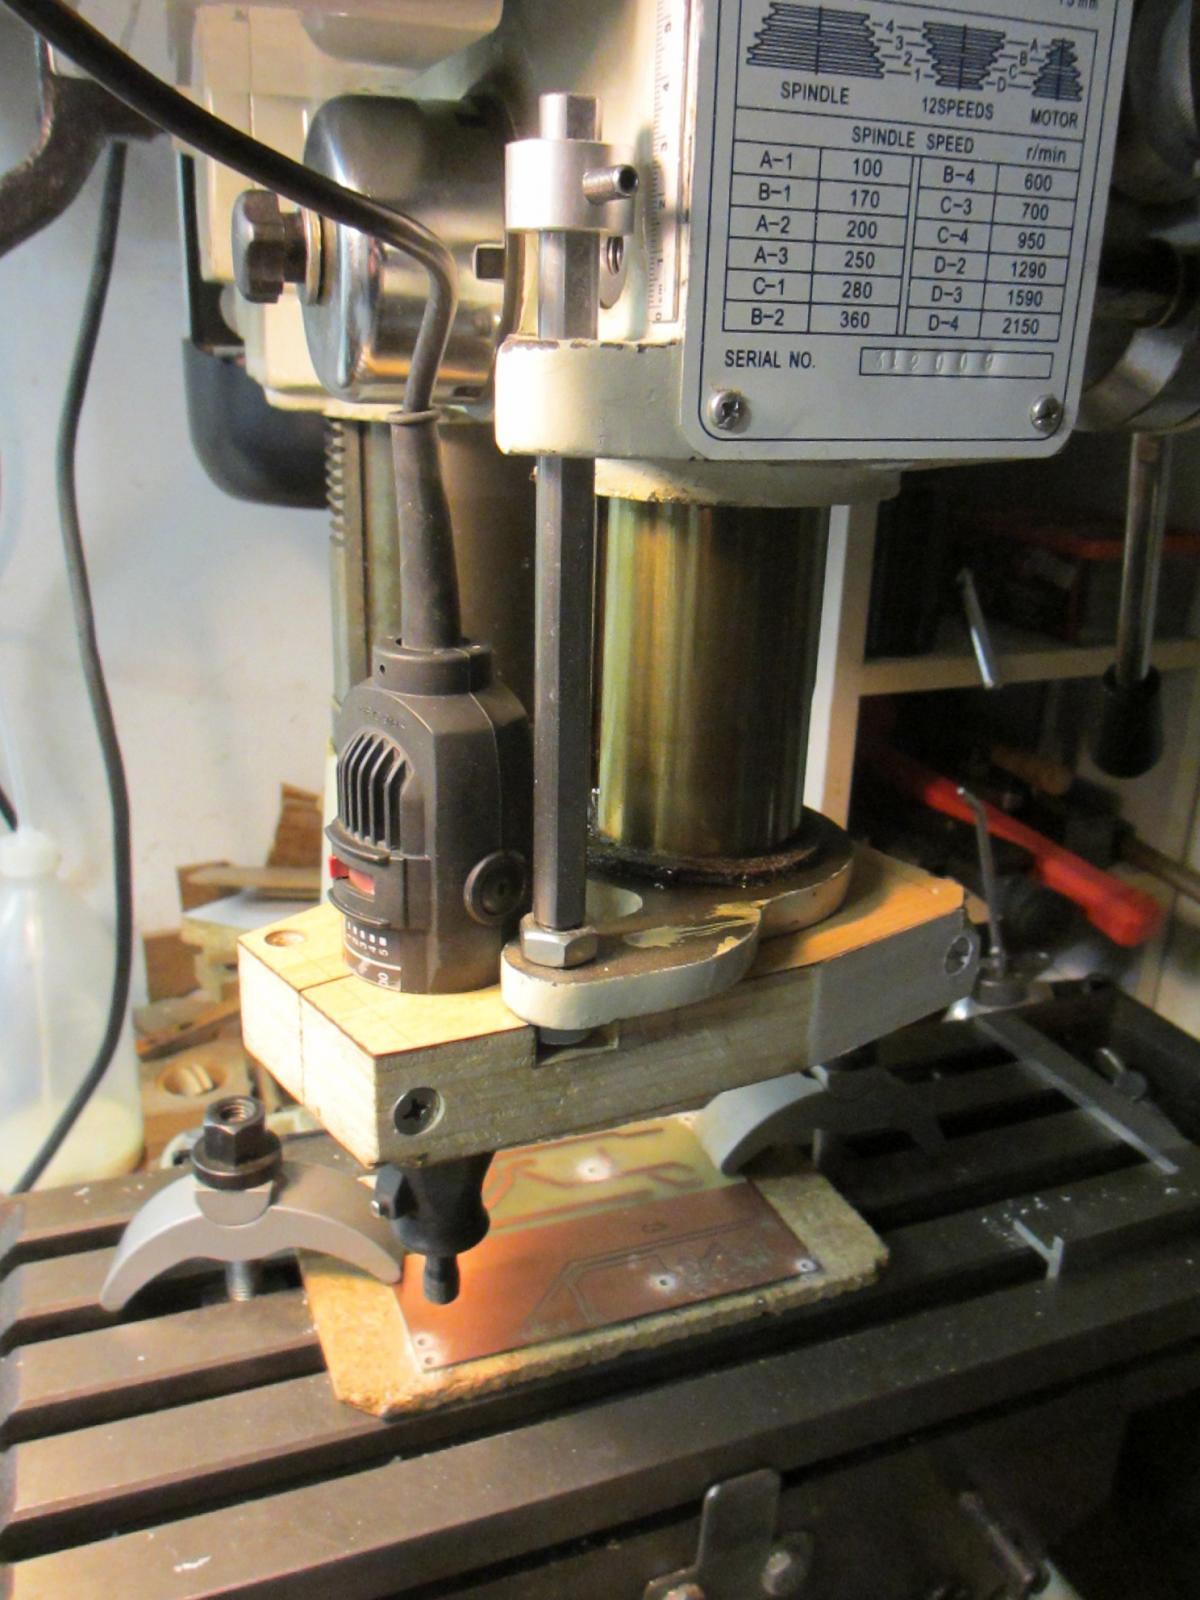
    I started some years ago with a quill clamp which holds the Dremel besides the machine head (picture 1).
    This design has a drawback: the quill has angular play which changes the position of the Dremel wrt the work piece.

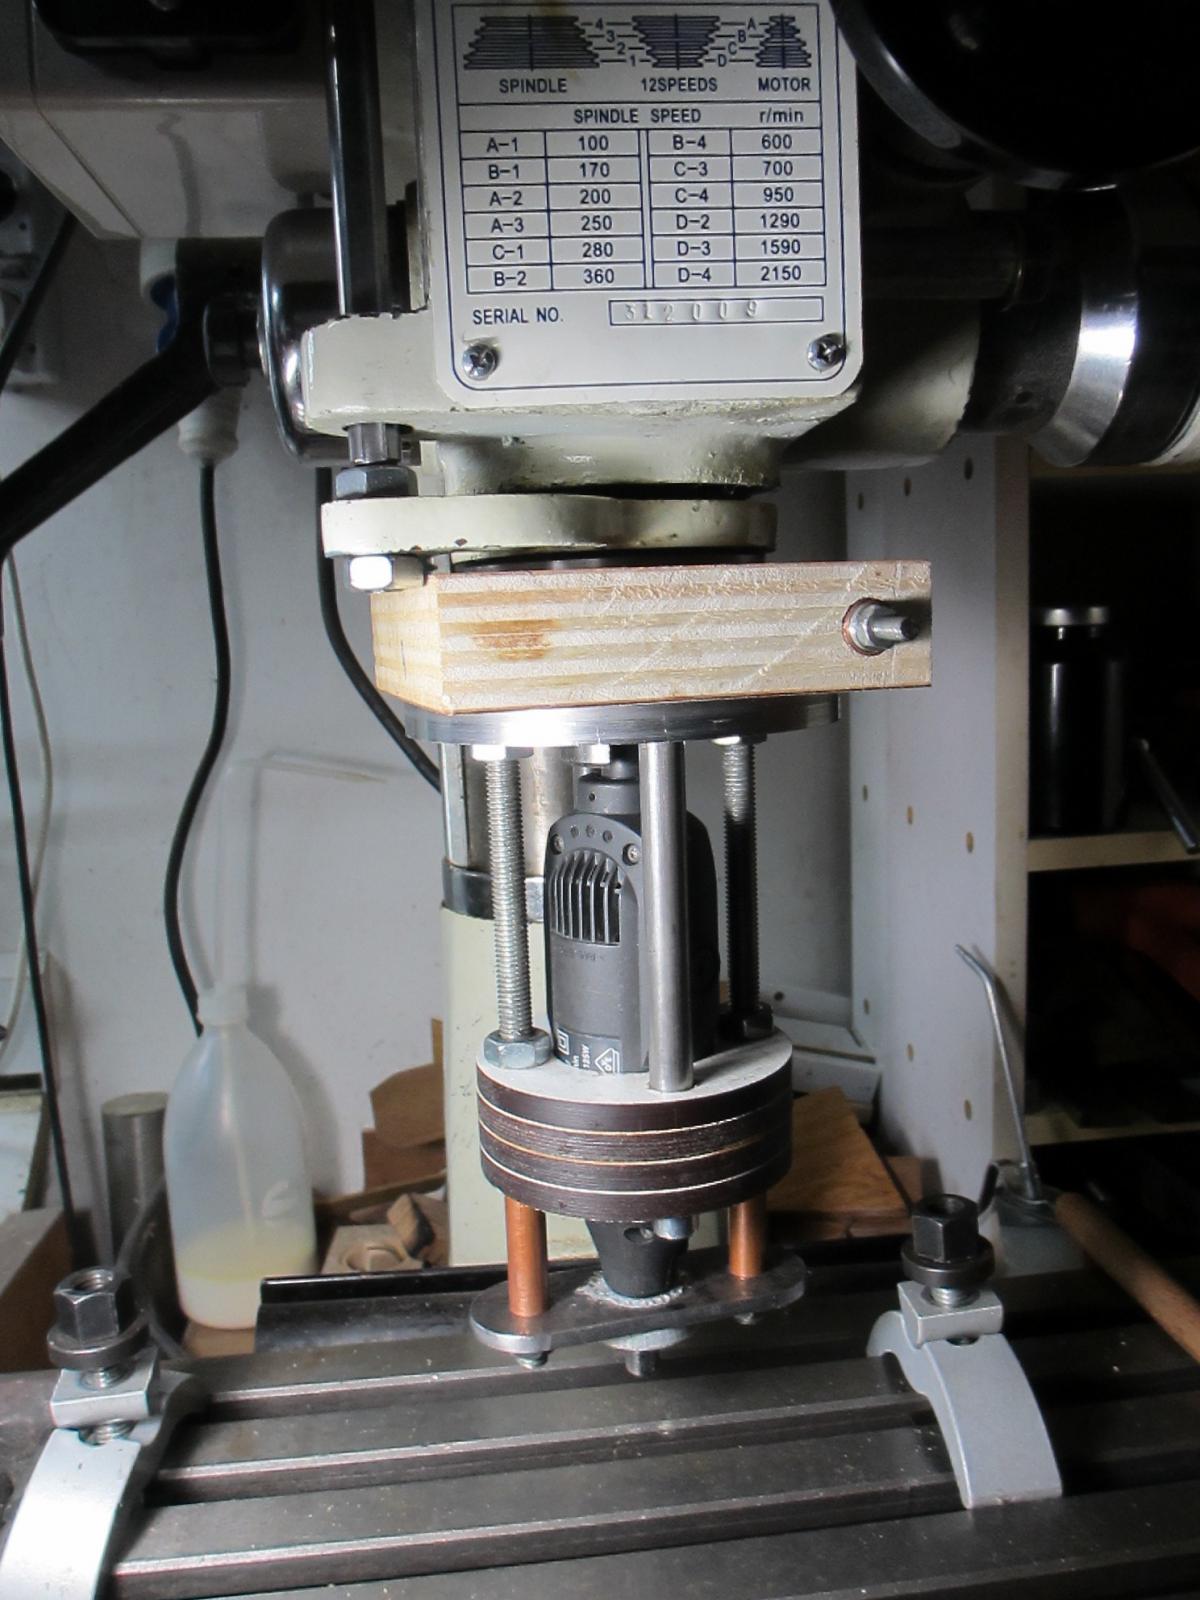
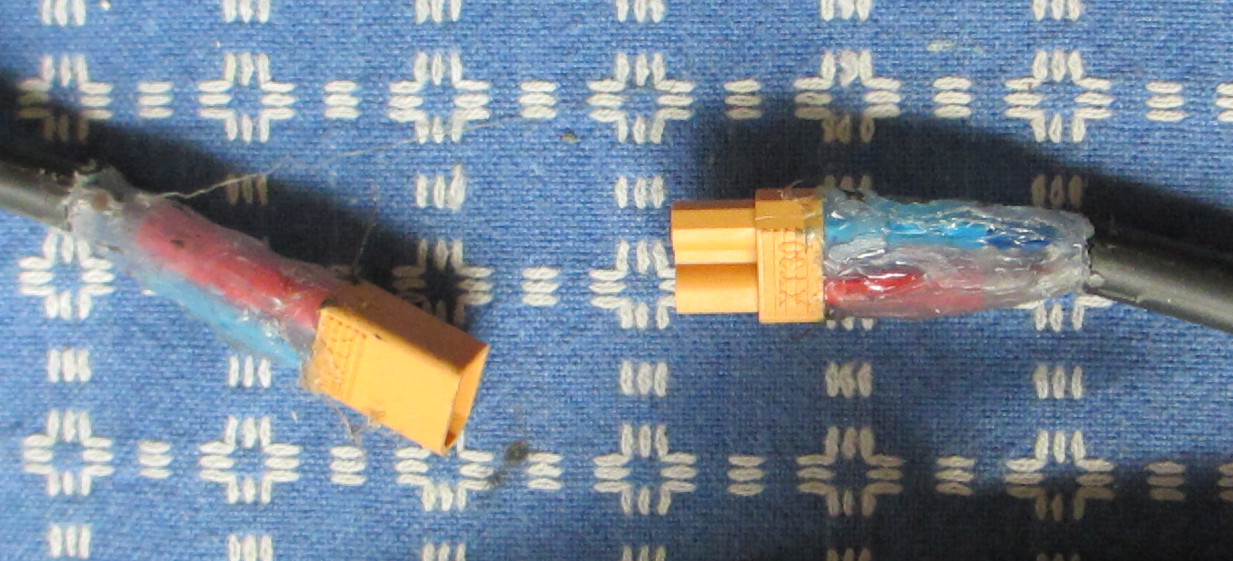
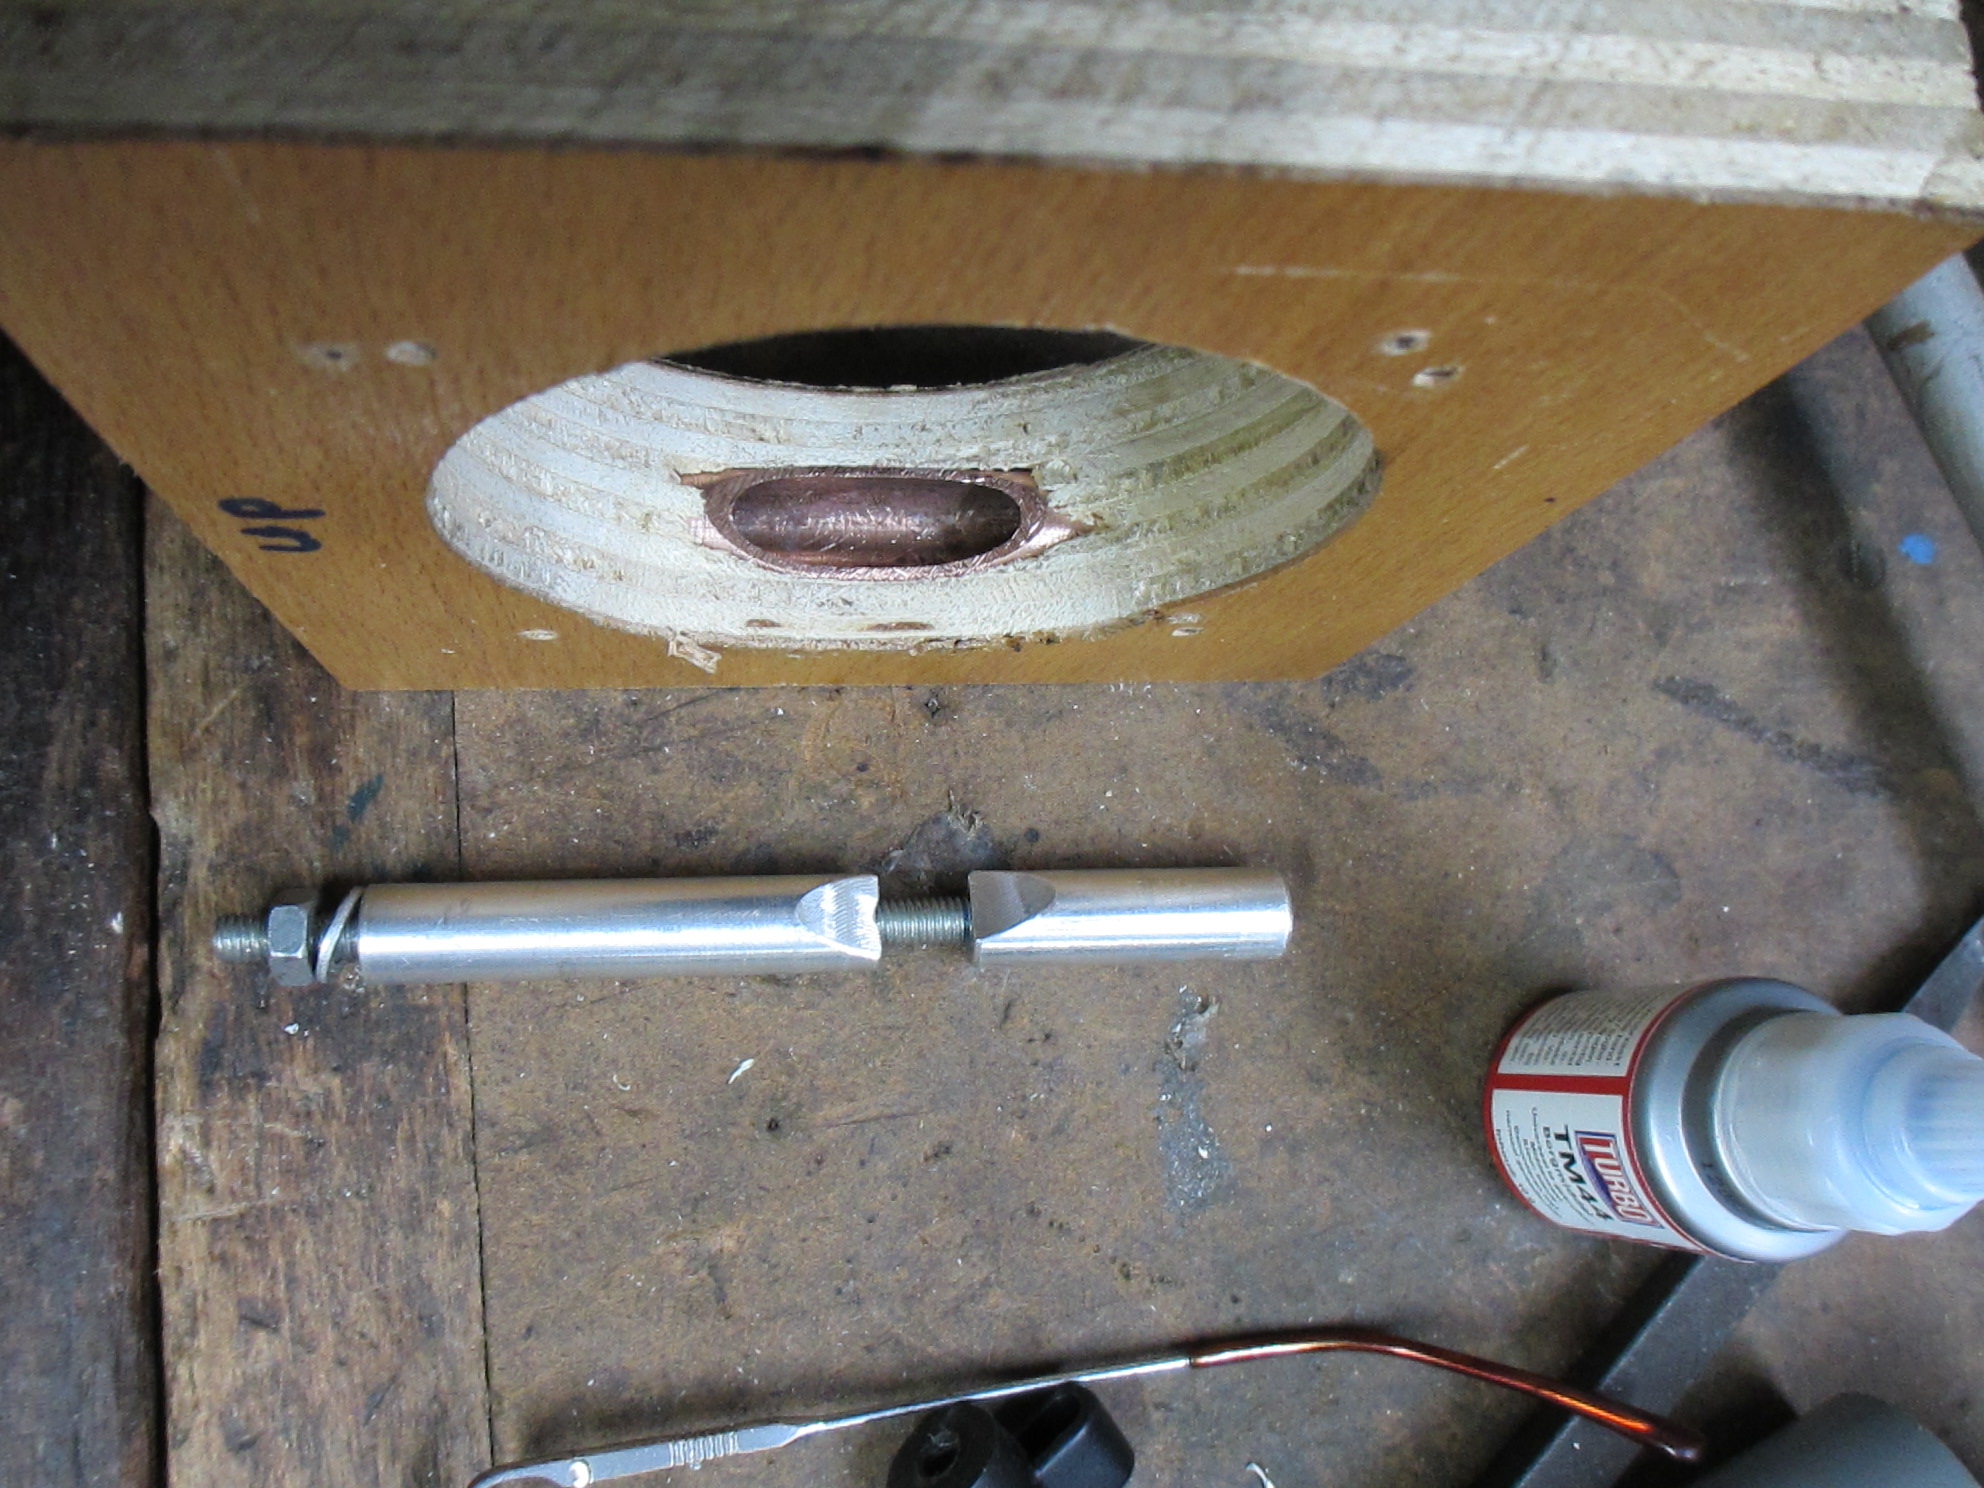
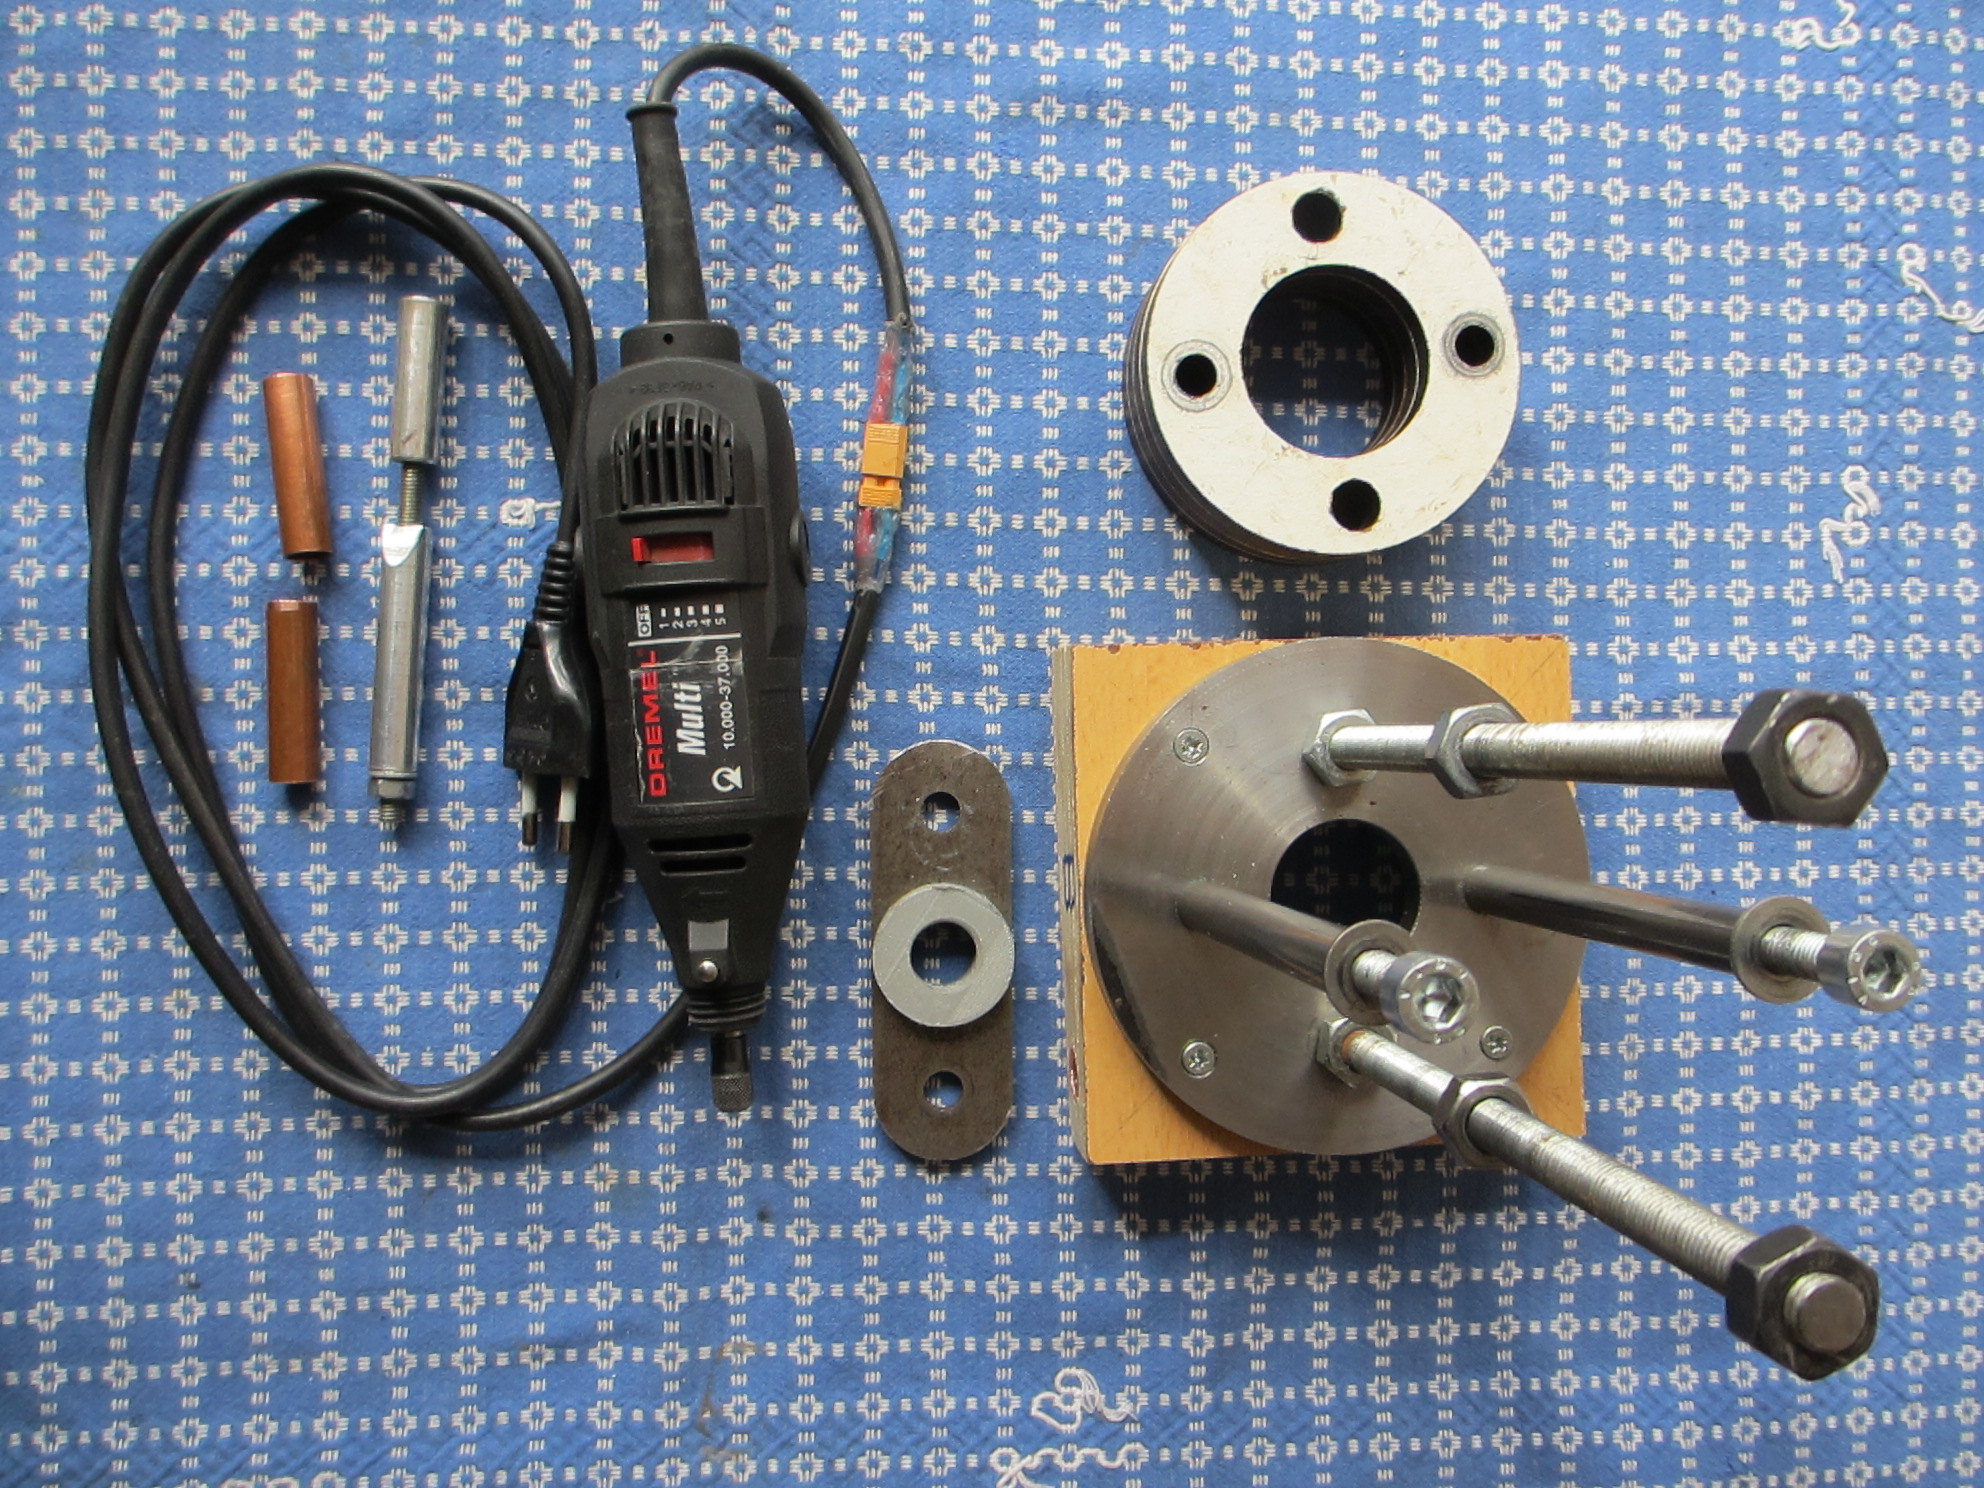
    So I decided to make a Dremel fixture where the Dremel is mounted centrally to the quill (picture 2). To limit the length of the fixture I directed the power cord through the spindle boring. To that end it was necessary the cut the power cord of the Dremel and provide it with a small (11 mm) plug and socket, small enough to allow passage through the boring (picture 3). The soldered connections are isolated with heat shrink and hot glue.
    Drill-mill fixure for central Dremel mounting-img_0797.jpgDrill-mill fixure for central Dremel mounting-img_0851.jpgDrill-mill fixure for central Dremel mounting-img_0858.jpgDrill-mill fixure for central Dremel mounting-img_0844.jpg

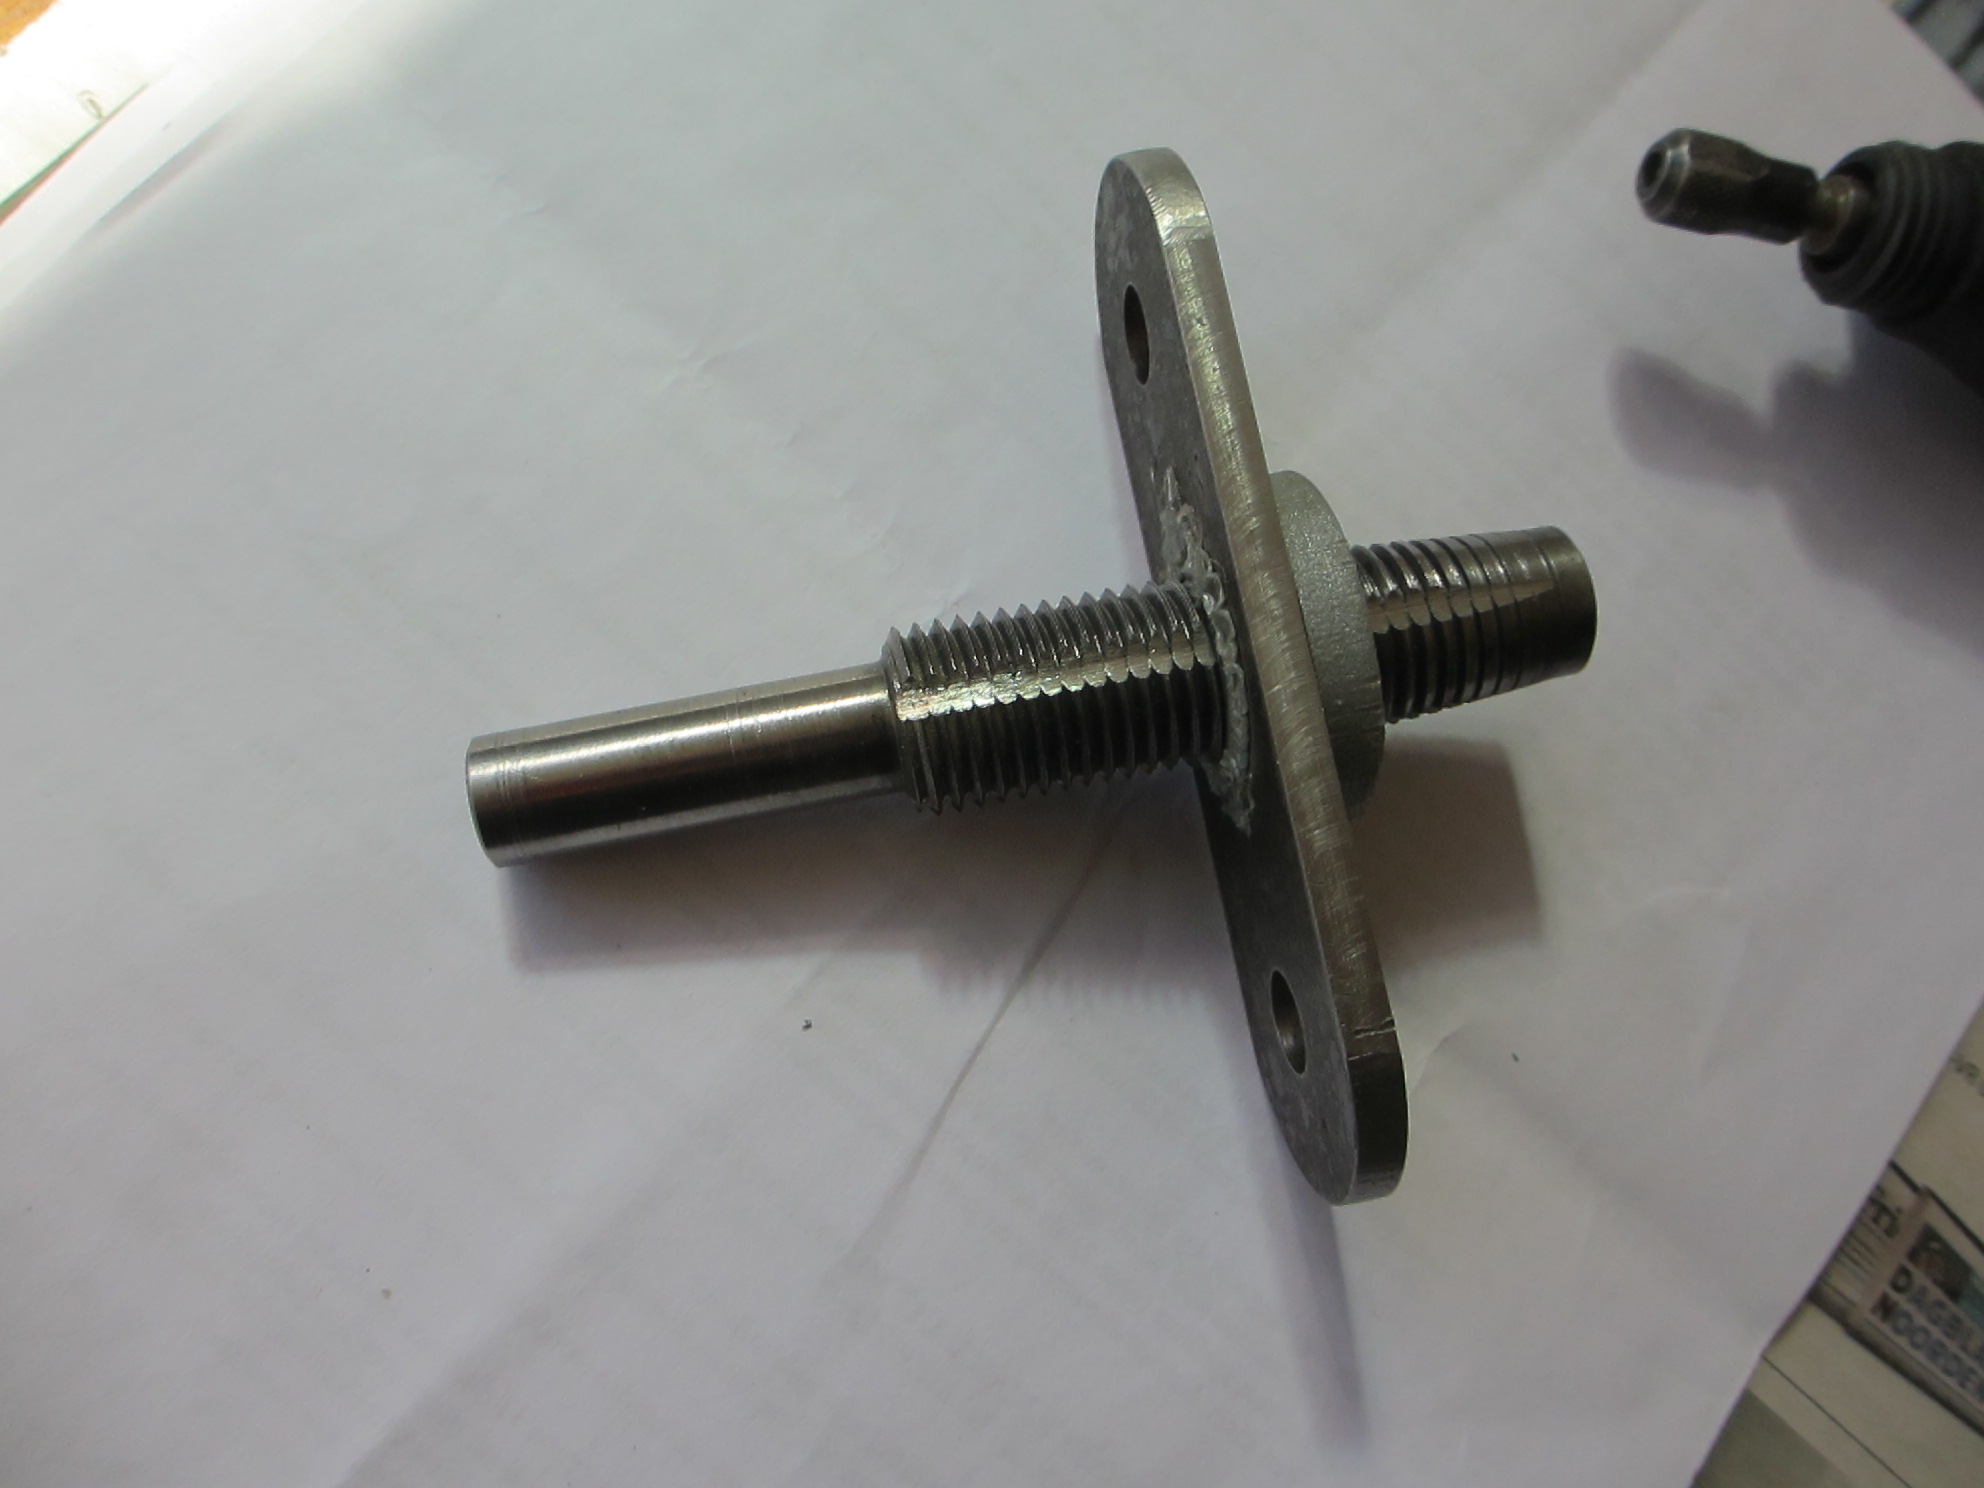
    The Dremel itself was screwed in a PLA nut, 3-D printed by a friend. The nut was pressed and hot fixed in a steel strip (picture 4). 3-D printing screw thread seems to be difficult for, in different trials, the threads where always to small. So I made a tap for this non standard thread (¾”, 12 tpi, 60 degrees) and widened the thread. (Alternatively an alu nut can be made with the same tap.)

    The Dremel is supported by an enclosure made from 4 stacked layers of 8 mm compact laminate sheet (see pictures 2 and 6). It ensures a stiff mounting without side movement.

    For clamping the fixture to the quill I used 32 mm plywood (pictures 2 and 5). Perhaps it is not the best material, but it was the only material of sufficient thickness I had in stock from a discarded kitchen top. The hole encloses the quill’s collar narrowly and is fixed by a pair of alumin(i)um cotter pins (British naming) (picture 5). The hole in the clamp for the cotter pins is provided by a copper tube in order to let the pins slide easily.
    Drill-mill fixure for central Dremel mounting-img_0850.jpgDrill-mill fixure for central Dremel mounting-img_0859.jpg
    My Dremel is an old model. I noticed some radial play in the Dremels spindle. Dismantling showed that it was not the bearing itself but the bearing house. I filled it with small pieces of 0.1 mm milar sheet. Now the spindle is without any play.

    This design is giving a very stiff mounting thanks to the 4 vertical studs. The shorter two are made from 12 mm round rod, the longer ones are 10 mm threaded rod.

    186 More Best Homemade Tools eBook

  2. The Following 12 Users Say Thank You to Carnel For This Useful Post:

    davesrepair (Dec 5, 2023), FEM2008 (May 5, 2020), gms002a (May 5, 2020), Jon (May 7, 2020), kboy0076 (Dec 14, 2022), Kevic (May 5, 2020), old_toolmaker (May 31, 2020), Paul Jones (May 19, 2020), thehomeengineer (May 5, 2020), Toolmaker51 (May 6, 2020), Tule (May 4, 2020), winmac (Sep 8, 2022)

  3. #2
    Content Editor
    Supporting Member
    DIYer's Avatar
    Join Date
    Aug 2013
    Posts
    3,056
    Thanks
    772
    Thanked 1,850 Times in 1,652 Posts


    Thanks Carnel! We've added your Rotary Tool Mounting Fixture to our Rotary Tools category,
    as well as to your builder page: Carnel's Homemade Tools. Your receipt:


    2000 Tool Plans

  4. #3
    Supporting Member thehomeengineer's Avatar
    Join Date
    Nov 2017
    Location
    Berkshire UK
    Posts
    705
    Thanks
    720
    Thanked 2,062 Times in 406 Posts

    thehomeengineer's Tools
    Really like this perfect for small cutters thanks for sharing.
    The Home Engineer

  5. #4
    Supporting Member
    Join Date
    Sep 2018
    Location
    Groningen, NL
    Posts
    44
    Thanks
    318
    Thanked 32 Times in 11 Posts

    Carnel's Tools
    Thank you, Home Engineer, for your interest. Specially for your small models it could be a good alternative. Also useful when your cross table is CNC controlled.

  6. #5
    Supporting Member
    Join Date
    Feb 2015
    Posts
    140
    Thanks
    27
    Thanked 94 Times in 43 Posts

    Manitoba Man's Tools
    My first thought was "That is a serious little unit. I like it." Very creative too.

    Bob
    Manitoba, Canada

  7. The Following User Says Thank You to Manitoba Man For This Useful Post:

    Carnel (May 7, 2020)

  8. #6
    Supporting Member Crusty's Avatar
    Join Date
    May 2019
    Location
    Dry Gulch, Tx
    Posts
    749
    Thanks
    220
    Thanked 845 Times in 324 Posts

    Crusty's Tools
    I needed to do some PCB work so I bought a Proxxon drill stand and a Proxxon XY table.

    Drill-mill fixure for central Dremel mounting-proxxon-01.jpg Name:  Proxxon 02.JPG
Views: 1845
Size:  13.6 KB

    It worked well but I burned up two of the Proxxon motor's electronics in short order, so I'd had enough of lowest cost electronics. I also had a Foredom hand carver with a powerful motor and I decided to adapt it to the Proxxon hardware. The Foredom has 1" diameter handpieces so I bought a unitized rifle scope mount for 1" scopes and attached it to the Foredom stand and now I have a small, precise and powerful milling machine that's perfect for making holes in circuit boards or other small milling work.

    Drill-mill fixure for central Dremel mounting-proxxon-03.jpg

    For those of you that're interested in hand carvers, while the Fordom is a nice tool, I later found that the MasterCarver clone is just as good as the Foredom at about half the cost. The MasterCarver handpieces also take ¼" shank bits so are more versatile that the Foredom ones.
    If you can't make it precise make it adjustable.

  9. The Following 3 Users Say Thank You to Crusty For This Useful Post:

    Altair (May 31, 2020), Carnel (May 18, 2020), Jon (May 19, 2020)

  10. #7
    Supporting Member jdurand's Avatar
    Join Date
    May 2019
    Location
    Krasnodar Krai, Russian Federation
    Posts
    1,456
    Thanks
    126
    Thanked 742 Times in 416 Posts

    jdurand's Tools
    I have the Grizzly version of the Foredom, the motor is fine for what I do but the bearings in the handpiece were bad. They replaced and it still got hot, so I bought a real Foredom handpiece when I saw one for a reasonable price.

  11. The Following User Says Thank You to jdurand For This Useful Post:

    Paul Jones (May 21, 2020)

  12. #8
    Supporting Member Crusty's Avatar
    Join Date
    May 2019
    Location
    Dry Gulch, Tx
    Posts
    749
    Thanks
    220
    Thanked 845 Times in 324 Posts

    Crusty's Tools
    Take a look at the Master Carver handpiece. It seems equivalent to a Foredom except the ability to mount ¼" shank bits opens up a new world of uses. Small router bits are available in a broad spectrum of profiles and they work well in my experience.

    I've also used a 3m sanding burr (hard carbide nuggets on a shaped core) in it to completely carve banjo necks in short order, but do it outside or you'll be cleaning up sawdust for months.
    Last edited by Crusty; May 19, 2020 at 07:18 AM.
    If you can't make it precise make it adjustable.

  13. #9
    Supporting Member Paul Jones's Avatar
    Join Date
    May 2014
    Location
    Del Mar, California
    Posts
    1,231
    Thanks
    5,810
    Thanked 1,440 Times in 655 Posts

    Paul Jones's Tools
    Nice set of photos. Many of the original Dremel tools have a strange front collar thread size of 3/4" by 12 TPI. The taps are available and I adapted my Dremel tools to some of my lathes for drilling and light grinding purposes.

  14. The Following User Says Thank You to Paul Jones For This Useful Post:

    Carnel (May 19, 2020)

  15. #10
    Supporting Member mklotz's Avatar
    Join Date
    Aug 2015
    Location
    LA, CA, USA
    Posts
    3,434
    Thanks
    357
    Thanked 6,379 Times in 2,117 Posts

    mklotz's Tools
    Buying a tap and the associated tap drill can get expensive. My guess would be somewhere in the neighborhood of $50.

    I've threaded adaption collars on the lathe and that works well but, for folks lacking a thread cutting lathe, consider buying the Dremel router attachment...

    https://www.amazon.com/Dremel-565-Mu...s%2C212&sr=8-4

    and repurposing the already threaded sleeve which is used to mount the Dremel tool.

    It may also be possible to repurpose the less expensive easy twist nose cap...

    https://www.amazon.com/dp/B009PBU0K0...s%2C200&sr=8-1

    although I can't guarantee it.

    Incidentally, people with metric equipment can thread an adapter M19 x 2 mm. This is very close to the inferial size: 3/4" = 19.05 mm and 12 TPI (.083" pitch) = 2.11 mm.
    ---
    Regards, Marv

    Home Shop Freeware
    https://www.myvirtualnetwork.com/mklotz

  16. The Following 3 Users Say Thank You to mklotz For This Useful Post:

    Carnel (May 19, 2020), old_toolmaker (May 31, 2020), Paul Jones (May 21, 2020)

Thread Information

Users Browsing this Thread

There are currently 1 users browsing this thread. (0 members and 1 guests)

Tags for this Thread

Bookmarks

Posting Permissions

  • You may not post new threads
  • You may not post replies
  • You may not post attachments
  • You may not edit your posts
  •