
 LinkBack URL
 About LinkBacks

Tawk about gilding turds! Tonights little project might be the epitome of absurdity. I love projects like that!
My tube of Barg cement dried out because the stupid too-thin polyethylene cap cracked when I had to use pliers to unscrew it. That happens a lot with tubes of stuff like JBWeld, super glue, etc. About nothing sticks to polyethylene, but sticky stuff can gum up the threads enough so it takes more torque with pliers to unscrew the cap than the cap can structurally withstand.
That may not be an accident. Using another 0.1 cent worth of PE in the cap would probably make it robust enough to keep being a cap until the stuff in the tube is used up but then we'd be buying new stuff less often.
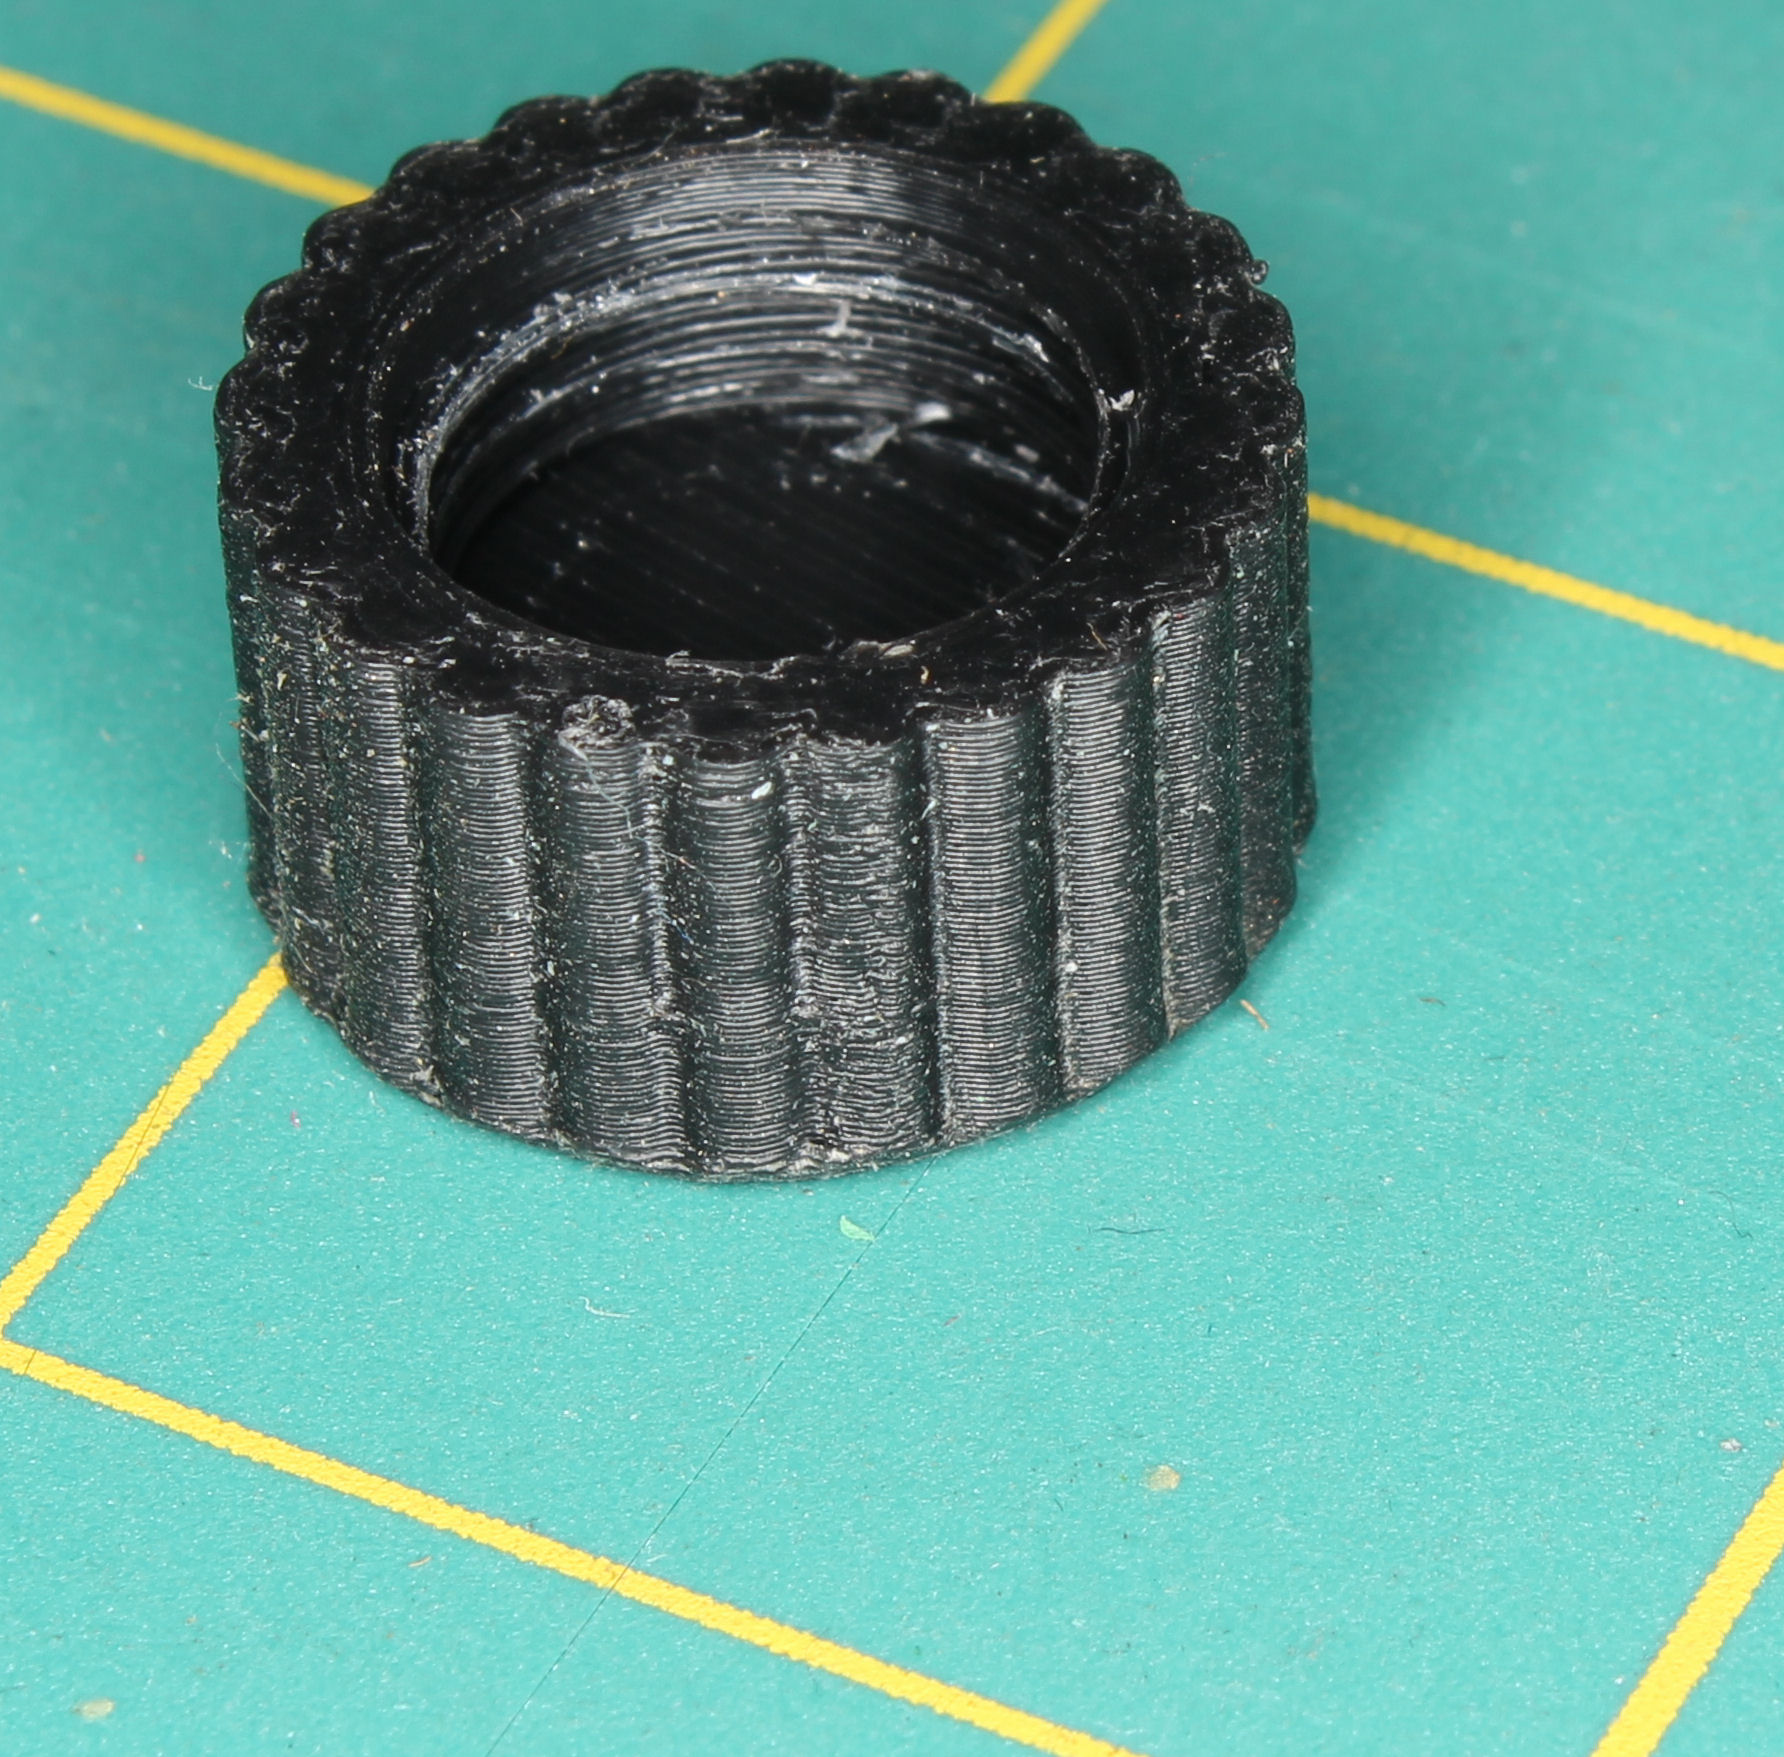
I decided to make a robust cap for my new, as yet unopened, tube of Barg cement.
I studied the threads on the neck of the tube at great length. They are very crappy threads; so crappy I was unable to determine the pitch with thread gages. Metric or inch, who knows?
I got out the 30X quill-mount made-in-Taiwan microscope Id bought from Enco a zillion years ago for maybe twenny bux, grabbed it in a 3/8 R-8 collet in my Bridgeport, got it focused on the very crappy threads. I centered the crosshair on the center of one crappy crest. Zeroed the DRO on the mill, moved the table in X to where the crosshair was again centered on the crest of the next crappy crest.
The DRO said .0500. How about that! 20 TPI inch threads.
I probably spent most of an hour trying to figure out what OD and ID should be. Im retired and a little slow some days. The threads on the neck of the tube are nowhere near full-depth well-formed V threads: they are, at best, sloppy approximations of threads thrice removed from any kind of thread spec, more like trapezoidal pasta wound around a sausage. I finally concluded that, while the threads were 20 TPI which would have crest-to-root depth of about 34 thou if truncated to 80% , these were more like .020 deep at most.
I decided to make the major diameter of my new cap large enough to clear the crests of the tubes threads by a coupla thou, make them truncated slightly rather than sharp but not quite trapezoidal, and make the roots plenty deep because it wouldnt matter if theyre deeper than necessary; Im not looking for a gas tight seal in the threads. Thatll happen when the flat bottom of the cavity in the cap butts against the flat end of the tubes neck.
I 3D modeled it and then made one on my entry-level Creality Ender 3 3D printer.
It works! It fits as well as or better than the crummy skimpy fragile factory cap, and this cap wont crack. It looks a bit crusty because entry-level 3D printing is far from the precision even we old crank-turner machinists routinely expect, but it works.


 Reply With Quote

Bookmarks