Free 186 More Best Homemade Tools eBook:  
Get 2,000+ tool plans, full site access, and more.

User Tag List

Page 1 of 2 1 2 LastLast
Results 1 to 10 of 12

Thread: HFT 14" bandsaw mod

  1. #1
    Supporting Member C-Bag's Avatar
    Join Date
    Aug 2015
    Location
    California, central coast
    Posts
    720
    Thanks
    689
    Thanked 876 Times in 471 Posts

    C-Bag's Tools

    HFT 14" bandsaw mod

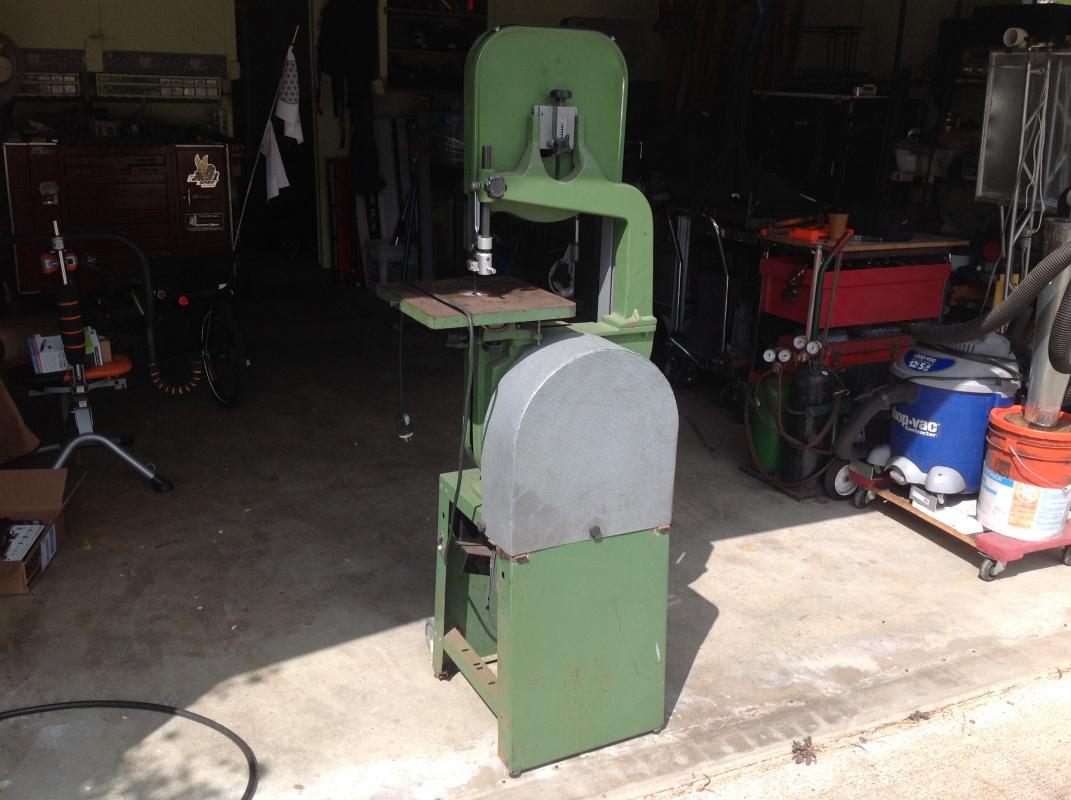
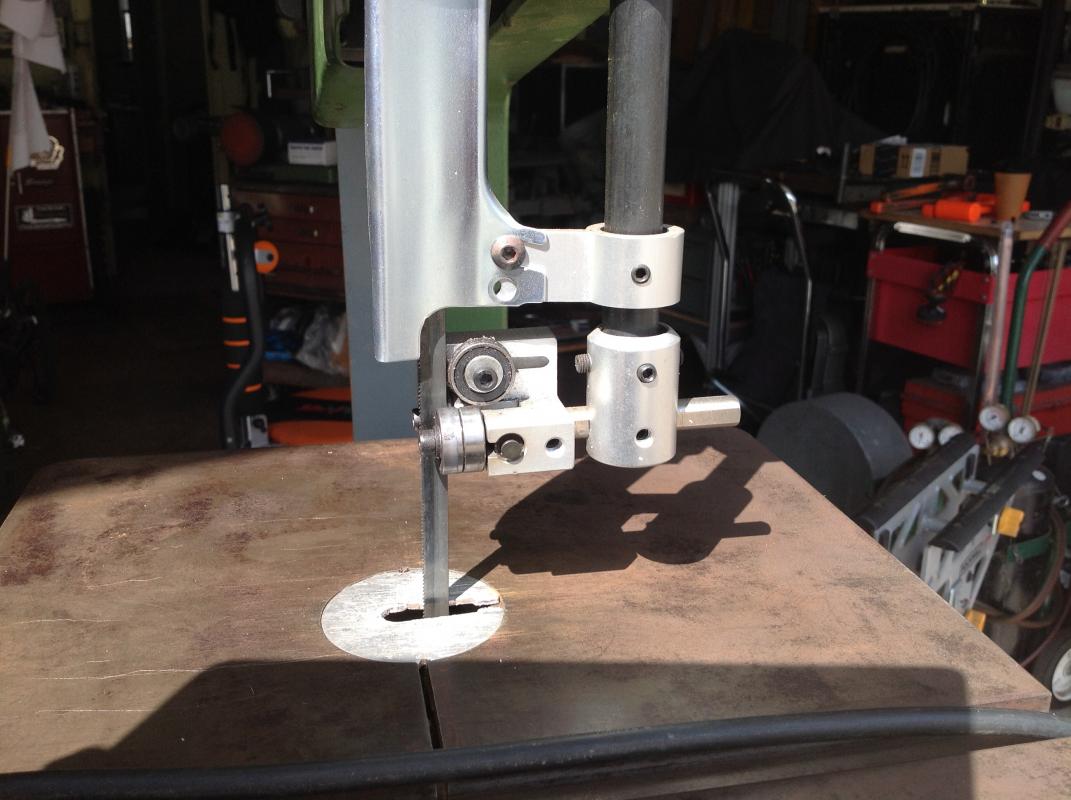
    I'd been needing a good metal cutting bandsaw because I was using my small HFT horizontal bandsaw in vertical mode to do stuff. Most times it was small and odd shaped and it felt way to unsafe on the horizontal. I kept seeing these 14" Delta/Rackwell wood bandsaws on CL. but even when they say they are two speed they are still way to fast for steel. I did some digging around on YouTube and there was some vids that hinted at slowing the blade speed down but they were not specific. On the Practical machinist forum there was a long discussion of blade speeds and everybody concurred you were looking for from 110 to 190 fpm. The bandsaw stock is 3,000 fpm.

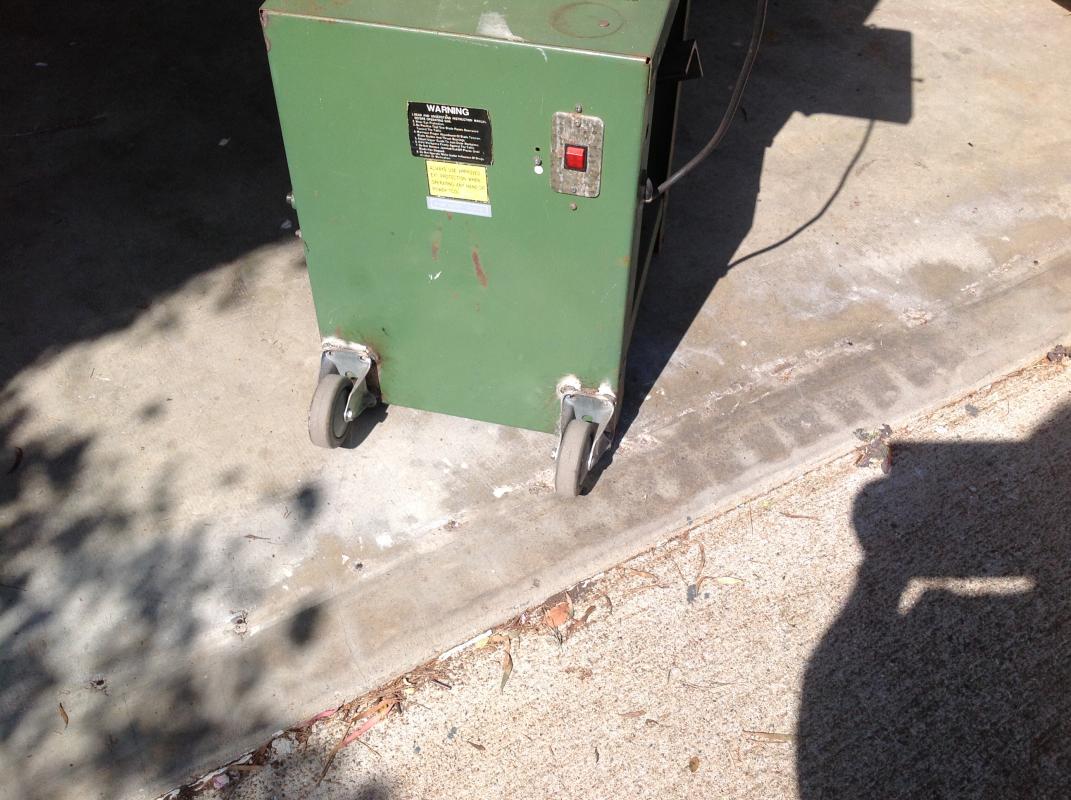
    I found a HFT 14" knockoff saw for $75. I could tell the guy was feeling weird about selling it to me but when I explained I was going to do an overhaul of it he relaxed. The guy he got it from had never been able to get it to track and he'd never been able to get it to keep a blade on it either.

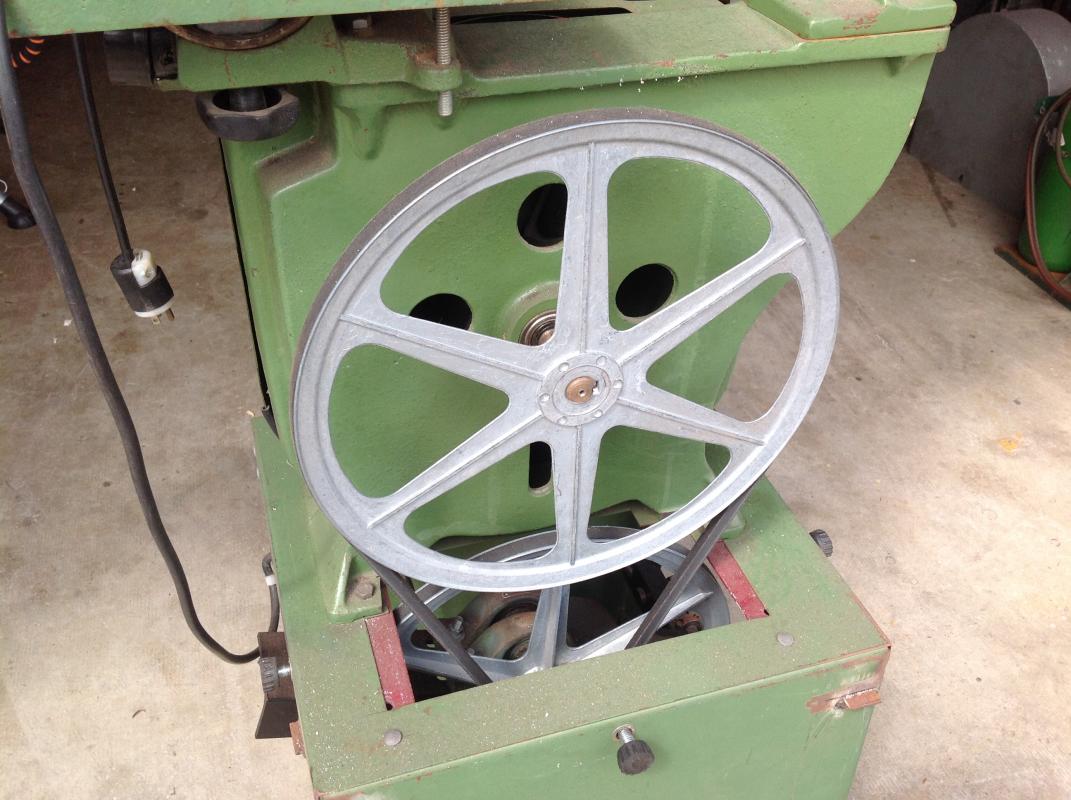
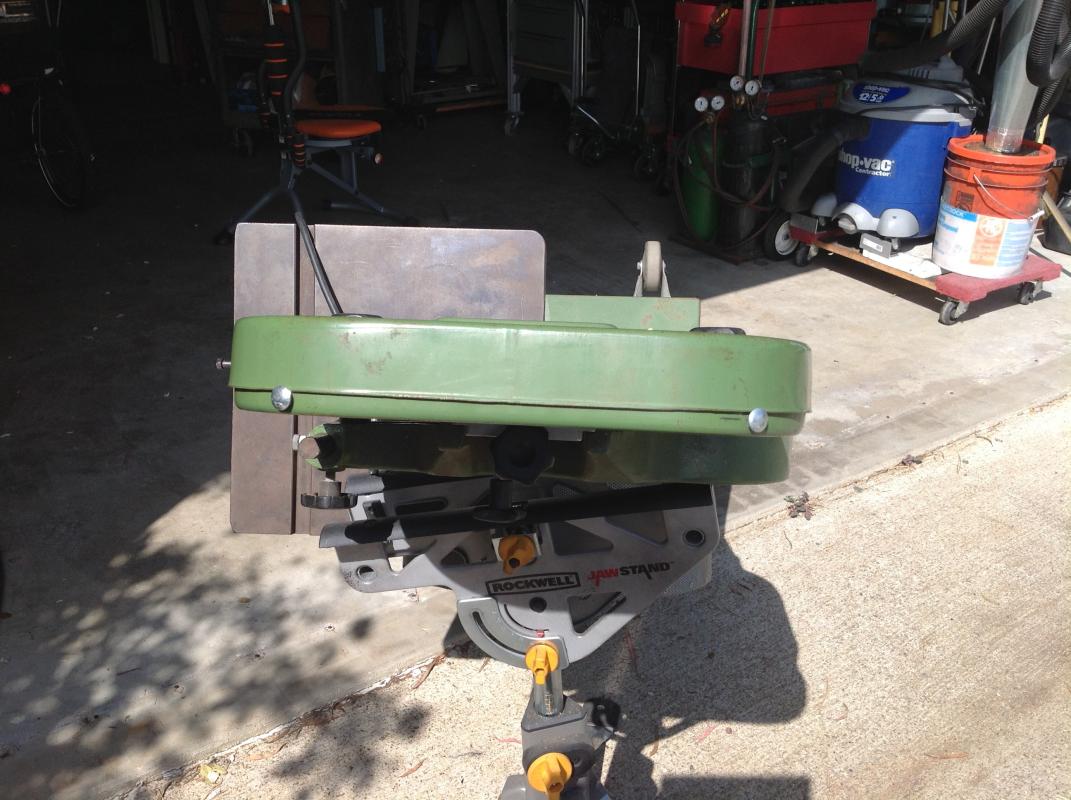
    I looked on one of the websites that you can plug in your pulley sizes and it turned out I needed to do a double reduction. It already had 1 3/4" on the motor and a 14" on the saw bottom pulley so going by the chart I'd be in the ballpark if I got another 1 3/4" and 14" and make a jack shaft/double reduction. This program even told me by my belt sizes. I also had some 3"x3" angle iron, 1" shaft and two 1" pillowblocks. I also had an old motor mount from a grizzly table saw that I got off of CL ended up being junk. The original motor mount is one of those nightmare things that stupid to tighten and get straight. So it was the first to go. Stripped all that out and made new mounts for the hanging old table saw motor mount. The idea was everything would hang off the saw drive pulley tensioning the belts. The jack shaft and motor. And you just lift up on the end of the angle iron jack shaft mount and pull off the upper belt then lower the motor to the floor and pull of the motor to jack shaft belt. Works slick unfortunately it's been all together now for several years but I tried my best to tilt it over to show some details. Here it is together with a belt guard I made out of some perforated aluminum I got from a artist who was moving. Sorry about the paint, I never seem to get to that.
    HFT 14" bandsaw mod-image.jpg
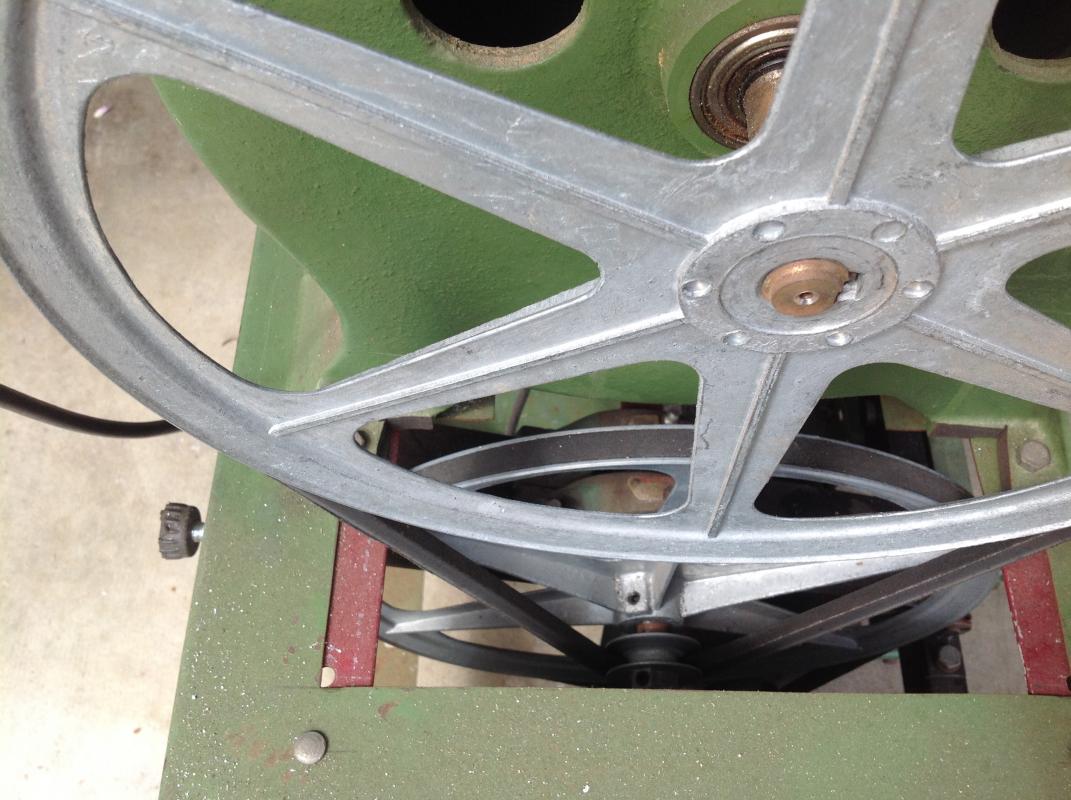
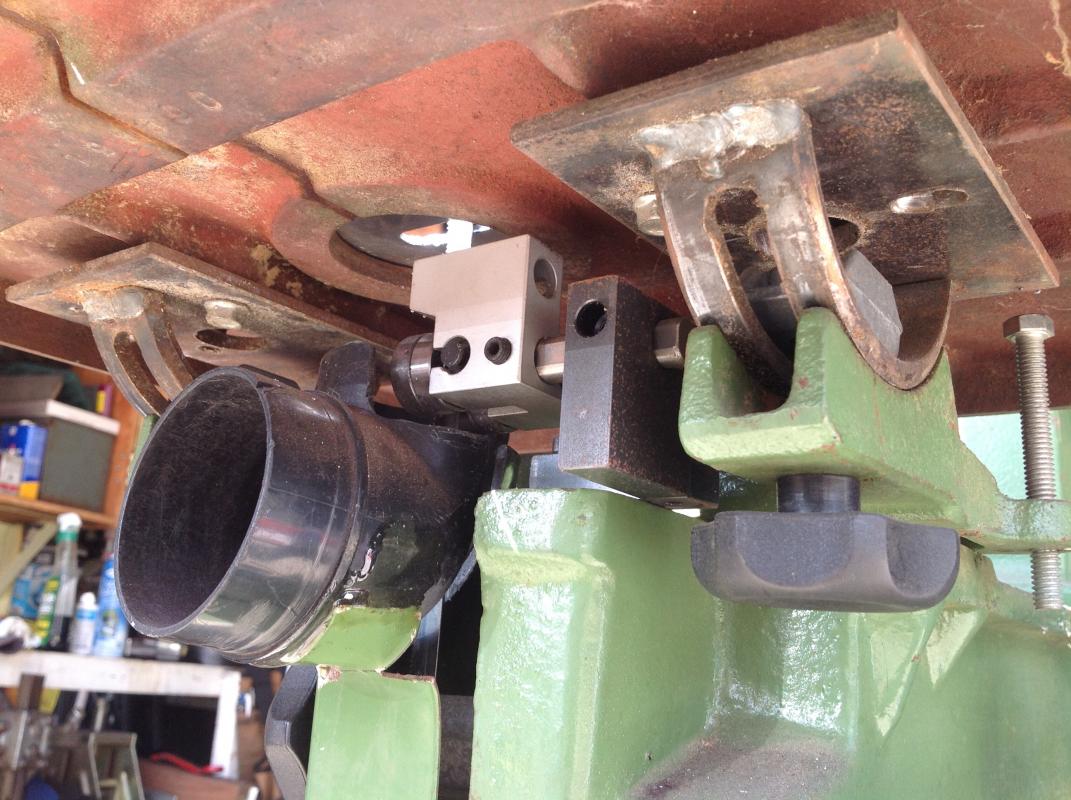
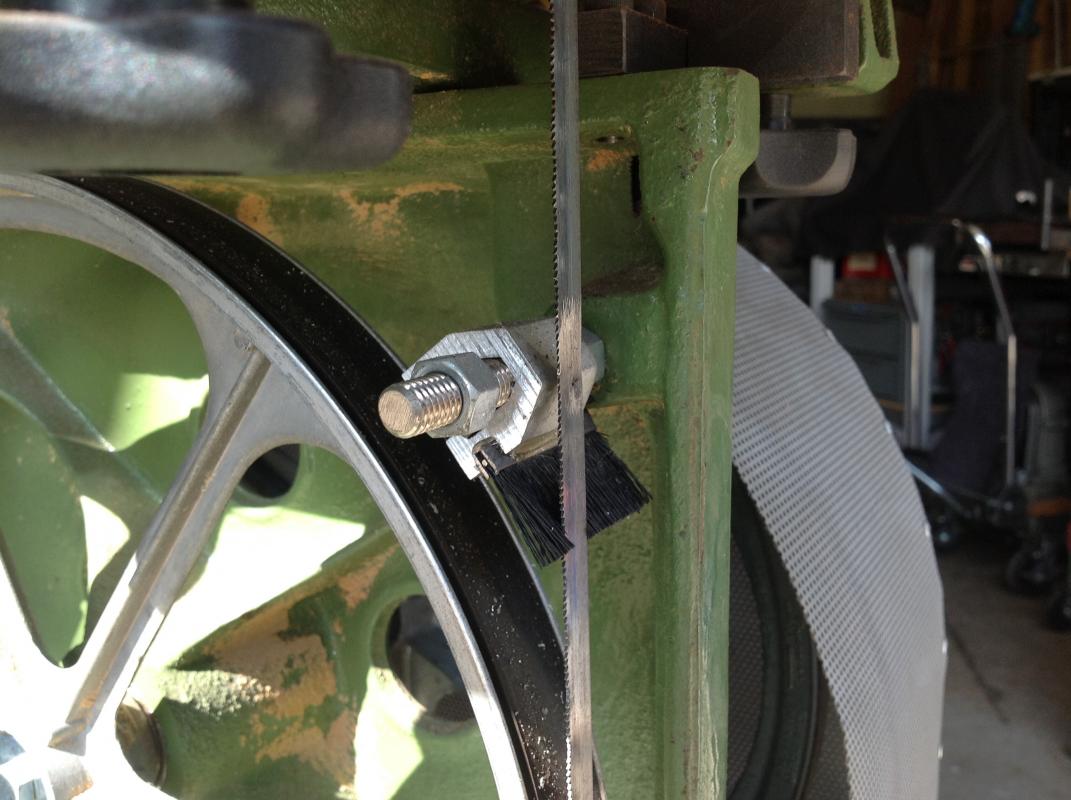
    Guard off, looking down at the jack shaft.HFT 14" bandsaw mod-image.jpgHFT 14" bandsaw mod-image.jpg
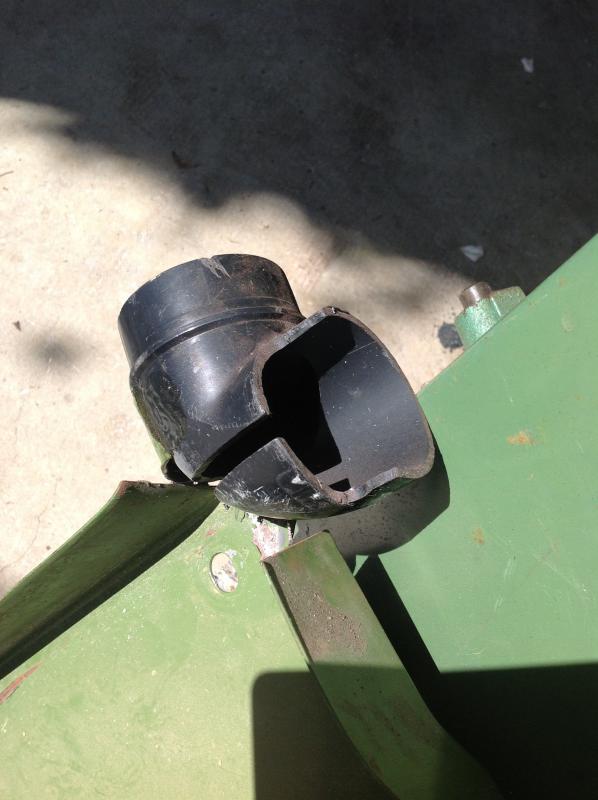
    Note the red angle irons on the sides of the cutout hole under the feet of the saw body. That got pretty weak when I cut out that hole so I bolted those braces in there and stiffened up.HFT 14" bandsaw mod-image.jpg
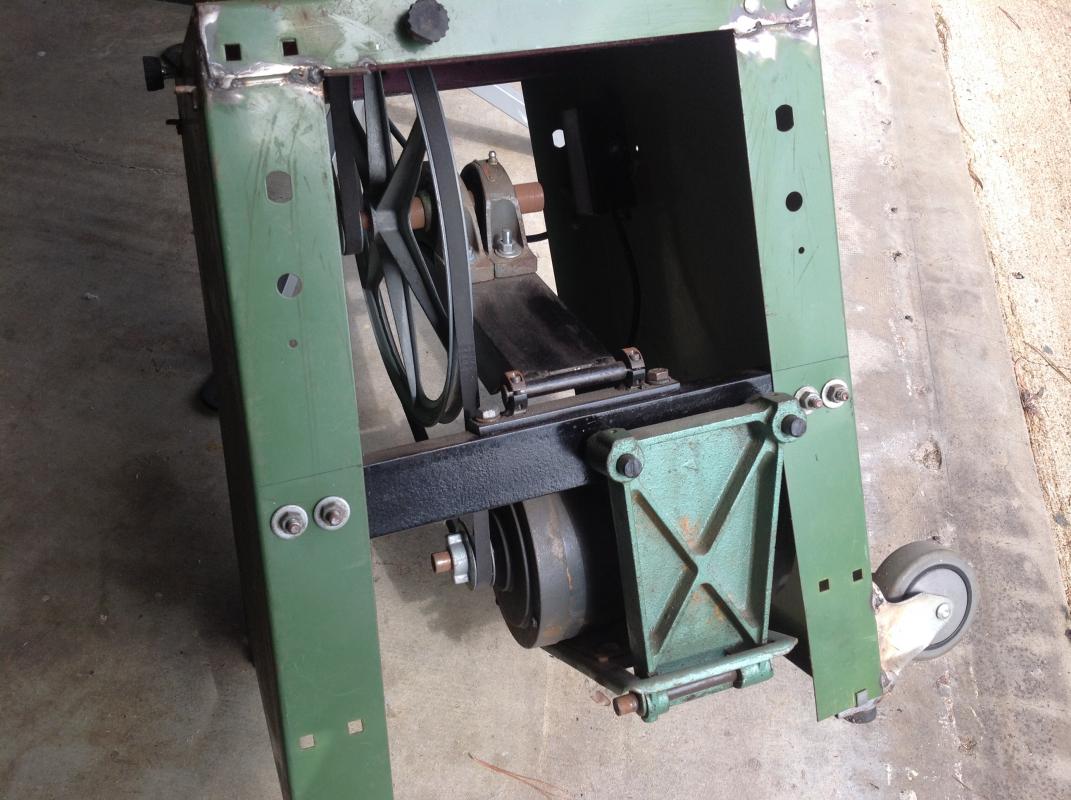
    Here's the opposite side.
    Attached Thumbnails Attached Thumbnails HFT 14" bandsaw mod-image.jpg  

    186 More Best Homemade Tools eBook

  2. The Following 4 Users Say Thank You to C-Bag For This Useful Post:

    Christophe Mineau (Apr 13, 2016), Downeast Thunder (Apr 14, 2016), Paul Jones (Apr 13, 2016), PJs (Apr 13, 2016)

  3. #2
    Supporting Member C-Bag's Avatar
    Join Date
    Aug 2015
    Location
    California, central coast
    Posts
    720
    Thanks
    689
    Thanked 876 Times in 471 Posts

    C-Bag's Tools
    I think I was getting to some critical mass with the pix so I'm continuing on....
    This is a shot from the same side as the last pic but I wasn't sure you could see the angle sticking out that the jack shaft is mounted to. This end just floats, the pivot being right above the motor. So this is what you grab and lift to loosen the top belt, and let down to rest the motor on the floor to change the bottom belt.
    HFT 14" bandsaw mod-image.jpgHFT 14" bandsaw mod-image.jpgHFT 14" bandsaw mod-image.jpg

    I think I've maxed my limit of pix tonite I'll try and see if a couple more details can make it on here tomorrow.

    2000 Tool Plans

  4. The Following 5 Users Say Thank You to C-Bag For This Useful Post:

    Christophe Mineau (Apr 13, 2016), Downeast Thunder (Apr 14, 2016), gene55 (Jun 18, 2023), Paul Jones (Apr 13, 2016), PJs (Apr 13, 2016)

  5. #3
    Content Editor
    Supporting Member
    DIYer's Avatar
    Join Date
    Aug 2013
    Posts
    3,056
    Thanks
    772
    Thanked 1,850 Times in 1,652 Posts


    Thanks C-Bag! We've added your Bandsaw Speed Reduction Modification to our Bandsaws category,
    as well as to your builder page: C-Bag's Homemade Tools. Your receipt:


  6. #4
    Supporting Member Paul Jones's Avatar
    Join Date
    May 2014
    Location
    Del Mar, California
    Posts
    1,231
    Thanks
    5,810
    Thanked 1,440 Times in 655 Posts

    Paul Jones's Tools
    C-Bag,

    The photos definitely help explain your modifications. The weight of the motor provides the belt tension. Buying the blade guide gets you running right away and probably one of the most important parts.

    Thanks for posting the photos. Lots of great ideas.

    Paul

    By the way, I have been installing four Cylindrical Vibration Isolators ($20 for the set from Zoro Tools) on some of my electric motors to isolate the motor vibration from the main frame of machine tools and it really makes a big difference along with using a linked belt (see http://www.homemadetools.net/forum/1...chniques-19914). In fact when I disengage the lead screw and feed rod selector gear on the geared-head metal lathe, I can hardly hear any electric motor running. It is pretty amazing. Also, the machined surface finish has absolutely no visible hint of tool vibration.

  7. The Following 2 Users Say Thank You to Paul Jones For This Useful Post:

    C-Bag (Apr 14, 2016), PJs (Apr 13, 2016)

  8. #5
    Supporting Member C-Bag's Avatar
    Join Date
    Aug 2015
    Location
    California, central coast
    Posts
    720
    Thanks
    689
    Thanked 876 Times in 471 Posts

    C-Bag's Tools
    Thanks Paul. It's always tough to try and show what's in such a confined space without taking it apart.

    While I agree the two all ball bearing heads have a lot to do with tracking, the real problems I think we're the rubber tires and especially the tensioner/tracking adjuster. It was mangled and the tires were a mess. But the good thing is this is such a direct knockoff and such a popular saw, it was not only easy to get good after the market parts but they were cheap!

    I never really tried to use the saw in its original condition he just ran it when I bought it and that was it. When I got it home that's when I noticed the tensioner/tracker was broken and the tires were a mess. And I hate those old friction style heads and liked this all sealed bearing setup on Rockler so I ordered all the parts at one time while I started hacking and fabricating. The heads were over $200 IIRC and the rest of the pulleys, tracker and belt didn't come to more than $50. So the heads cost me more than the whole saw and repair parts. But I feel it was worth it. Especially when you see the EXACT same saw billed as a metal cutting saw for around $1500! I think I figured when it was all said and done I had somewhere around $350 in it.
    Last edited by C-Bag; Apr 13, 2016 at 12:43 PM.

  9. The Following 2 Users Say Thank You to C-Bag For This Useful Post:

    Paul Jones (Apr 13, 2016), PJs (Apr 13, 2016)

  10. #6
    Supporting Member C-Bag's Avatar
    Join Date
    Aug 2015
    Location
    California, central coast
    Posts
    720
    Thanks
    689
    Thanked 876 Times in 471 Posts

    C-Bag's Tools
    I'll try to finish up and see if the server will let me upload these last pix. As all my machines this one has wheels so I can tilt it and move it wherever I'm needing. Because I work out of my garage I have to push all the unused machinery out of the way when not use and then redeploy when needed. And in order to grab the top of the saw where the upper wheel guard is and not collapse the guard and rub on the blade wheel I put 1/4" carriage bolts as stops.
    HFT 14" bandsaw mod-image.jpgHFT 14" bandsaw mod-image.jpgHFT 14" bandsaw mod-image.jpg
    The other key to tracking and tire longevity is keeping schmootz off the tire so the metal cuttings don't embed themselves into it and cause the tire to deform. I had an old brush laying around from some fruit packing machinery so I incorporated it into the lower guard mount.HFT 14" bandsaw mod-image.jpgalong with a modified vac elbow mounted to the bottom guard.HFT 14" bandsaw mod-image.jpgHFT 14" bandsaw mod-image.jpg

  11. The Following 3 Users Say Thank You to C-Bag For This Useful Post:

    Downeast Thunder (Apr 14, 2016), Paul Jones (Apr 13, 2016), PJs (Apr 13, 2016)

  12. #7
    PJs
    PJs is offline
    Supporting Member PJs's Avatar
    Join Date
    Sep 2014
    Location
    Northern CA
    Posts
    1,841
    Thanks
    8,333
    Thanked 1,118 Times in 718 Posts

    PJs's Tools
    Real Nice, C-Bag! Nice pictures that show the details well with the write up. That jack shaft system seems to fit in there real good and still leave easy access. Liked your "schmootz brush" too with a handy mounting on the casting. The tip casters and carriage bolts are a nice touch, leaving solid contact to the ground when in position. Curious if you ever swap back to wood SFM and what it takes to get there?

    Those guides are pricey beauties, but well worth your overall costs for what you got out of the deal! A great reconstitution of a meager machine on a cheap and cheerful budget!! Before I forget...what blades are you using? Thanks for sharing it with us.

    Because of lack of space, currently I'm interested in finding a bench top model...9"-10". Dad's is a Craftsman 14" with a floor stand and just feels a bit big for my space...one day a bigger shop. There is a bunch of info out there on making them better too, but this was a great thread for me to consider, whatever I get.

    Thanks Much!
    ~PJ
    ‘‘Always do right. This will gratify some people and astonish the rest.’’
    Mark Twain

  13. #8
    Supporting Member C-Bag's Avatar
    Join Date
    Aug 2015
    Location
    California, central coast
    Posts
    720
    Thanks
    689
    Thanked 876 Times in 471 Posts

    C-Bag's Tools
    Thanks Wiz. I do virtually no wood work. But I have done several projects with UHMW and for those I swapped the wood blade back in but can't change the speed. I guess I could but the motor and the upper pulley don't line up anymore so it would be a hassle. It worked great, slow, but great. That's also what the vac hook up was for. That UHMW goes everywhere and I guess it gets a static charge and gets all over the tires and everything else even with the schmootz duster.

    Depending on your need and use for the 14" takes up almost the same amount of floor space and doesn't need to take up precious benchtop space. I'm totally with you about space being a premium. Also there's no comparison in ruggedness between those little table top saws and the 14". It would be interesting to see what the difference in price of blades for the little saws and the 14". Sometimes smaller is not cheaper because of the popularity. Also it's nice to have a 1/2" width blade in the 14". I was in Lowes and I'll be dipped but they had the 92 1/2" metal cutting blade for the 14". Can't remember the name, maybe a Lennox? dunno.

  14. The Following 2 Users Say Thank You to C-Bag For This Useful Post:

    Paul Jones (Apr 13, 2016), PJs (Apr 13, 2016)

  15. #9
    PJs
    PJs is offline
    Supporting Member PJs's Avatar
    Join Date
    Sep 2014
    Location
    Northern CA
    Posts
    1,841
    Thanks
    8,333
    Thanked 1,118 Times in 718 Posts

    PJs's Tools
    Thanks C-Bag. Think I agree about availability/size/price for blades/machines, but just couldn't fit another floor item without a complete rework of the space...a week project at least. For me I would like the versatility of doing pretty much whatever I wanted with it and with the low prices of smaller VFD's now (~$100) 
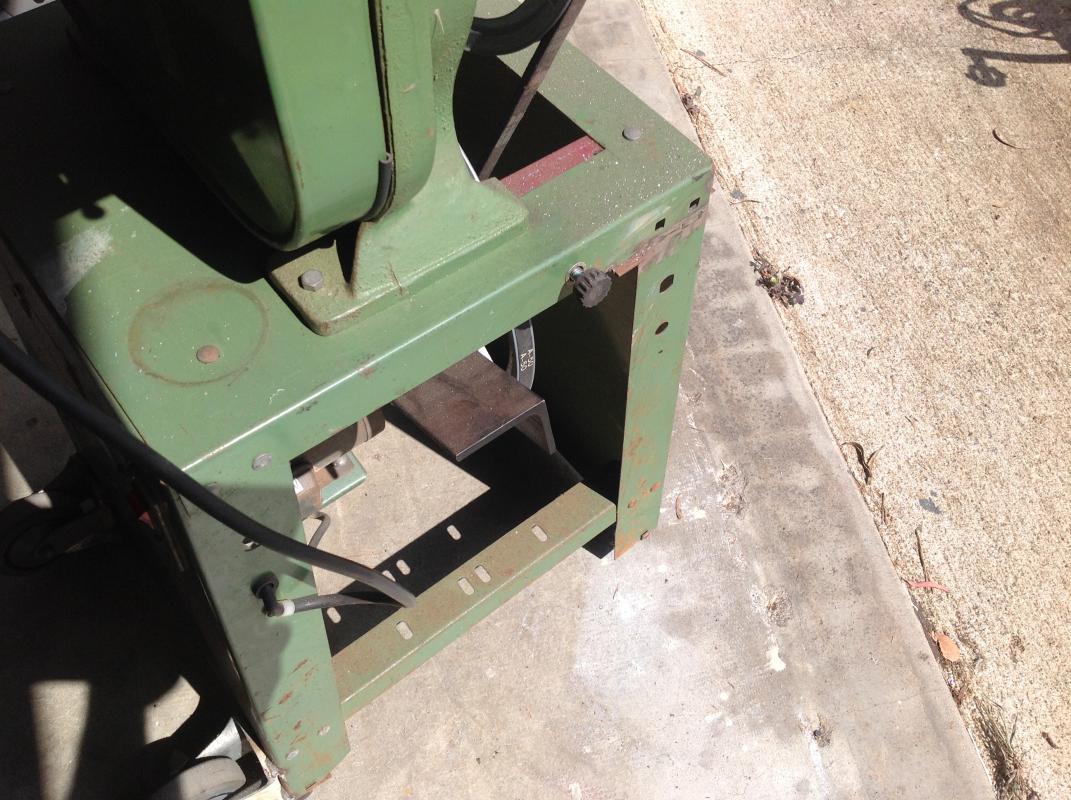
would probably save my duckets and go that route.

    I know exactly what you mean about UHMW. When I've turned it on the peanut it sticks to everything everywhere, like pigtails and stink on a skunk...even the vac doesn't like the taste of it.

    ~PJ
    ‘‘Always do right. This will gratify some people and astonish the rest.’’
    Mark Twain

  16. The Following 2 Users Say Thank You to PJs For This Useful Post:

    C-Bag (Apr 13, 2016), Paul Jones (Apr 13, 2016)

  17. #10
    Supporting Member C-Bag's Avatar
    Join Date
    Aug 2015
    Location
    California, central coast
    Posts
    720
    Thanks
    689
    Thanked 876 Times in 471 Posts

    C-Bag's Tools
    Wiz I have no idea about VFD's, but if you you slow it way down to like we're talking about for metal isn't it going to make the motor overheat and be puny?

  18. The Following User Says Thank You to C-Bag For This Useful Post:

    PJs (Apr 13, 2016)

Thread Information

Users Browsing this Thread

There are currently 1 users browsing this thread. (0 members and 1 guests)

Bookmarks

Posting Permissions

  • You may not post new threads
  • You may not post replies
  • You may not post attachments
  • You may not edit your posts
  •