Free 186 More Best Homemade Tools eBook:  
Get 2,000+ tool plans, full site access, and more.

User Tag List

Page 2 of 2 FirstFirst 1 2
Results 11 to 19 of 19

Thread: How can I center my drill

  1. #11

    Join Date
    Apr 2016
    Posts
    4
    Thanks
    0
    Thanked 0 Times in 0 Posts
    Mystery Tool ANSWER tubalcain mrpete222, You tube. This guy has to be as old as me. He knows all the old machining tricks and tools. He is a retired school teacher.

    2,000+ Tool Plans

  2. #12

    Join Date
    Nov 2015
    Posts
    11
    Thanks
    0
    Thanked 3 Times in 2 Posts

    majnun's Tools
    The most important consideration is matching the two pieces as possible. Having done that, the next step is to decide how to glue them together. One suggestion already mentioned is to use hide glue or thickened and tinted epoxy without dowel ingejohn@whidbey.com, which, I agree, is sufficient, since it is only decorative. The advantage of the hide glue over epoxy is that it can be reset with hot water or steam. Epoxy is like steel. It works best with little clapping. It is gap filling. That's where the thickening comes in. In either case, you have set up clamps or a jig to hold the pieces while the glue dries/cures. Be sure to wipe all the excess glue off before it sets. Epoxy is forever. You want to preserve the finish as much as possible. Sanding opens up a can of worms. Using a dowel is a lot more work leaving you with the same problem of aligning the pieces. In most similar situations, I would drill oversized holes, mix up a batch of thickened and tinted epoxy and put the pieces together as discussed. Yes, it is a lot of fastidious work.
    .

    2,000+ Tool Plans

  3. #13

    Join Date
    Jan 2016
    Posts
    4
    Thanks
    0
    Thanked 0 Times in 0 Posts
    Quote Originally Posted by Okapi View Post
    If I've good understood, this is just a decorative part, then why not just replace it with normal wood glue, positionning exactly as broken and with a wooden mallet and something to protect push it in place.

    I've repaired a lot of antique furniture or treen broken parts just with hot animal glue and maintaining in place until hard without problems after.
    This was what I was also going to suggest. The break looks "craggy' enough that the glue would have a lot of surface to bind to. You could use some masking or duct tape over the top to hold it in place until it dries.

  4. #14

    Join Date
    Aug 2015
    Posts
    8
    Thanks
    0
    Thanked 6 Times in 2 Posts
    I did furniture repairs professionally full time for 8 years, new and used. One of my thoughts for this would be what 'awright' suggested. Line them up and drill down thru both. I'd use a 1/8 inch bit for it. One very important thing is look closely at each side of the break and get rid of any splinters that are bent over because they will prevent getting them fully back together. They make dowel alignment pins but that won't work on this rough surface presisely enough. If they don't line up when you dry fit them after you are done drilling your holes; I suggest you not enlarge one of the holes as some have suggested here. I would shave or trim down a portion of the dowel so they will line up better. One advantage I had when I did this work was I was able to match the wood grain, colors and finish precisely. If you drill down thru the top of the finial you will have the small hole in the top left...fill that with a small piece of wooden BBQ skewer or whittle down a small plug that fits the hole, a drop of Elmers of wood glue and plug the hole. The trick to this is leave the plug protrude out the top until the glue has dried, then trim it down until it's level. Wet your finger , rub it a touch and the dirt from your fingertip should make it dissapear, then rub it with a candle, the wax will seal it and blend it in. For the glue, Elmers (polyvinyl) or a wood glue should be fine, epoxy would also be OK....it depends on what you are comfortable with. If you have to shave down the dowel a lot then a thin shim on the opposite side will fill it in but I do not think you need to bother with that. Get it to dry fit tightly before you glue it and you'll be fine. If it does not want to dry fit properly then take the time to get the correct fit. If the dowel is loose in both hole then add some fine sawdust to the glue, it will help bridge the gap. Good luck with it.
    Last edited by mikeyrocks; Aug 14, 2016 at 12:46 AM. Reason: spelling...typo

  5. The Following User Says Thank You to mikeyrocks For This Useful Post:

    Paul Jones (Sep 27, 2016)

  6. #15

    Join Date
    Feb 2016
    Posts
    5
    Thanks
    0
    Thanked 1 Time in 1 Post
    I believe just gluing both pieces together, even with epoxy, is not durable solution. I would prefer cutting off of rest of dovetails, clamping bot pieces together in final position and drill trough both a hole for stronger nail. The length of hole must be shorter than the nail. If you make before on top and little bit wider hole you can cover the head of nail by tin dovetail and paint as many of us already proposed. After such wide discussion it would be interesting to know what solution you have chosen...

    best regards

  7. #16
    Supporting Member Okapi's Avatar
    Join Date
    Mar 2013
    Location
    Switzerland
    Posts
    222
    Thanks
    346
    Thanked 132 Times in 76 Posts

    Okapi's Tools
    I think you don't need more than just a repositionning, you all give solutions which are good when our friend need this piece to become an profesionnal acrobat, but in fact, it's just a decorative item, and when correctly made, just a ten minutes work. ;-)
    Despite all time used to search solutions, the piece does be repaired since a week…

  8. #17

    Join Date
    Jul 2016
    Posts
    2
    Thanks
    0
    Thanked 0 Times in 0 Posts
    Your wife or girl may be able to help you. Ask for an old lipstick. Put a glob on one of the pieces, as close to center as possible. Dry fit them together and carefully take them apart again. There will be a lipstick mark that will match for both pieces. Drill a hole carefully in both marks, being sure to keep plumb. Place your dowel on and dry fit again to make sure, and then glue it all up.

  9. #18
    Supporting Member jotasierra's Avatar
    Join Date
    Sep 2015
    Location
    país Argentina, provincia de San Juan
    Posts
    118
    Thanks
    0
    Thanked 13 Times in 13 Posts

    jotasierra's Tools
    Interesante el tema, siempre hace falta en alguna oportunidad un trabajo así, gracias por el aporte mklotz.

  10. #19
    bluegrallis's Avatar
    Join Date
    Dec 2015
    Posts
    4
    Thanks
    0
    Thanked 1 Time in 1 Post
    Quote Originally Posted by bluegrallis View Post
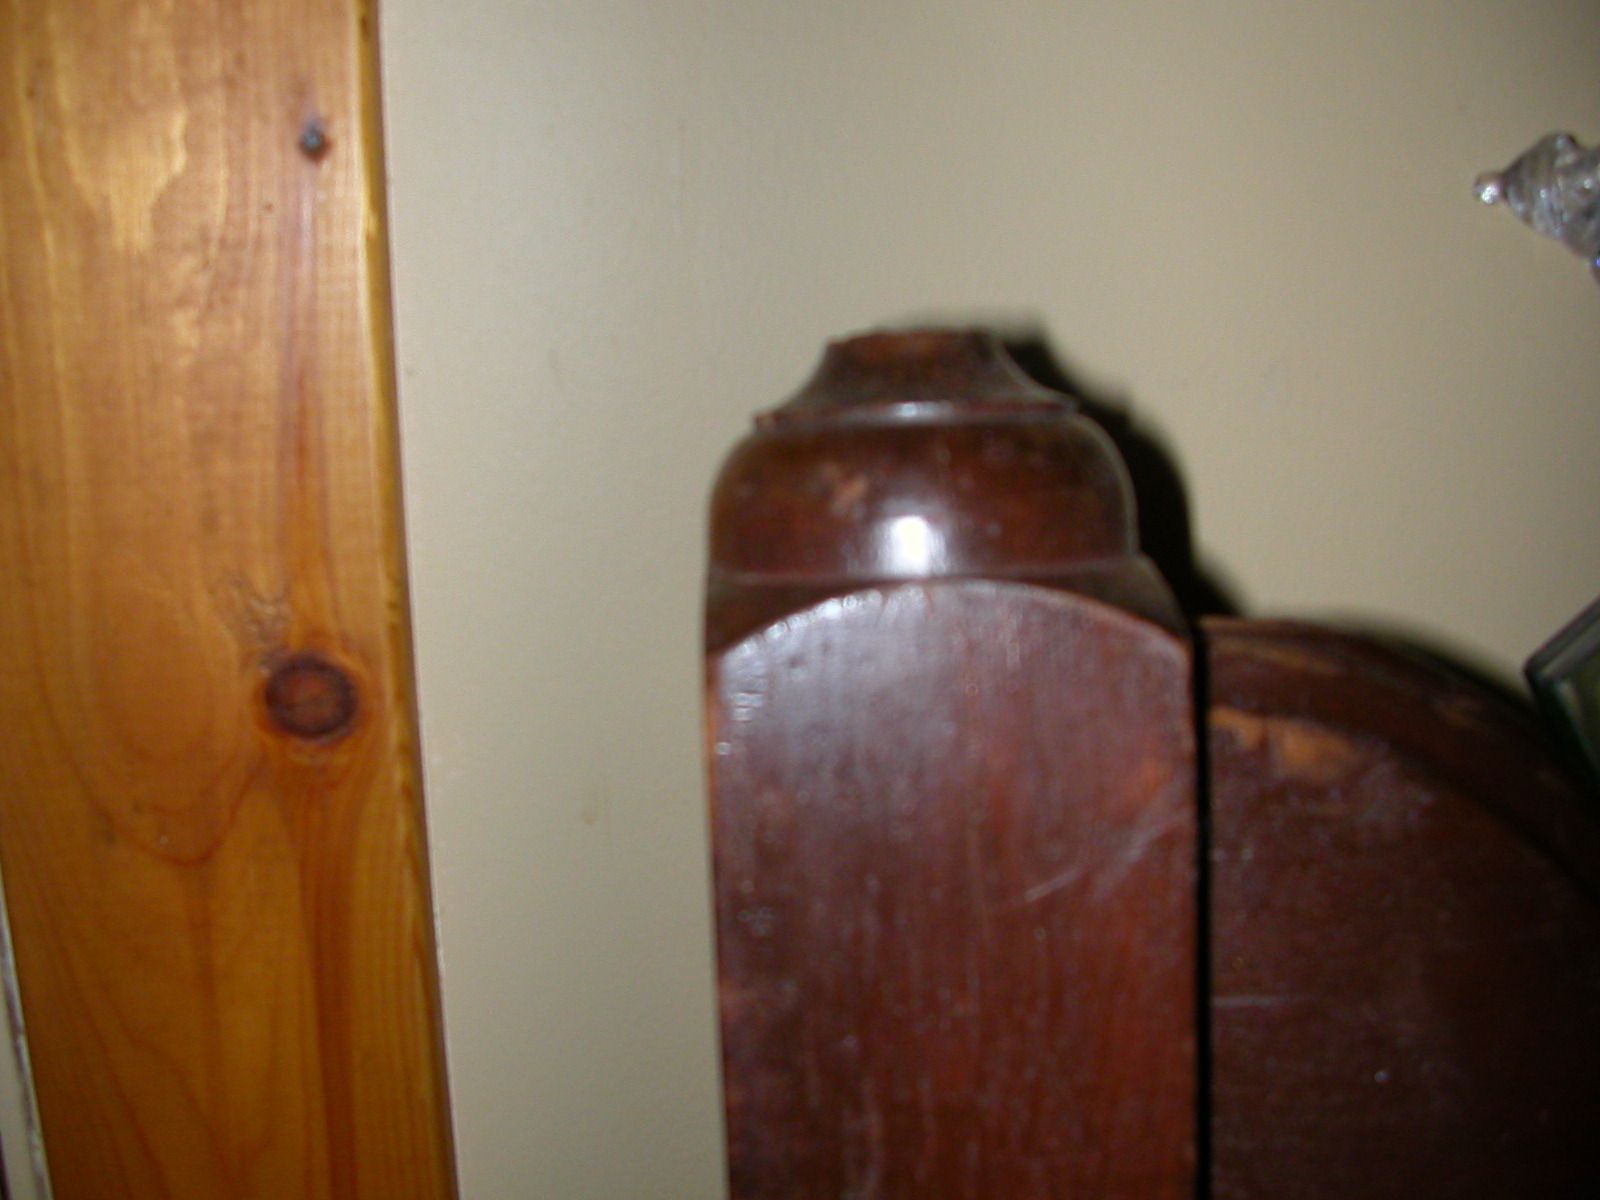
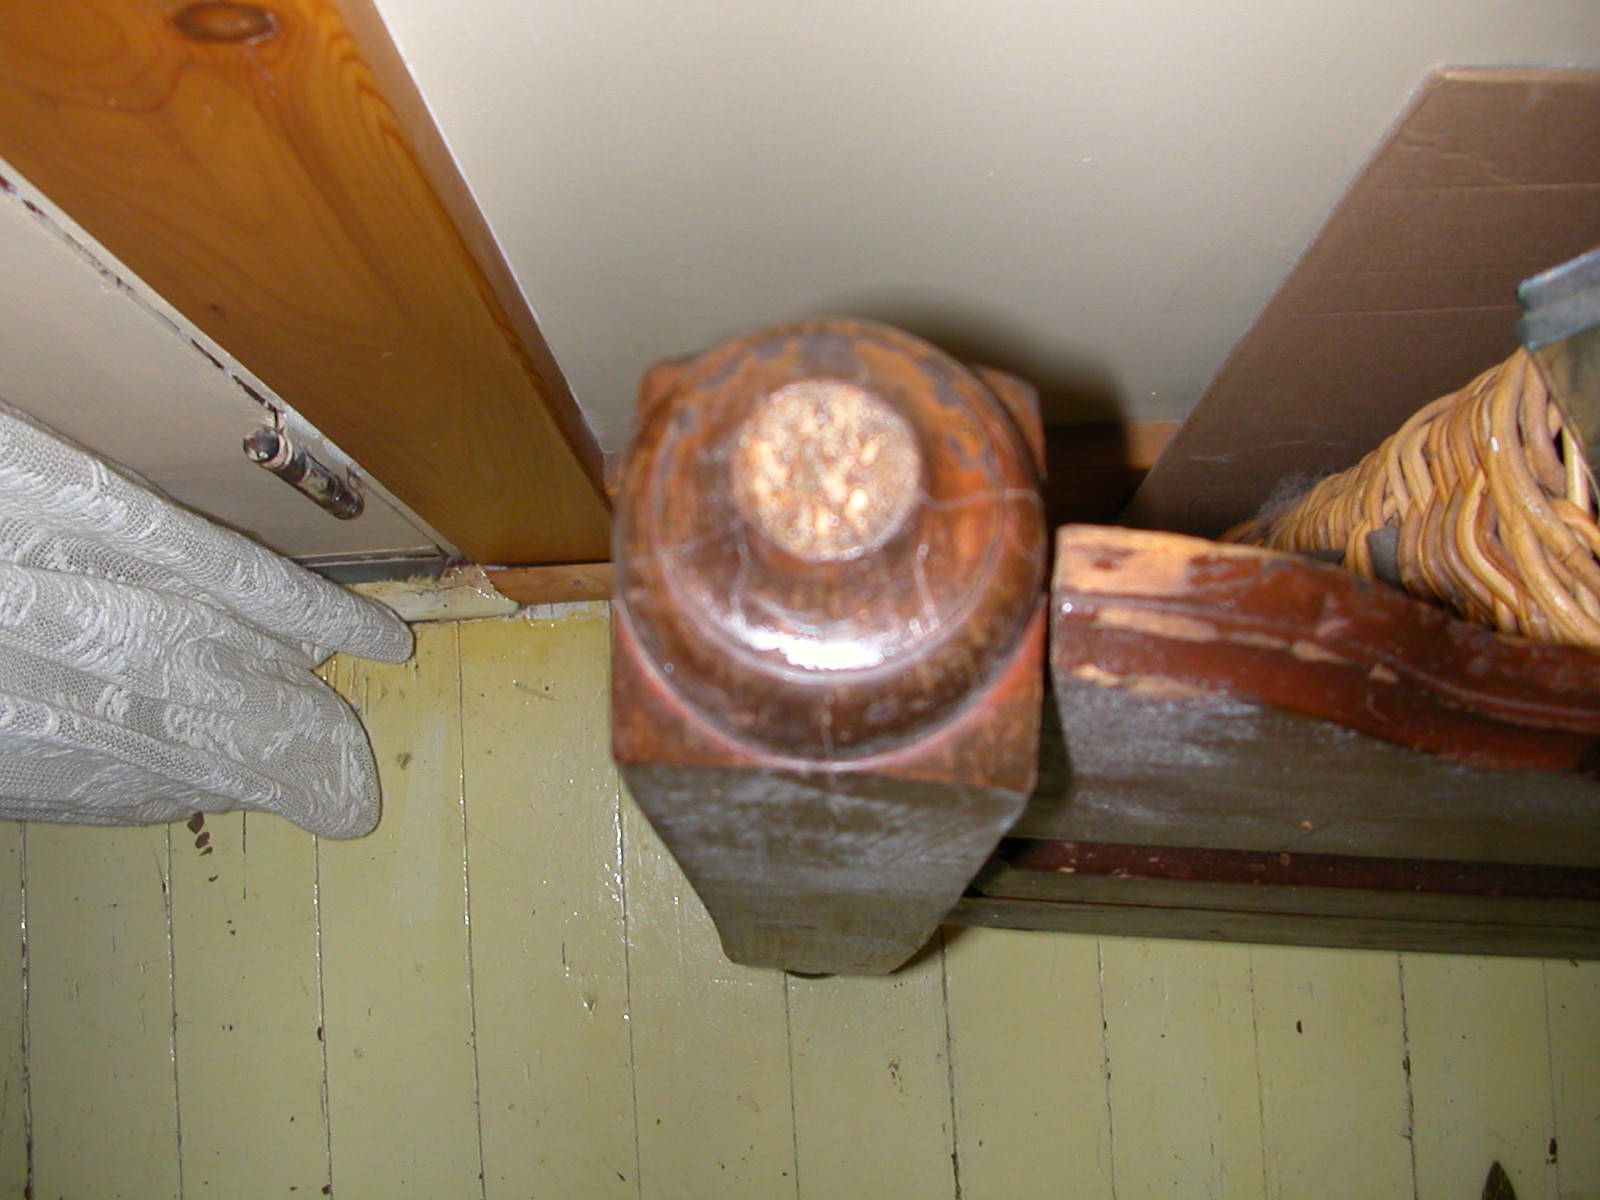
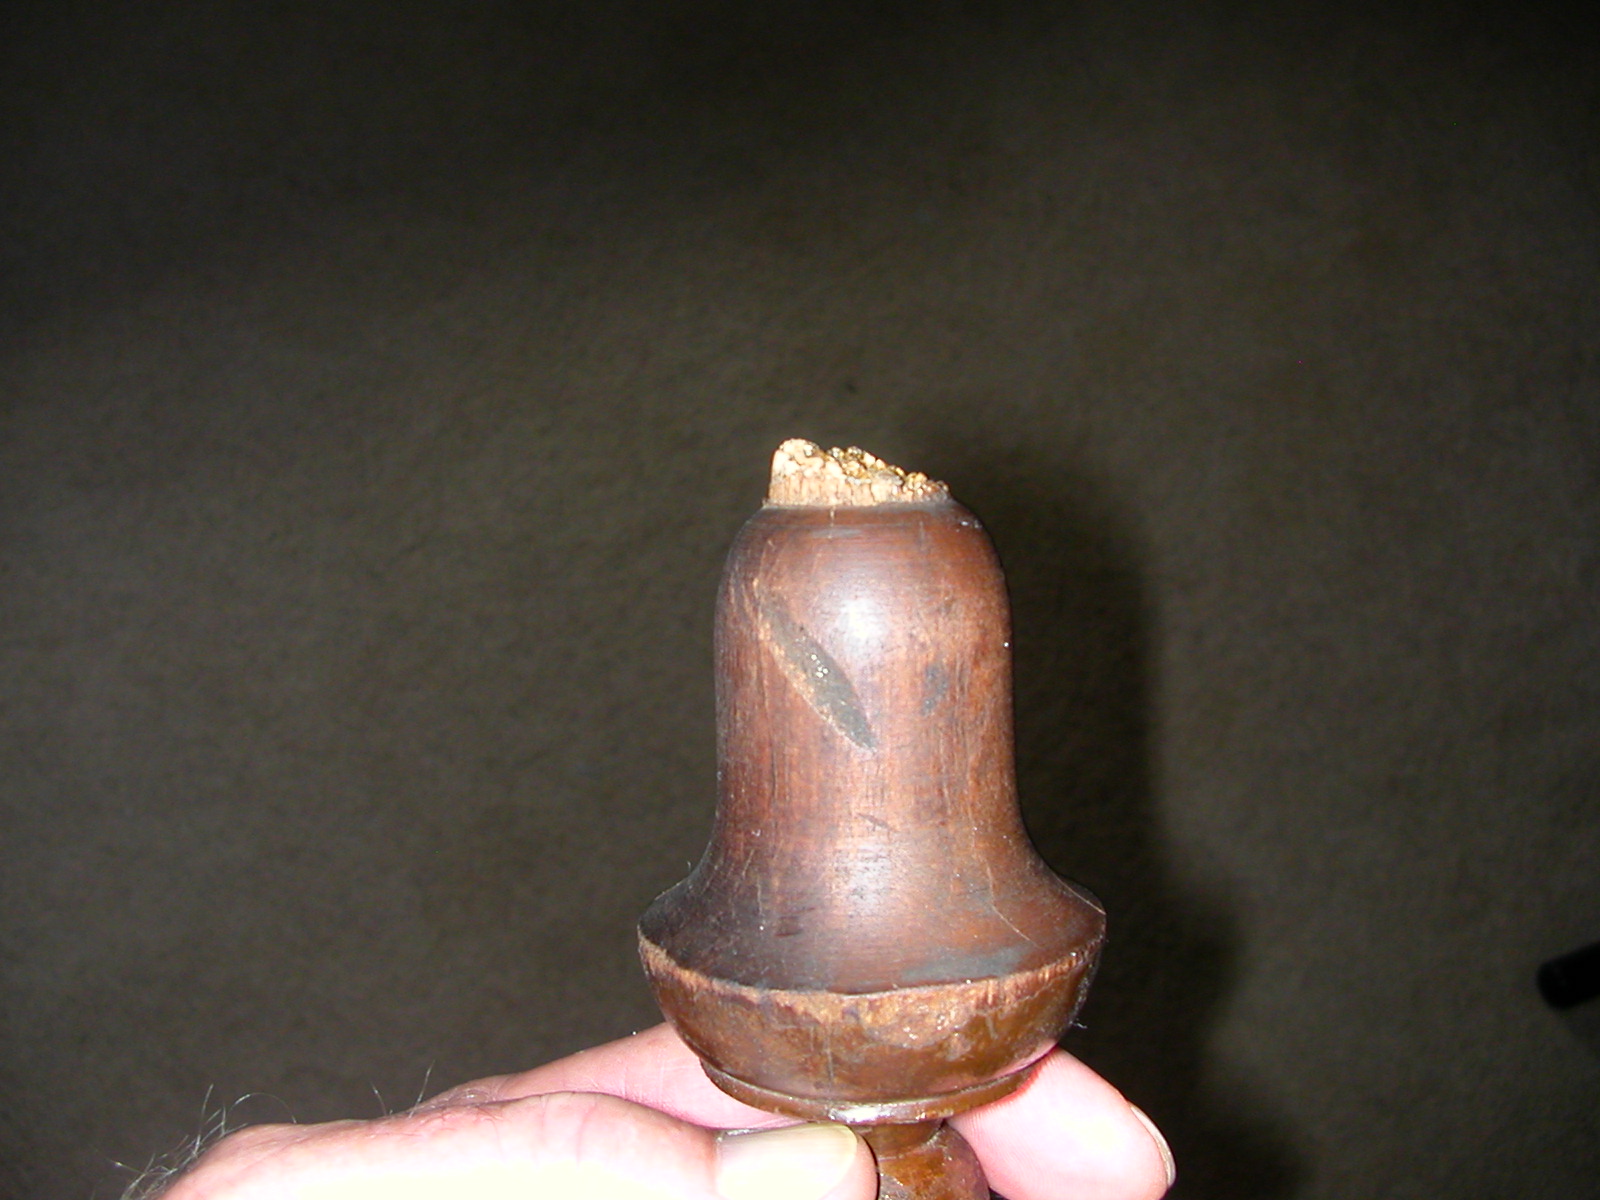
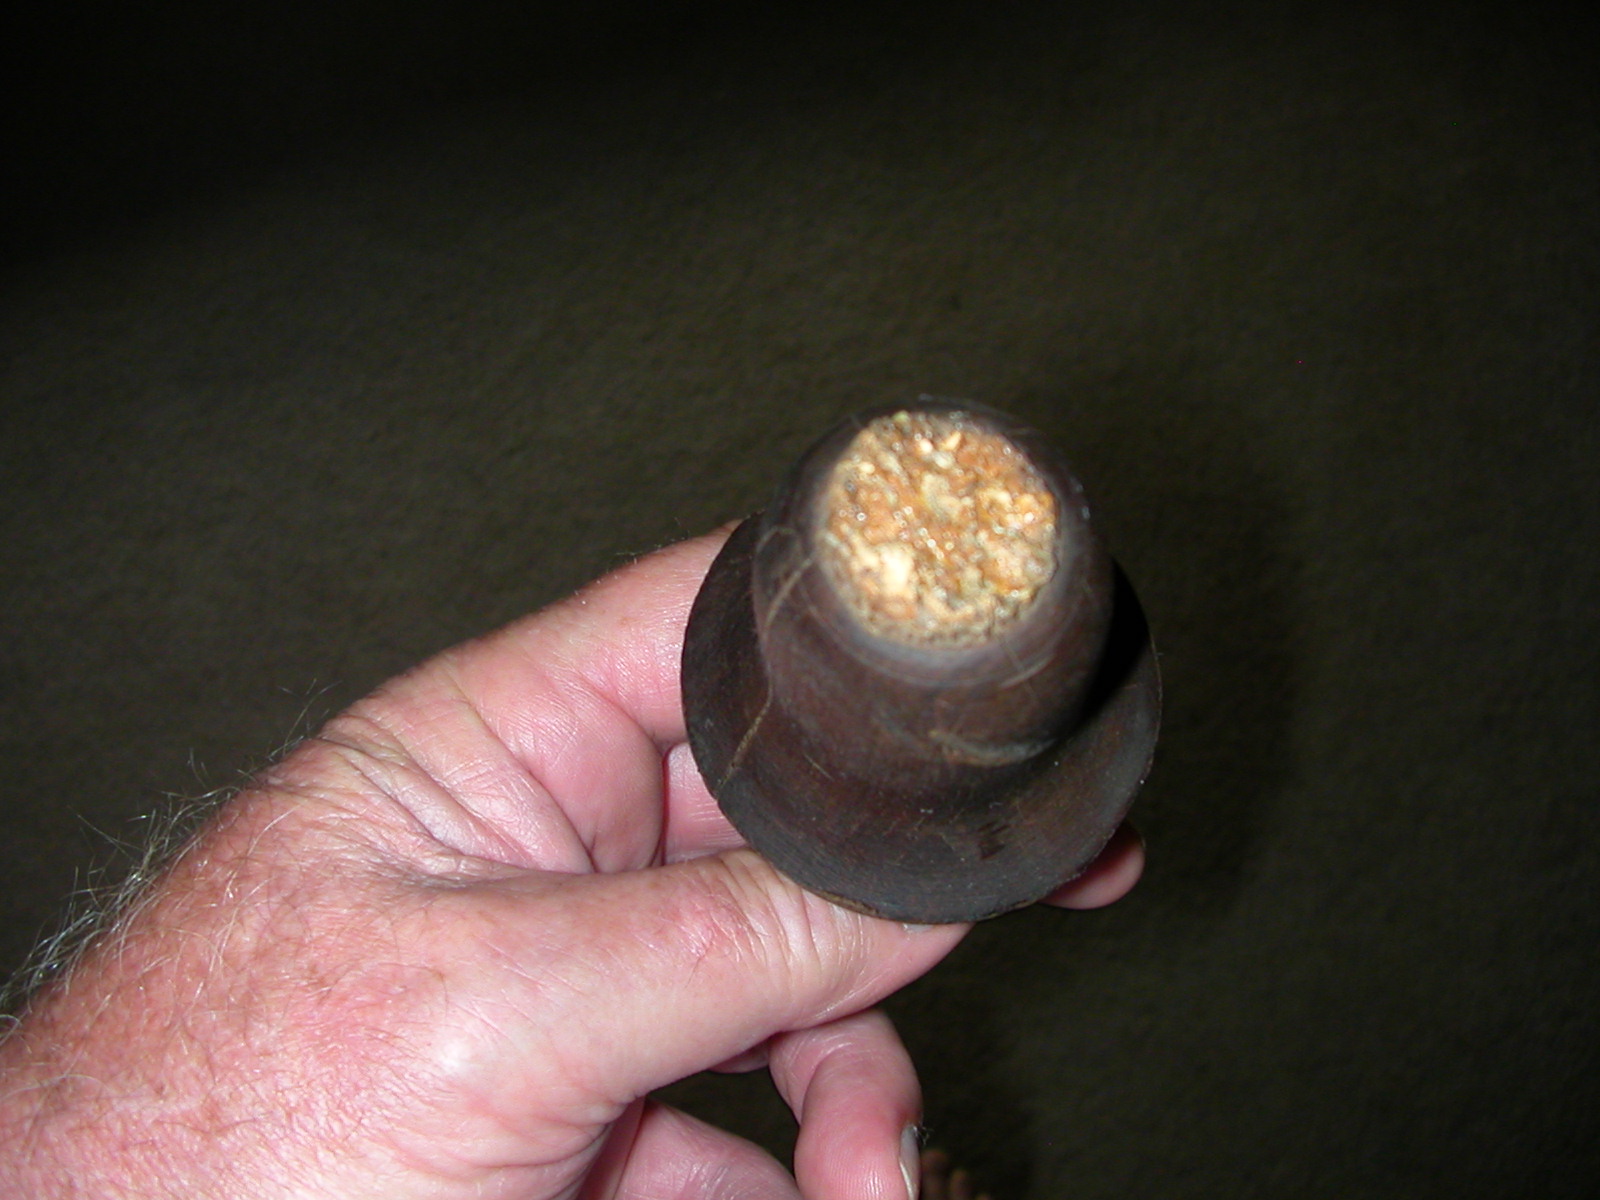
    I have a broken bed post. I want to drill a hole for a dowel on each piece so I can glue it back together. I would like to hear any ideas as to how to go about this.
    Attachment 12959Attachment 12960Attachment 12961Attachment 12962
    Well, I finally decide to do this and get it out of my way. I roughly marked center and hand drilled the bottom for a good fit for the dowel. Theh I did the same on the top piece, but wallered the hole out a bit. lathered it up with gorrilla wood glue and clamped it . It centered up OK and doesn't even look too bad


    2,000+ Tool Plans

  11. The Following User Says Thank You to bluegrallis For This Useful Post:

    Paul Jones (Sep 27, 2016)

Thread Information

Users Browsing this Thread

There are currently 1 users browsing this thread. (0 members and 1 guests)

Bookmarks

Posting Permissions

  • You may not post new threads
  • You may not post replies
  • You may not post attachments
  • You may not edit your posts
  •