
 LinkBack URL
 About LinkBacks

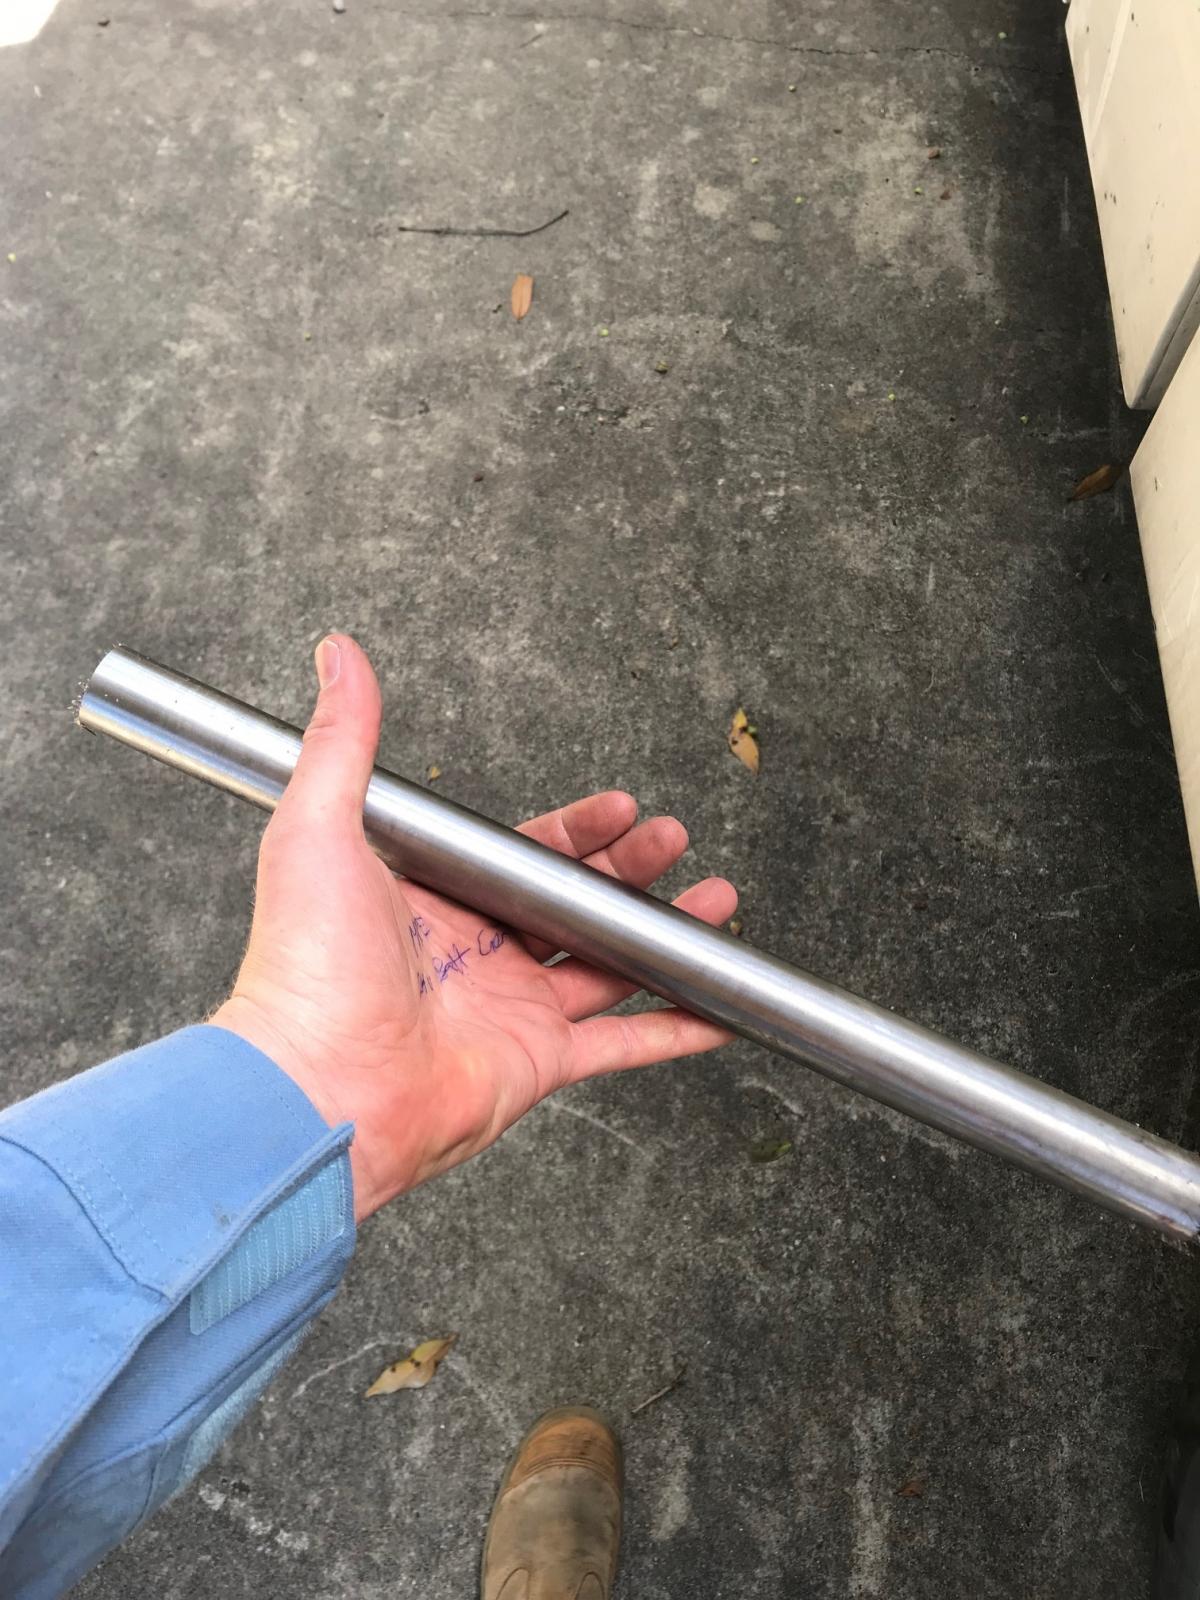
The next step I took was to buy the pins for the height adjustment of the press bed. I decided on some 30mm 4140 ground bar because it was accessible and far exceeded the shear strength required. I also picked up the 7/8UNF bolts to hold the two halves of the bed together.
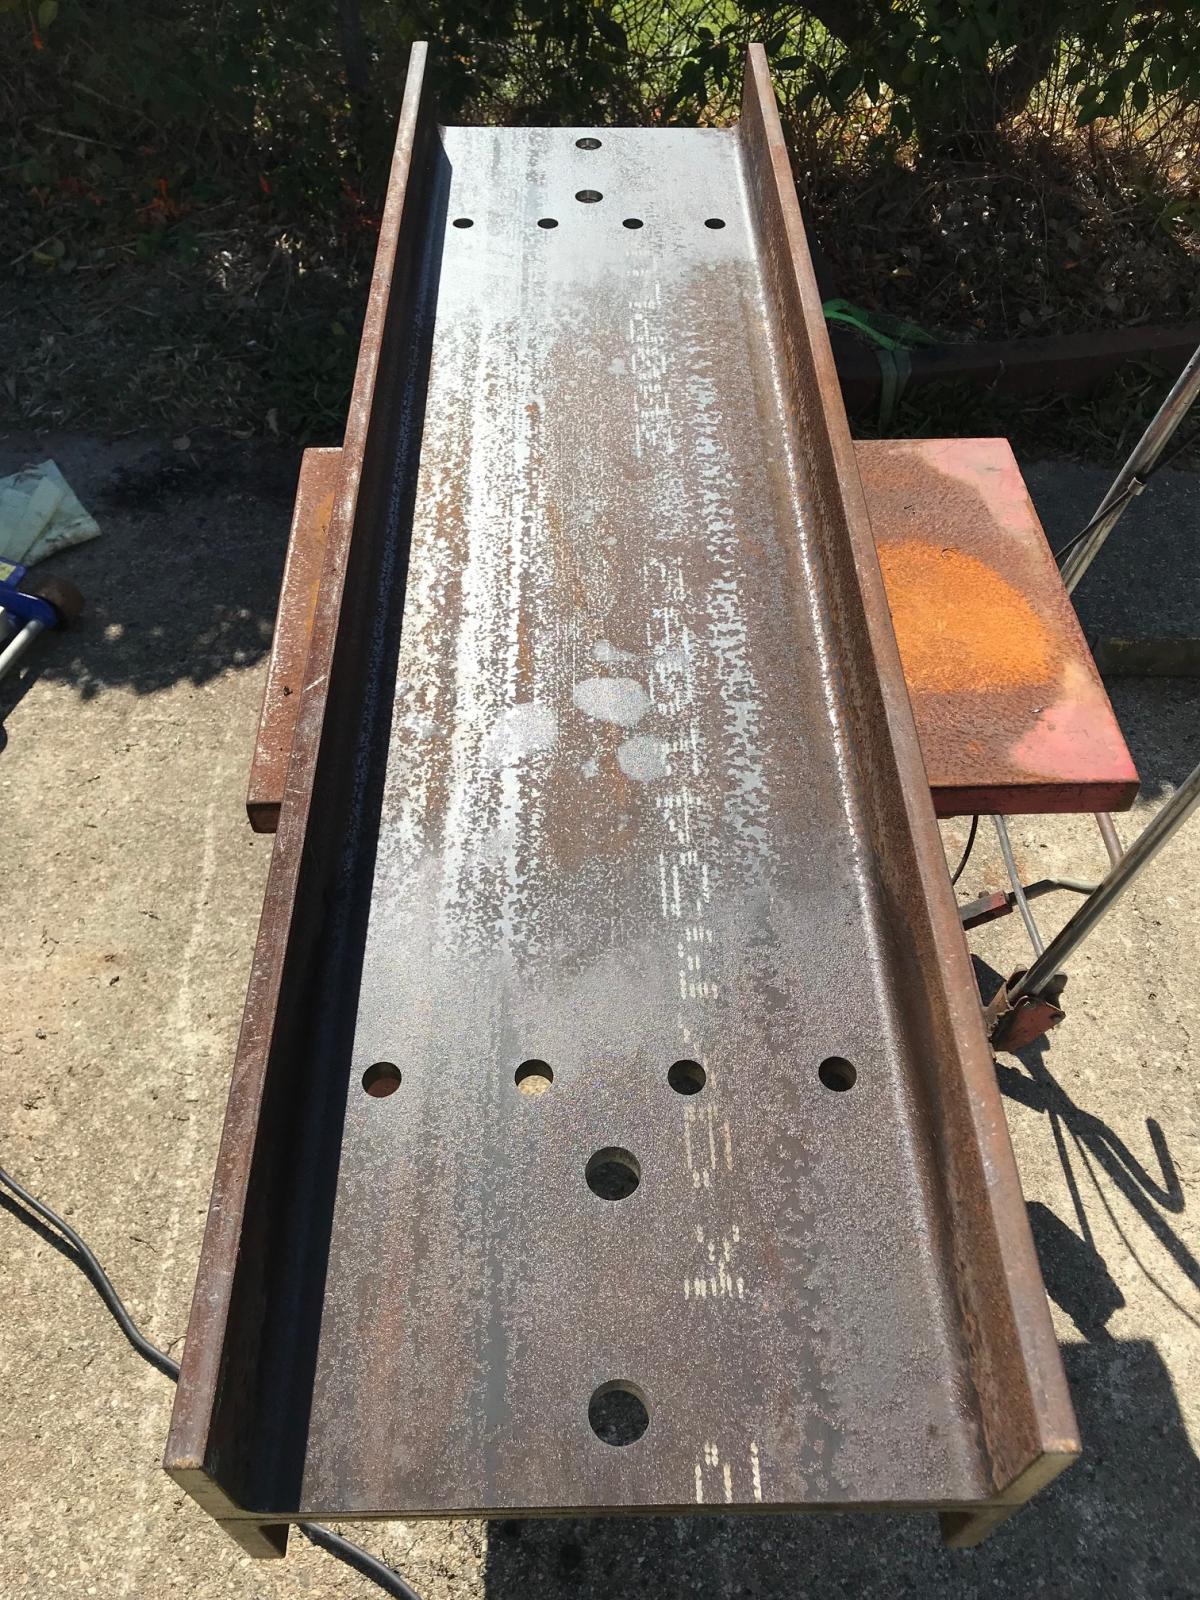
I placed the two halves of the bed back to back to ensure the through holes would be as accurate as possible. One by one I drilled and installed the 7/8th bolts to again ensure the holes were as parallel as possible.
Then I marked out and drilled the 30mm holes for the pins.
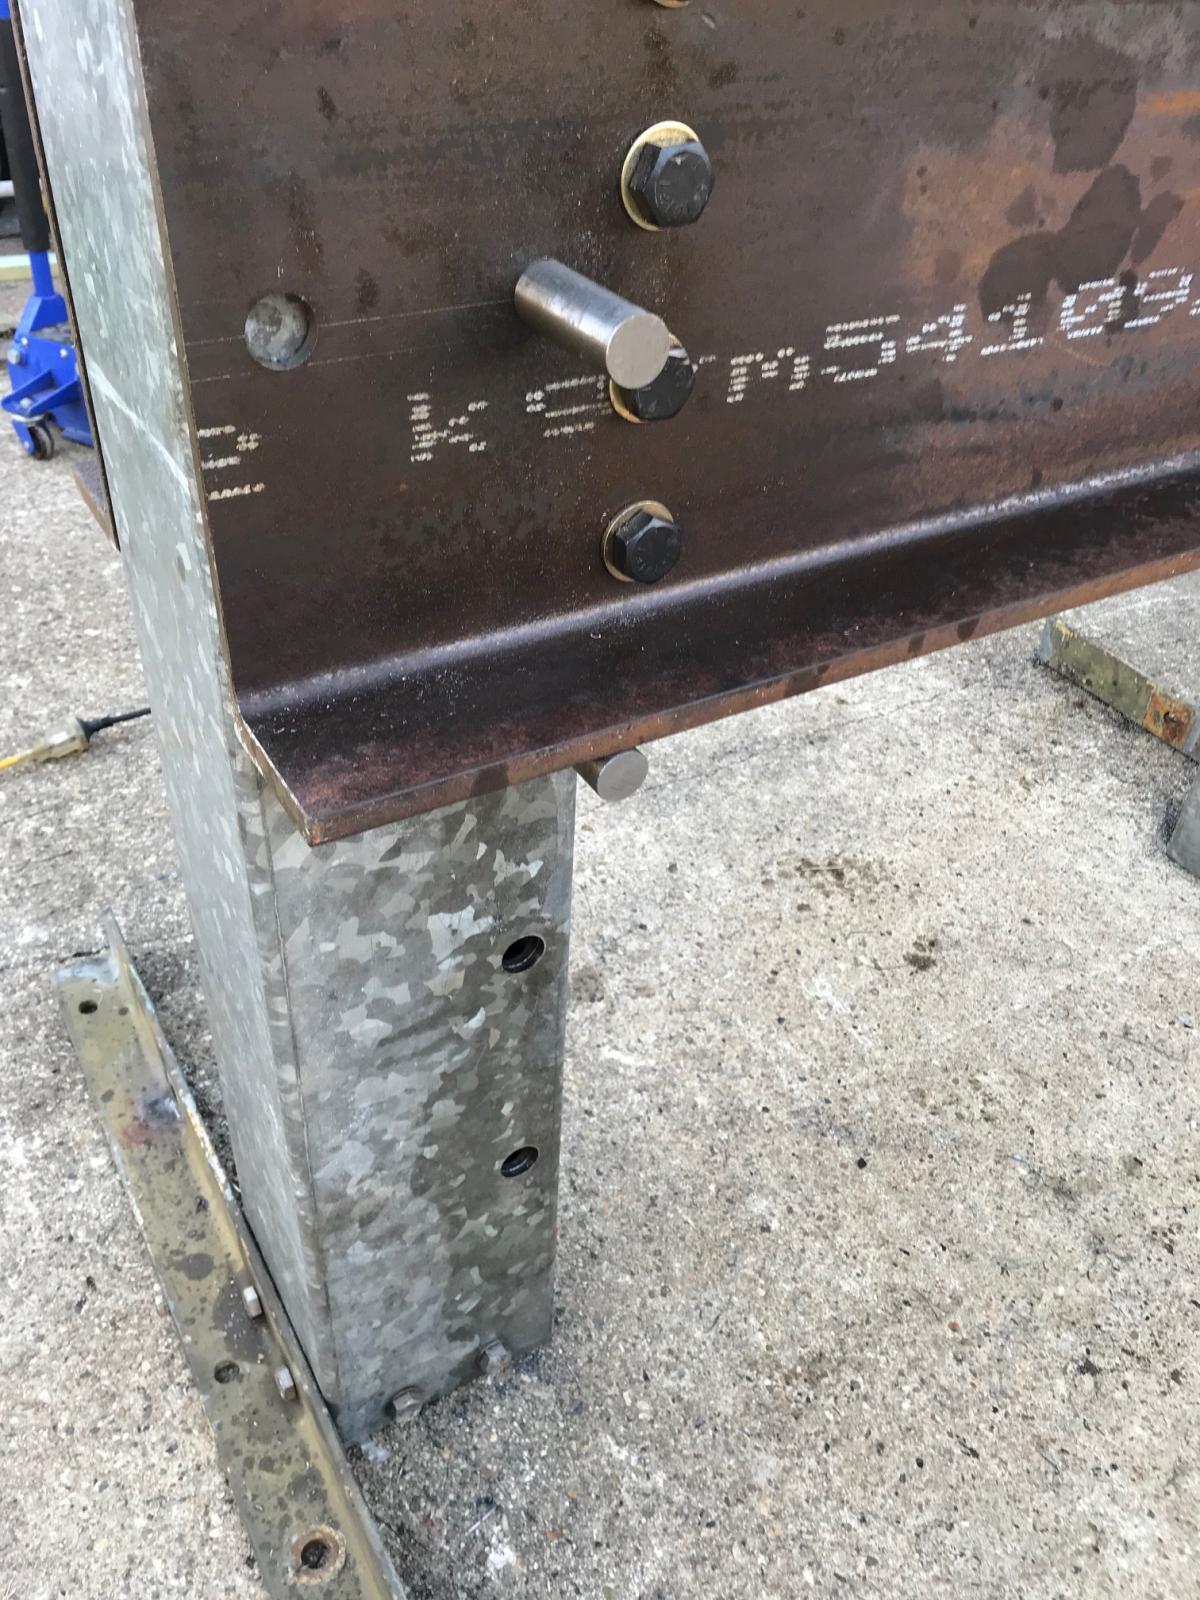
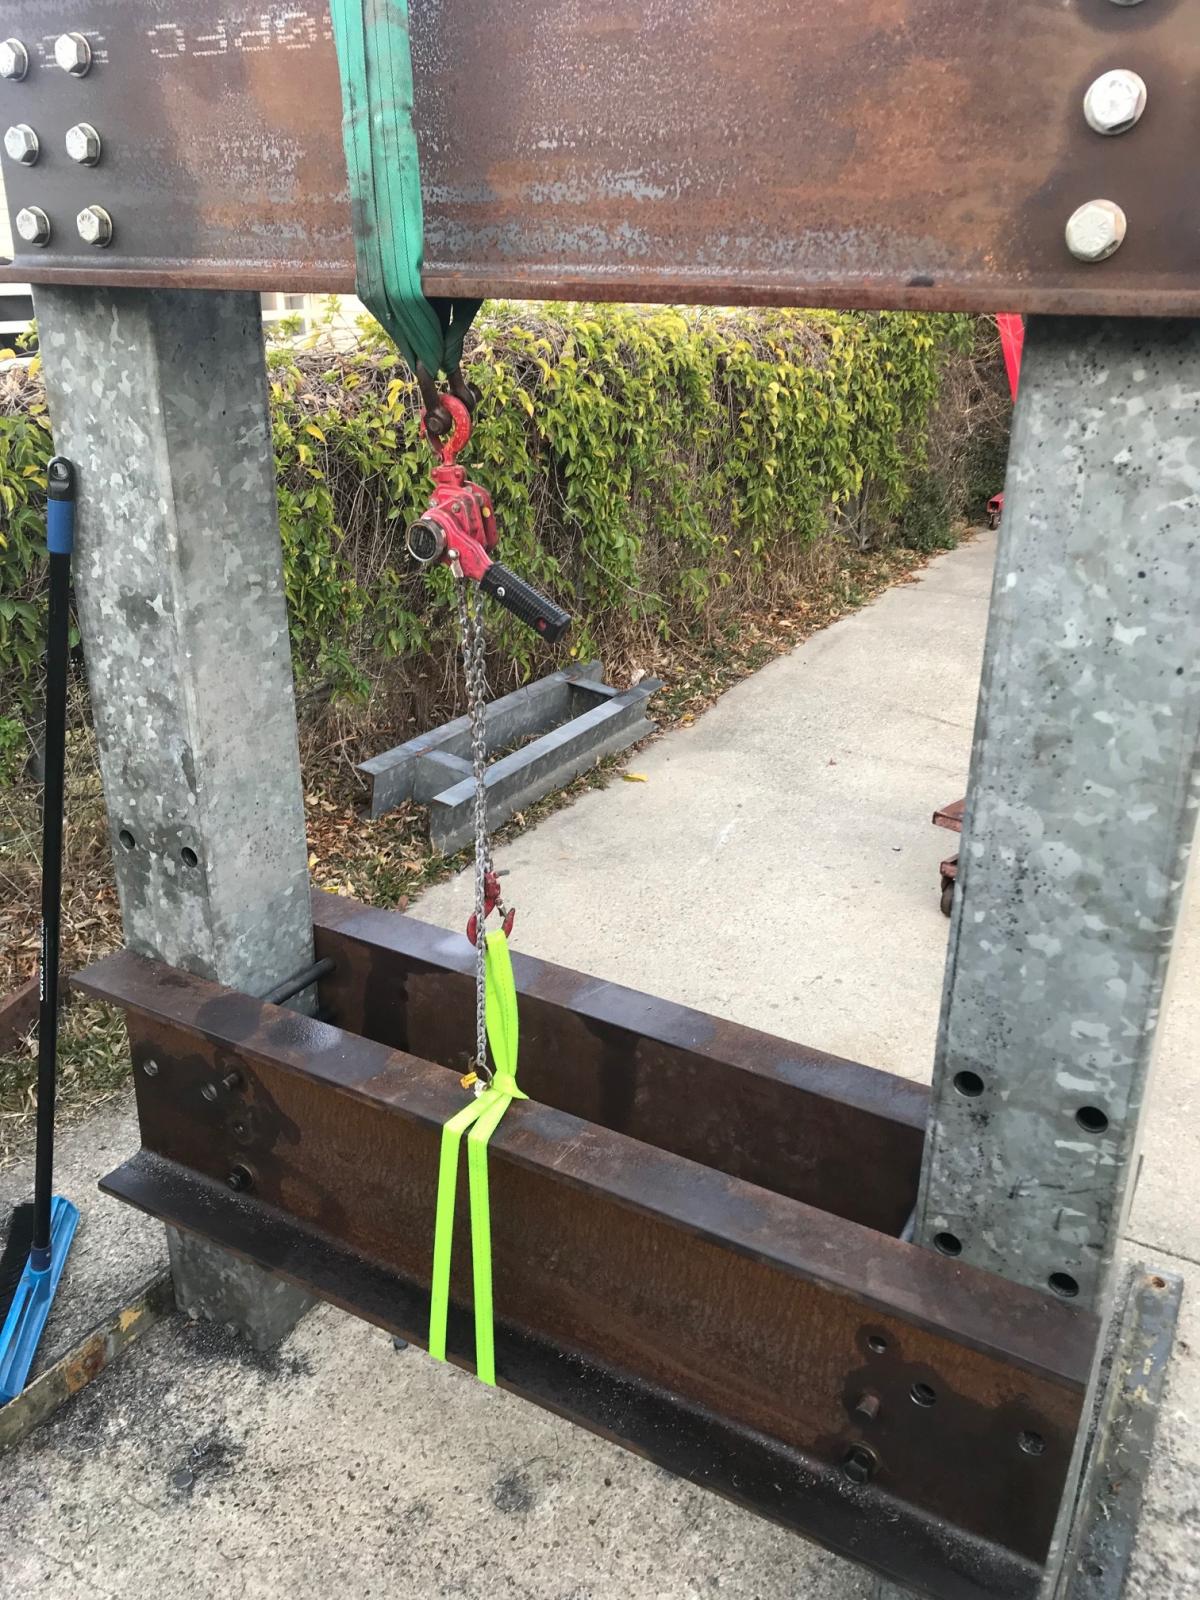
Drilling the uprights accurately was the next issue. I wanted the bed to be as square as possible. Starting at the bottom I assembled the bed around the uprights and measured everything to ensure it was sitting square before drilling the first set of holes through the uprights. Drilling the 30mm holes was a very time consuming task. Because I reinforced the box section with channel I had to drill through one layer, remove the plug and swarf and drill through the second before resetting the drill over the opposite hole and starting again. I installed the pins in the holes after drilling to ensure nothing was moving as I worked. Once the first set of holes were drilled I lifted up the bed, re-installed the pins in the holes and lowered the bed onto the pins, ready for the next set of holes. As you can see in the picture I drilled one set of holes first so I had the possibility of repairing any accidental mistakes.
The adjustable bed stays within 2mm of tolerance throughout the entire range of movement, more than accurate enough in my opinion. I lowered the bed and drilled the rest of the holes on the way back down.
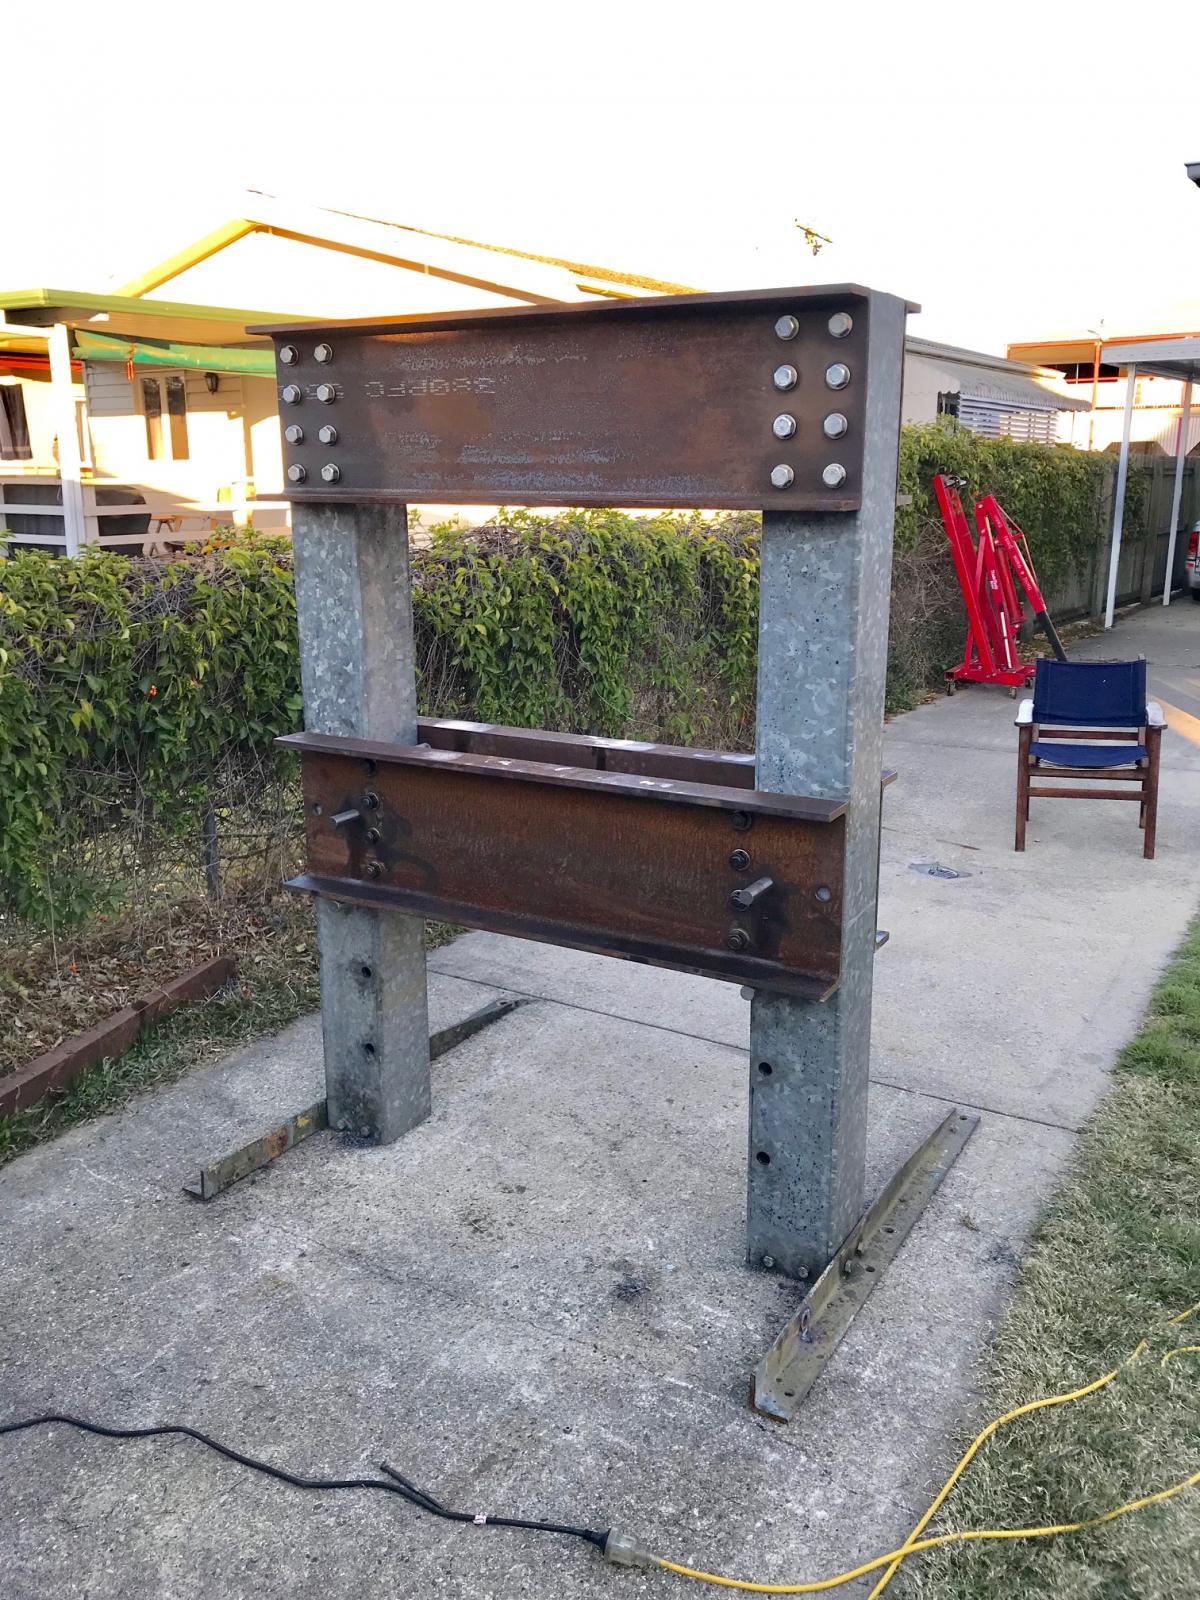
Next step was to build the carriage to support the hydraulic cylinder.


 Reply With Quote

Bookmarks