Free 186 More Best Homemade Tools eBook:  
Get 2,000+ tool plans, full site access, and more.

User Tag List

Page 1 of 2 1 2 LastLast
Results 1 to 10 of 18

Thread: Improving the RF-30 Mill/Drill Y Axis Take Up Nut

  1. #1
    Supporting Member rgsparber's Avatar
    Join Date
    Nov 2012
    Location
    Phoenix, AZ
    Posts
    1,278
    Thanks
    735
    Thanked 2,764 Times in 650 Posts

    rgsparber's Tools

    Improving the RF-30 Mill/Drill Y Axis Take Up Nut

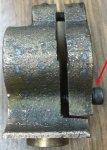
    This article deals with modifying the take up nut on a RF-30 Mill/Drill in order to reduce both backlash and change in backlash over distance. It assumes the Y leadscrew is parallel to the Y ways within 1/2 thou. How to do that is the subject of a future article.

    If you are interested, please see

    http://rick.sparber.org/YTUN.pdf

    186 More Best Homemade Tools eBook

  2. The Following 3 Users Say Thank You to rgsparber For This Useful Post:

    C-Bag (Sep 14, 2015), kbalch (Sep 14, 2015), PJs (Sep 17, 2015)

  3. #2
    Supporting Member C-Bag's Avatar
    Join Date
    Aug 2015
    Location
    California, central coast
    Posts
    720
    Thanks
    689
    Thanked 876 Times in 471 Posts

    C-Bag's Tools
    Thanks Rick.

    As an owner of an old Taiwan RF30 this is very pertinent to me. I have yet to delve into the X and Y adjustments. I would like to go through the whole machine because it seems it's gone through a lot of different owners and each person seems to done his own little "experiments" that I've had to go in and fix. Each fix though has made the mill work much better and having so many users like yourself who have published your improvements/fixes have been a true godsend in my quest to understand and maintain this mill.

    2000 Tool Plans

  4. The Following User Says Thank You to C-Bag For This Useful Post:

    PJs (Sep 17, 2015)

  5. #3
    Supporting Member rgsparber's Avatar
    Join Date
    Nov 2012
    Location
    Phoenix, AZ
    Posts
    1,278
    Thanks
    735
    Thanked 2,764 Times in 650 Posts

    rgsparber's Tools
    You may go screaming from the room when you see what I had to do in order to adjust the X and Y leadscrews so they are parallel to their ways. Had to deal with XYZ movement along with roll, pitch, and yaw. Yet the results make it worthwhile. This is the only way to get a small backlash without binding.

  6. The Following User Says Thank You to rgsparber For This Useful Post:

    PJs (Sep 17, 2015)

  7. #4
    Supporting Member C-Bag's Avatar
    Join Date
    Aug 2015
    Location
    California, central coast
    Posts
    720
    Thanks
    689
    Thanked 876 Times in 471 Posts

    C-Bag's Tools
    Not being a CNC guy and not working at the tolerances you're trying to achieve it will mostly be observation of what your methodology and what's applicable to my situation. I look forward to your next article.


  8. #5
    kbalch's Avatar
    Join Date
    Jun 2012
    Location
    Clermont, FL
    Posts
    5,034
    Thanks
    2,275
    Thanked 531 Times in 383 Posts
    Thanks Rick! I've added your RF-30 Take Up Nut Modification to our CNC category, as well as to your builder page: Rick Sparber's Homemade Tools. Your receipt:


  9. #6
    Supporting Member Paul Jones's Avatar
    Join Date
    May 2014
    Location
    Del Mar, California
    Posts
    1,231
    Thanks
    5,810
    Thanked 1,441 Times in 655 Posts

    Paul Jones's Tools
    Thanks Rick,
    Looks like a real winner for removing backlash. Perhaps you can modify the lower screw to be your own version of a NYLOK® TORQ-STRIP® screw by using a Dremel cutoff wheel to cut a thin slot and then filling in with RTV silicone. Looking forward to you next article on the RF-30 Mill/Drill.

  10. The Following User Says Thank You to Paul Jones For This Useful Post:

    PJs (Sep 17, 2015)

  11. #7
    Supporting Member rgsparber's Avatar
    Join Date
    Nov 2012
    Location
    Phoenix, AZ
    Posts
    1,278
    Thanks
    735
    Thanked 2,764 Times in 650 Posts

    rgsparber's Tools
    Paul,

    Your suggestion of increasing friction on the screw is a good one. I have played with RTV many times and found it does not hold up well around movement. Using a strip of nylon is far more robust. Someone suggested using a Belleville washer between the parts and that would work too. Using split washers would not be good because of the uneven force. I'm wondering if rubber O-rings might provide enough pressure on the parts to lock in the screw. These O-rings only need to provide drag and will not see any leadscrew force.

    Thanks!

    Rick

  12. The Following User Says Thank You to rgsparber For This Useful Post:

    PJs (Sep 17, 2015)

  13. #8
    Supporting Member C-Bag's Avatar
    Join Date
    Aug 2015
    Location
    California, central coast
    Posts
    720
    Thanks
    689
    Thanked 876 Times in 471 Posts

    C-Bag's Tools
    Paul's nylok torkstrip type bolt would be my choice too. But if I was going to make one I agree with Rick, RTV just won't hold up. But UHMW would, it would just be tricky to do that small and I'd have to make it beforehand because this will take the mill outta commission. O rings in my experience are lousy washers. They are made to be retained in a recess with x amount of compression. Without the recess they squish out and split.

    If I was going to do some kind of torkstrip, I think I'd want to do the other bolt too so I could have the approximate same feel to hope to tighten them equally, no?

  14. The Following User Says Thank You to C-Bag For This Useful Post:

    PJs (Sep 17, 2015)

  15. #9
    Supporting Member C-Bag's Avatar
    Join Date
    Aug 2015
    Location
    California, central coast
    Posts
    720
    Thanks
    689
    Thanked 876 Times in 471 Posts

    C-Bag's Tools
    BTW I've been working my way through your site and looked through the tutorial on pulling the lead screws, but I don't see anything on the kind of lube you used to reassemble. Mine needs that cleaning pretty bad, but a while back I put some Mobil1 on the X screw and it was magic. I know the old Bridgport we had at work had a single point oiler system. What would be wrong with oil instead of grease if you kept track of it?

  16. #10
    Supporting Member rgsparber's Avatar
    Join Date
    Nov 2012
    Location
    Phoenix, AZ
    Posts
    1,278
    Thanks
    735
    Thanked 2,764 Times in 650 Posts

    rgsparber's Tools
    I have spent the entire summer fussing with my leadscrews and have used lithium grease, way oil, spindle oil, Teflon, and graphite at different times. When I was running my mill manually, I only used lithium grease. The key is to remember to oil it at regular intervals!

Thread Information

Users Browsing this Thread

There are currently 1 users browsing this thread. (0 members and 1 guests)

Tags for this Thread

Bookmarks

Posting Permissions

  • You may not post new threads
  • You may not post replies
  • You may not post attachments
  • You may not edit your posts
  •