Free 186 More Best Homemade Tools eBook:  
Get 2,000+ tool plans, full site access, and more.

User Tag List

Page 1 of 2 1 2 LastLast
Results 1 to 10 of 11

Thread: Laser engraver/cutter from old 3D printer.

  1. #1
    Supporting Member tonyfoale's Avatar
    Join Date
    Nov 2016
    Location
    Spain
    Posts
    1,566
    Thanks
    690
    Thanked 2,650 Times in 710 Posts

    tonyfoale's Tools

    Laser engraver/cutter from old 3D printer.

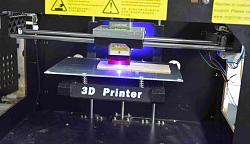
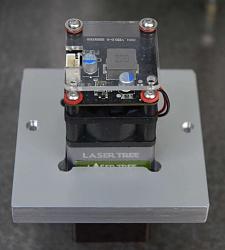
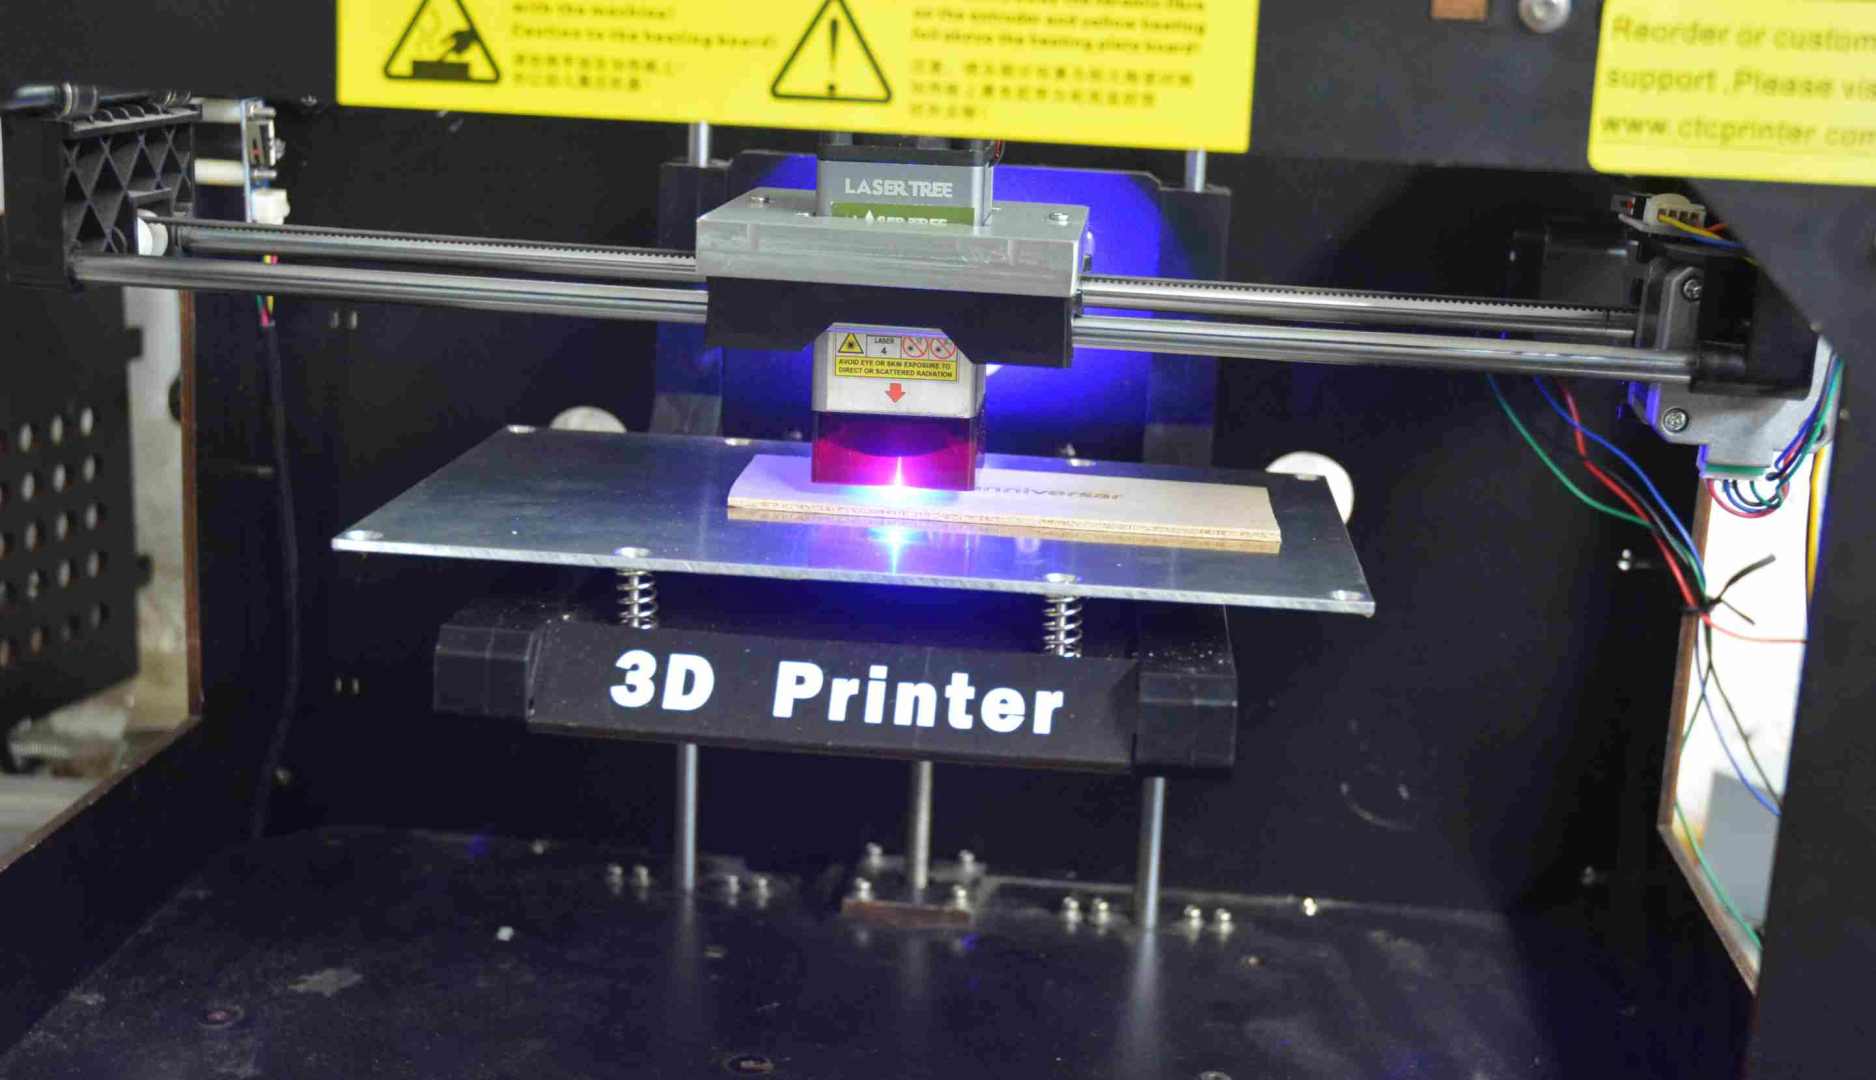
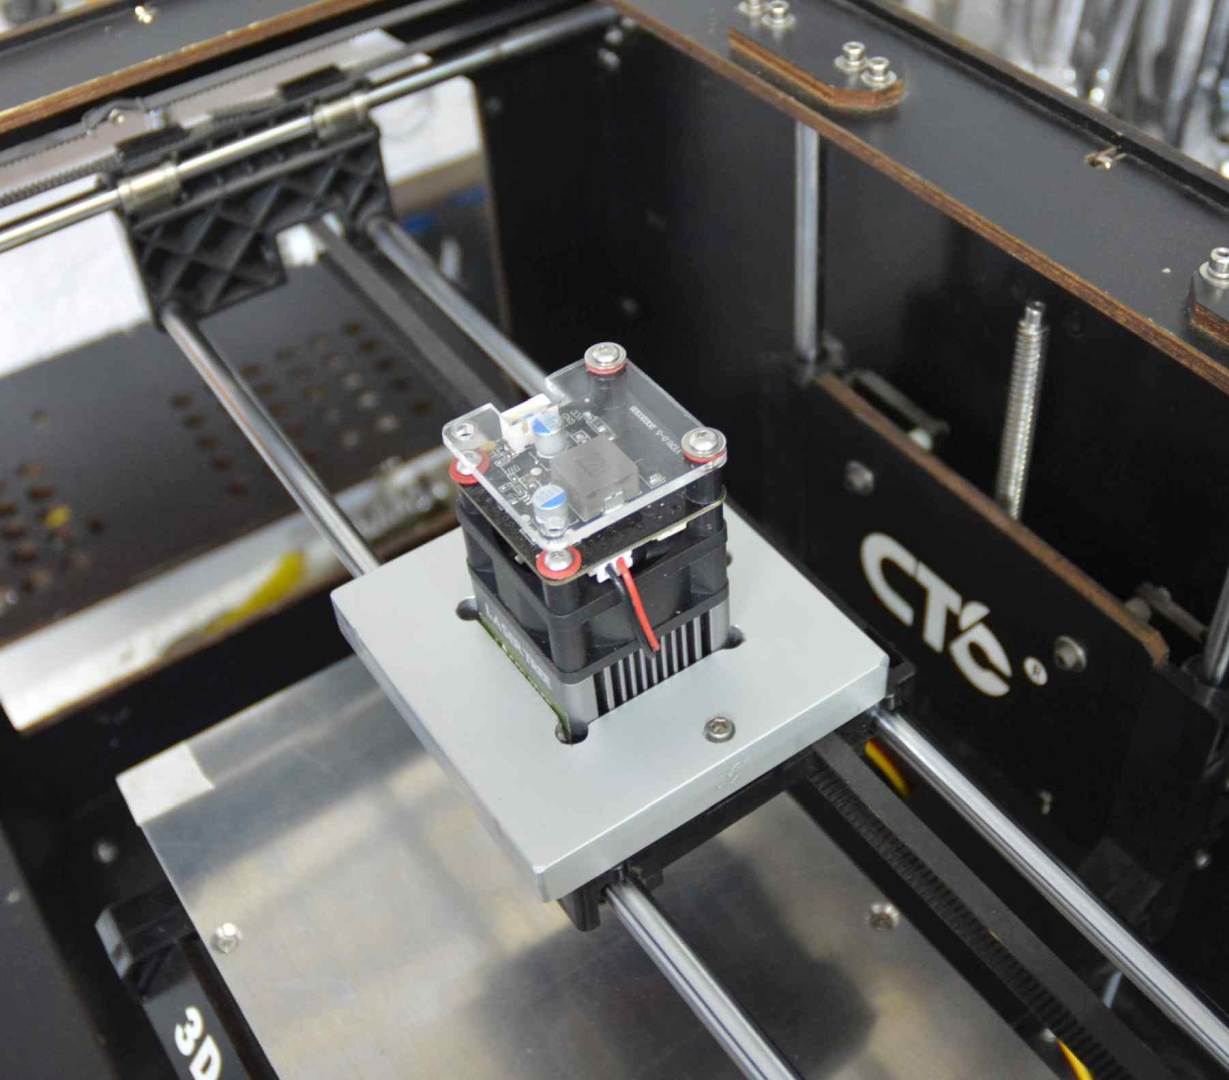
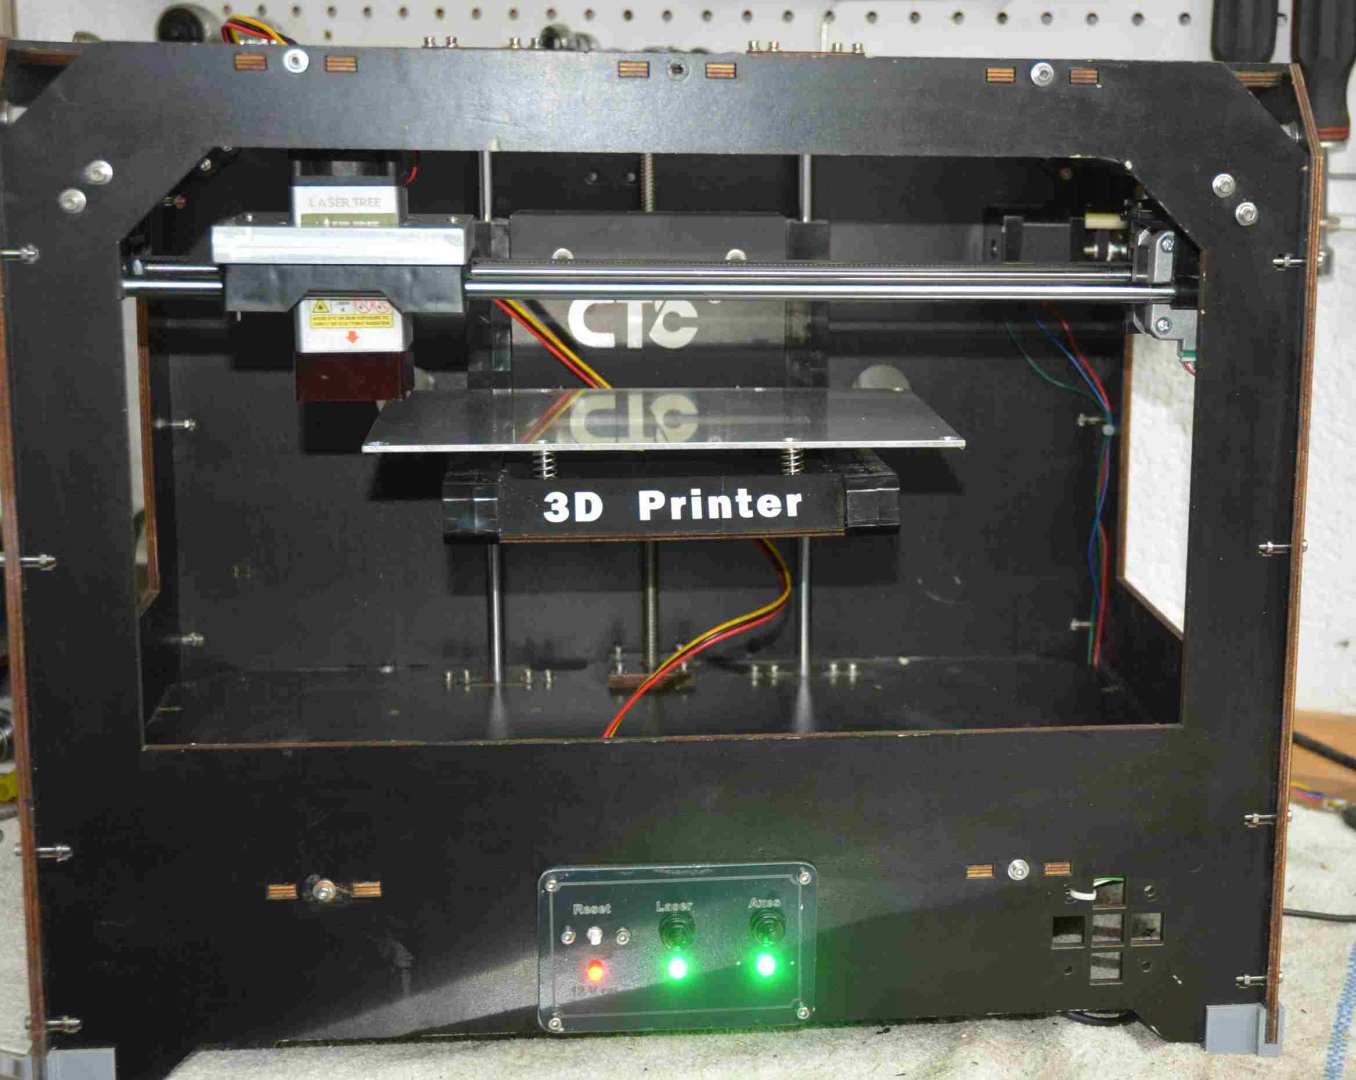
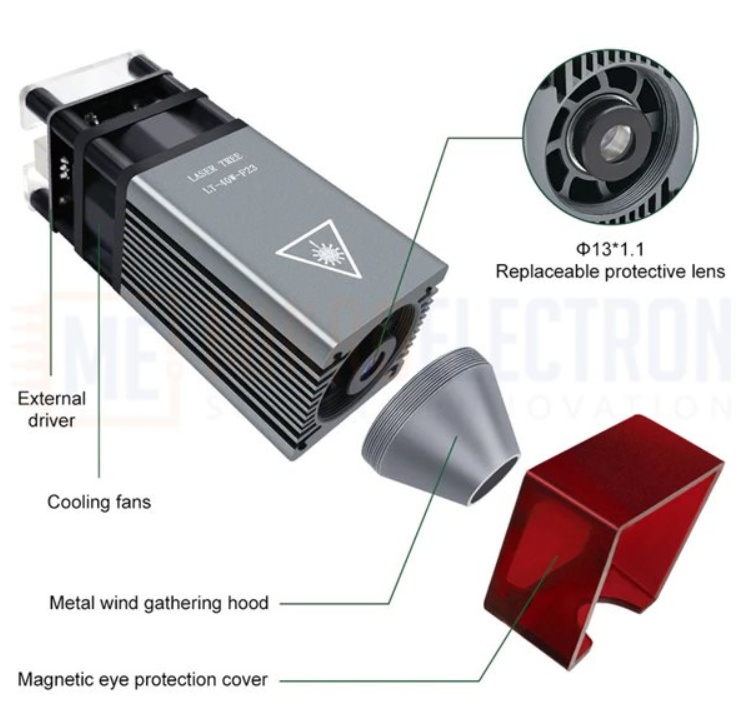
    I became interested in learning if a laser engraver/cutter would have any use for me. My son had a surplus 3D printer and it seemed that it would be a simple and quick job to replace the 3D printing head with a laser module. I bought a low power laser diode variety as a low cost option to see if it might prove useful, if so then I could replace it with a more powerful laser at a later date. For reference the second photo shows the laser that I bought, it is specified as having an optical power of 5W +/- 1W. 10 and 20W are now common but the price increases considerably.

    Laser engraver/cutter from old 3D printer.-laserthing002.jpg Laser engraver/cutter from old 3D printer.-mylaser.jpg Click for full size pix.

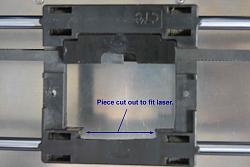
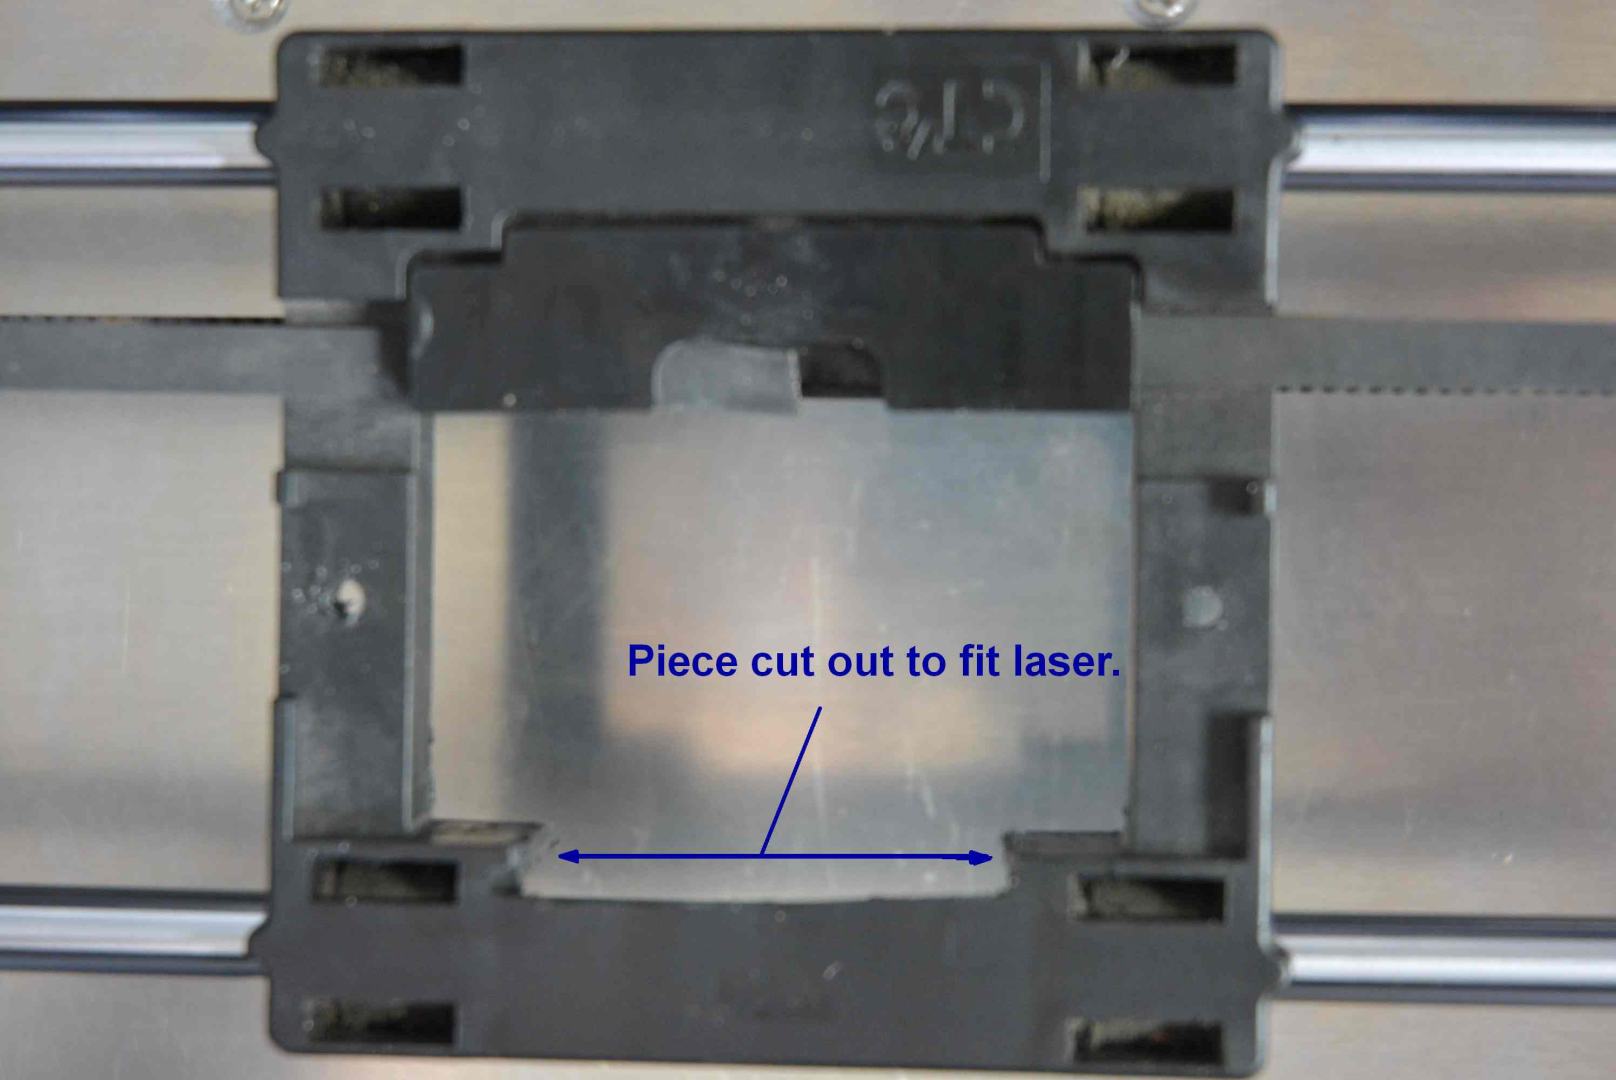
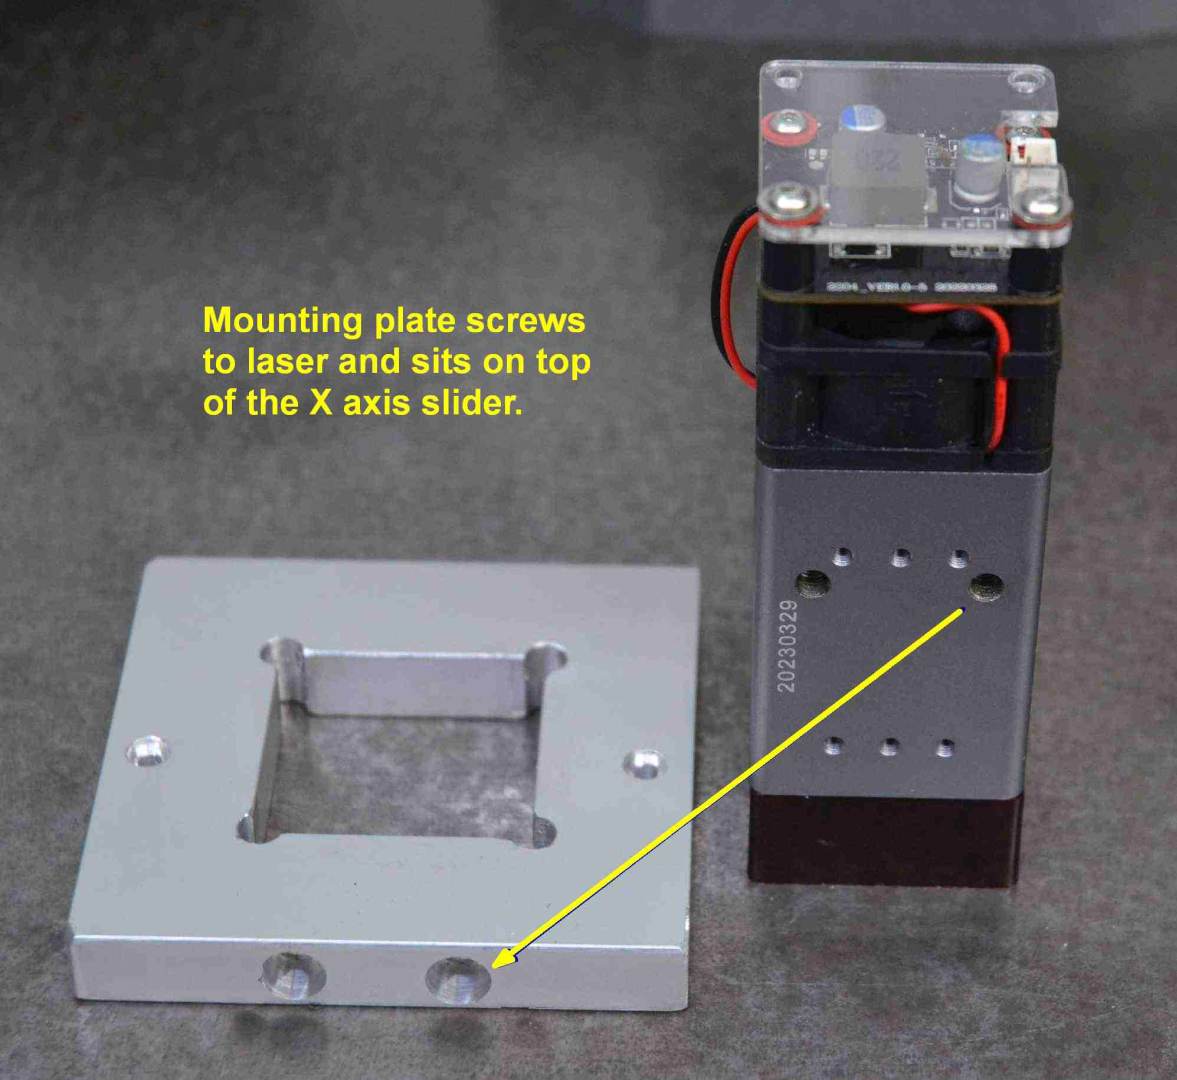
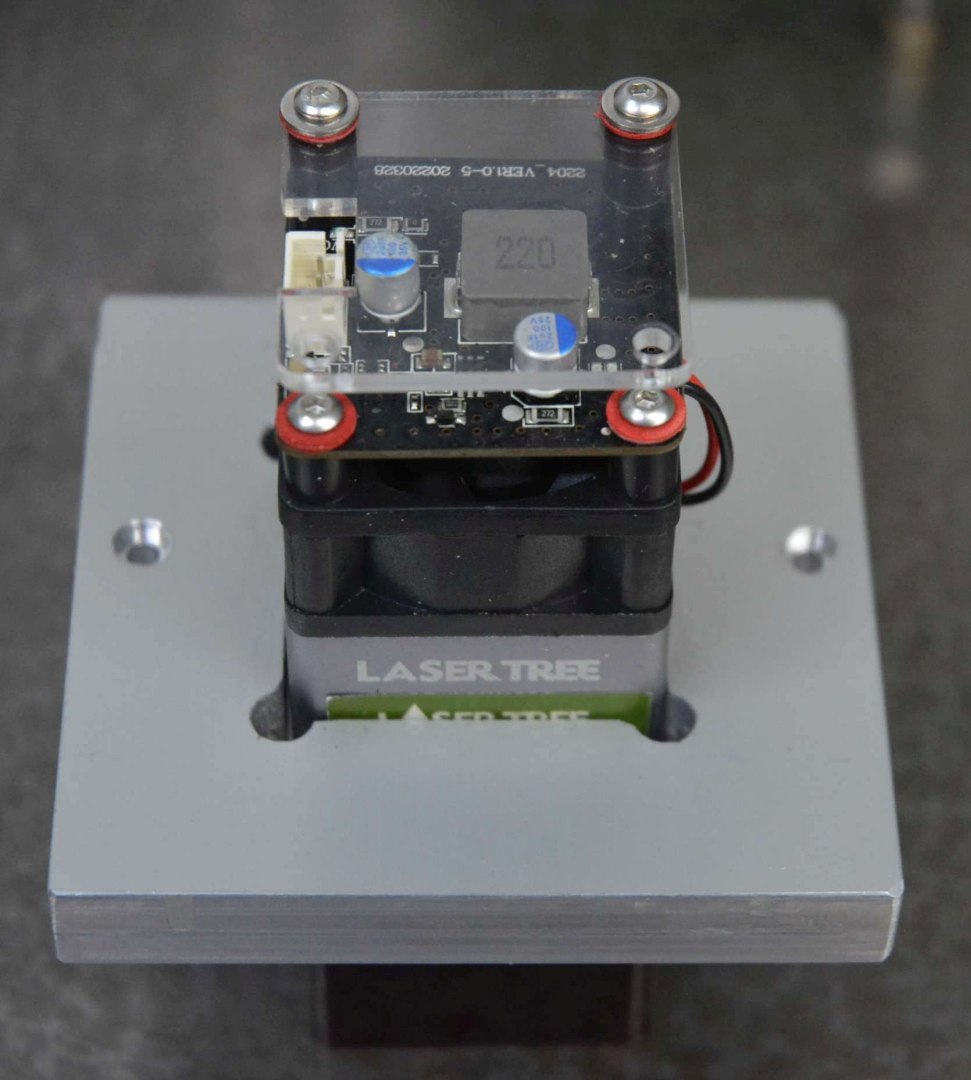
    Once the print head was removed it left a horizontal surface to mount the laser head to but I had to cut a bit out for it to fit. Then I cut a square hole in a piece of aluminium plate to accept the laser and this plate sat on the original print head support. Hardly any work required.

    Laser engraver/cutter from old 3D printer.-laserthing025.jpg Laser engraver/cutter from old 3D printer.-laserthing026.jpg

    Laser engraver/cutter from old 3D printer.-laserthing028.jpg Laser engraver/cutter from old 3D printer.-laserthing029.jpg

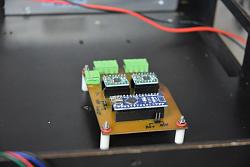
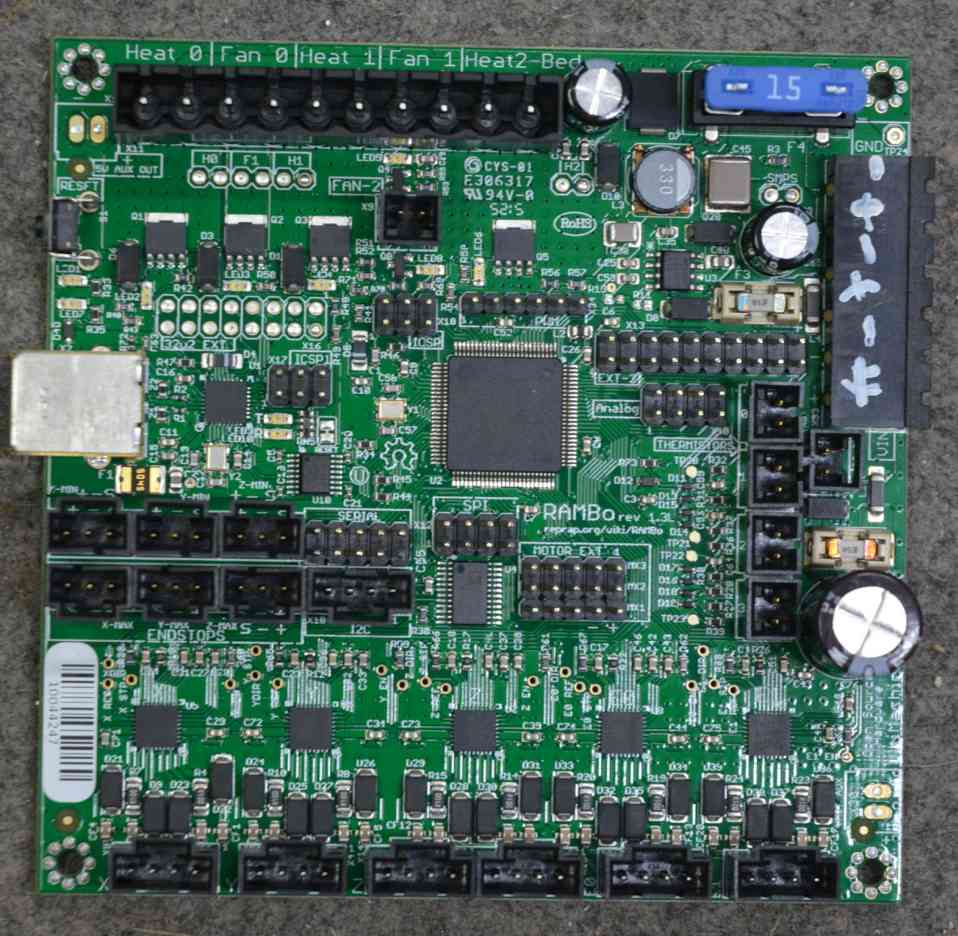
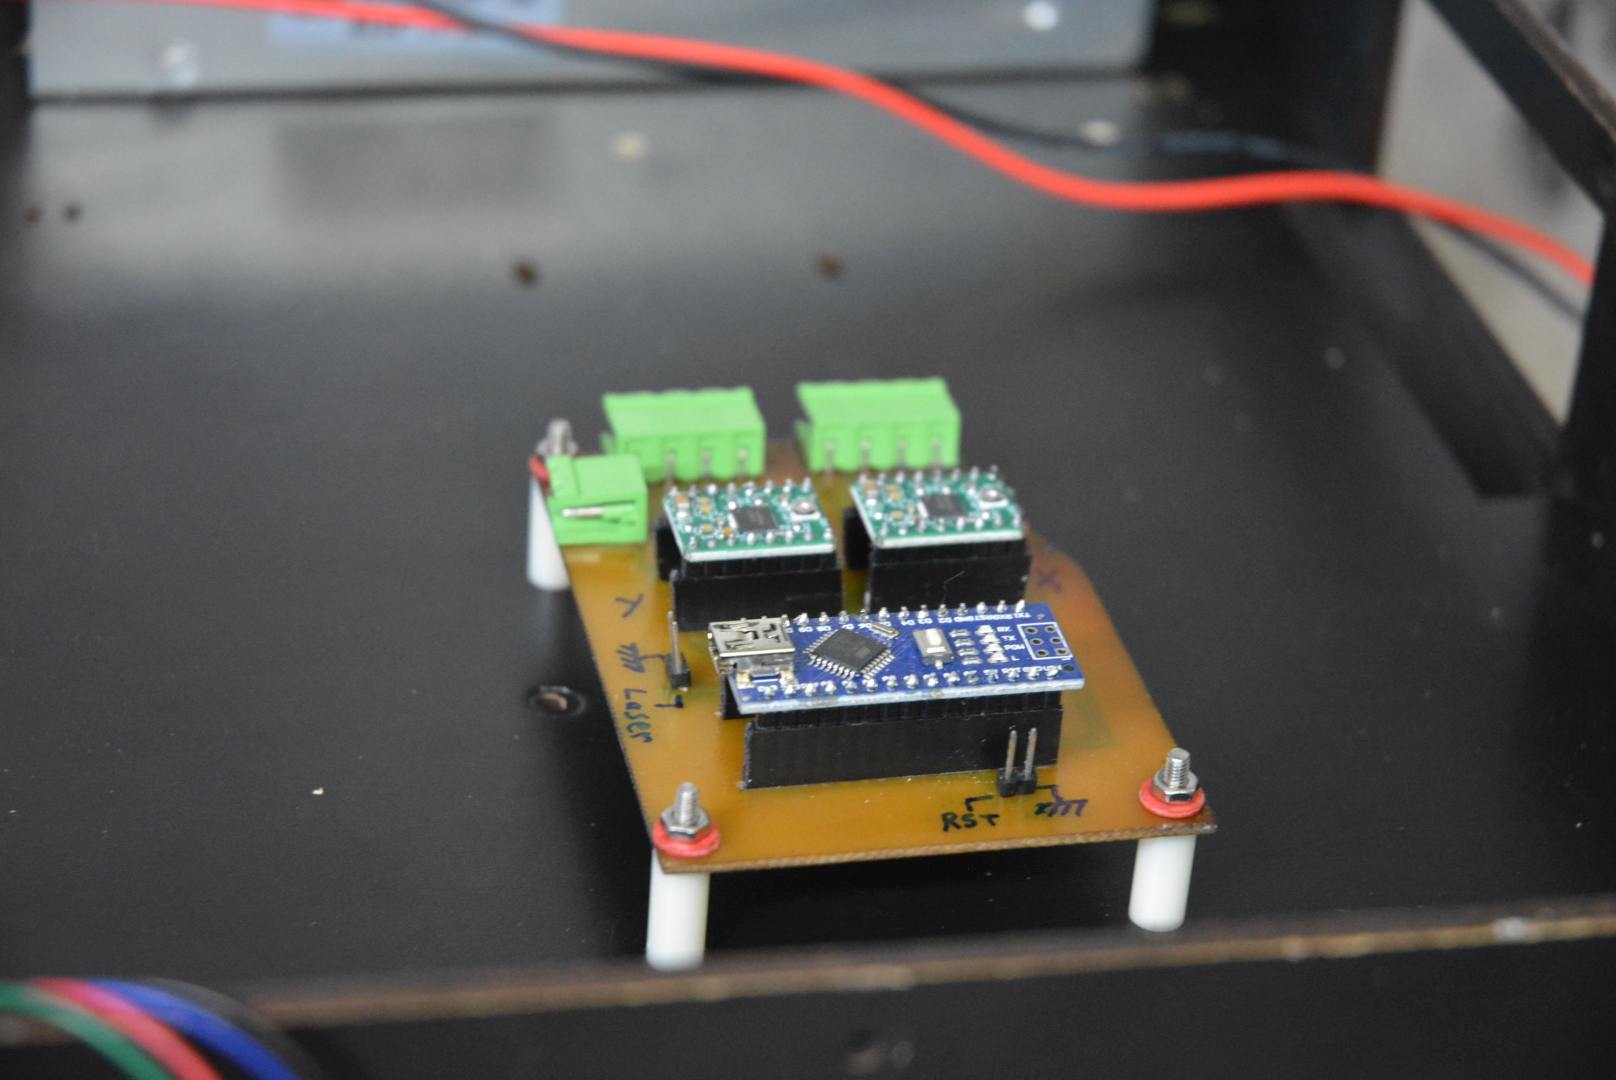
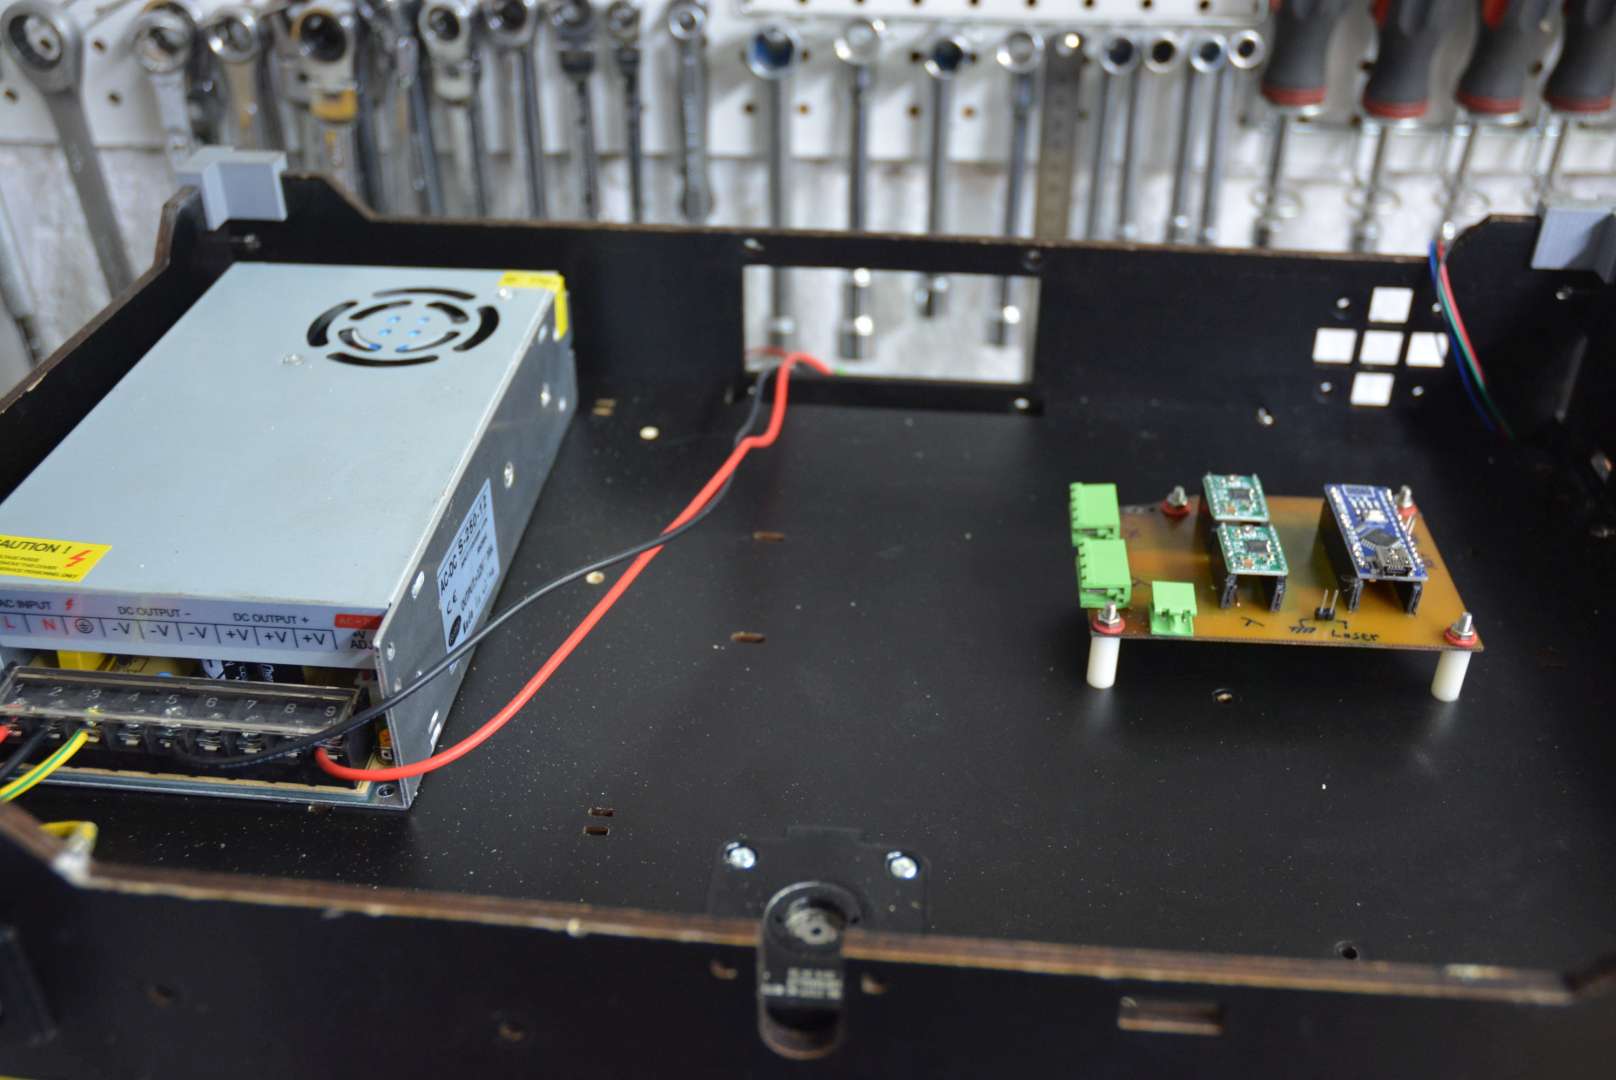
    That pretty much took care of the mechanical modifications. That left the inevitable electronics and software to make the workpiece move. The 3D printer had small stepper motors and driver modules on the X & Y axis so I retained those. For simplicity I removed the drive for the Z axis and I do that manually to set the height of the laser. The printer had a control board to feed the motor drives but I decided that it would be quicker to make my own rather than figure out how to use the original and find matching software. The axes only need to move slowly on an engraver like this so I used an Arduino Nano as the brains and two of the original motor drives completed the electronic control. It was far simpler than the original board, and I do love simplicity.

    Laser engraver/cutter from old 3D printer.-oldboard.jpg Laser engraver/cutter from old 3D printer.-laserthing012.jpg

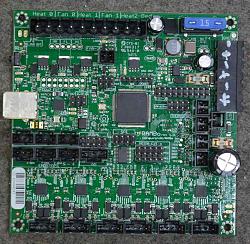
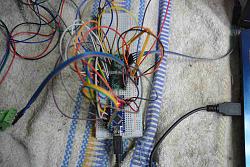
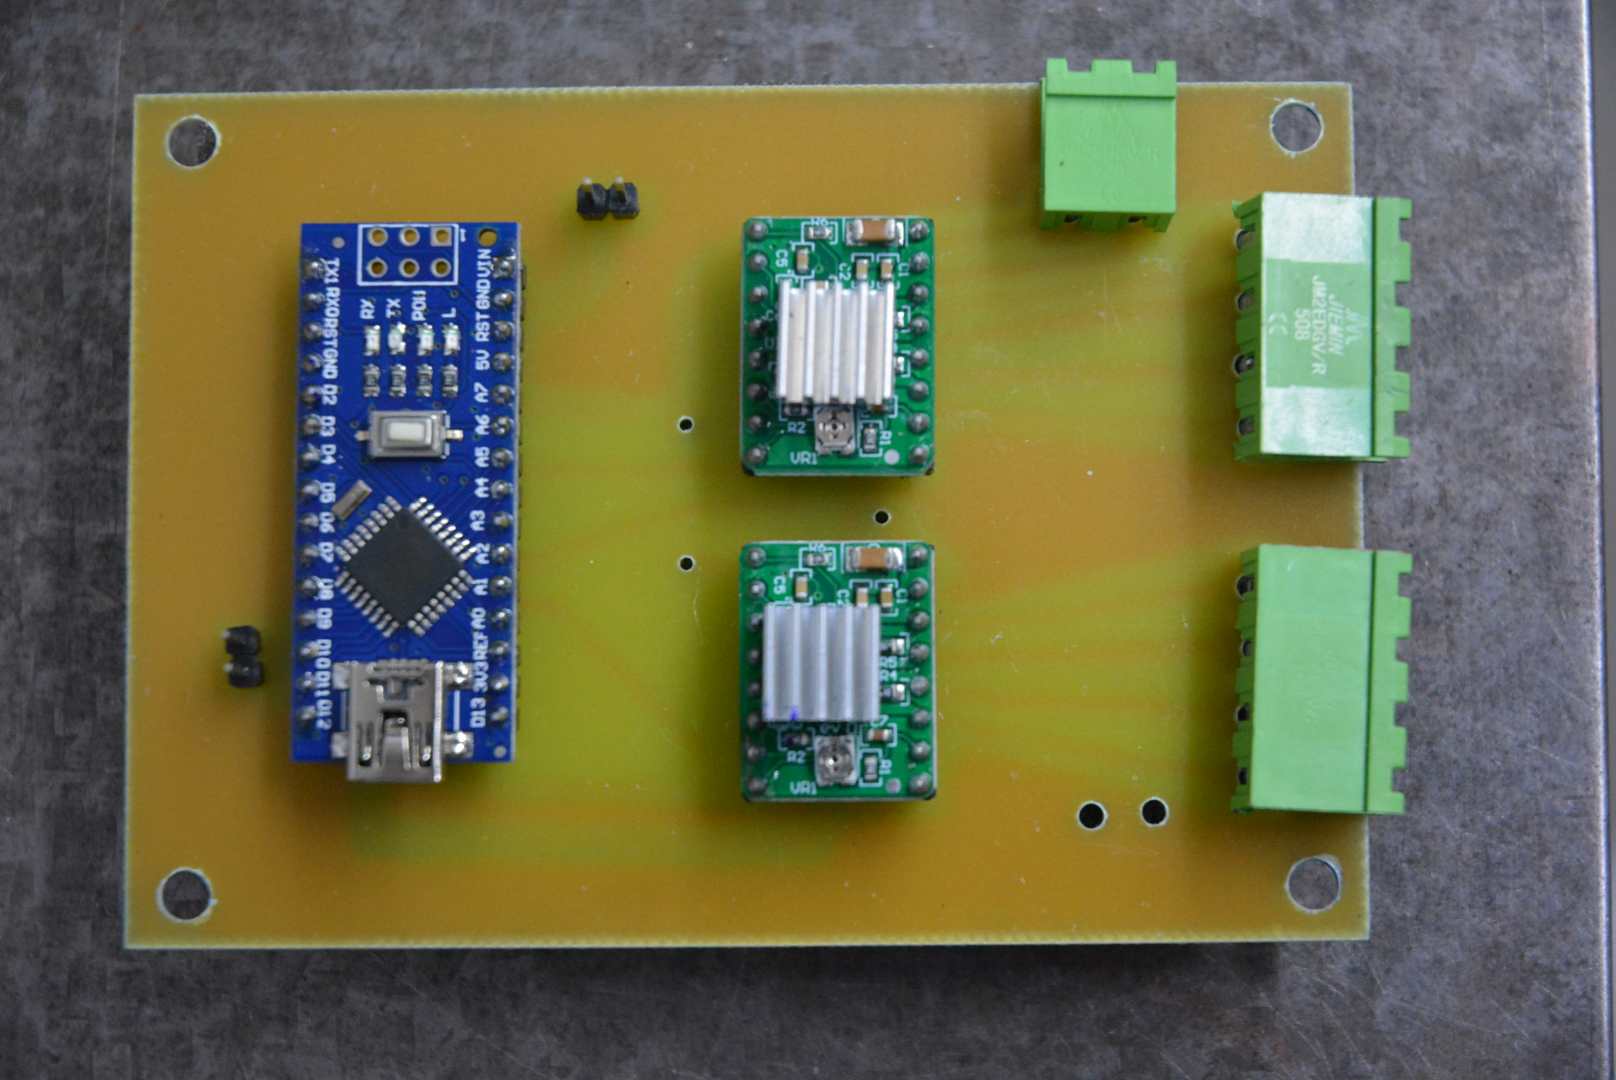
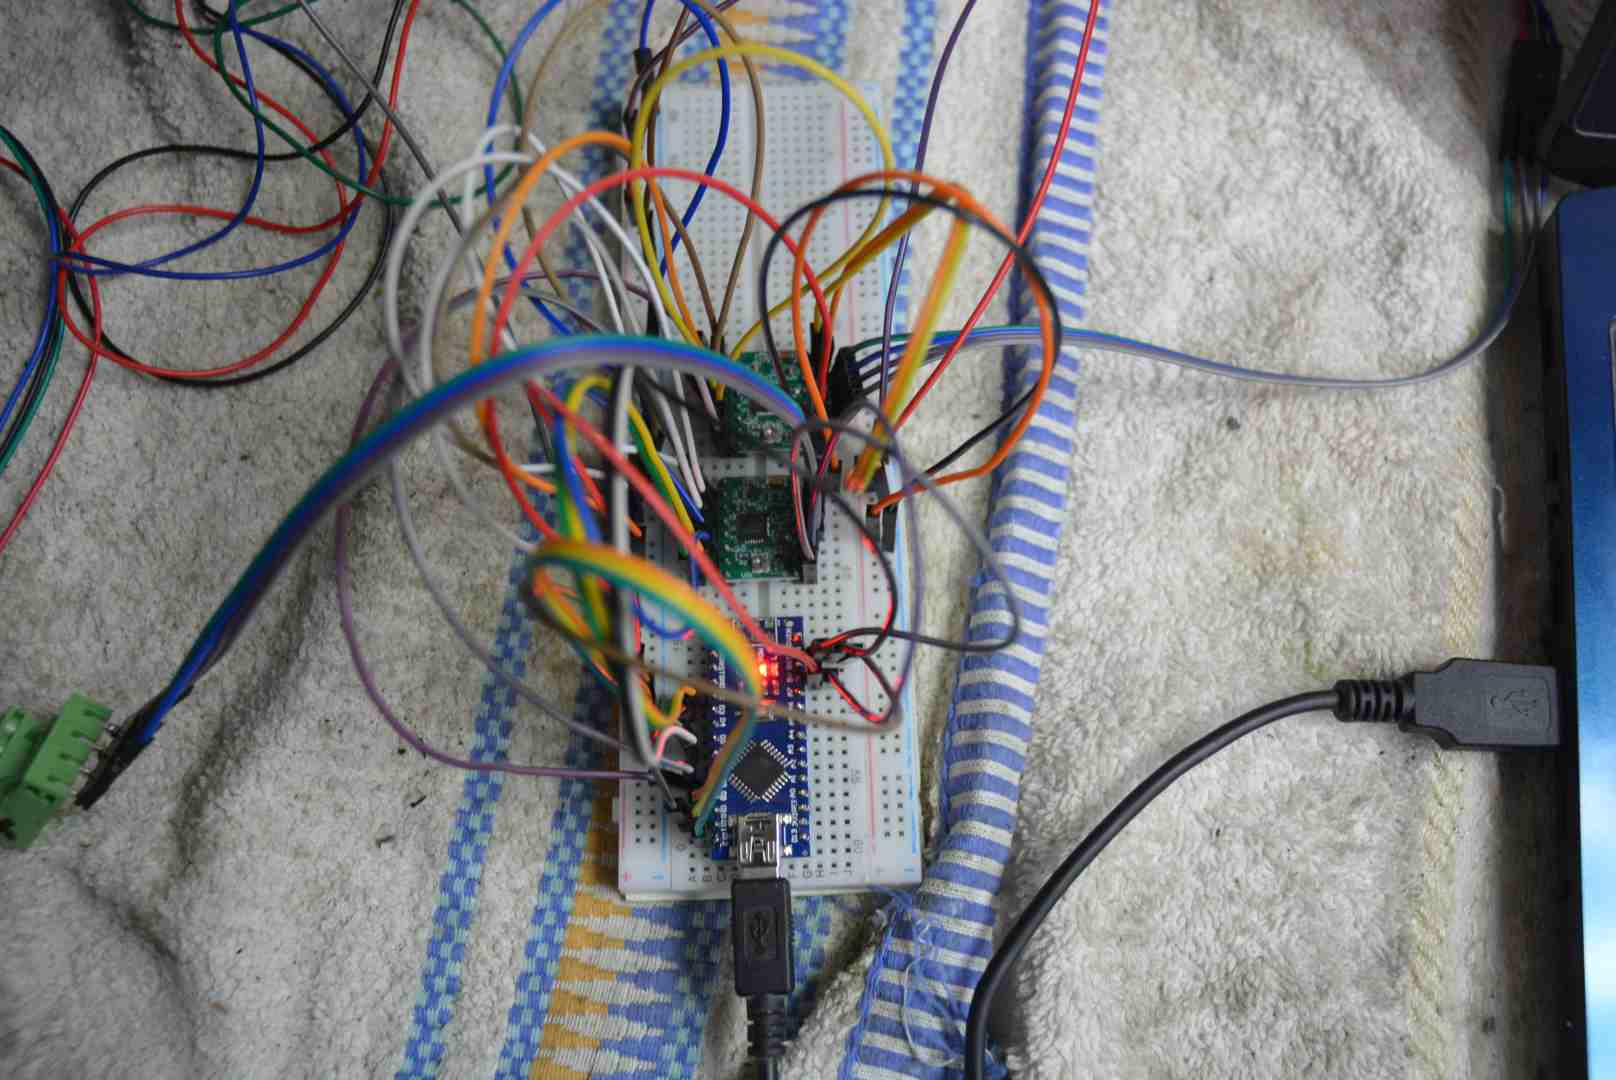
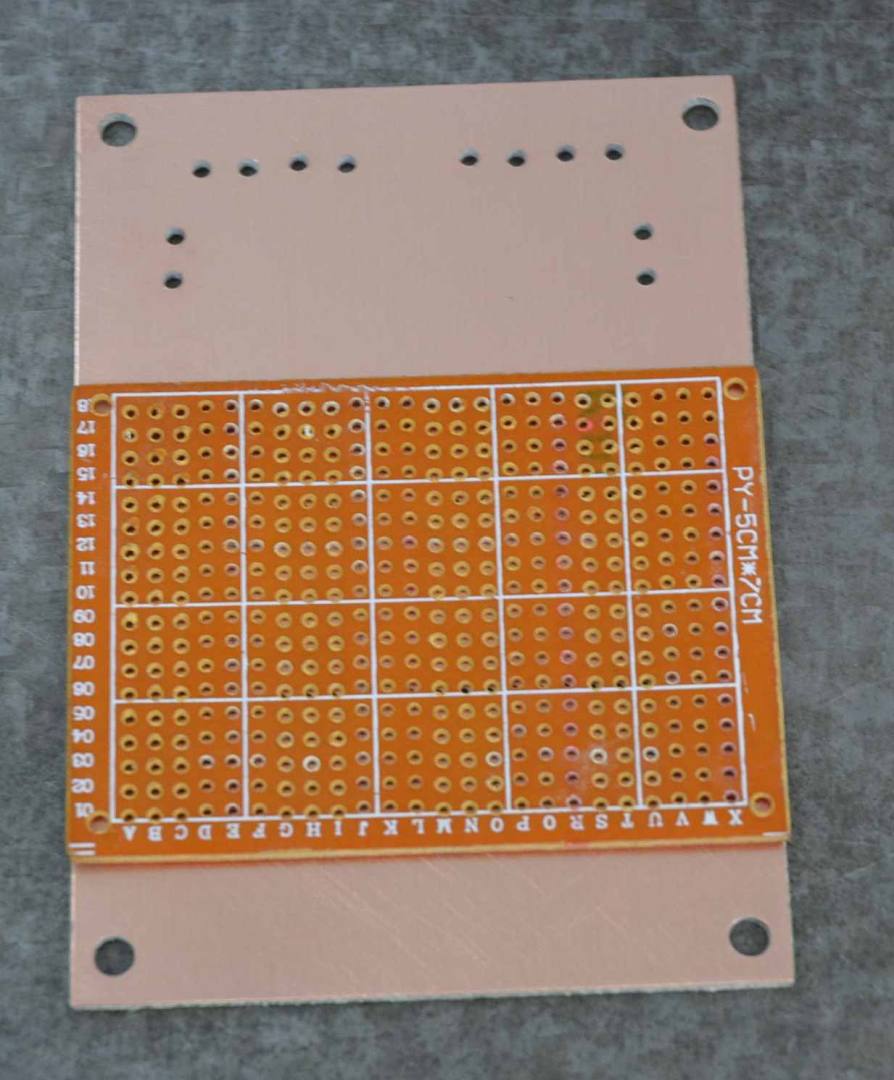
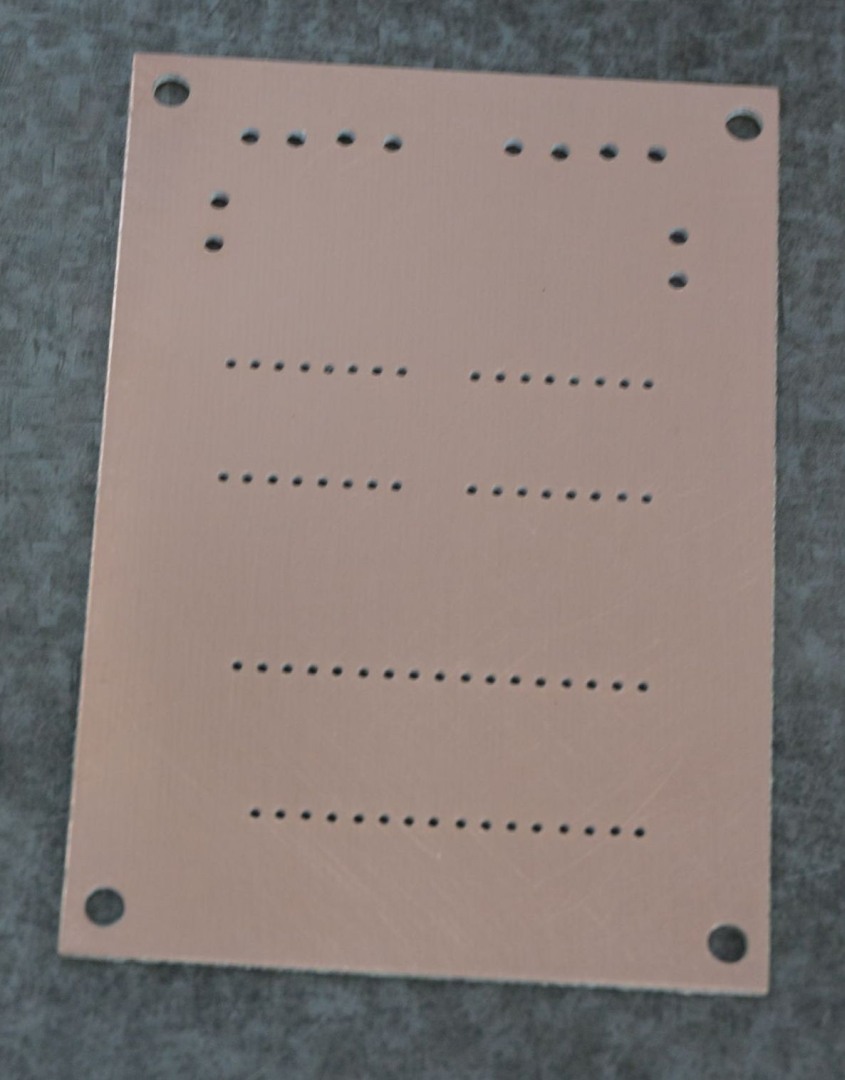
    Rather than wire these together on vero board I decided to make a simple PCB to take the three modules plus some connectors. I managed to design a routing scheme with no tracks crossing so a single sided board was all that was necessary. Firstly I used a piece of Vero board as a template for drilling the pin holes at the required 0.1" spacing. I used a tiny handheld high speed drill for that (like a small version of a Dremel). The first photo shows the initial breadboard lash up for testing. It is always best to find any problems BEFORE making a PCB.

    Laser engraver/cutter from old 3D printer.-laserthing003.jpg Laser engraver/cutter from old 3D printer.-laserthing009.jpg Laser engraver/cutter from old 3D printer.-laserthing008.jpg

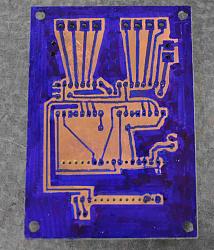
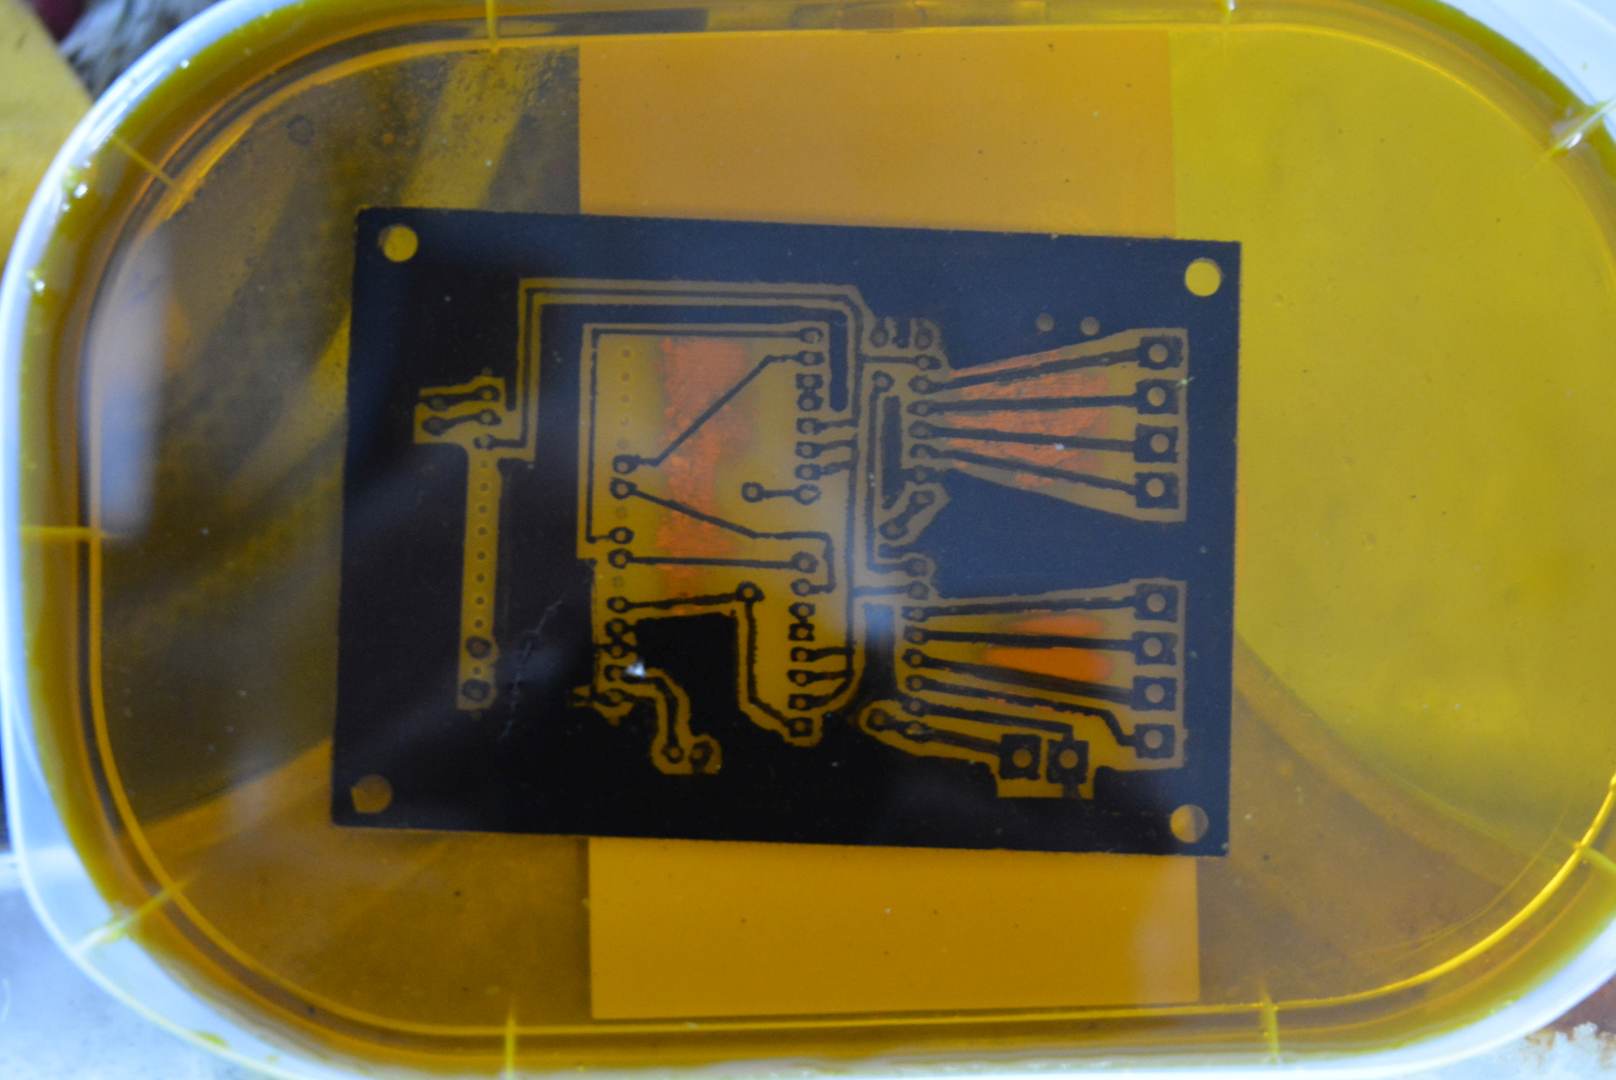
    Using the holes as a guide I used an etch resist pen (a fine marker pen will do) to draw the circuit on the board and then a large marker pen to mask off most of the unused sections as an earth plane but which avoids depleting the etching solution more than necessary. Only the spaces between the traces will be etched away. Here is the board as drawn and being etched. Ferric cloride is the etchant. There are alternatives but I had that from years ago. The PCB is not up to professional standards but it works just as well, and this was just a quick conversion job not a life's work.

    Laser engraver/cutter from old 3D printer.-laserthing010.jpg Laser engraver/cutter from old 3D printer.-laserthing011.jpg

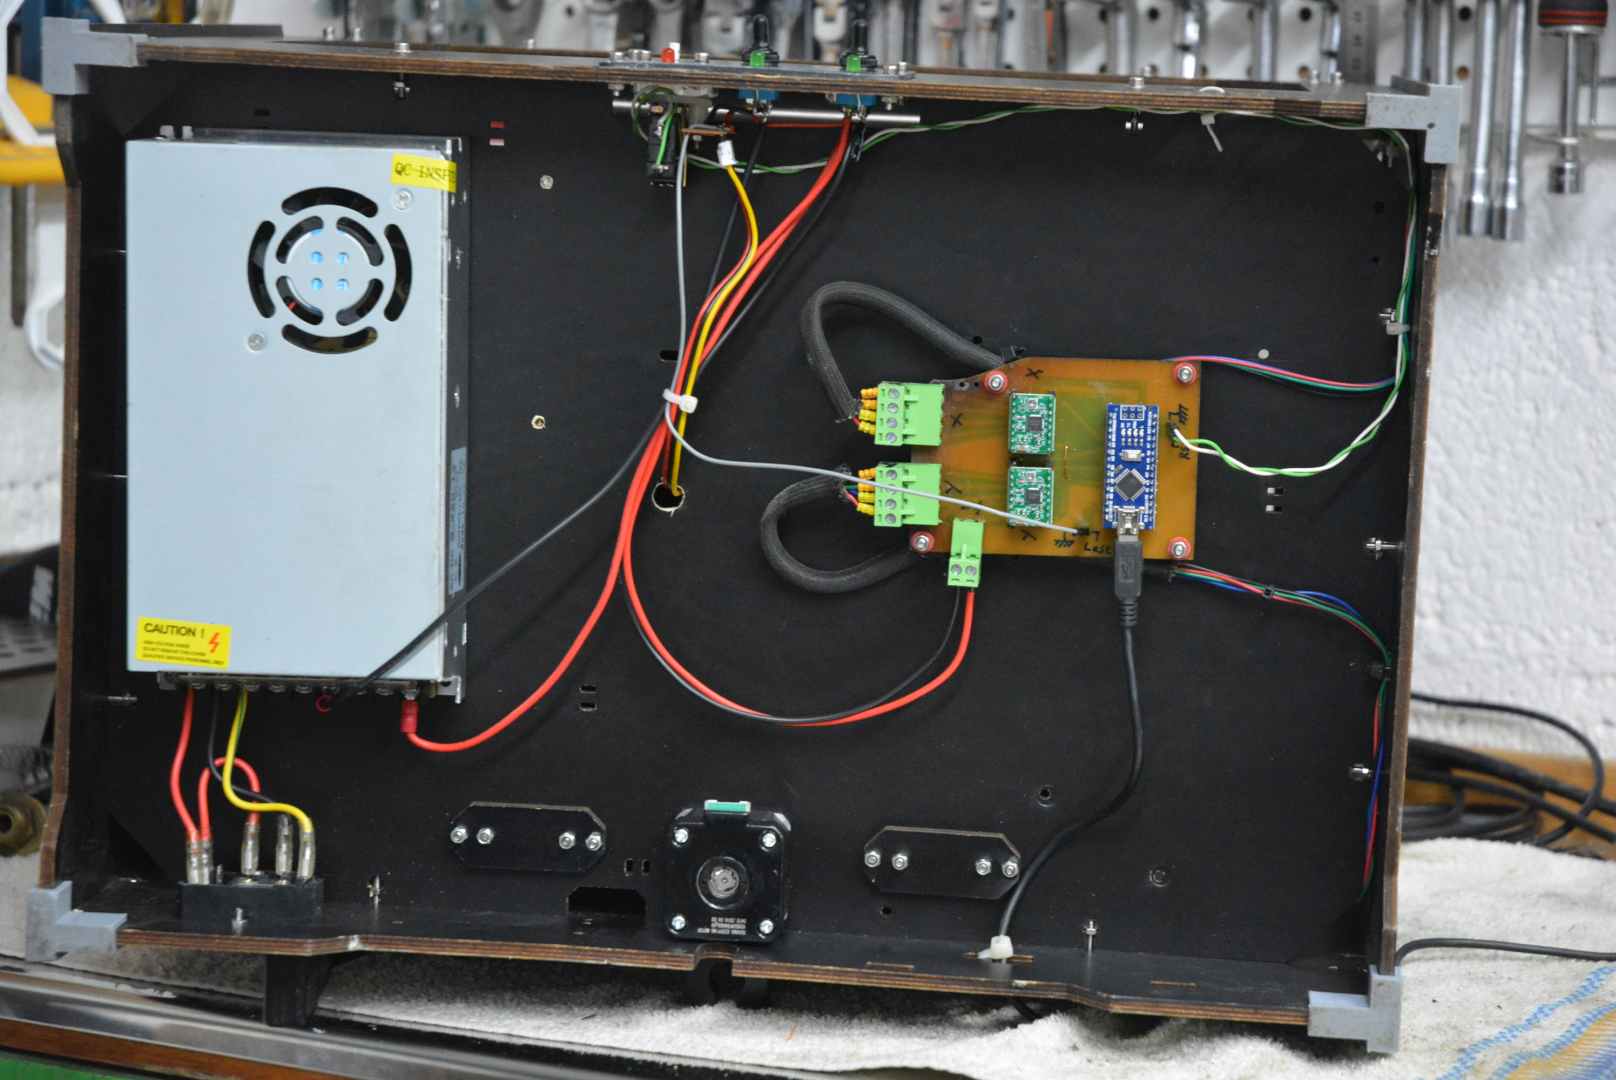
    The 3D printer had a 12 volt DC power supply with a capacity way overkill for the laser but a 3D printer needs a heated bed, a heated extruder and filament feed as well as the axes movements and needs more power than the laser and its axes movements. It was there so I kept it and both the power supply and control/driver board were mounted in a space under the main body.

    Laser engraver/cutter from old 3D printer.-laserthing016.jpg Laser engraver/cutter from old 3D printer.-laserthing017.jpg Laser engraver/cutter from old 3D printer.-laserthing023.jpg

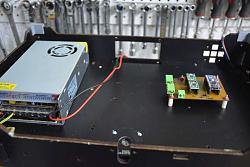
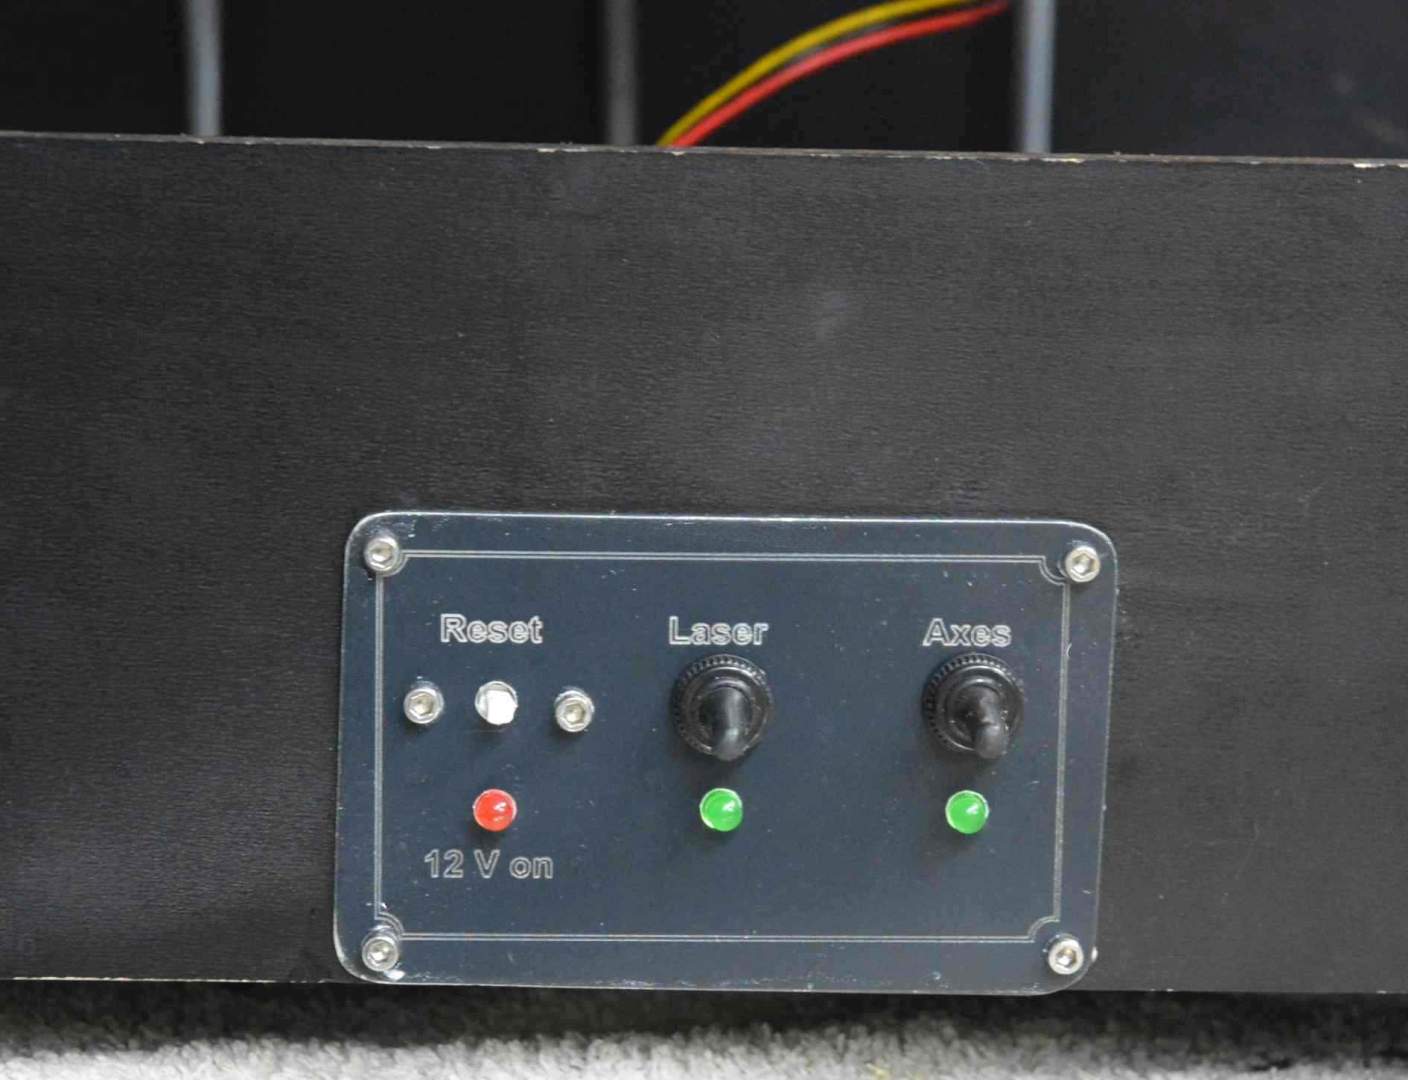
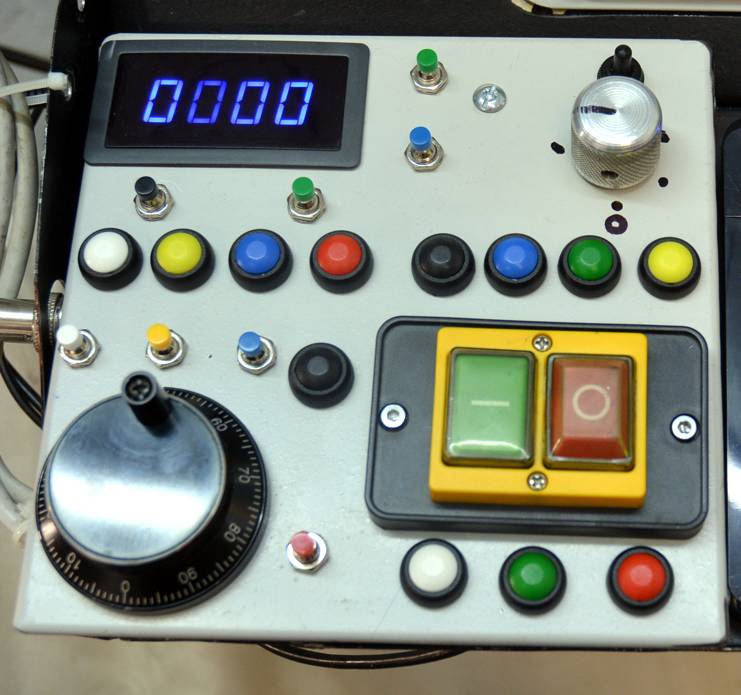
    A simple switch panel completed the electrics. One switch each for the axes power and laser power, a reset button from an old PC serves as a reset for the Arduino. That has never been needed but it is done now. Three indicator LEDs complete the panel.

    Laser engraver/cutter from old 3D printer.-laserthing020.jpg Laser engraver/cutter from old 3D printer.-laserthing021.jpg

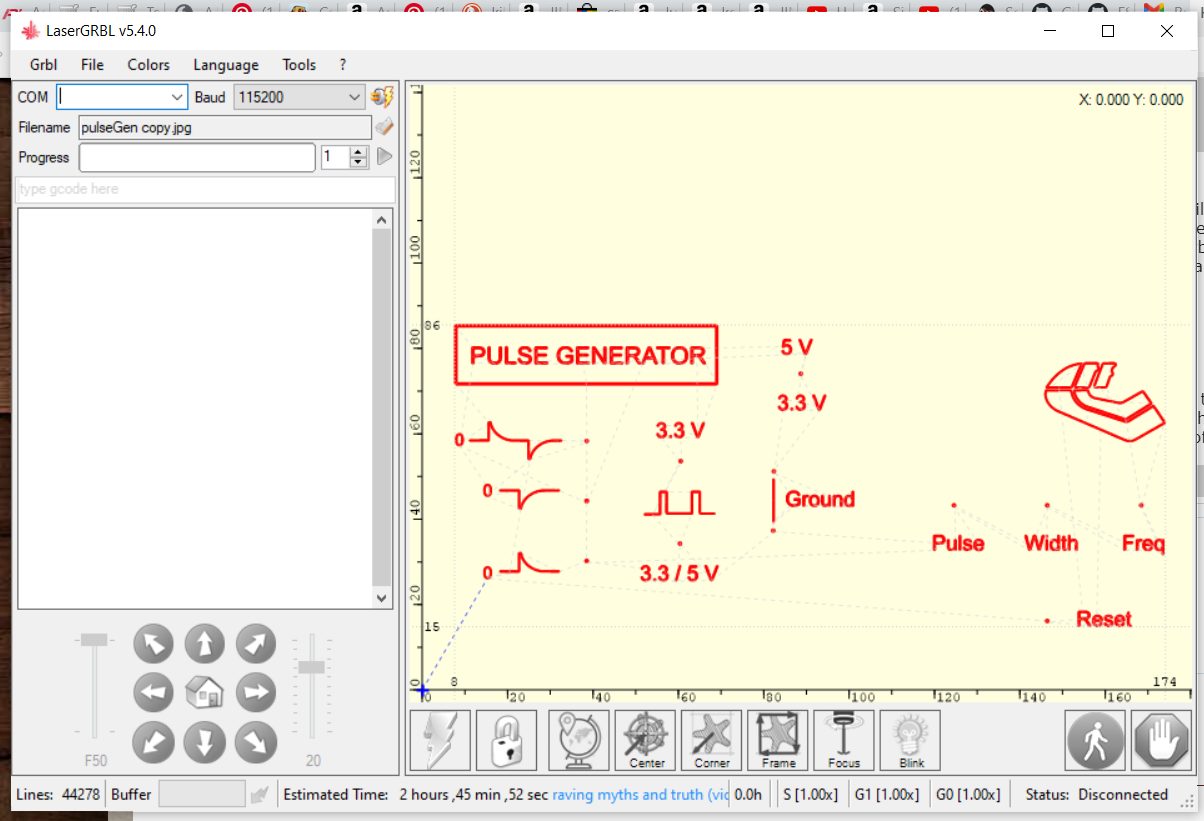
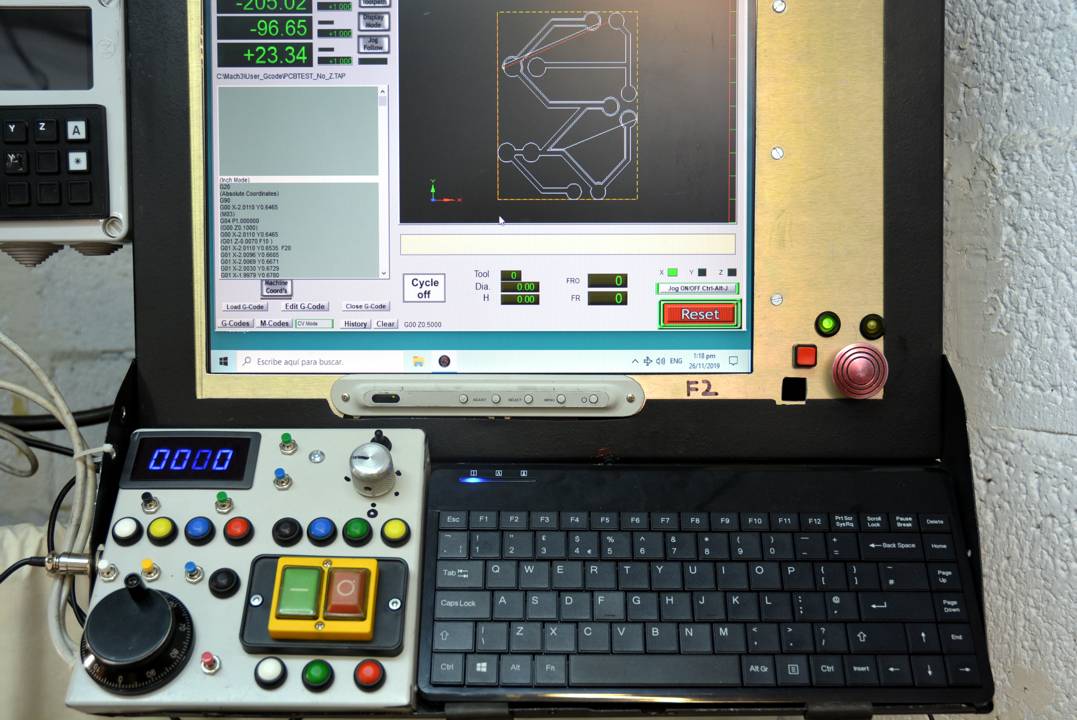
    Just the software that is missing. This time I did not have to write my own. There is a well proven freeware programme written to turn base Arduinos into simple CNC controllers and that is the main reason why I chose the Arduino Nano. This is called GRBL and there is a ton of info on the net for those interested. GRBL is the software core of most of the dedicated budget CNC controllers from the east. There is a later more advanced version called GrblHAL which can work with a number of other more advanced micros but the extra speed and features are not necessary for an engraver like this. GRBL needs feeding with G-code and there is another freeware programme called LaserGRBL which takes files in a number of graphics formats and converts them into G code and sends to GRBL. this programme runs on a Windows PC attached to the Arduino and GRBL via a USB cable. The photo shows the LaserGRBL screen with the front panel of a pulse generator loaded ready to be engraved. The pulse generator is one that I built for testing ignition systems.

    Laser engraver/cutter from old 3D printer.-lasergrbl.jpg

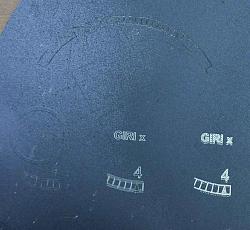
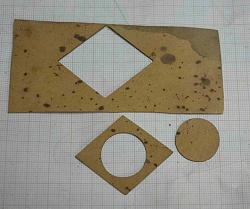
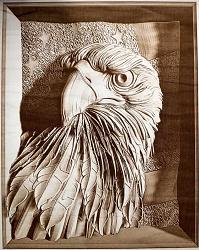
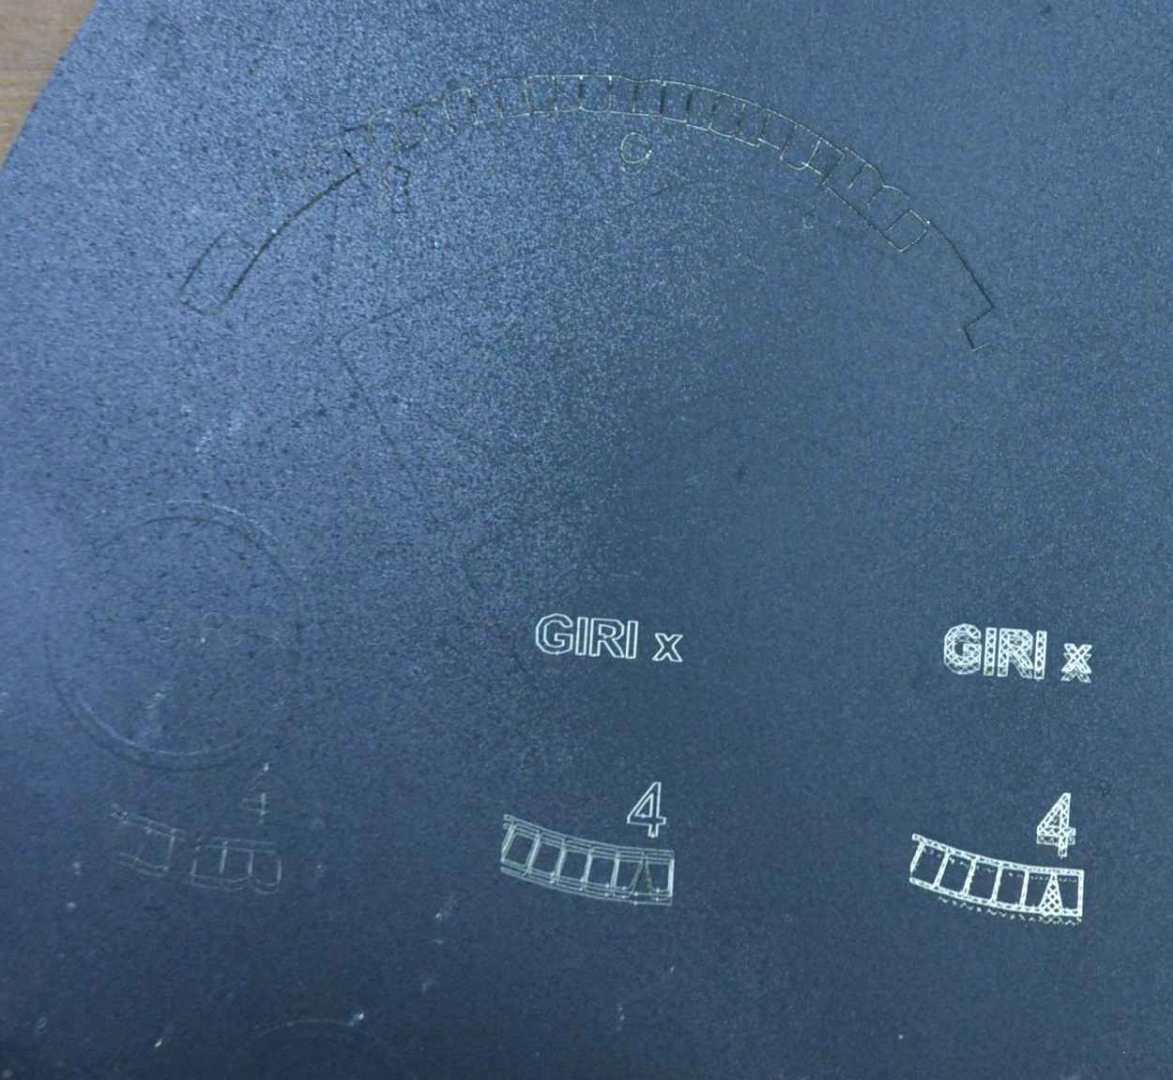
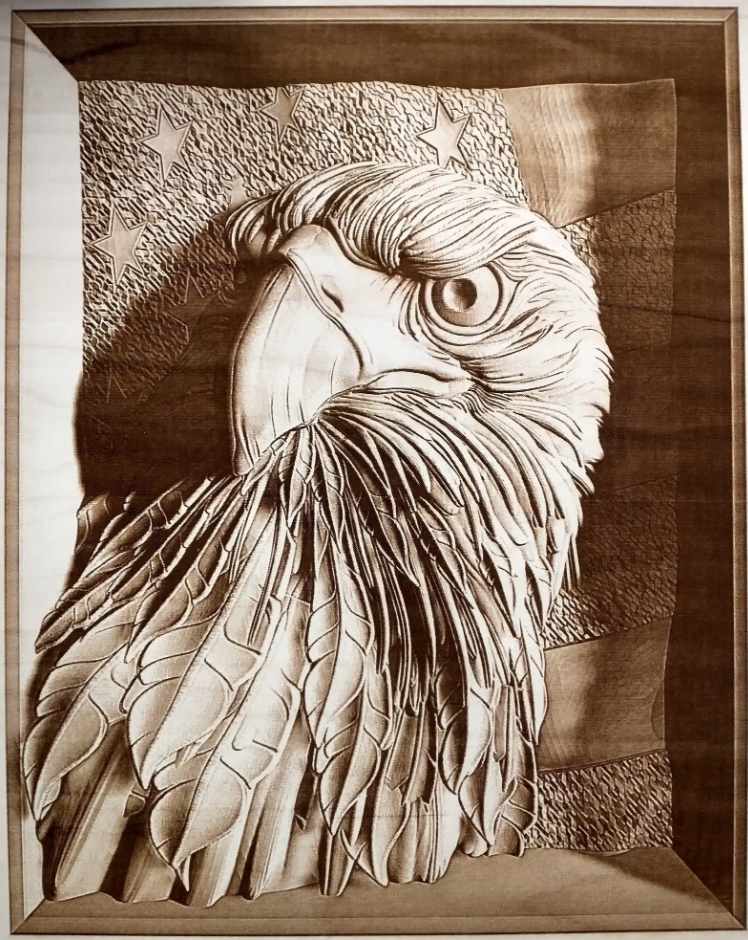
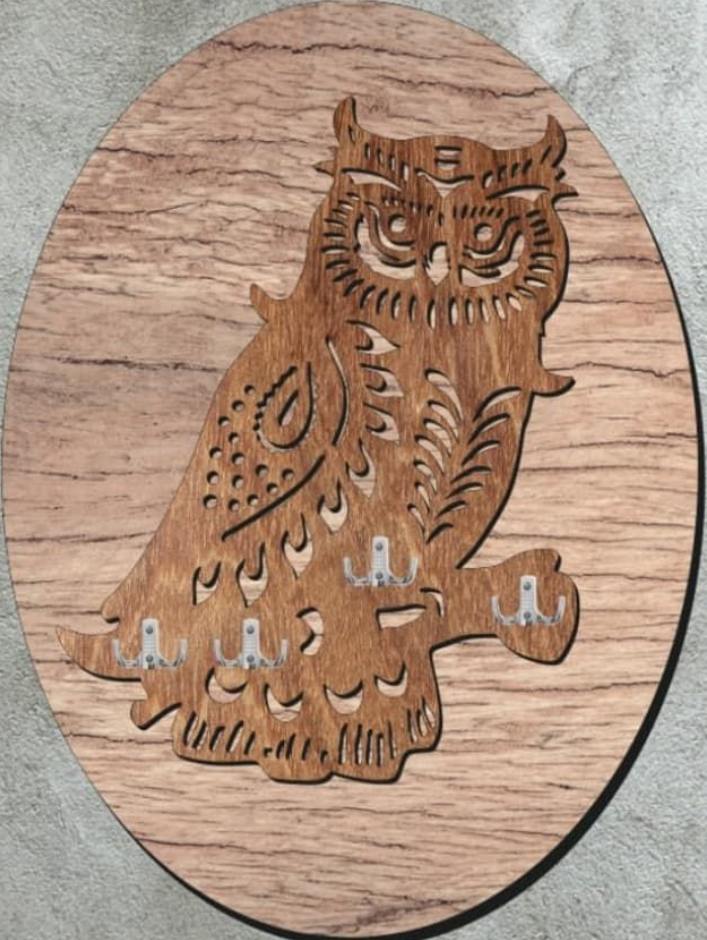
    So what can it do? To be honest I have not done all that much with it and so I have only scratched the surface of the possibilities. Many people use units of this power for engraving artwork on wood but for serious workshop use it needs a laser of more power as I suspected in the beginning. The power that I have is fine for engraving panels with white lettering on a black background and it does a superb job of cutting out gaskets from thick gasket material. The gaskets come out with very clean cut edges. The first photo shows my first test, learning the software settings. The lower engraving and cutout photos are not my doing, they are from Pinterest.

    Laser engraver/cutter from old 3D printer.-laserthing005.jpg Laser engraver/cutter from old 3D printer.-tacho-aermacchi-partial.jpg Laser engraver/cutter from old 3D printer.-laserthing004.jpg

    Laser engraver/cutter from old 3D printer.-artwork.jpg Laser engraver/cutter from old 3D printer.-artworkcutout.jpg

    PS. I have not shown a schematic because it is so simple and would depend on the motor drivers used, they do not all have the same pinouts. Do not ask me how I know. So you connect the four output wires of the stepper drivers to the stepper motors as per the spec sheet on the drivers and you connect the Arduino to the drivers as per the GRBL documentation, which also has full instructions for loading the software on the Arduino. It is a pretty simple and fun project.

    186 More Best Homemade Tools eBook

  2. The Following 6 Users Say Thank You to tonyfoale For This Useful Post:

    bruce.desertrat (Dec 1, 2023), Carnel (Dec 1, 2023), Jon (Nov 29, 2023), nova_robotics (Dec 3, 2023), phred (Nov 30, 2023), thevillageinn (Dec 3, 2023)

  3. #2
    Content Editor
    Supporting Member
    DIYer's Avatar
    Join Date
    Aug 2013
    Posts
    3,056
    Thanks
    773
    Thanked 1,853 Times in 1,654 Posts


    Thanks tonyfoale! We've added your Laser Engraver to our Electronics category,
    as well as to your builder page: tonyfoale's Homemade Tools. Your receipt:


    2000 Tool Plans

  4. #3
    Supporting Member bruce.desertrat's Avatar
    Join Date
    Nov 2017
    Posts
    788
    Thanks
    560
    Thanked 668 Times in 357 Posts

    bruce.desertrat's Tools
    Just remember the cardinal rule of working with lasers:


    Laser engraver/cutter from old 3D printer.-img_1324.jpg

  5. The Following User Says Thank You to bruce.desertrat For This Useful Post:

    tonyfoale (Dec 1, 2023)

  6. #4
    Supporting Member tonyfoale's Avatar
    Join Date
    Nov 2016
    Location
    Spain
    Posts
    1,566
    Thanks
    690
    Thanked 2,650 Times in 710 Posts

    tonyfoale's Tools
    Quote Originally Posted by bruce.desertrat View Post
    Just remember the cardinal rule of working with lasers:


    Click image for larger version. 

Name:	IMG_1324.jpg 
Views:	24 
Size:	101.2 KB 
ID:	46696
    The unit that I am using has an eye protection cover, which is a first line of defence. I always wear protective glasses when using the laser. The 3D printer originally had open sides but since taking the photos in the post I have closed in the sides and top for two reasons. One, to prevent accidental eye flashes and two, I added an extractor fan to get rid of the fumes from burning noxious materials like paint, plastic and wood.

    Laser engraver/cutter from old 3D printer.-eye-protection.jpg

  7. #5
    Supporting Member
    Join Date
    Mar 2018
    Posts
    80
    Thanks
    18
    Thanked 11 Times in 10 Posts
    This: “…a reset button from an old PC serves as a reset for the Arduino. That has never been needed but it is done now.”

    I used a Nano to control accent lighting in our projection TV room. It worked flawlessly for 2 years. Crashed only because the (Apple) power brick died.

    Good solid design.

  8. #6
    Supporting Member Christophe Mineau's Avatar
    Join Date
    Jul 2014
    Location
    France, Brittany !
    Posts
    913
    Thanks
    826
    Thanked 1,691 Times in 481 Posts

    Christophe Mineau's Tools
    Hi Tony,
    A bit late, sorry for that, but better late than never, I completely missed this build when you published it.
    That is very close to what I am doing as an addition to my CNC.
    Your build is really interesting and for sure you will have more use of a laser cutter/engraver than these dumb filament things.
    I have purchased the same exact "Laser Tree" 40W / 5w optical laser, I feel like it's a good product and you shouldn't under estimate it, 5W optical is already a lot of power, and it cuts 4mm plywood in one pass, and of course you can do several of them(if you can control the Z axis)
    The laser beam is really well focused, it has good performance, especially with the air assist, which you do not seam to mention.
    I think you need really more powerful, CO2/fiber lasers, see now multi diodes lasers (they actually optically combine several beams from several diodes) if you want to tackle tasks on metal, engraving, see cutting, but it's another story.

    I am still experimenting and setting all things up and so far, the main difficulty I have is with fumes extractions in my basement
    It's been a show stopper for me, I have to solve that before going further.
    I would have liked to implement a grbl solution like you, because I do love arduinos, but in my case, for other reasons, I wanted to upgrade from my Chinese No Name controller board made for Mach3.
    Not that it was not working, but the USB interface/ Windows PC / old mach3 was not reliable 100%, and on several hours cutting job , you had a chance that this old piece of software that Mach3 is will get interrupted, slowed down by any Windows task, Defender in particular, and it did several time ruined my work.
    So for me, as far as I wanted to keep my shop PC (becoming old, but ok otherwise), I wanted a more reliable solution, Linux based, and Ethernet based.
    So I looked around and went for a CSMIO-IP/M from Cslab, which a European company (Poland), they produce really good and appreciated HW and software stuff.
    So their board has an excellent reliability reputation and they also sell a Linux supported software to control it, in place of Mach3/Mach4 which only work on Windows.
    And it's Ethernet connected which is also way more resistant to environmental disturbance.
    And a great advantage of their software is that it supports natively Laser engraving (engraving photos in gray scale of simply vectors paths).
    Well, I will try to post something on how I converted my Chinese CNC to this CSMIO Ethernet board, which improves already a lot.
    And I will also publish how I managed this addition of the laser head, once I will have solved this fumes extraction issue.
    Read you soon Tony, keep posting good stuff like that !
    Christophe
    PS
    Cheers !
    Christophe
    ________________________________________________________________
    Visit my Website : http://www.labellenote.fr/
    Facebook : La Belle Note
    All my personal works, unless explicitly specified, are released under
    Creative Commons BY-NC-SA license.

  9. #7
    Supporting Member tonyfoale's Avatar
    Join Date
    Nov 2016
    Location
    Spain
    Posts
    1,566
    Thanks
    690
    Thanked 2,650 Times in 710 Posts

    tonyfoale's Tools
    Christophe,

    The built in air assist is useful and cleverly done but I wonder if it is enough. I have been thinking about adding a small air-brush compressor to increase that.

    The multi-diode heads look interesting but are still quite expensive, I'll wait for them to get cheaper.
    I have manual control on the Z axis. I left the original screw in place but with the motor disconnected. It is easy to twist the screw by hand to adjust focus.

    The GRBL based Arduino control is more than adequate for the Laser control but grblHAL with a better micro is much faster and more capable. For more demanding projects I would use that with ESP32 micros. Have you used the ESP32s? They are very fast and have two cores. Have you seen the electronic lathe conversion that I posted a couple of years back? That uses both cores but with my software not GRBL.

    I really dislike Mach3 but I am stuck with it on my mill. The mill was fitted with an Anilam CNC system from new which was functioning when I got the mill. The actual controller was a pain to use and really needed updating, but the servos and drivers were good. So I wanted to replace the controller and keep the motors and drivers. This was around 2009 and there were not many options open at that time, or not many options that I could find, plenty for steppers but not servos. I bought an expensive 4 axis controller card from Galil but I did not do my homework properly and wrongly assumed that it fed on G-code. It does not. These controllers are top quality but are designed as general purpose motion controllers not CNC machining specific controllers. So they have their own proprietary language. Galil only knew of two software solutions that converted G-code to their language. One was very expensive and the net was full of people complaining about the lack of basic support and the hugely inflated charge for paid support. The other was Mach3 which had a Galil plugin which could connect over ethernet. I run it on a PC which is dedicated to the mill. It is not on the net so I do not need to run anti-virus and other protection software and I have had no problems with Windows interrupts. I have considered writing my own G-code to Galil code interpreter, it would not be difficult but it would be time consuming and tedious. There is a Galil plugin for Mach4 which the Mach people say is better than sliced bread but they say that is for a later and fancier Galil card and it will not work with mine. They are wrong, I tried it with Mach4 and it works fine, but it did nothing that Mach3 did not so I did not get Mach4. If I was doing the mill conversion today I would change the motors to closed loop steppers, controlled by grblHAL on an ESP32 and fed from ioSender software. Centroid have a hardware and software solution that would work with my hardware but you never know when you can stop paying out with them. To do screw cutting on a lathe you have pay extra!!!

    I will look at the CSMIO that you mention. Thanks.

  10. #8
    Supporting Member Christophe Mineau's Avatar
    Join Date
    Jul 2014
    Location
    France, Brittany !
    Posts
    913
    Thanks
    826
    Thanked 1,691 Times in 481 Posts

    Christophe Mineau's Tools
    Yes, I know and like the ESP32, I have a drawer with different flavors of ESP32 and the older 8266.
    But surprisingly, it turns out I didn't used it a lot so far in practical projects, it's often overkill and it lacks i/os.
    I also have a 16 i/o board to be connected in i2c with and ESP32, but not used it in a project yet.
    No actually, most of my projects, I use a good old Arduino Nano, it fits a lot of situations. Or I tend to use now the Arduino micro, because of its usb support, and it's ability to be seen as a keyboard or mouse.
    I will have to show also my CNC pendant, based on micro, which sends key stocks to Mach3 or SimCNC (the new soft I used from Cslab now)

    About Mach3 being interrupted by Windows, I'm afraid you may see them happening when you won't think about it.
    Same as you, my shop PC has no internet access, and I try to disable whatever I can, and until recently, I did not notice any trouble (it's running W10 64bits)
    But, I decided to upgrade it for good measure, and to speedup its boot time and responsiveness, so I changed the HDD to a SSD.
    Very efficient ! But alas, here came the troubles. I think it is now so fast in disk I/O, compared to what it was, that when Defender passes (and it always passes, sooner or later, even if you have disabled it), it is not self regulated as it naturally was with a slow HDD (meaning the proc mostly waiting for the disk, so letting time for other tasks), now the SSD is more responsve and when Defender loops on some disk resources, it really takes a lot of cpu, and typically Mach3 is disturbed, you get the "hourglass" cursor (sorry I don't know the exact English for that) and it's no more responsive, and the CNC looses steps meanwhile...

    So for me, unless you have a modern fast PC with plenty of cores, Linux is far much reliable to run a software that needs somewhat real time responsiveness.
    Note that now I have moved to this CSMIO IP/M board with Ethernet connection, I first tried it with Mach3/Windows, because they say with this board, more of the real time stuff is actually executed by the board, with a bigger code buffer, but alas again, when the disturbance occur, I actually loose the Ethernet connection ...
    So I decided to get rid of Windows/Mach3, and I'm now happy to be on Linux/SimCNC. (and I gained the laser support)
    Well, I will have soon to pay for a new license for SimCNC , I am still on the 3 month free trial license. It's about 250€ I think...
    Cheers !
    Christophe
    ________________________________________________________________
    Visit my Website : http://www.labellenote.fr/
    Facebook : La Belle Note
    All my personal works, unless explicitly specified, are released under
    Creative Commons BY-NC-SA license.

  11. #9
    Supporting Member tonyfoale's Avatar
    Join Date
    Nov 2016
    Location
    Spain
    Posts
    1,566
    Thanks
    690
    Thanked 2,650 Times in 710 Posts

    tonyfoale's Tools
    Quote Originally Posted by Christophe Mineau View Post
    Yes, I know and like the ESP32, I have a drawer with different flavors of ESP32 and the older 8266.
    But surprisingly, it turns out I didn't used it a lot so far in practical projects, it's often overkill and it lacks i/os.
    Overkill at times I agree but I use the 38 pin versions and even on my lathe project I had enough I/O. Only one spare but enough.

    Quote Originally Posted by Christophe Mineau View Post
    I will have to show also my CNC pendant, based on micro, which sends key stocks to Mach3 or SimCNC (the new soft I used from Cslab now)
    I do similar but my "pendant" is fixed.

    Laser engraver/cutter from old 3D printer.-control01.jpg Laser engraver/cutter from old 3D printer.-control02.jpg Click for full size.

    Quote Originally Posted by Christophe Mineau View Post
    About Mach3 being interrupted by Windows, I'm afraid you may see them happening when you won't think about it.
    Same as you, my shop PC has no internet access, and I try to disable whatever I can, and until recently, I did not notice any trouble (it's running W10 64bits)
    But, I decided to upgrade it for good measure, and to speedup its boot time and responsiveness, so I changed the HDD to a SSD.
    Very efficient ! But alas, here came the troubles. I think it is now so fast in disk I/O, compared to what it was, that when Defender passes (and it always passes, sooner or later, even if you have disabled it), it is not self regulated as it naturally was with a slow HDD (meaning the proc mostly waiting for the disk, so letting time for other tasks), now the SSD is more responsve and when Defender loops on some disk resources, it really takes a lot of cpu, and typically Mach3 is disturbed, you get the "hourglass" cursor (sorry I don't know the exact English for that) and it's no more responsive, and the CNC looses steps meanwhile...
    In 13 years of use I have never had any of those problems. I use a NUK with Win64 and an SSD, but in the beginning it was an old computer on XP. I only ungraded when I was thinking about going to Mach4. "hourglass cursor" is fine in English and is exactly how I would phrase it.

    Quote Originally Posted by Christophe Mineau View Post
    So for me, unless you have a modern fast PC with plenty of cores, Linux is far much reliable to run a software that needs somewhat real time responsiveness.
    I did look at CNCLinux or is it LinuxCNC? but IIRC it only had parallel port O/P not ethernet and no Galil controller support.

  12. The Following User Says Thank You to tonyfoale For This Useful Post:

    Christophe Mineau (Mar 8, 2024)

  13. #10
    Supporting Member Christophe Mineau's Avatar
    Join Date
    Jul 2014
    Location
    France, Brittany !
    Posts
    913
    Thanks
    826
    Thanked 1,691 Times in 481 Posts

    Christophe Mineau's Tools
    great (non pending) pendant !
    Cheers !
    Christophe
    ________________________________________________________________
    Visit my Website : http://www.labellenote.fr/
    Facebook : La Belle Note
    All my personal works, unless explicitly specified, are released under
    Creative Commons BY-NC-SA license.

Thread Information

Users Browsing this Thread

There are currently 1 users browsing this thread. (0 members and 1 guests)

Tags for this Thread

Bookmarks

Posting Permissions

  • You may not post new threads
  • You may not post replies
  • You may not post attachments
  • You may not edit your posts
  •