Free 186 More Best Homemade Tools eBook:  
Get 2,000+ tool plans, full site access, and more.

User Tag List

Results 1 to 6 of 6

Thread: manual lathe slotting broaching attachment

  1. #1
    Supporting Member thehomeengineer's Avatar
    Join Date
    Nov 2017
    Location
    Berkshire UK
    Posts
    706
    Thanks
    722
    Thanked 2,070 Times in 407 Posts

    thehomeengineer's Tools

    manual lathe slotting broaching attachment

    Hi All
    I made this simple manual slotting/broaching attachment for my lathe. I do have a set of imperial keyway broaches but the set only has 5 sizes. As broaches are so expensive and this is afterall only a hobby I can't justify buying every size I need. The cost and the amount of times I would use each broach and often to only cut one keyway. I decided to make this tool so I could cut anysize by grinding a piece of high speed steel to the desired size.

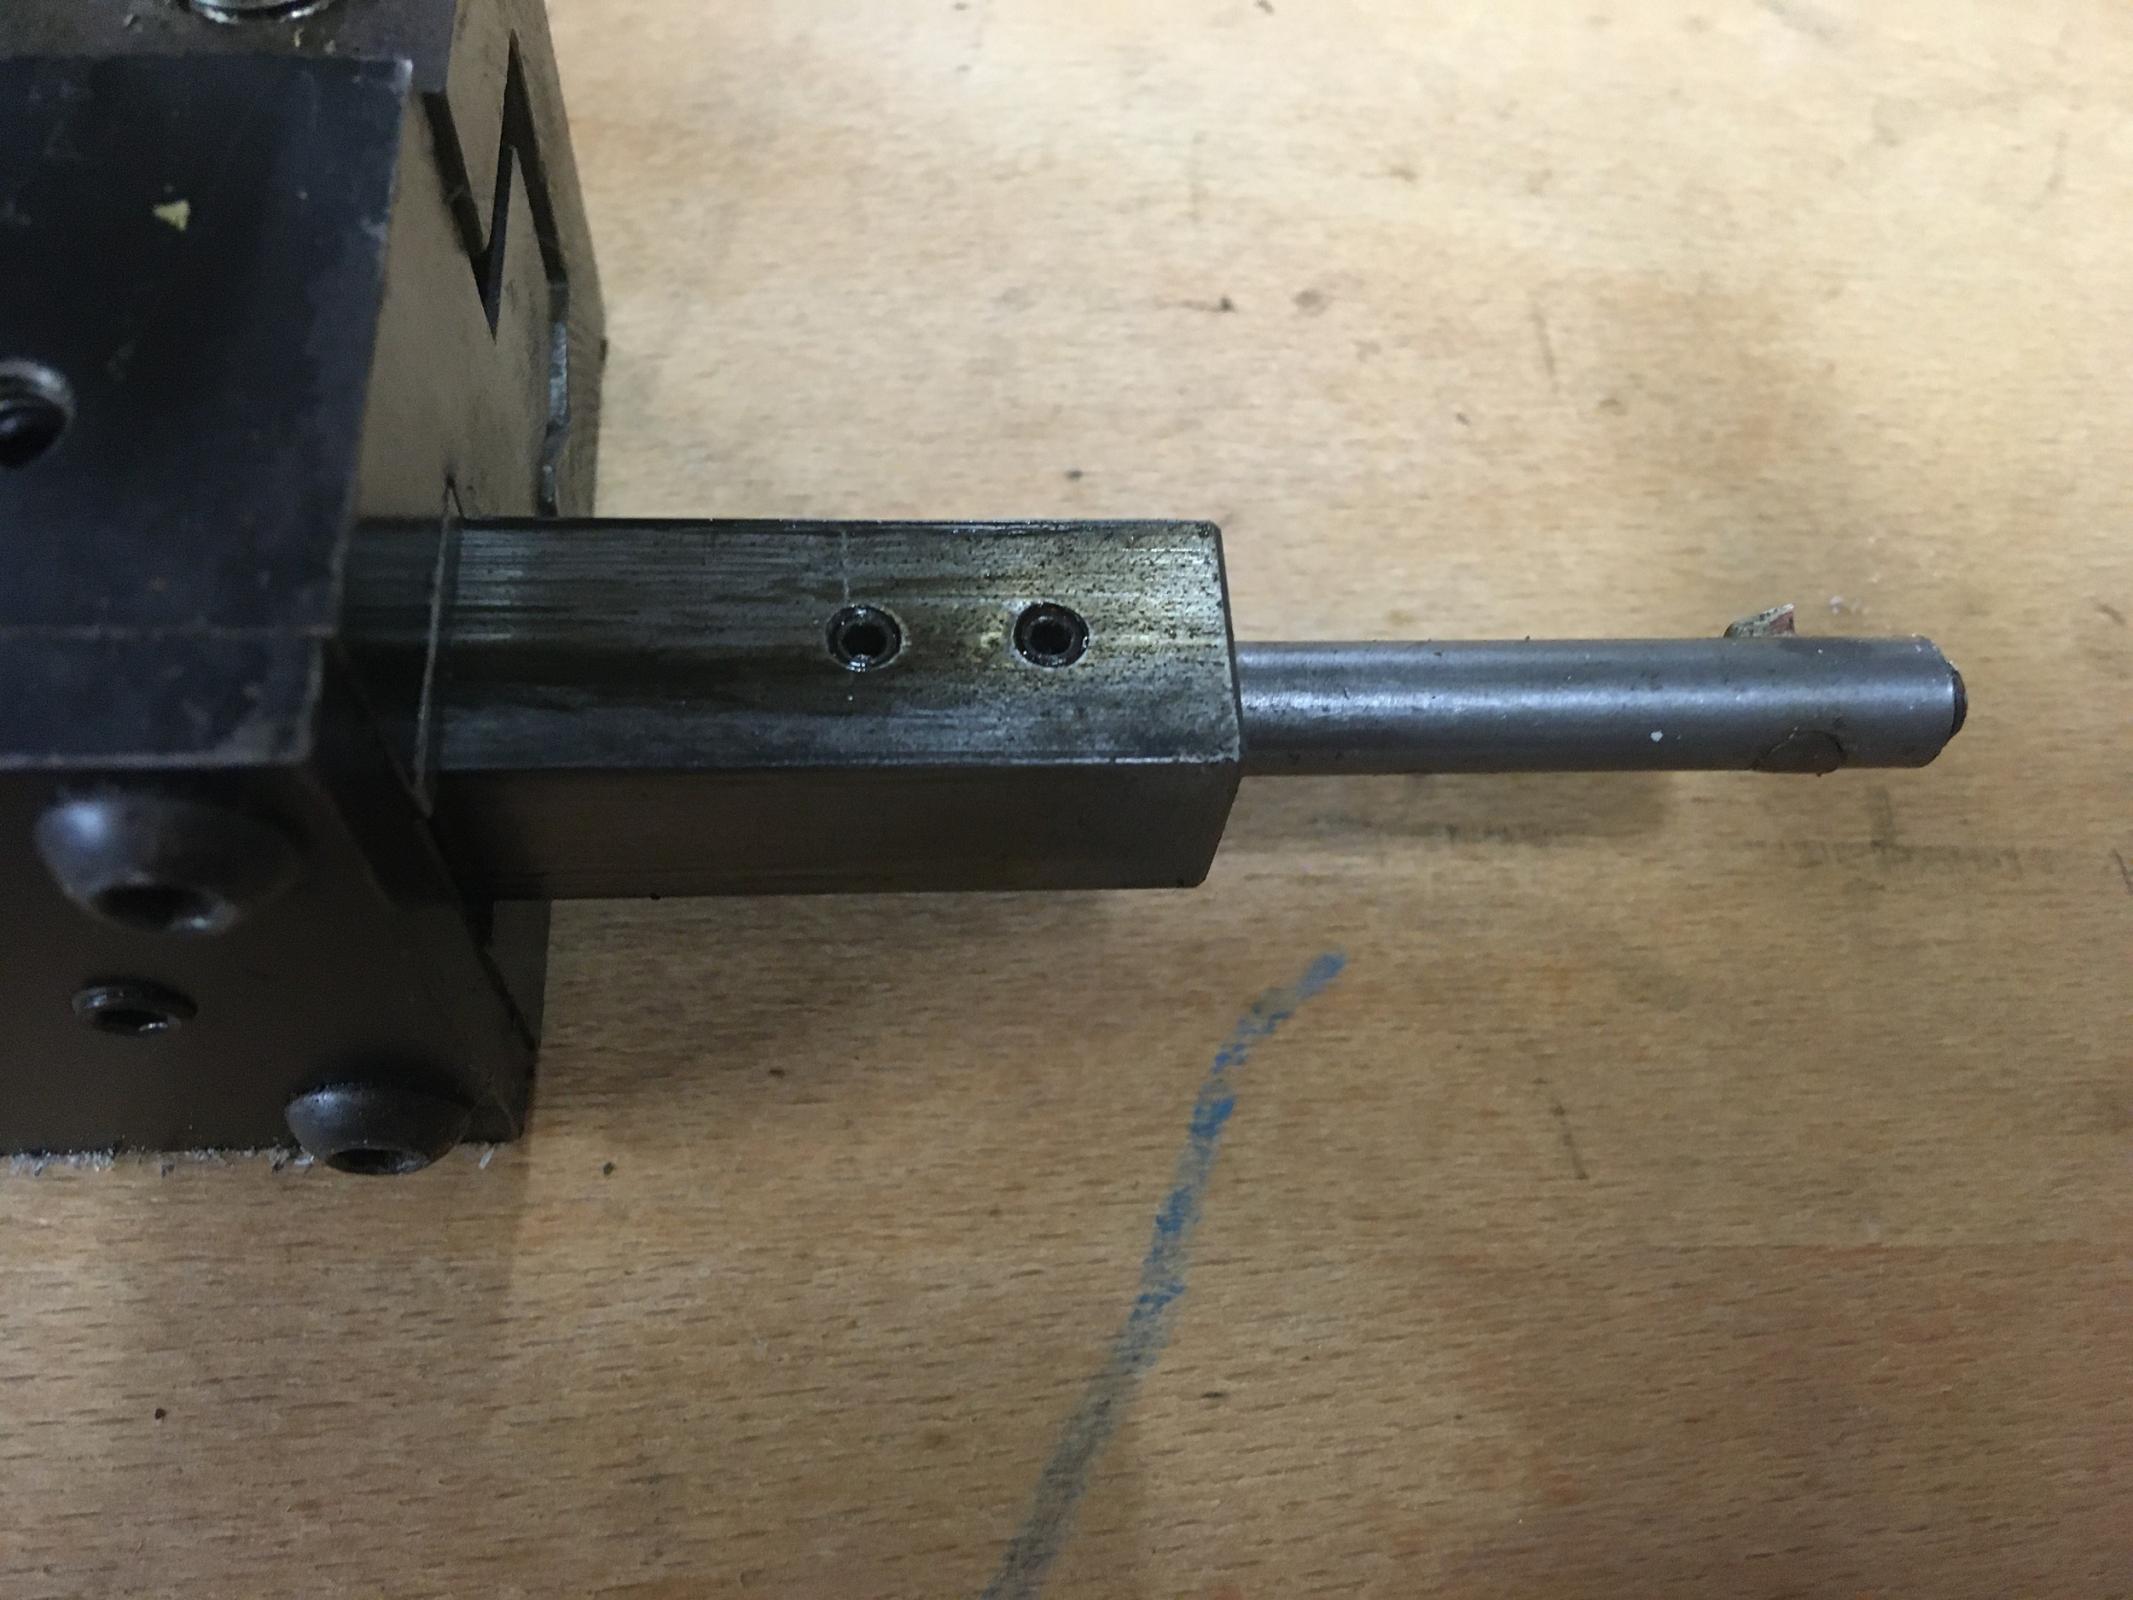
    The tool has a 3" stroke and the material costs were half the price of one good quality broach. I kept the build construction very simply by using a solid square stock bar as a ram with a simple lever operated movement to drive the tool in and out.

    The other advantage of this tool is blind holes can also have keyways cut, I normally drill a cross hole or undercut the bottom of the hole to prevent a build up of swarf at the end of the stroke.

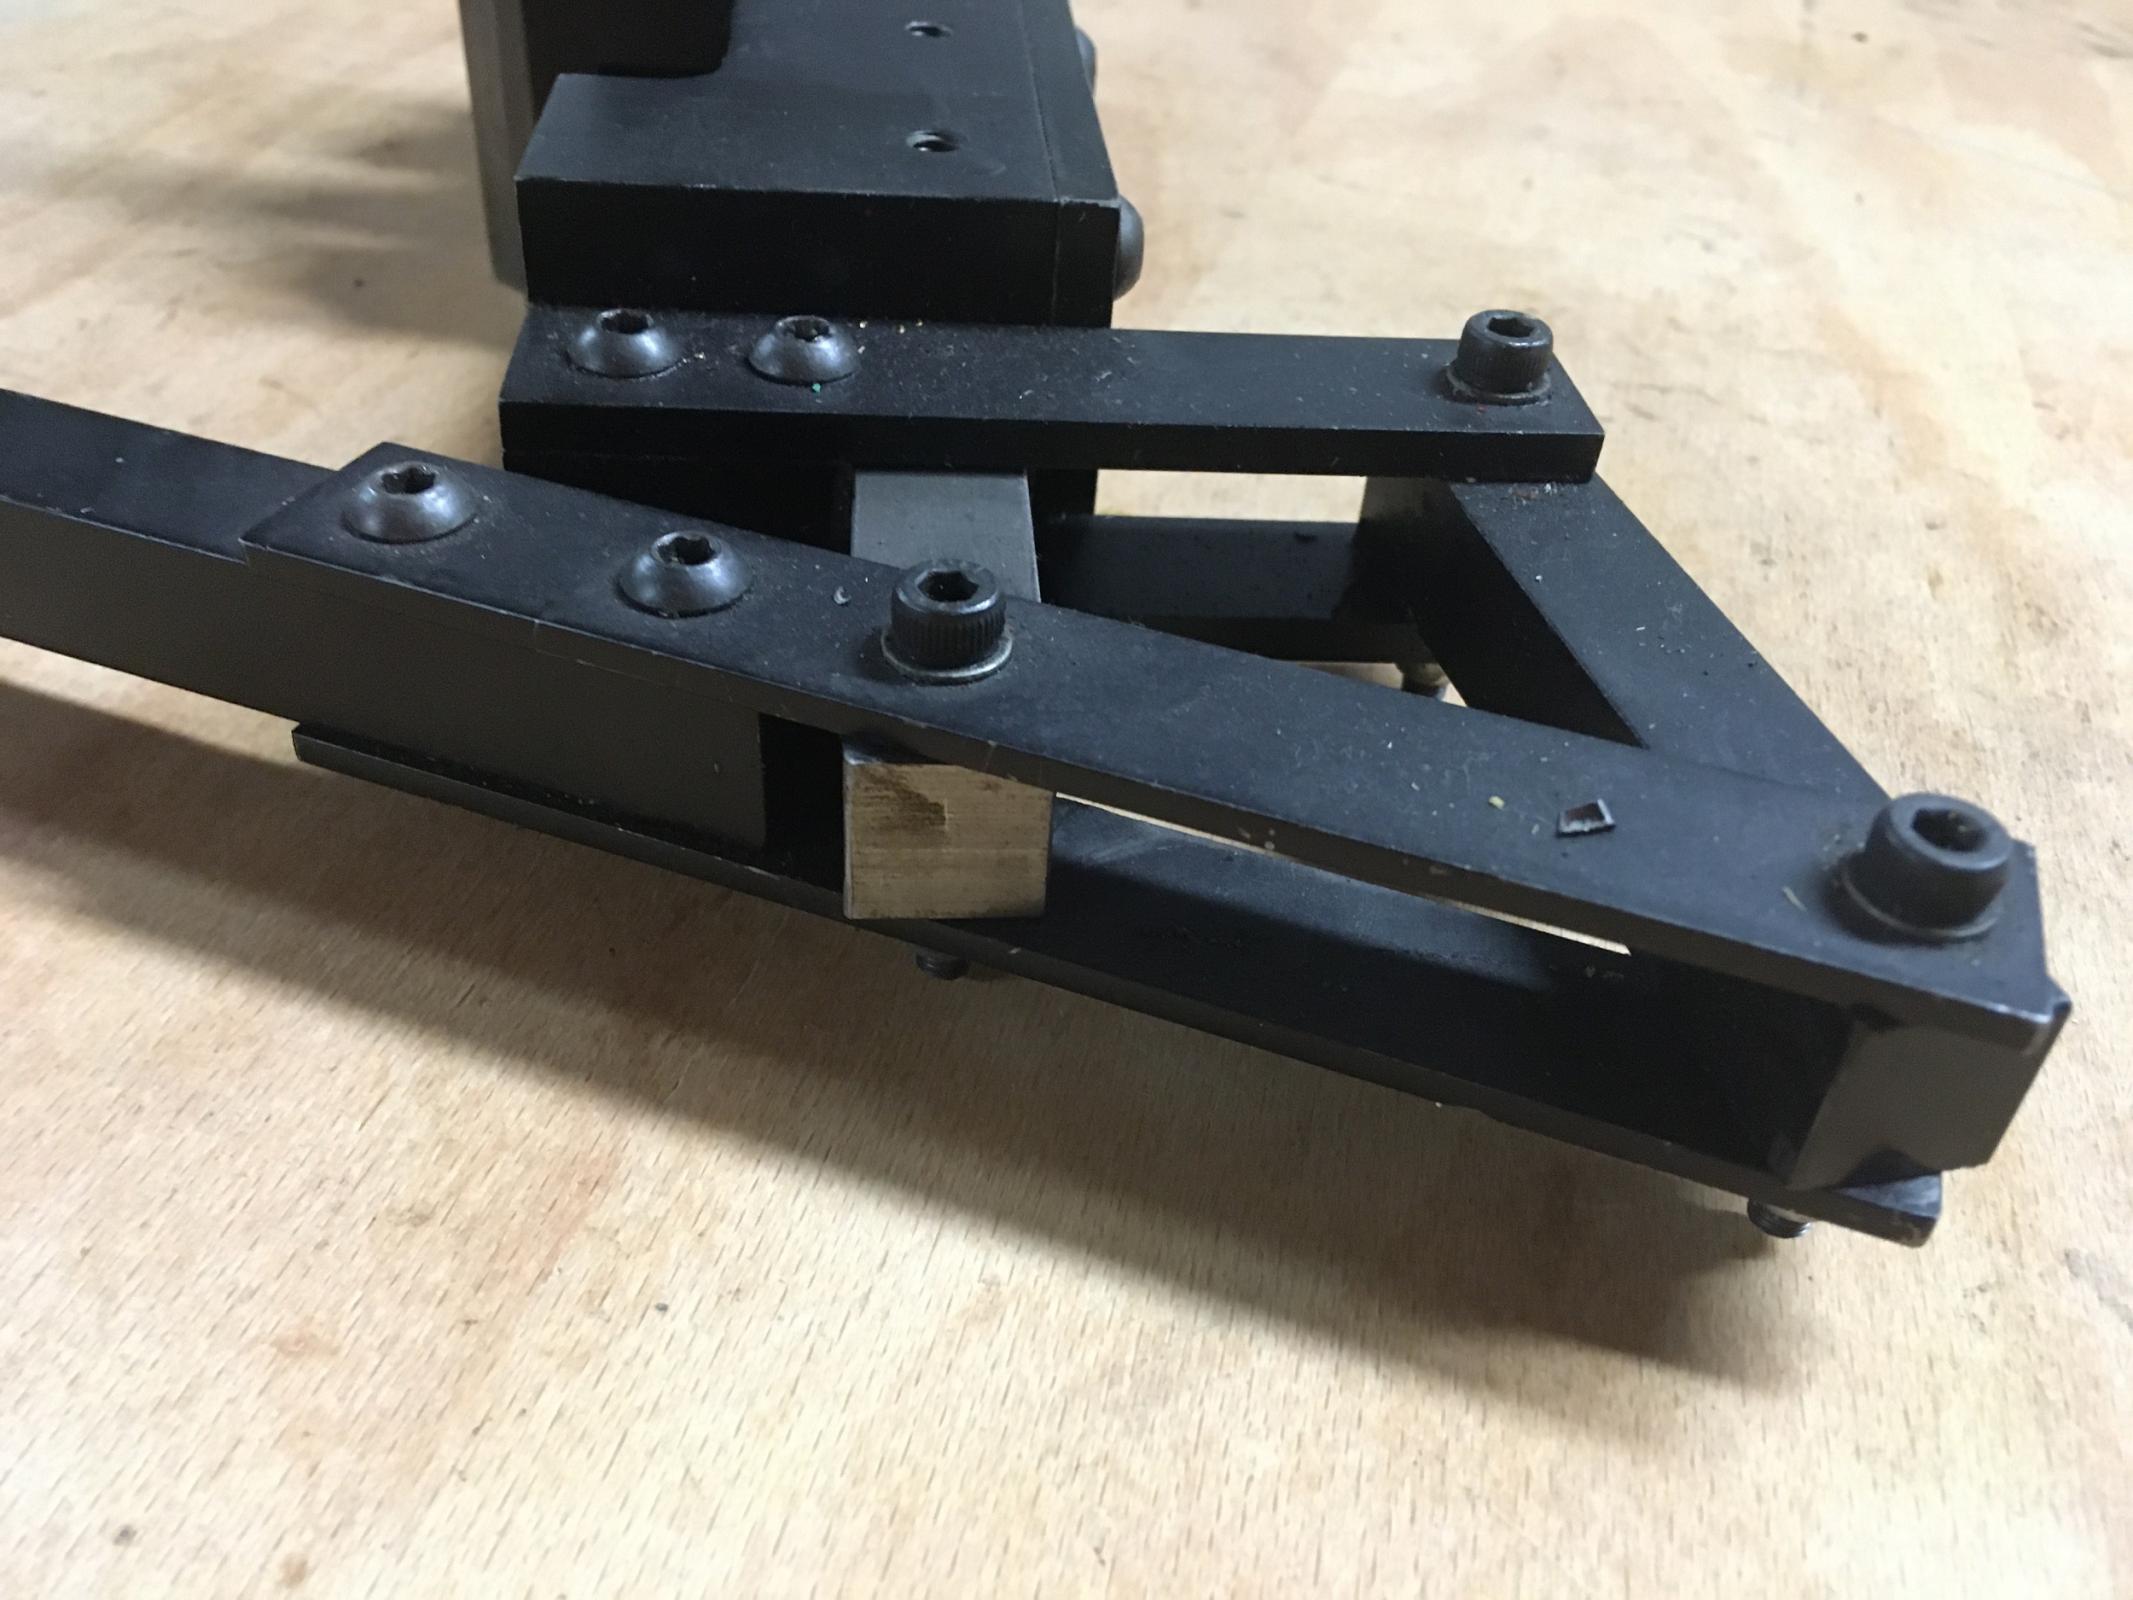
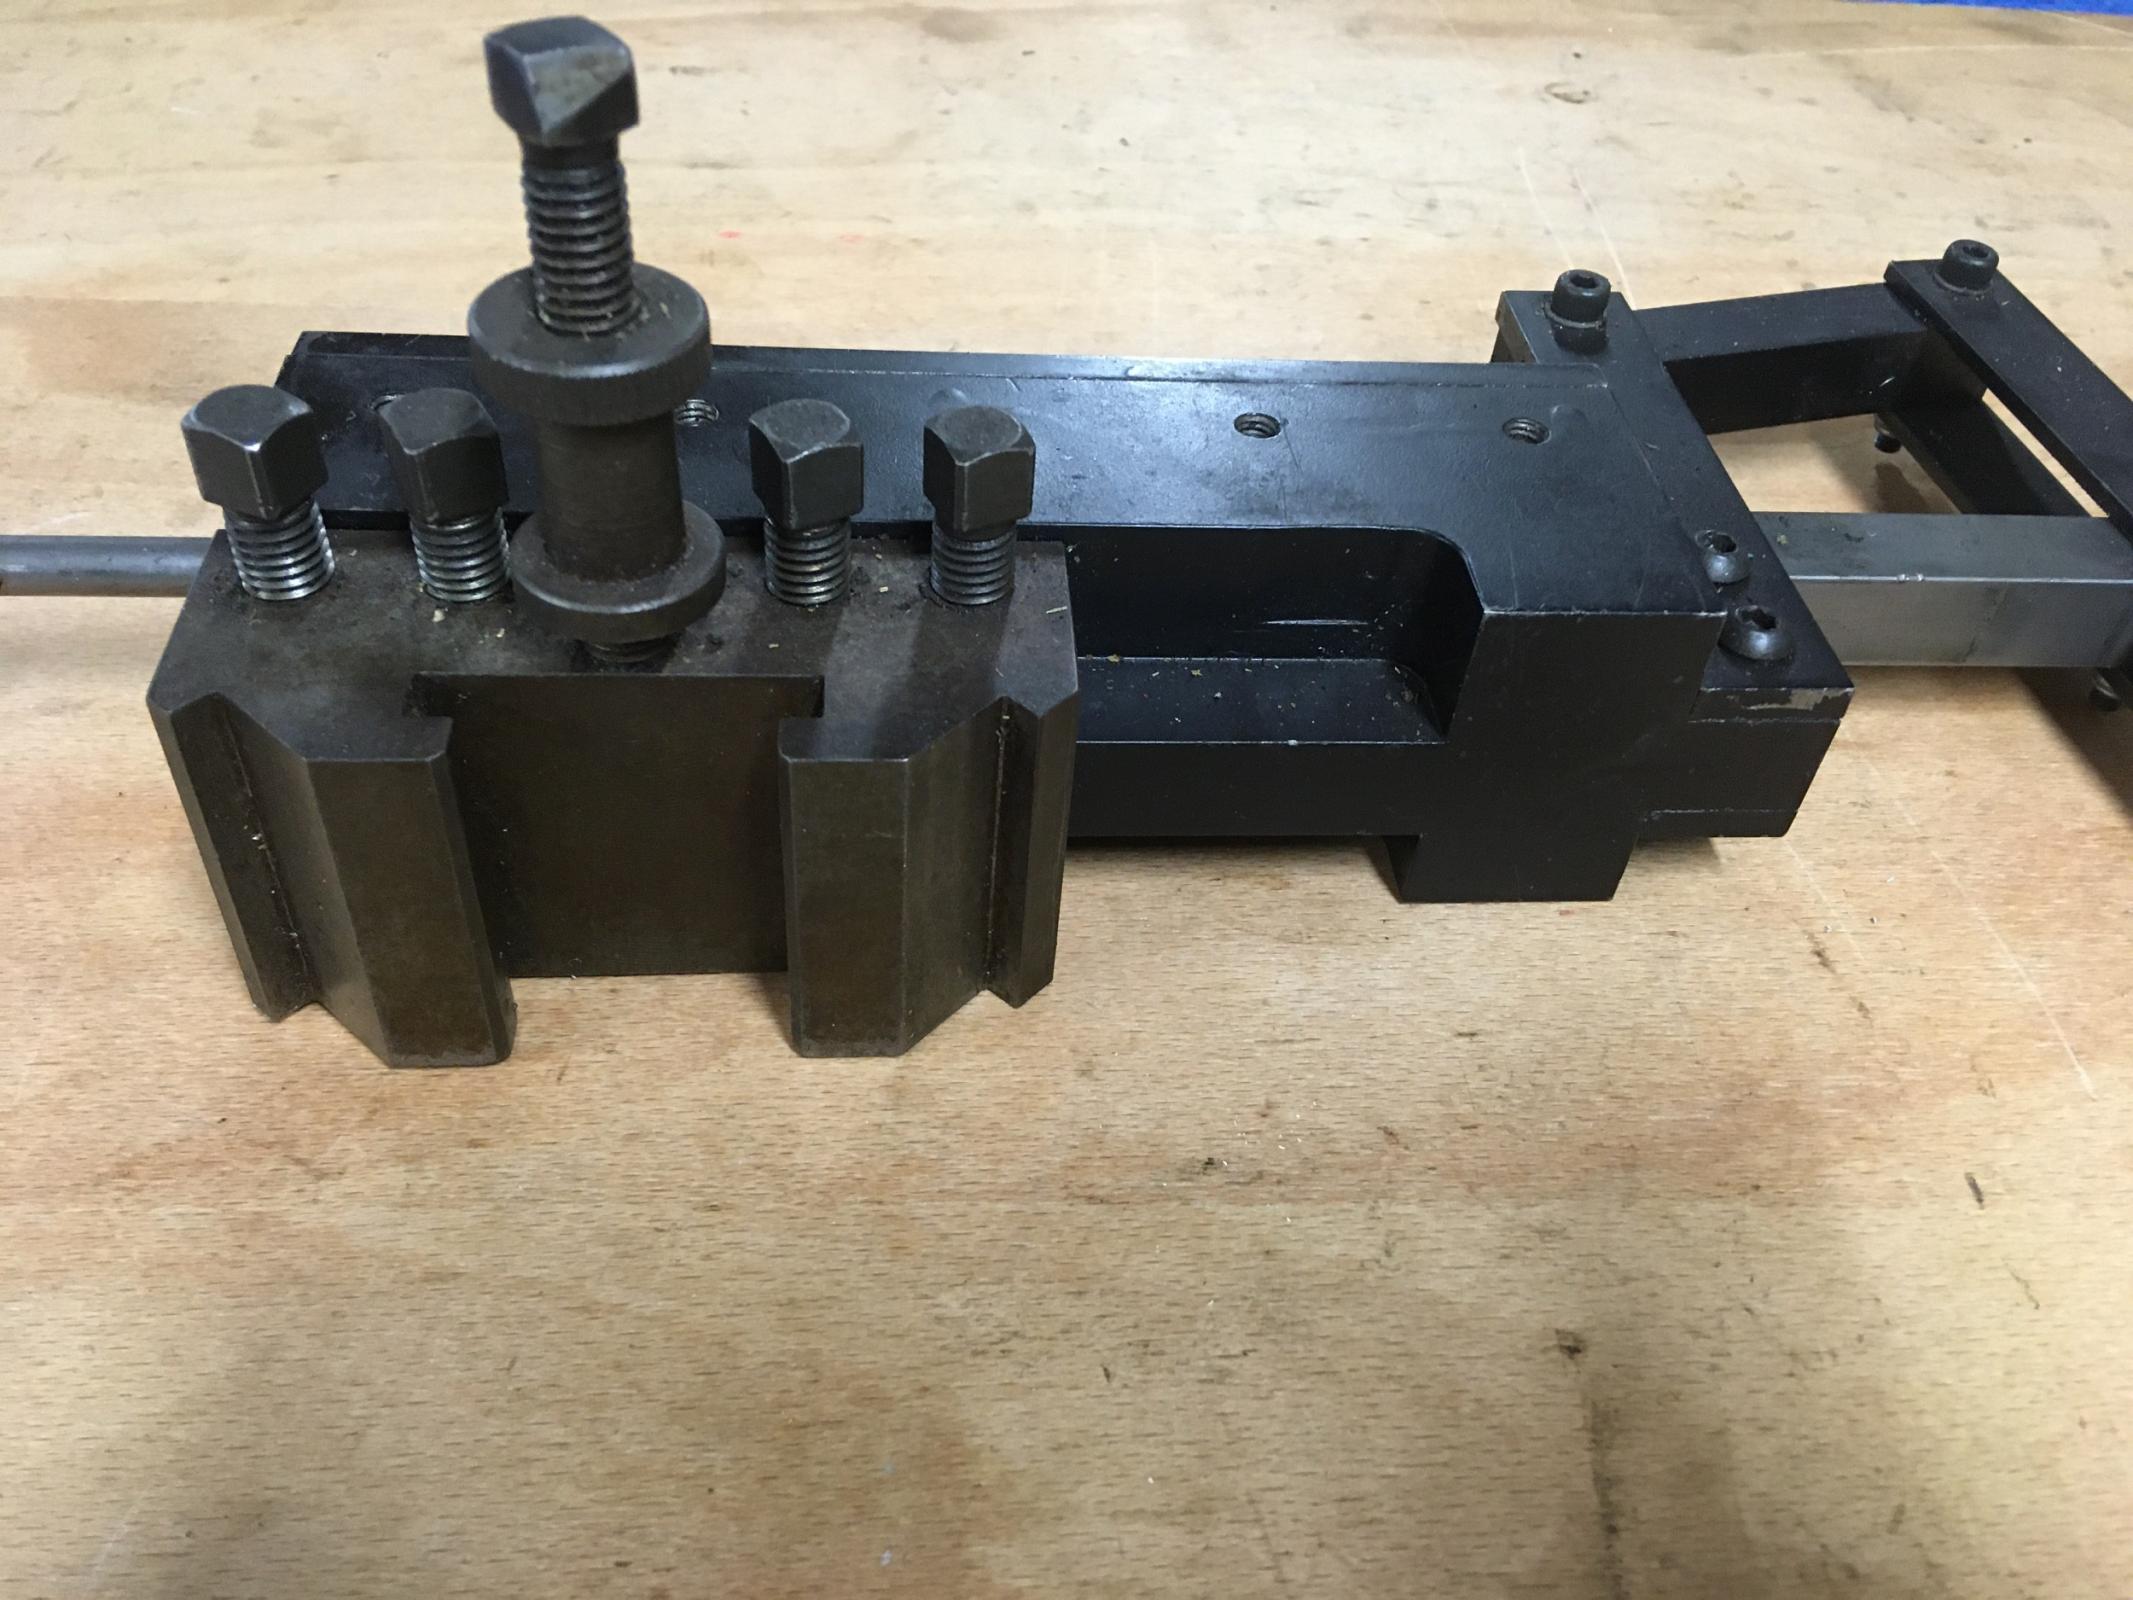
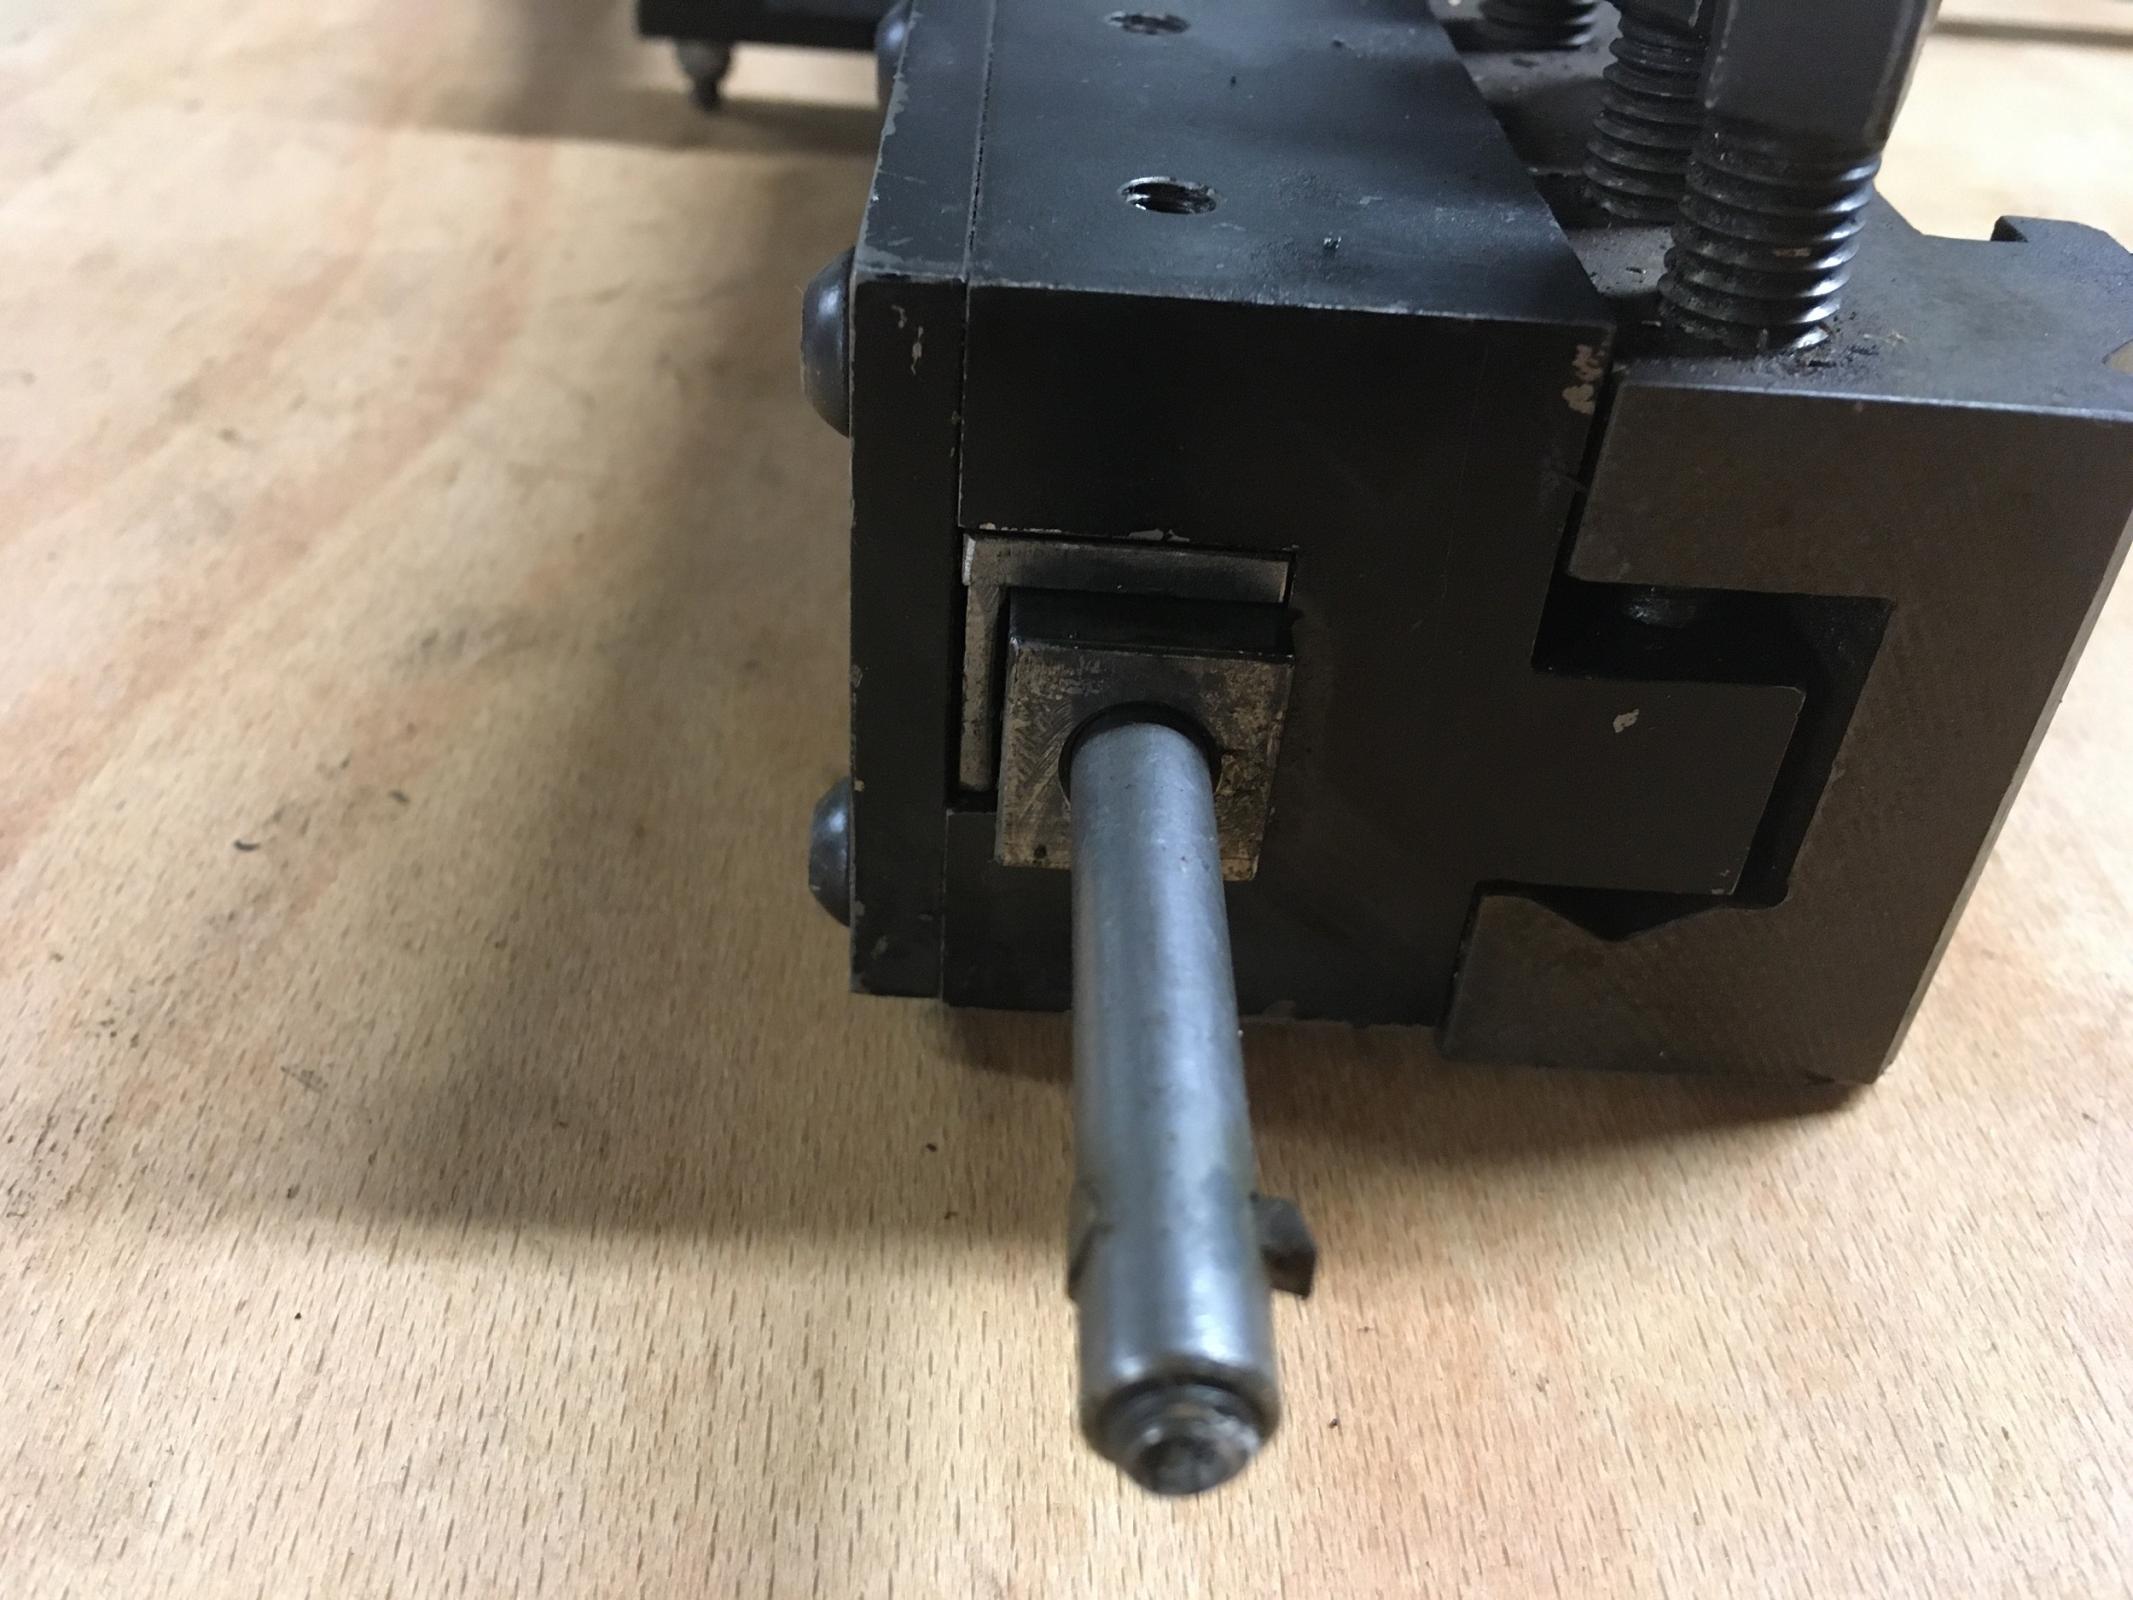
    The ram is held in place with two Jibs/Wear plates so the tool is ridged but can still slide smoothly with little friction/resistance.

    manual lathe slotting broaching attachment-slotter.jpg
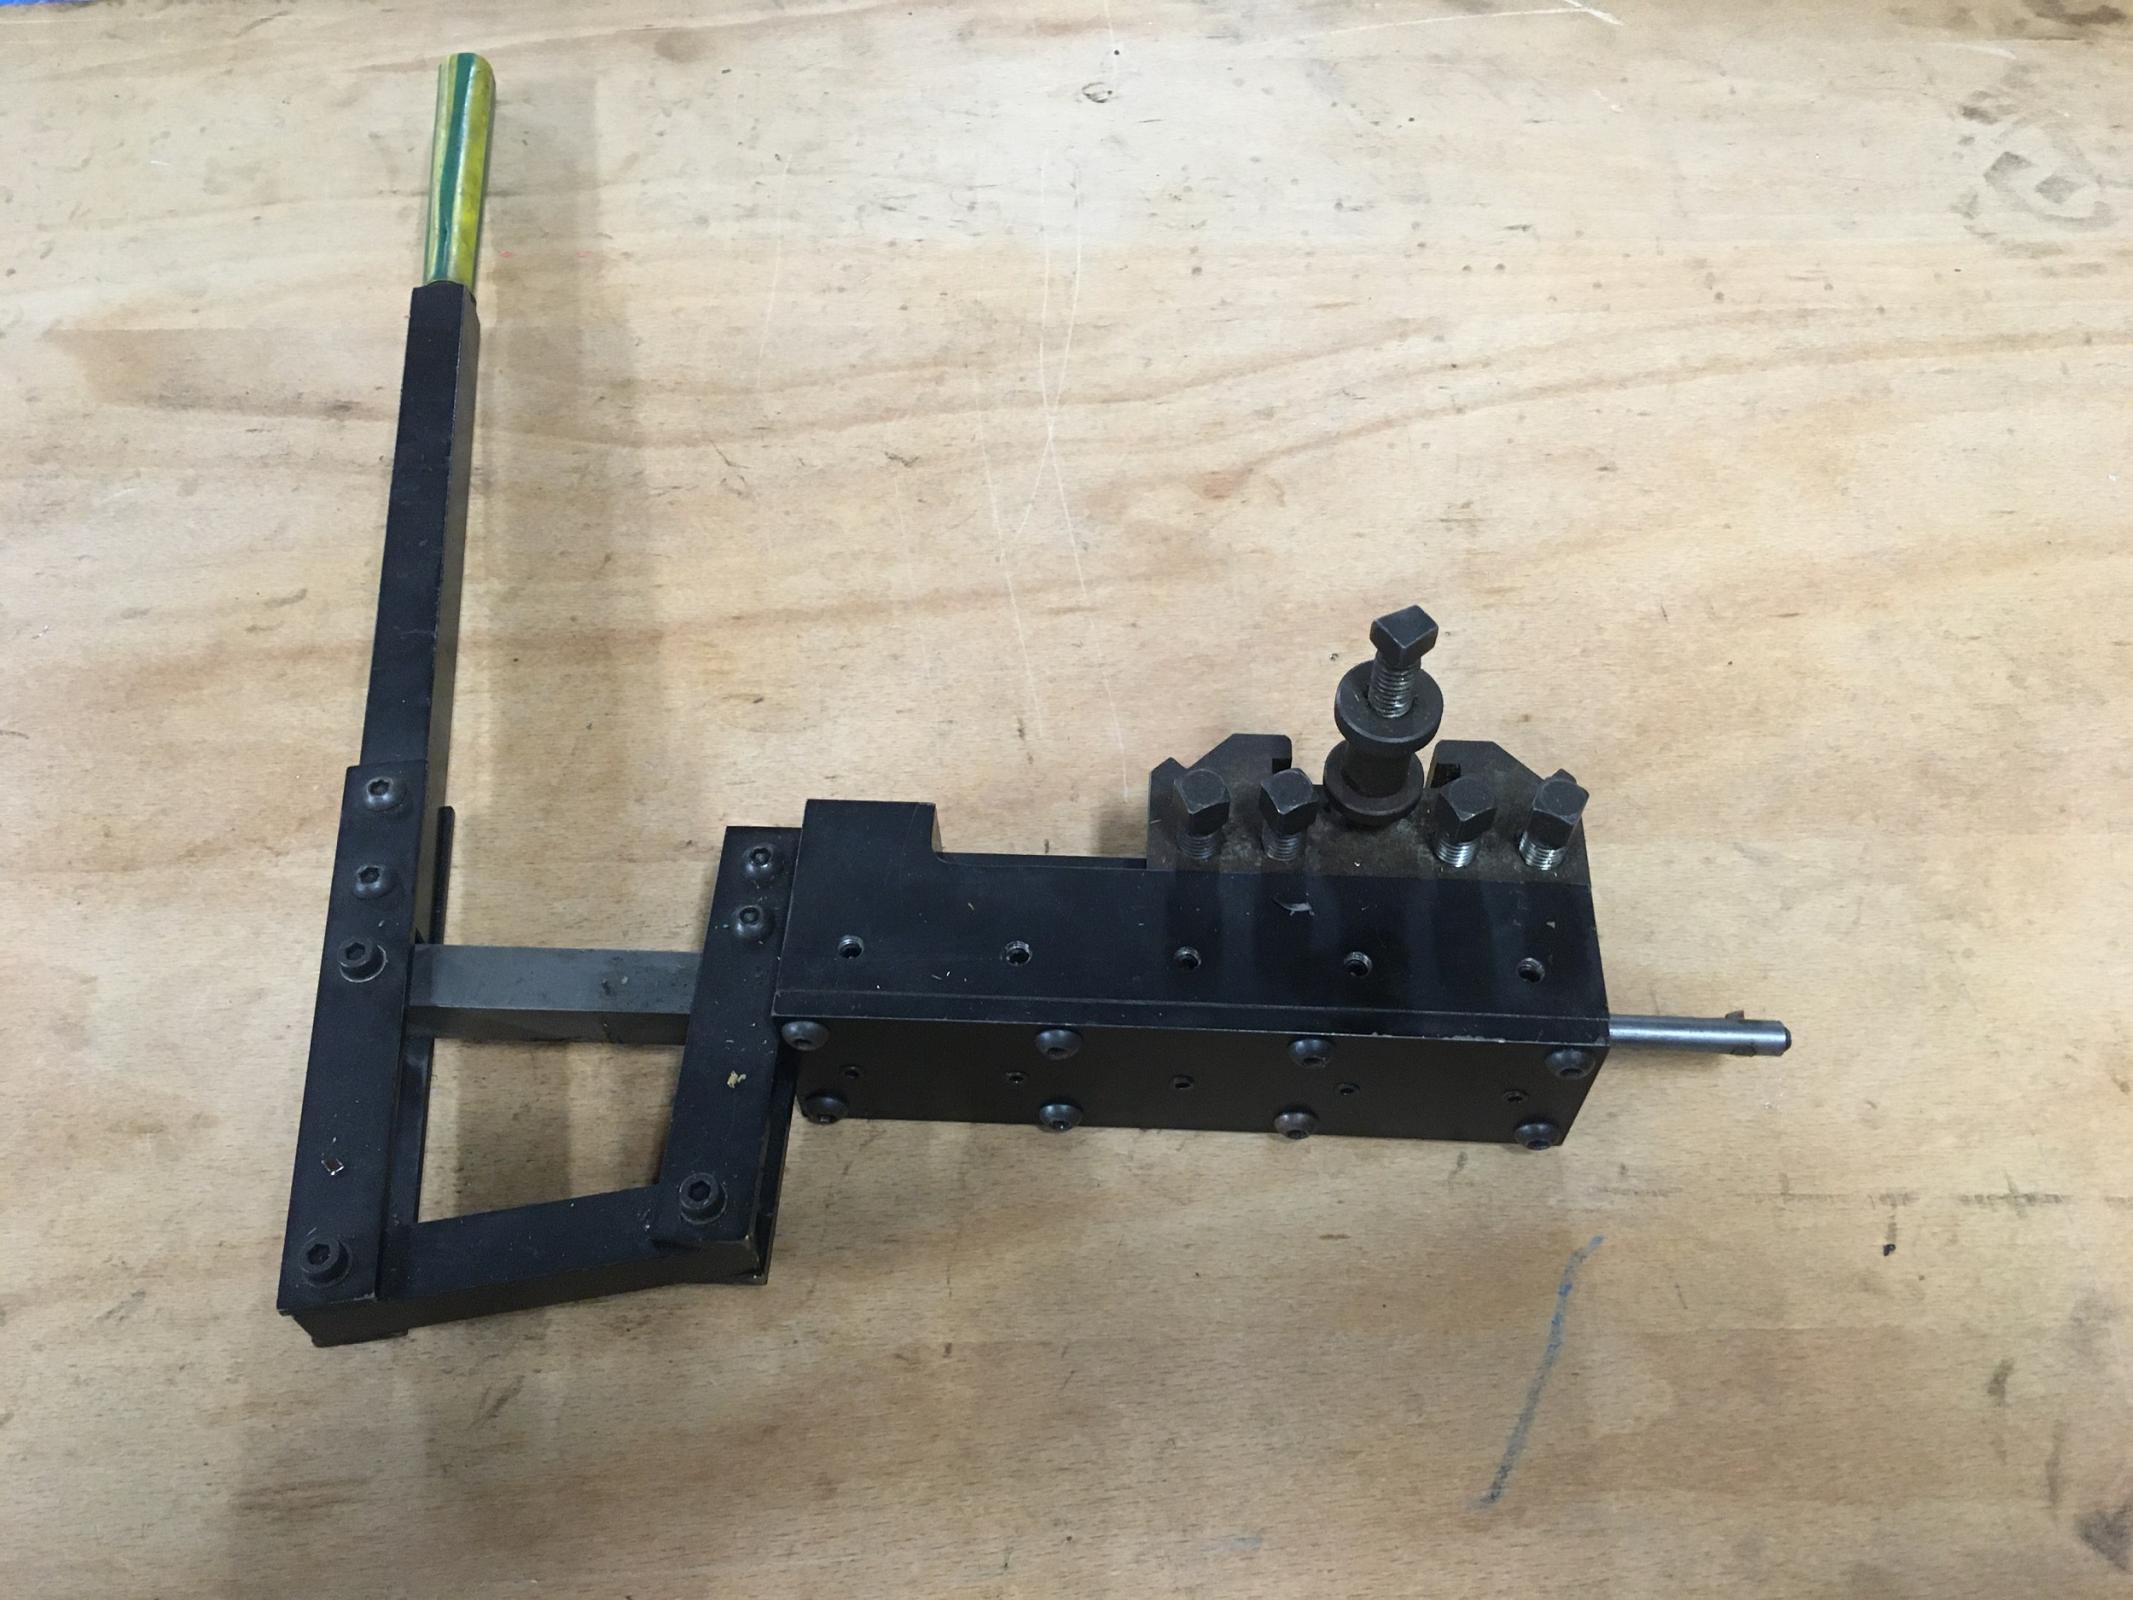
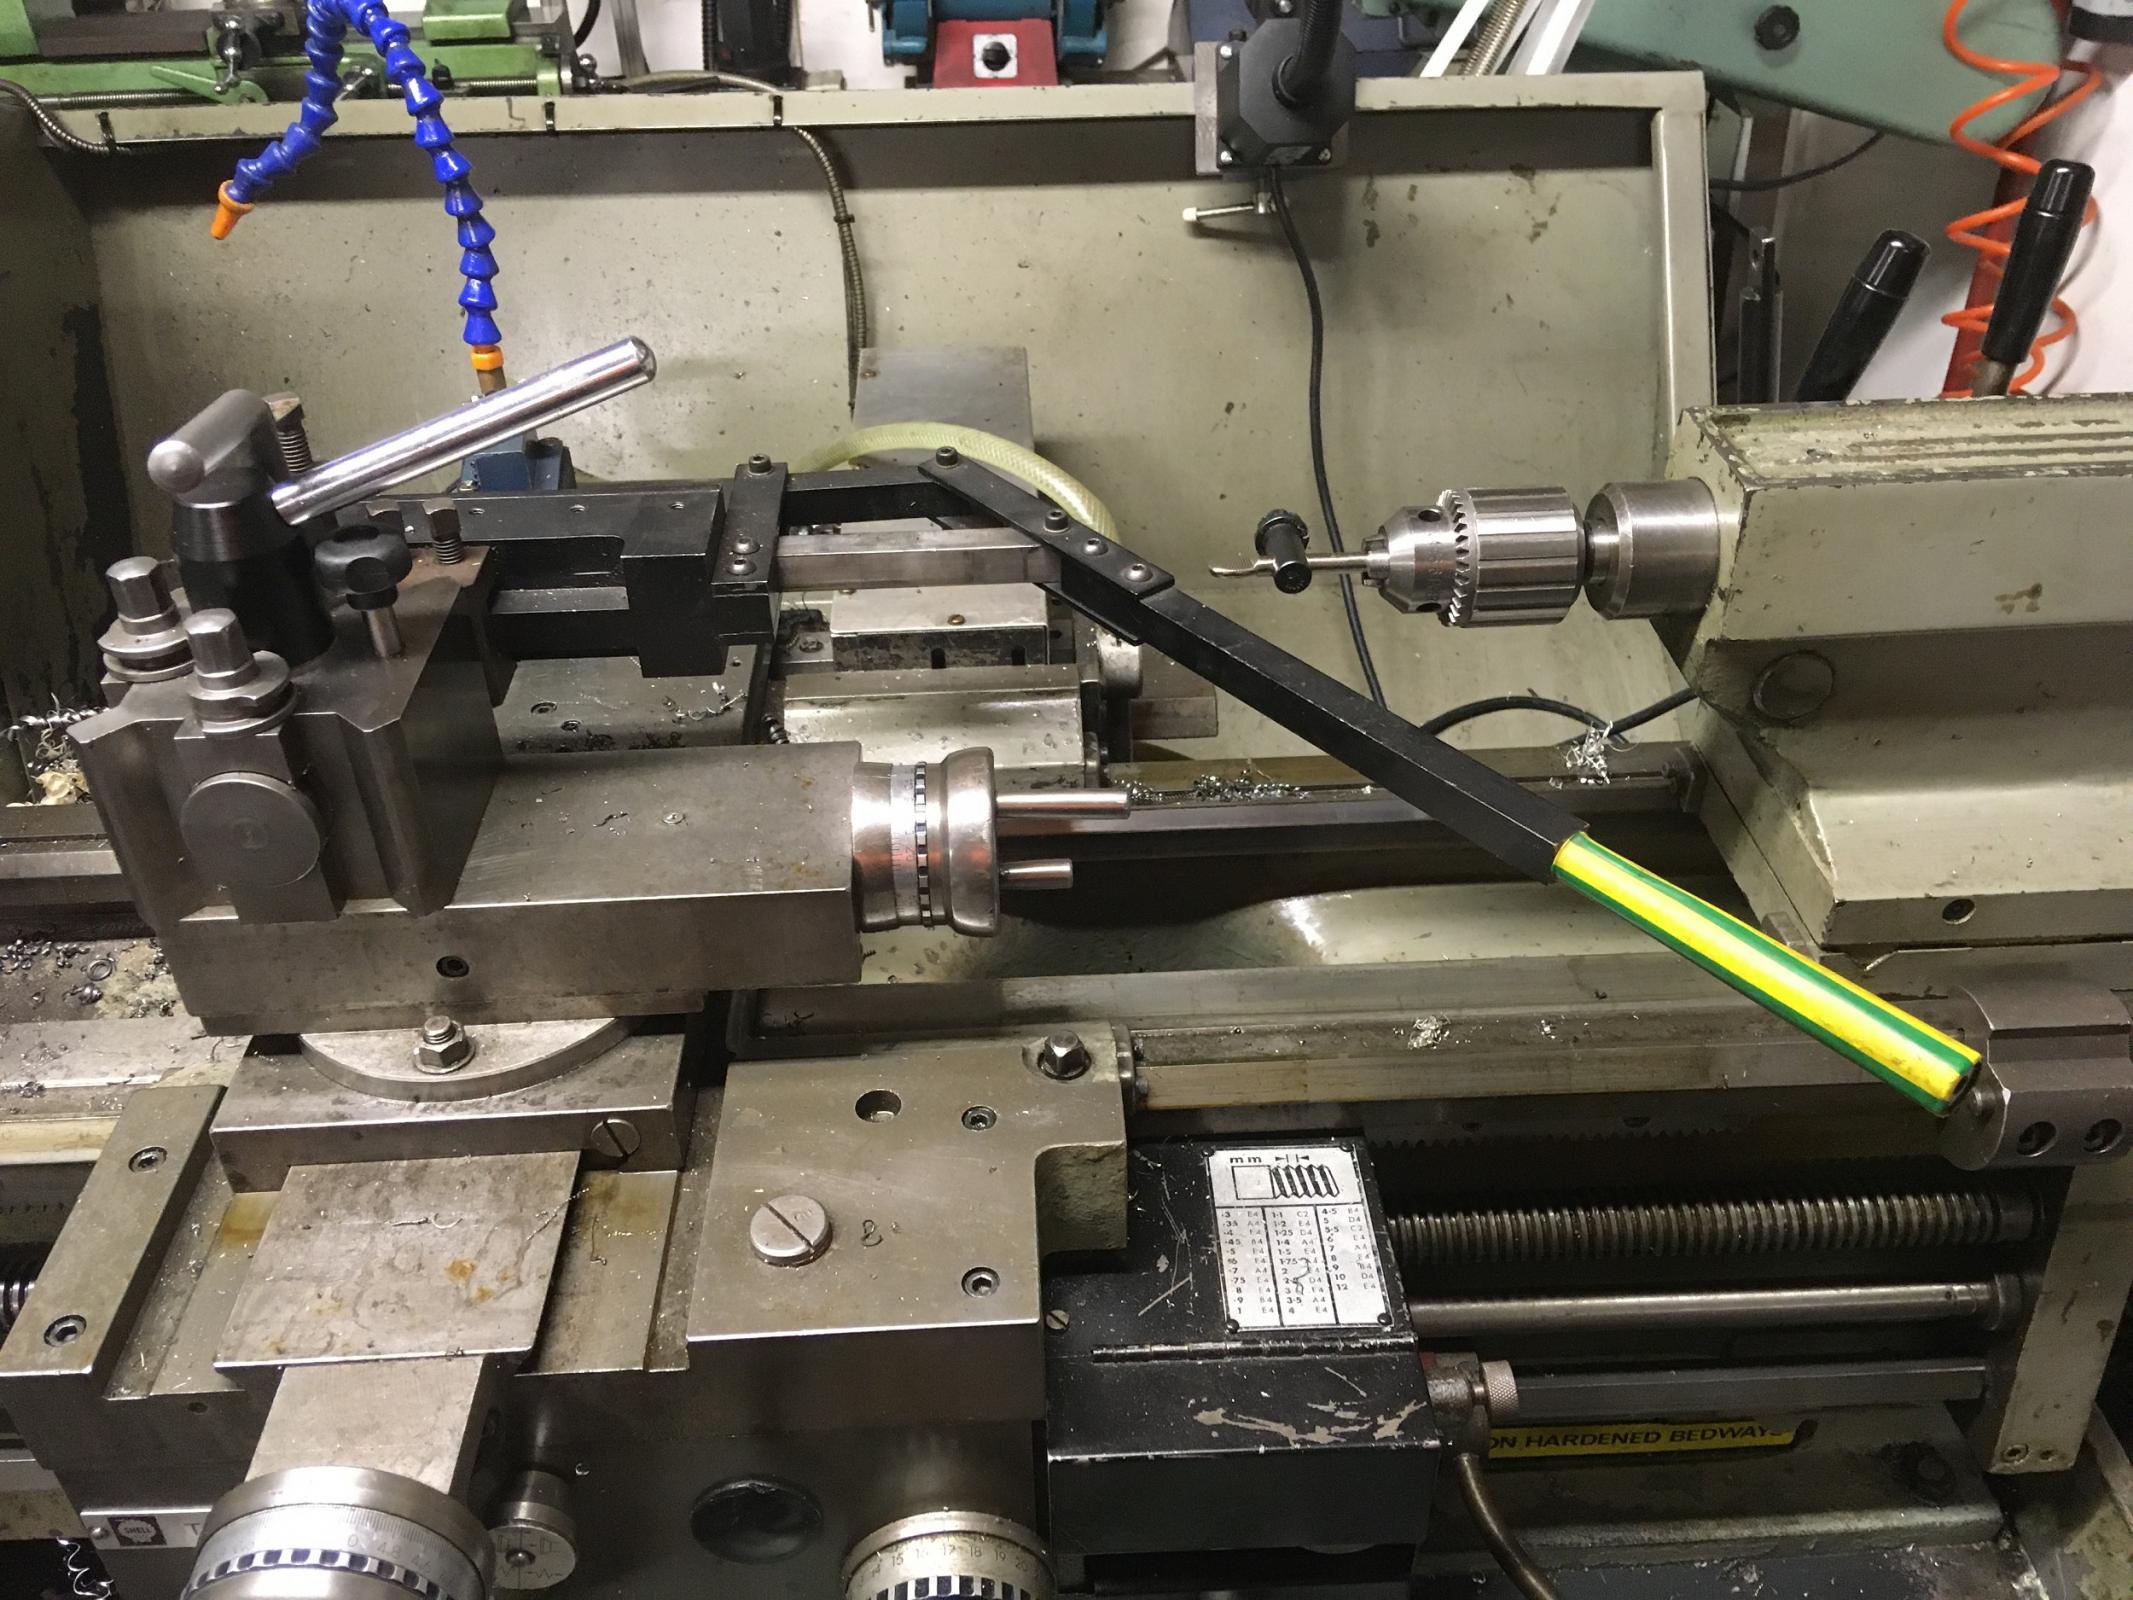
    Manual slotting tool
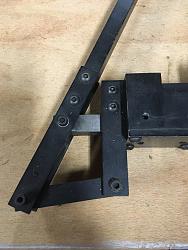
    manual lathe slotting broaching attachment-lever-mech.jpg manual lathe slotting broaching attachment-lever-mech-2.jpg
    Lever mechanism.

    manual lathe slotting broaching attachment-tool-holder.jpg
    Made to fit standard lathe tool holder.

    manual lathe slotting broaching attachment-lathe-back.jpg
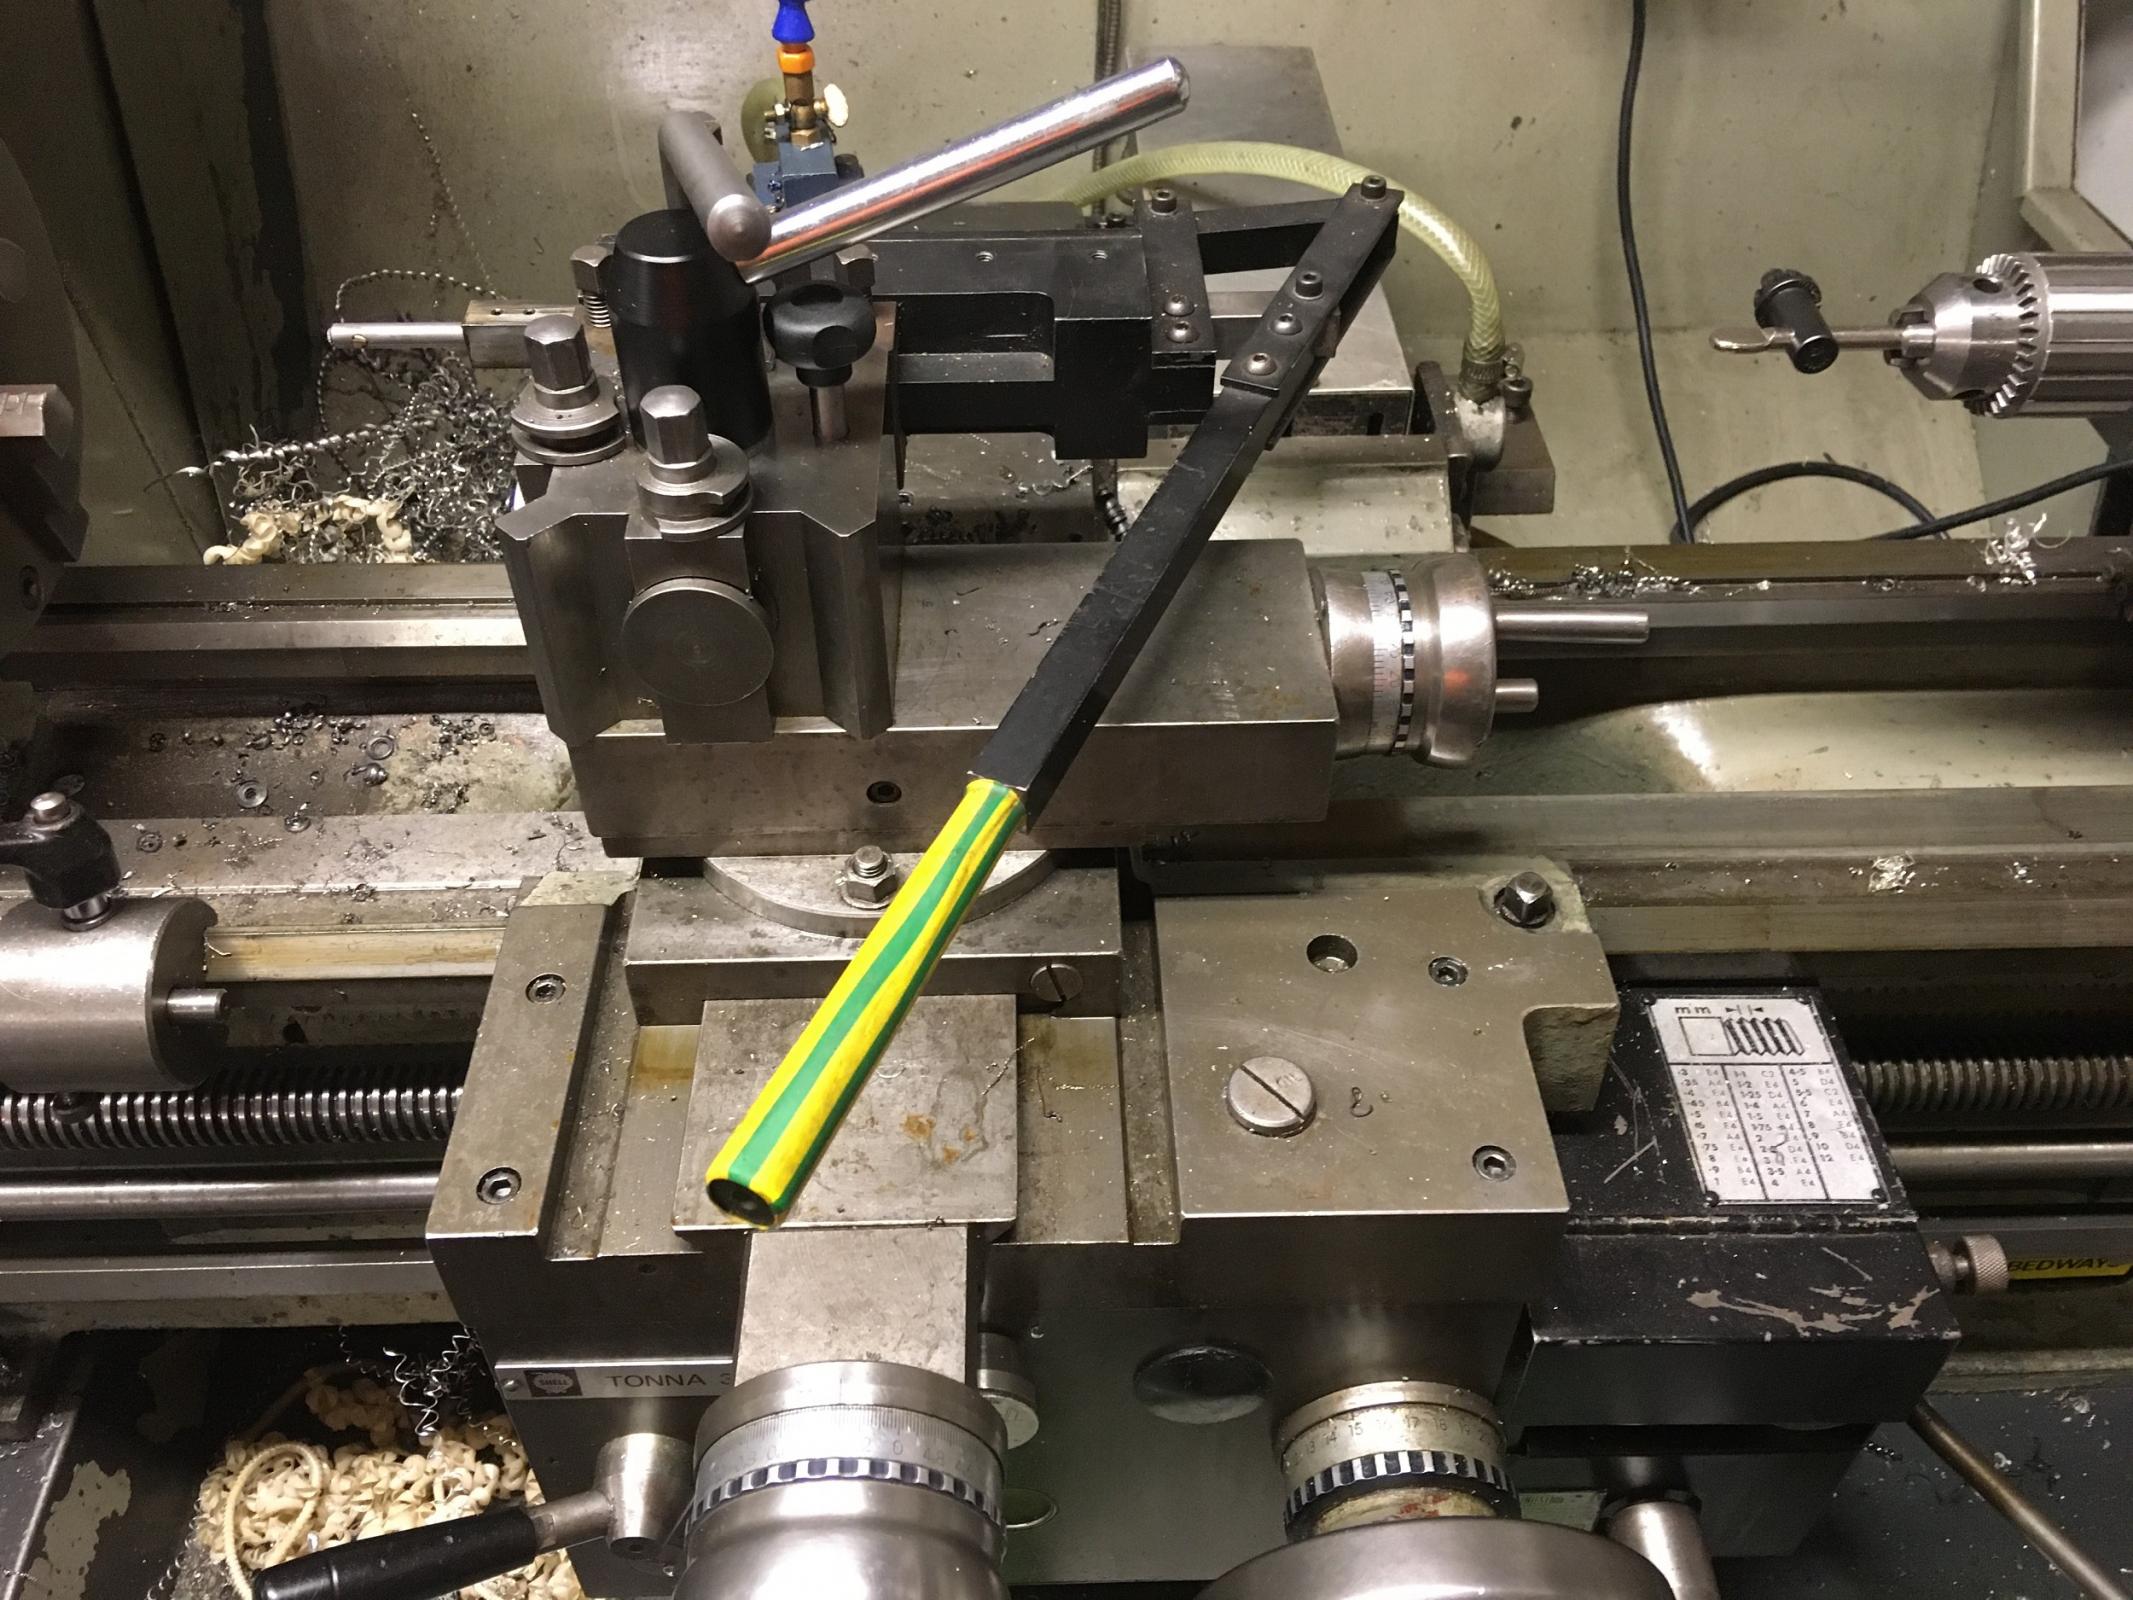
    In place on the lathe with the ram fully back.

    manual lathe slotting broaching attachment-lathe-forward.jpg
    Fully forward (total tool movement 75mm / 3")

    manual lathe slotting broaching attachment-tool.jpg
    Different tool holders can be clamped to the ram.

    manual lathe slotting broaching attachment-jib-wear-strips.jpg
    Jib/Wear plates can be seen top and to the left of the main ram. The plates are adjusted by grub screws to prevent lateral side movement while cutting.

    This didn't take long to make but has saved me hundreds of pounds in tooling.
    Thank you for taking the time to read.
    The Home Engineer

    186 More Best Homemade Tools eBook
    Last edited by thehomeengineer; Dec 30, 2019 at 07:07 PM.

  2. The Following 10 Users Say Thank You to thehomeengineer For This Useful Post:

    bigtrev8xl (Jan 6, 2020), DIYSwede (Dec 29, 2019), fergiomaria (Mar 18, 2023), Jon (Dec 29, 2019), Okapi (Jan 2, 2020), Philip Davies (Jan 1, 2020), Skun Knuckles (Mar 17, 2023), suther51 (Dec 31, 2019), threesixesinarow (Jan 6, 2020), Toolmaker51 (Jan 6, 2020)

  3. #2
    Content Editor
    Supporting Member
    DIYer's Avatar
    Join Date
    Aug 2013
    Posts
    3,056
    Thanks
    773
    Thanked 1,852 Times in 1,653 Posts


    Thanks thehomeengineer! We've added your Lathe Broaching Attachment to our Lathe Accessories category,
    as well as to your builder page: thehomeengineer's Homemade Tools. Your receipt:


    2000 Tool Plans

  4. #3
    Supporting Member DIYSwede's Avatar
    Join Date
    May 2019
    Location
    Stockholm, Sweden...
    Posts
    634
    Thanks
    415
    Thanked 799 Times in 319 Posts

    DIYSwede's Tools
    Thank you, TheHomeEngeineer for sharing yet another finely made and finished tool!

    I'll eventually need to cobble something similar together, though much smaller and compact -
    and wonder if you choose your ram to be 1/2" sq, and a 1/4" dia for the tool holder?
    Ram housing out of 6" of 2" sq BMS stock?

    Already being cheap and dirty, I'll probably settle for a housing block of (free) cast iron with integral,
    milled QCTP dovetails and 12 mm sq hot-rolled for a ram and handle for my 7 x 12" mini lathe.

    Cheers

    Johan

  5. #4
    Supporting Member thehomeengineer's Avatar
    Join Date
    Nov 2017
    Location
    Berkshire UK
    Posts
    706
    Thanks
    722
    Thanked 2,070 Times in 407 Posts

    thehomeengineer's Tools
    Hi Johan
    Thank you again for your interest and kind words.
    This tool was made from stock bar the ram was 3/4” (19mm) as this is what I had to hand but it could have ended up being 1” (25 mm) or 1/2” (12 mm) as I did not make to any design and made it up as I went along. I knew the tool would only be used occasionally, as I try to always use my imperial broaching set when ever possible. So I didn’t want to spend to much time and money making an elaborate tool but something basic to just get me out of trouble. As it happens it works great and have used it quite a few times.
    The actual tool was made about 25 years ago and it sits on the shelf but is a life saver. The largest keyway cut using this tool was 12mm width x 50mm long.
    With reference to your build and with out telling you how to suck eggs. Try and make the ram and body as large as possible as this increase the tool rigidity and with the lathe carriage clamped to the bed stops the carriage being pushed back away from the chuck. You can only take small cuts 0.002” (0.05 mm) but it doesn’t take long to cut a slot.
    I look forward to seeing your take on this build on HMT as I am sure many improvements can be made like an adjustable stop fo blind holes etc.
    Many thanks again
    Andy

  6. #5

    Join Date
    Nov 2017
    Posts
    2
    Thanks
    9
    Thanked 0 Times in 0 Posts
    This is a great idea... Well done! Thank you Home Engineer...

  7. #6
    Supporting Member Toolmaker51's Avatar
    Join Date
    Feb 2016
    Location
    Midwest USA
    Posts
    5,333
    Thanks
    7,042
    Thanked 2,981 Times in 1,893 Posts

    Toolmaker51's Tools
    thehomeengineer hits it again!
    I appreciate savings against little used tooling. Using lathe axis means you could make quite large keyways, even roughing first by milling. Either way, far less effort and tooling than trying to push an equally sized broach, handful of shims, and 6 ton arbor press.


    186 More Best Homemade Tools eBook
    Sincerely,
    Toolmaker51
    ...we'll learn more by wandering than searching...

  8. The Following User Says Thank You to Toolmaker51 For This Useful Post:

    thehomeengineer (Jan 6, 2020)

Thread Information

Users Browsing this Thread

There are currently 1 users browsing this thread. (0 members and 1 guests)

Bookmarks

Posting Permissions

  • You may not post new threads
  • You may not post replies
  • You may not post attachments
  • You may not edit your posts
  •