
 LinkBack URL
 About LinkBacks


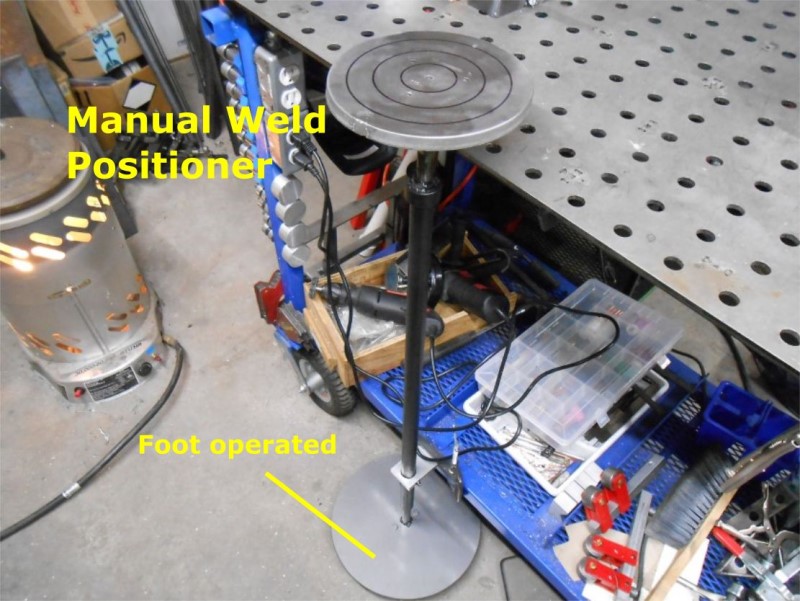
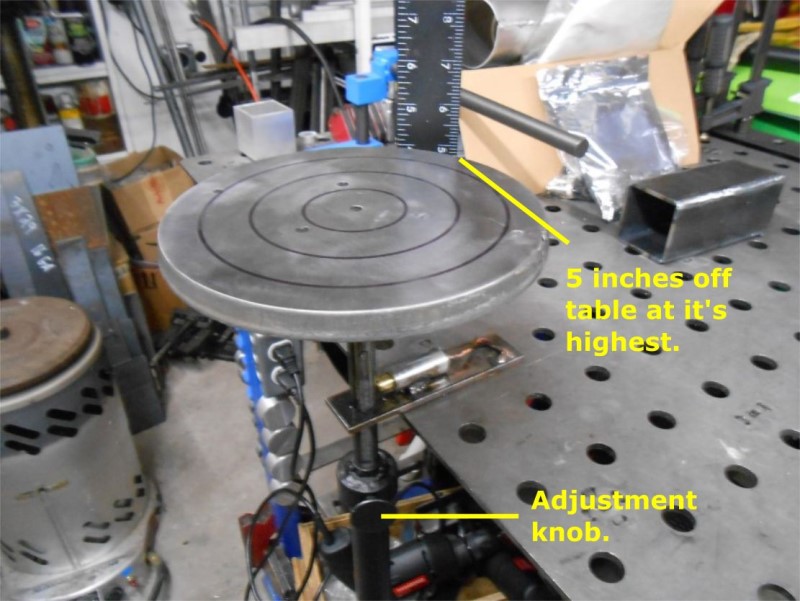
Just completed is my version of a manual welding positioning table or "potters wheel." I learned of such a thing from some you tube videos so I didn't invent it and take no credit in that department.
You manually turn this with your foot on the lower disc allowing you to make one weld pass on round parts. It should work with all welding processes. I have not tried it yet but was told it's easy to catch onto and use. (I hope so, this uses the last remaining limb I have when Tig welding!)Note: this isn't for just round parts! Imagine you were welding up a box or square item. You weld one side, then with your foot, turn it so you can weld another side, etc.
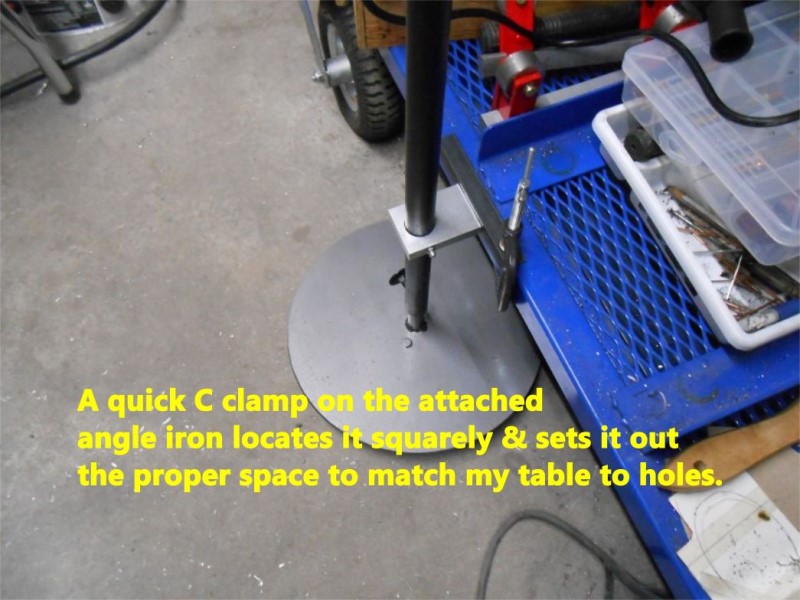
Because of the design of my table with the lower shelf, I opted to mount this to the front edge rather than thru one of the holes further in on the table. It can attach all along the front where the lower disc clears the tires. The lower block has an angled piece that locates the post at 90 degrees & the proper space from the table easily. The top bracket just drops into 2 holes of the table. The lower block attaches simply with a C clamp.
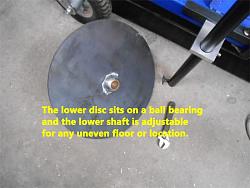
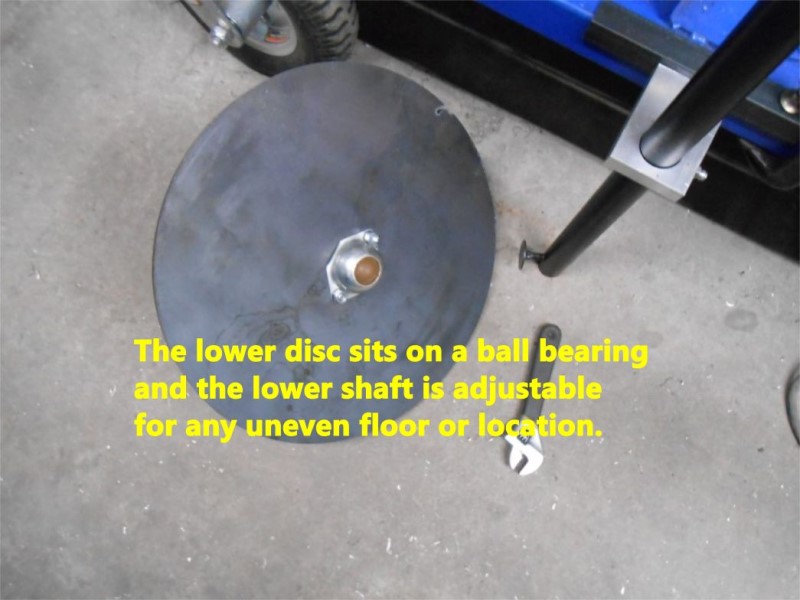
The lower disc sits about 1 inch off the floor on a ball bearing roller. The lower shaft has a few inches of travel for any odd floor heights.
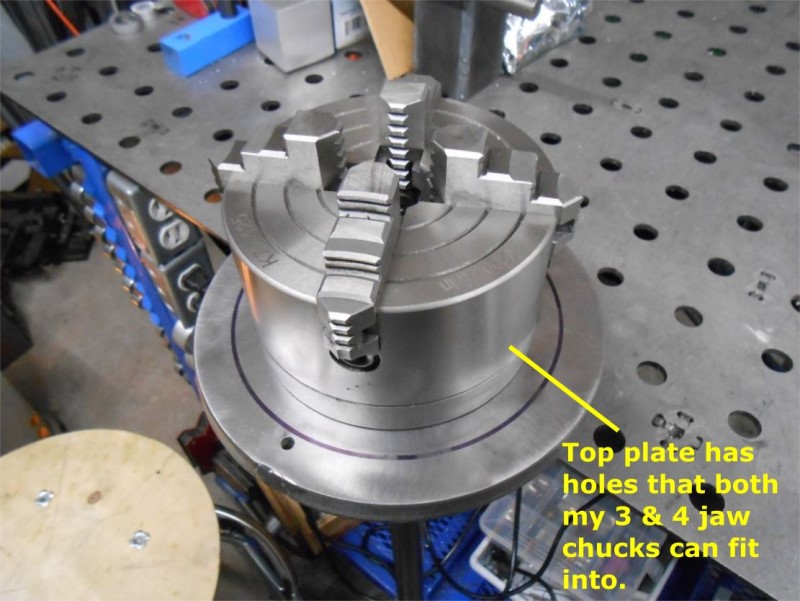
The table top can be used with either my 3 jaw or 4 jaw lathe chucks, they simply drop into 3 holes in the table. (no need to bolt them down) The table can also be used plain without the chuck. Locating rings are there to help center the part being welded.
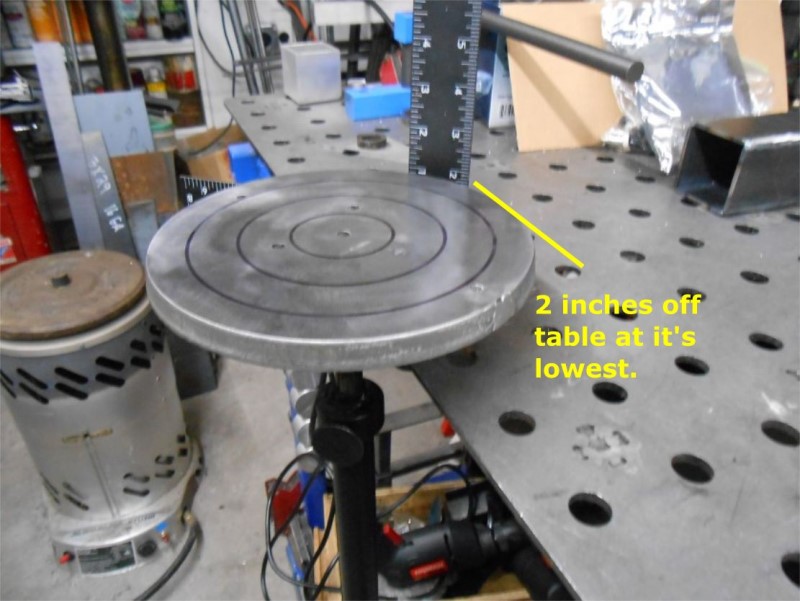
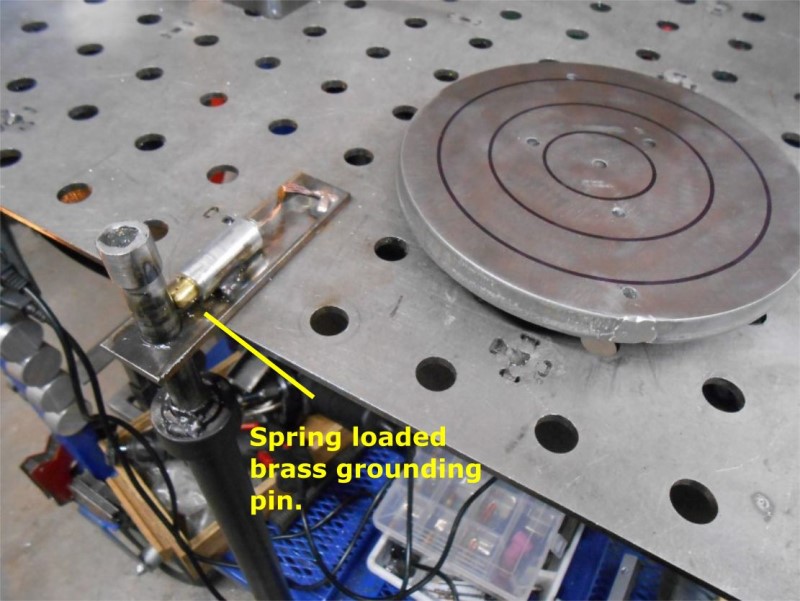
To keep a good ground that the welder always needs, I fabricated a spring loaded brass contact that rides on the upper shaft. The upper shaft is also adjustable to raise the table top from 2 inches to 5 inches.
It was tempting to "over engineer" this by using all kinds of fancy bearings, etc but as it is, it spins better than needed and this isn't going to see any high rpms so I don't expect any wear. (contact areas have been greased) In fact, it spins a bit too easily, I might put a brake to give it slight drag.
I am thinking of making a tig torch holder to compliment this. It would hold the torch the correct amount from the part at all times and should help to produce some nice welds.
Stay tuned for the "motorized" weld positioner to come later today...


 Reply With Quote

Bookmarks