A good choice.Quote:
Originally Posted by SteelCraft
Printable View
A good choice.Quote:
Originally Posted by SteelCraft
I agree with using sand instead of concrete. The finer the grind the betterQuote:
Originally Posted by SteelCraft
Yup you have mass and you have something that will vibrate and convert the machine vibrations into a tiny bit of heat. Although there is expanding grout. I still think that the sand is a smarter way to do it.Quote:
Originally Posted by Frank S
I have had good success using sand that was almost powder and oil and 80/20 to 90/10 sand to oil for vibration dampening. in a 10 HP gantry drill it also seemed to add a lot of stiffness we drilled a 2" hole near the top of the columns then filled the columns and the gantry cross beam a few inches with sand added a bit of oil then rinsed and repeat until the columns were full. Made a huge difference in the performance of the machine and lowered the overall sound level significantly, virtually eliminated and chatter when drilling with 2" and larger drill bits.
Video about column:
https://youtu.be/xCo_X3Lmj-w
Now I will focus on dovetail guides and movement mechanisms.
Update!
https://youtu.be/yEiRBF2DeE0
Hello
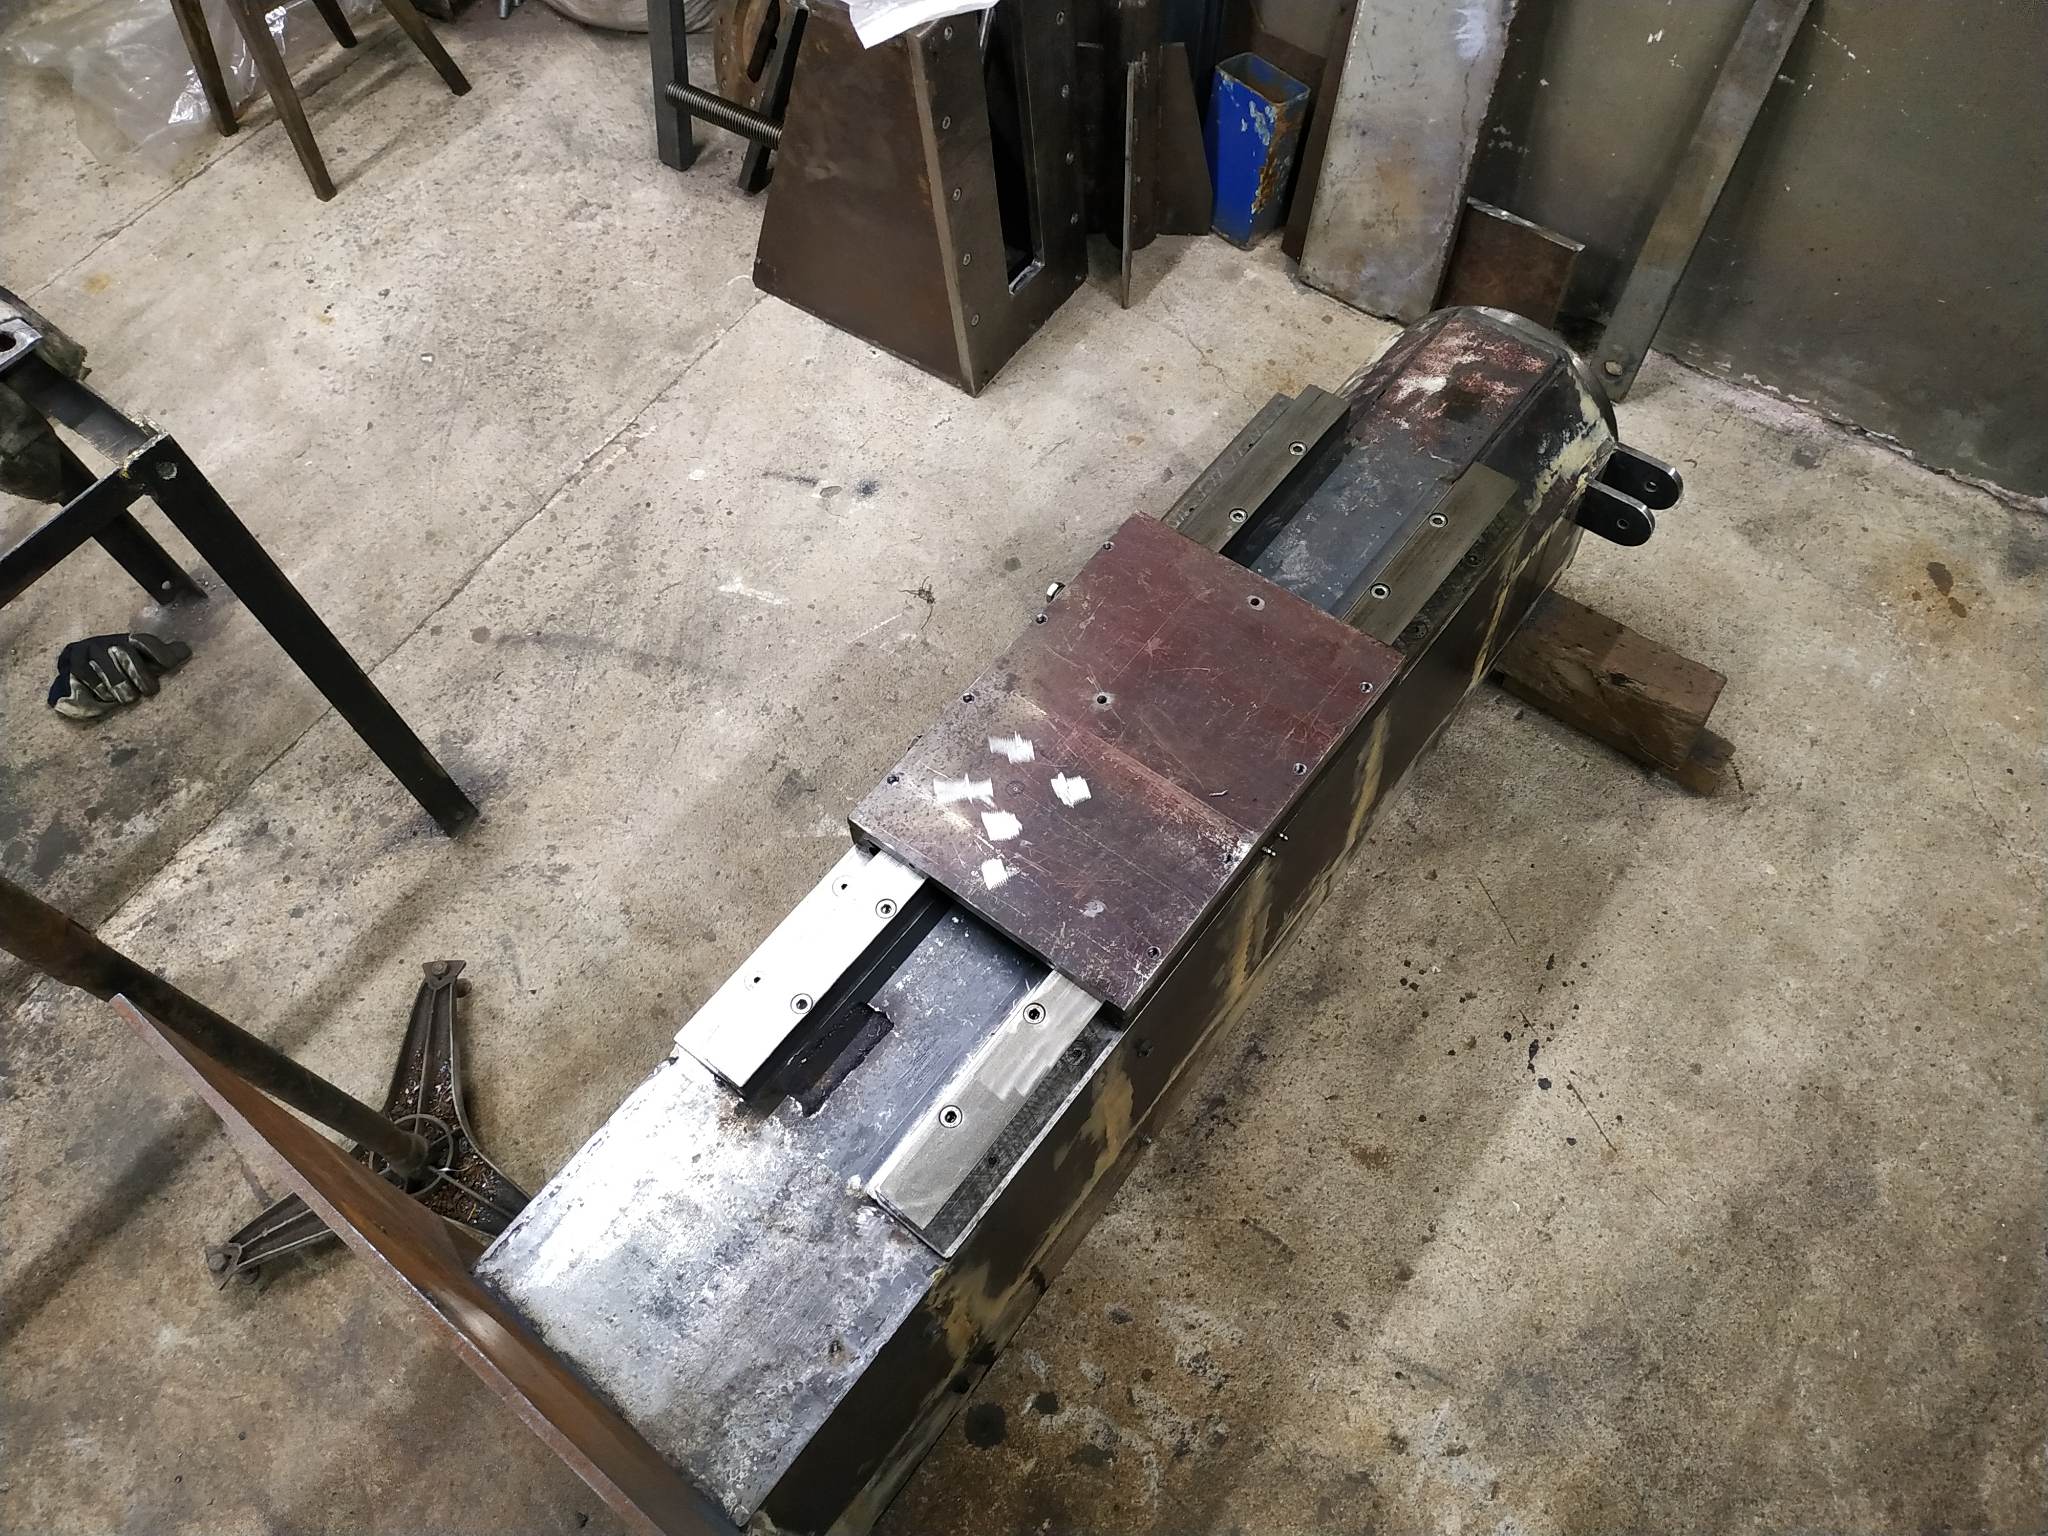
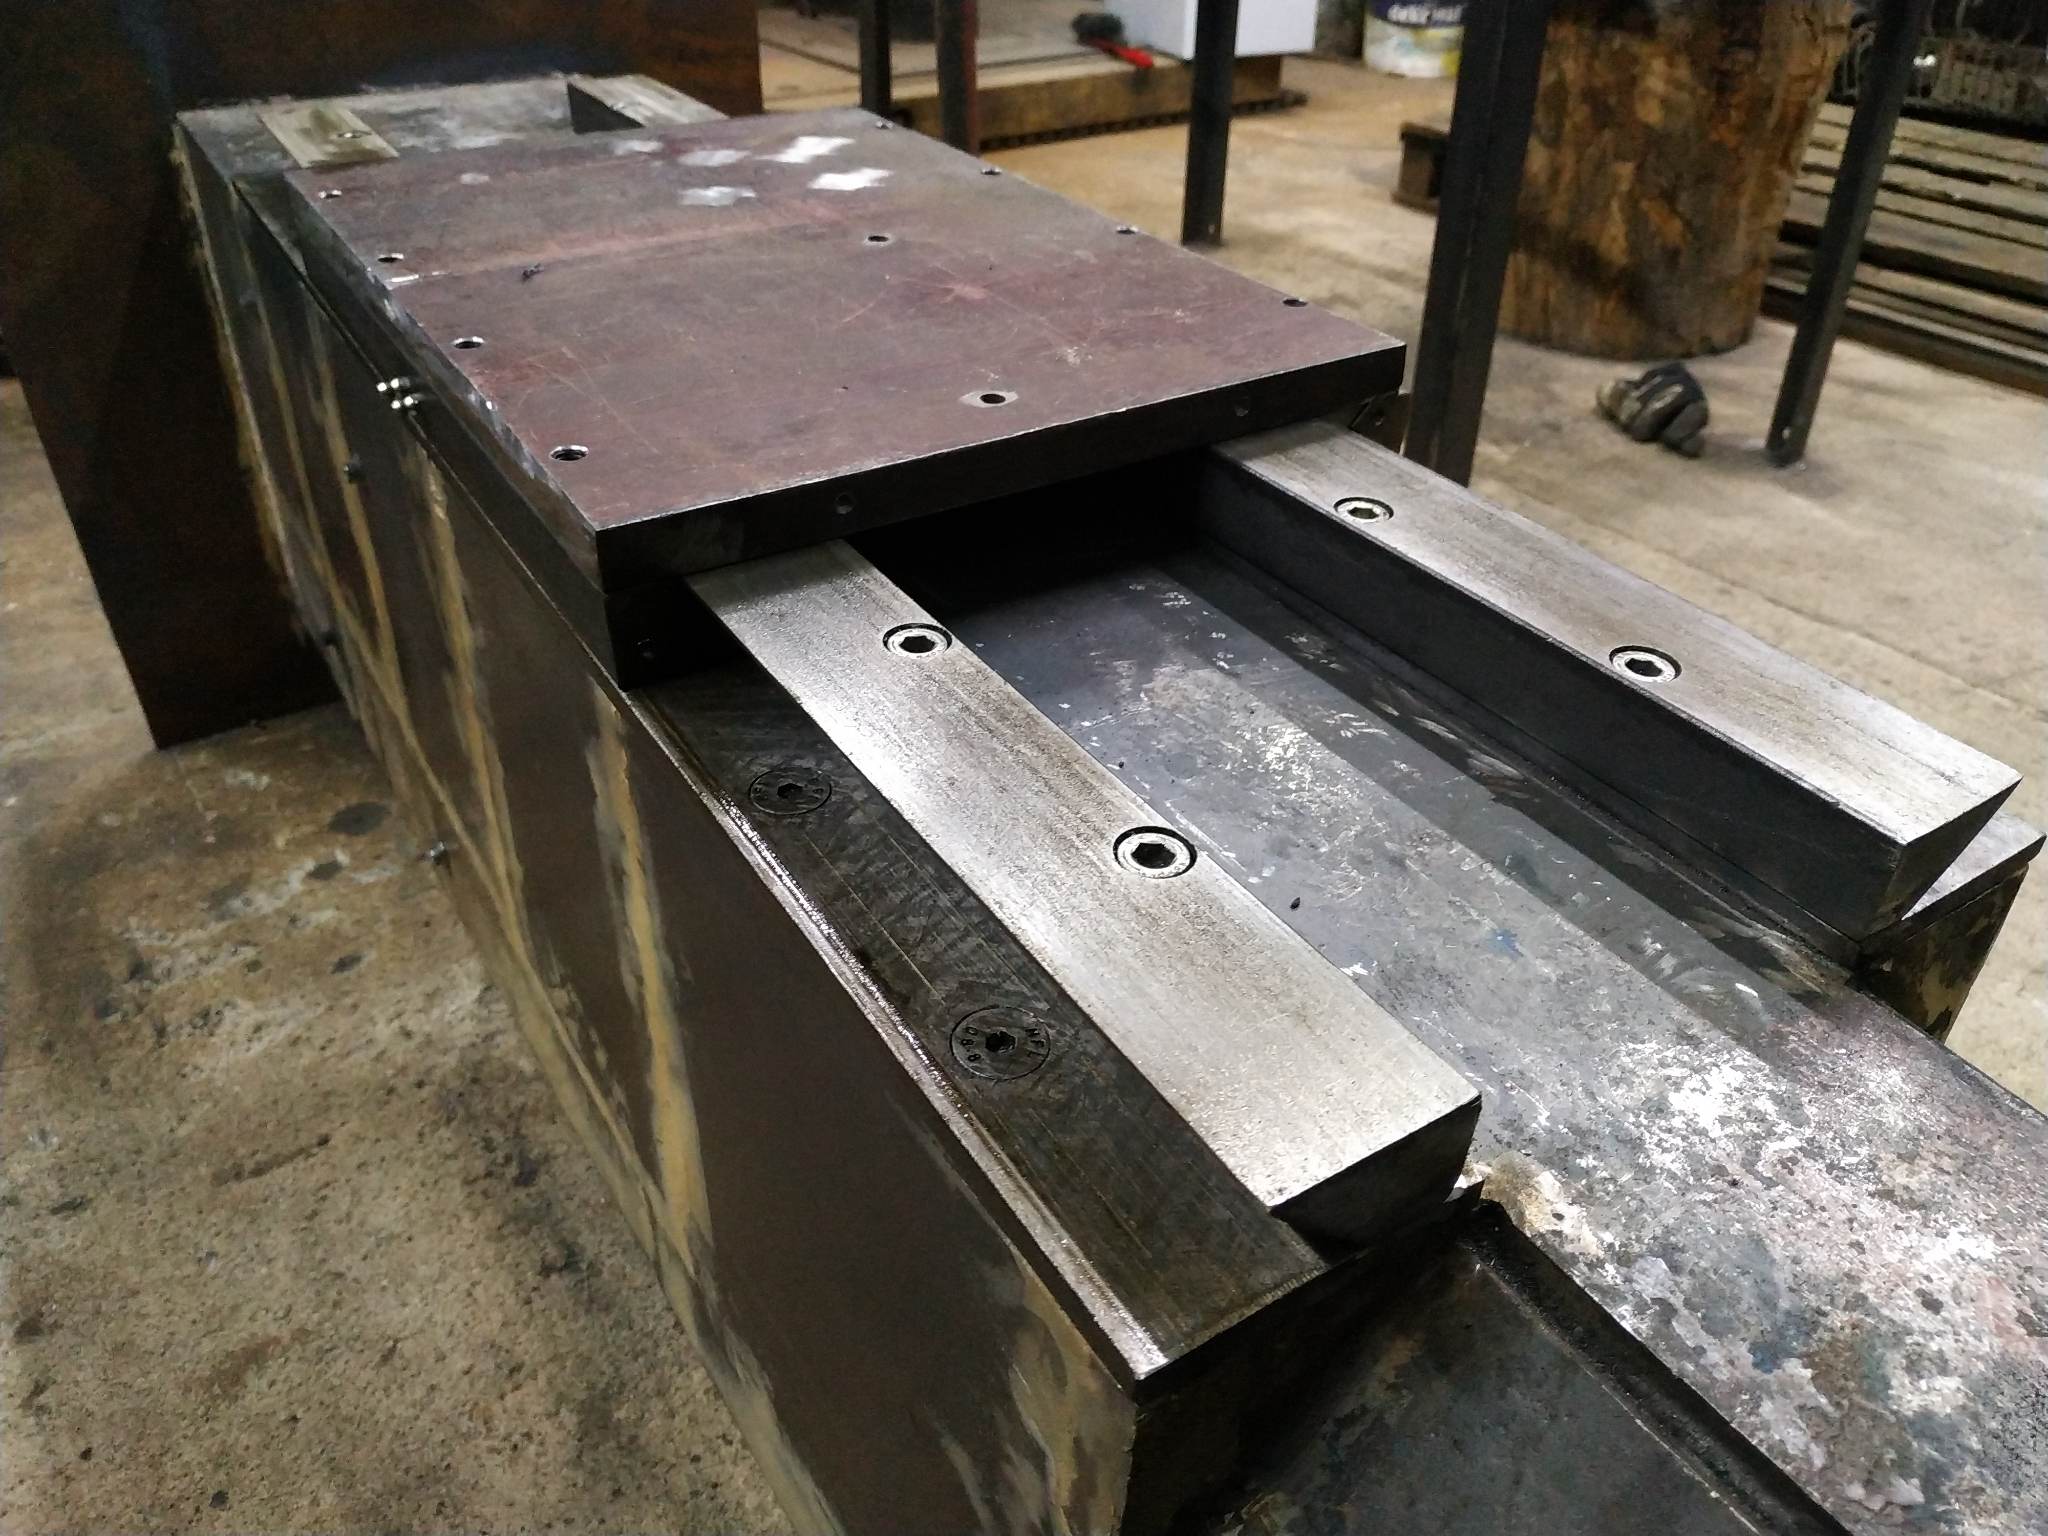
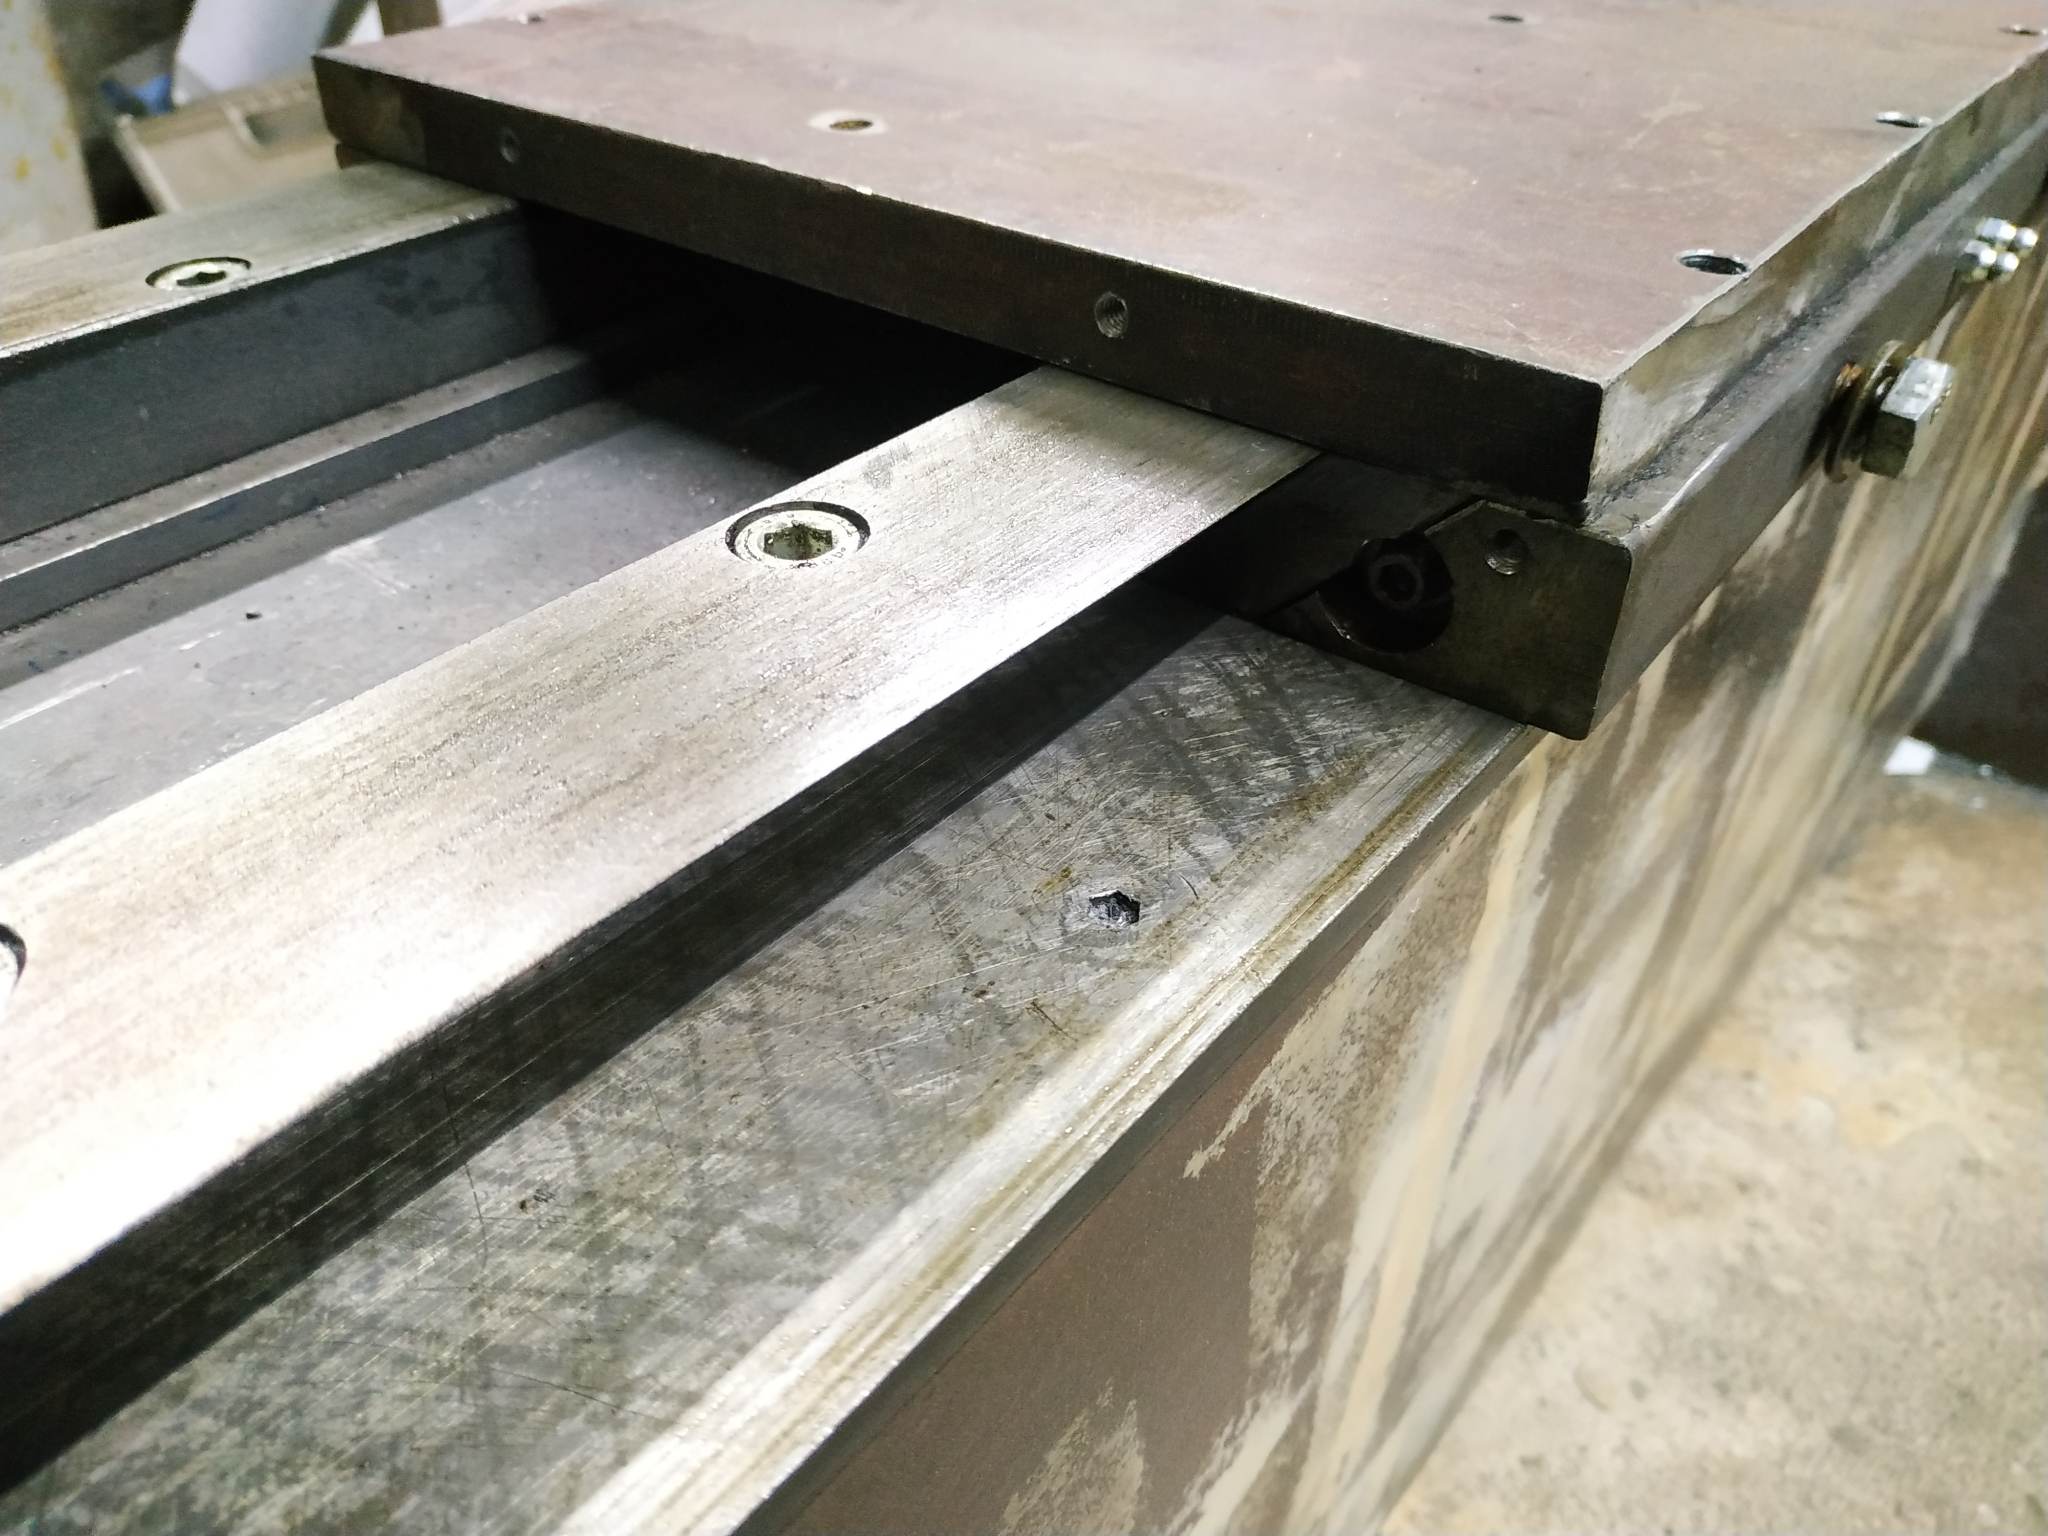
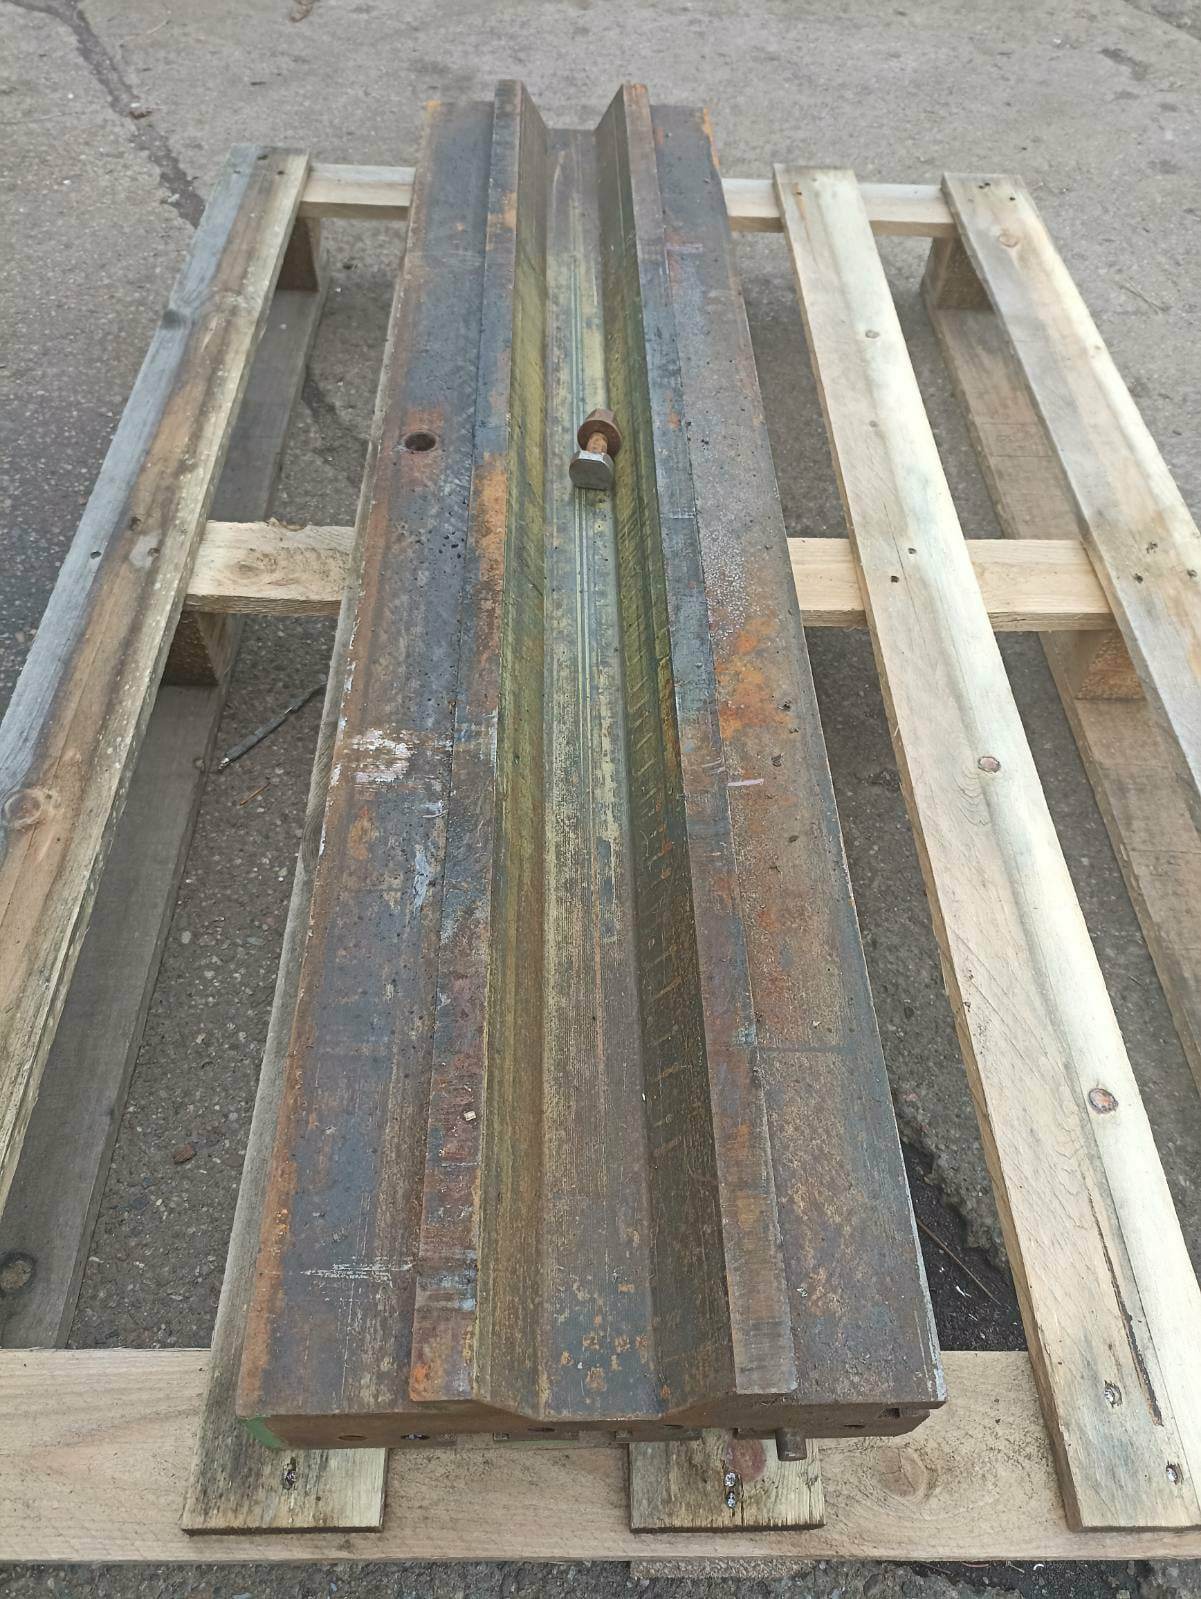
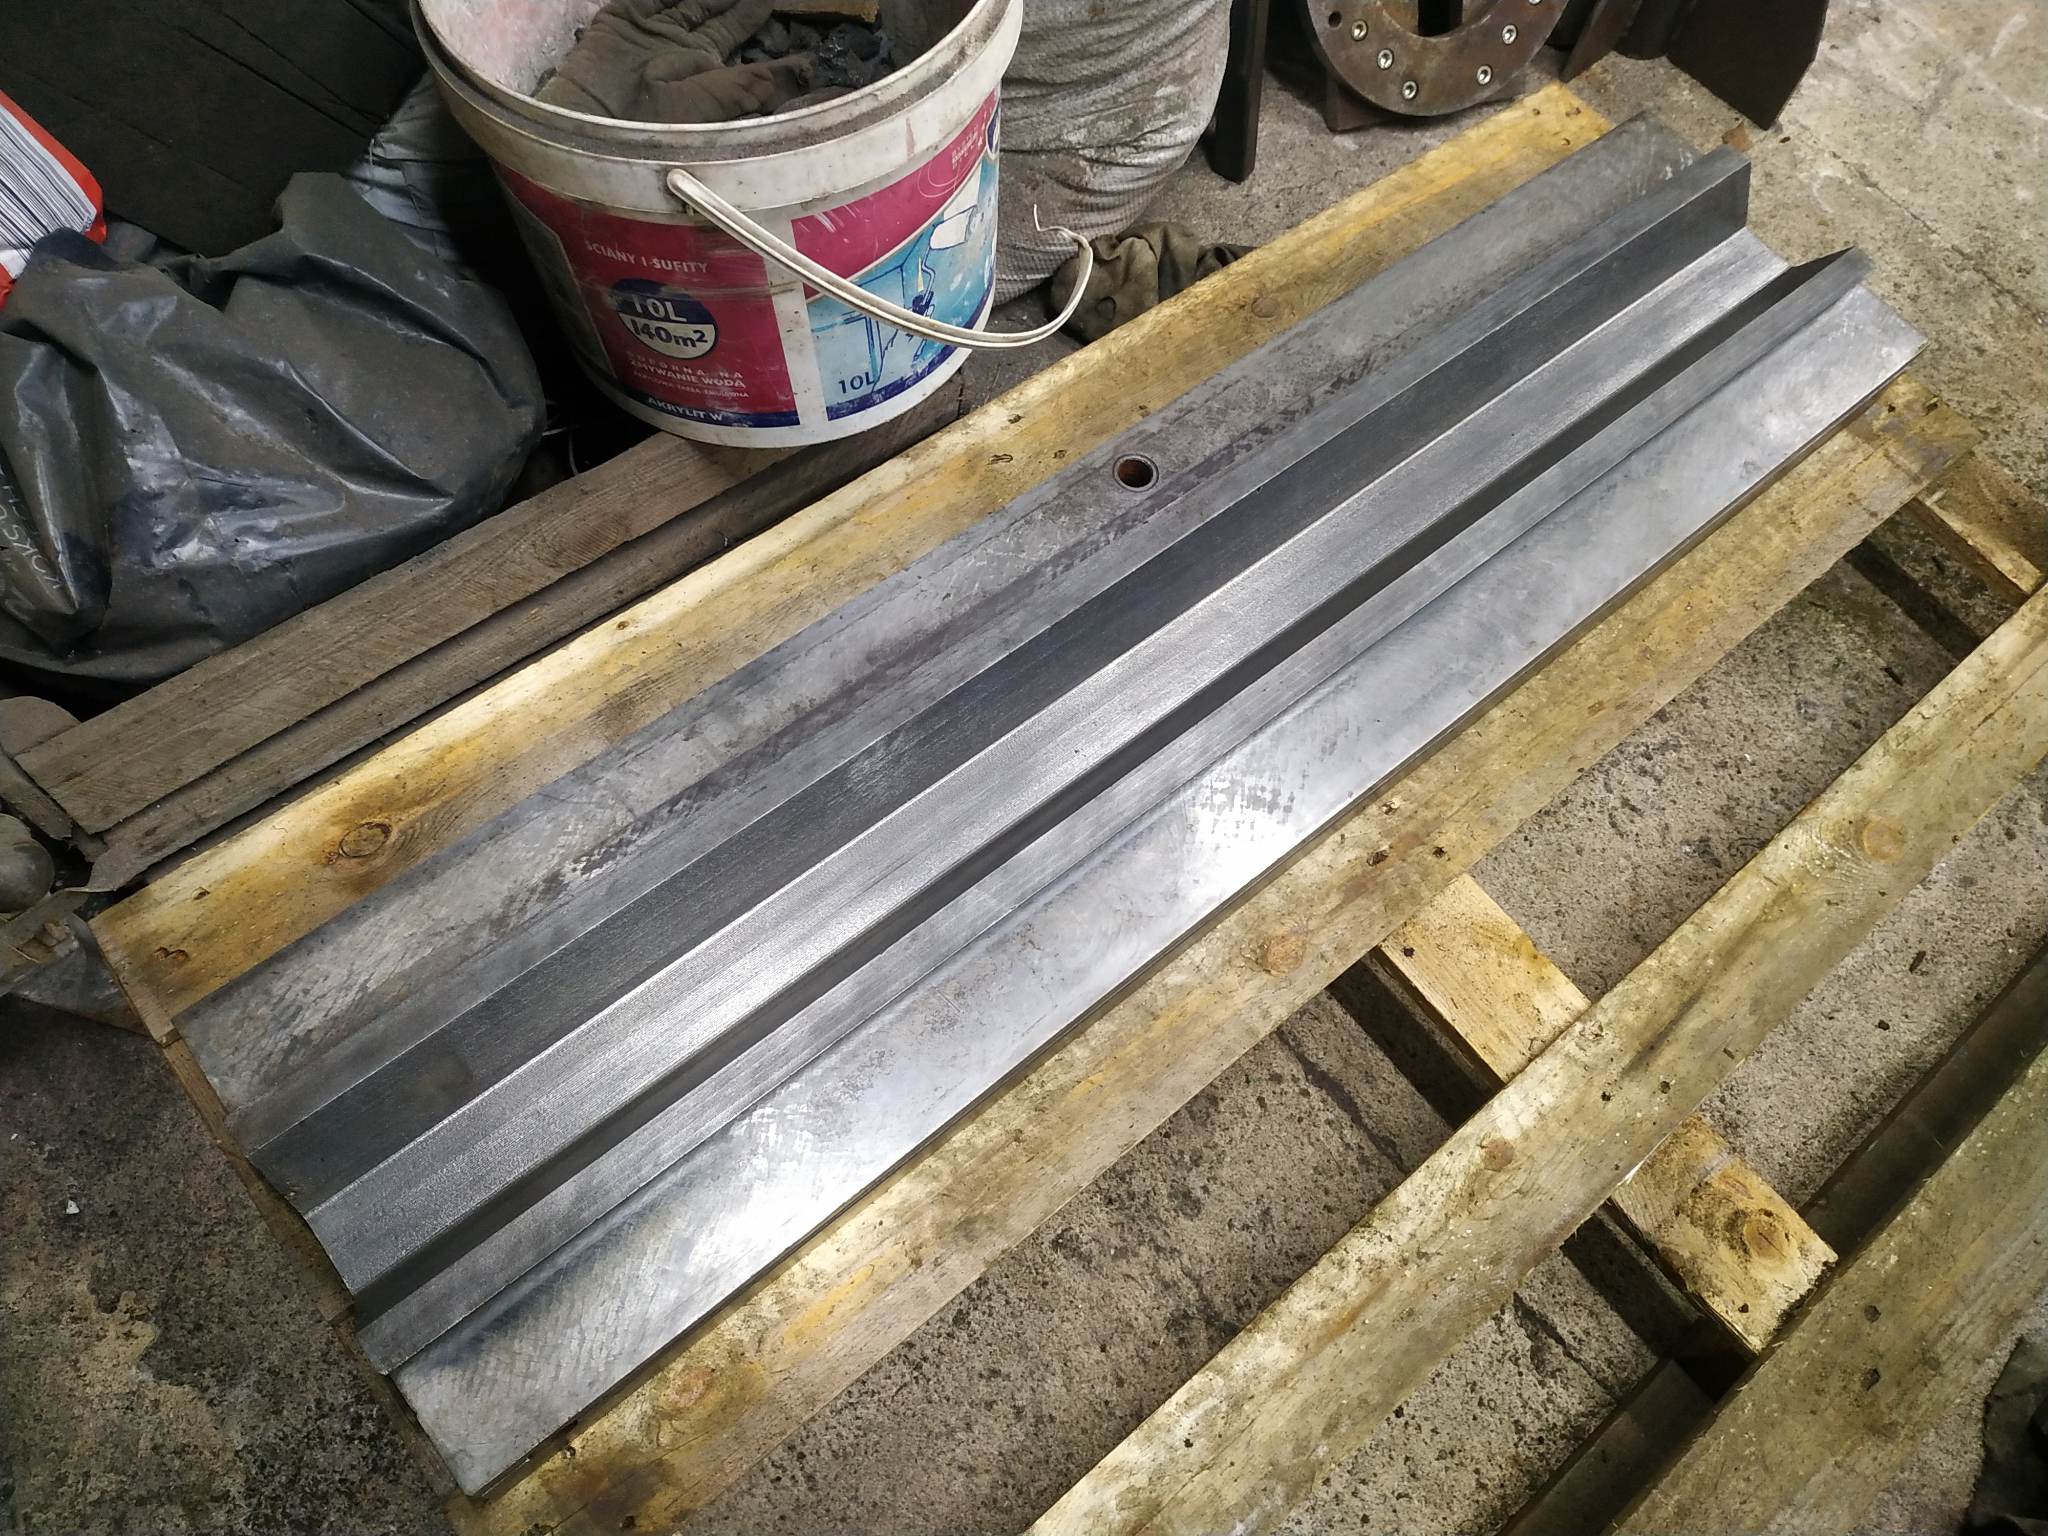
Some newest photos. Ton of hand scraping done in those photos :sweating: and still one of the guides (right one) is 0,2 mm wider on last 15 cm on the bottom. I found this defect after putting everything together, rest 70cm works perfectly. So more hand scraping is waiting...
Attachment 46280Attachment 46281Attachment 46282
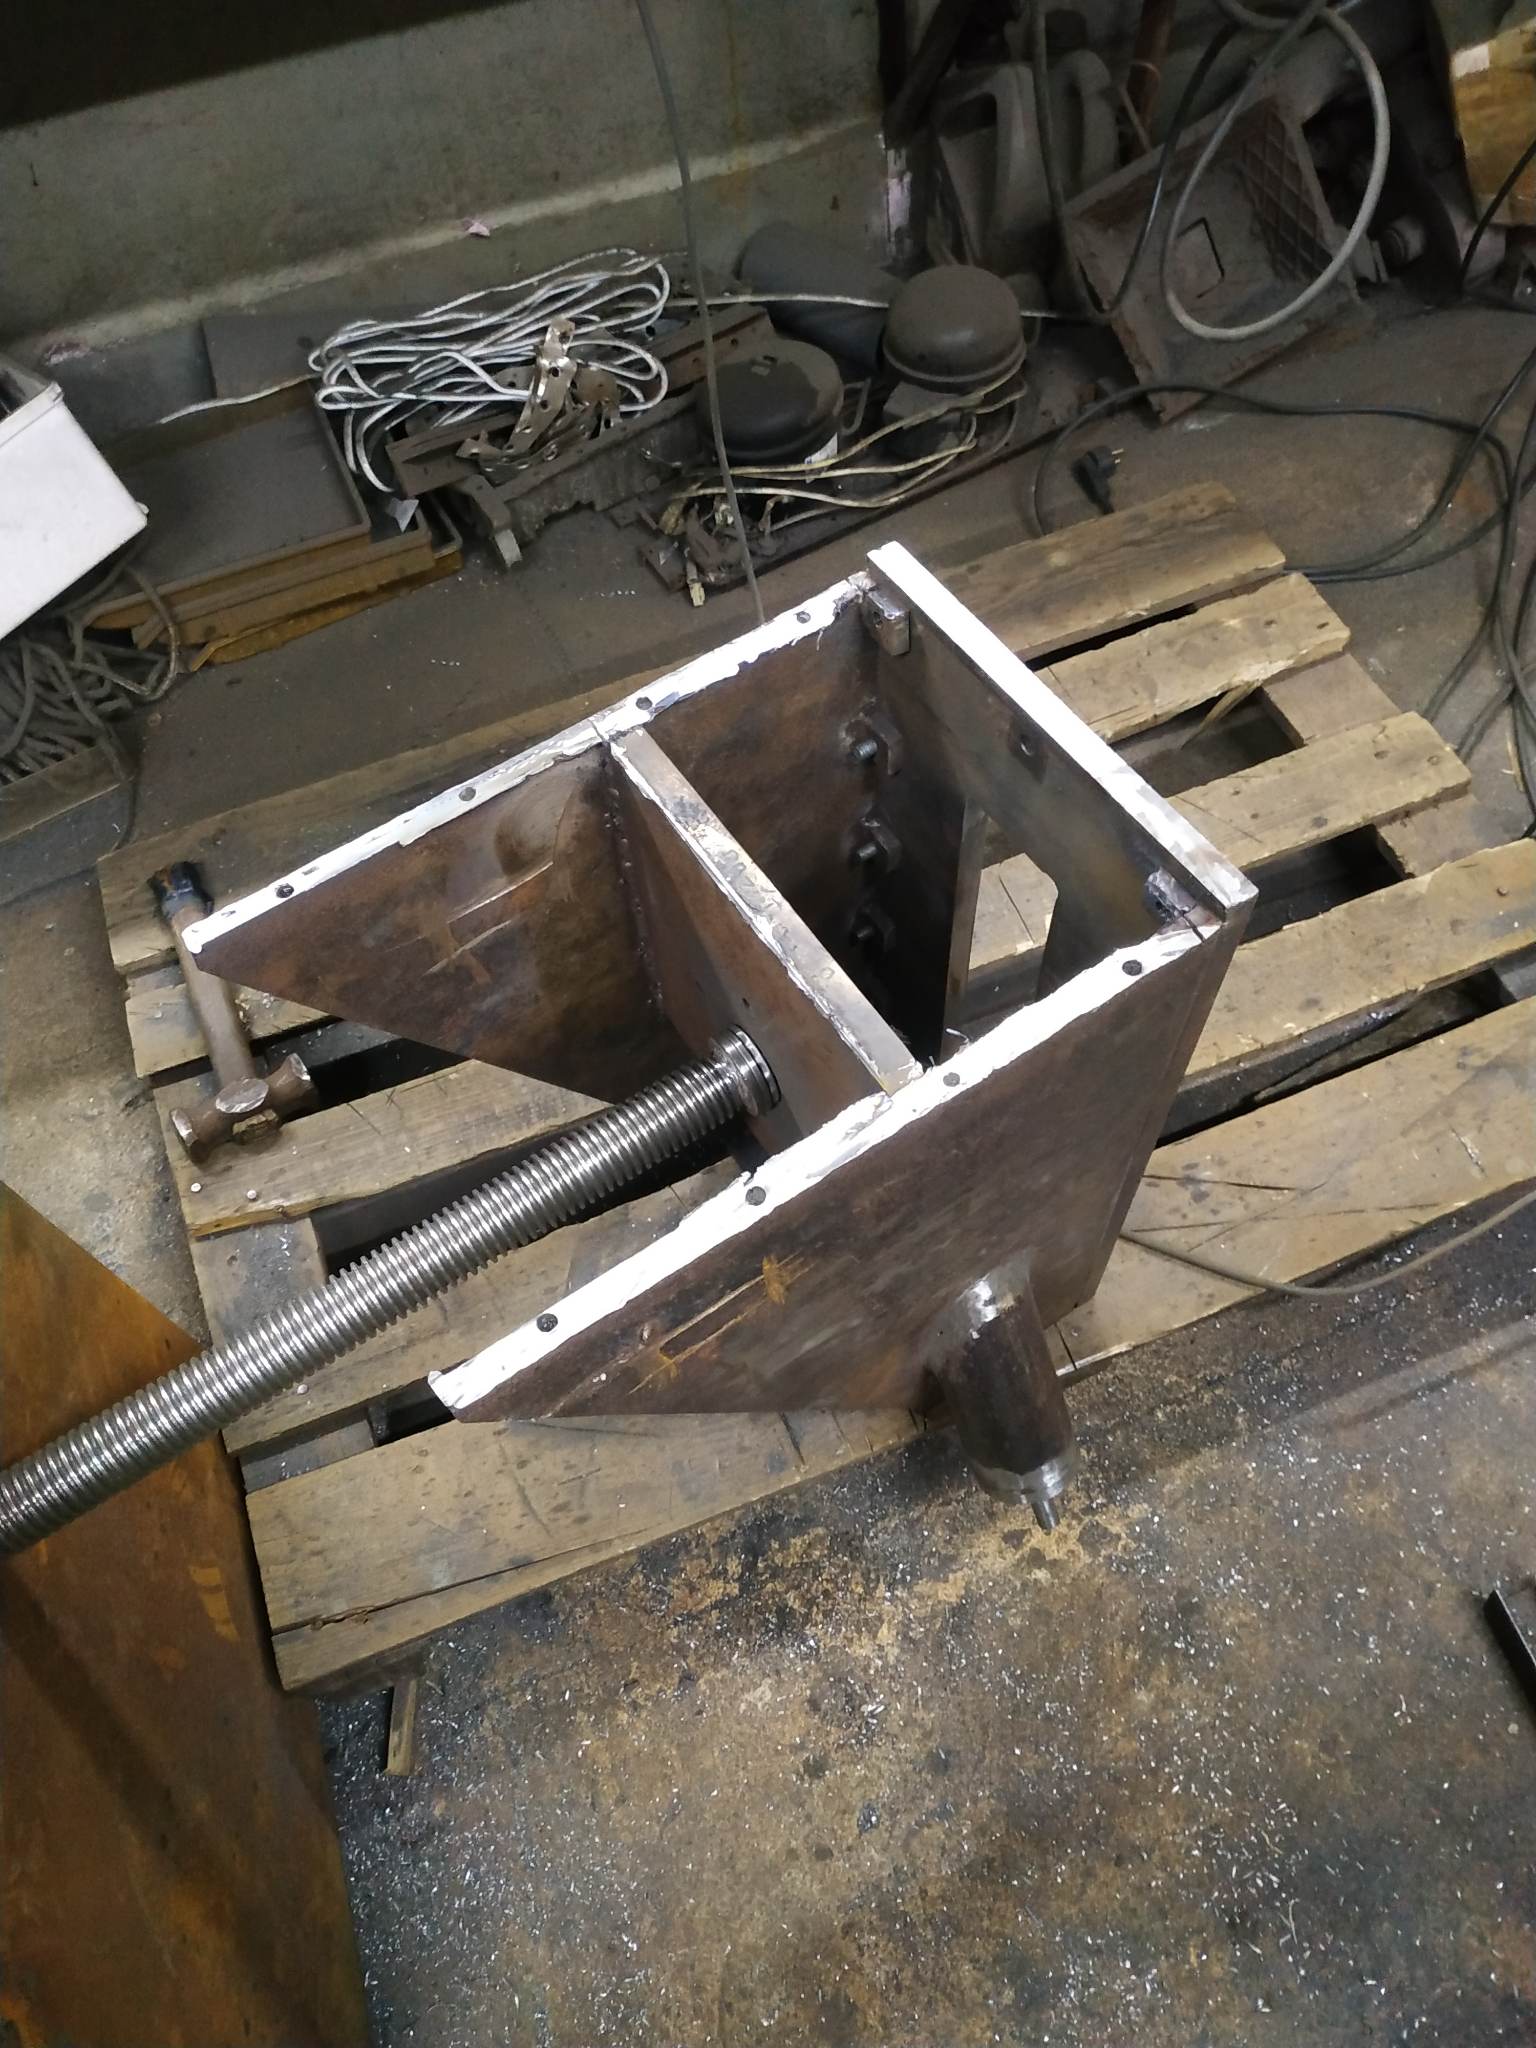
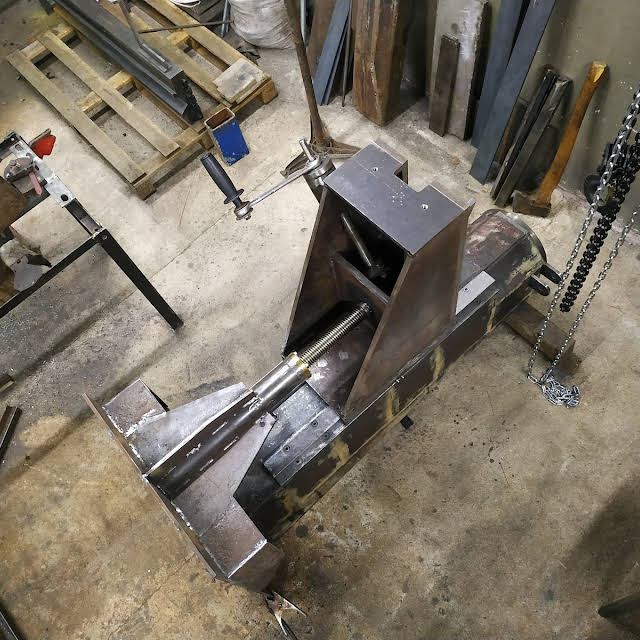
Oh and I screw up a backplate of the knee. It turned out that Y axis would not be square to Z axis of the machine. It was like 2mm of difference on distance of 530 mm. I tried to grind the backplate but I made it worse. I mean It was square vertically but got twisted. I had to cut off this piece and make, a new one (you can see it on photos above).
Attachment 46283
You are getting an education that few people will ever have. Not good you need to do work two times. But you certainly are learning a great amount about how to make better setup and better welding.
Mark
Repairing knee is not that bad, it's like 2 extra hours of work. The worst is extra scraping. It will wait to christmas break. I'm back on university now.
New video.
Basically it's covers everything that you can see in my previous post with photos about machine guides.
https://youtu.be/97bBCnfTrm0
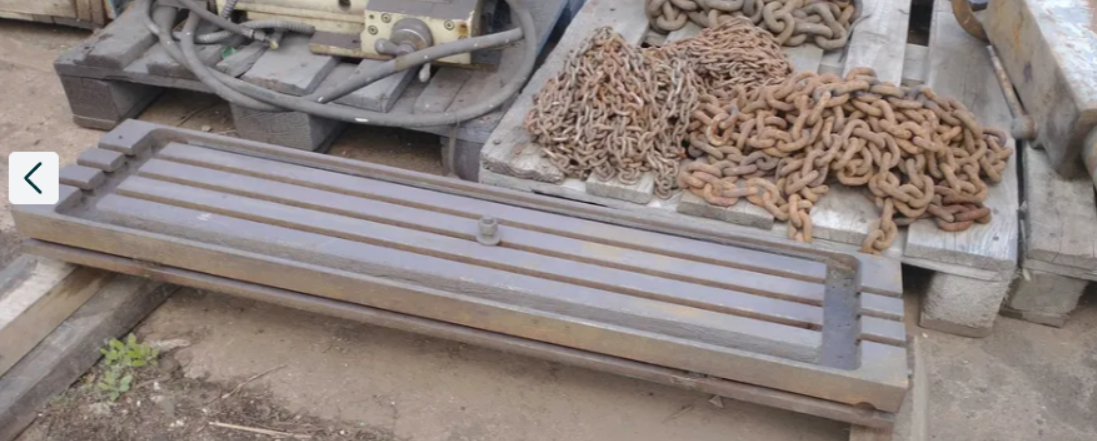
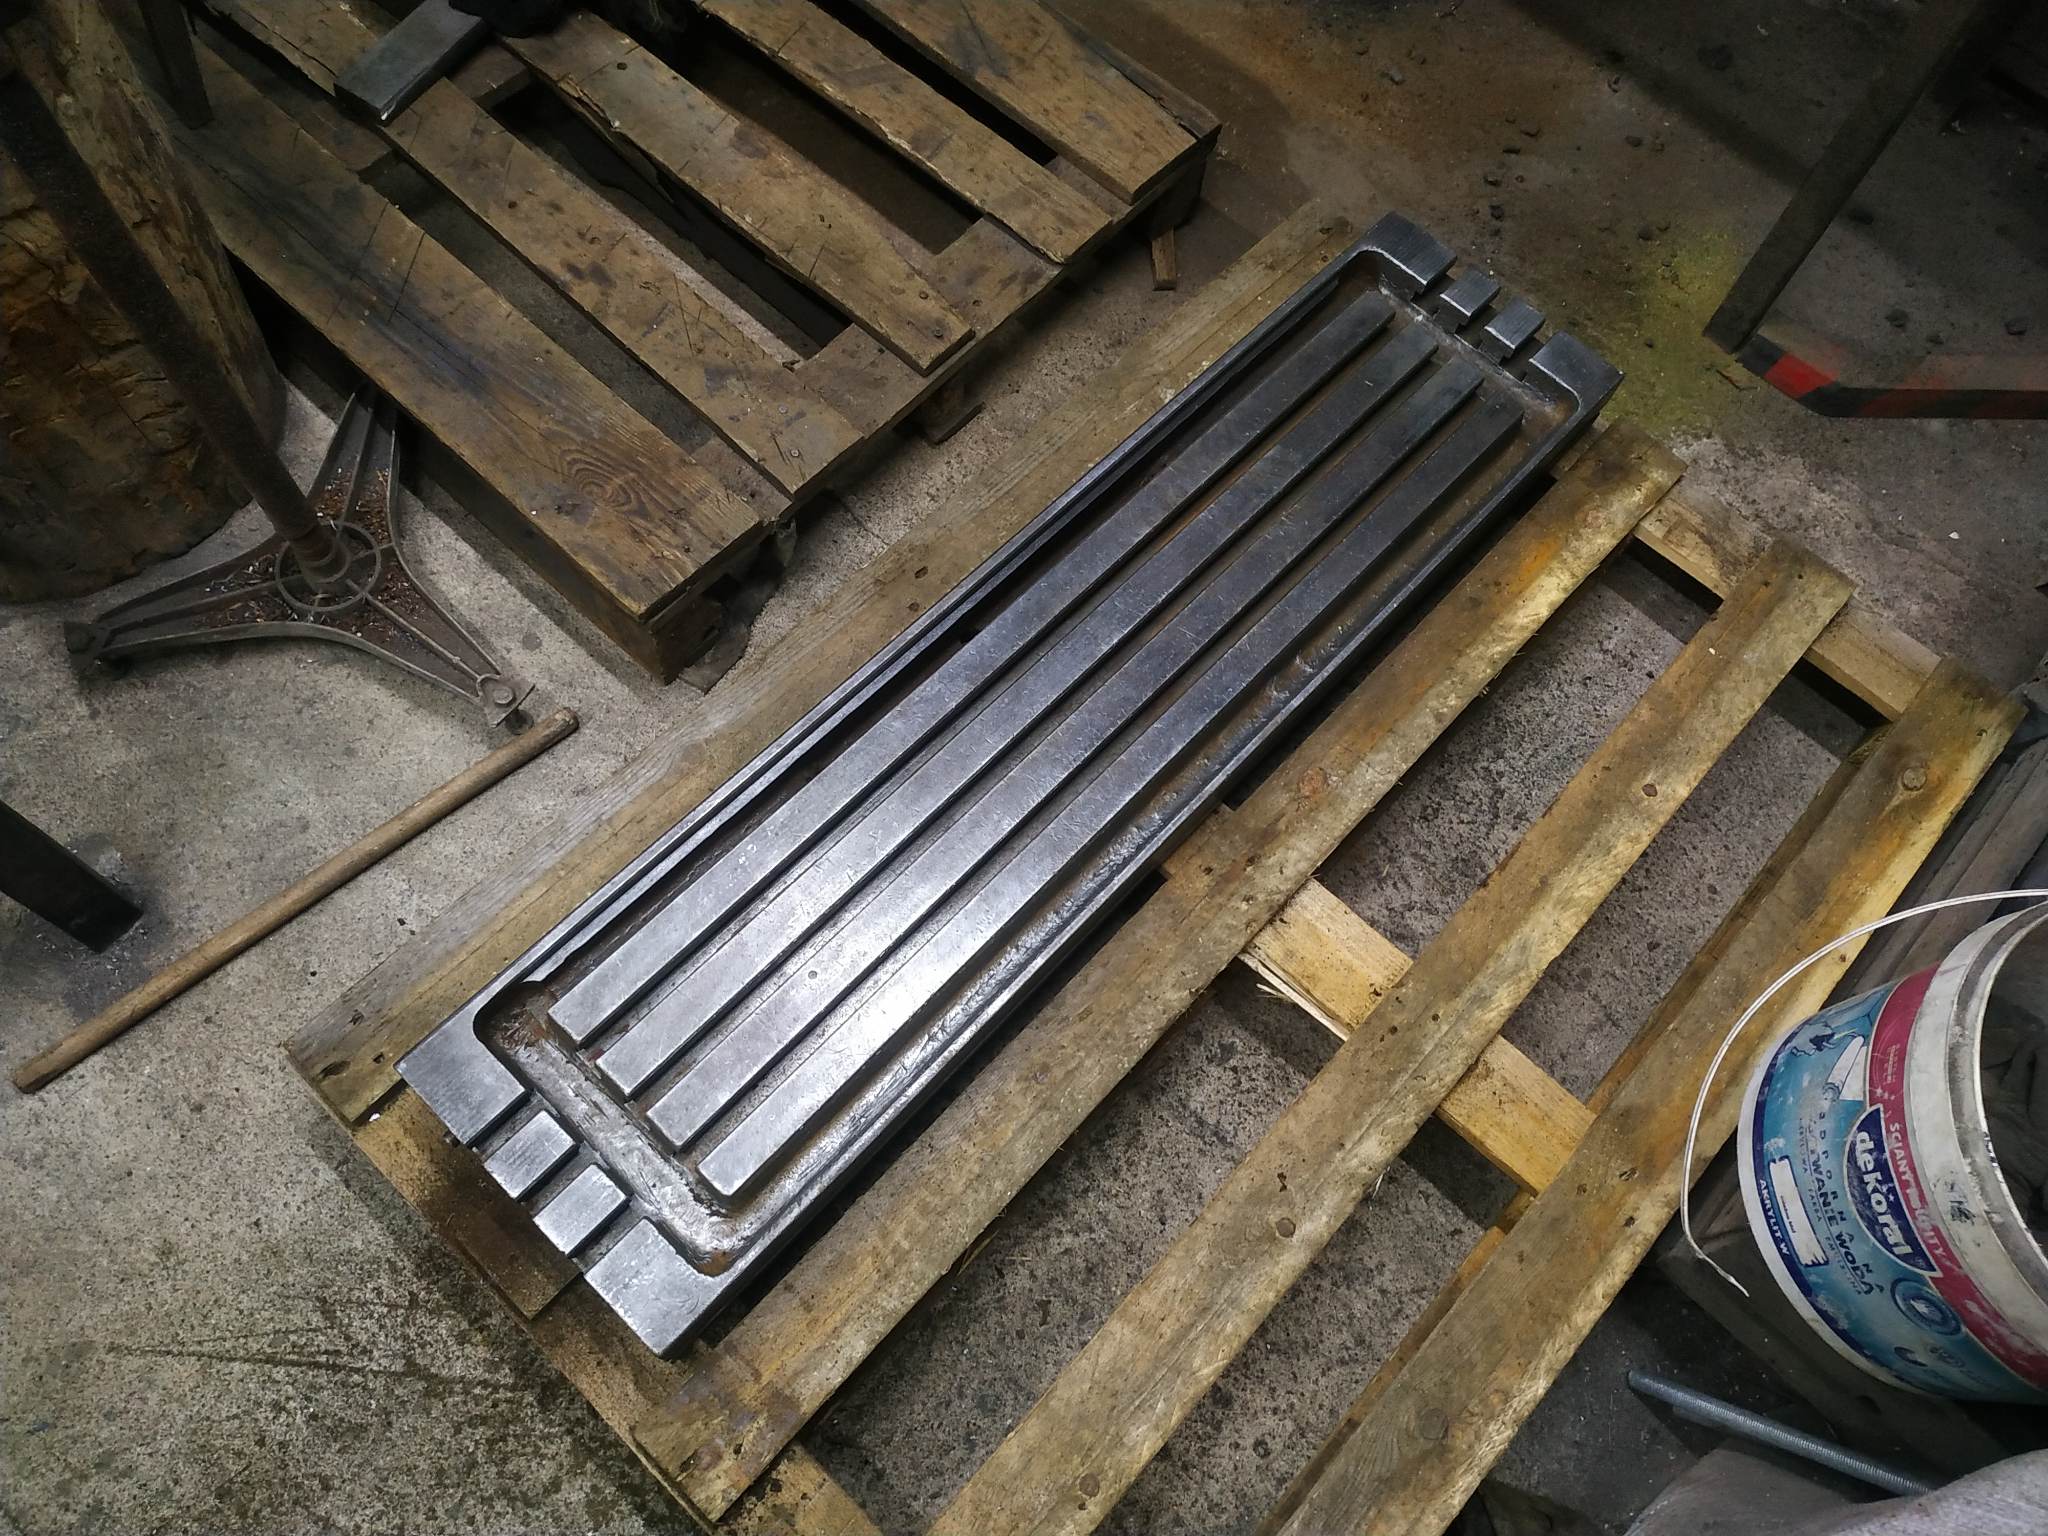
I bought a t-slot table for my milling machine. Table is from Polish Jarocin FWC25 milling machine. Dimension of the table are very simmilar to my drawings (20mm longer and 10mm wider)
Some photos before and after cleaning:
Attachment 46447Attachment 46448
Attachment 46450
Attachment 46449
Attachment 46451
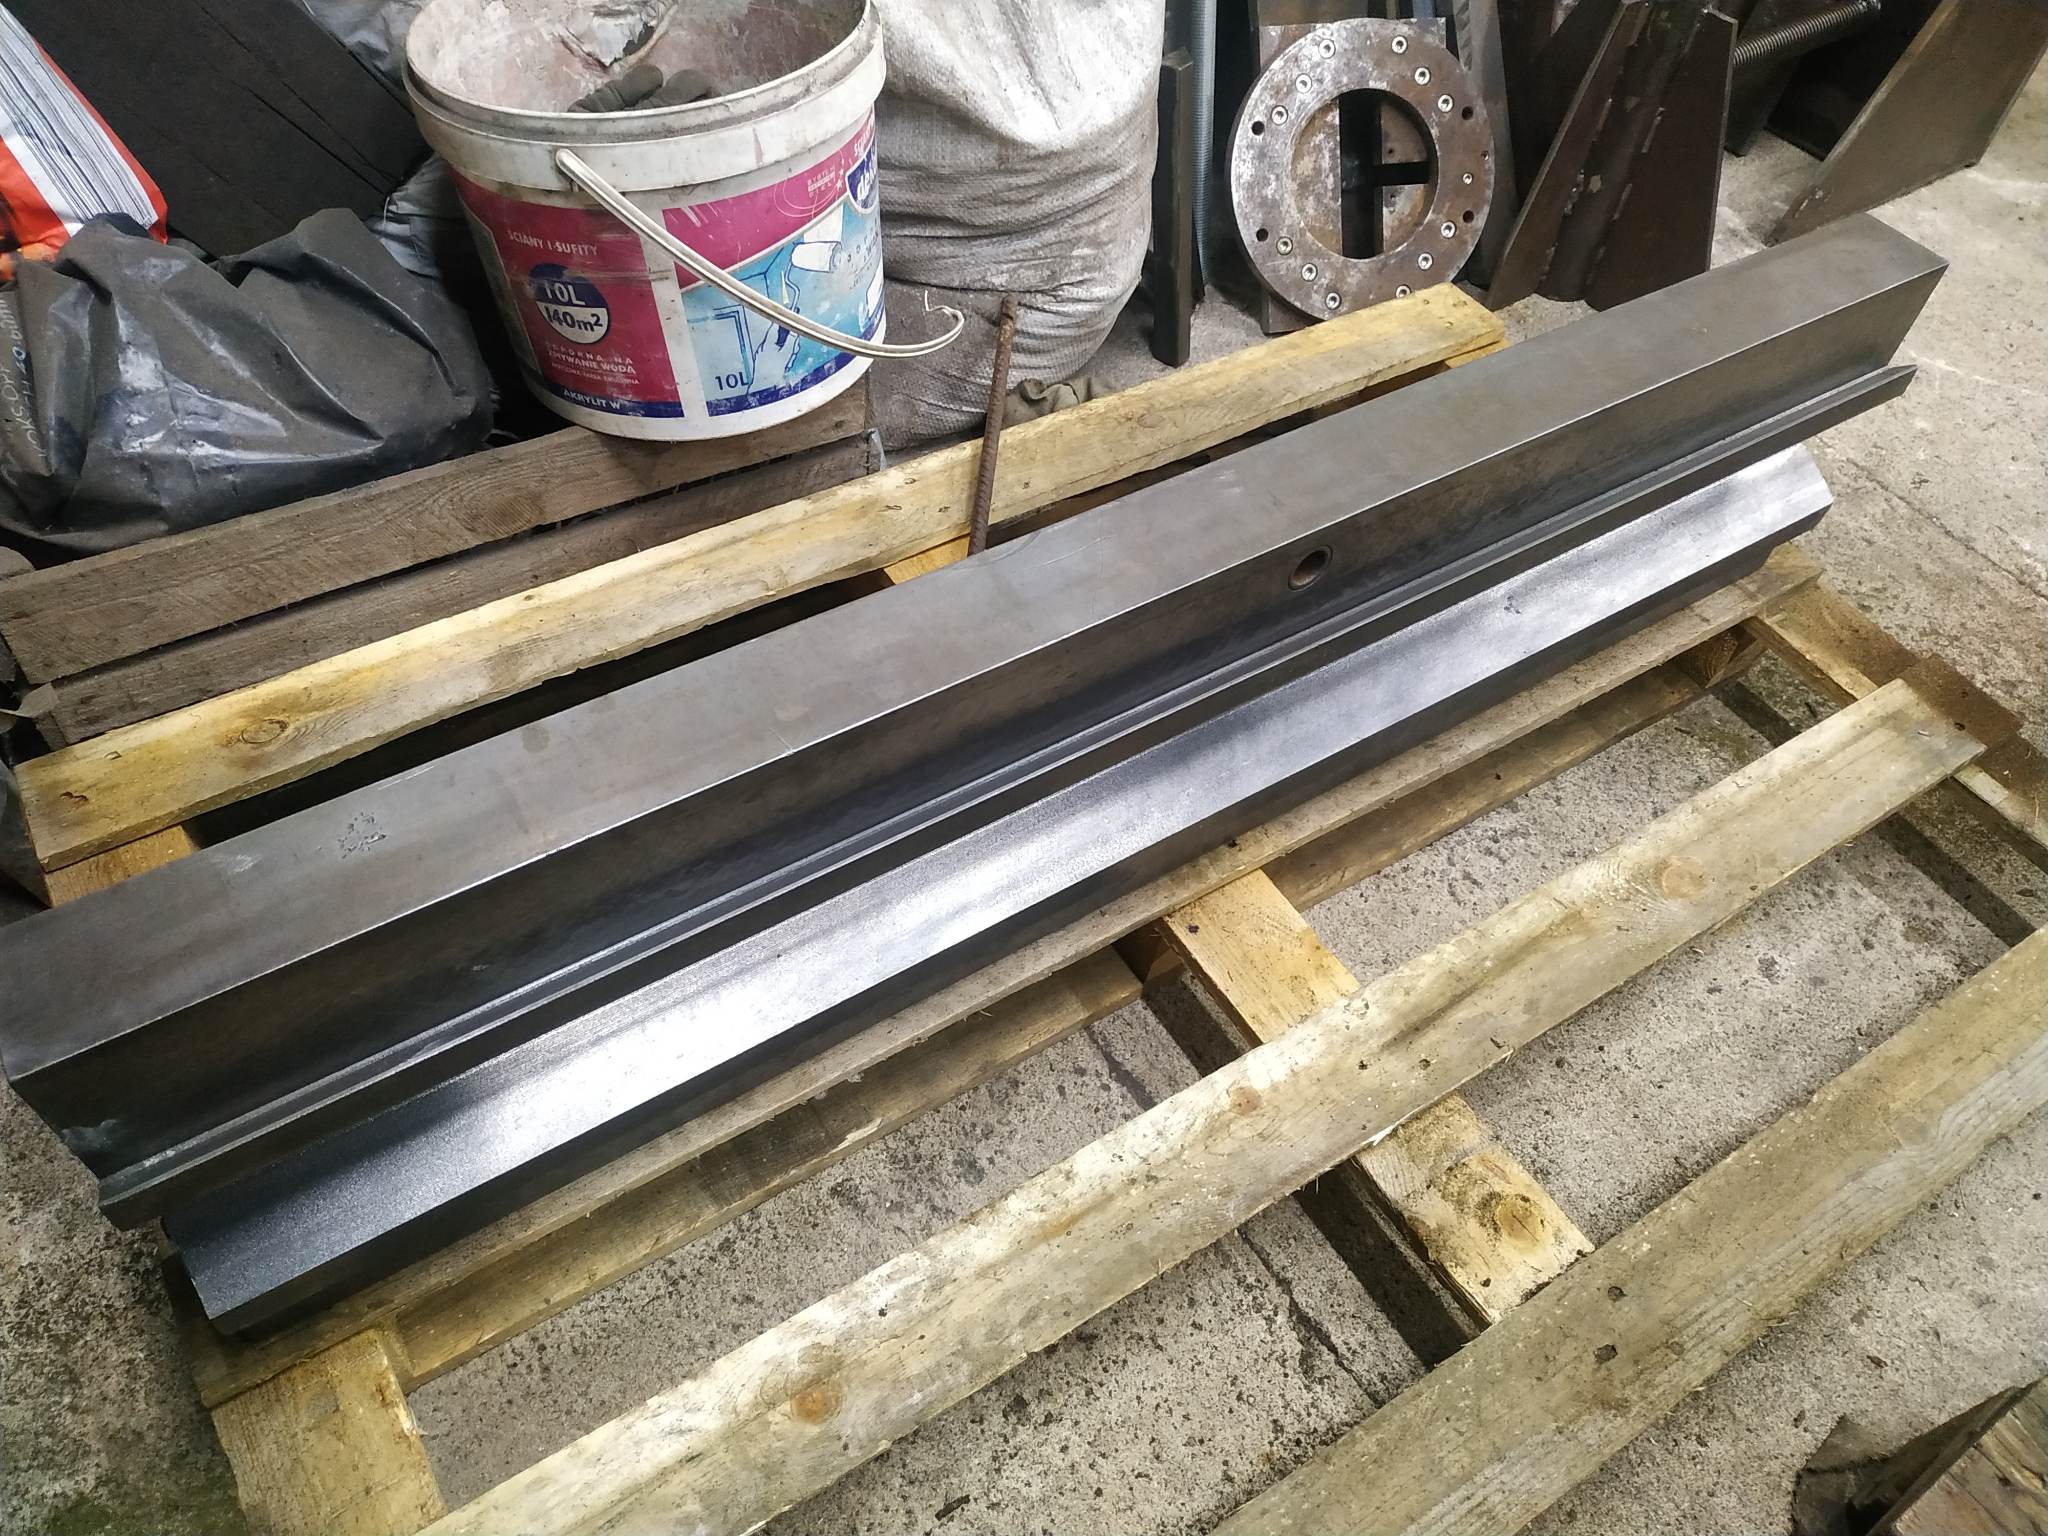
I also managed to finish Z axis guide. Cause of problem was last bolt on the bottom. Bolt was twisting end of the right dove tail. This is why it seemed to be wider. I drilled bigger hole and now everything is fine.
You saved so much work with buying that table. And good that you found the cause of your problems on the Z axis. Soon Milling!Quote:
Originally Posted by SteelCraft
Mark
More than month for sure :DQuote:
Originally Posted by mwmkravchenko
Also whole build plan has changed. Instead of making ram guides and lifting whole machine to vertical position I will make table carriage first. Then I will temporary weld it to main body then milling head will be attached to the knee and bang I have 3 axis milling machine to make other parts of final milling machine :cool:
Now I'm waiting for Christmas to implement this plan.
Chain hoist will be necessary...
As I said in previous post I managed to weld knee to the carriage and then attach milling head.
Attachment 46840
This is how current setup looks like:
Attachment 46841
Spindle was squared to Z axis guides. Ready for table guides milling operation.
Soon you will be making parts on your milling machine! It is looking better and better. So many things you have learned to get this far!
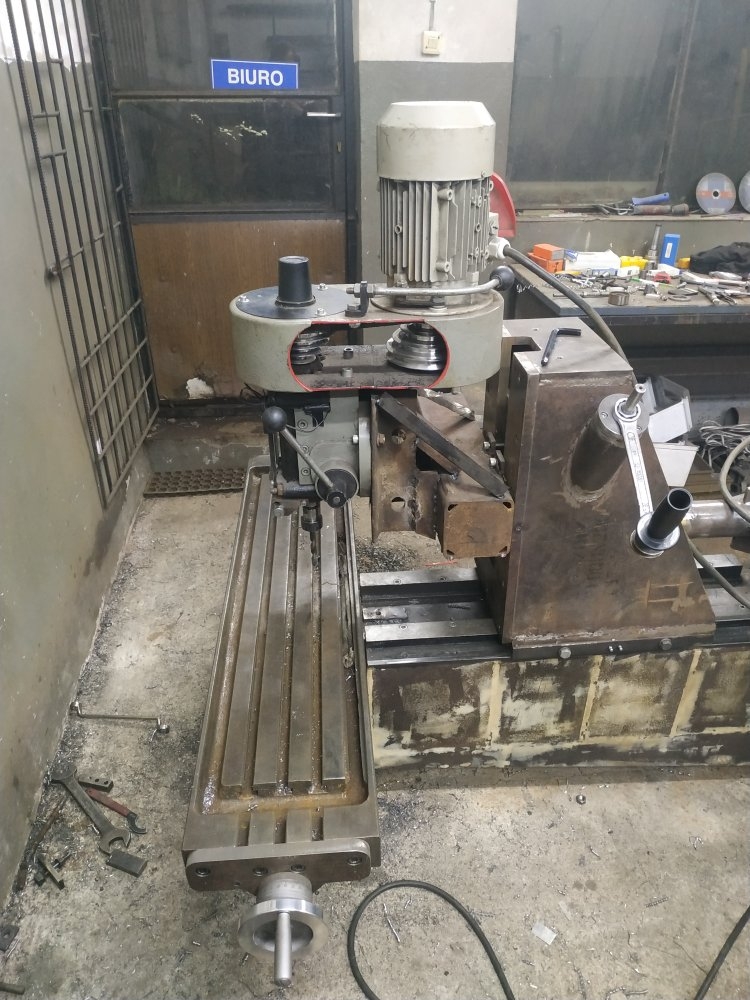
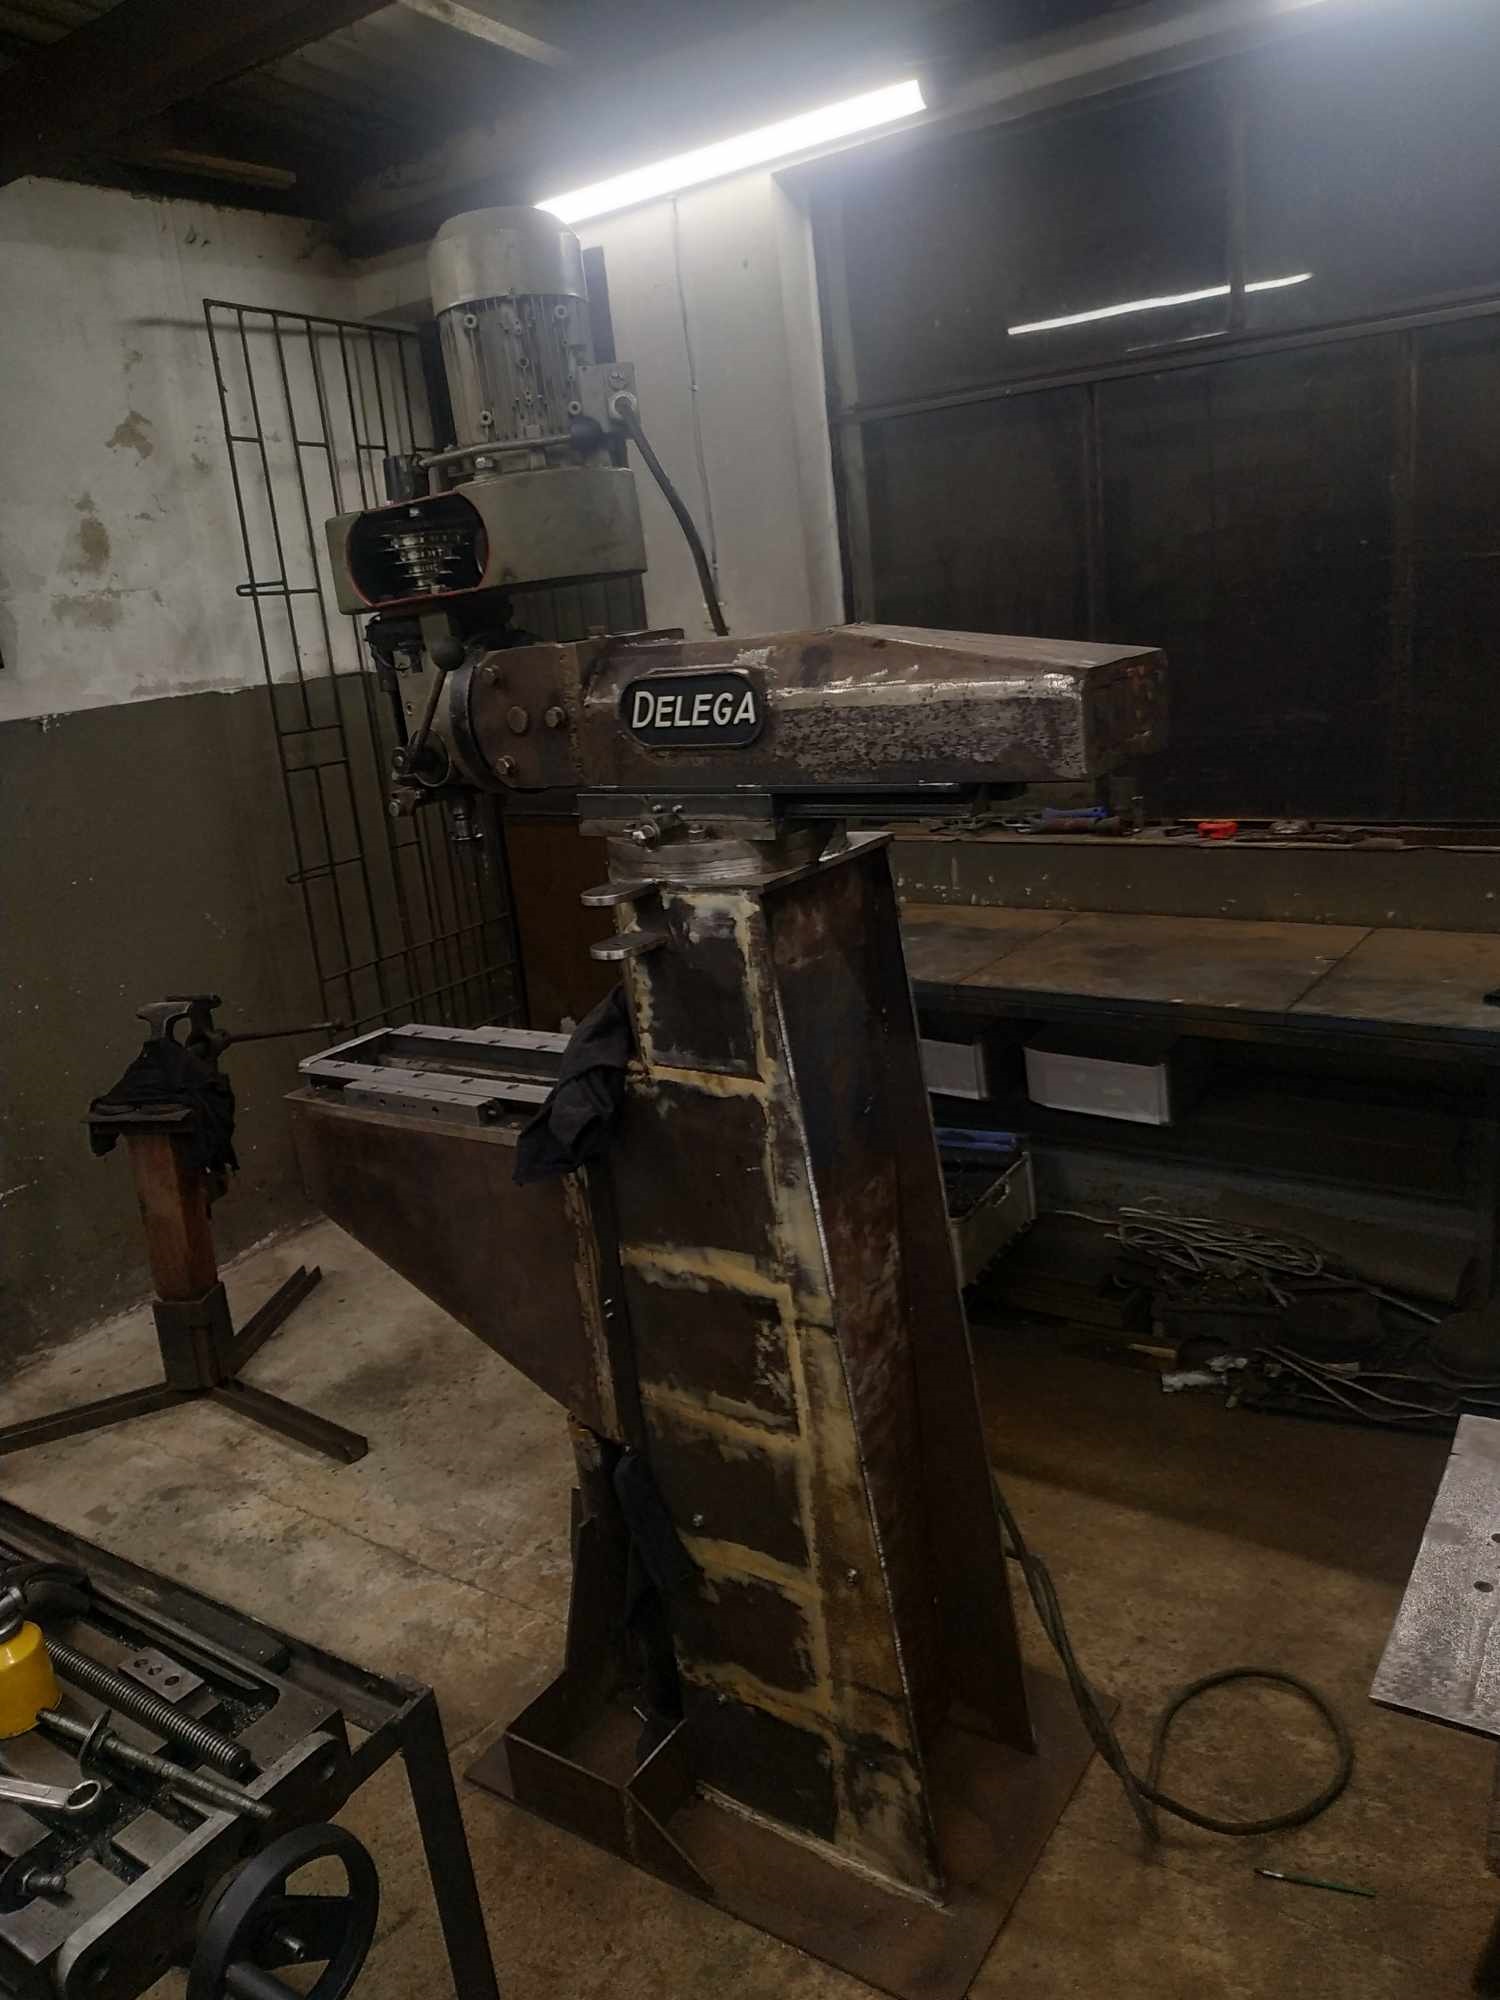
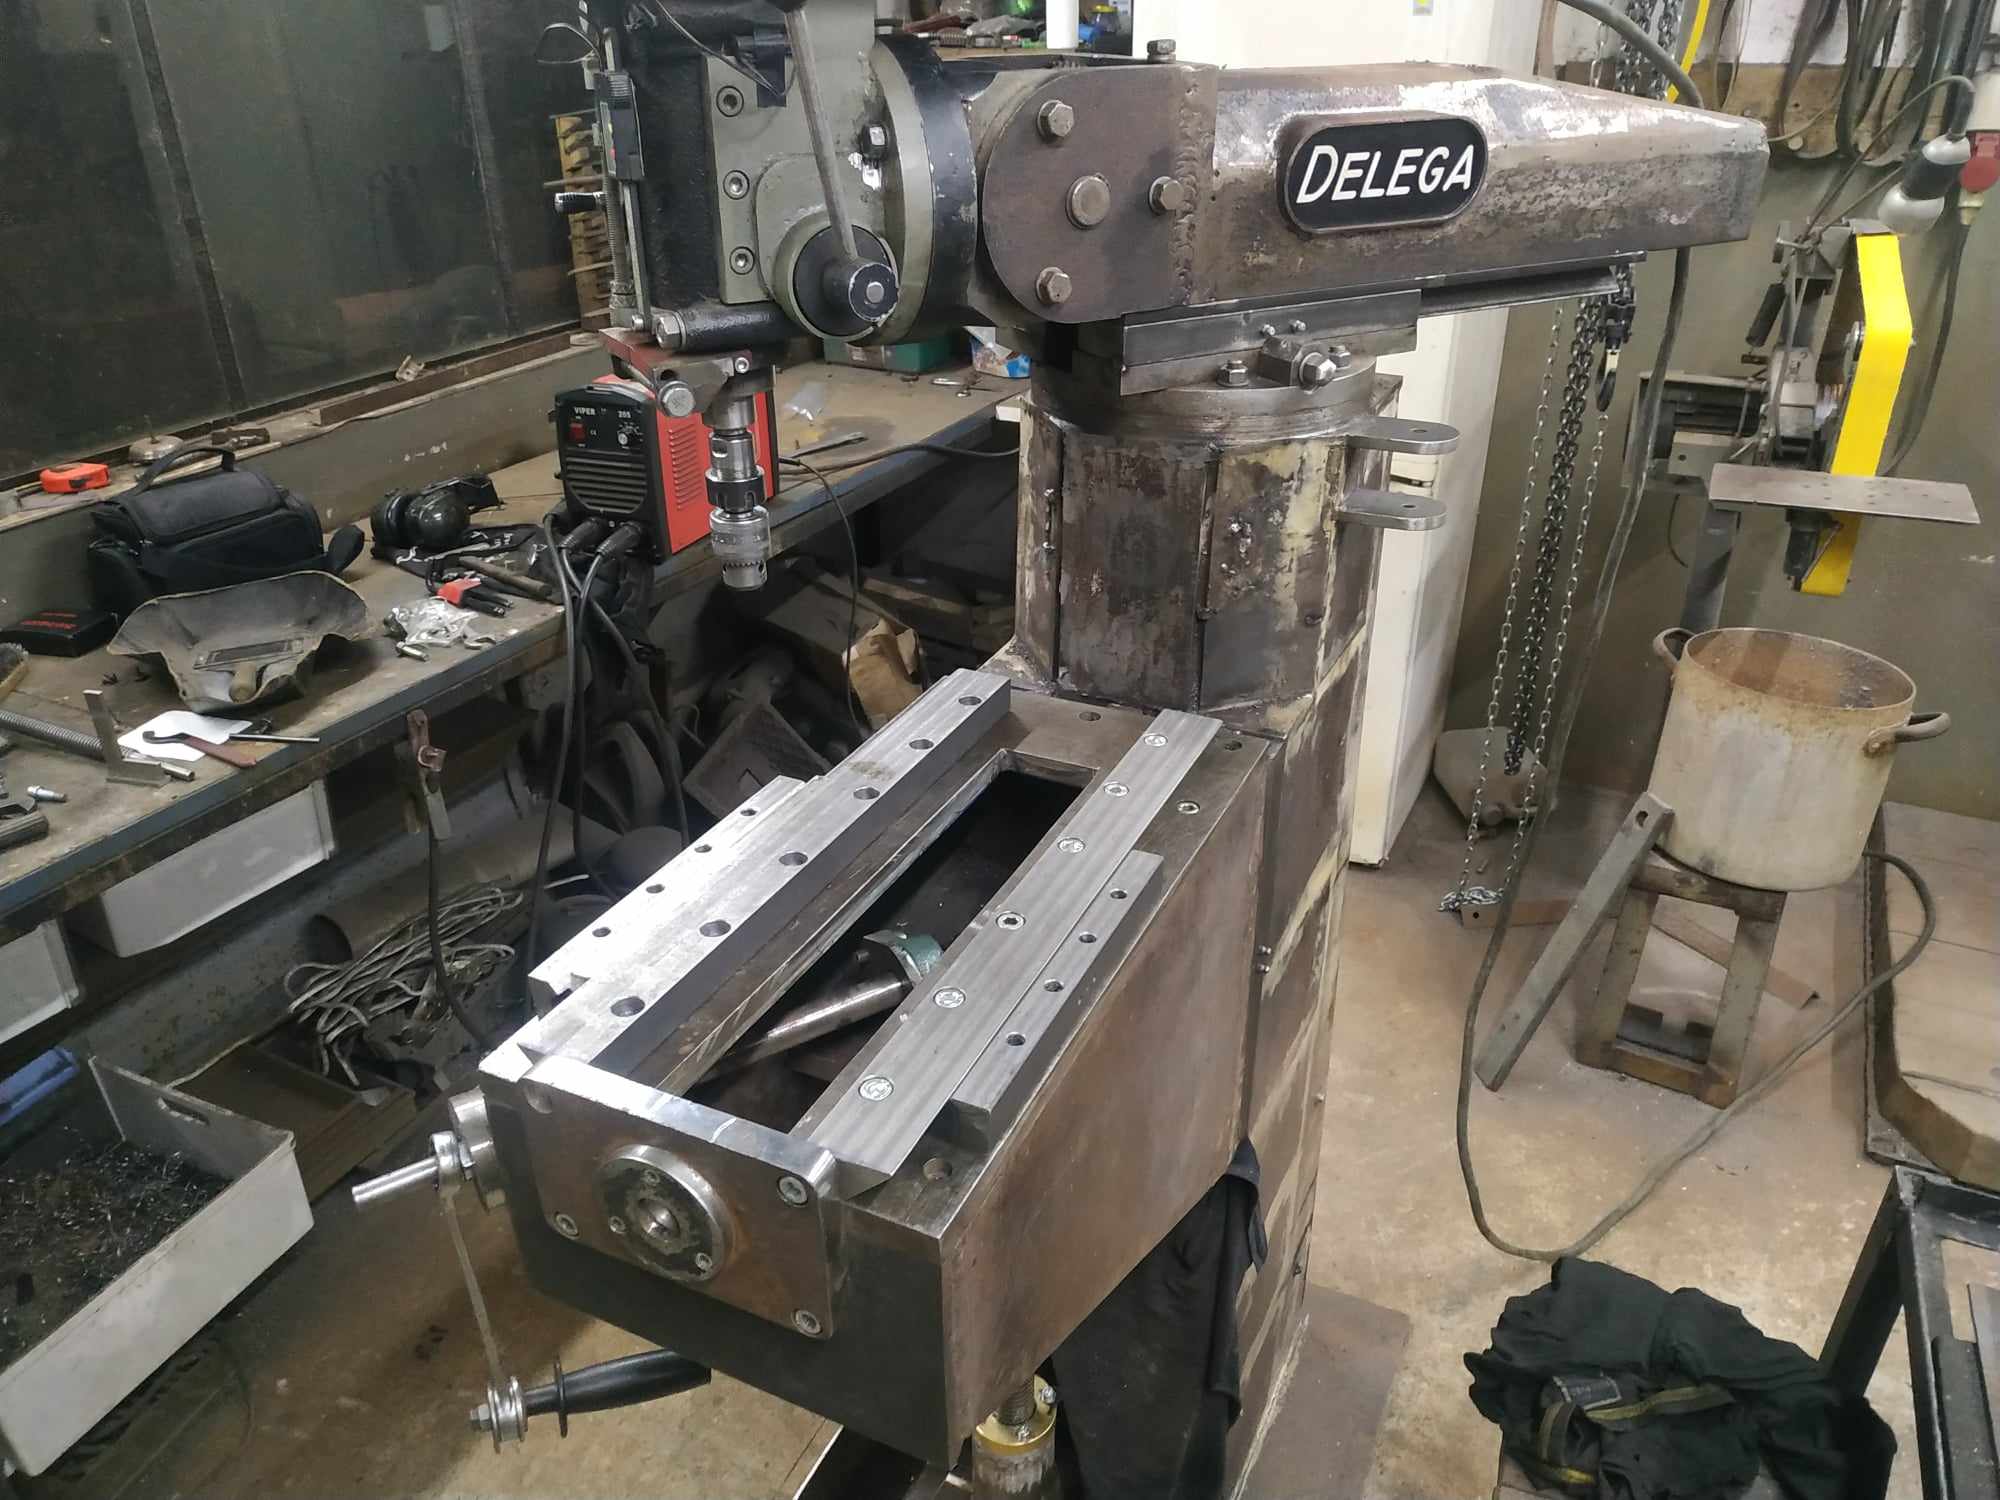
Saddle of my mill is almost ready.
Top surface of the guides is milled parallel to the bottom surface of base plate. Ability of milling is huge improvement in comparison to grinding with angle grinder and scraping. I used rotary table as third axis of movement for the set up from my previous post.
Attachment 47033
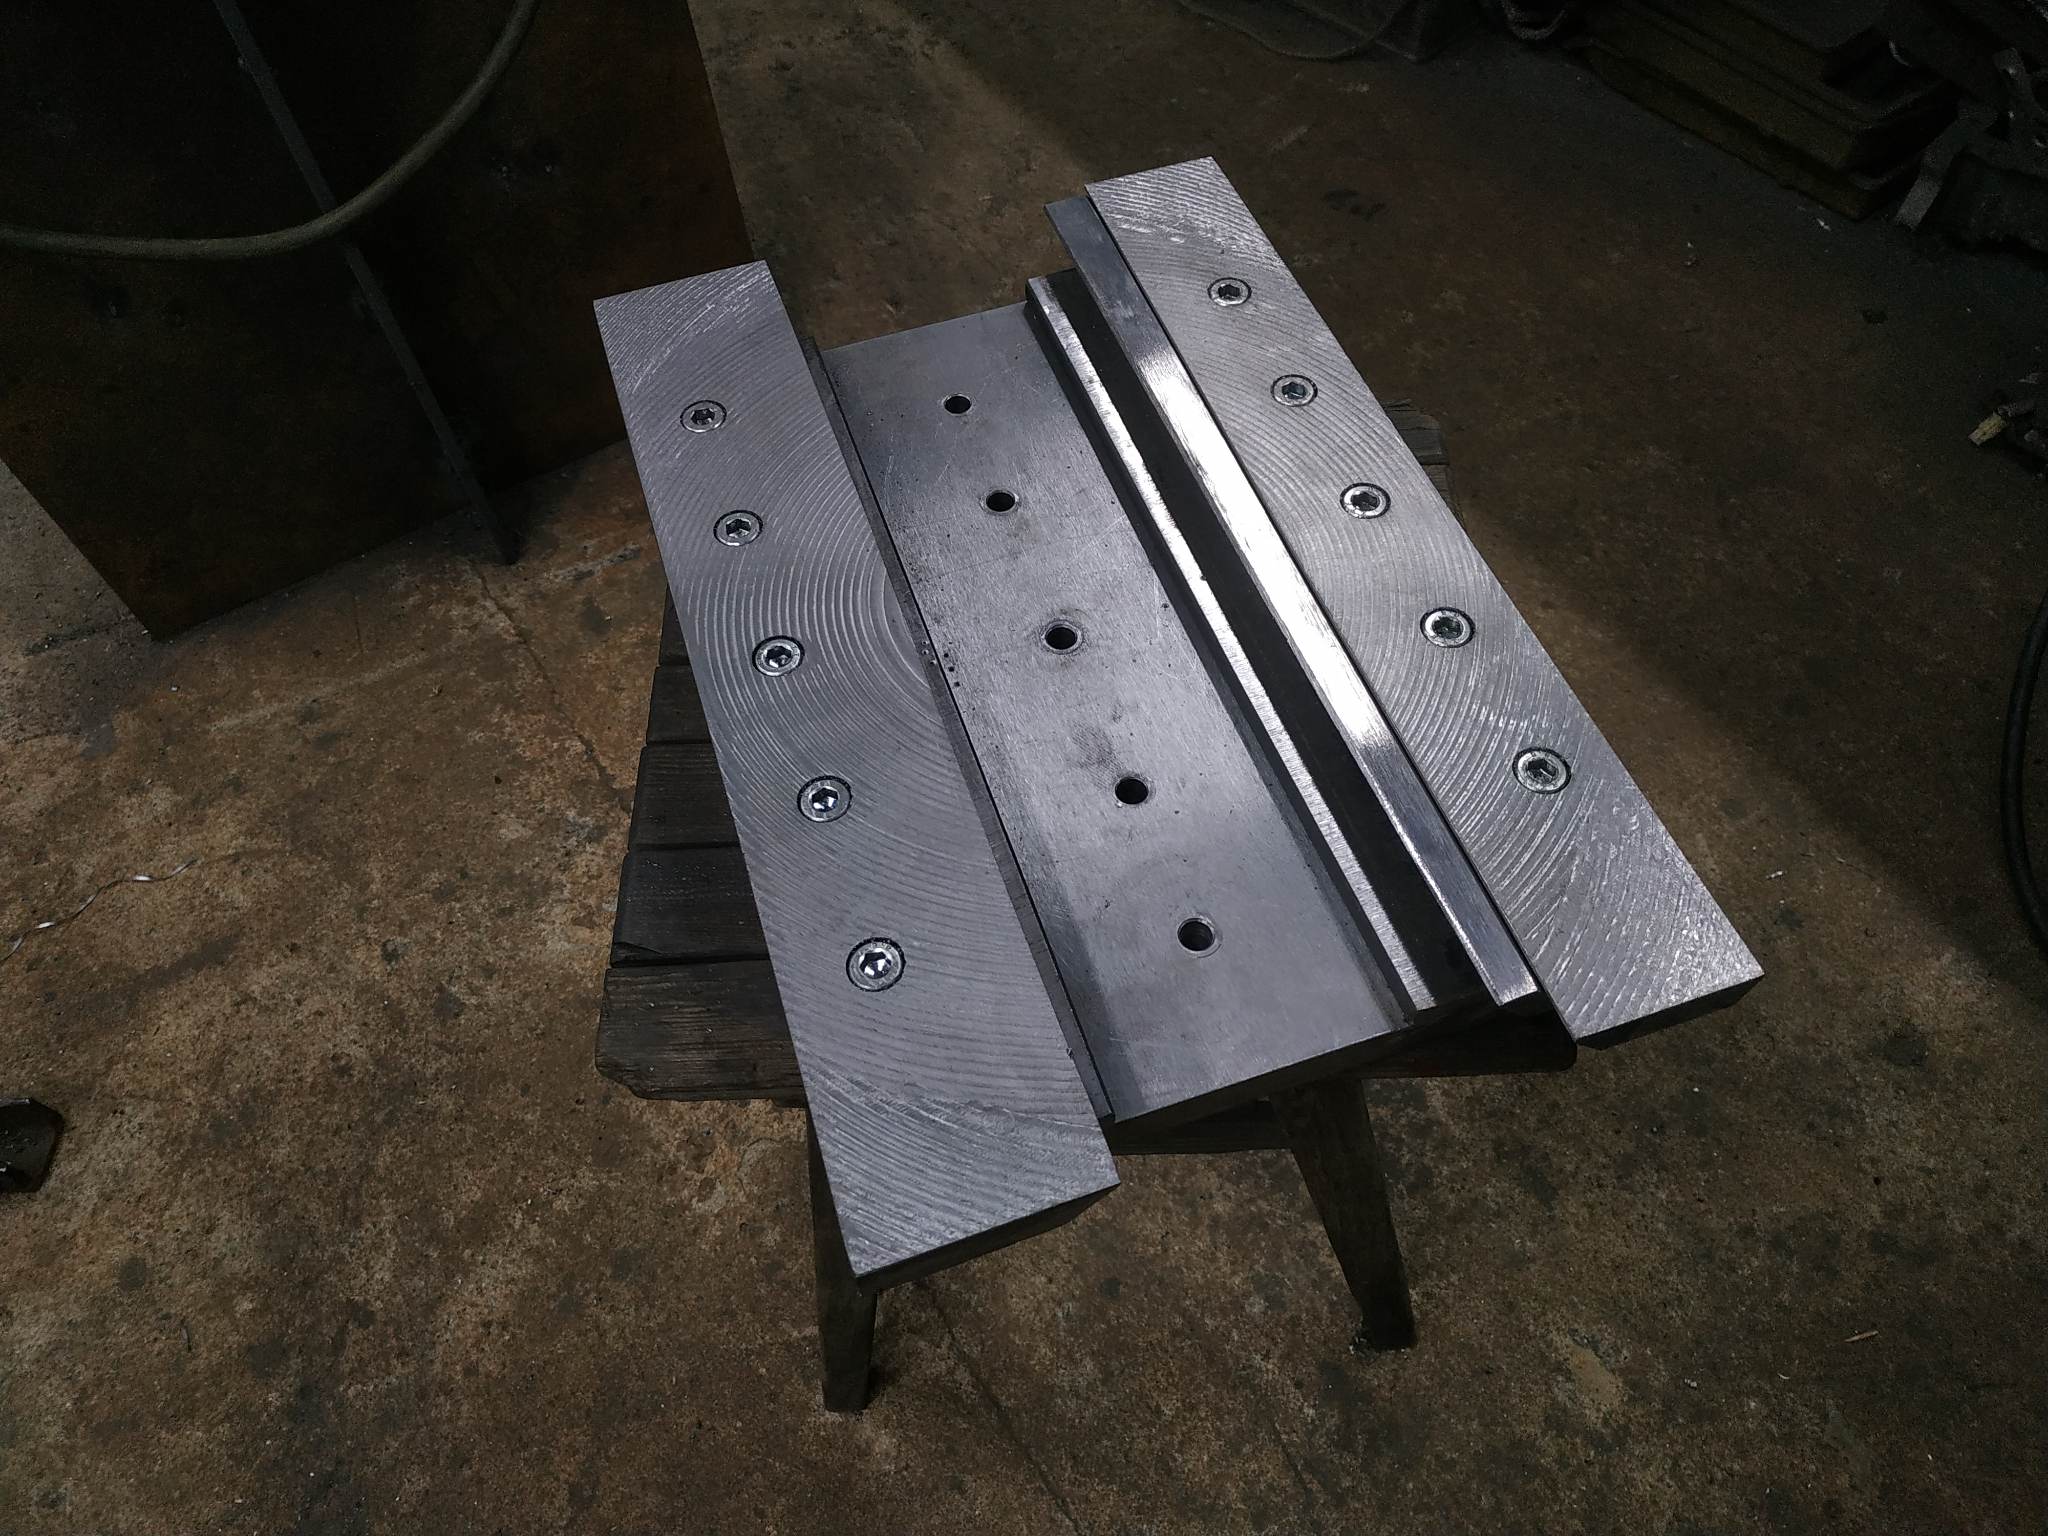
I still have to make plates for mounting lead screw nuts and cut oil grooves etc.
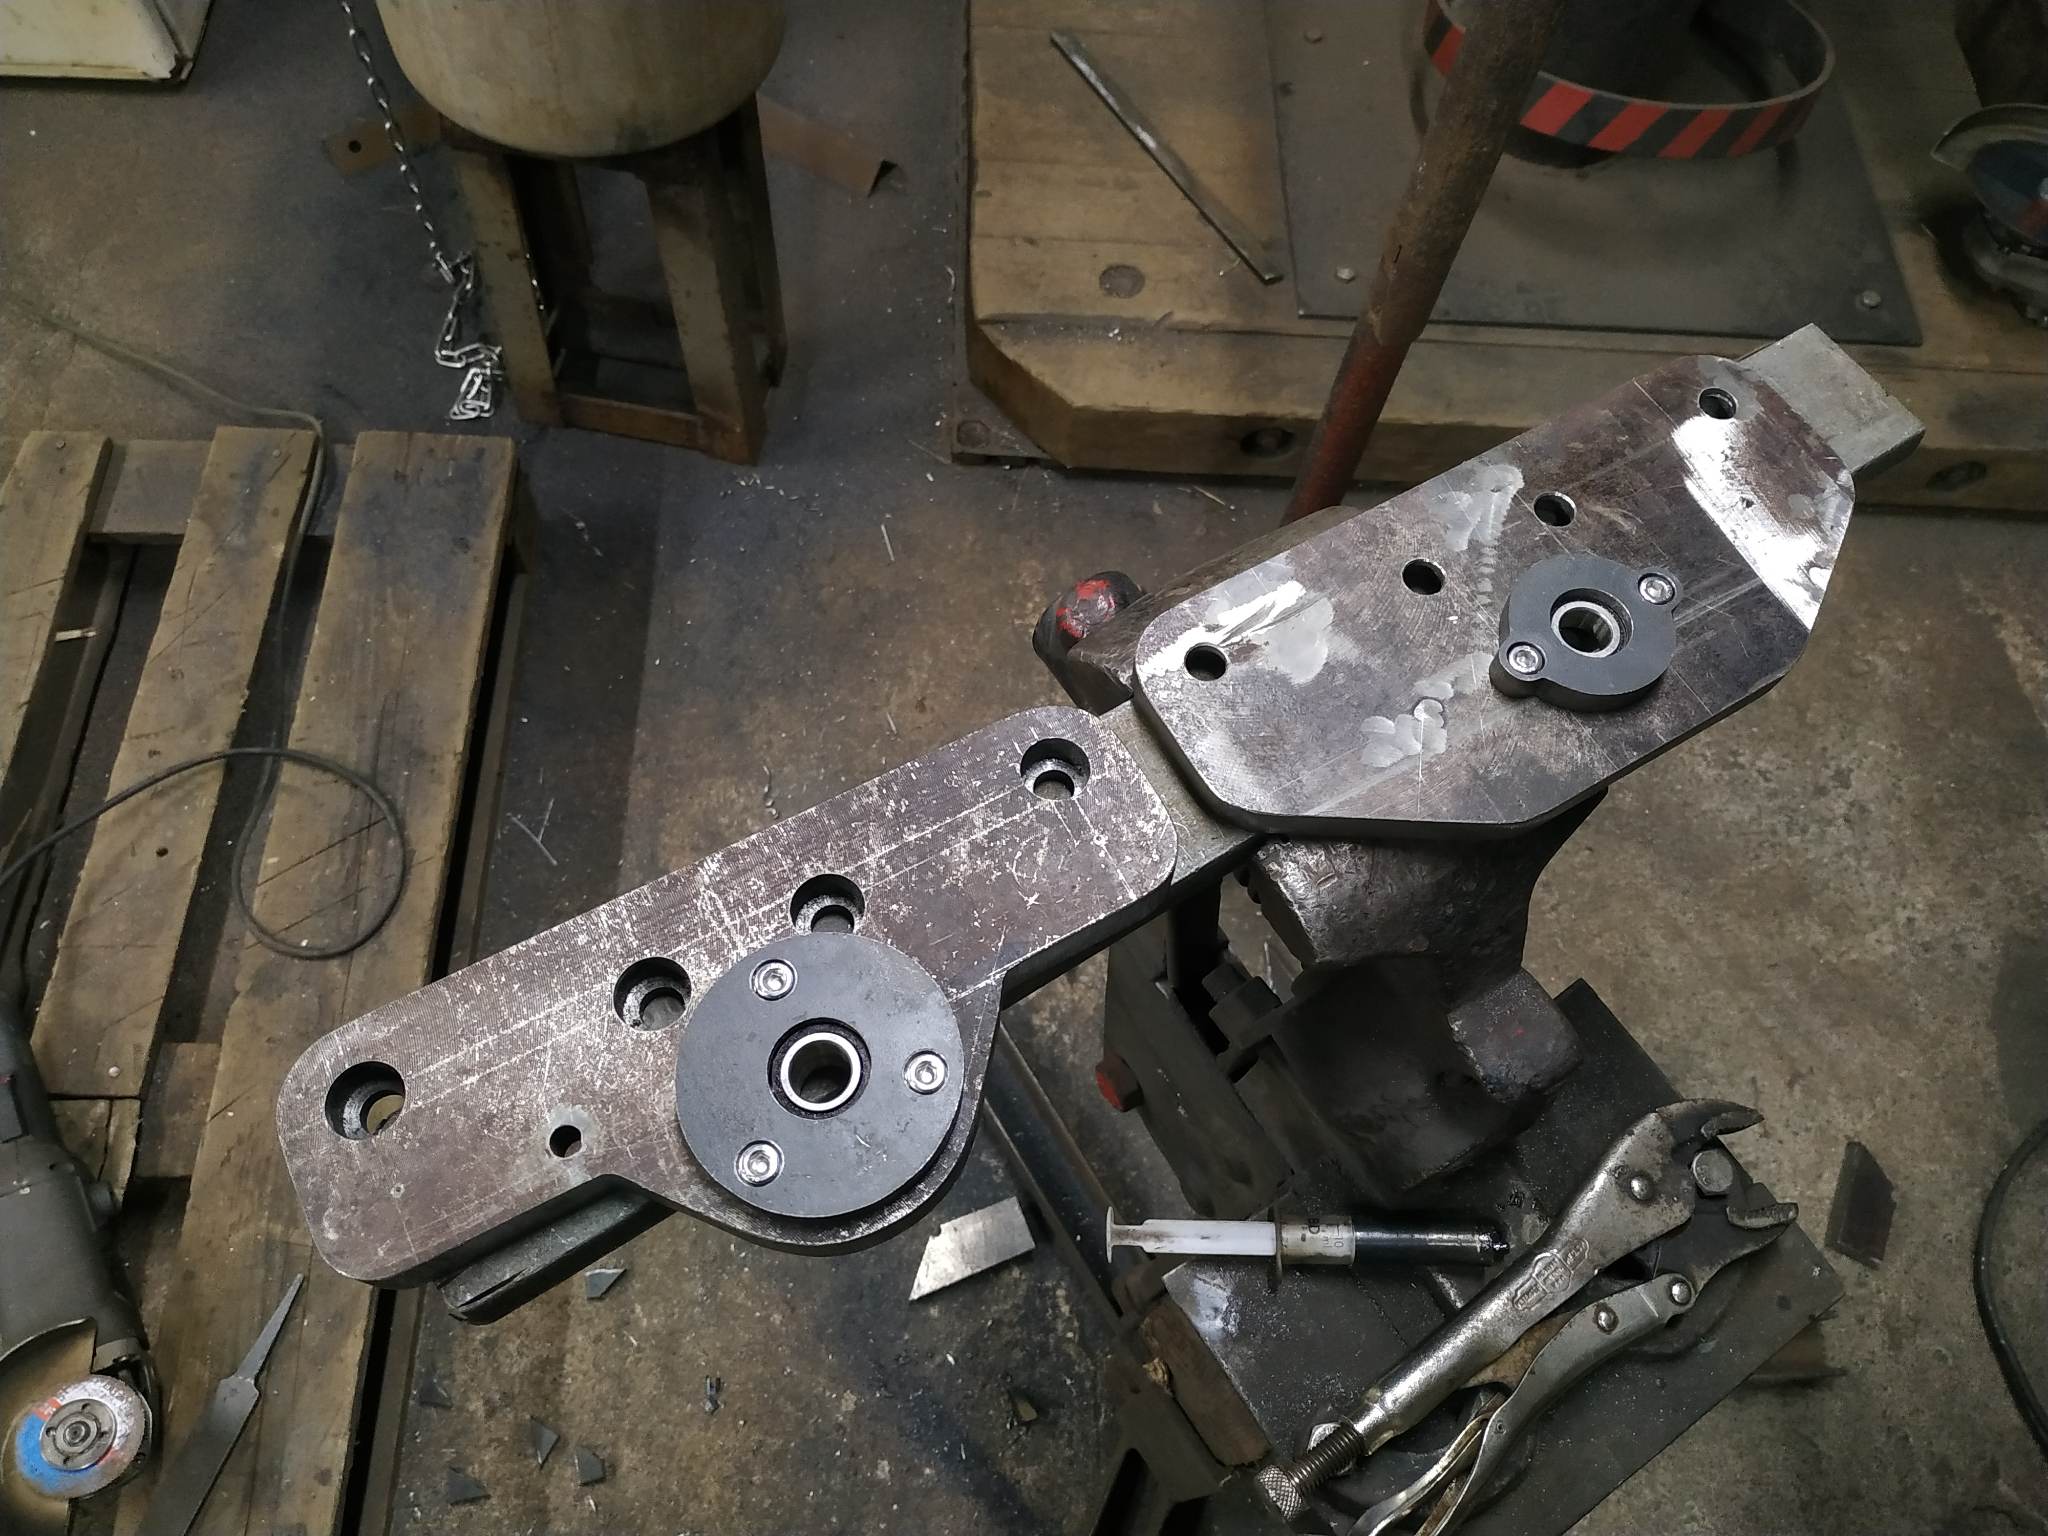
Bearing brackets for table. One is bigger because I wanted extra space for installing an electric power feed unit.
Attachment 47034
Part 12 is out! :D
https://youtu.be/xVxEuB6O028?si=vDKZp5uipZkjGhEw
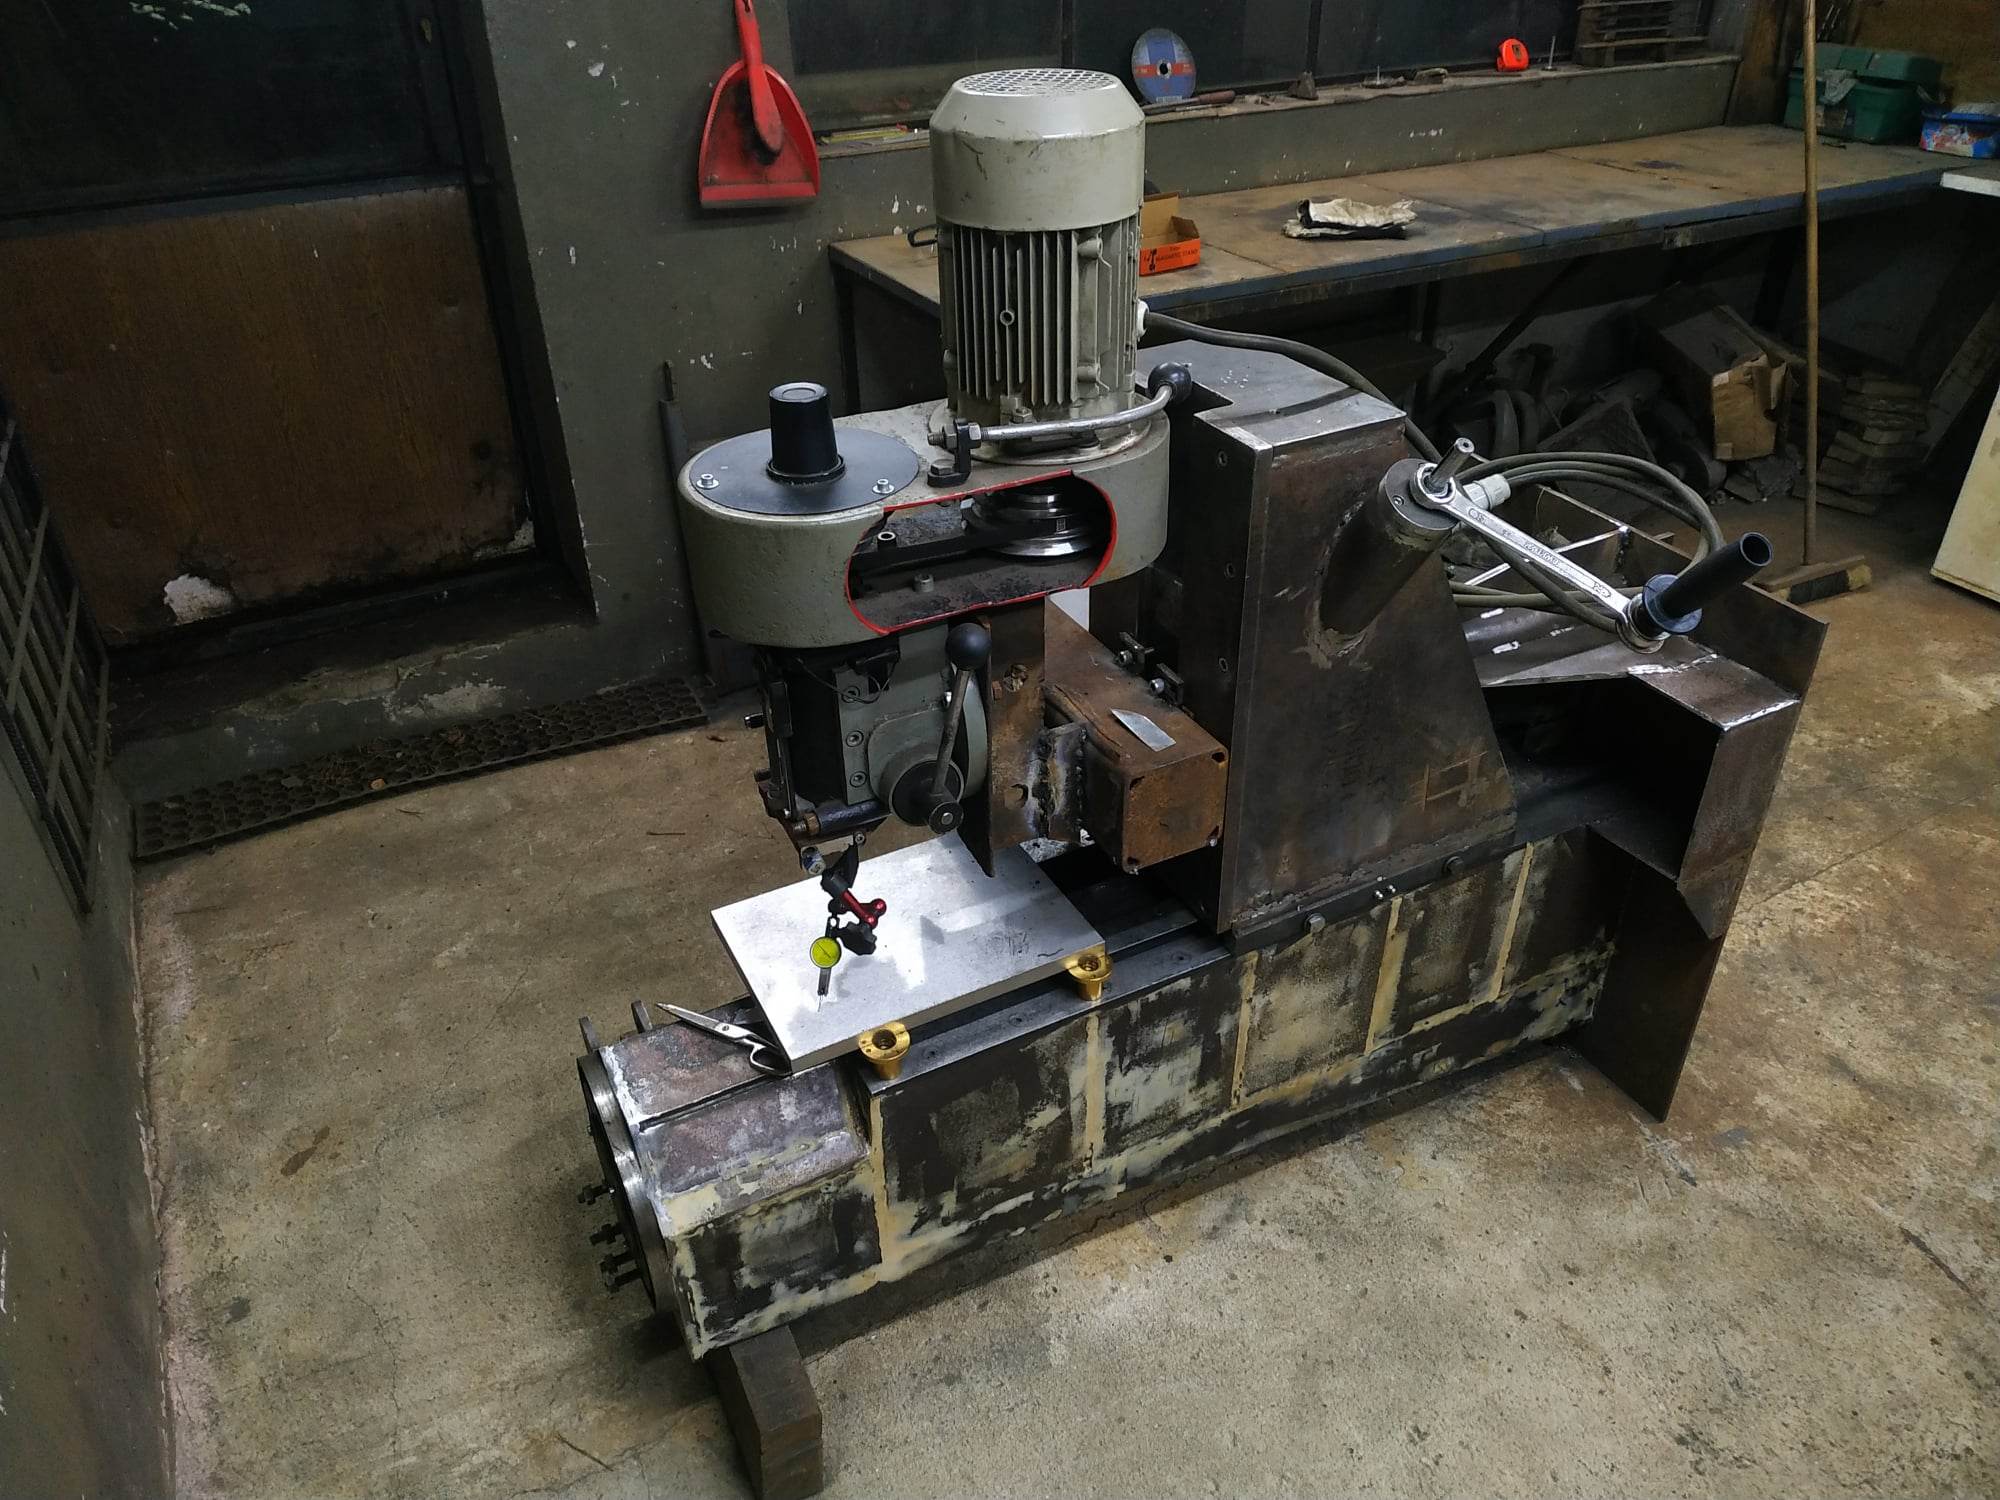
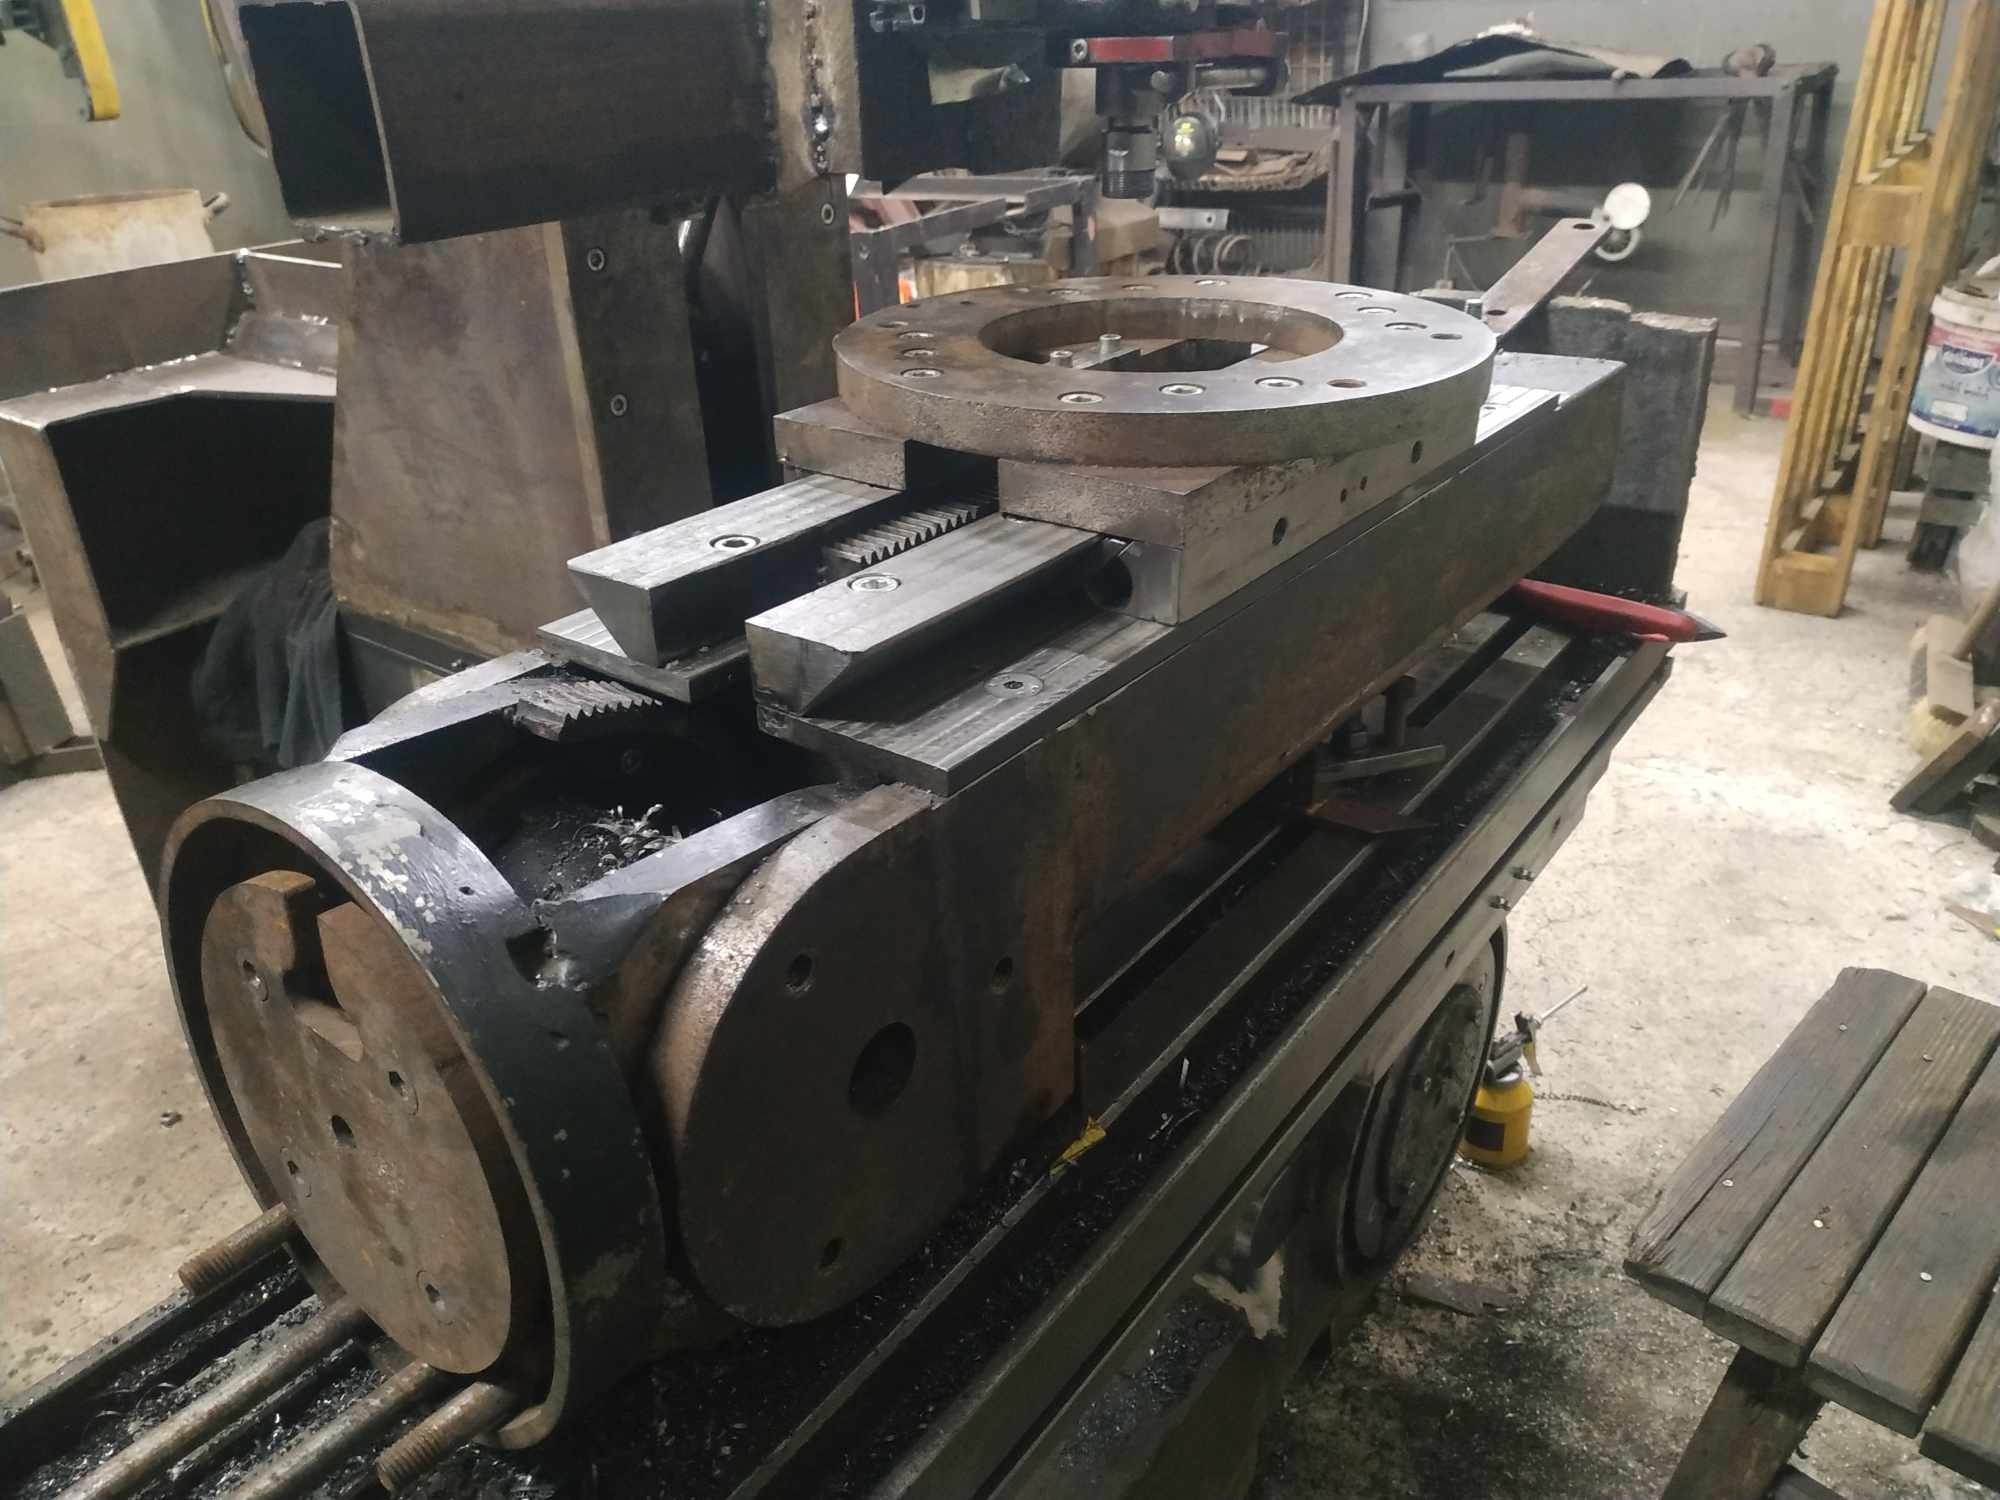
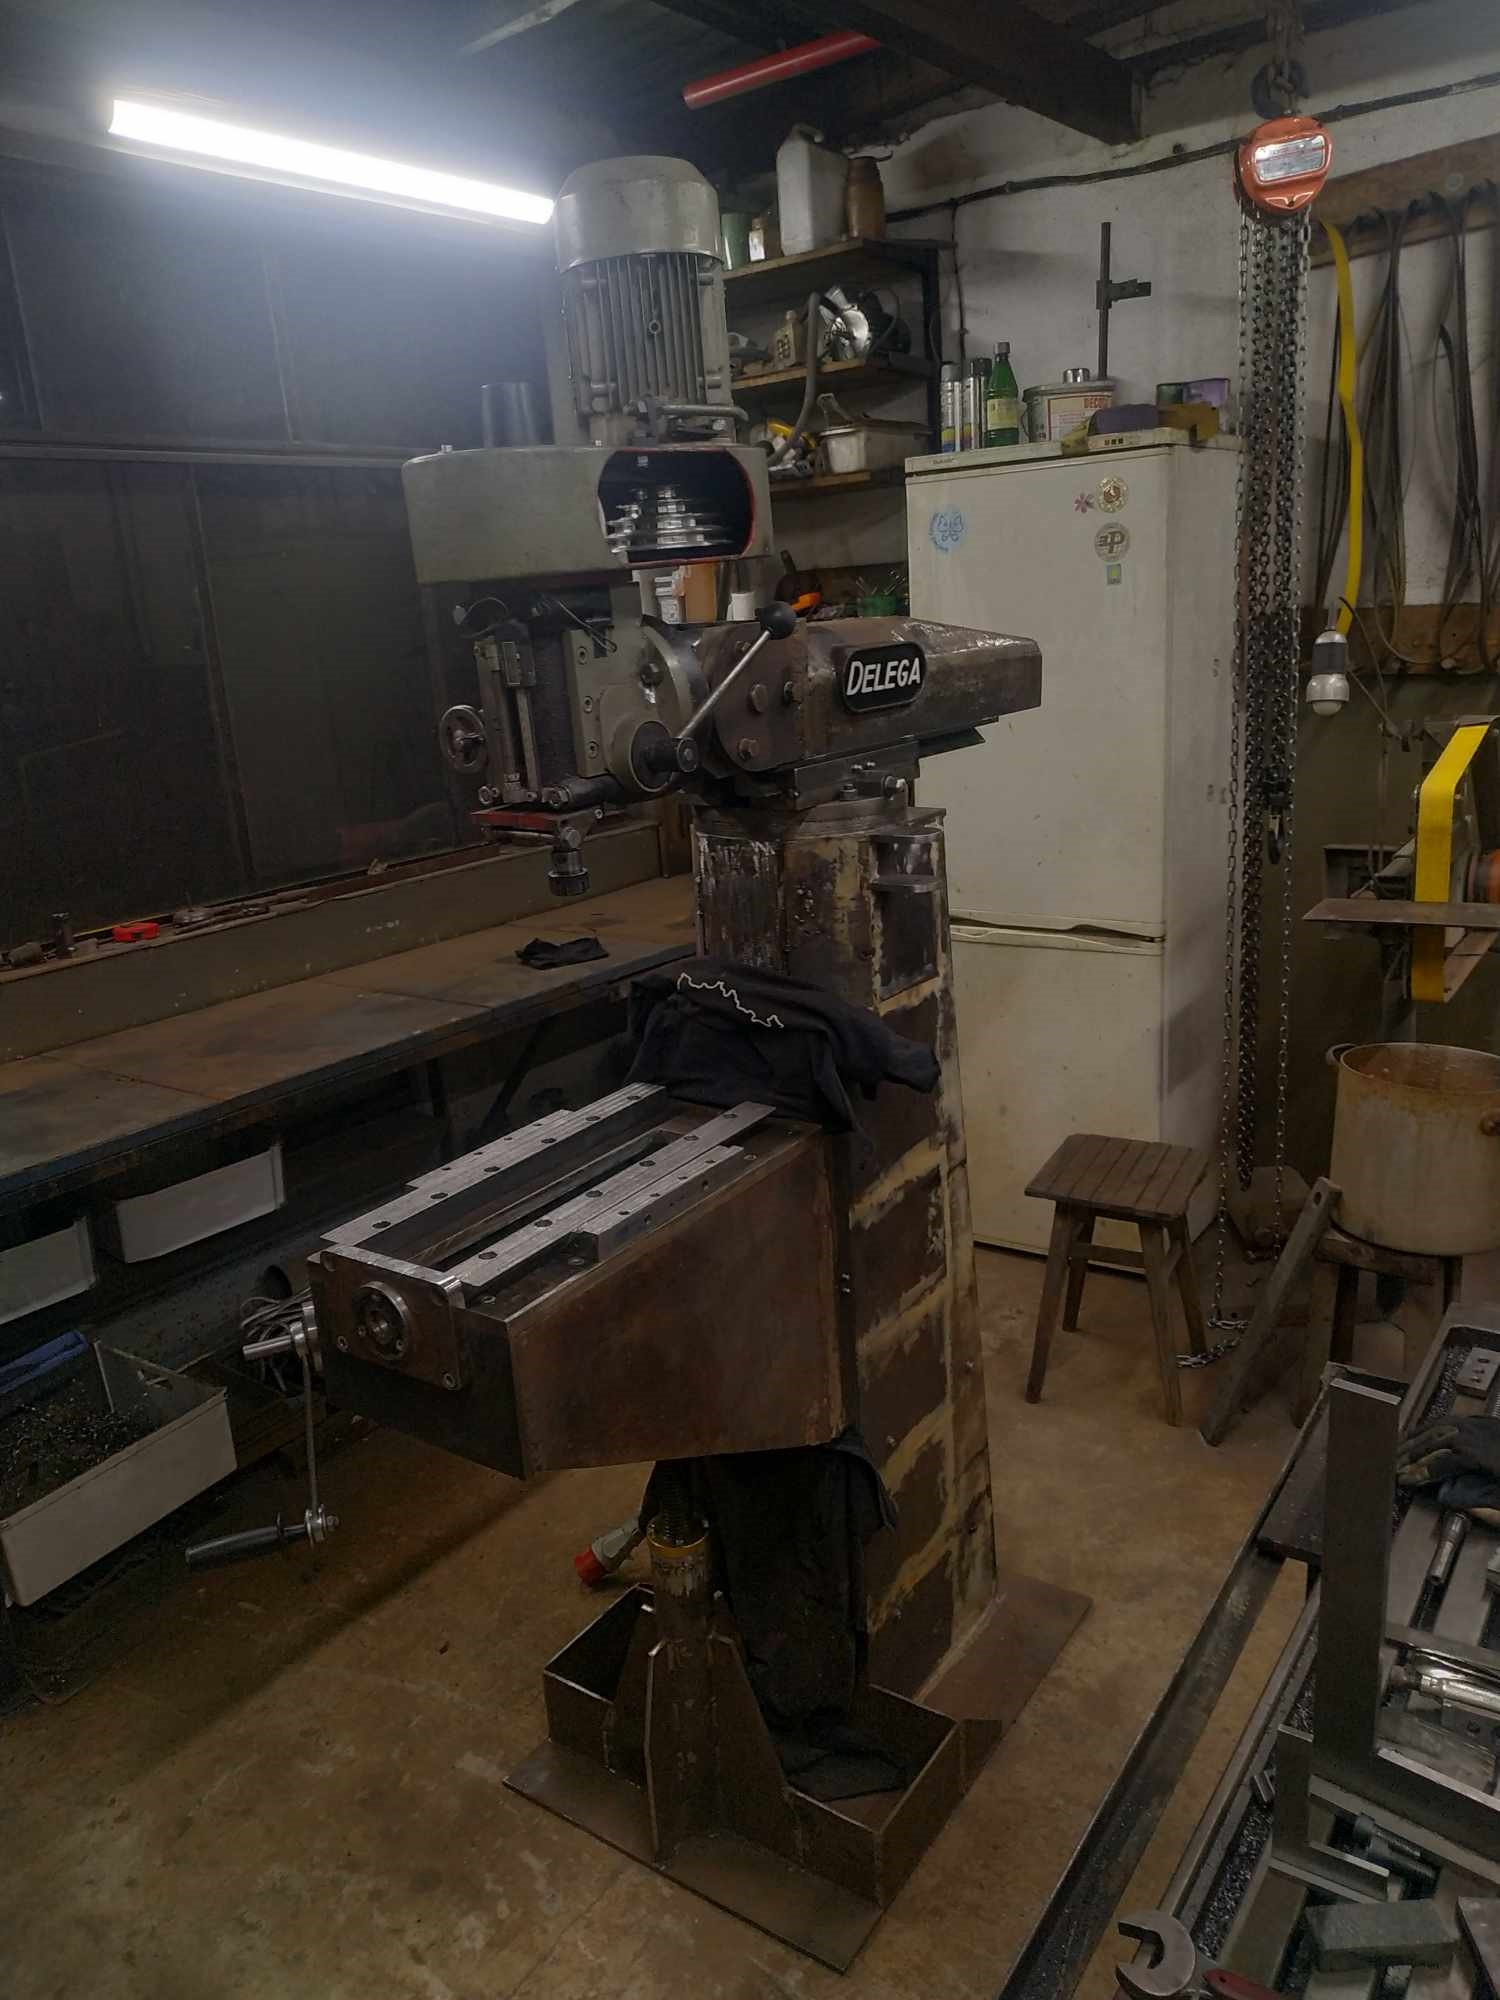
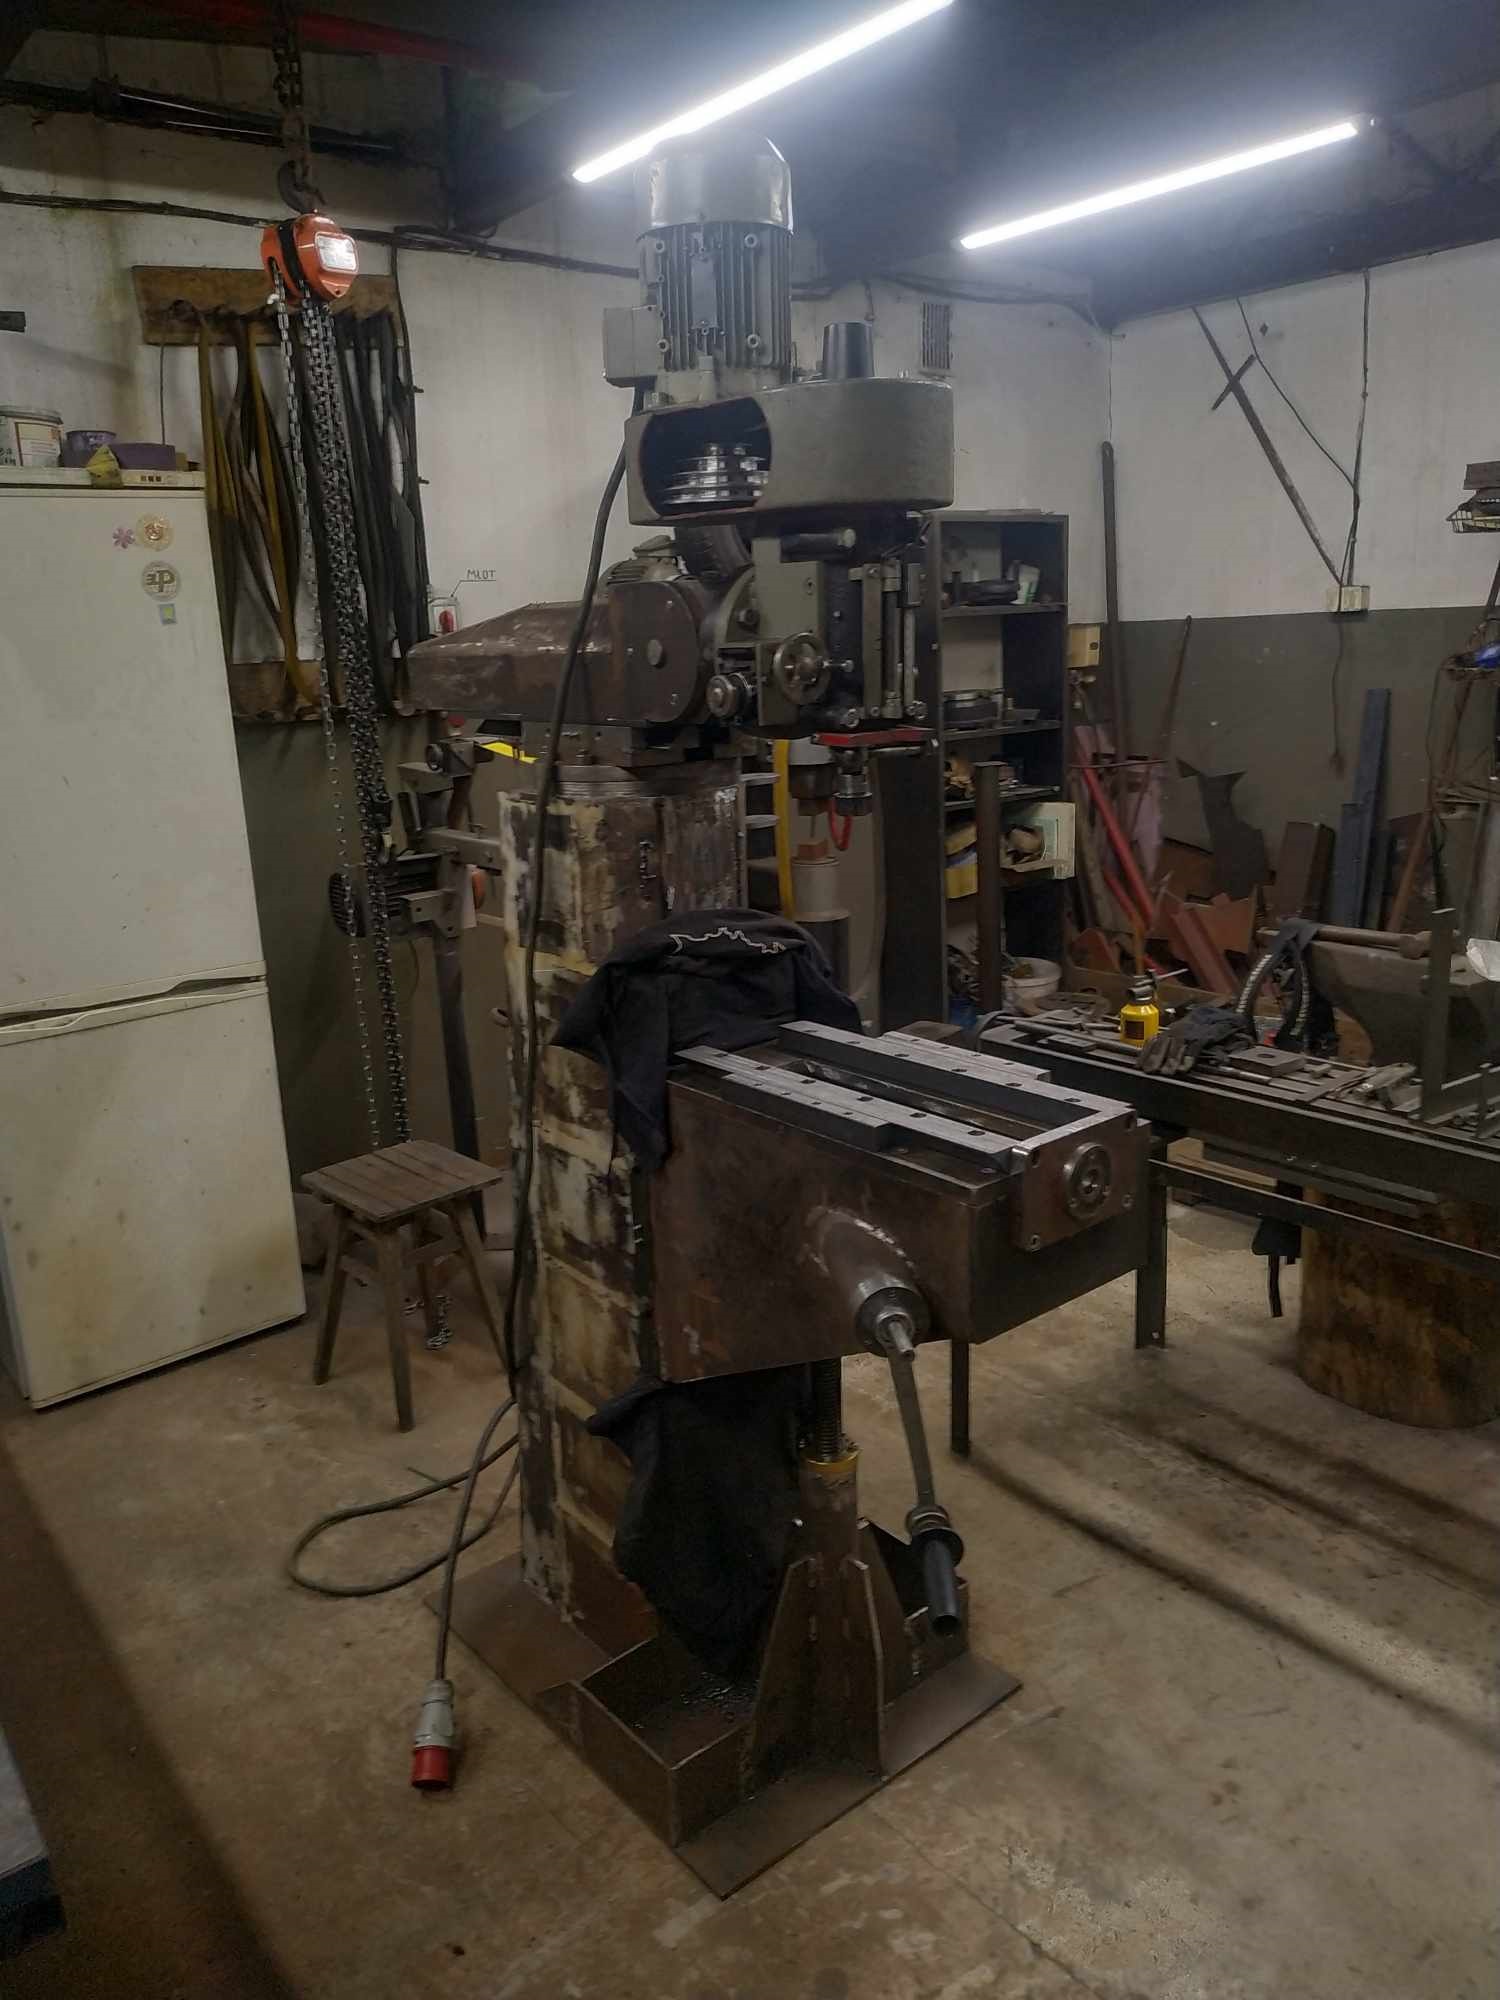
Madness of temporary setups continues. This time this is fully operational 3 axis milling machine which will make rest of parts needed to it's final form :D
Attachment 47081
Only downside is distance between center of spindle and the knee. It's extended very far and bends 0.15 [mm] under weight of my body. This is why 50 [mm] diameter face mill doesn't work well at this moment.
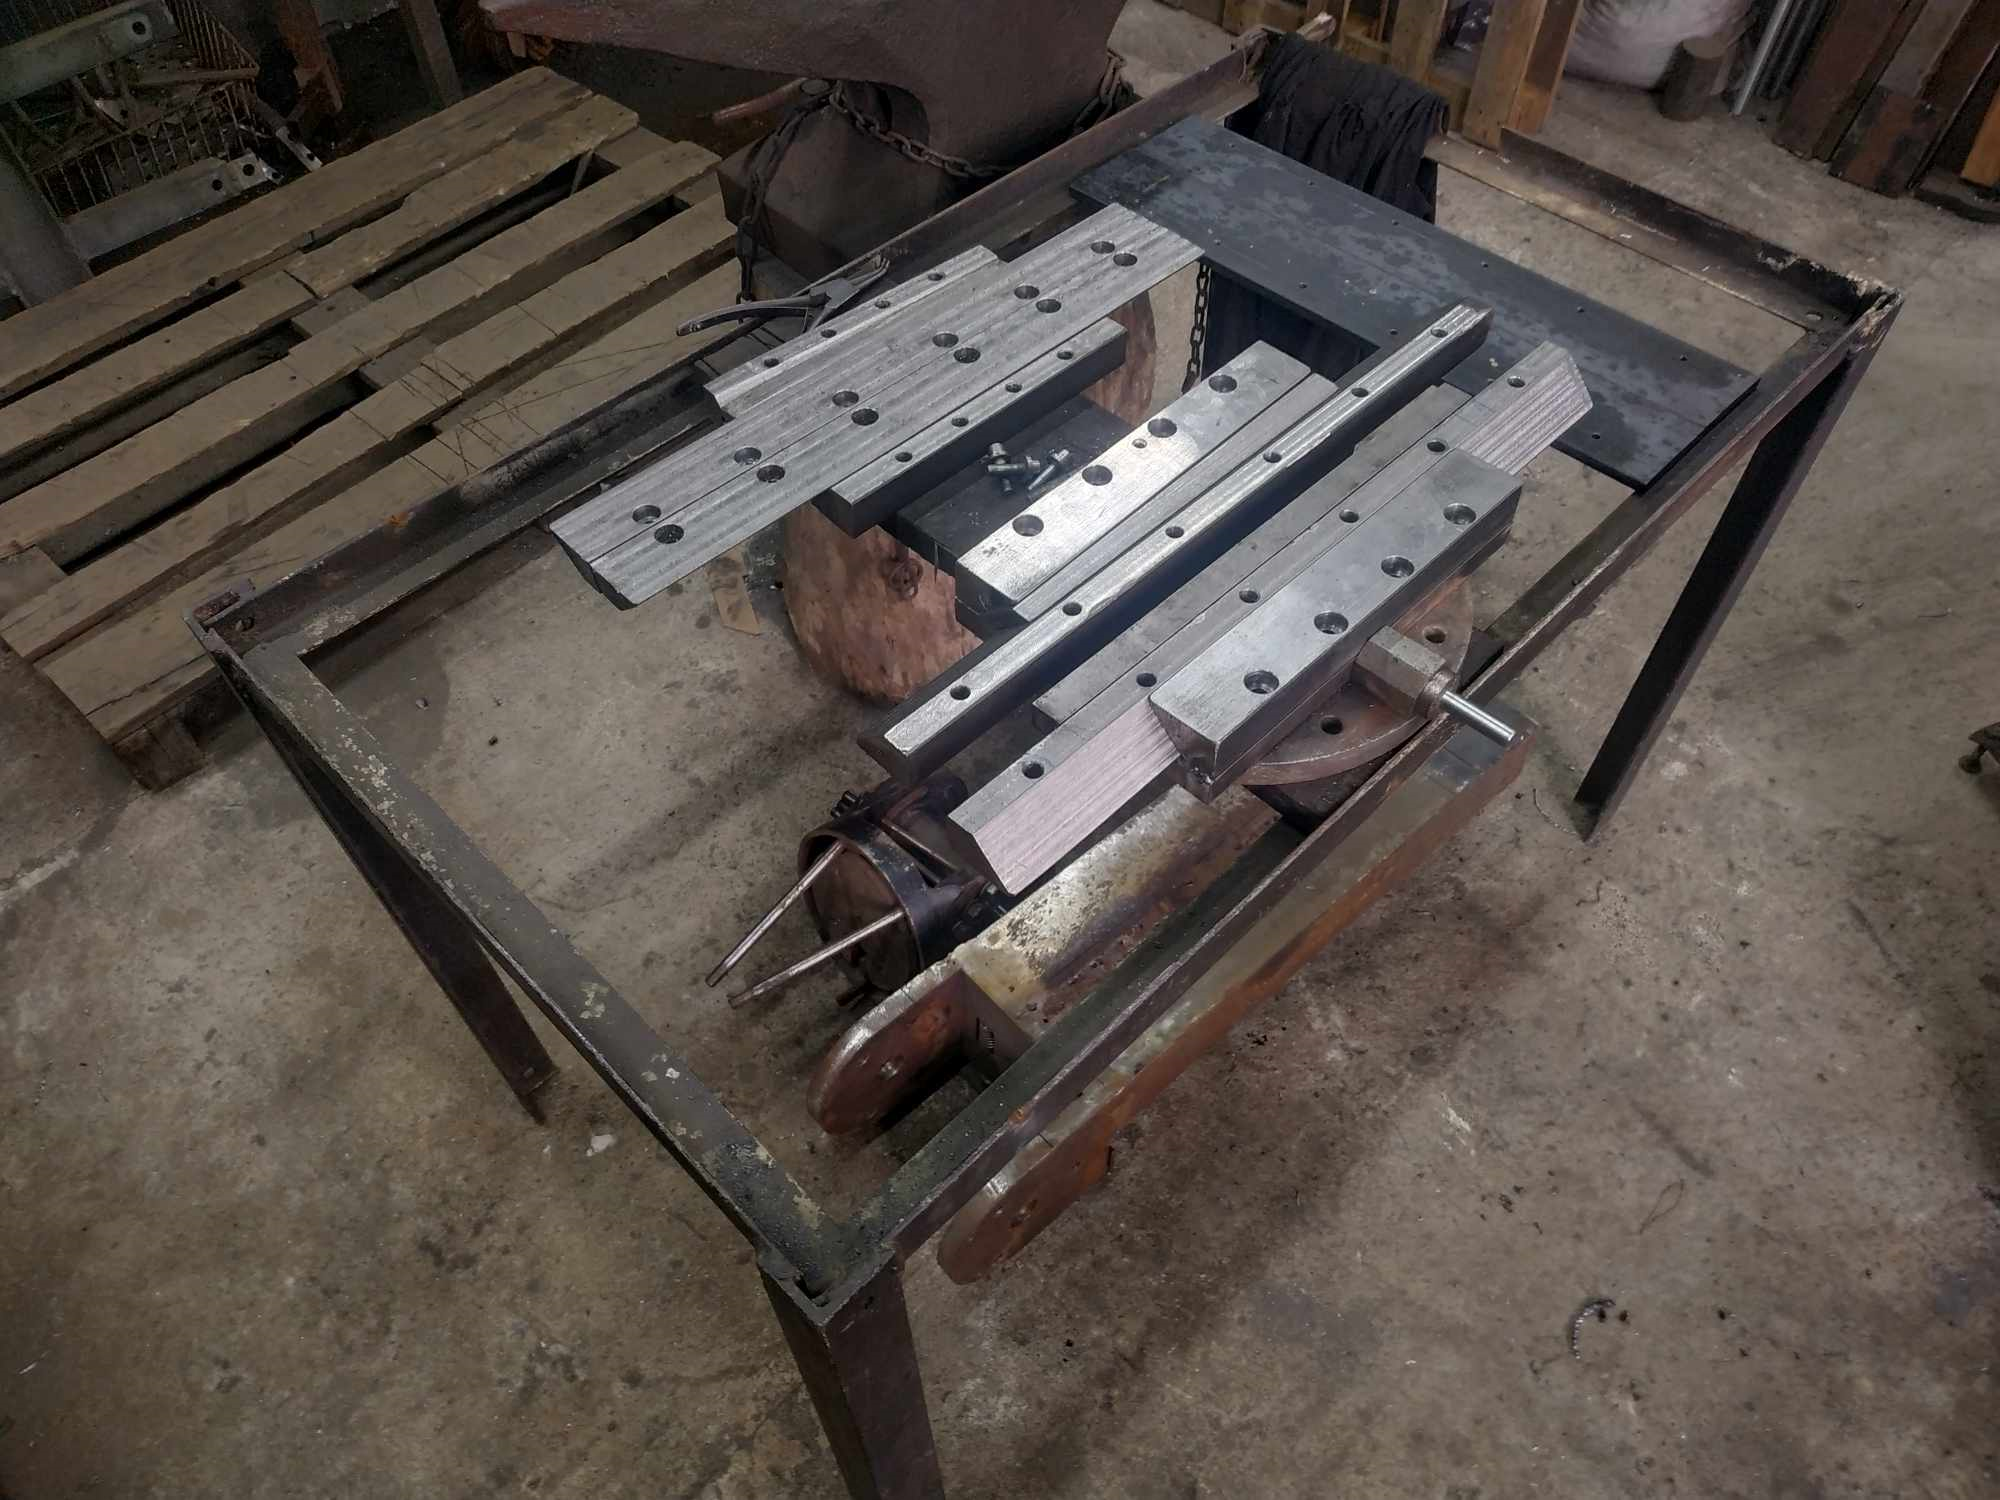
Ram and Y axis guides are almost ready. I wish I had machine like that in the beginning of the project :D
What left to do?
I have to scrape them and machine bottom surface of the Ram to flatness. After final assembly basically this will be the end of "mechanical" part of the whole project. Then the "electrical" part will start.
Attachment 47321
This looks simple. But, there is a large amount of work in this picture. Seeing your video will be very nice!Quote:
Originally Posted by SteelCraft
Mark
The worst part is when it's 2-3 day to finish another step and you have to leave all progress and wait another month to came back home and finish it.
Probably the most spectacular update so far :P It starts to look like milling machine :D
Attachment 47402
Attachment 47403
Attachment 47404
Attachment 47405
Video soon!
Since last video, I drilled holes for Y axis guides. Drilling with rotary turret was fun. I was like radial drilling machine. Squarness was set to Z axis flat guides using 1-2-3 blocks and machinist square - it's the best I could do.
Attachment 47514
Attachment 47515
Attachment 47516
I made flat bottom countersunks for gib setscrews by plunge milling.
Attachment 47517
Attachment 47518
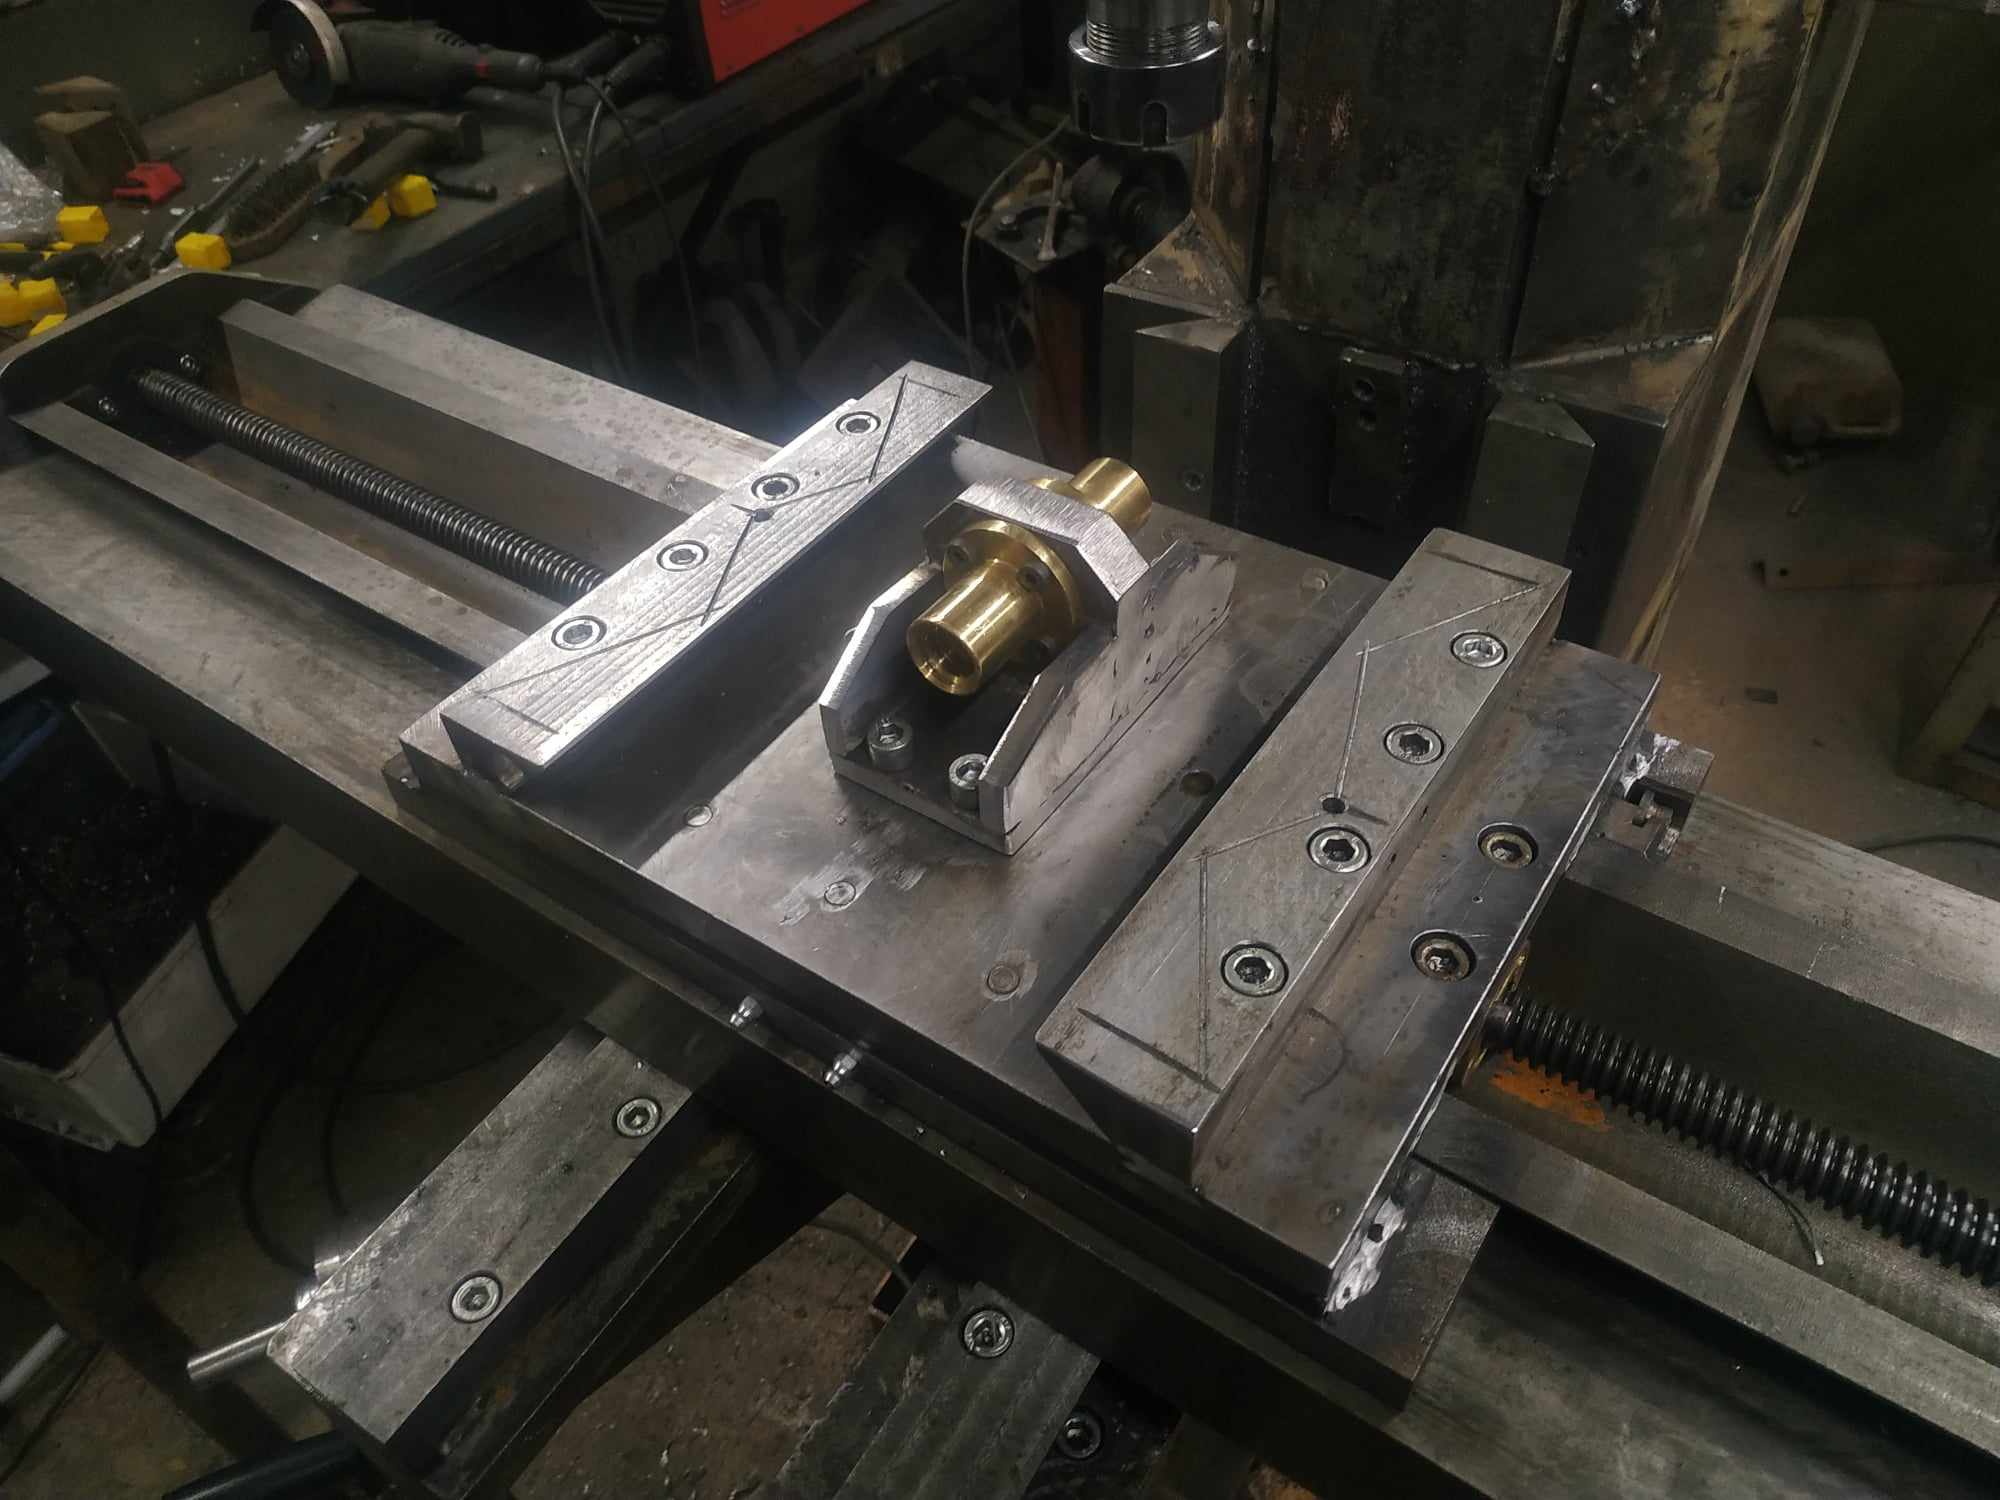
This is bracket with leadscrew nuts
Attachment 47519
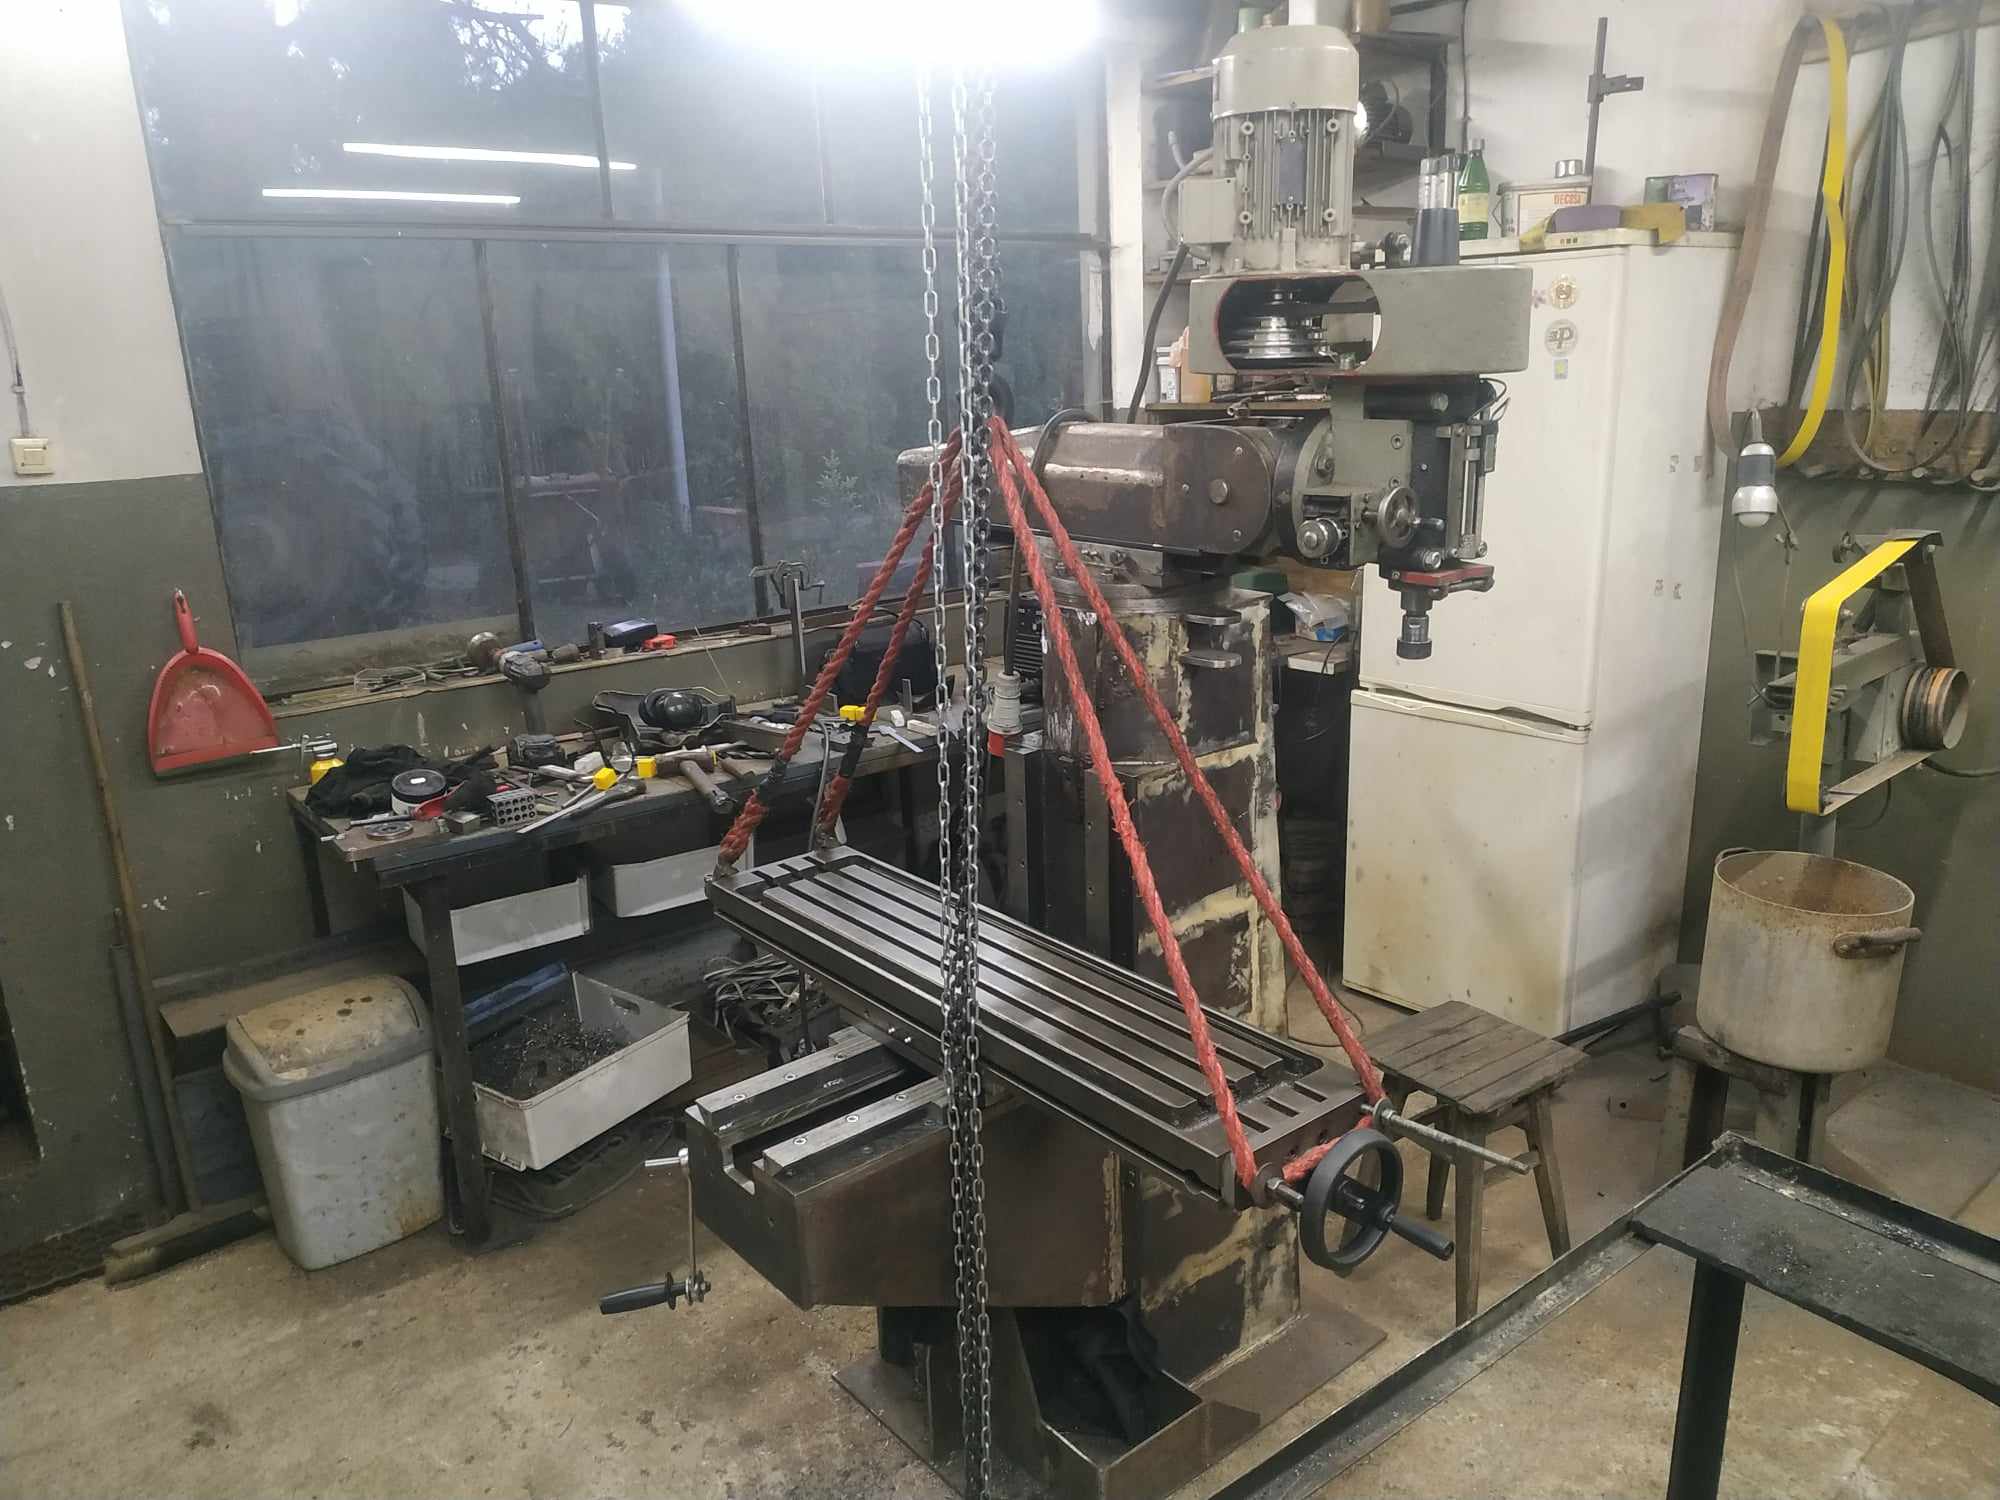
Assembled milling machine.
Attachment 47520
Attachment 47521
There is still a lot of things to do so stay tuned ;)
A splendid looking mill! What a lot of work you have accomplished up to this point. This will be something that you never forget!
Mark
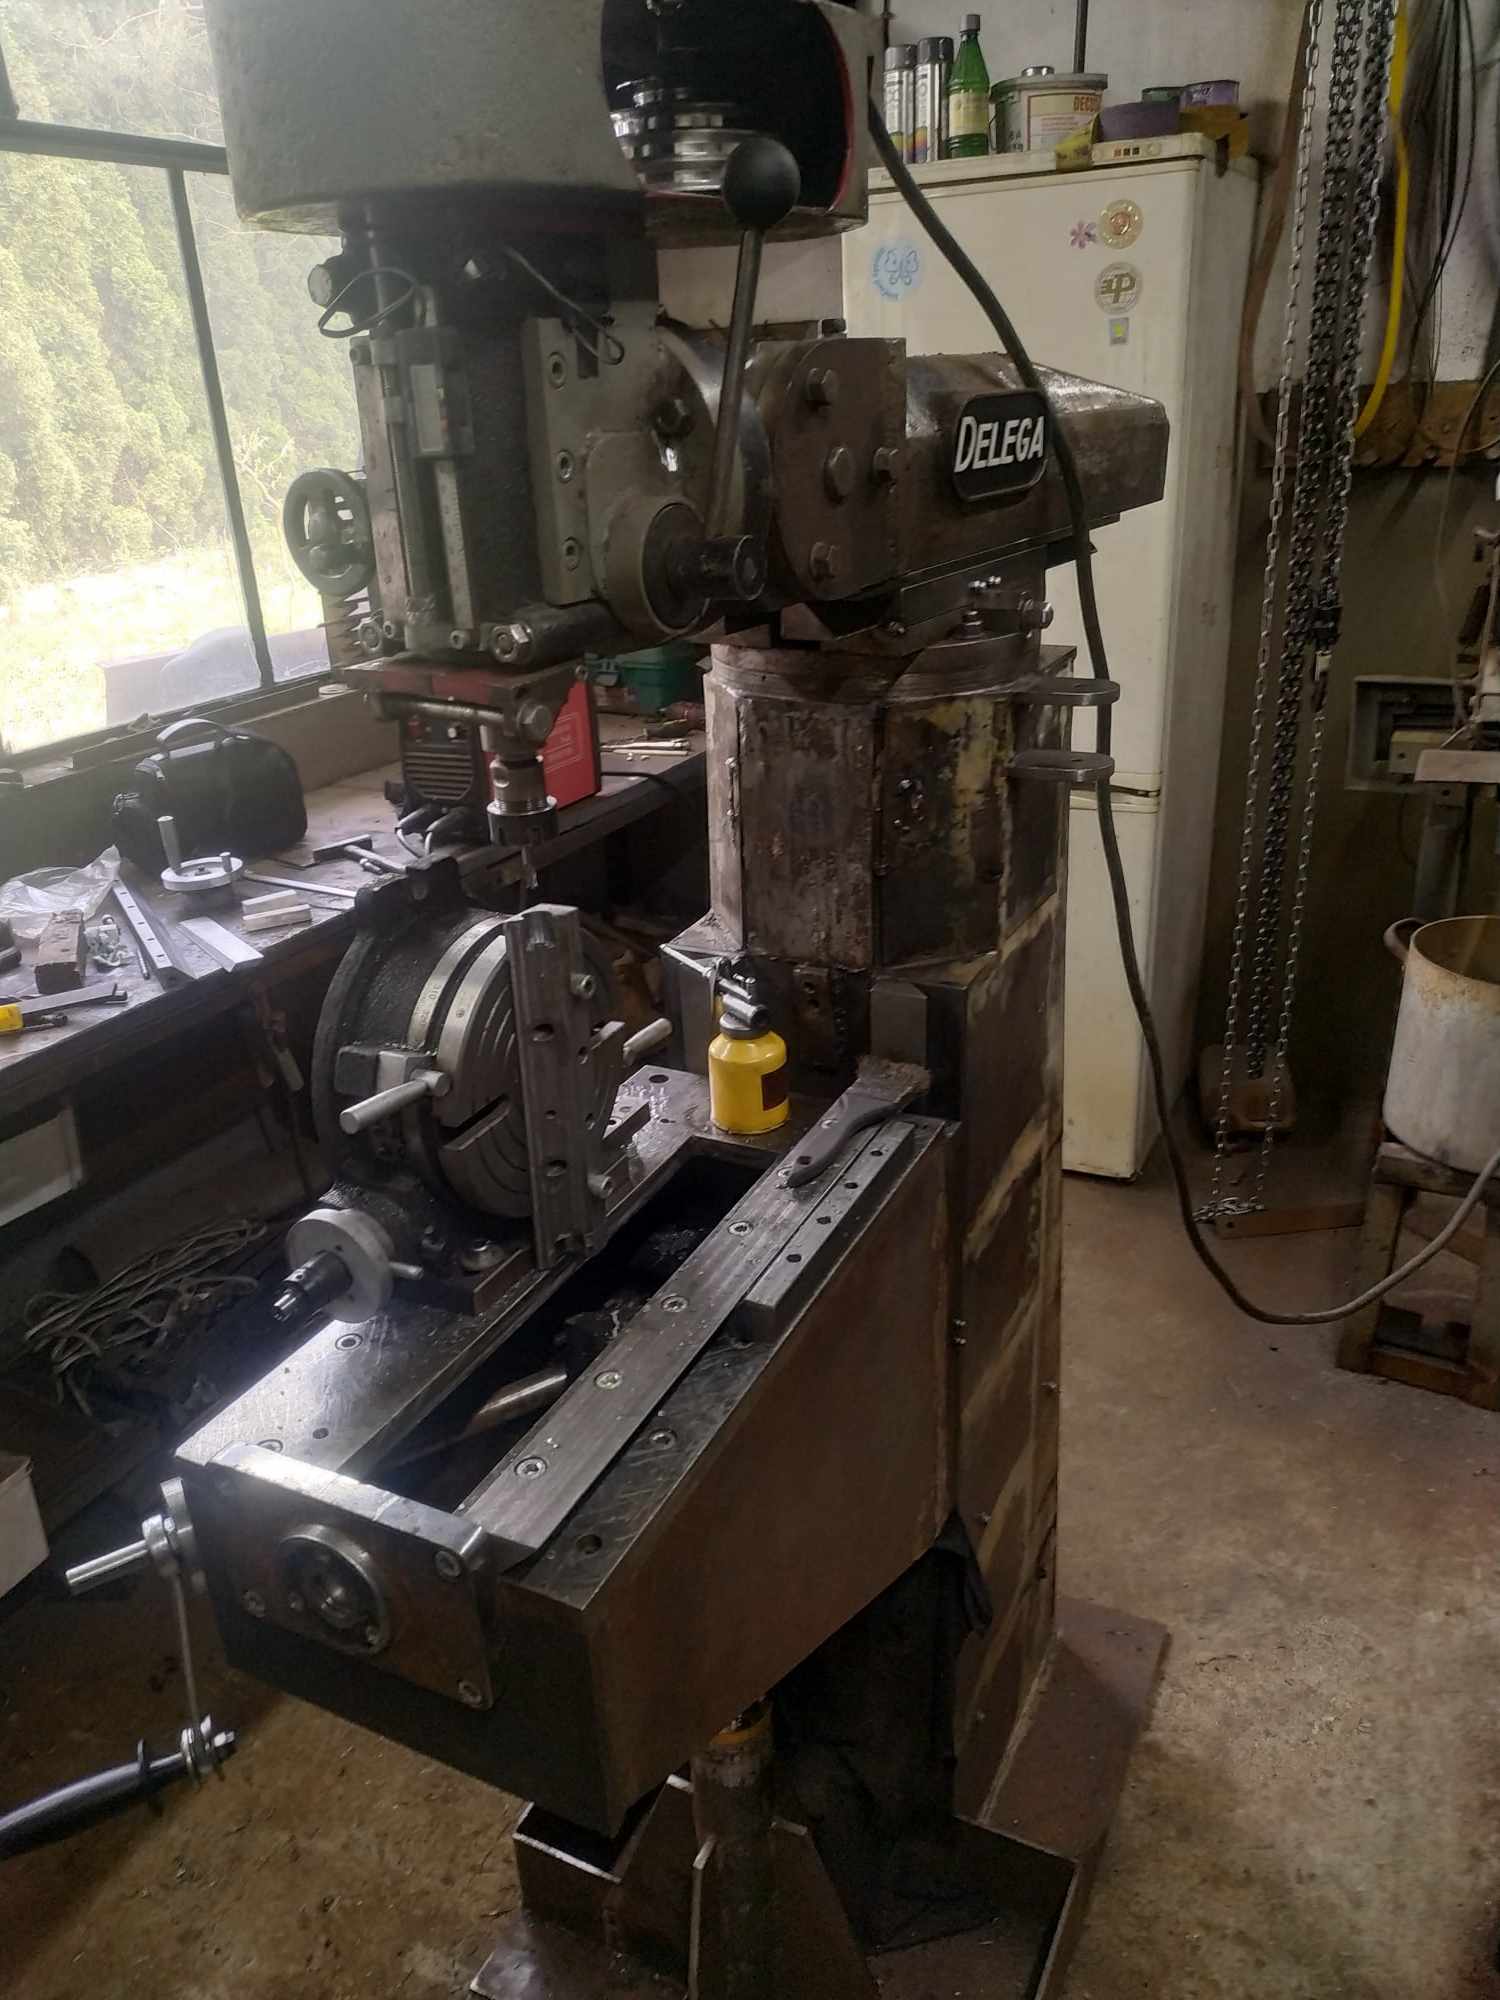
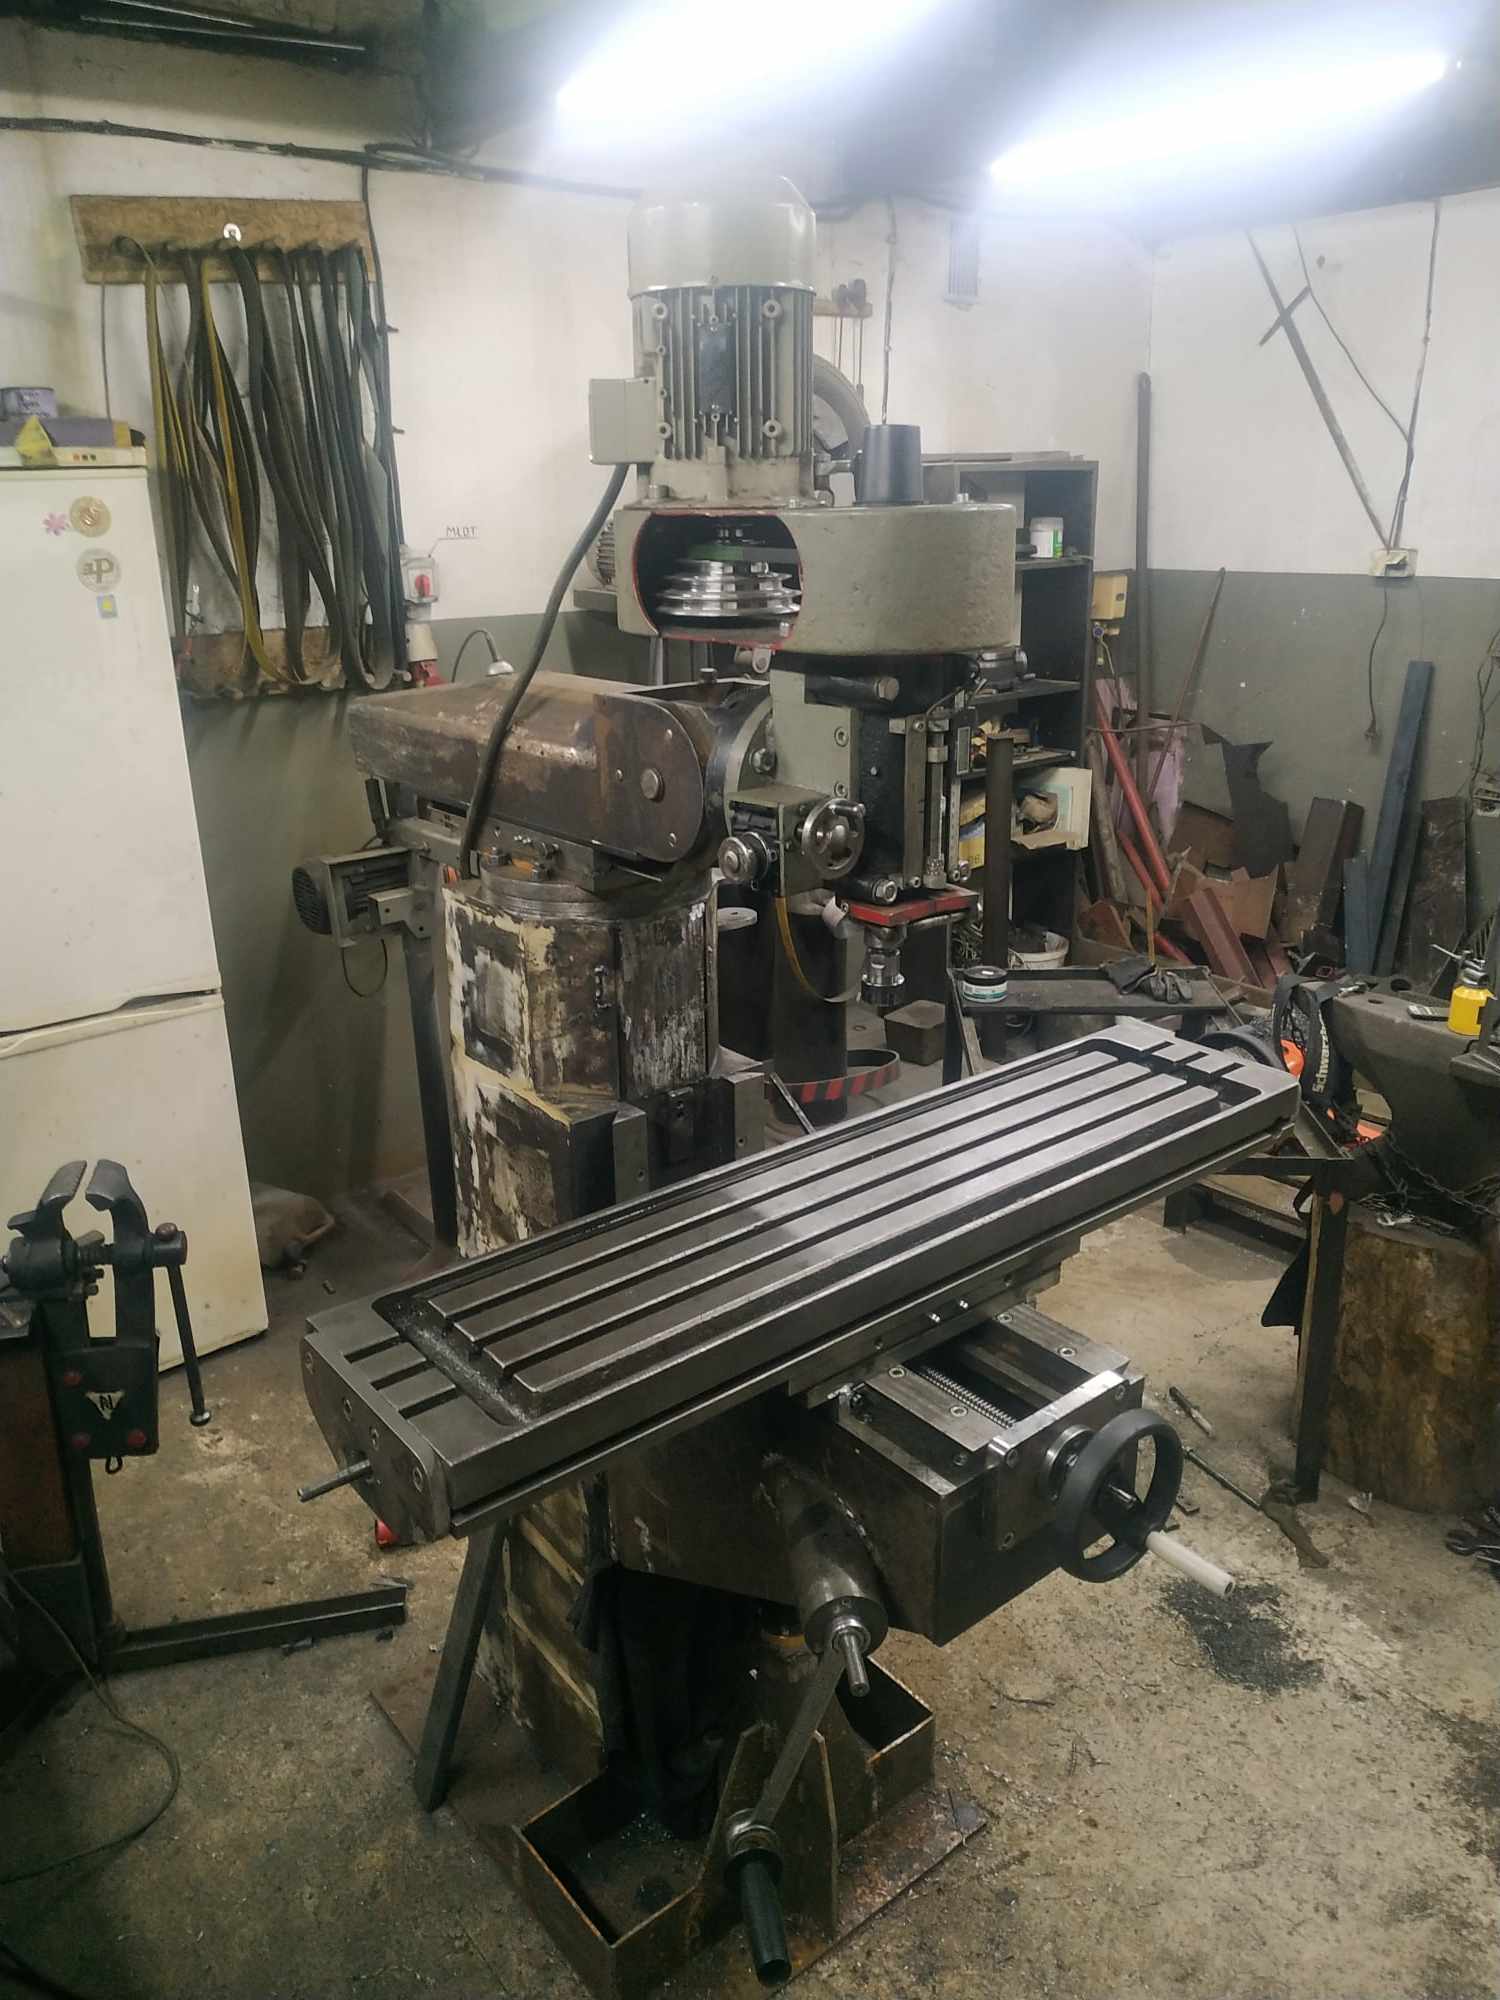
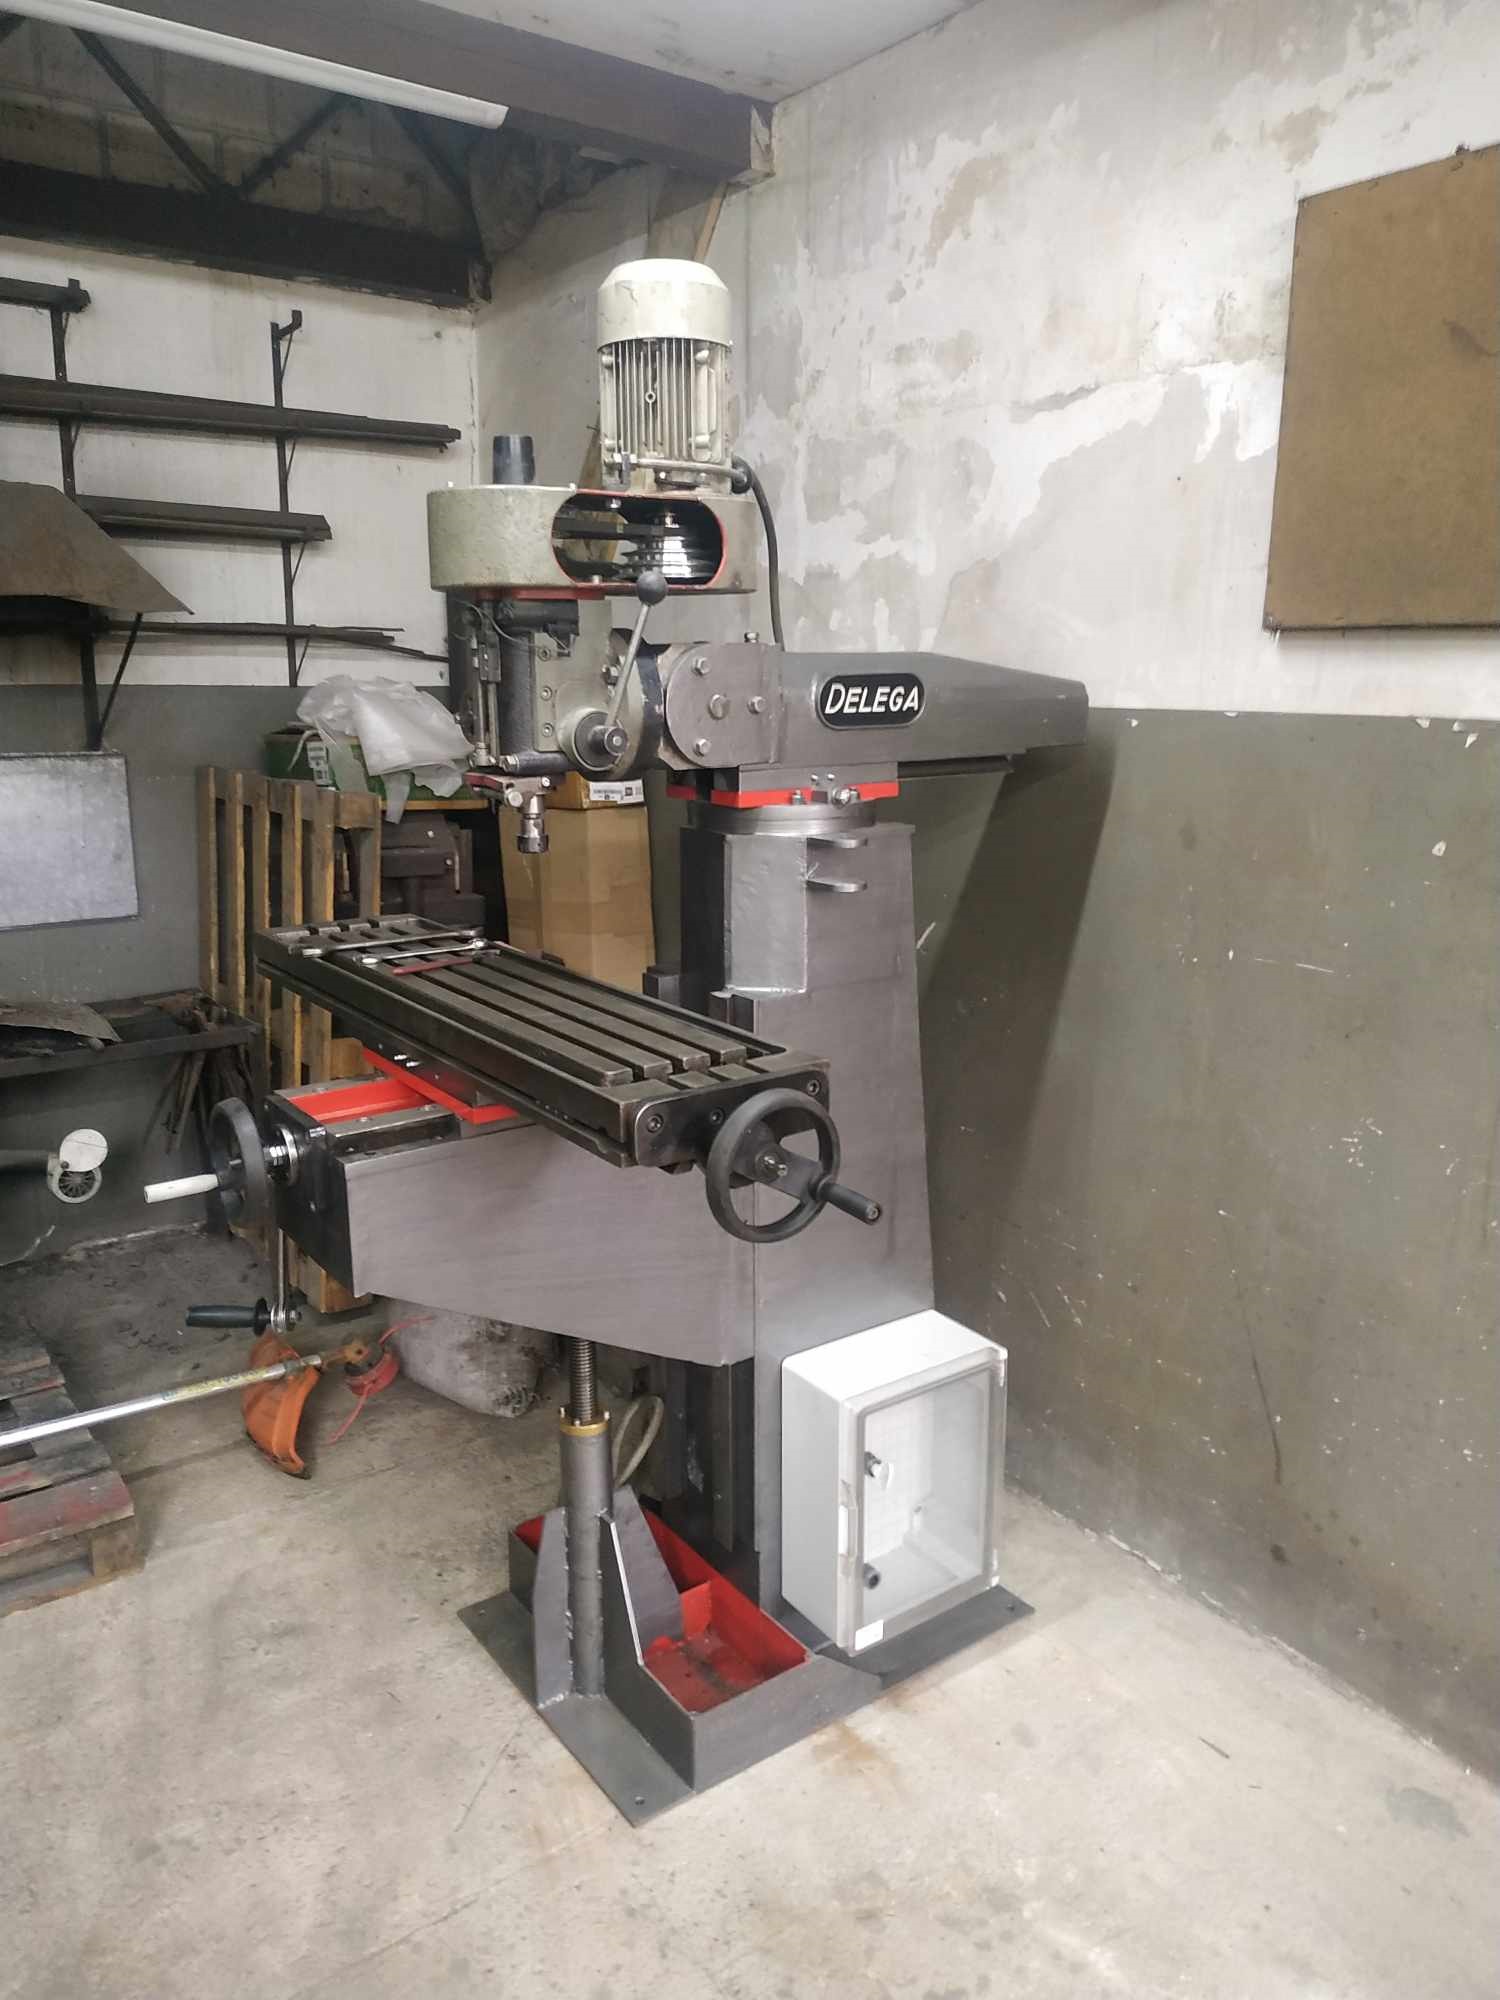
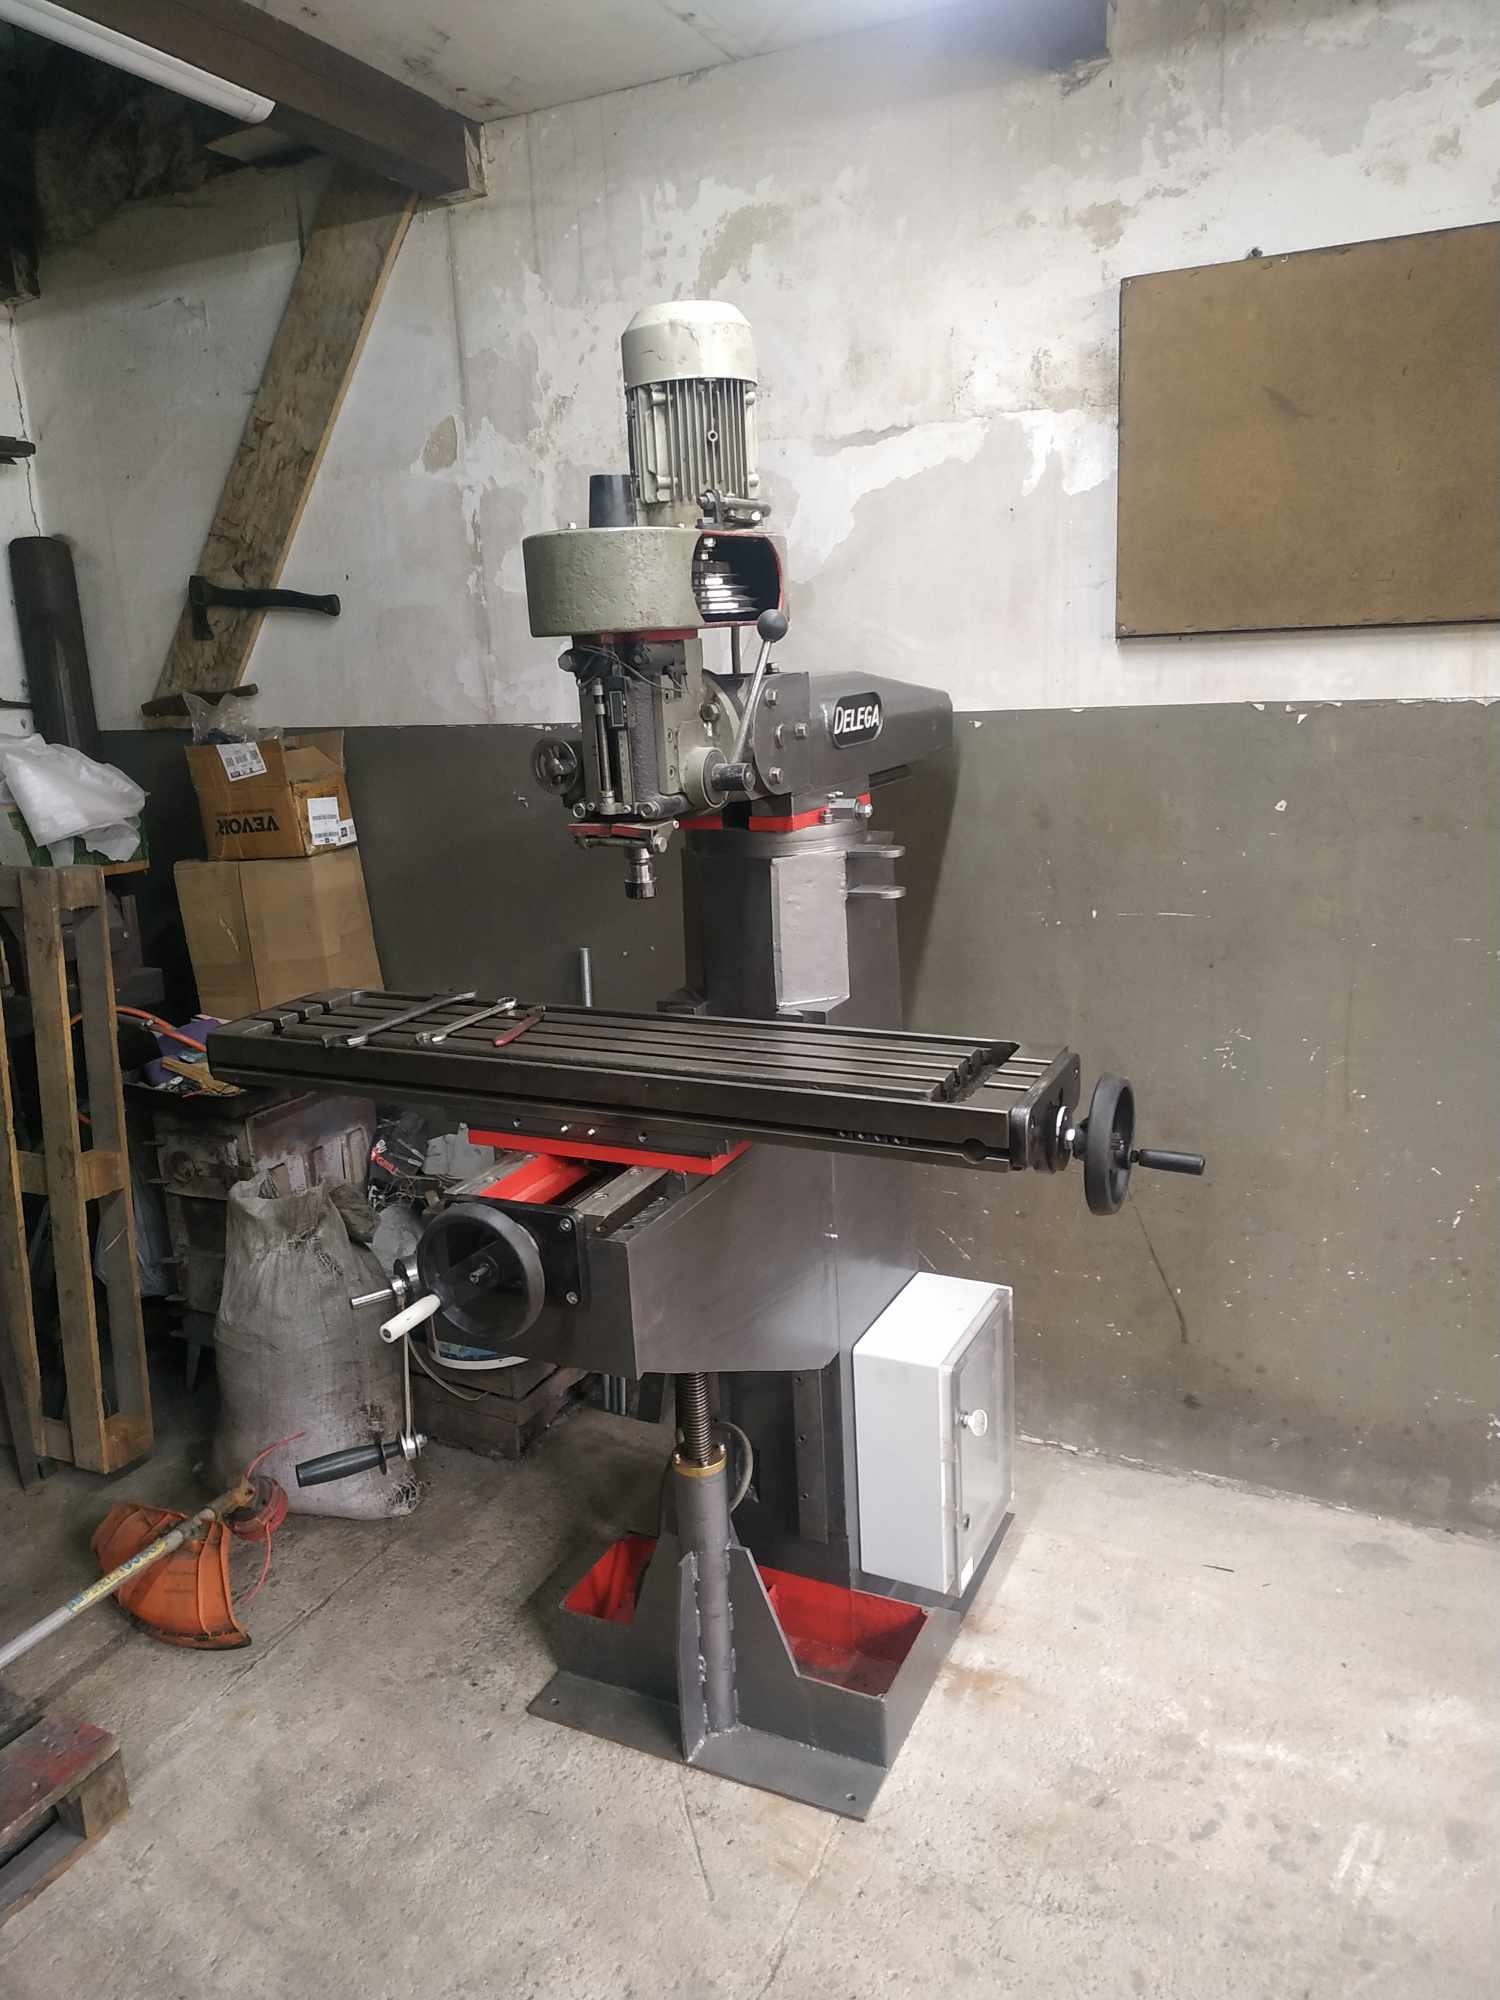
Painted. On final position.
Attachment 47618Attachment 47619
Milling head will be improved and painted later.
<!-- BEGIN /var/www/html/homemadetools/protected/modules/zeus/views/tool/postUpdate.php -->
Thanks SteelCraft! We've added your Milling Machine to our Milling category,
as well as to your builder page: SteelCraft's Homemade Tools. Your receipt:
<div id="blocks"> <div class="block b1 pngfix"> <div class="bimg"> <div> <a href="https://www.homemadetools.net/homemade-milling-machine-2"> <img src="/uploads/269152/homemade-milling-machine-2.jpeg"/> </a> </div> </div> <div class="head pngfix"></div> <div class="left pngfix"></div> <div class="right pngfix"></div> <div class="blockover b1 pngfix"> <div class="title"> <a href="https://www.homemadetools.net/homemade-milling-machine-2">Milling Machine</a> <span> by <a href="https://www.homemadetools.net/builder/SteelCraft">SteelCraft</a></span> </div> <div class="tags">tags: <a href='https://www.homemadetools.net/tag/mill'>mill</a> </div> </div> </div> </div>
<!-- END /var/www/html/homemadetools/protected/modules/zeus/views/tool/postUpdate.php -->
I paid about $500 for my 49x9, I couldnot of built it for 3x that. good work. if it has a harmonic you may be able to fill some portions of it to dampen it.
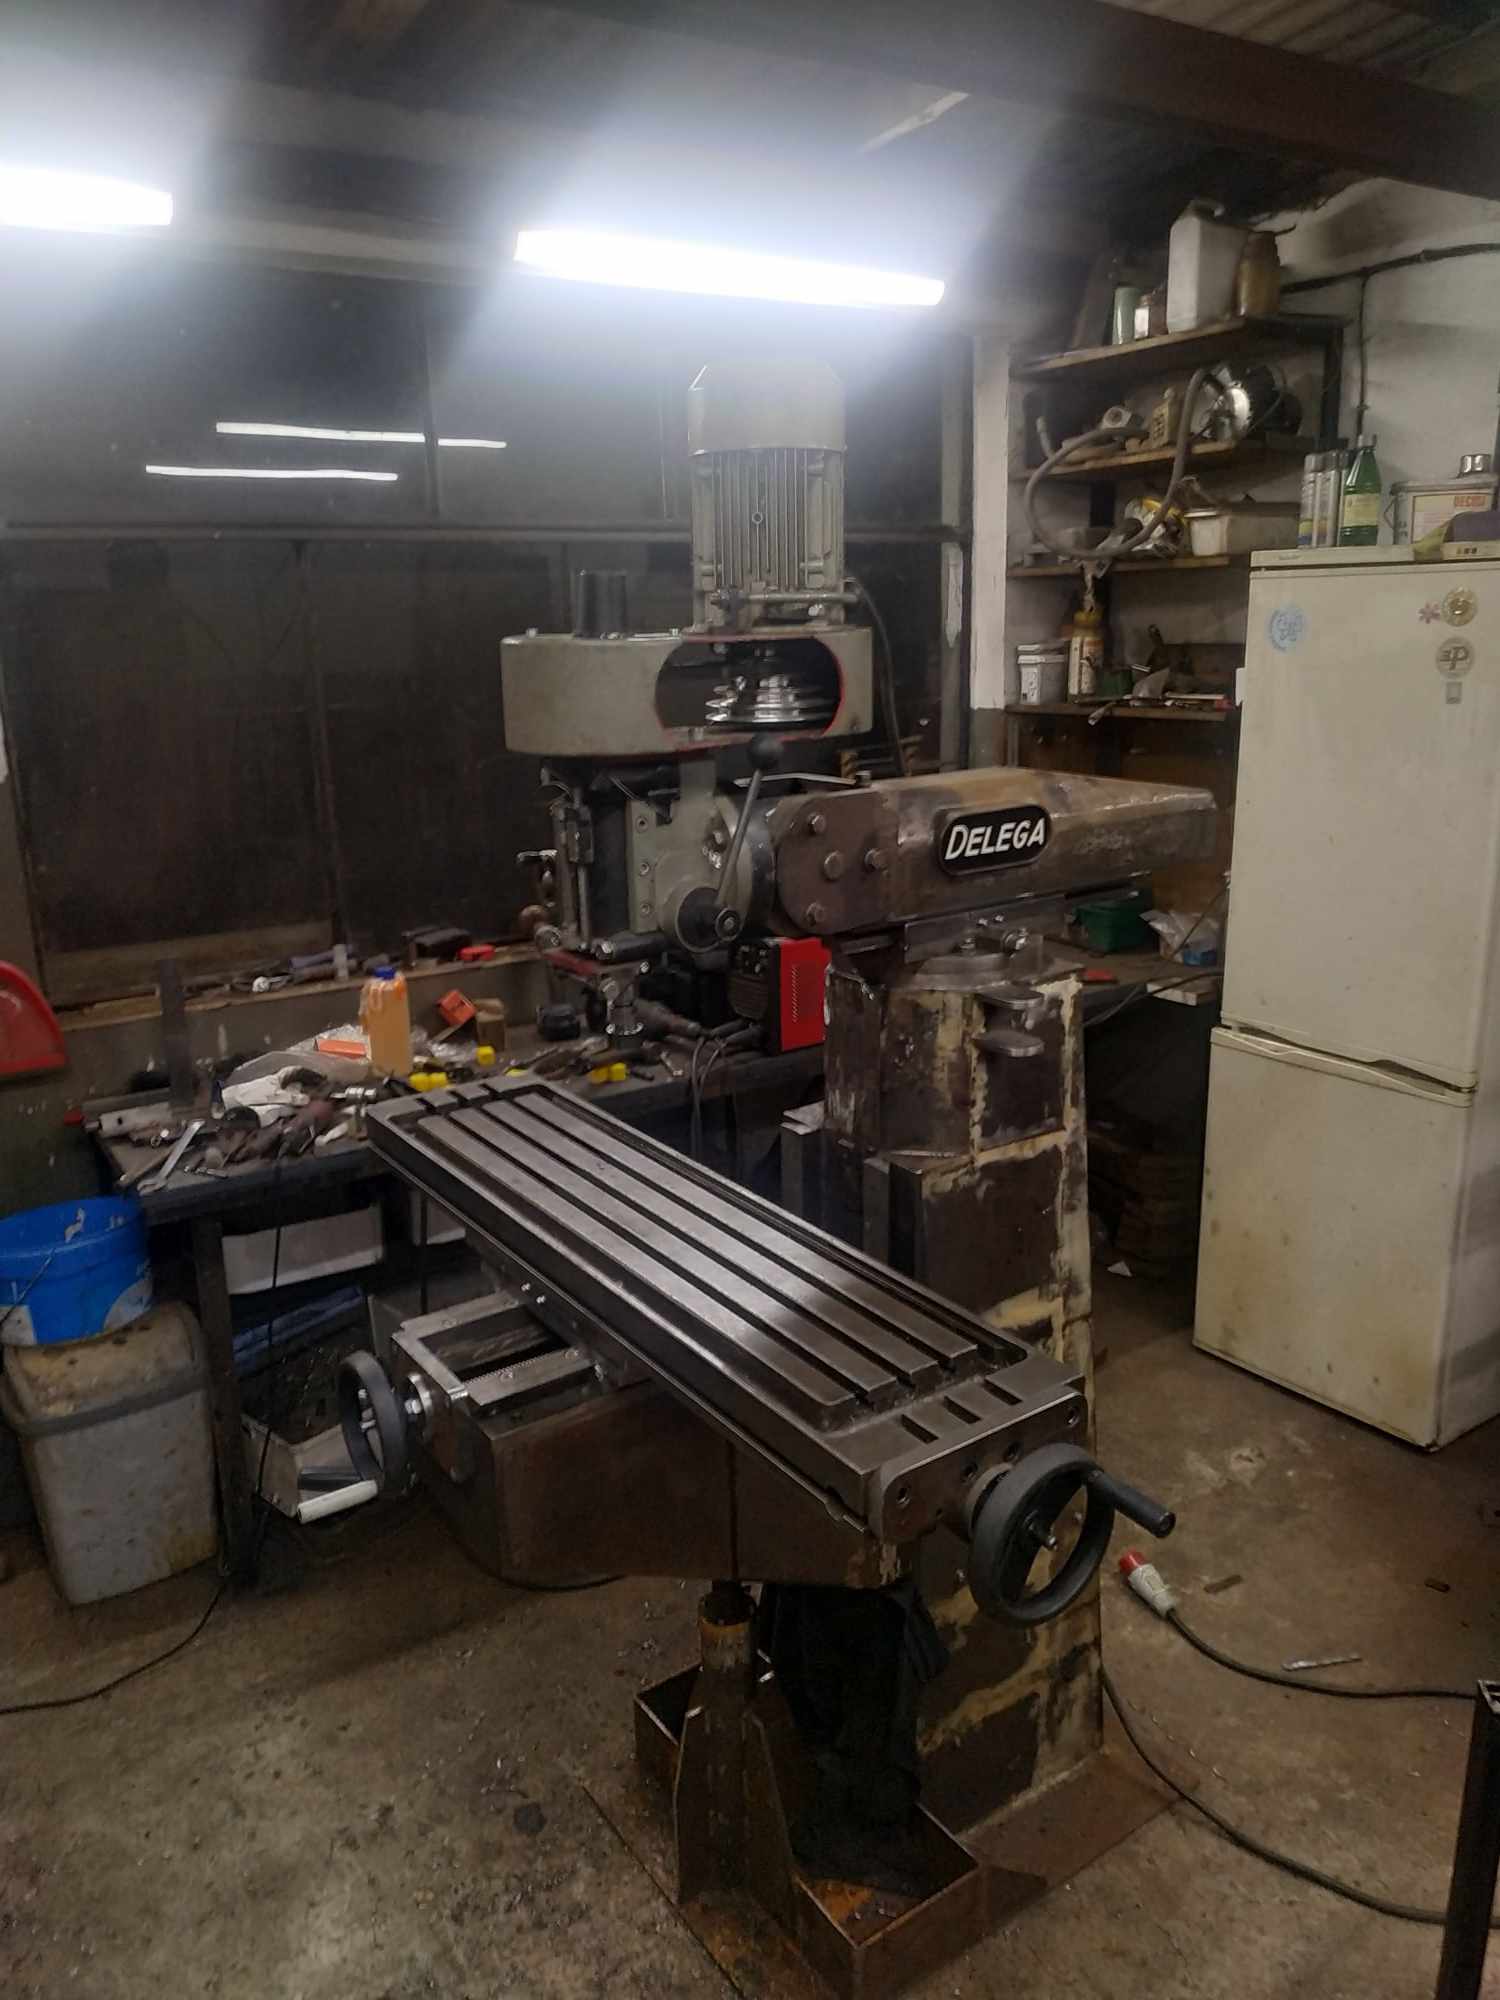
Whole column is filled with compacted sand. Should work fine. New video soon.
sounds good.just dont let it absorb moisture and start rust growing...
New Video!
Part 14: Y axis guides and first real tests.
https://youtu.be/joKyL-fjmgE
I will change spindle bearings preloading system from spring to thread and nuts, pulley cover and spindle pulley makes terrible noise - it will be improved.
Overall I'm happy with results.
Congratulations SteelCraft - your milling machine is the Homemade Tool of the Month for June 2024!
This is an epic build that we have been following for years, and a worthy winner of our first Homemade Tool of the Month contest.
Some more good builds from June:
Dremel EZ Lock Modification by ductape
Current Sensor by BuffaloJohn
Thickness Caliper by olderdan
Leadscrew Half-Nut by h7eh7e
Sandblaster Foot Pedal by garagehobbyist
Electrical Connector Filing Template by Occasional machinist
Chamfered Spacer Cutting Tool by Mook
Soil Compactor by warsztatOdZera
Snake Catching Tools by desbromilow
SteelCraft - You'll be receiving a $250 cash prize, in your choice of Amazon, PayPal, or bitcoin. Please PM me your current email address and prize choice and I'll get it sent over right away.
And, you'll now notice the new four-column award in the awards showcase in your postbit, visible beneath your username:
https://www.homemadetools.net/forum/...fTheMonth1.pnghttps://www.homemadetools.net/forum/...MonthIcon1.png
Thank you very much for the prize. This notification was nice suprise in my brithday! :D
Ofcourse project continues:
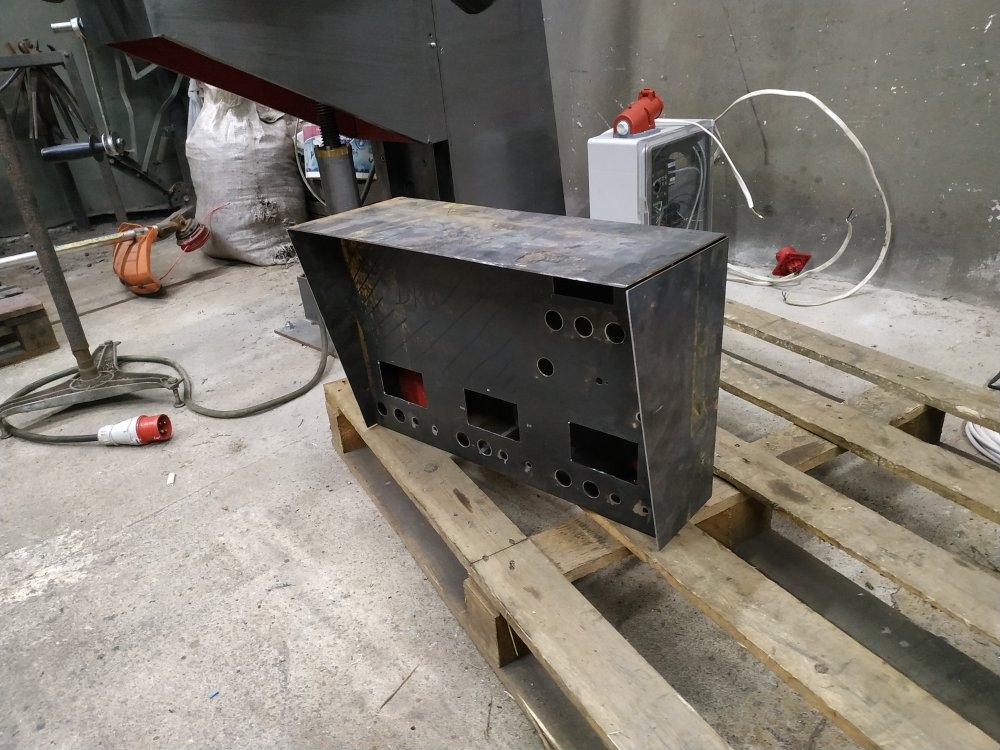
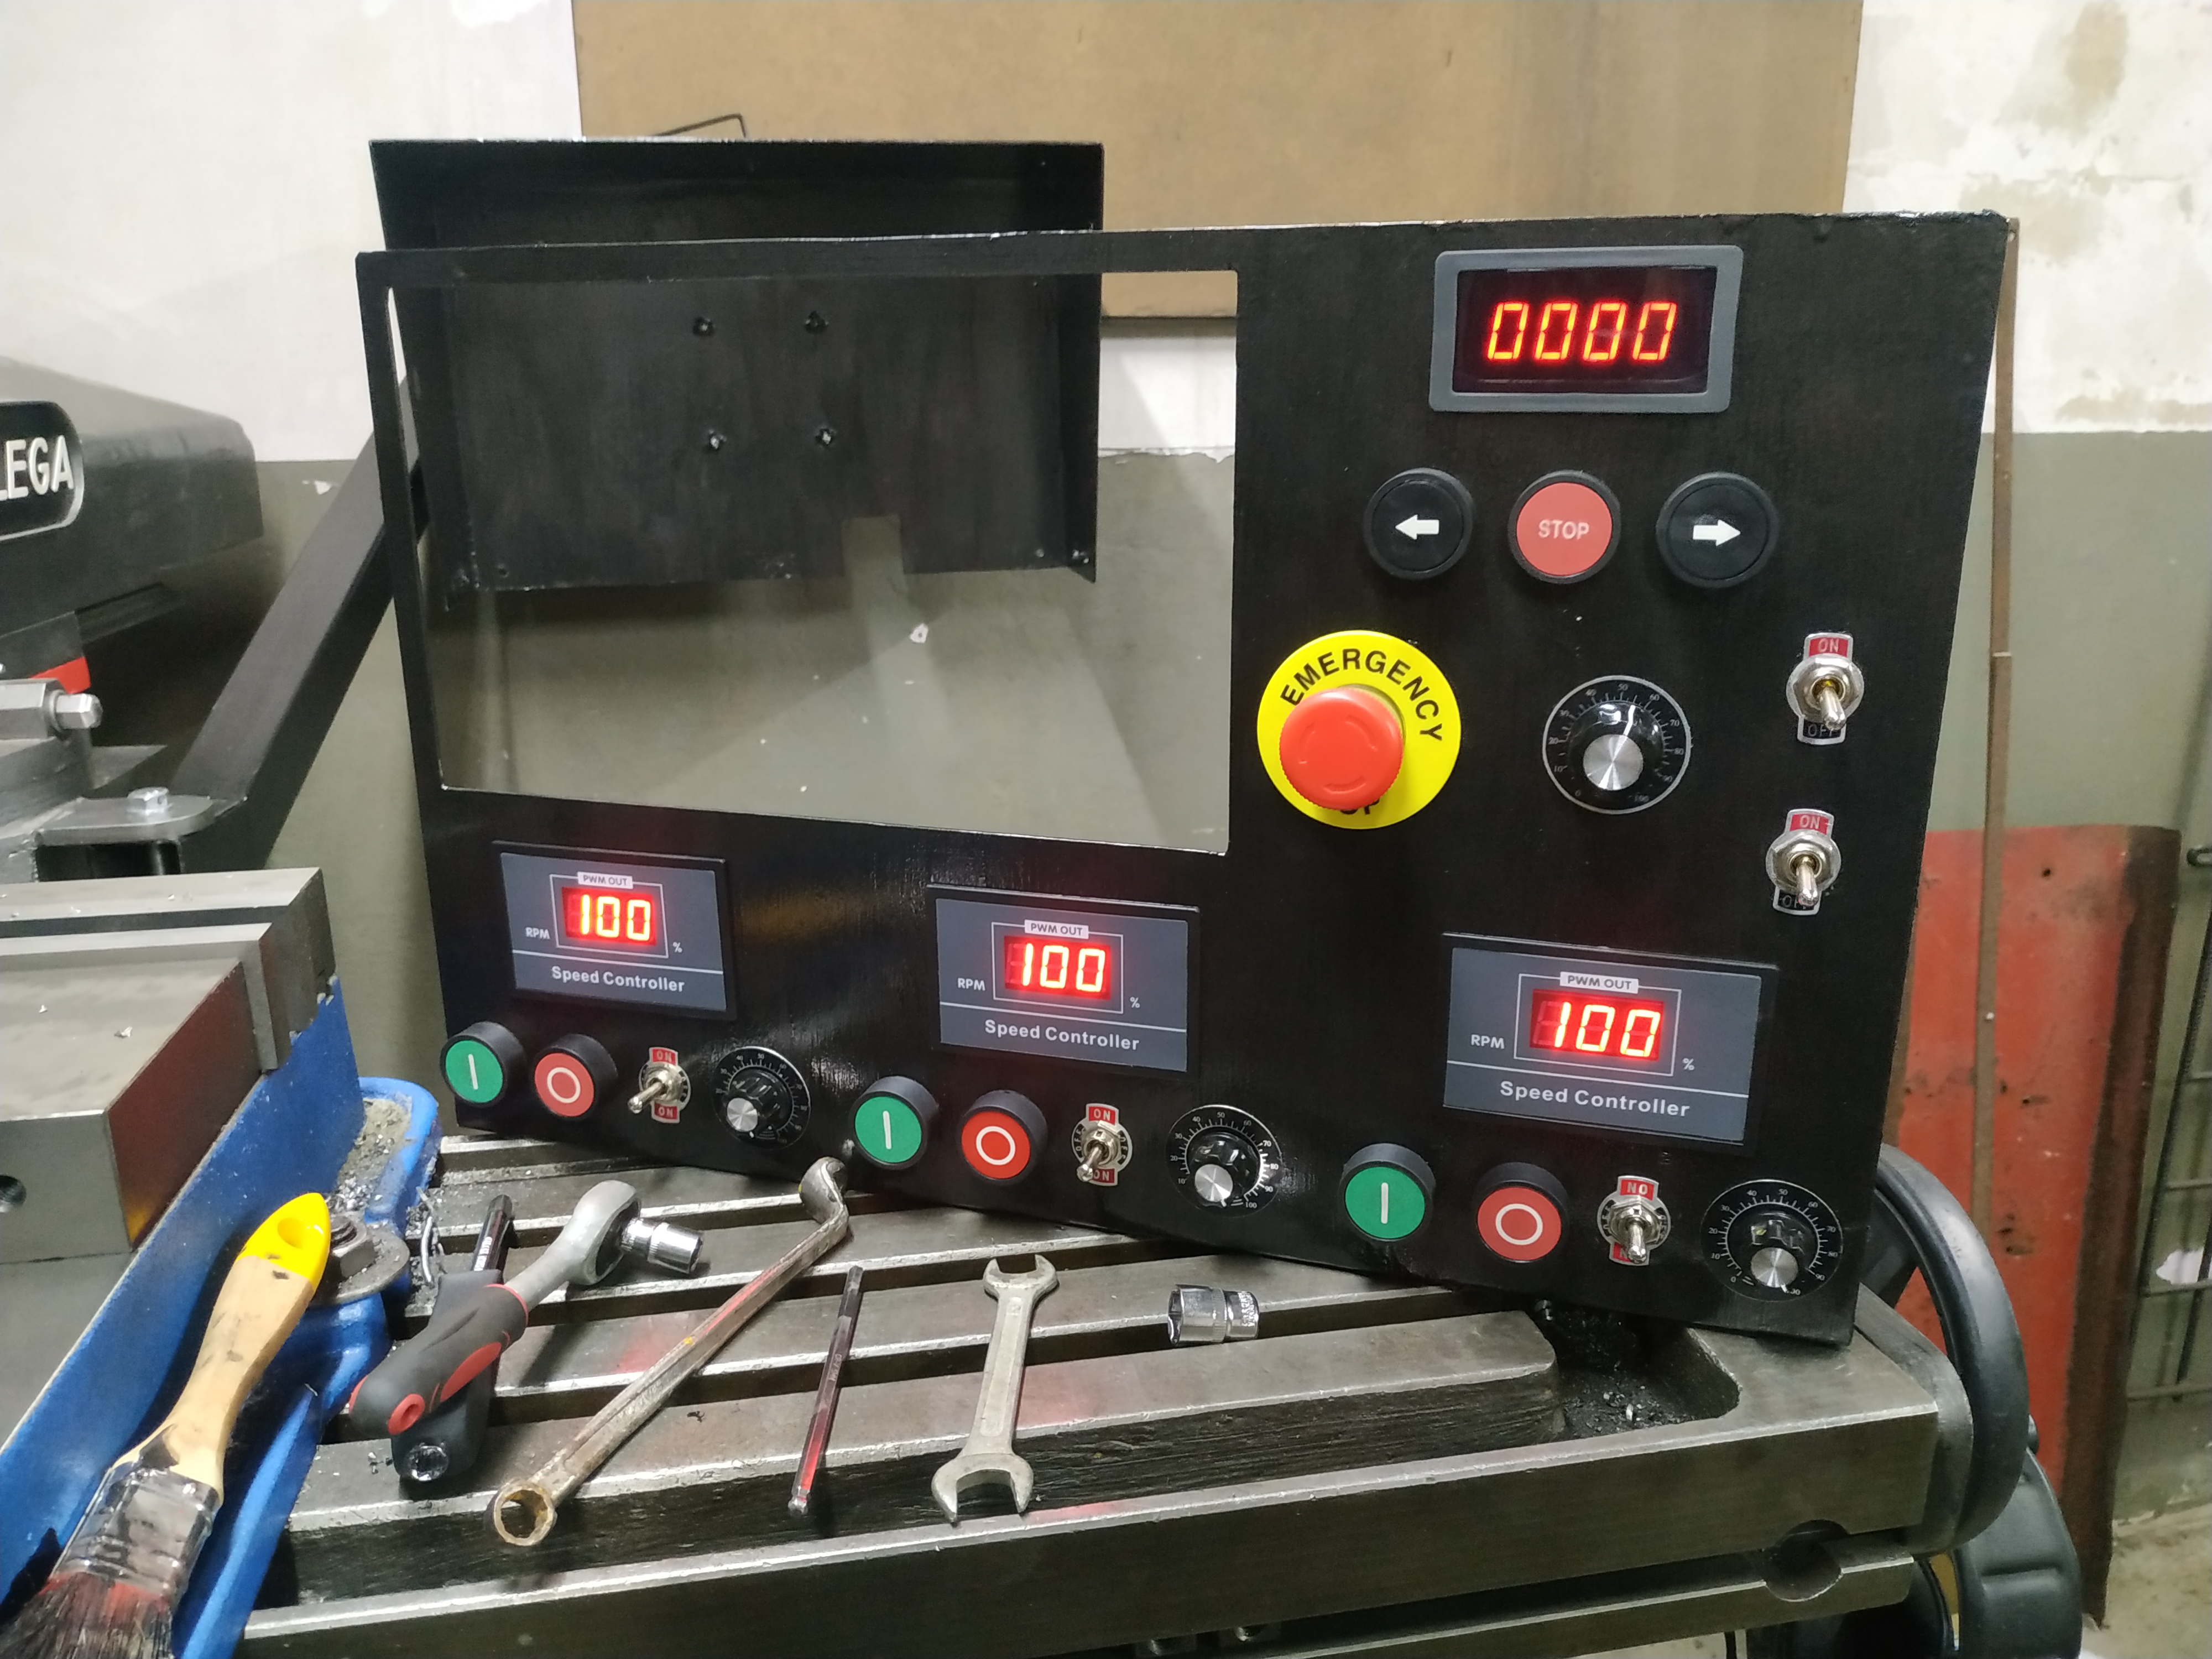
Currently I'm working on control panel for my milling machine.
Swivel arm is made from 50x50x2 [mm] square tube:
Attachment 47693
Box for electronics and switches is made from 2 [mm] steel sheet (a little bit overkill but I don't like when whole thing bends while pushing the buttons):
Attachment 47694
This big area in the left corner is left for DRO lcd screen. I won't cut it untill I buy one. Cutting too big window would be fatal failure for apperance of whole thing.
Congratulations, and happy birthday!
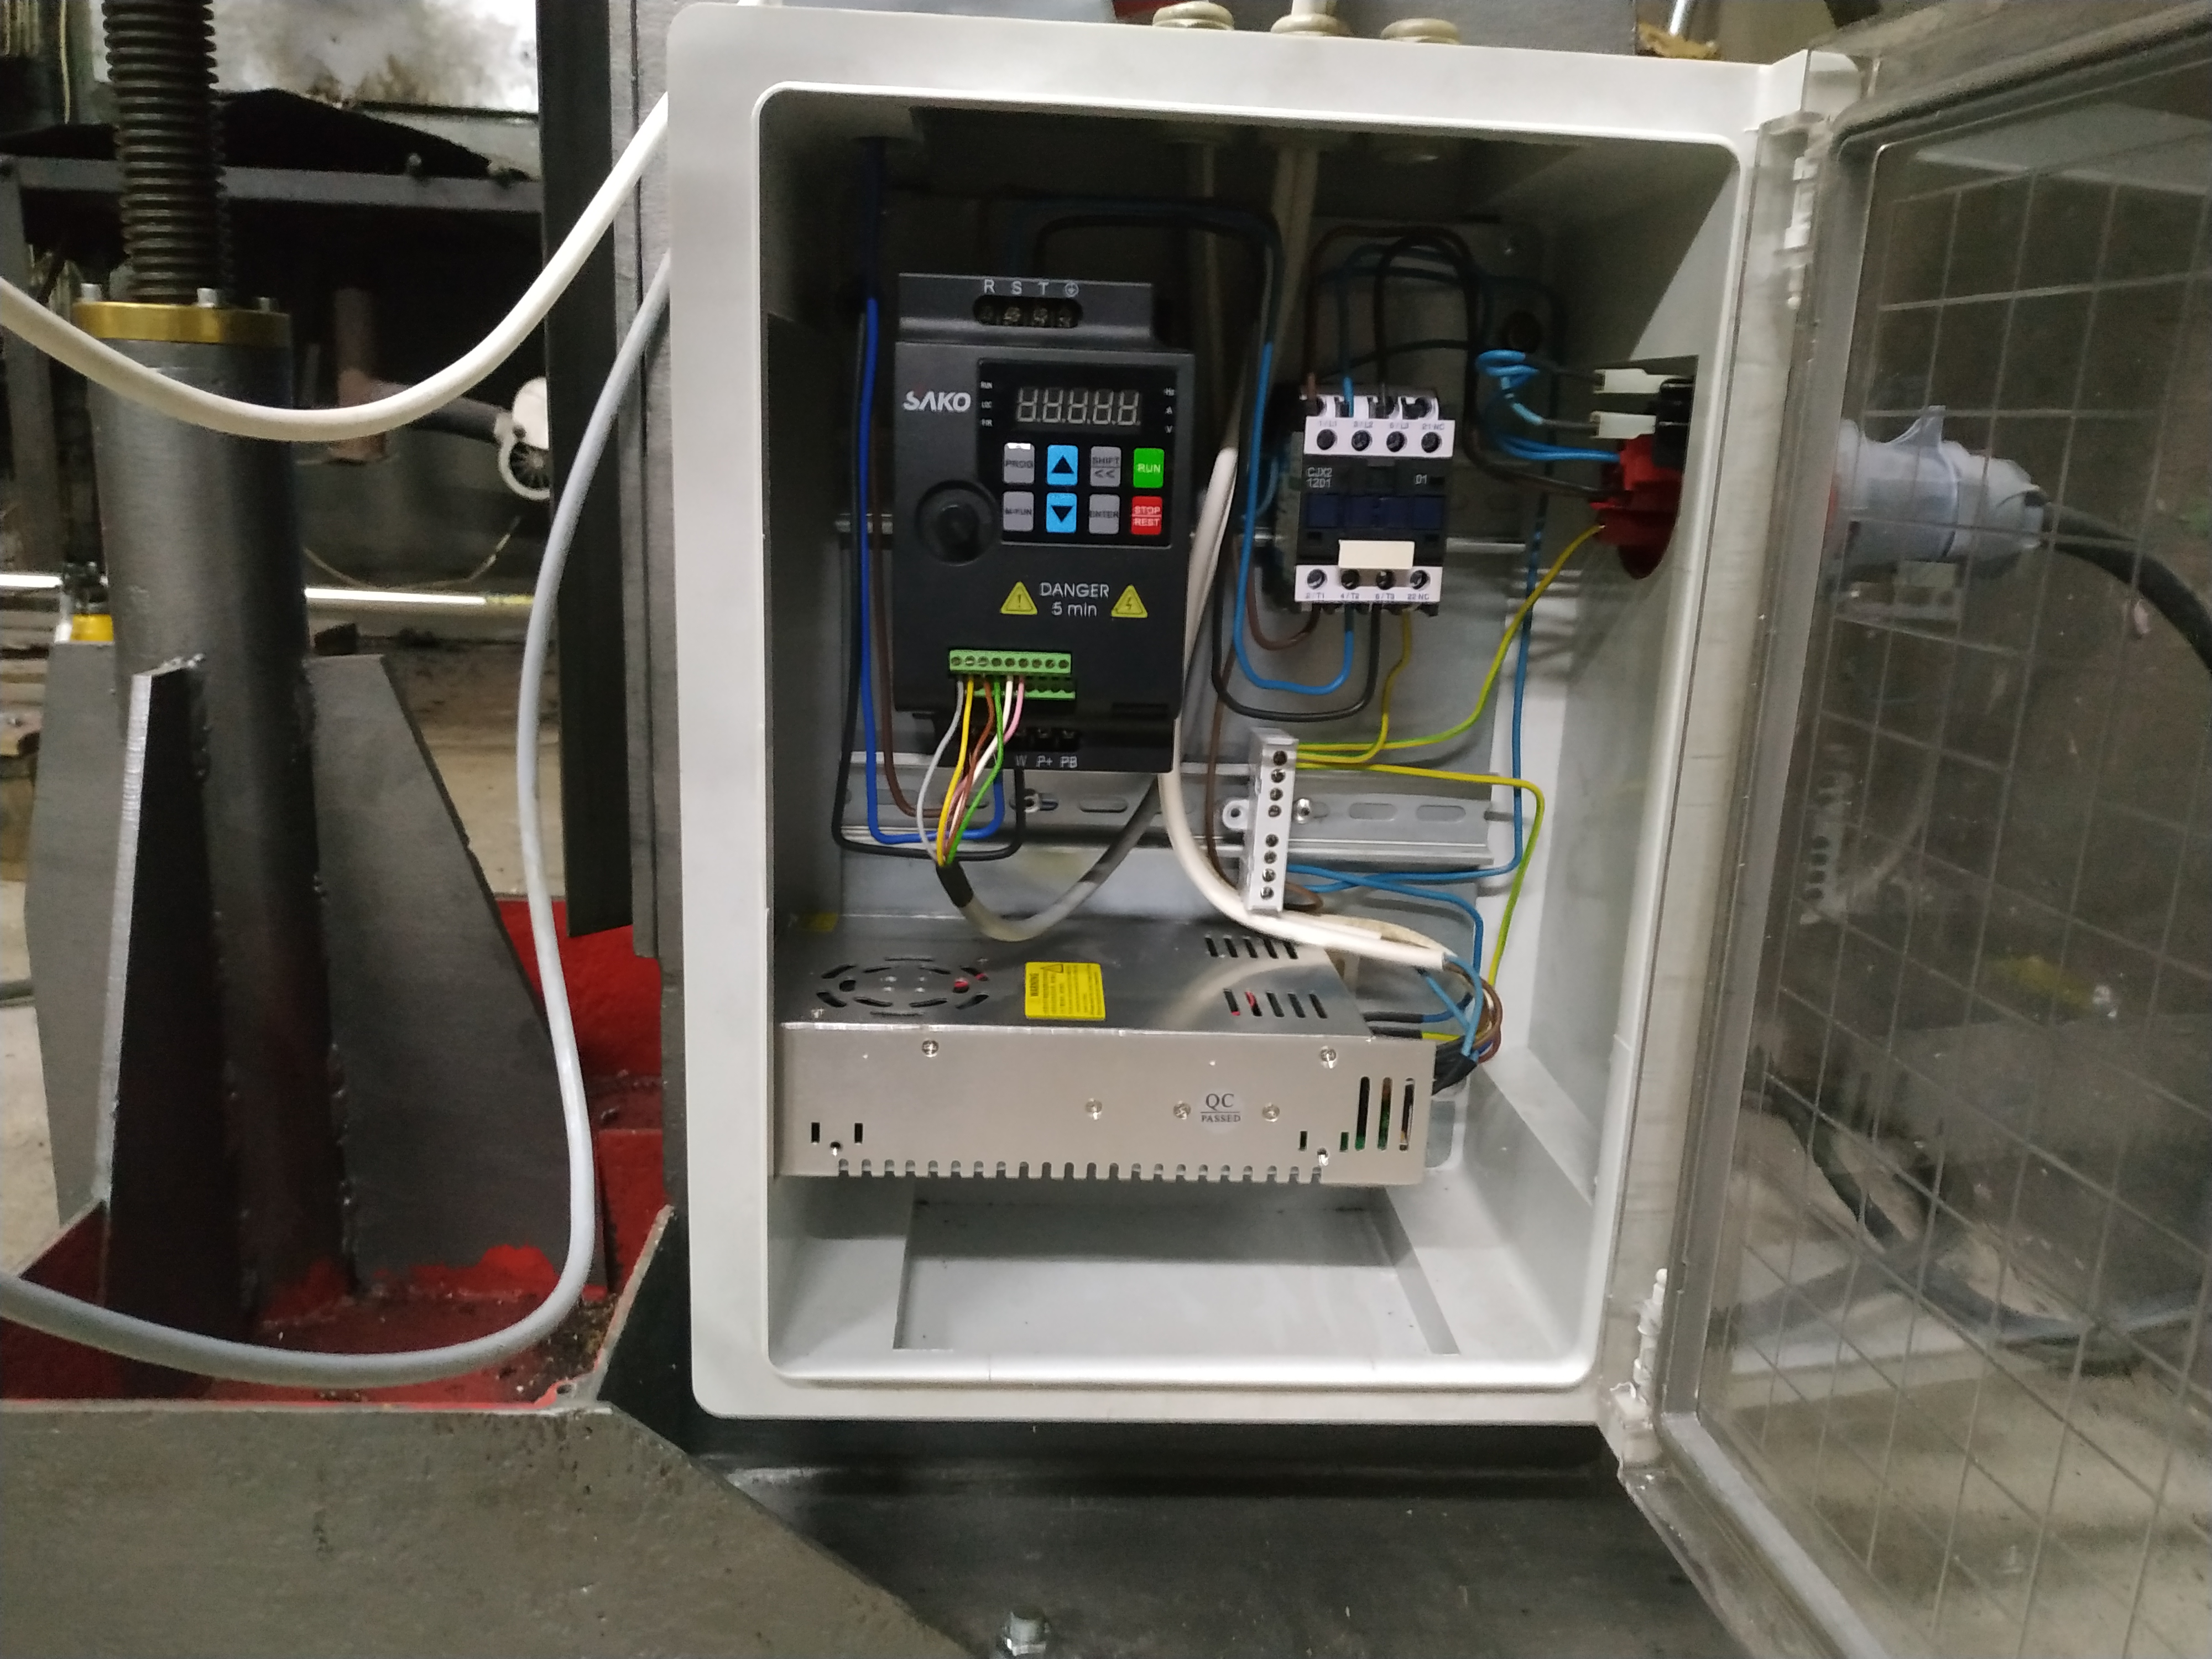
I did some wiring in control panel. I also bought DRO but lcd screen got damaged during transport and now I'm waiting for screen replacement.
Attachment 47810
Attachment 47812
Attachment 47811
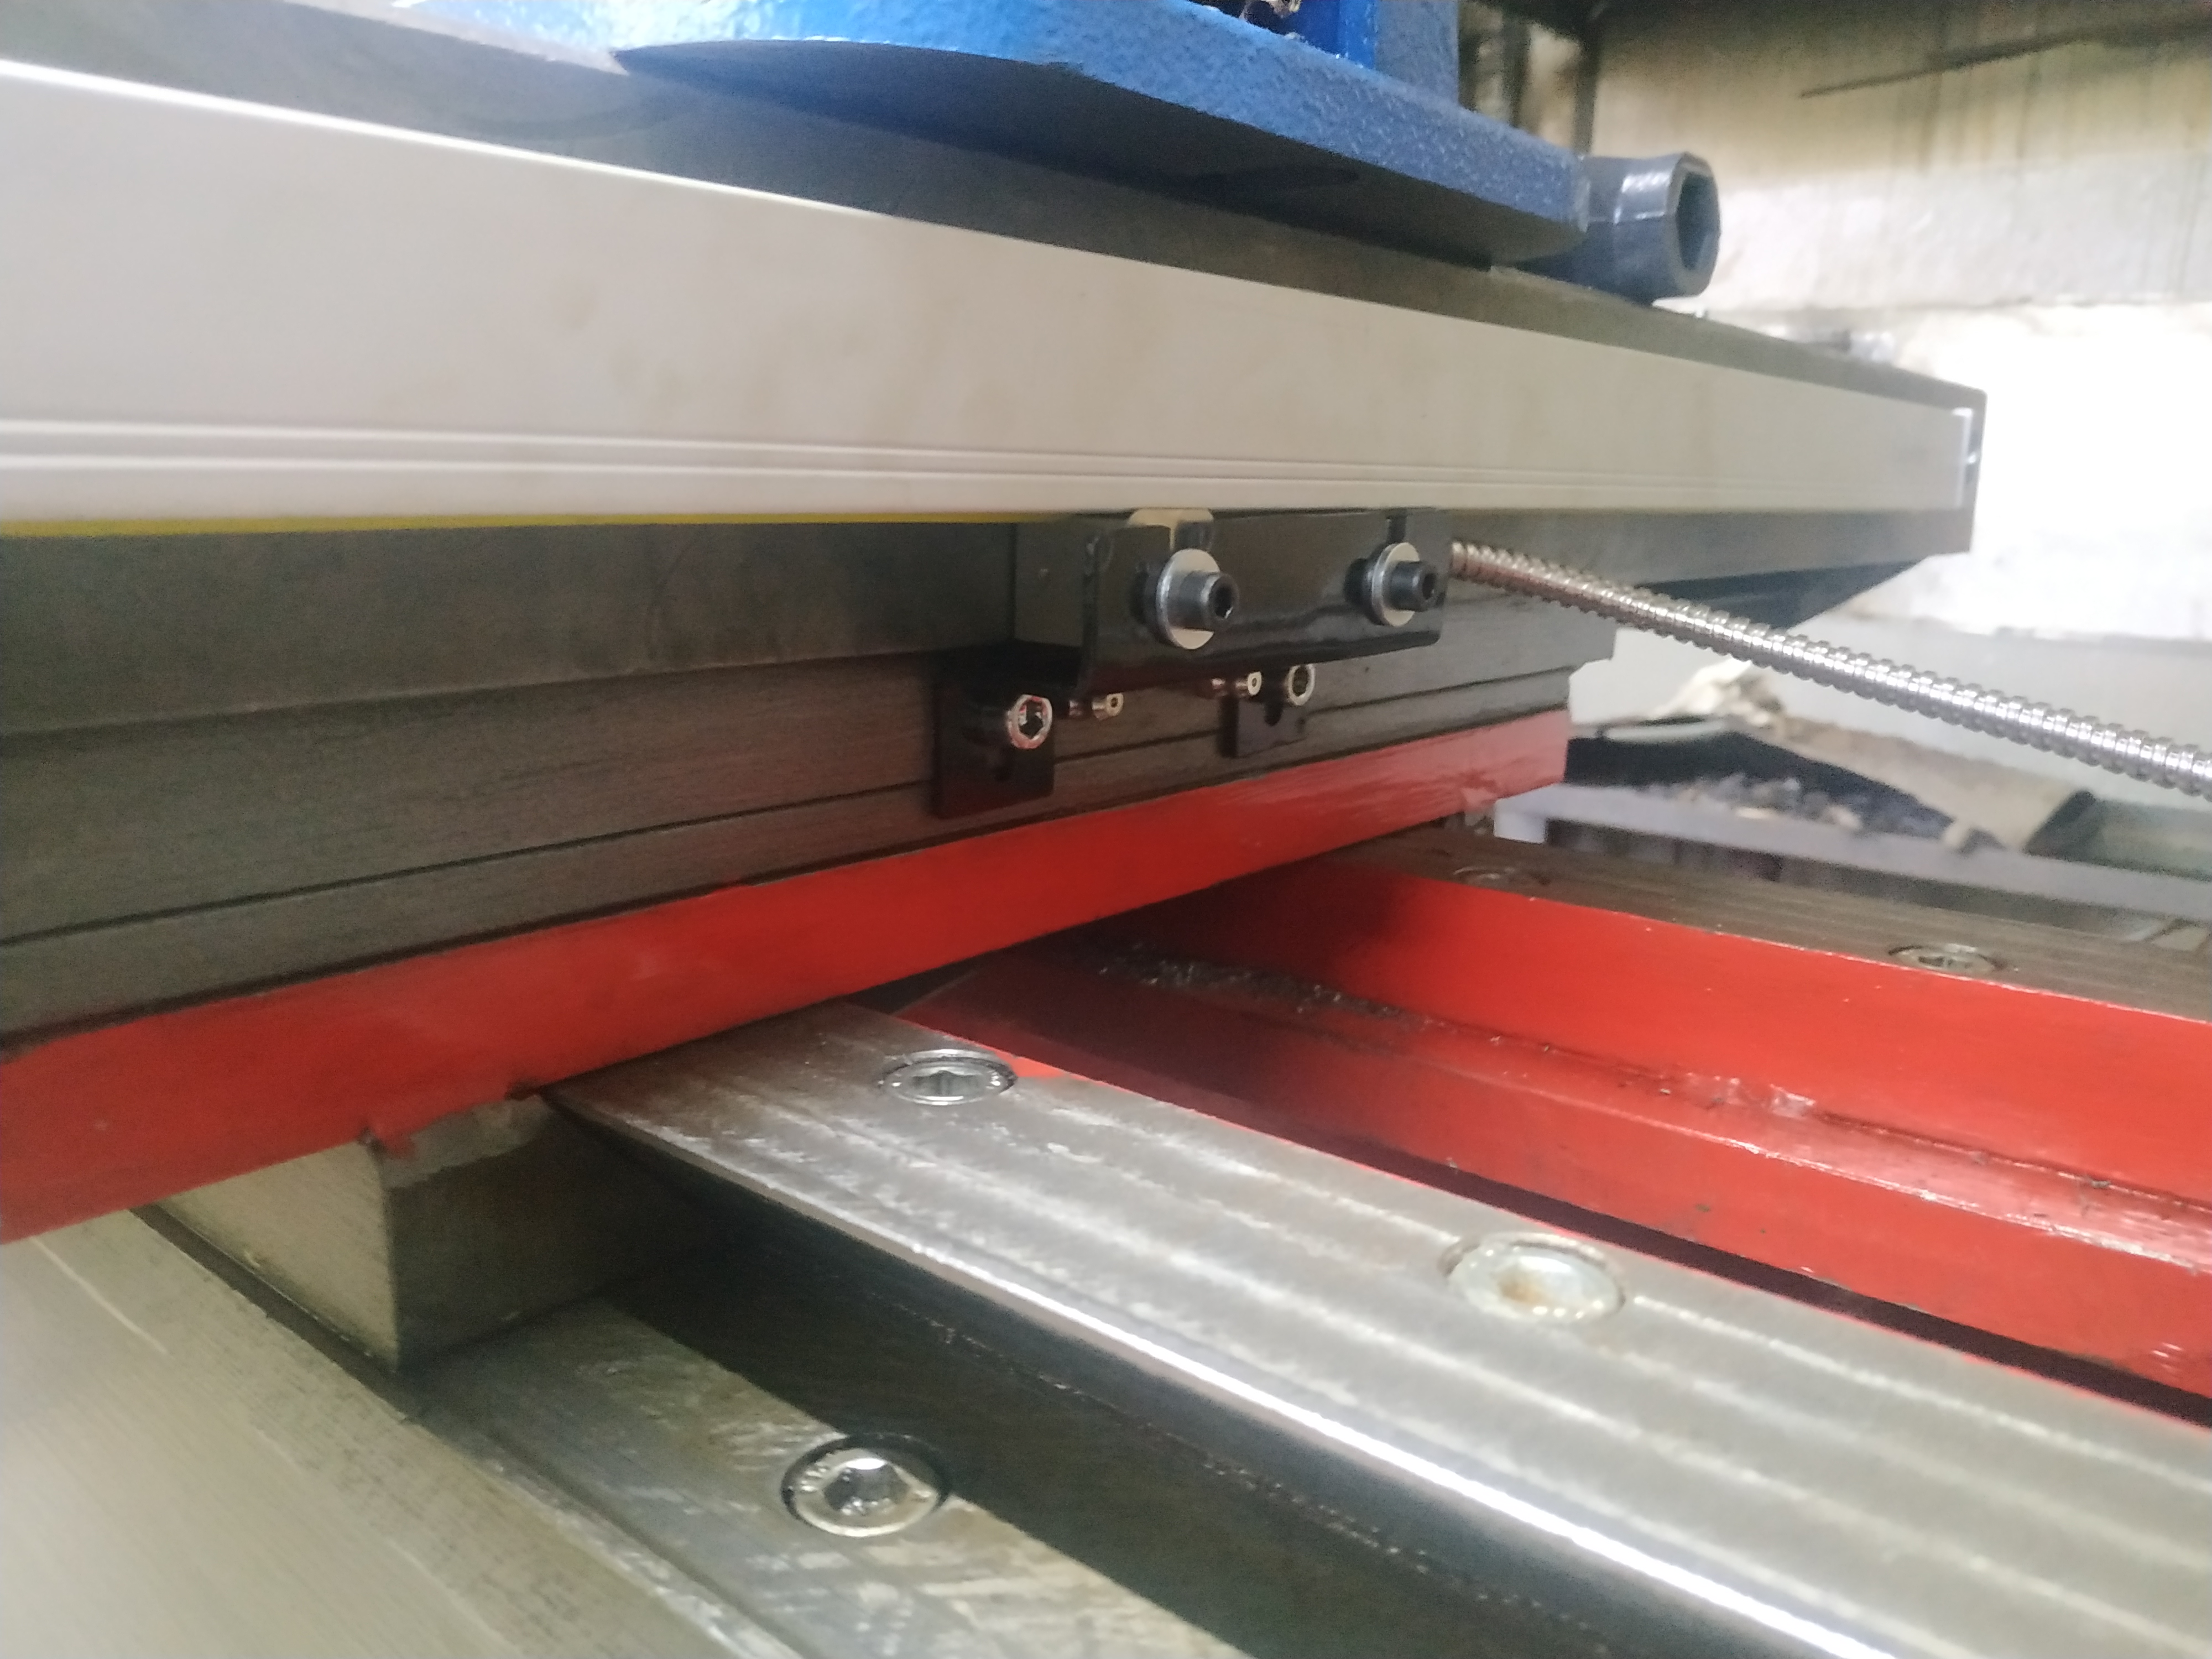
Still waiting for new lcd screen, meanwhile I installed linear scales with covers.
Attachment 47831
Attachment 47832
I have to find a nice solution for cable managment.
These are going to be great additions. The linear scales will allow easier milling work.
Mark
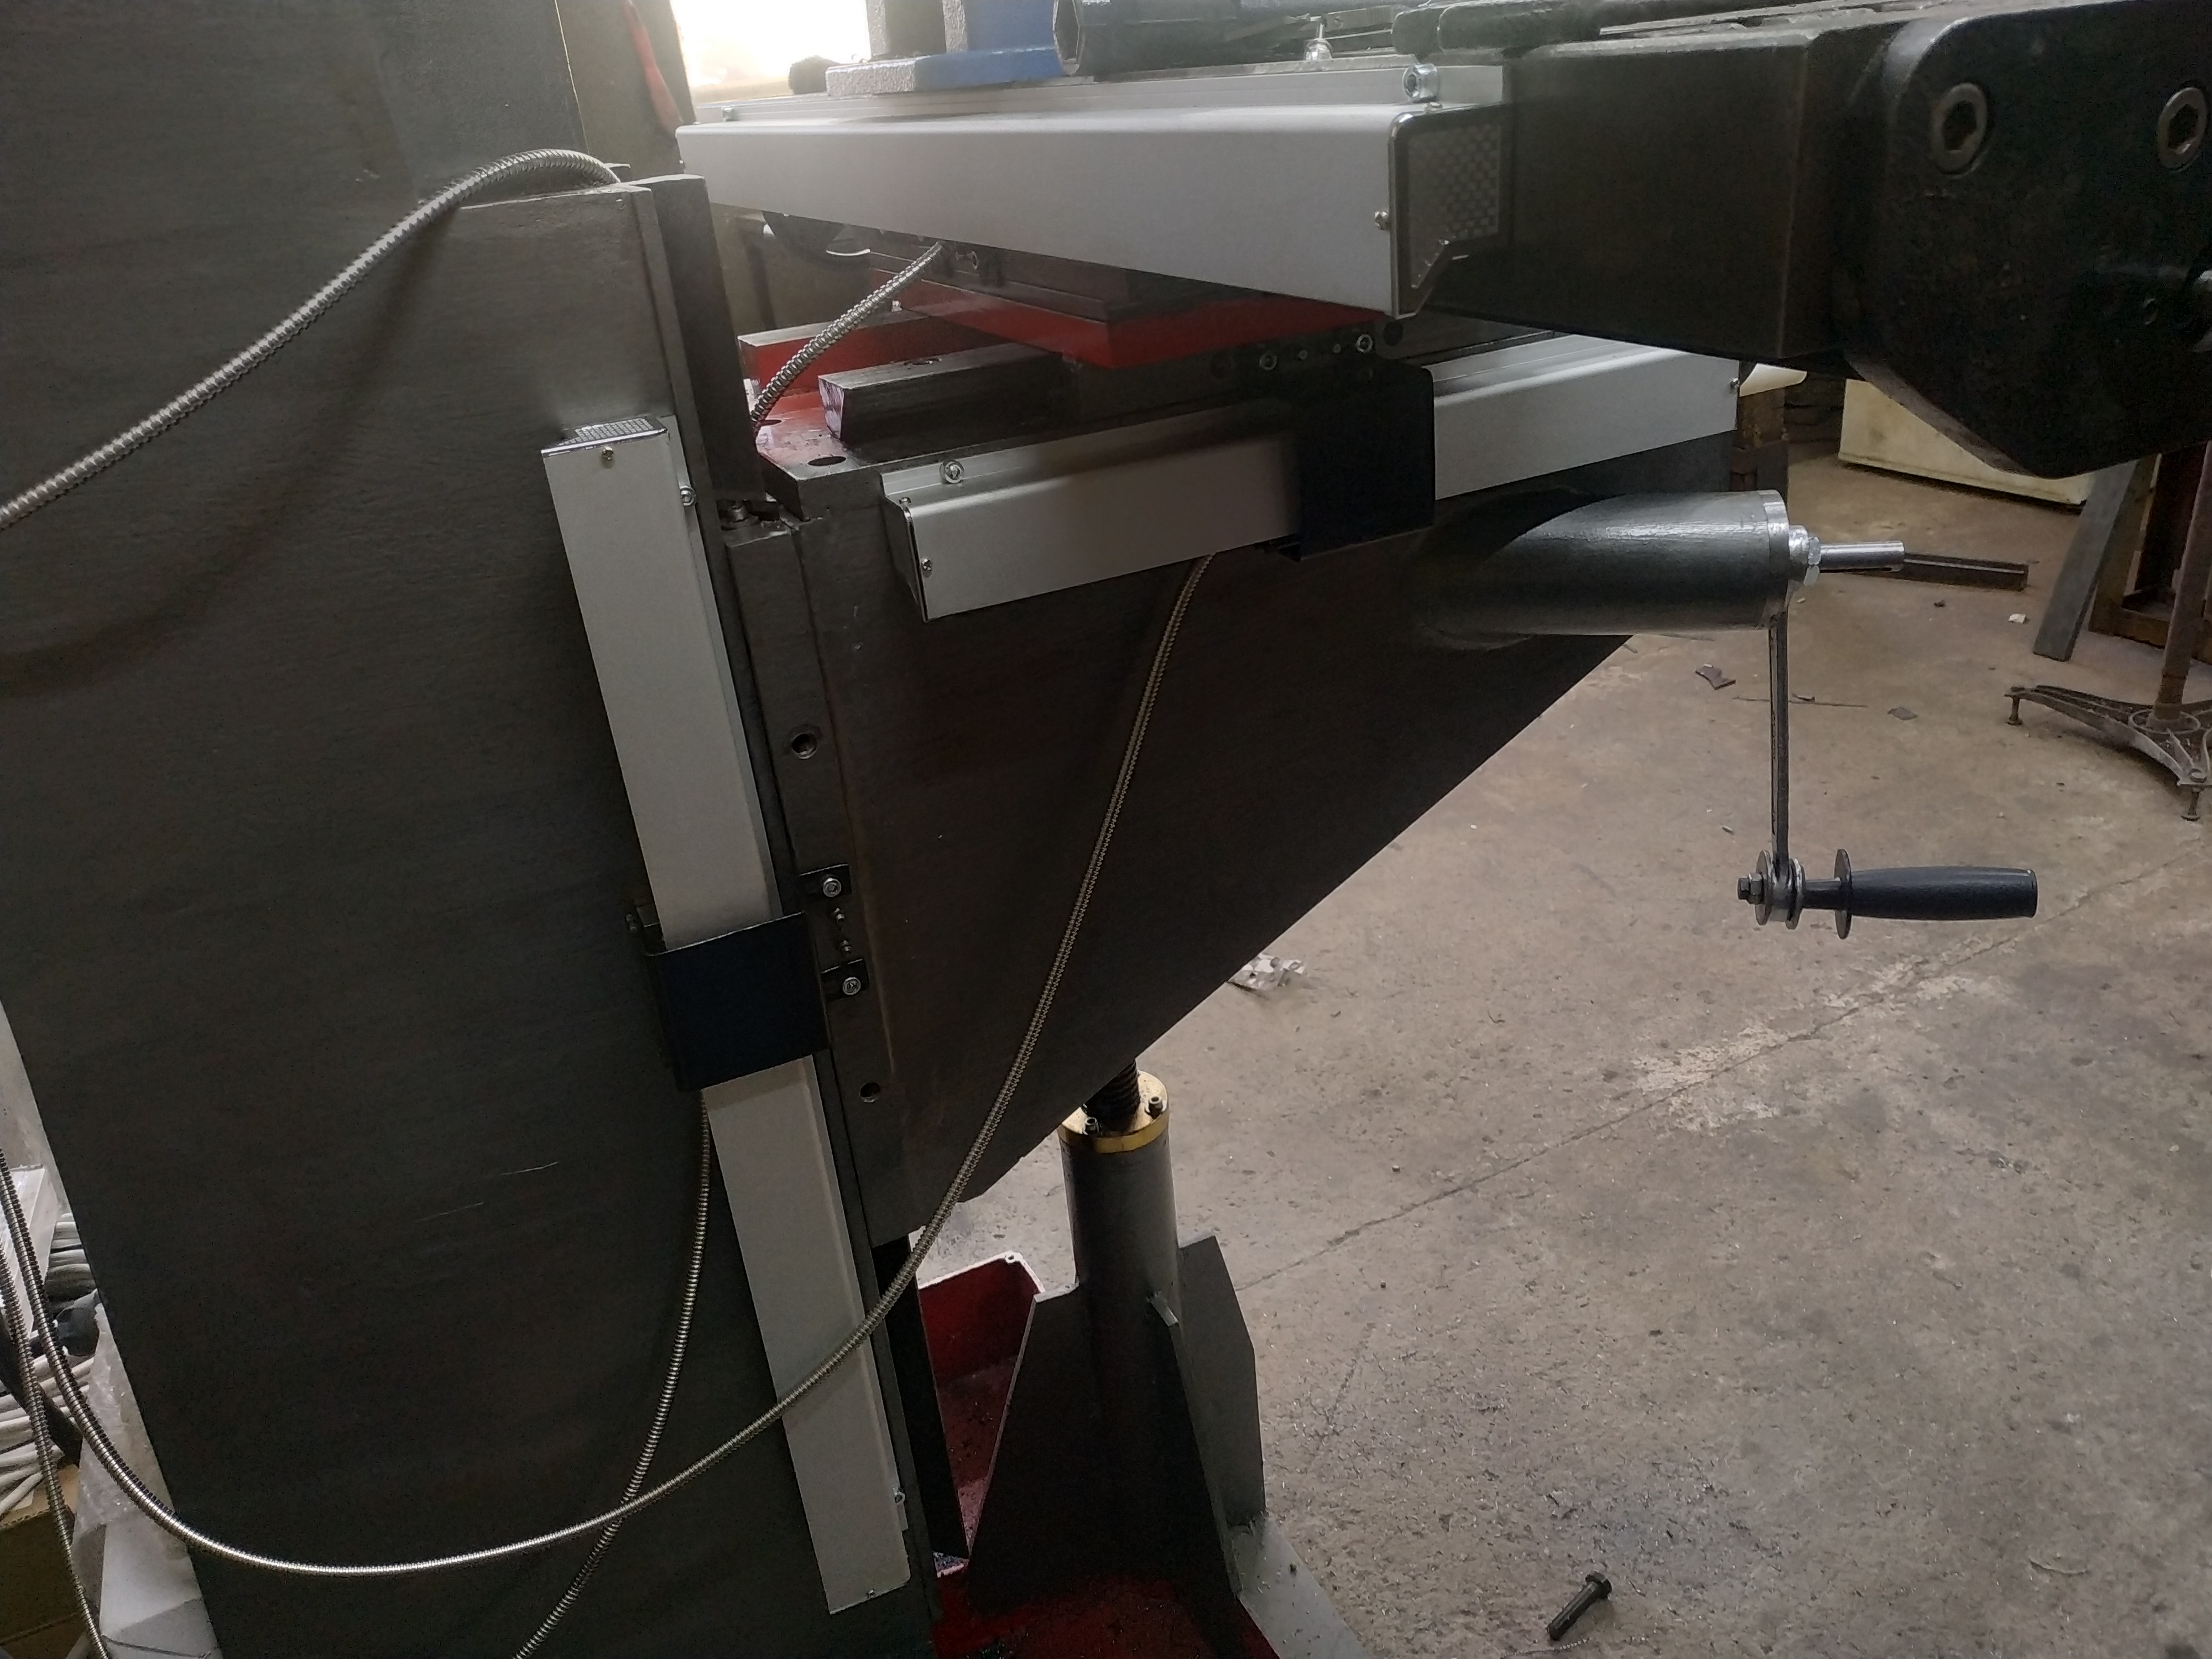
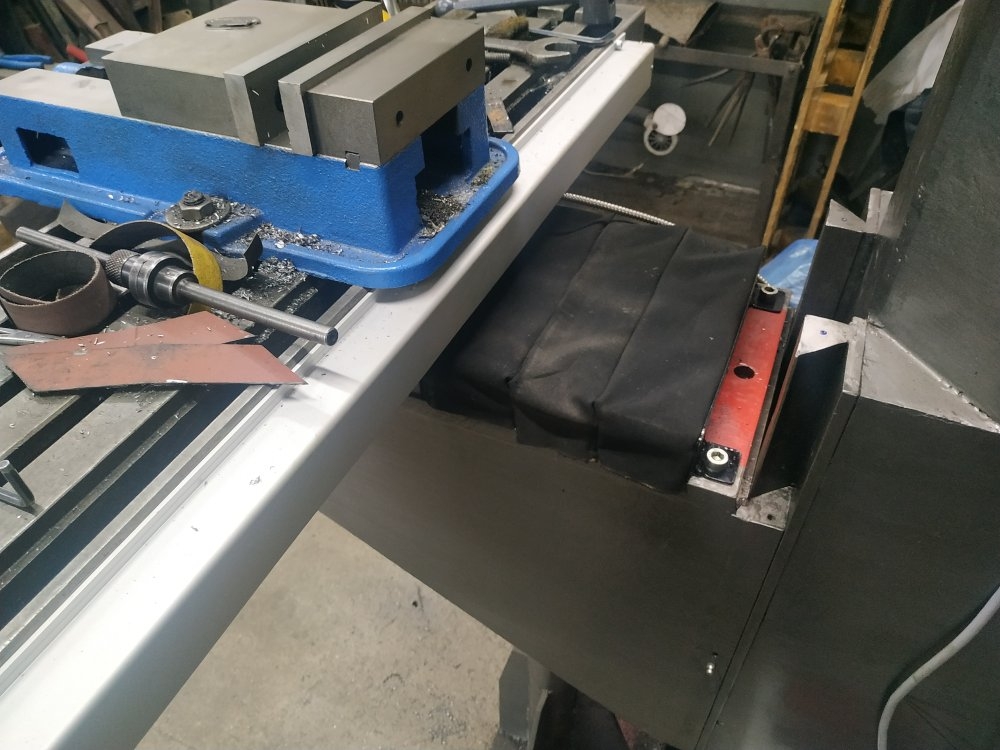
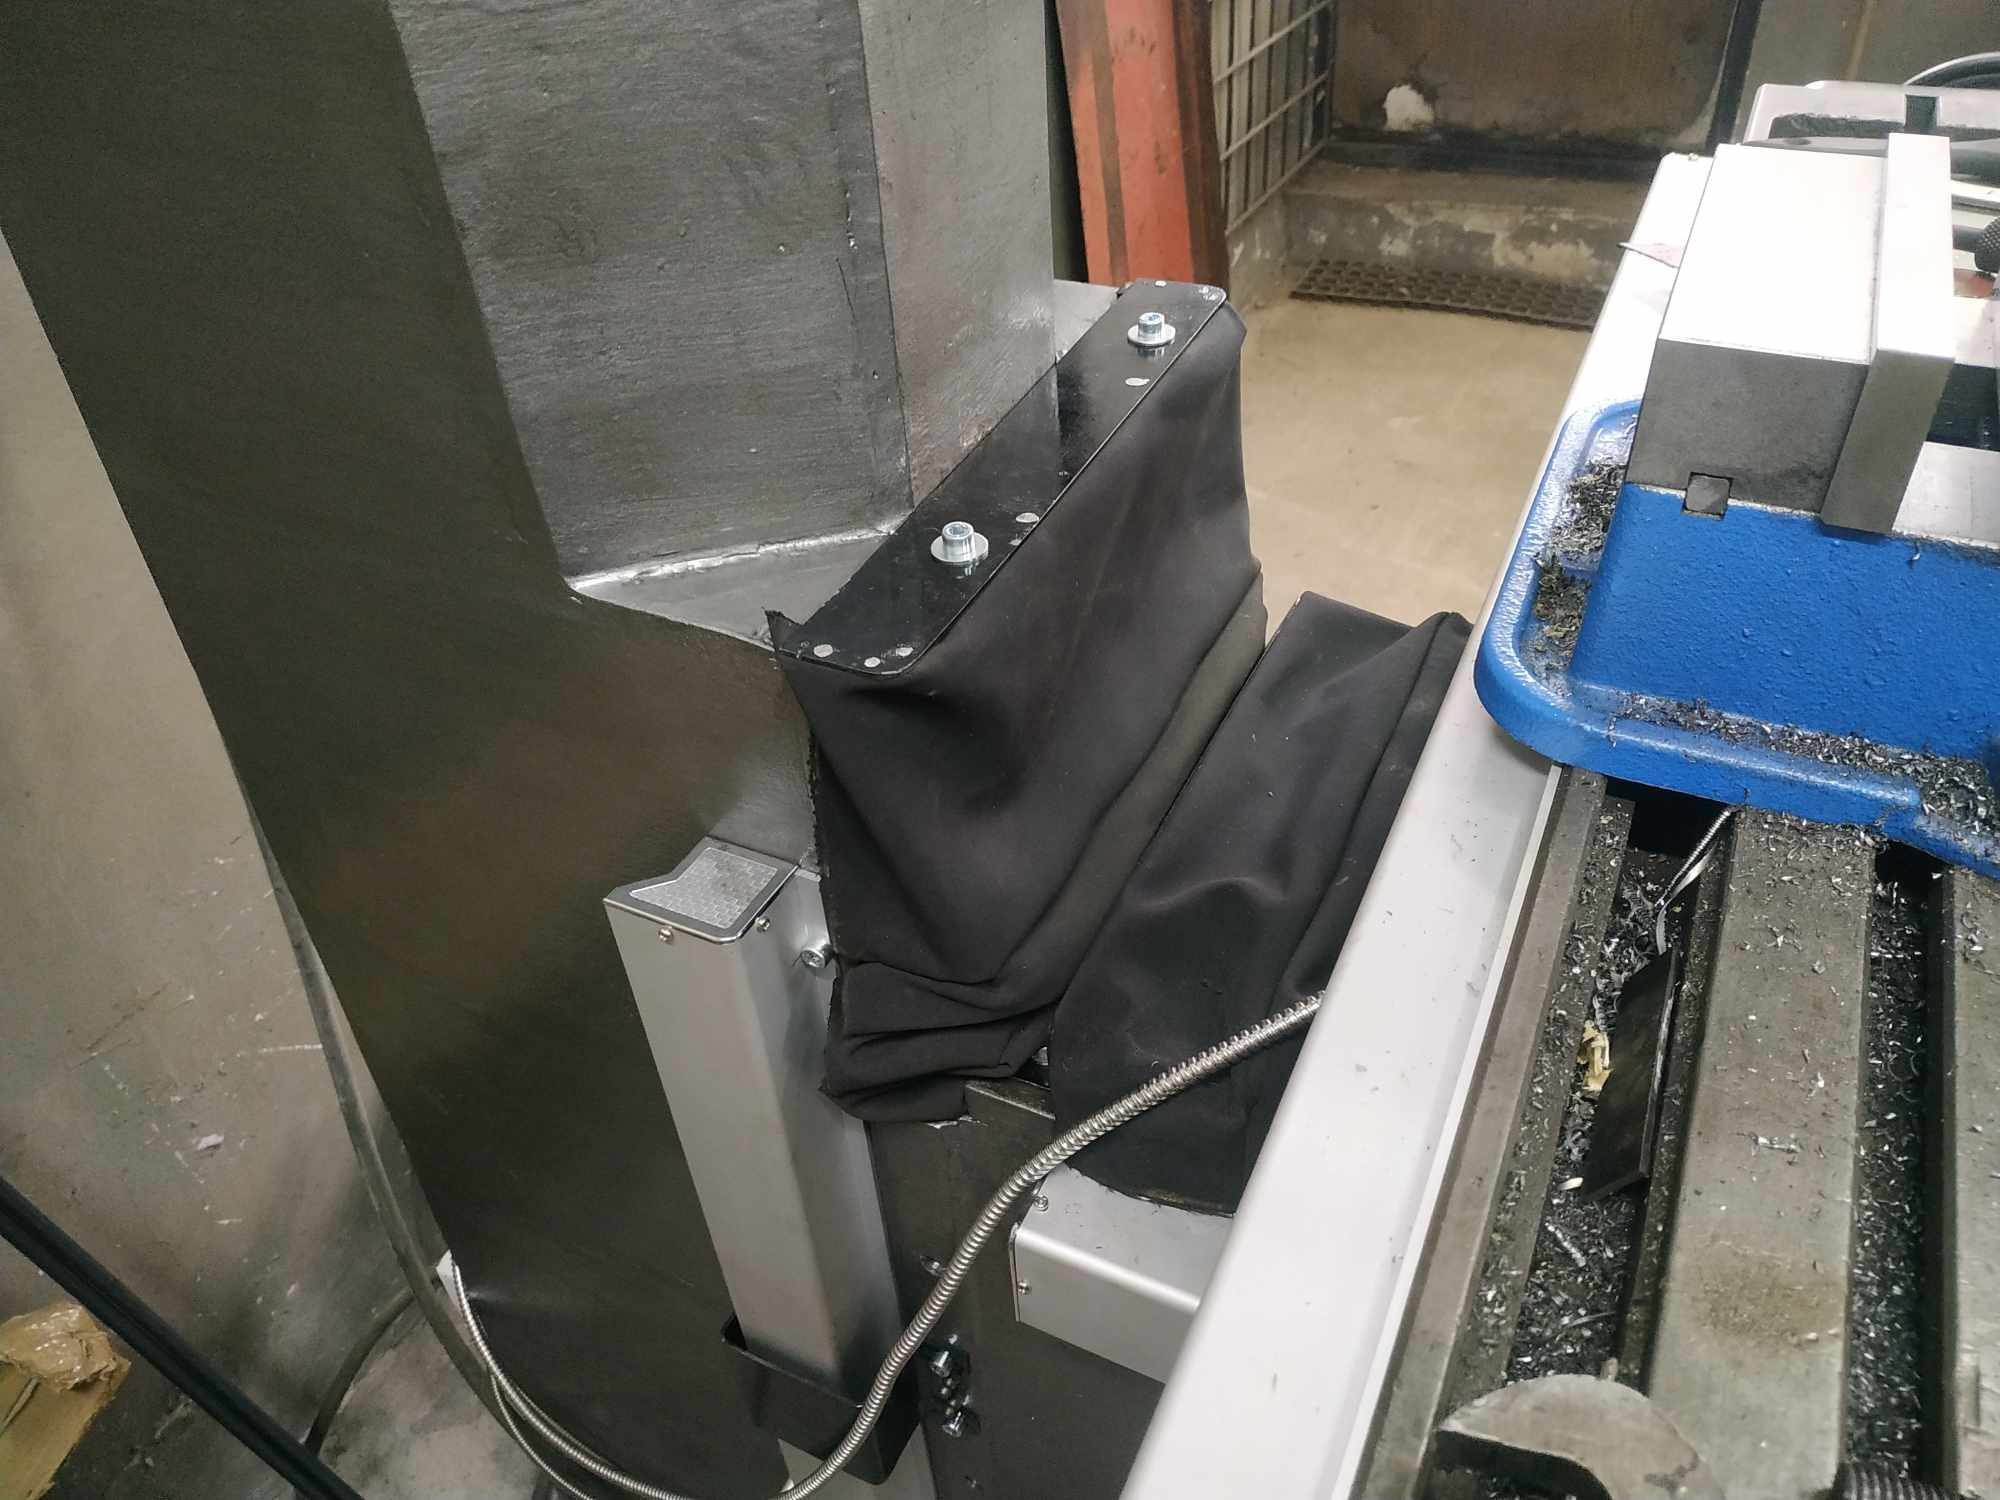
DIY Y axis covers made out of waterproof fabric. Sections of the covers have dove tail matching plates so they fold nicely.
Attachment 47856
Attachment 47857
I'm going to make the same covers for Z axis guides.
Z axis cover is done :D
Attachment 47859
Attachment 47860
New video!
Part 15, DRO, VFD, way covers.
https://youtu.be/rS24uxNFOkc