Free 186 More Best Homemade Tools eBook:  
Get 2,000+ tool plans, full site access, and more.

User Tag List

Results 1 to 9 of 9

Thread: My method for repairing a leak in poly pipe

  1. #1
    Supporting Member Frank S's Avatar
    Join Date
    Aug 2015
    Location
    Peacock TX
    Posts
    11,229
    Thanks
    1,986
    Thanked 8,794 Times in 4,212 Posts

    Frank S's Tools

    My method for repairing a leak in poly pipe

    Our well is about 500 feet from my water tower where our potable water is stored. Currently the well is only used for irrigating the garden I have a 3000-gallon storage tank elevated on a tower by the well water is pumped into it then a pressure pump sends it to the garden. Eventually I will complete an adequate filtration and recirculating system to remove enough of the minerals and gypsum making the water potable enough to be stored in our house water system.
    Thats the background of the well.

    The 1" poly pipe is preexisting to our living here and there are a few connections in the length I don't know if they had to buy the pipe in 100-to-150-foot coils or if it has broken from time to time. I suspect maybe gophers or the former. Anyway, this summer the pipe developed a leak and I lost 1000s of gallons of water. before the evidence of the leak was known.

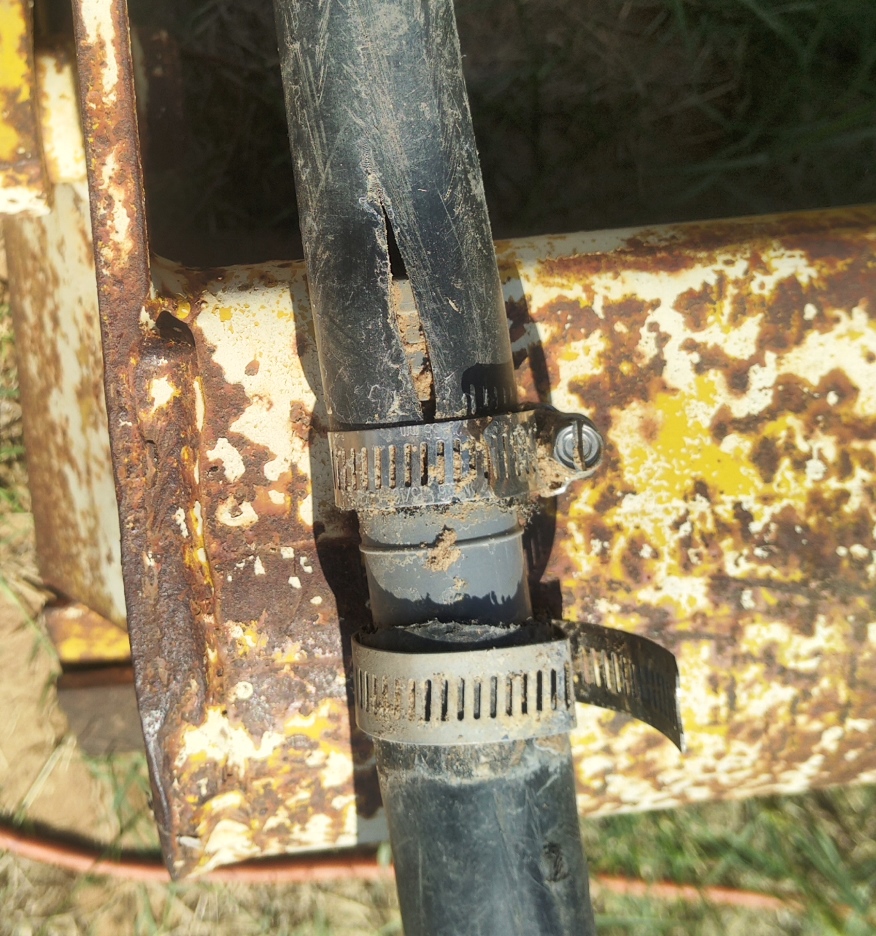
    I dug up the pipe to find a section that had 3 splices, in 2 feet this is what 1 of the splices looked like and the source of the leak.
    the pipe had split this indicated to me that the splice inside was installed when the pipe was cold weakening it and it may have been fine and apparently was for many years but when I pressed the well back into service this summer my delivery pressure caused the pipe to split.
    My method for repairing  a leak in poly pipe-img_20230926_124336wp.jpg
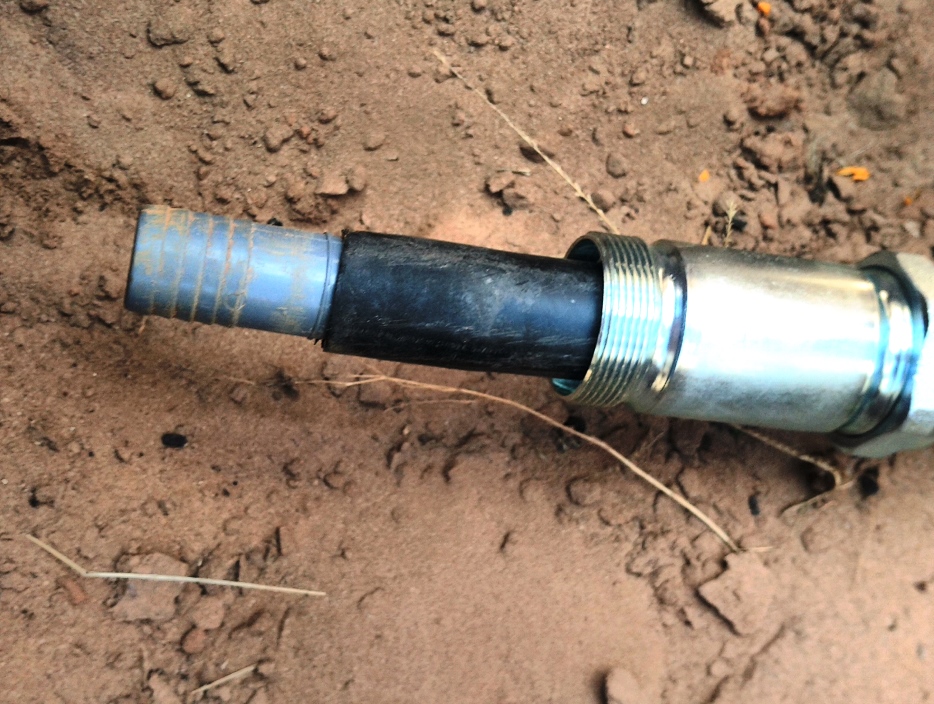
    To repair the leak, I cut out the section with the splices and made 2 new splices Like this
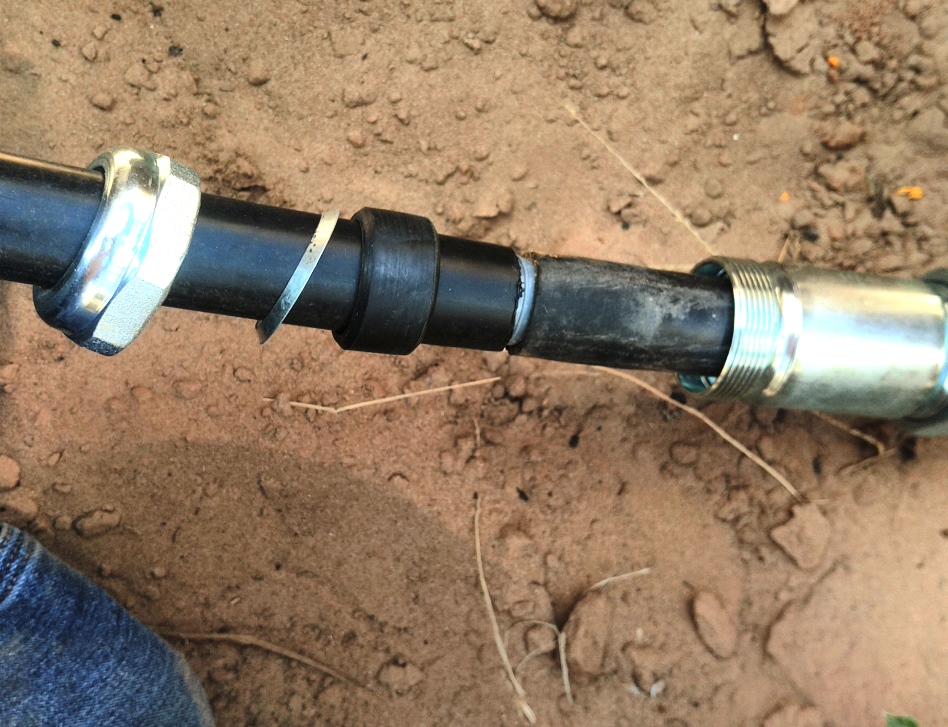
    I used a heat gun to slightly soften the pipe inserted the splice and instead of using a hose clamp I captured the splice with a compression splice fitting normally used on steel pipe.
    My method for repairing  a leak in poly pipe-img_20230926_124901wp.jpg

    My method for repairing  a leak in poly pipe-img_20230926_125404wp.jpg
    Properly tightened the compression fitting does a much better job of securing the splice than a hose clamp
    My method for repairing  a leak in poly pipe-img_20230926_130008wp.jpg
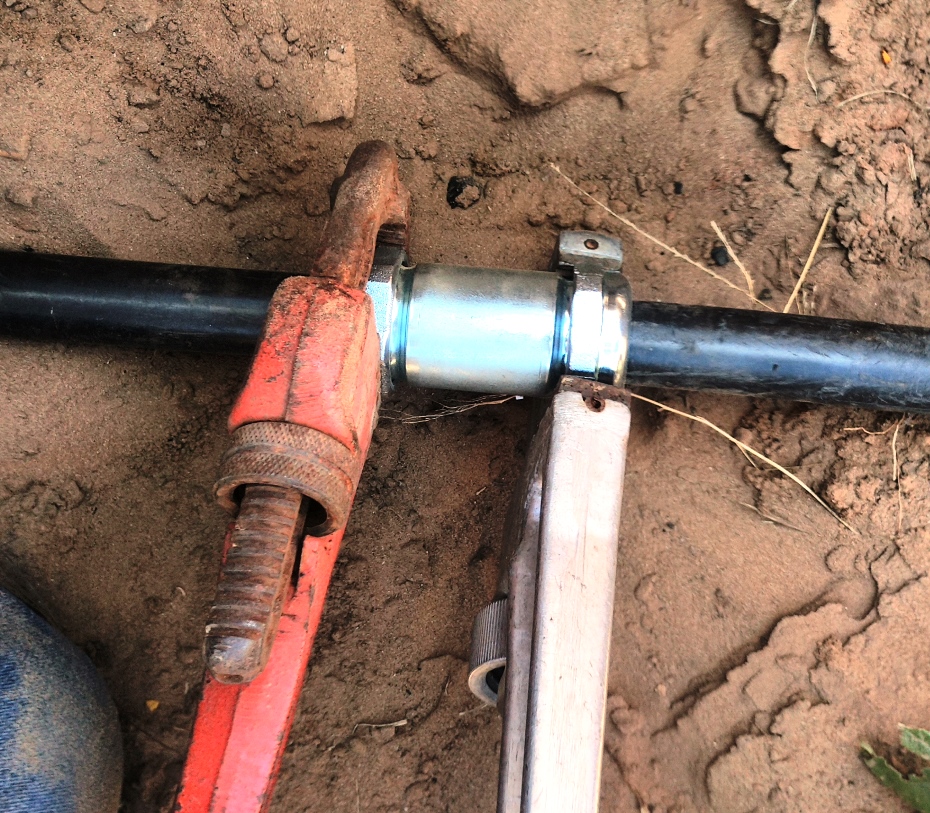
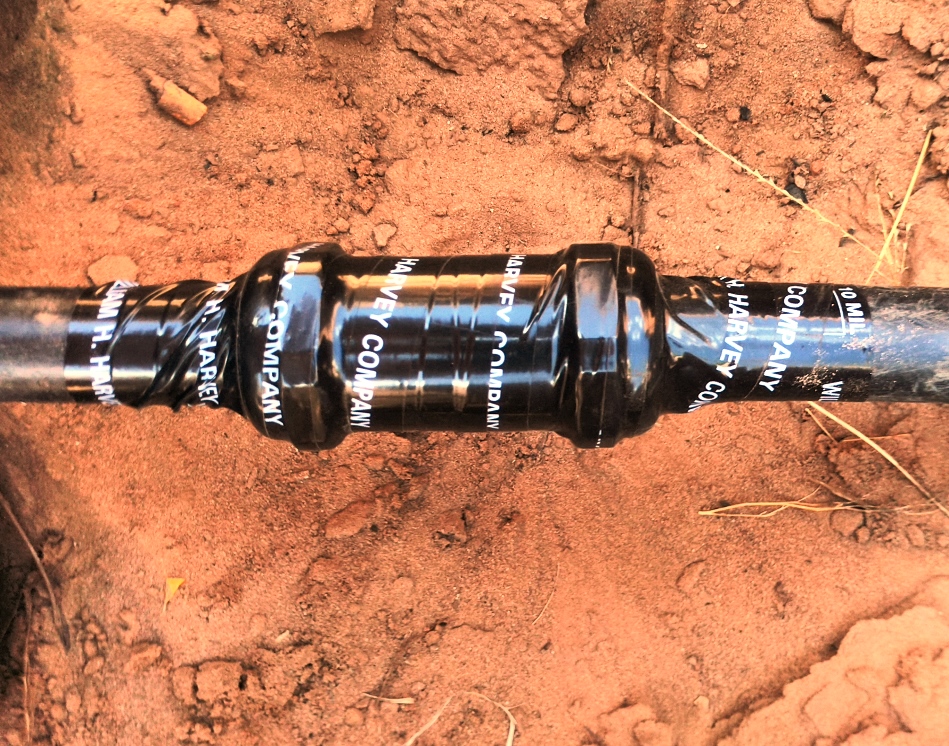
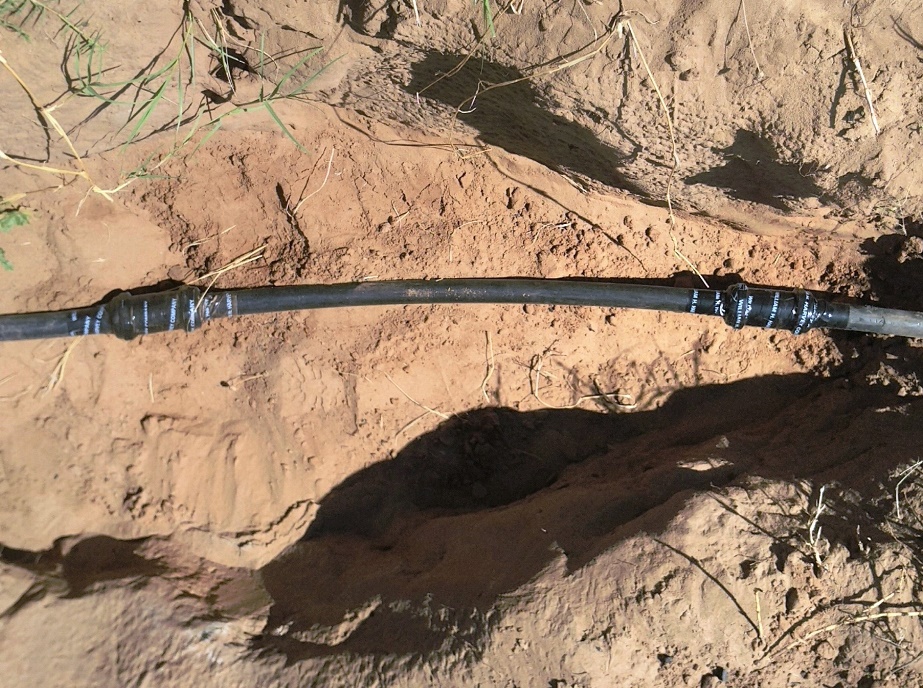
    I then wrapped the splice connection in waterproof 10 mil 2" wide vinyl pipe wrap tape to protect the steel fitting from moisture in the dirt
    My method for repairing  a leak in poly pipe-img_20230926_130218wp.jpg
    Completed repair waiting for the next break to show up. Hopefully many years from now
    My method for repairing  a leak in poly pipe-img_20230926_131024wp.jpg

    186 More Best Homemade Tools eBook
    Never try to tell me it can't be done
    When I have to paint I use KBS products

  2. The Following 11 Users Say Thank You to Frank S For This Useful Post:

    baja (Sep 28, 2023), Gadgeteer (Sep 27, 2023), Jon (Sep 26, 2023), KustomsbyKent (Sep 27, 2023), mr mikey (Sep 28, 2023), mwmkravchenko (Sep 26, 2023), nova_robotics (Sep 26, 2023), piper184 (Sep 29, 2023), Sleykin (Oct 4, 2023), thevillageinn (Sep 26, 2023), WmRMeyers (Sep 26, 2023)

  3. #2
    Supporting Member mwmkravchenko's Avatar
    Join Date
    Nov 2017
    Location
    Perth Ontario Canada
    Posts
    1,015
    Thanks
    5,099
    Thanked 377 Times in 266 Posts
    Looks like a solid repair. Hoping the rest of the pipe is up to the pressure Frank.

    2000 Tool Plans

  4. #3
    Supporting Member
    Join Date
    Sep 2018
    Posts
    2,166
    Thanks
    10,206
    Thanked 1,150 Times in 620 Posts

    nova_robotics's Tools
    How did you find the leak?

  5. #4
    Supporting Member Frank S's Avatar
    Join Date
    Aug 2015
    Location
    Peacock TX
    Posts
    11,229
    Thanks
    1,986
    Thanked 8,794 Times in 4,212 Posts

    Frank S's Tools
    Quote Originally Posted by mwmkravchenko View Post
    Looks like a solid repair. Hoping the rest of the pipe is up to the pressure Frank.
    This repair is about 150 feet from where the pipe had as a frost bite hydrant sticking out of the ground it is the second such repair, I've made on the pipe the other one is about 150 feet from this one, the well is about the same distance from that one, so I am making a guess that these splices were originally where lengths of the pipe was connected. Once a connection fails the only solution is to section it out and add a short length. which appears to be what was done, probably not suspecting that hose clamps were not the best holding devices or not realizing the Charteristics of plastic pipe when stretched cold?
    Never try to tell me it can't be done
    When I have to paint I use KBS products

  6. The Following User Says Thank You to Frank S For This Useful Post:

    Sleykin (Oct 4, 2023)

  7. #5
    Supporting Member Frank S's Avatar
    Join Date
    Aug 2015
    Location
    Peacock TX
    Posts
    11,229
    Thanks
    1,986
    Thanked 8,794 Times in 4,212 Posts

    Frank S's Tools
    Quote Originally Posted by nova_robotics View Post
    How did you find the leak?
    when sandy loam gets wet enough to show up above ground I just started digging in the middle of the wet area. It helped that the 45 PSI stream was aimed up too.
    Never try to tell me it can't be done
    When I have to paint I use KBS products

  8. The Following User Says Thank You to Frank S For This Useful Post:

    nova_robotics (Sep 26, 2023)

  9. #6
    Supporting Member hemmjo's Avatar
    Join Date
    Feb 2017
    Posts
    2,553
    Thanks
    226
    Thanked 1,453 Times in 823 Posts

    hemmjo's Tools
    Oh how I hate repairing leaky buried pipe!!! ALWAYS such a mess.

  10. #7
    Supporting Member Frank S's Avatar
    Join Date
    Aug 2015
    Location
    Peacock TX
    Posts
    11,229
    Thanks
    1,986
    Thanked 8,794 Times in 4,212 Posts

    Frank S's Tools
    Quote Originally Posted by hemmjo View Post
    Oh how I hate repairing leaky buried pipe!!! ALWAYS such a mess.
    after I dug down and found the leak, I just let it dry out then finished digging a hole large enough to do the repair.

    What I hate is any septic tank or associated work related to it. I think that stuff could dry out for 100 years and still be bad.
    Last edited by Frank S; Sep 26, 2023 at 09:10 PM.
    Never try to tell me it can't be done
    When I have to paint I use KBS products

  11. #8
    Jon
    Jon is offline Jon has agreed the Seller's Terms of Service
    Administrator
    Supporting Member
    Jon's Avatar
    Join Date
    Jan 2012
    Location
    Colorado, USA
    Posts
    25,581
    Thanks
    7,961
    Thanked 38,877 Times in 11,345 Posts
    Congratulations Frank S - your poly pipe leak repair method is the Tool Tip of the Month for September 2023!

    This is a much more durable repair than hose clamps, and well worth it to not have to dig up the pipe again.

    Some more nice tool tips from September:

    C-Spanner Holesaw Plug Extractor by Philip Davies
    Coiled Air Hose Hanger by BuffaloJohn
    Use for Discarded Rules by Philip Davies
    Magnets in Jigs by Make Things
    Magnetic Bench Appliance by Make Things
    Vacuum Sealer Heat Sealing Method by rgsparber
    Bandsaw Jig Made for the Lathe by Make Things


    Frank S - we've added your Tool Tip to our All Tool Tips of the Month winners post. And, you'll now notice the tool tip award in the awards showcase in your postbit, visible beneath your username:


    And, you'll be receiving a $100 cash prize, in your choice of Amazon, PayPal, or bitcoin. Please PM me your current email address and prize choice and I'll get it sent over right away.

    Congrats again
    Last edited by Jon; Oct 3, 2023 at 08:29 PM.

  12. The Following 2 Users Say Thank You to Jon For This Useful Post:

    Frank S (Oct 5, 2023), Sleykin (Oct 4, 2023)

  13. #9
    Supporting Member tonyfoale's Avatar
    Join Date
    Nov 2016
    Location
    Spain
    Posts
    1,566
    Thanks
    690
    Thanked 2,650 Times in 710 Posts

    tonyfoale's Tools
    Here we have plastic hose connectors. They consist of a centre section and two screw on caps. The screw on caps have an internal taper which clamps down on a split tapered spacer. An O-ring is fitted over the pipe with a 5 or 6 mm backup ring/spacer. The ends of the hose spigot into the centre section then when the caps are screwed on the tapered pieces force the spacer against the O-ring to seal and then further tightening forces the split tapered spacer onto the hose to give a good grip to prevent the pipes pulling out. The inner diameter of the tapered spacer is grooved to bite into the hose. Everything is plastic and so you can bury it for 1000 years. I can take photos if anyone is interested enough.


    186 More Best Homemade Tools eBook

Thread Information

Users Browsing this Thread

There are currently 1 users browsing this thread. (0 members and 1 guests)

Bookmarks

Posting Permissions

  • You may not post new threads
  • You may not post replies
  • You may not post attachments
  • You may not edit your posts
  •