
 LinkBack URL
 About LinkBacks

 that I've been looking after for a "Pin It")
Hi folks
So this is one of those "between" projects that sometimes happen in order to finish up another. In this case, I'm nearing the end of restoring a Dore Westbury Mk1 Milling machine and need to install a new set of bearings into the quill but lack any kind of press. By coincidence, I happen to have in my possession an old AC "buzz box" (transformer welder) that I've been looking after for a fair amount of time and it came with a pile of E6013 electrodes of varying diameters.
I've been wanting to add welding to my skill set for a while and had planned on getting some lessons and firing up the welder for ages but as is the way, so many other things to do and finish. However, just as I have a lagitimate reason to use it, irony stepped in and my time with the welder is suddenly running out as it needs to go back to it's rightful owner.
Couldn't help but see this as a challenge I had to rise to and there's nothing like an incentive to spur you on, so my mission is to try and get good enough at welding in order to make the press before I have to return the buzz box
However, recent crappy weather conditions have cut outside play times down to a minimum of late, so pretty beads will have to wait till later, cuz right now I'm aiming at function over form (I realise that pretty beads genrally mean better welds but as long as there's no inclusions, trapped slag or porosity, I'll be happy).
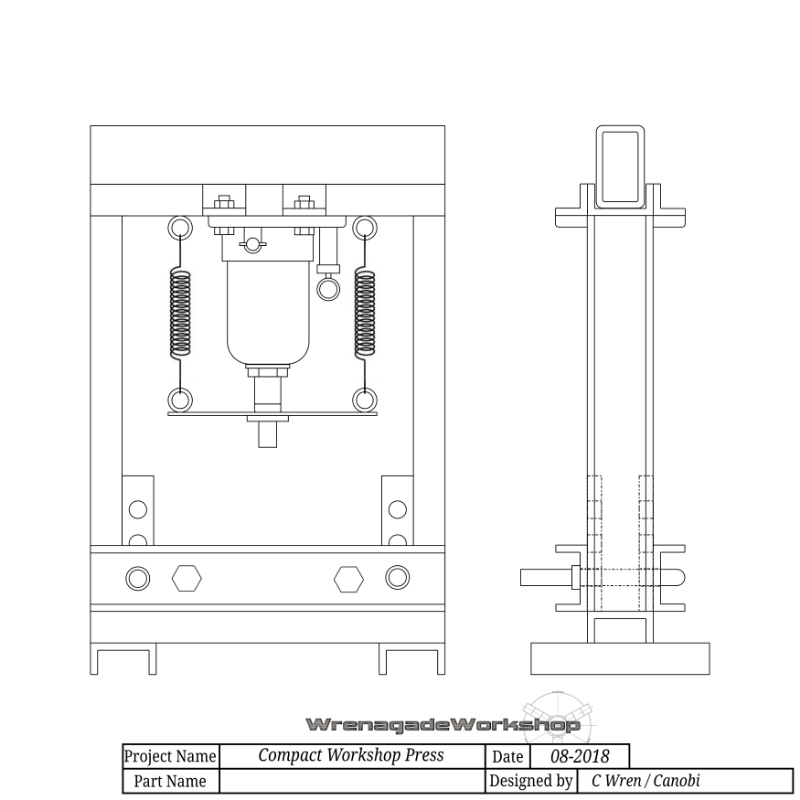
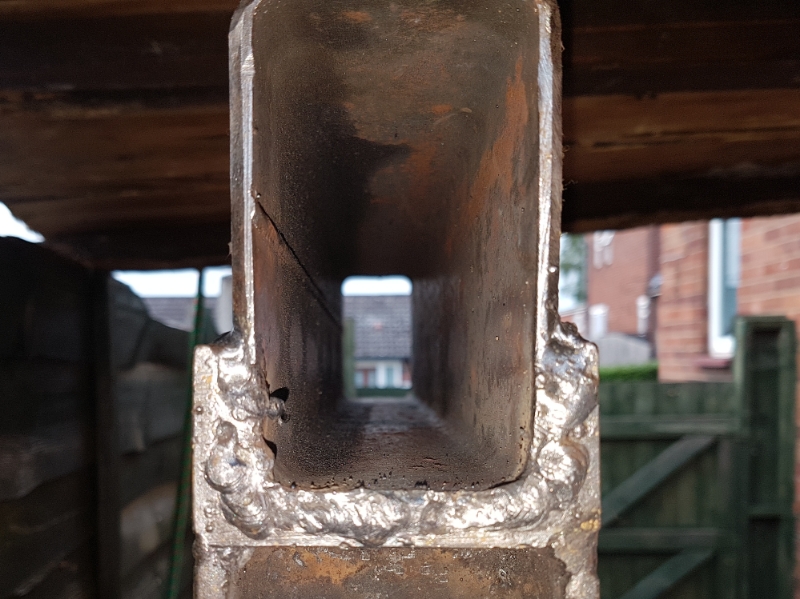
Even though the press will be quite compact @ 500mm wide x 790 tall, I went for 75x38x5mm C channel for the majority of the construction as I'll be using a 32 ton bottle jack. Not that I'll ever need anything like that kind of force, my thinking behind going for such a high tonnage is due to the seals which have a tendency to perish after about a year if the jack sees it's max (or near) on a regular basis. Having some headroom means the seals won't be put under high stress, which should by all accounts, mean it will last for the natural lifespan of the seals but it's also good to know the extra tonnage is there, just in case.
To back up the "just in case" scenario, I also got a 500mm length of 100x60x5mm box section to use as a cross brace for the top of the press. In addition the that I plan on sticking plates on either side that run the entire length from top to bottom. I'm thinking 8x70mm as it will give a nice little valley to weld without having to bevel and it should be thick enough to contribute considerably to the frames tensile strength without eating too much of my small hobby budget for both lengths, any left overs will go straight into my small materials bucket (scrap metal is a rare thing in my workshop, once I get a foundry together, not even swarf will be considered scrap).
While I waited for the materials to arrive, I set about sketching out a basic design to work from, though it should be noted that the drawings aren't to scale and I omitted the modifications I have planned for the bottle jack and the side plates from the sketch below for clarity.
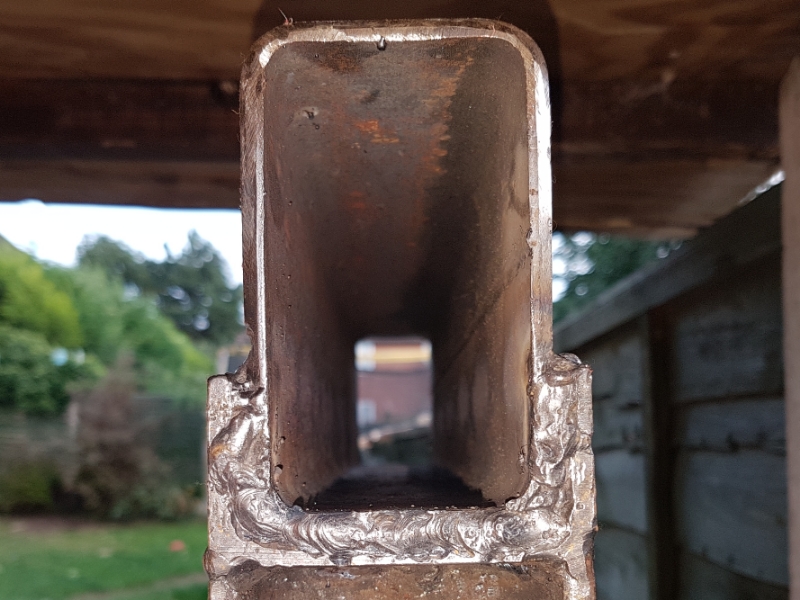
Given the channel side walls are only 38mm wide and the pins I'm going to make will be 24mm diameter, I opted to place a pair of thick flat bars in both corners for the hight adjustment holes in order to retain structural integrity.
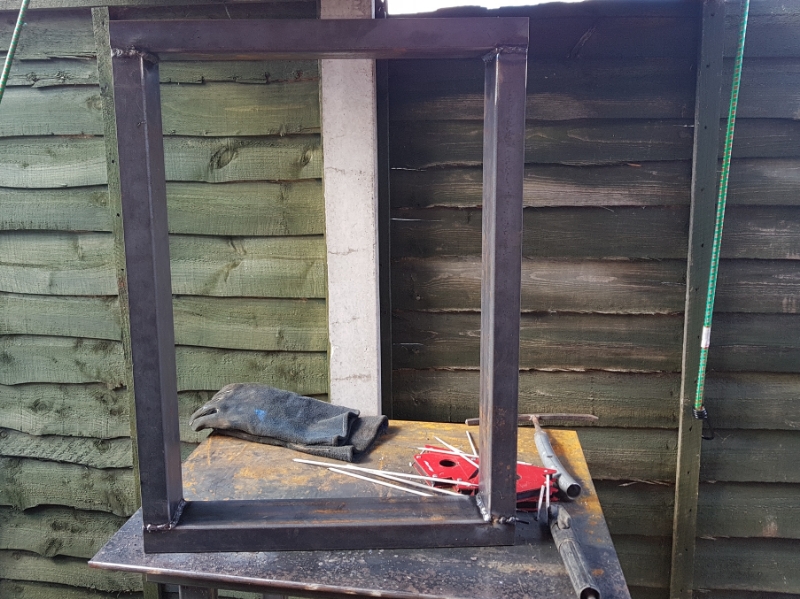
Once the materials arrived and the weather was good enough to get my horizontal band saw out, I spent a good bit of time making sure everything was square before cutting the channel to length as I know my saw is off true a bit.
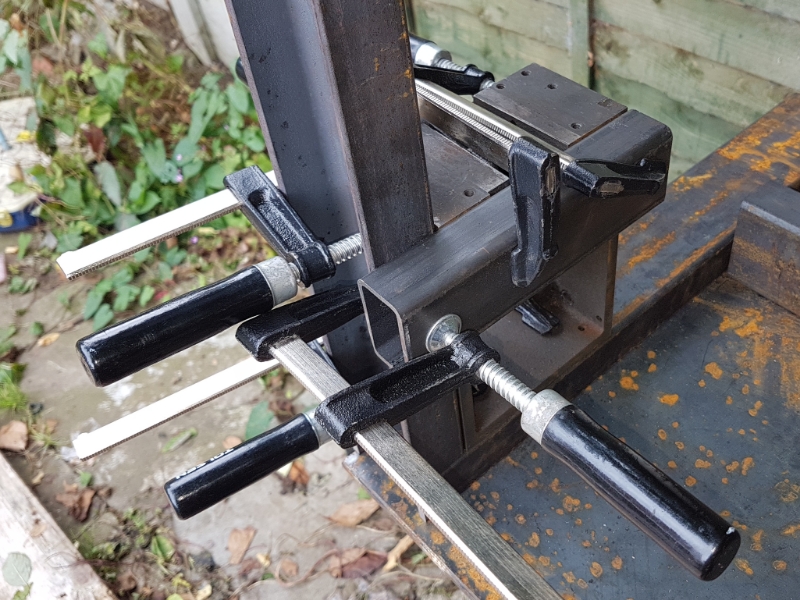
Here's my rig for tack welding the frame, though I had to tear it down again after realising I hadn't bevelled the edges (doh!)
Typically, as soon as it was all tacked together, the crappy weather came back and I had to wait again. During the interim, I ordered some more elecreodes as I wanted to use different types that had deeper penetration and/or a higher tensile strength than the 6013s for the frame.
Annoyingly, I could not found a local source, or a welding related vendor in the UK via the interwbs for anything but E6013, or E7018 (which is primarily a DC rod). In the end I resorted to searching eBay to see if I could find other types being sold by UK vendors. Luckily there are a couple that sell a good variaty, so got a small pack of x40 2.5mm E6011 from one and a 1lb pack 2.5mm E7016 1H4 R from the other, both of which are ac friendly types of electrode.
The 6011 are great for rusty/painted/grimy situations where cleaning and prep is difficult at best or simply not an option as they will cut right through the lot. They will also save your skin if measurements went south somewhere and the parts don't fit up properly as these rods have been designed to fill gaps and holes no problem (often referred to as a "fast freeze" rod because the weld puddle cools so quickly).
The E7016 is an intersting beast as it appears that it's mostly sold this side of the pond. Just like it 7018 cousin, these are a hydrogen free rod and are said to be great to handle and produce deep welds and pretty beads in the right hands due to good weld puddle visibility and flow.
These rods in particular have an extra characteristic in that they are also hydrogen resistant (as denoted by the 1H4 R suffix). Totally unlike it's E7018 cousin, these don't require rod ovens for pre heat and reconditioning, as well as special storage conditions when used for coded, or critical work. Hydrogen free flux coatings have to stay absolutely dry or they cause micro porosity in the welds due to hydrogen out gassing from the hot metals.
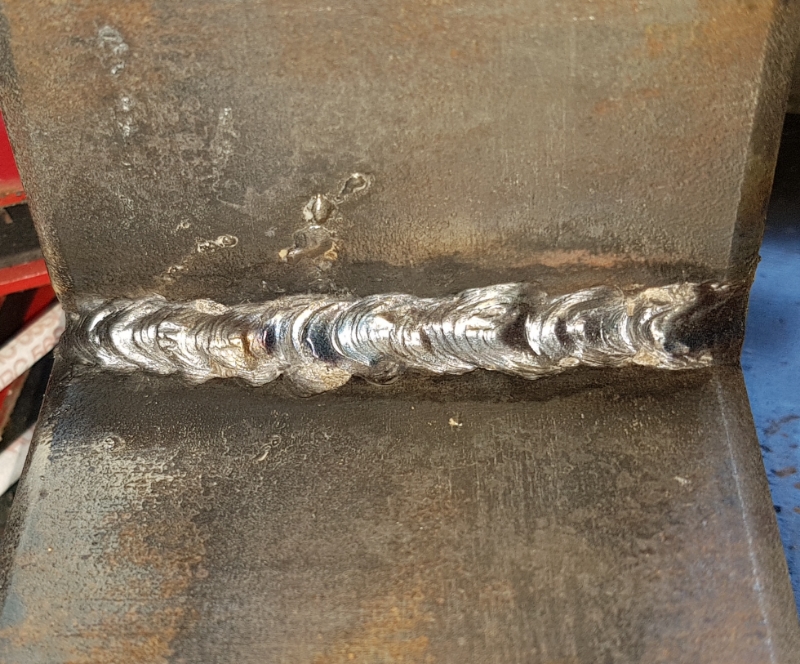
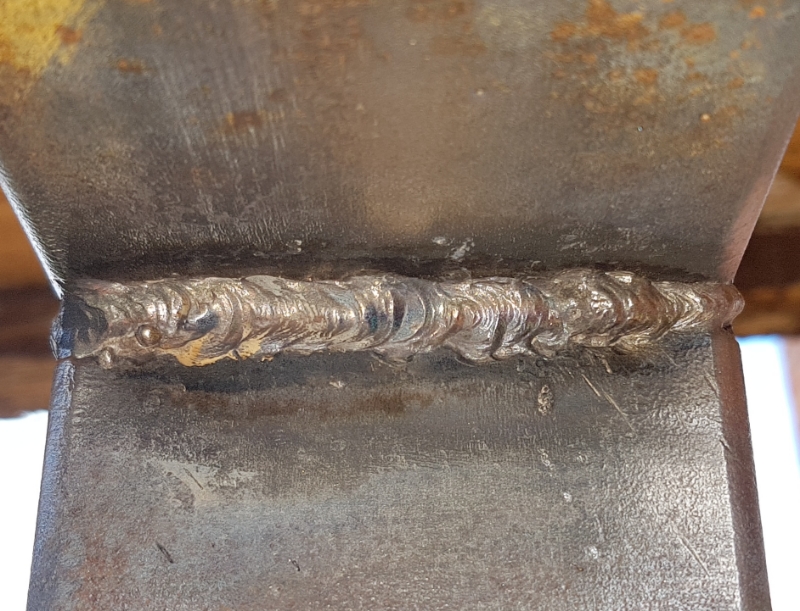
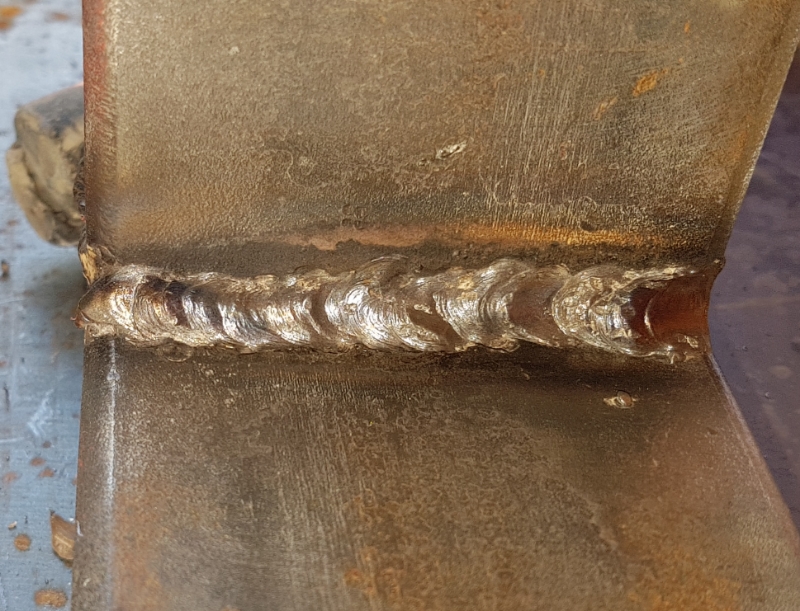
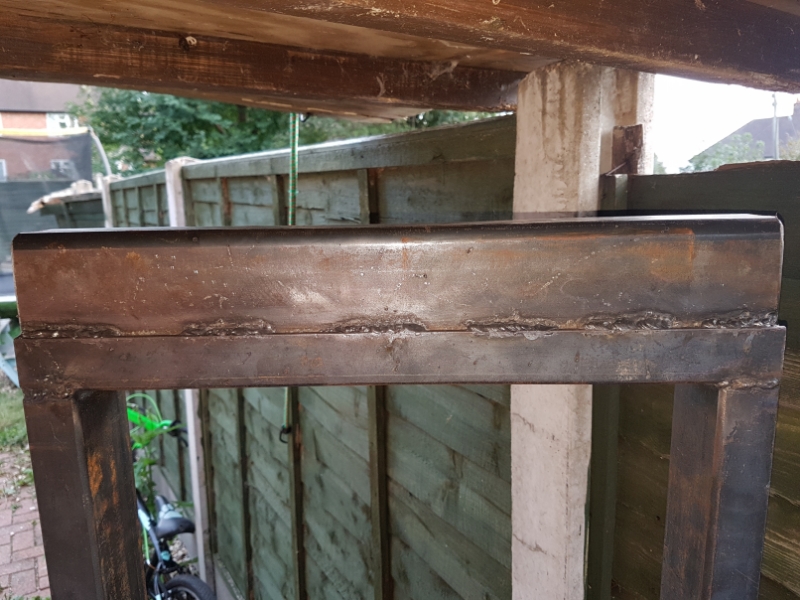
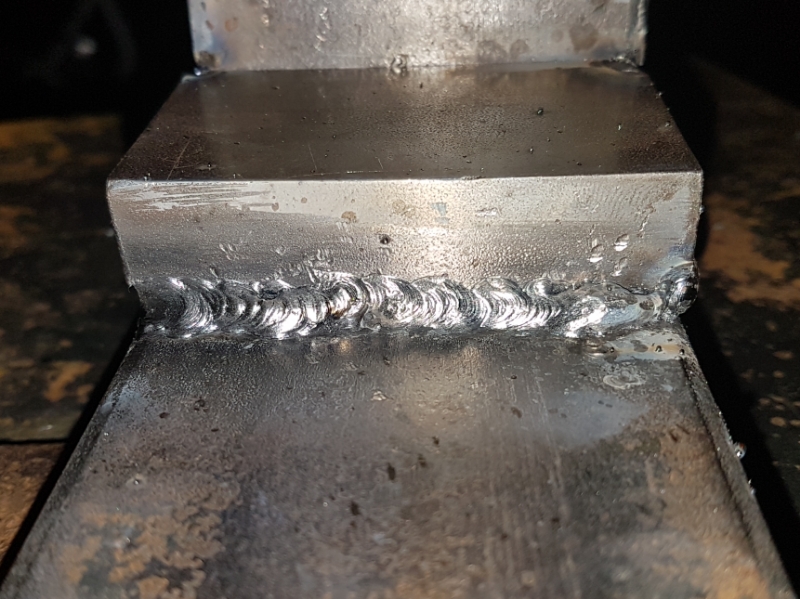
Again I had to sit chomping the bit for a few days, this time after the rods arrived but the weather finally broke the end of last week and I was able to get the frame welded up. I first burned a couple of each to see haw they behaved and chose the 7016s for the outer seams due to poorer restrikability as I didn't fancy my chances trying them on a double inside corner fillet:
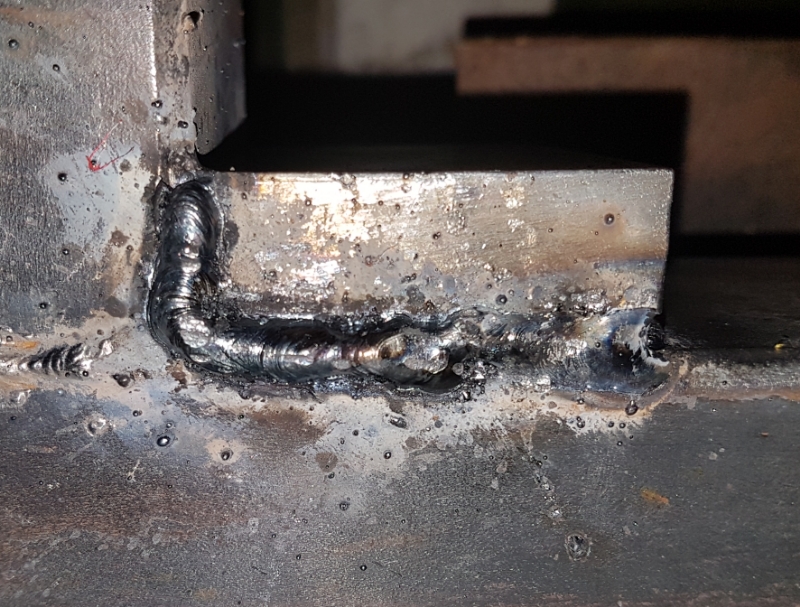
I welded the inside seams with the 6011 and while they are deep and functional, I was too embarrest to take pics as the beads produced by the "fast freeze" characteristic don't make for any kind of viewing when used by the cackhanded
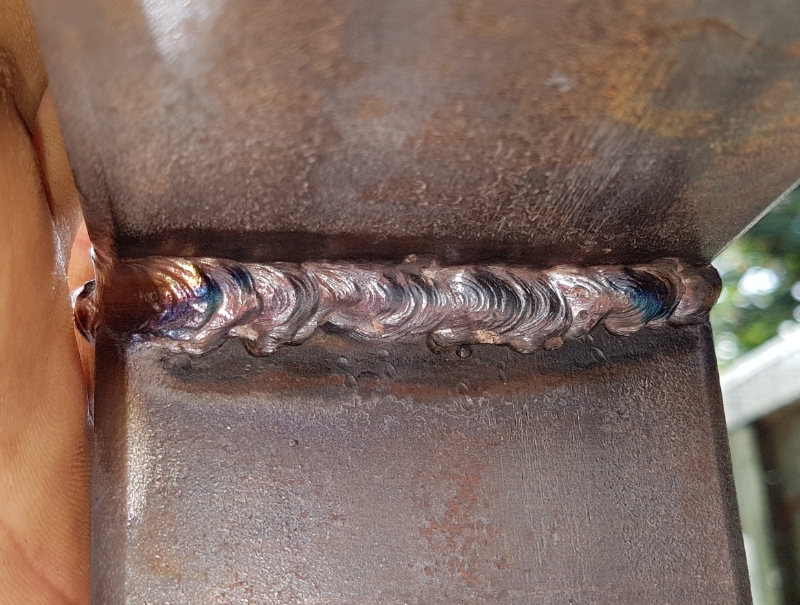
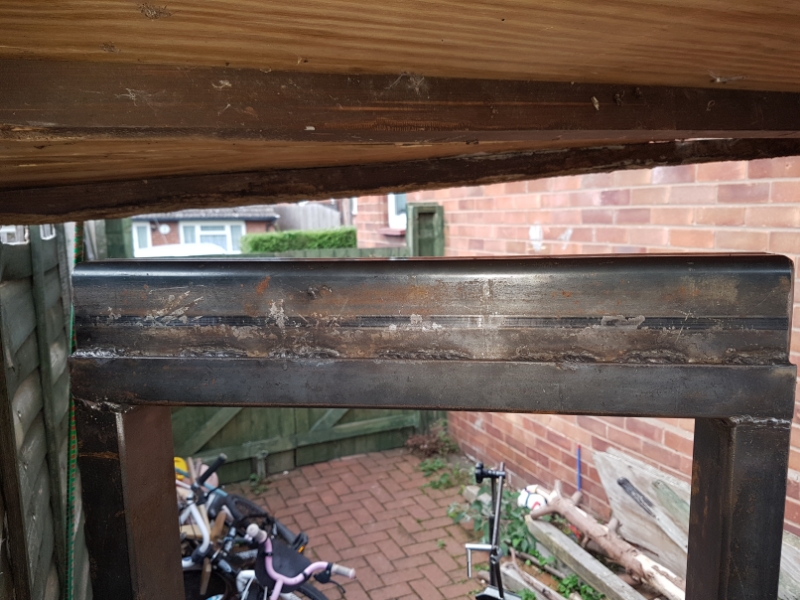
Had good weather in the evening the next day, so I welded on the cross brace using the 7016 at both ends and then put a bunch of short welds across the length on both sides to allow for flex. Unfortunately more prep and clean up was needed before I could start and I got caught out by the sun setting earlier. As such, things got a bit hard to see by the end and as a result, the welds are rather ugly and not very uniform but they are substantial and went in deep:
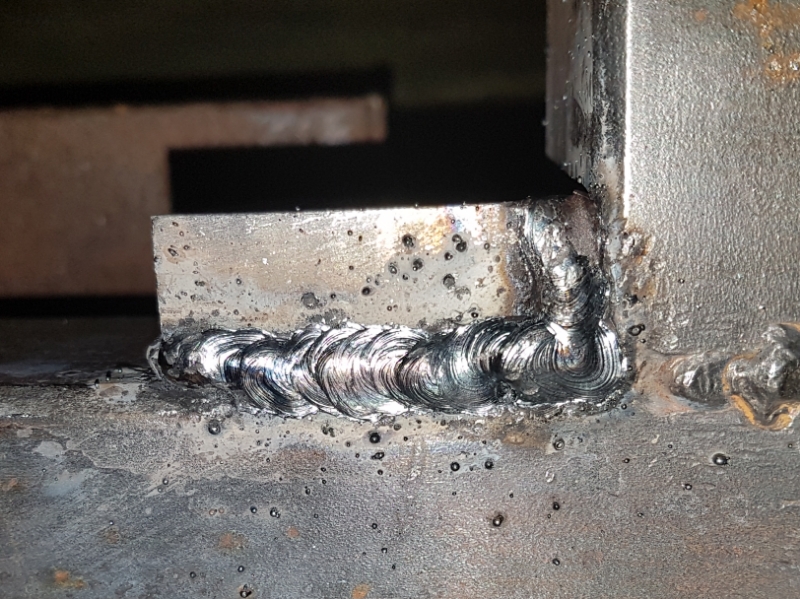
With the frame essentially complete, I focused on the hight adjustment brackets again as I saw a issue with using two per side (as shown in my sketch), due to the fact there wouldn't be enough access for the electrode to weld the inside seams properly with on my 35mm between them, so I deviated from the plans and opted to use two single 30x60mm bars instead.
Since the applied forces will be going directly downward and the bars will sit in the centre of the channel (which is the weakest point), I used some 20x50mm bar to make a pair of feet for the brackets to spread the stresses away from the centre of the channel in case there's a chance of it buckling due to unfavourable circumstance.
It might well be a lack of understanding on my part but it seemed like a good idea nonetheless and as the welds for the feet don't contribute structurally in any way, I'm going to grind them flush with the frame so they don't interfere with the receiver platform when adjusting it:
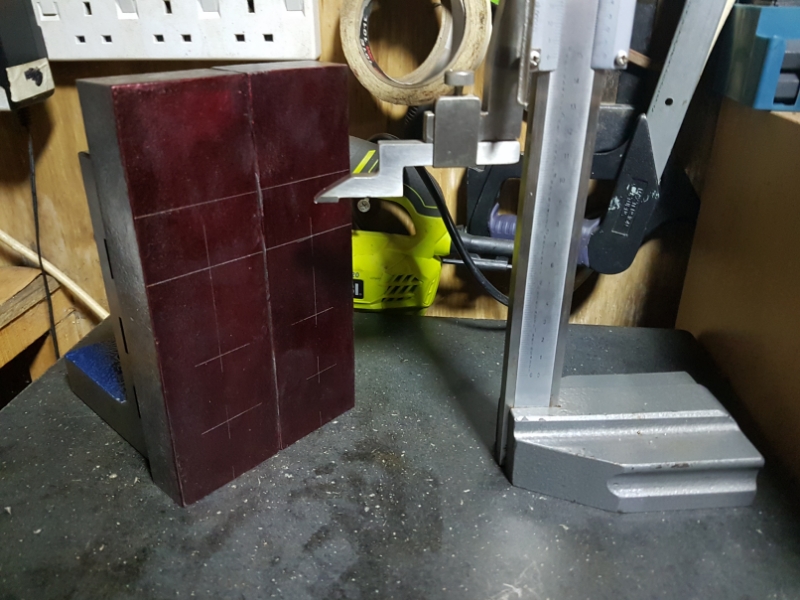
Had a spell of sun in the afternoon the following day, so it was back to it. This time I took the 30x60mm bars to my granite surface plate in order to measure and mark the hole centres and cut lines:
I then punched the hole centres for later, cut the brackets to length and bevelled them in preparation for welding:
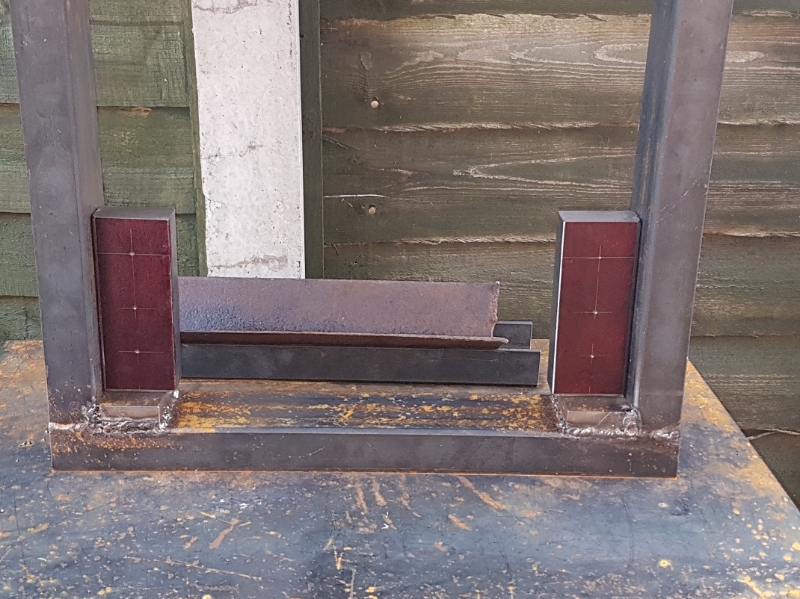
While I wait for decent weather again, my next move is to make the receiver platform. The bolt holes are arbitrary so I'll drill them to size right off the bat. The holes for the pins will be drilled to 2mm to help align them with the bracket punch marks so I can make the pin holes in the bracket and receiver in one go. I then plan to turn a couple of large spacers just a shade over 75mm long so the table doesn't bind while raising and lowering it. They will also help prevent any twisting that might occur if the part being pressed isn't in the centre of the receiver.
I'll update with pics later but for now, stay safe, have fun and keep those chips flyin'


 Reply With Quote

Bookmarks