
 LinkBack URL
 About LinkBacks


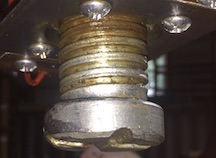
I needed to assemble a cam and timing gear. This is my first tight interference/shrink fit assembly. I have pressed lots of bearings and races into place before but this fit in much tighter than any I have done before.
The cam shaft nose diameter is 1.0022. The timing gear bore is 1.000. (As close as I can measure them.)
After consulting a number of sources, Including HMT, the common consensus is a combination of heat and force. I did not have a press, so I had to refurbish one I got from a friend. (Hydraulic Shop Press Rehab)
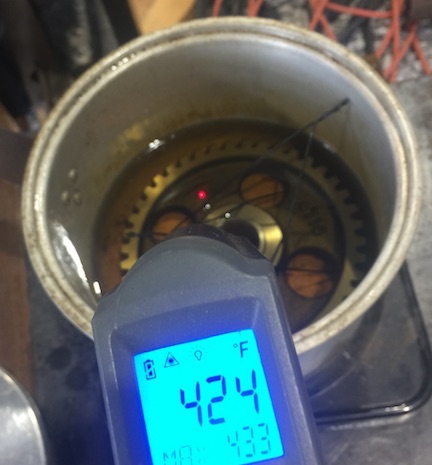
The heat part was easy with an old pot with lid, electric hot plate, corn oil and a digital thermometer. Testing the heat process, with oil temperature of 420˚-430˚f the bore enlarged to 1.002, making this a light press fit.
01
I needed a good set up on the press to ensure the gear went on correctly the first try.
The ram on the press is not ideal for pushing on precision parts. It is rough and dented from years jacking heavy construction equipment around. I wanted to remove the adjustment screw and machine it smooth, but that would not be easy. Also, it would just get banged up again, when back in its normal life.
02
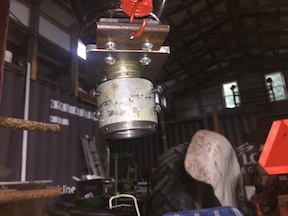
A collar, made from an iron pipe coupling allows various adapters to be attached to the ram. The set screws take none of the press load, they only hold the parts together and in alignment
03- 04
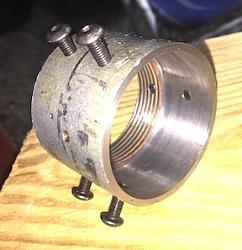
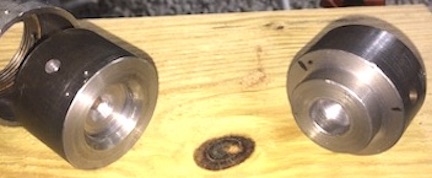
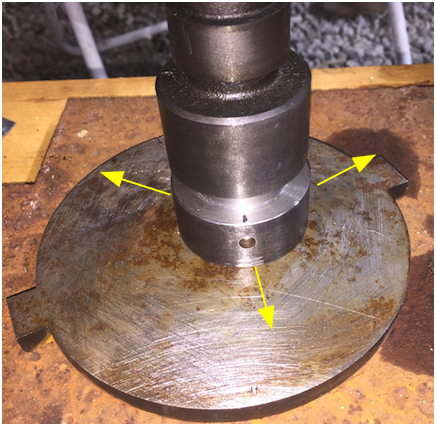
One end of the cam passes through the gear, the other end has a small boss to position another gear for a hydraulic pump that is driven by the cam. Steel adapters were machined to fit each end.
05
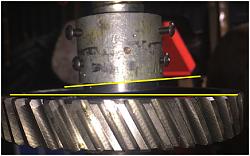
I thought maybe the gear would be down and stationary with the cam pushed down into it. For many reasons this was not a good idea.
06
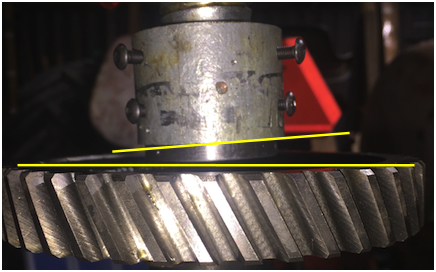
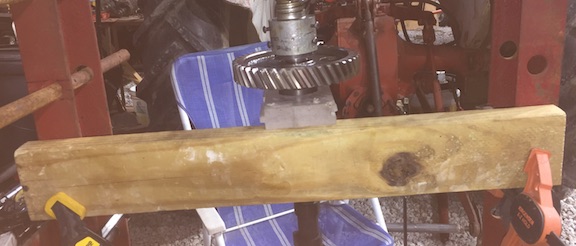
With the top of the cam held stationary, in contact with the press ram, it was easy to position the bottom the cam as required to be perfectly aligned and perpendicular with the bore of the gear and the face of the press ram adapter. I was lucky to have an old gear that was a slip fit on this cam to use for alignment purposes.
07-08
After perfect alignment is achieved the top of the cam was braced in place with a 2 x 4 clamped to the press anda piece of plastic deck material, bored to fit the cam bearing, screwed to the 2 x 4
09
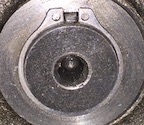
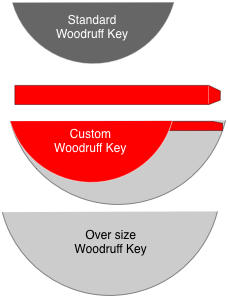
In order to make gear alignment with the woodruff key easier, I cut a woodruff key with an extension to assure alignment before beginning to press the gear onto the shaft. I did not take a photo of this key, but it looks like this.
10
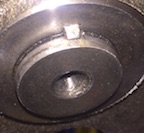
The custom key protrudes into the snap ring groove. It was either cut the protruding key, or trim the snap ring. It was easier to trim the snap ring than the key.
11-12


 Reply With Quote

Bookmarks