Free 186 More Best Homemade Tools eBook:  
New: 300+ fresh build posts/day from 275 forums → BuildThreads.com

User Tag List

Results 1 to 4 of 4

Thread: Rossbotics Angle Dresser

Threaded View

  1. #1
    Supporting Member
    Join Date
    Oct 2018
    Posts
    5
    Thanks
    4
    Thanked 10 Times in 2 Posts

    Tek12h's Tools

    Thumbs up Rossbotics Angle Dresser

    Recently, I’ve been looking for a grinding wheel dresser to dress some angles. I’ve came across the ever so popular radius/angle dresser, however that seemed too big for my needs. I did a little google search with some keywords and behold a DIY popped up. I understand this angle dresser is not meant for super accurate angle dressing as the commercially available ones are. I’m totally fine with angle block setup for accuracy, it will be great for what I’m doing. So all the Credit and Thanks goes to Rossbotics, he did all he hard work

    This tool was a gem to complete, and is quite the handy little dresser.
    I made a few changes to suit my needs. It’s a bit longer and wider, maybe 1/8” wider and about 1.5” longer.
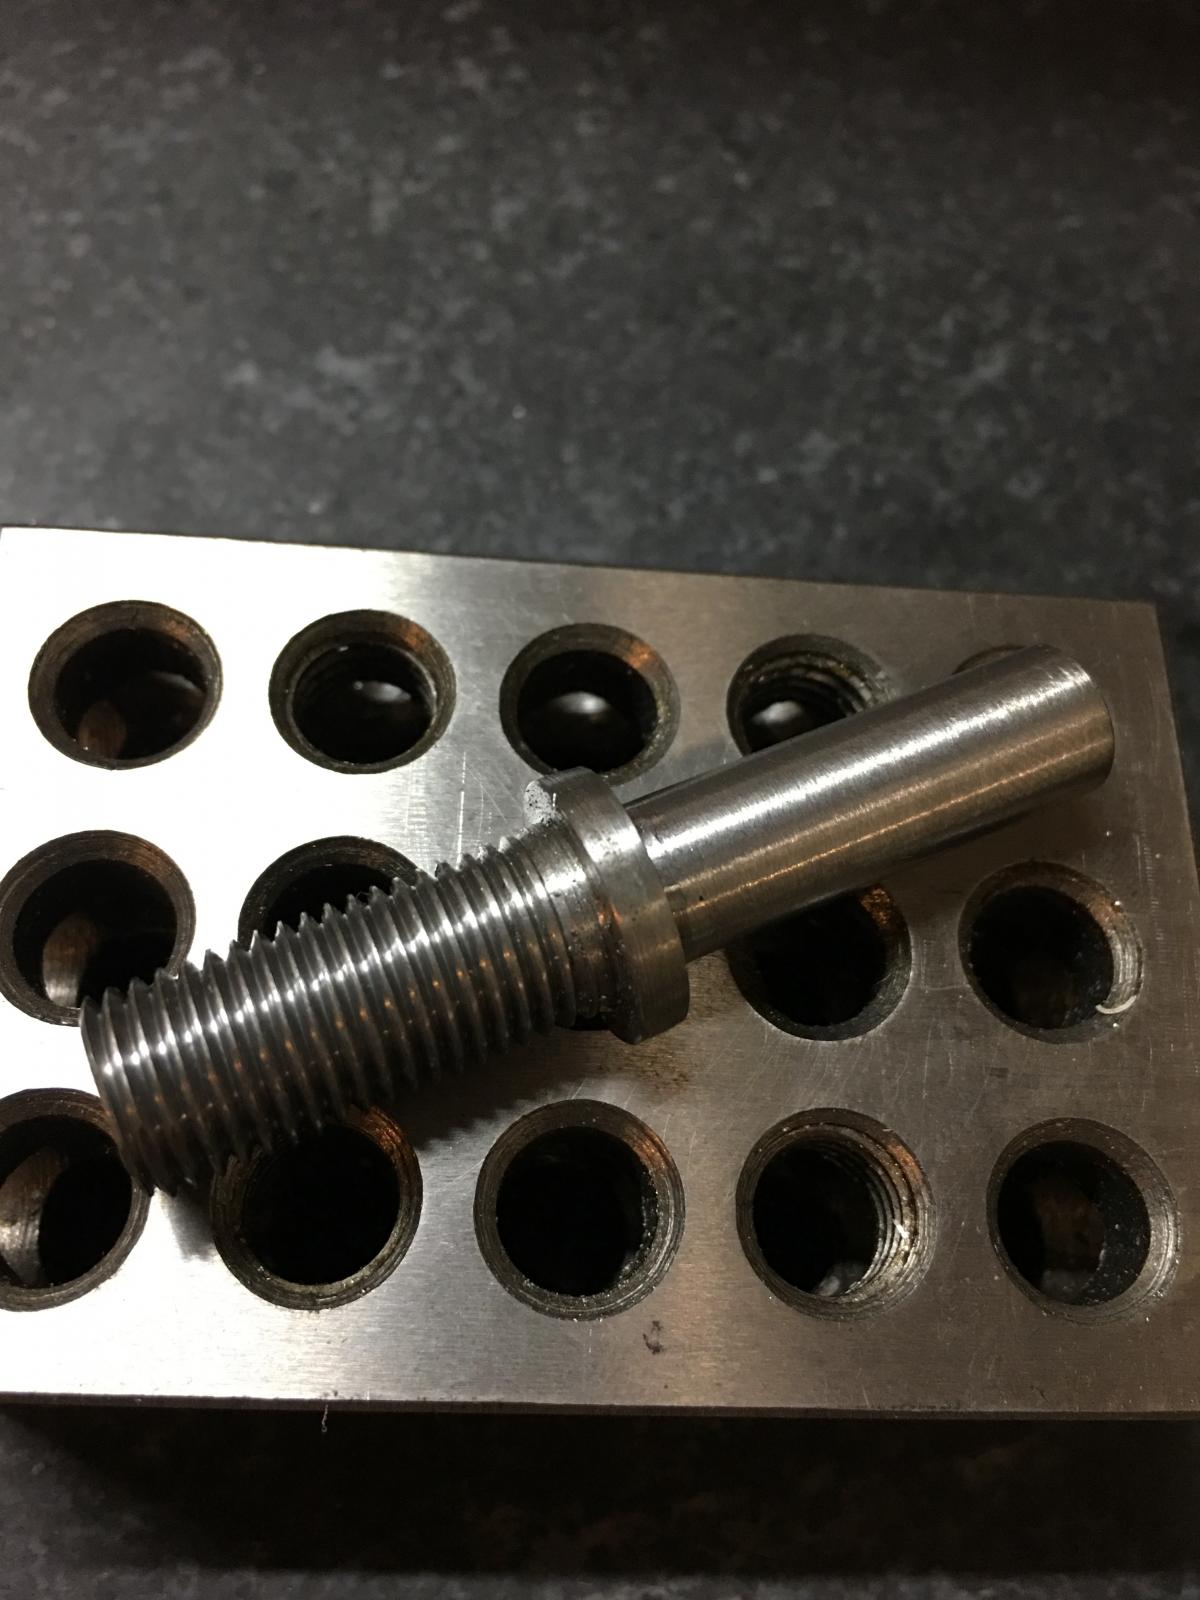
    The threads were changed as well, he called for 3/8-16LH threads and I went for 7/16-20LH. Mainly because that’s the Size tap I had that was close as well as I had a die to make it quick.

    I used some 4140 for the body, 1018 for the base, pivot brackets, and screw retainer, 303 for the screw and handle knob, and 2024 AL for the knob.

    I did not get any pictures of the work on any of the smaller brackets as. They were simple drilling operations, I used stock to size and then cleaned it up on grinder.


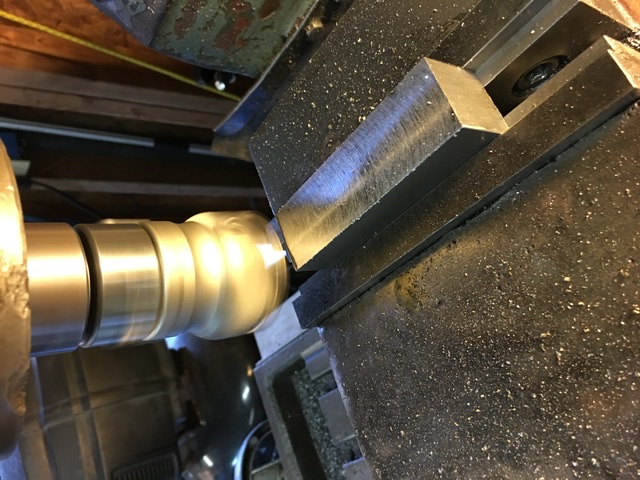
    Starting work on the upper body portion.
    Click image for larger version. 

Name:	D5C05C1A-635B-420B-ADE8-B98749C77DFF.jpeg 
Views:	328 
Size:	120.8 KB 
ID:	32394
    Click image for larger version. 

Name:	1A5A28CD-AB1B-4836-A684-61210C64C7F5.jpeg 
Views:	345 
Size:	121.9 KB 
ID:	32395


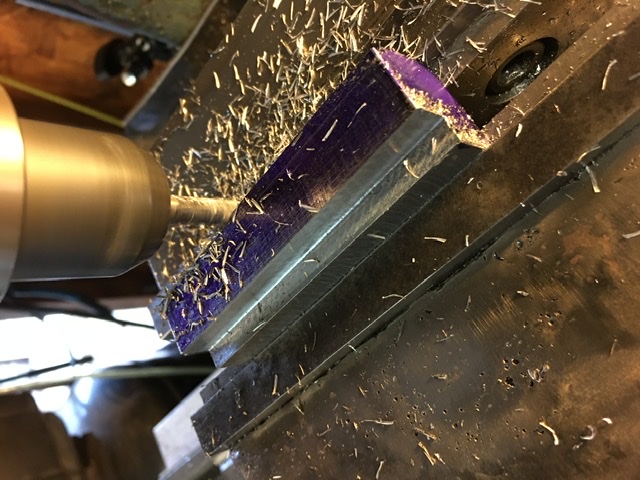
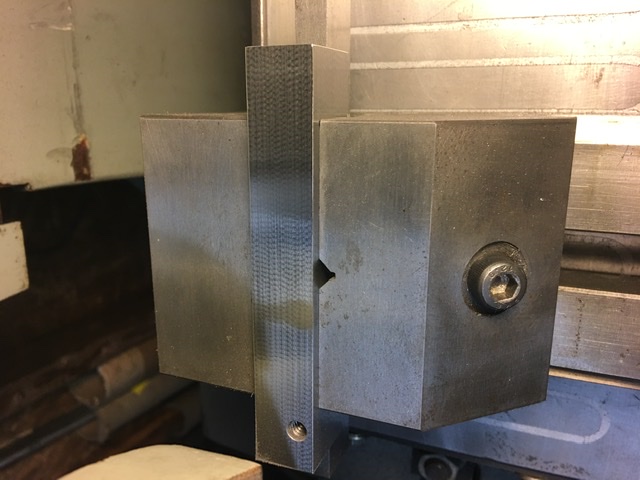
    Cutting slot in lower body.
    Click image for larger version. 

Name:	C3FD99BD-EBDA-4A32-9561-5ED2417C5D5C.jpeg 
Views:	296 
Size:	111.3 KB 
ID:	32396
    Click image for larger version. 

Name:	8F224739-9A75-43BC-A1AD-DB1F24154105.jpeg 
Views:	330 
Size:	70.0 KB 
ID:	32397


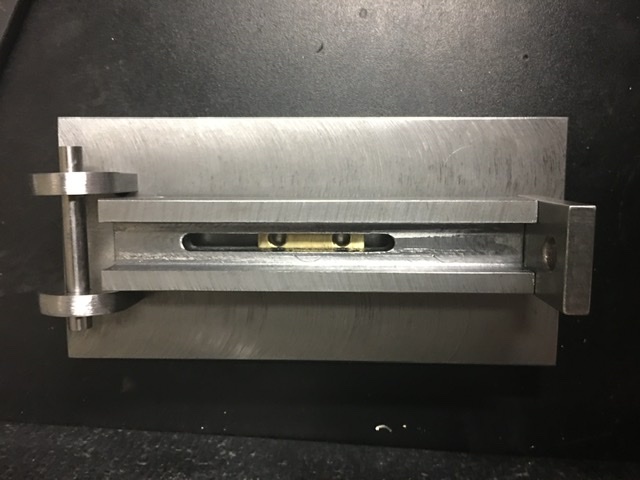
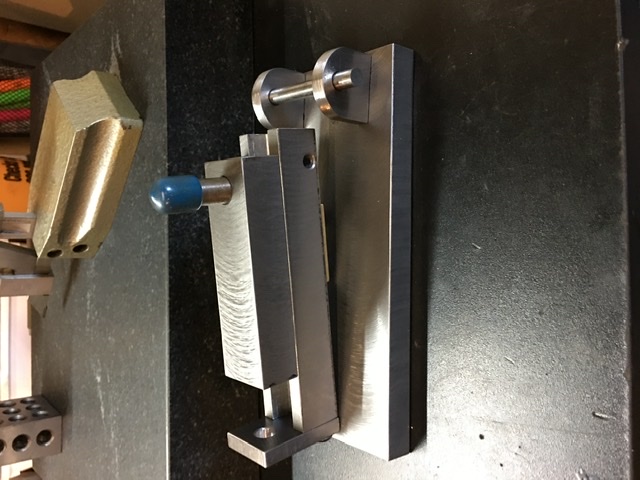
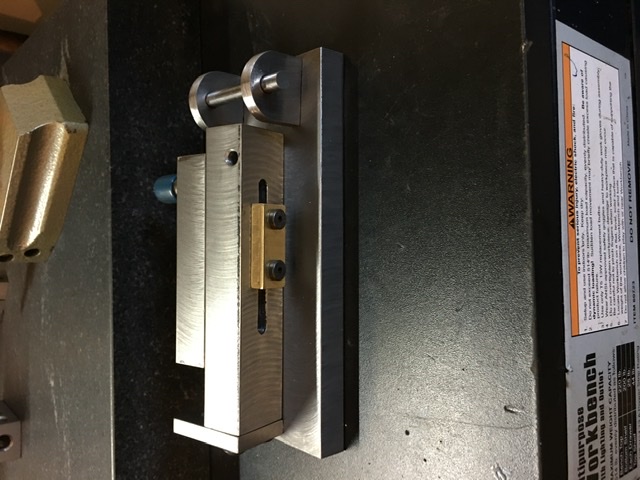
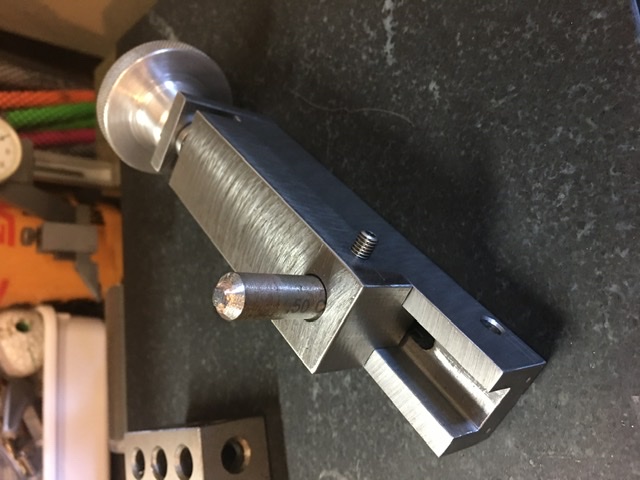
    Body complete, testing fit
    Click image for larger version. 

Name:	F4FF6BC7-E059-40F5-B967-94115BD660D1.jpeg 
Views:	327 
Size:	96.1 KB 
ID:	32398
    Click image for larger version. 

Name:	9C0E8655-CBE6-472C-B8CB-786DDF348A55.jpeg 
Views:	309 
Size:	98.7 KB 
ID:	32399


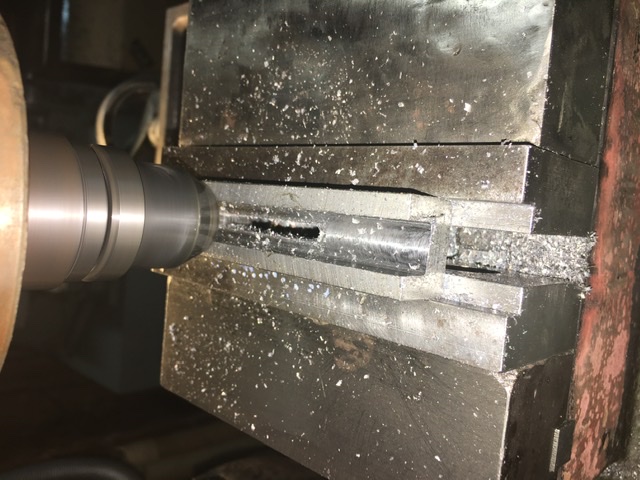
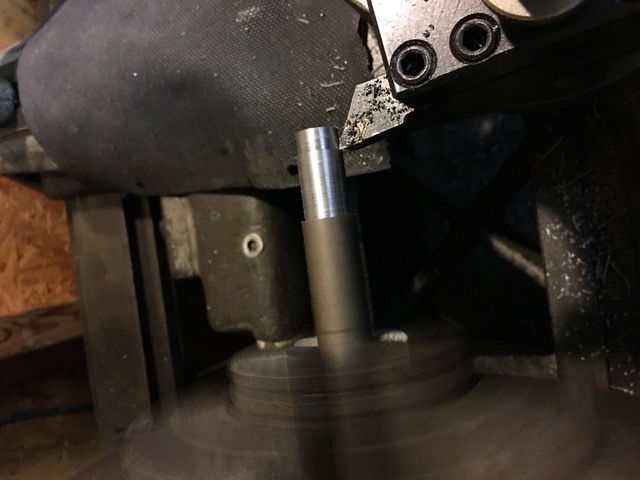
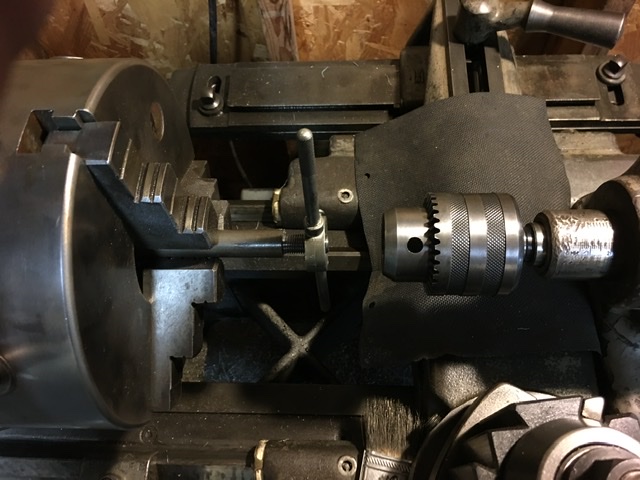
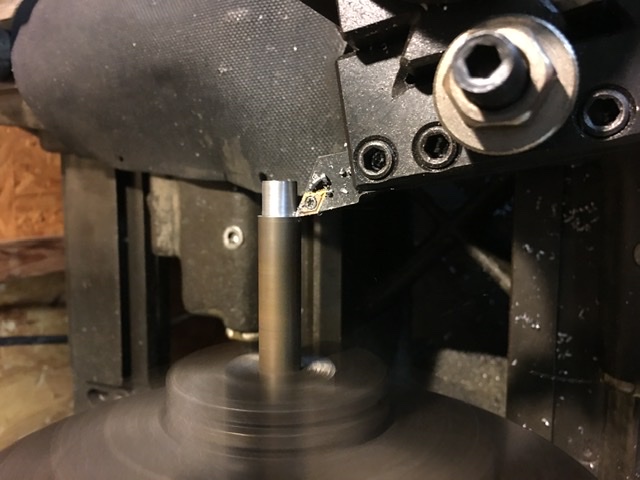
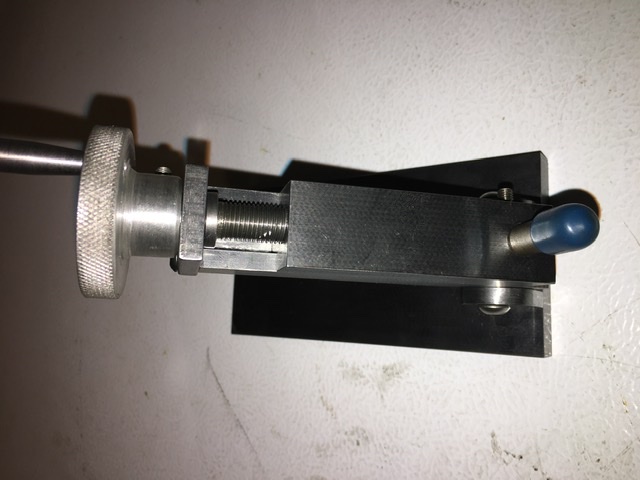
    Lathe work is next, starting on the screw first.
    Click image for larger version. 

Name:	03E7D18C-EC9A-4811-9F86-825F26DD02C8.jpeg 
Views:	330 
Size:	65.0 KB 
ID:	32400
    Click image for larger version. 

Name:	2042F549-EA23-408D-B18E-121F55C1F7F4.jpeg 
Views:	294 
Size:	95.8 KB 
ID:	32401
    Click image for larger version. 

Name:	3E82670C-8831-4BD9-8E1B-201B2777D1FB.jpg 
Views:	320 
Size:	157.6 KB 
ID:	32402


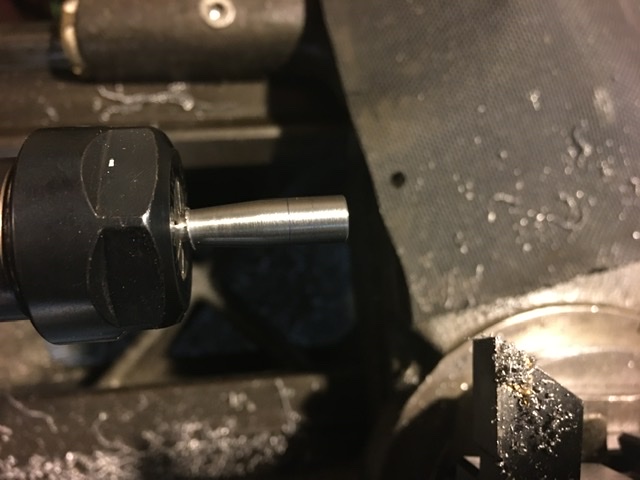
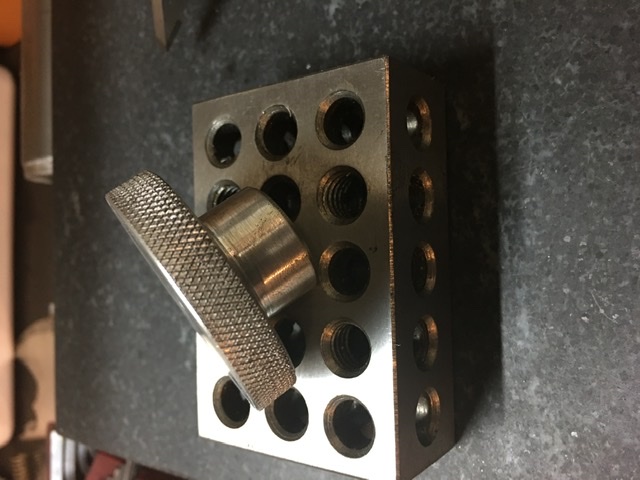
    The knob, tapered and threaded. Used a die for 10-24 threads.
    Click image for larger version. 

Name:	22DB0217-12AE-4F41-8861-04236A831ECC.jpeg 
Views:	322 
Size:	75.2 KB 
ID:	32403
    Click image for larger version. 

Name:	998033C1-0FA7-4F33-AC60-47FF2BDC380A.jpeg 
Views:	302 
Size:	69.2 KB 
ID:	32404


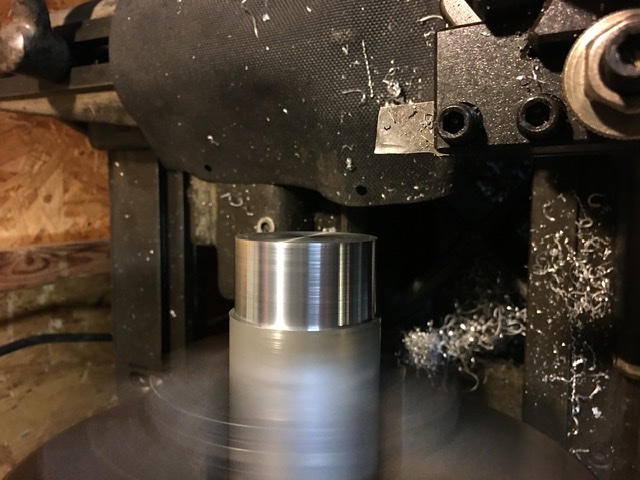
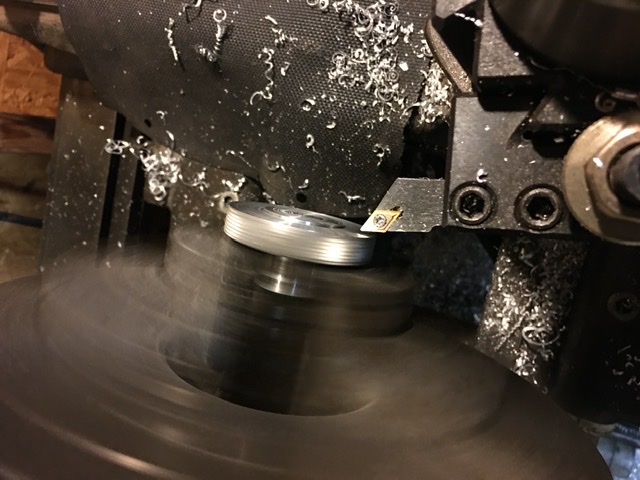
    Finally the hand wheel. Knurls didn’t turn out too well, should’ve went deeper.
    Click image for larger version. 

Name:	34C2A3D7-46B5-4576-BDAC-35083971DD3E.jpeg 
Views:	297 
Size:	91.2 KB 
ID:	32405
    Click image for larger version. 

Name:	B6D68B07-C982-43D0-BB78-1E4640C466DD.jpeg 
Views:	294 
Size:	93.0 KB 
ID:	32406
    Click image for larger version. 

Name:	23E0D8A4-7B1D-4F51-B0B6-26727C935F14.jpeg 
Views:	301 
Size:	84.8 KB 
ID:	32407


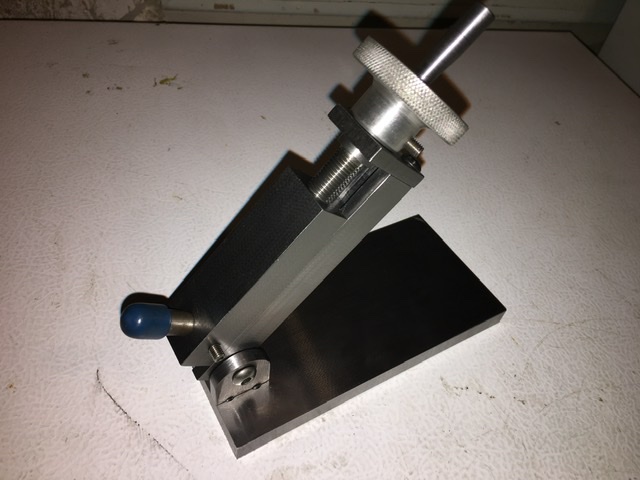
    Final assembly before grinding.
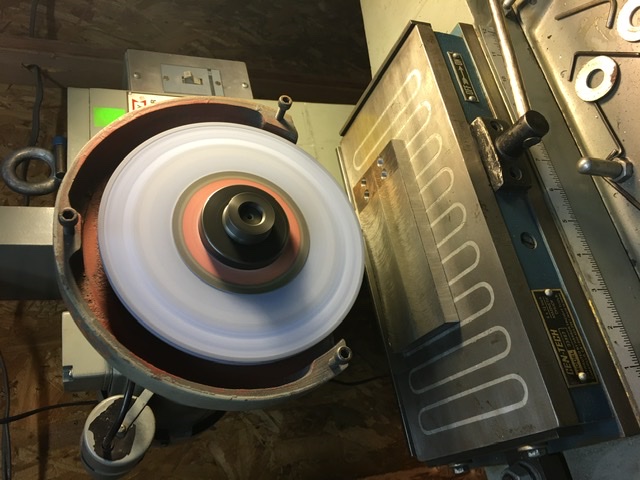
    Click image for larger version. 

Name:	A9B75778-5C12-42E4-AF21-C8E555635D35.jpeg 
Views:	304 
Size:	83.2 KB 
ID:	32408
    Click image for larger version. 

Name:	869BC9A1-9DE1-40B6-AFB1-B5D243C0D61B.jpeg 
Views:	332 
Size:	92.0 KB 
ID:	32409


    Grinding begins!
    Click image for larger version. 

Name:	FF7D7678-7A1D-4E2E-9D12-08AD8A586D41.jpeg 
Views:	308 
Size:	101.1 KB 
ID:	32410
    Click image for larger version. 

Name:	622B607A-E157-43E2-8D79-DEFFC40B6BEB.jpeg 
Views:	324 
Size:	80.7 KB 
ID:	32411


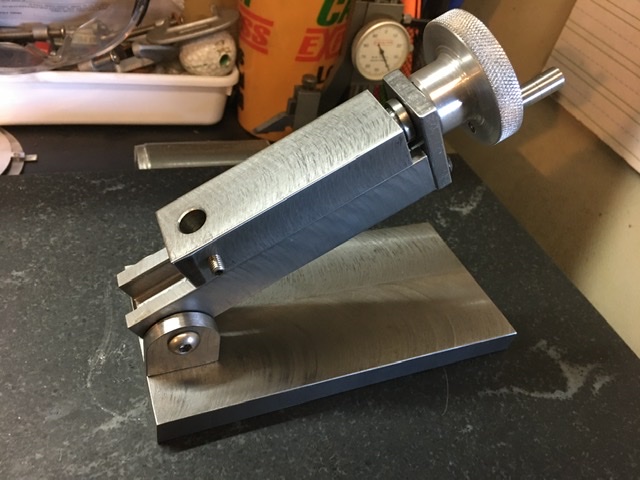
    Final assembly, ready for use.
    Click image for larger version. 

Name:	F62E33F1-C6FA-401E-AF17-78721ABFB3CD.jpeg 
Views:	343 
Size:	77.8 KB 
ID:	32412
    Click image for larger version. 

Name:	52B228C1-AED2-496F-8DB9-6A8B167FBEAD.jpeg 
Views:	304 
Size:	69.9 KB 
ID:	32413


    This was a fun project that will definitely get use in my shop. Thanks for checking it out and Thanks to Rossbotics for the clever idea and sharing it with us!
    Attached Thumbnails Attached Thumbnails Click image for larger version. 

Name:	195FA34A-AAB1-42C2-8FD1-A8DE46A63757.jpeg 
Views:	244 
Size:	129.8 KB 
ID:	32393  
    Last edited by Tek12h; Dec 13, 2019 at 04:40 AM.

  2. The Following User Says Thank You to Tek12h For This Useful Post:

    Jon (Dec 6, 2019)

Thread Information

Users Browsing this Thread

There are currently 1 users browsing this thread. (0 members and 1 guests)

Tags for this Thread

Bookmarks

Posting Permissions

  • You may not post new threads
  • You may not post replies
  • You may not post attachments
  • You may not edit your posts
  •