
 LinkBack URL
 About LinkBacks


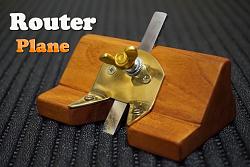
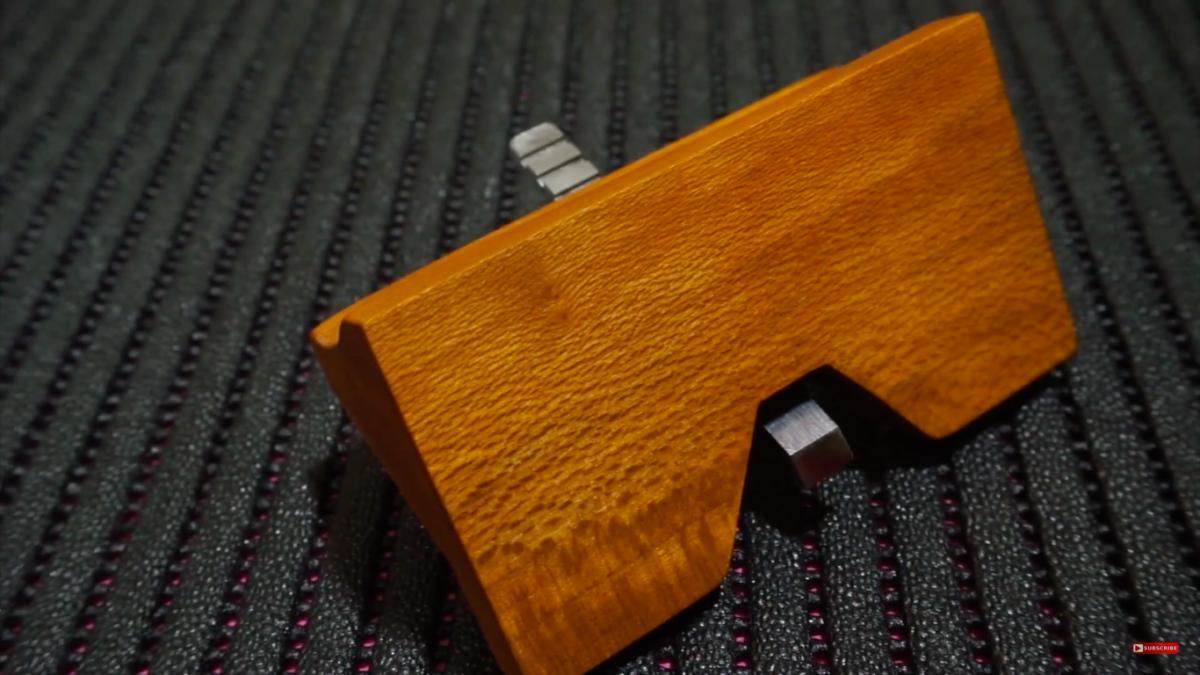
Inspired in one Paul's Sellers collection hand planes, I decided to make my own one as similar as possible in an easy way and using hand tools. In this video you can see the step by step.

If you like the video please Subscribe to my Youtube channel
Materials
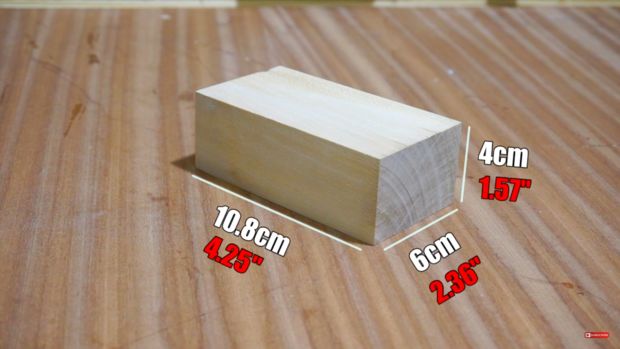
- Sycamore wood
- Quality Brass sheet (1,6mm/0,06") thickness
- Insert rivet nut (M6) 0,35"
- Blade plough plane (10mm/0,39")
- Sapeli dye and Wood wax
- Thumb screw
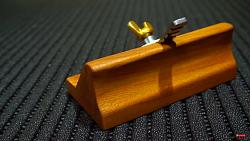
For this project I used Sycamore wood since this is a resistant and hard kind of wood. I have made it, as almost always, hand tools but you can replace them by power tools.
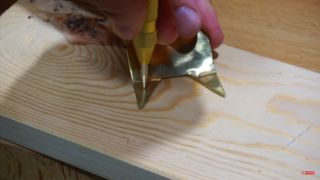
I began cutting one side of the wood and planing it with a hand plane. Once straight with the help of a gauge I marked the rest of the parts to cut. I repeated the previous steps in order to obtain a completely square wooden block
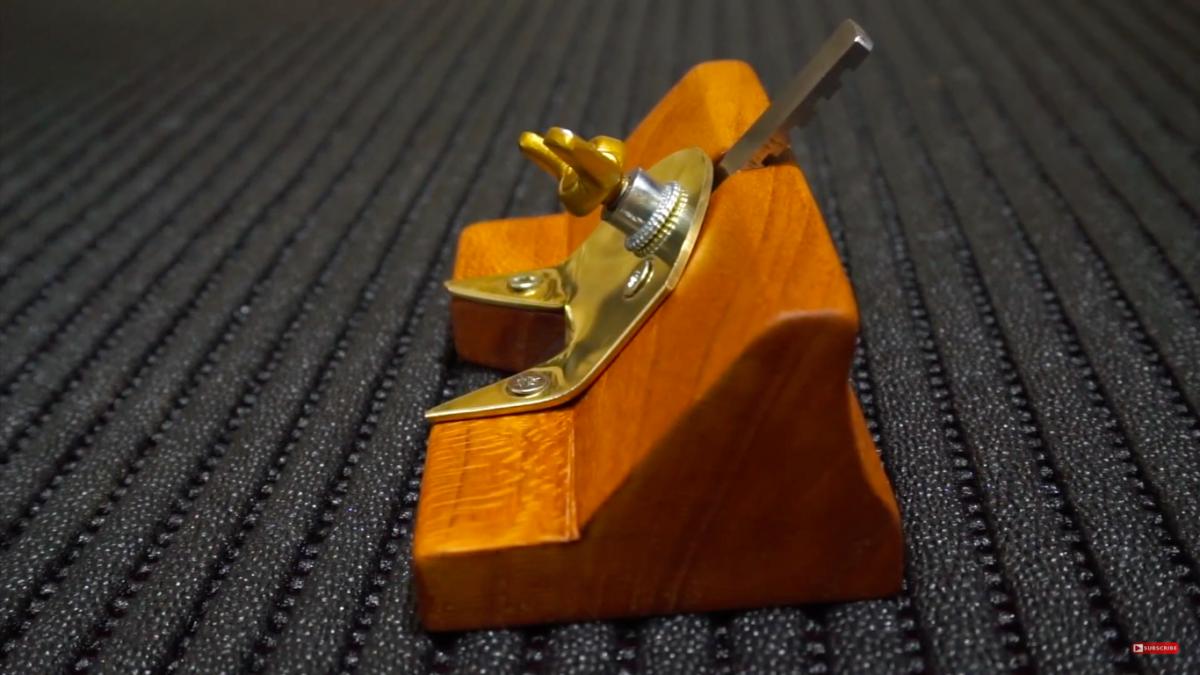
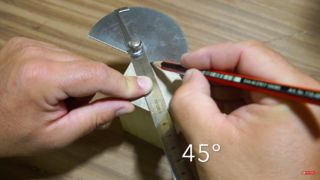
We have to mark an angle between 45 and 50º as per photographs and we cut it wihout reaching the end.
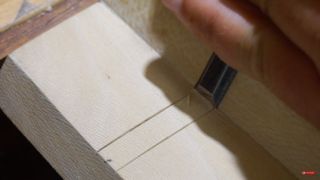
Then clean the saw-toothed marks leaving a smooth and plane surface.
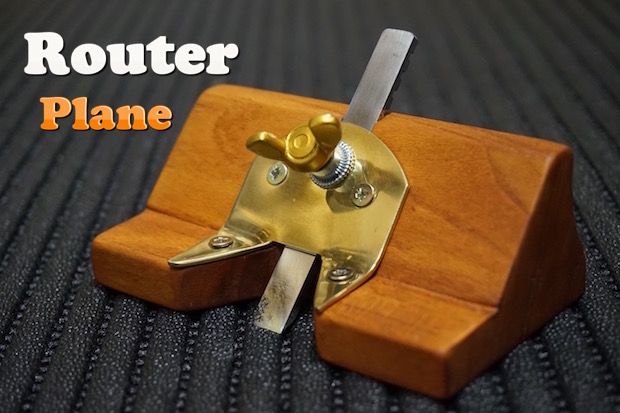
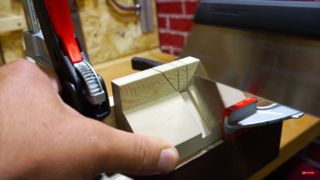
With the help of a ruler mark the centre of the piece and introduce the blade that we'll use for our router plane. In my case I used an old plough plane blade of 10mm/0,39". Mark the contour and eliminate the wood where we'll introduce the blade with a chisel.
Now we have to cut a wide enough surface to see the blade path when we're working. I chose triangular shape but it can be used any other shape.
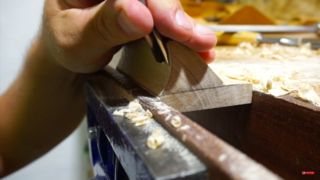
In order to give the router plane a more ergonomic shape, I give where the thumbs will be supported rounded shape with the help of gouge cut straight
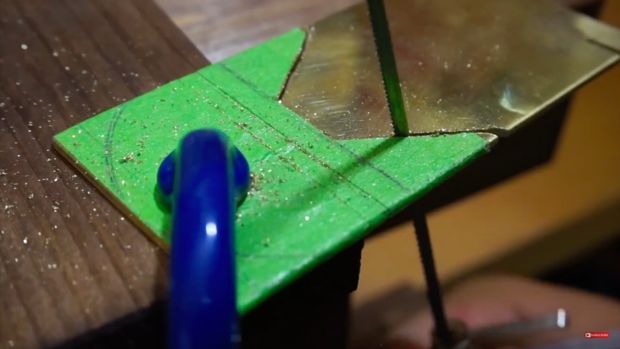
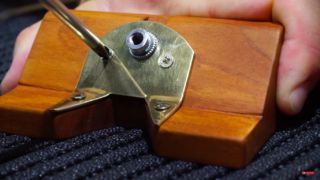
Now we have to make the lever cap which will hold the blade. I make a template with the help of paper joining tape and later I glue it on a brass plate. Cut the piece and file down the edges until it's smooth.
I drill 4 holes for the fastening screws and another one of 9mm/0,35" in the middle for the rivet nut. As I don't have the necessary tool for the rivet nut, I use for it a hammer as you can see in the video.
For the wooden finishing I use Sapele dye and wax.
Now the only thing left is to screw the brass plate, to introduce the blades, set the ploughing depth and to start working!!
I would also apologise for my English as a non-native English speaker some terms are very difficult for me.


 Reply With Quote

Bookmarks