 LinkBack URL
 About LinkBacks
10 gauge is pretty ambitious for a standard style brake, you might want to consider a press brake. Many plans around for hydraulic press add on ones
.


10 gauge is pretty ambitious for a standard style brake, you might want to consider a press brake. Many plans around for hydraulic press add on ones
.

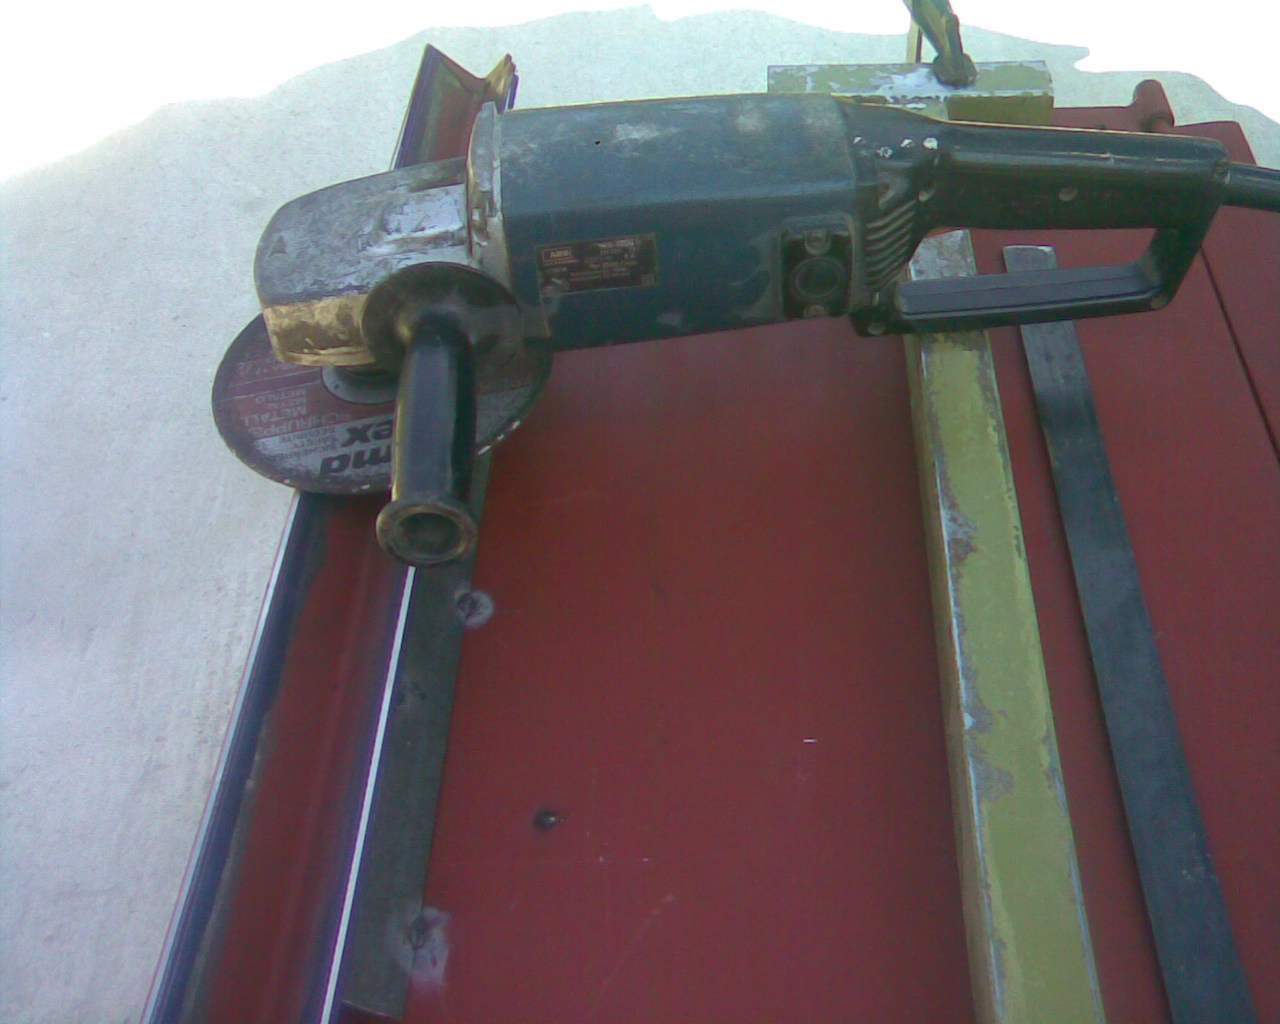
One more. How did you grind the bending edgeOriginally Posted by dwbachor


Hi G.Paul,
Mount the clamp onto a flat and stable metal surface (I had use my hydraulic portable table) using two pieces of angle-iron (e.g. 30x30mm or 35x35mm.
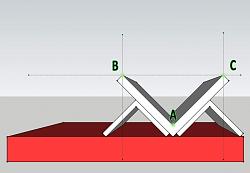
Be sure that the hypotenuse (BC) of the triangle (ABC) of your clamp is absolute parallel with the surface of your base and do welds to keep it all in place.
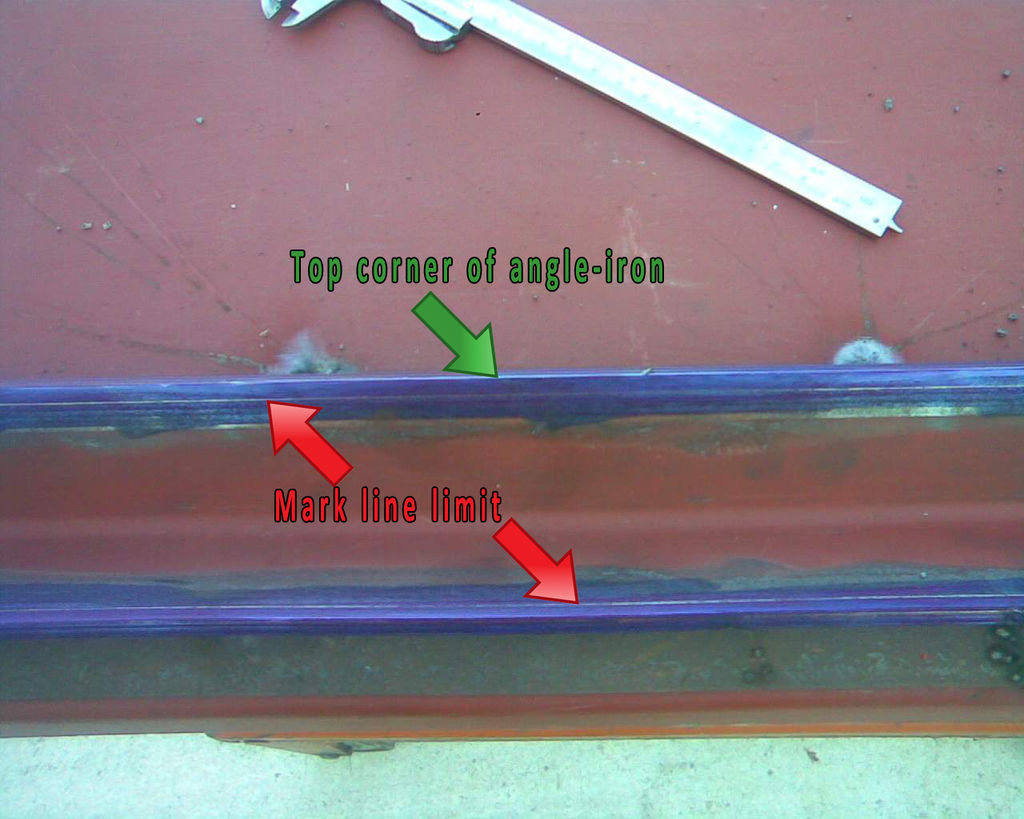
Clean up the paint or the rust at the inner sides of angle iron about 10-15mm from corner. Paint with Aniline paint and wait for a while to dry.
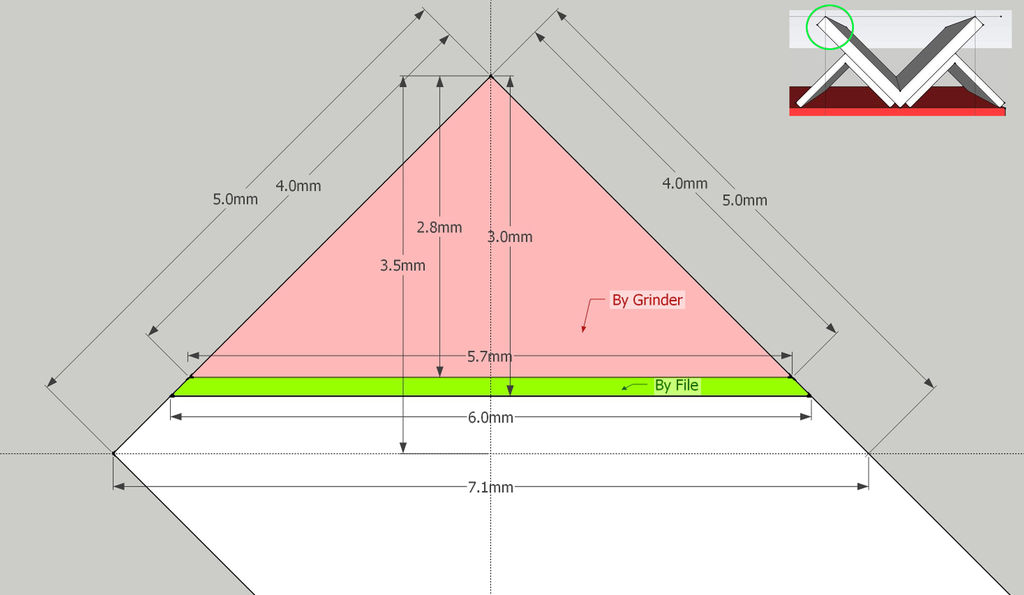
Using a caliper or a Vernier, mark a straight line at the entire length on both inner sides at 4mm from the corner.
(Aniline paint is a very thin paint that used for clean and easy to view marks at metal treatment. You can make it, using 400ml Alcohol, 50ml Shellac, 18~20ml Aniline and very good shake.)
Place a square tube and lock it with clamps so as to using it as slide-base for grinder.
Place a flat bar 3mm thick onto the tube.
According to dimensions of your grinder the height of the slider (tube+flat bar 3mm) must be so as the grinding disk to be absolutely parallel to surface of base and be adjacent to both sides of angle-iron.
Don’t use a flat bar thicker than 3mm, but you can use a combination of bars one over the other, (the top bar must be the 3mm thick bar).
The total height of grinding is 3mm but we need to make only 2.8mm leaving the rest 0.2mm for the final sharpening by file.
So when start the grinding, watch the lines, and be careful, to not exceed the limits.
The use of a new unused 180mm grinding disk is required for best performance.
Start grinding sliding the grinder gently from one end to other.
At starting do not use any pressure on the grinder, let it work with its own weight, and then push it very gently and with the same pressure from one end to other.
If you are not sure that you can control your pressure just slide and let it to work alone. May be take little more time but we need a very good grinding without gaps.
After some passes and when the grinding sides, start to have different width or have already grind about 1.5mm of the height, remove the (3mm) flat bar and continue to slide the grinder direct up to the tube.
According to setup (main base, clamp, and grinder slide-base) the grinding axis is parallel to main base.
The more grinding, the most offset of the grinding axis to downwards,
(The center is: at the point that the grinders handle, be adjacent to the slider).
The side of angle iron that is closer to slider has less grind (or more height) from the far away side.
But we need 3mm grind at the both sides.
Removing from the height of slider 3mmt (the flat bar), the grinding axis will move upwards creating an opposite offset that equate the grinding height on both sides.
When the grinding axis becomes parallel to main base, then the height will be the same at both sides of angle-iron.
Using a flat file refine the last 0.2mm.
Regards
Jon (Dec 15, 2017)

Thank you Kess
There are currently 1 users browsing this thread. (0 members and 1 guests)
 Posting Permissions


 Reply With Quote
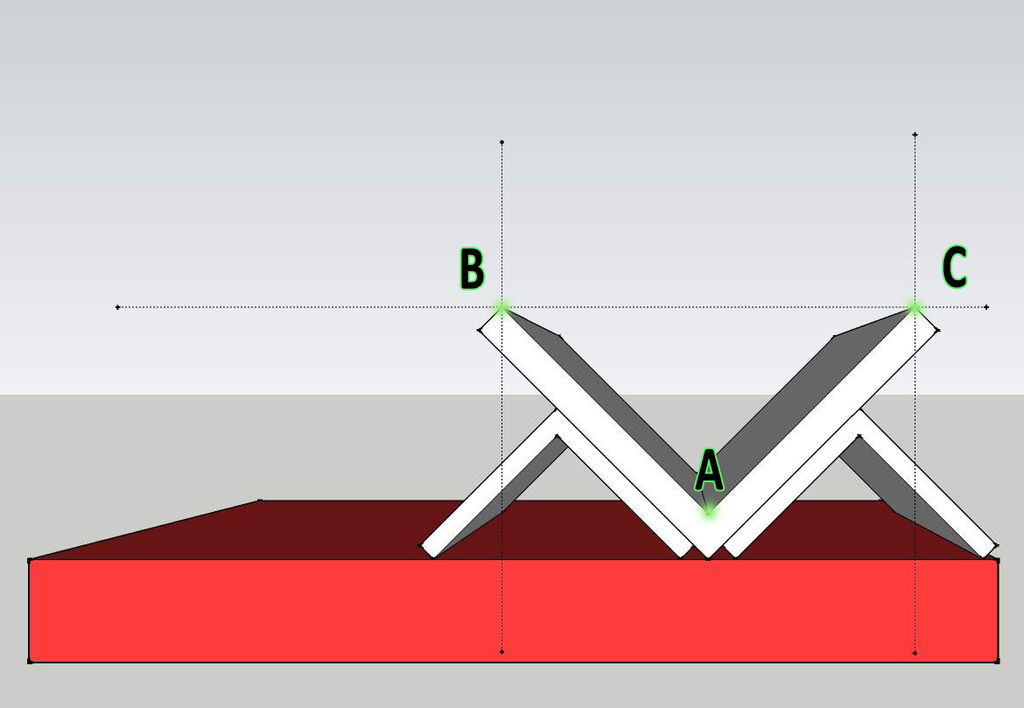

 kess
kess
Bookmarks