Free 186 More Best Homemade Tools eBook:  
New: 300+ fresh build posts/day from 275 forums → BuildThreads.com

User Tag List

Results 1 to 5 of 5

Thread: Tailstock die holder

Threaded View

  1. #1
    Supporting Member mattthemuppet's Avatar
    Join Date
    Aug 2016
    Location
    Walla Walla, WA USA
    Posts
    46
    Thanks
    27
    Thanked 104 Times in 41 Posts

    mattthemuppet's Tools

    Tailstock die holder

    another little widget, the making of which helps keep me sane!

    I've long had issues starting dies straight, perhaps because I have crap dies, perhaps because I'm not doing it right, but either way I thought this was a neat project to do. Also, seeing jjr2001's thread on it helped

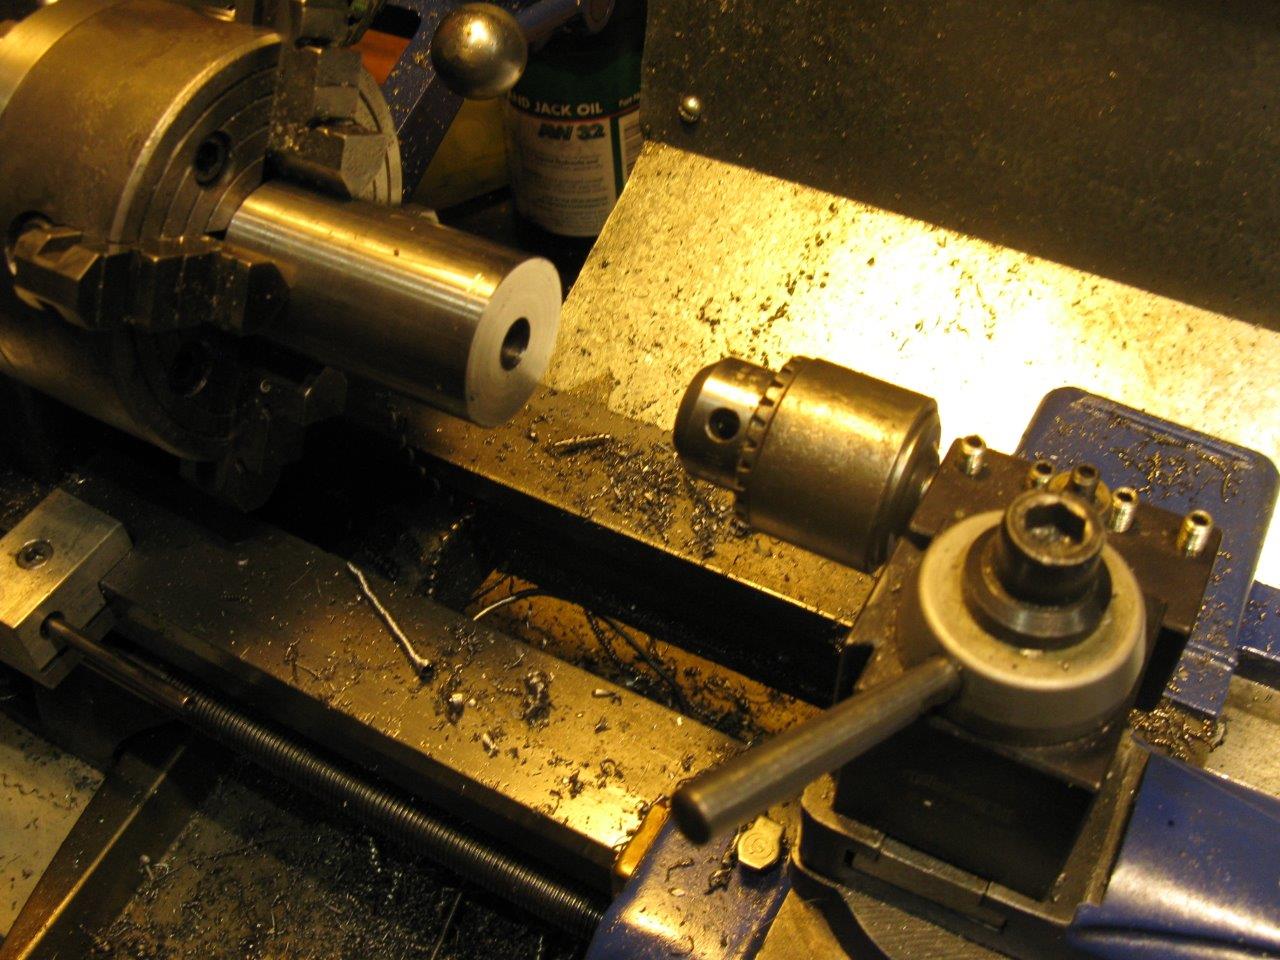
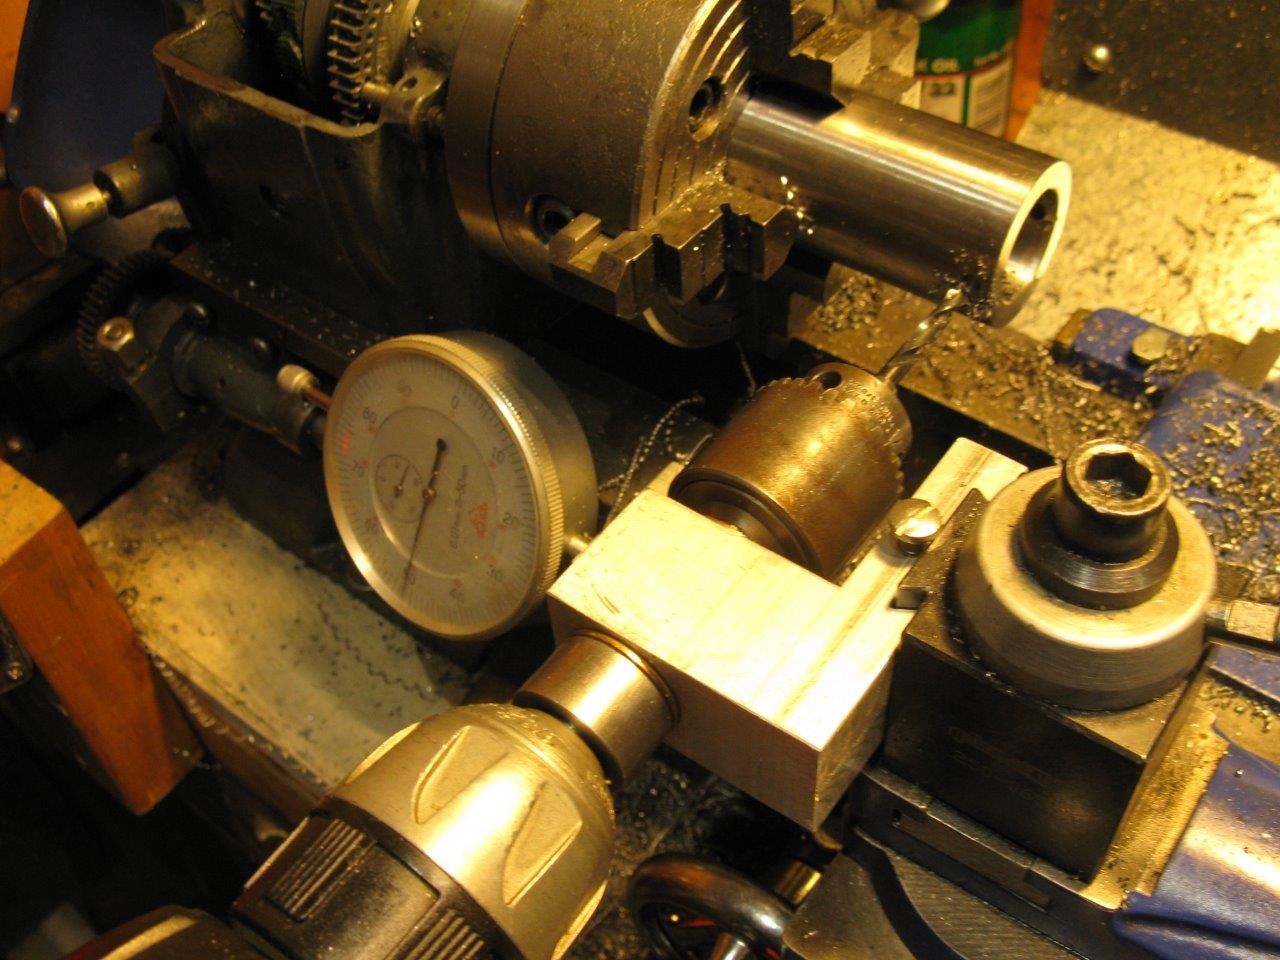
    A chunk of 2in steel rod was hacksawed off and faced both ends, then dialed in on the 4 jaw.

    Using my toolpost drill chuck - an absolute necessity on a lathe with 1 1/2in tailstock ram travel - I drilled the rod out to 1/32 or so under 1/2in diameter. Then I reamed it to 0.500 dead on. I thought that was an over reamer, but now I know!
    Click image for larger version. 

Name:	IMG_5408.JPG 
Views:	276 
Size:	184.2 KB 
ID:	14809

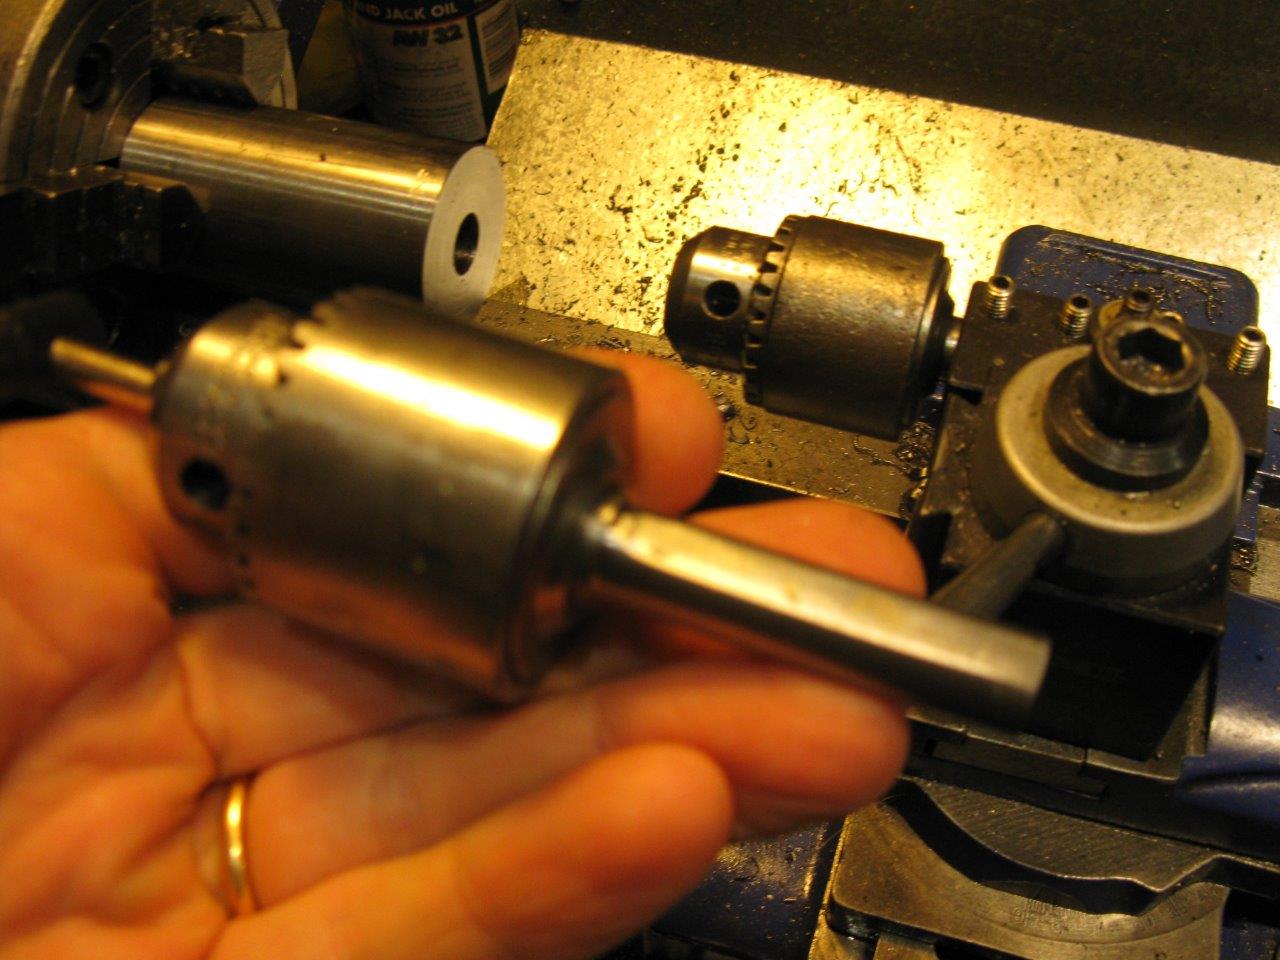
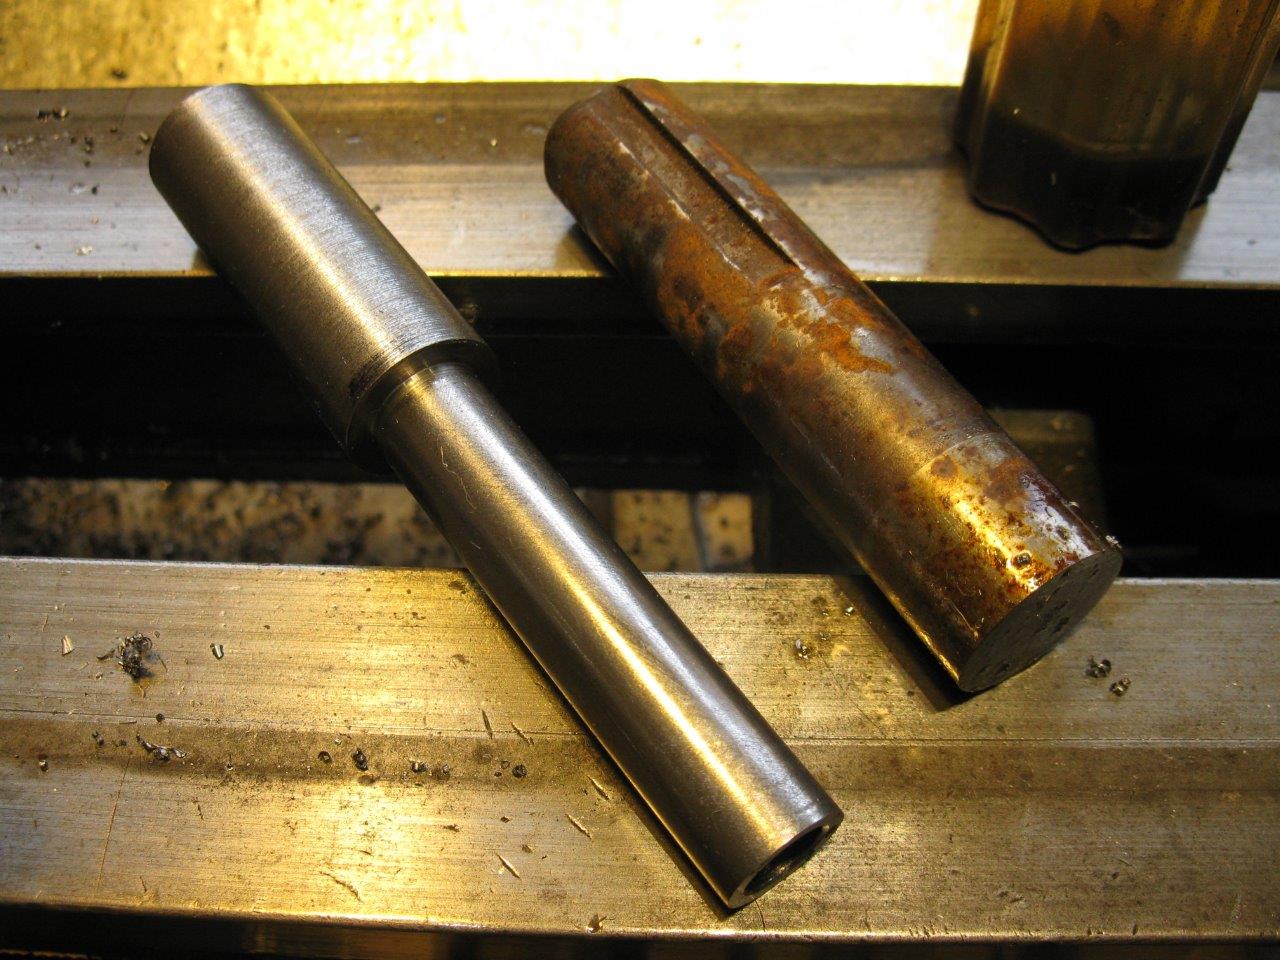
    couple of pics showing the 3/8in shank arbors I made, one for a 3/8" chuck, the other for a 1/4" chuck
    Click image for larger version. 

Name:	IMG_5409.JPG 
Views:	277 
Size:	141.6 KB 
ID:	14810Click image for larger version. 

Name:	IMG_5410.JPG 
Views:	274 
Size:	128.3 KB 
ID:	14811

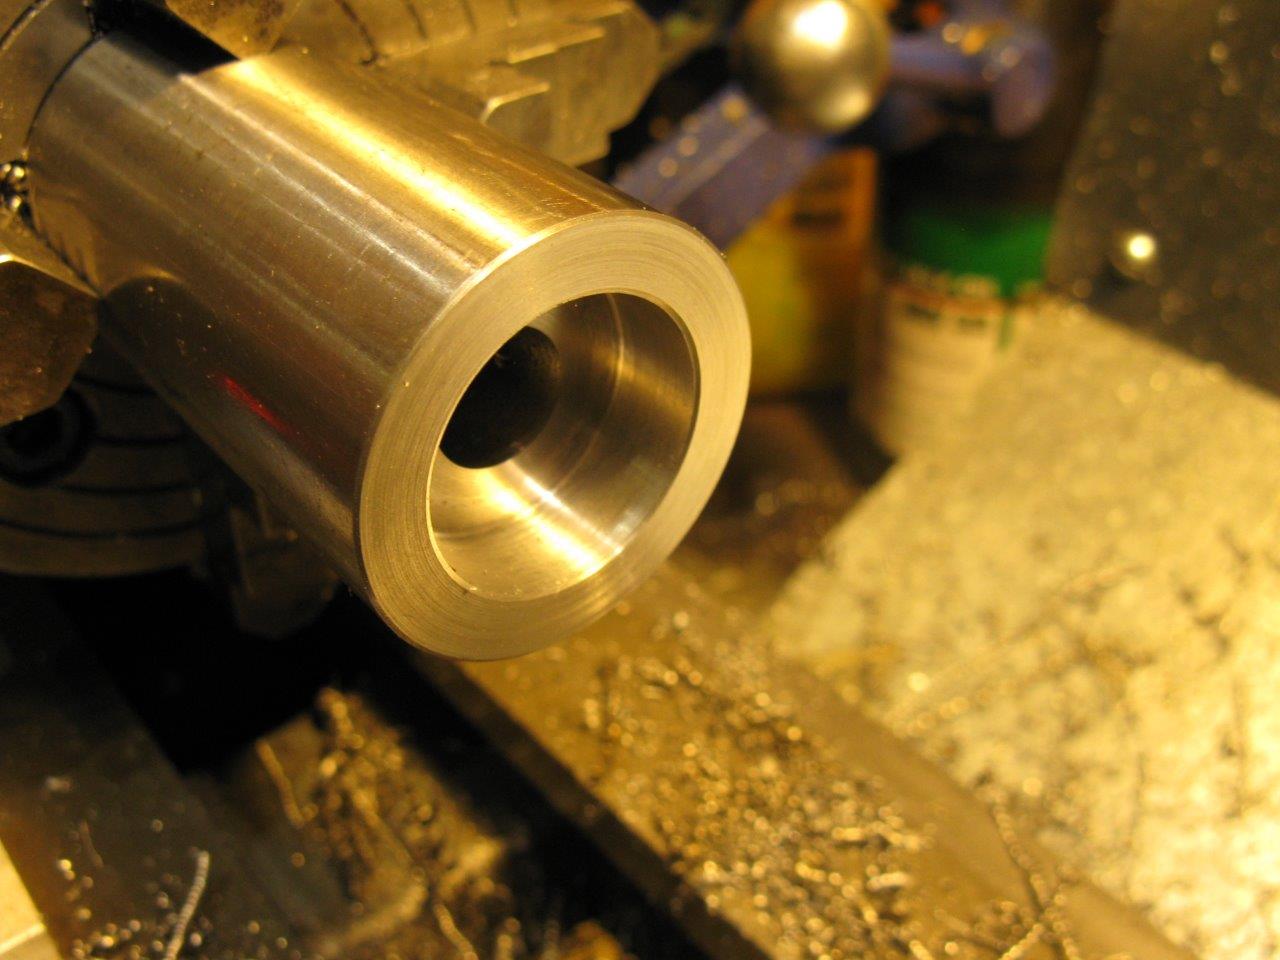
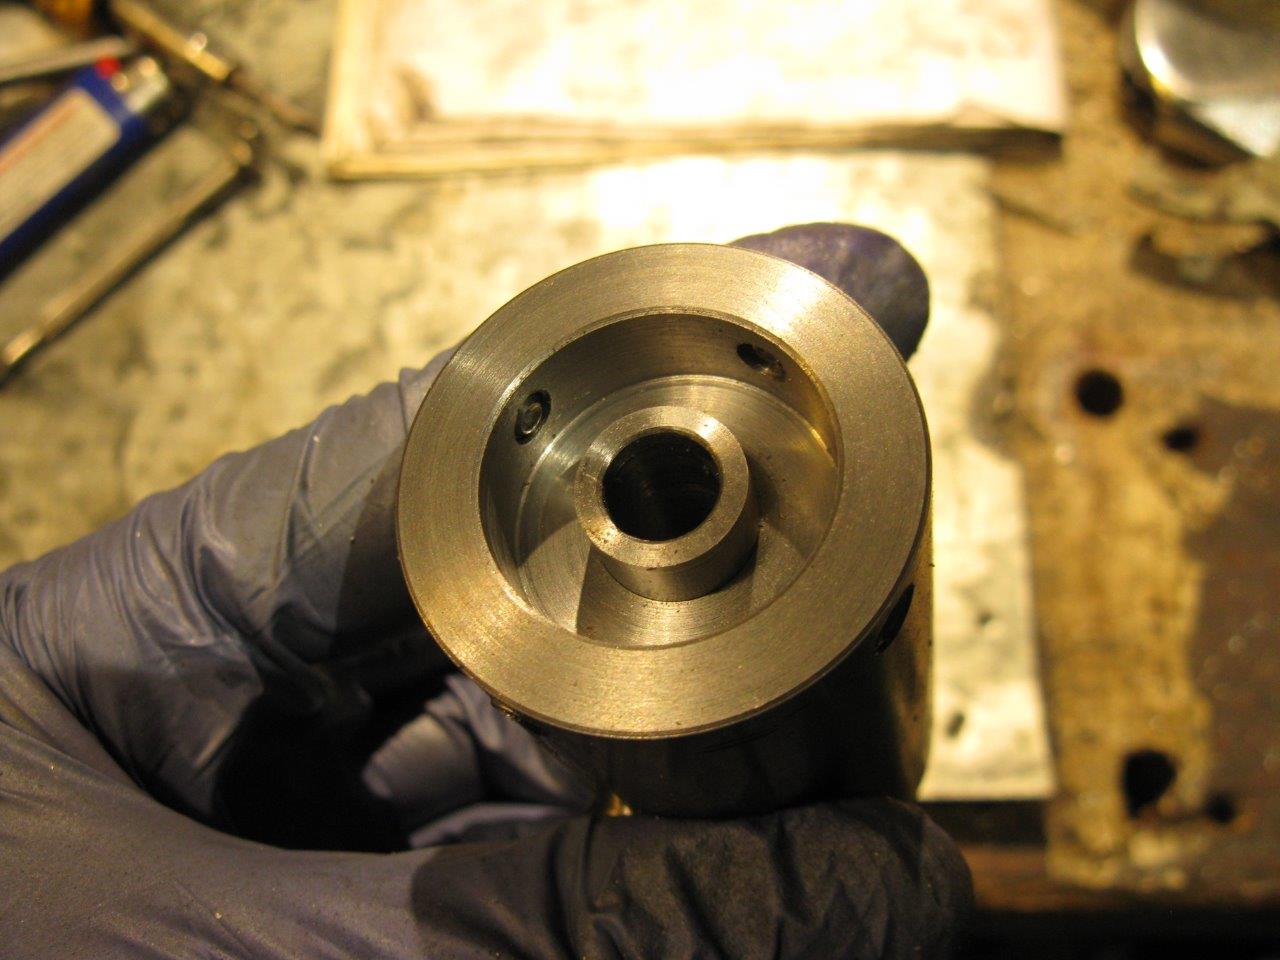
    with the work still in the chuck, I bored the face to accept a 1" die
    Click image for larger version. 

Name:	IMG_5411.JPG 
Views:	301 
Size:	118.6 KB 
ID:	14812

    then cross drilled it at 90deg around the circumference to tap holes for 10-32 set screws
    Click image for larger version. 

Name:	IMG_5412.JPG 
Views:	281 
Size:	164.7 KB 
ID:	14813

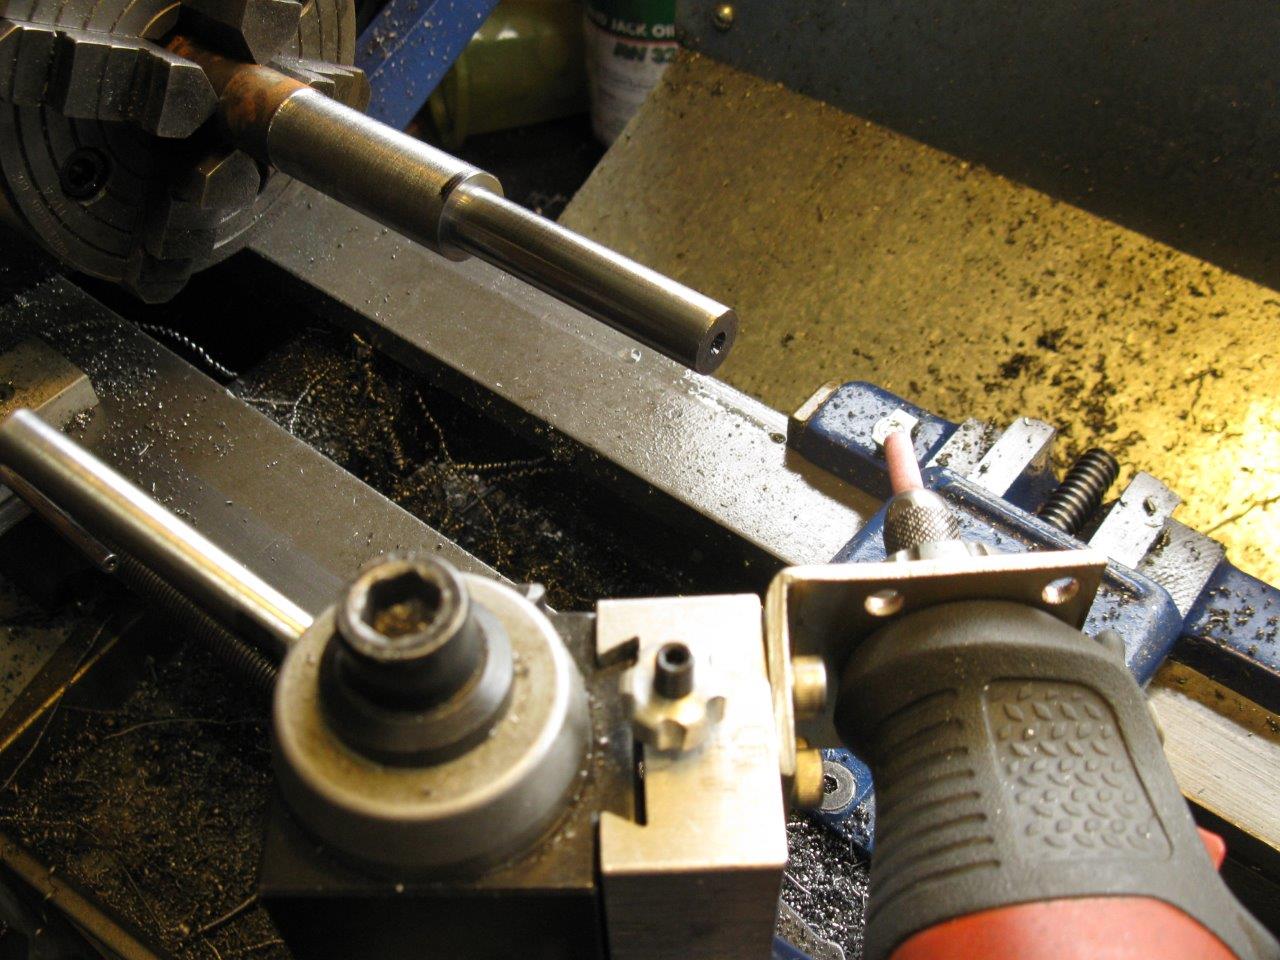
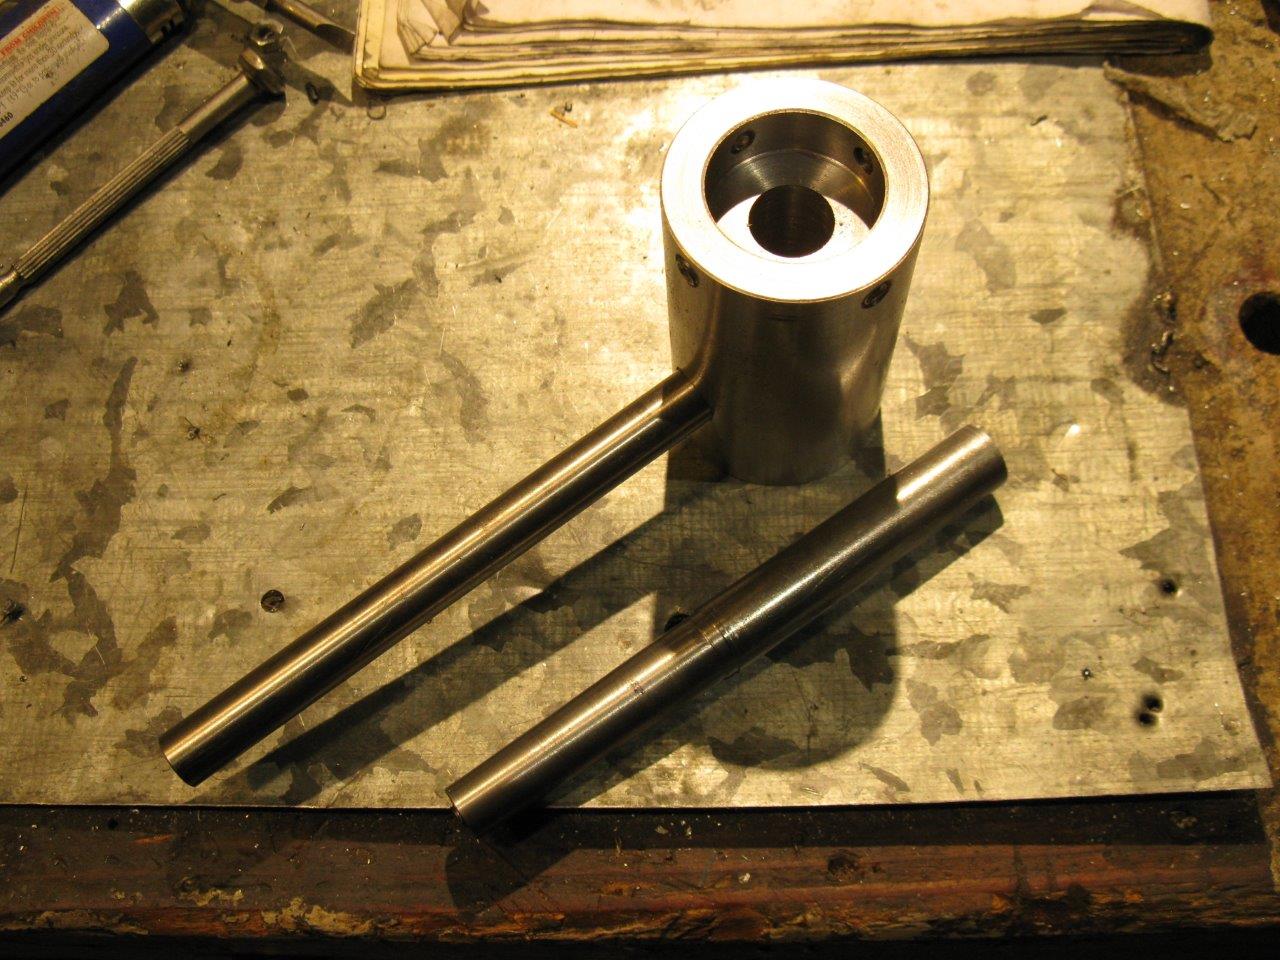
    next up is the arbor, using a rusty old 3/4" ex-axle. Faced then center drilled for a dead center. Then turned it down to around 0.501.
    Click image for larger version. 

Name:	IMG_5413.JPG 
Views:	254 
Size:	100.6 KB 
ID:	14814

    then ground it to fit using my Dremel and tool post attachment (first use!). Wasn't perfect, but with a bit of patience and some sand paper got it down to 0.499-0.4995, so a nice tight slidding fit into the die holder.
    Click image for larger version. 

Name:	IMG_5414.JPG 
Views:	260 
Size:	180.6 KB 
ID:	14815

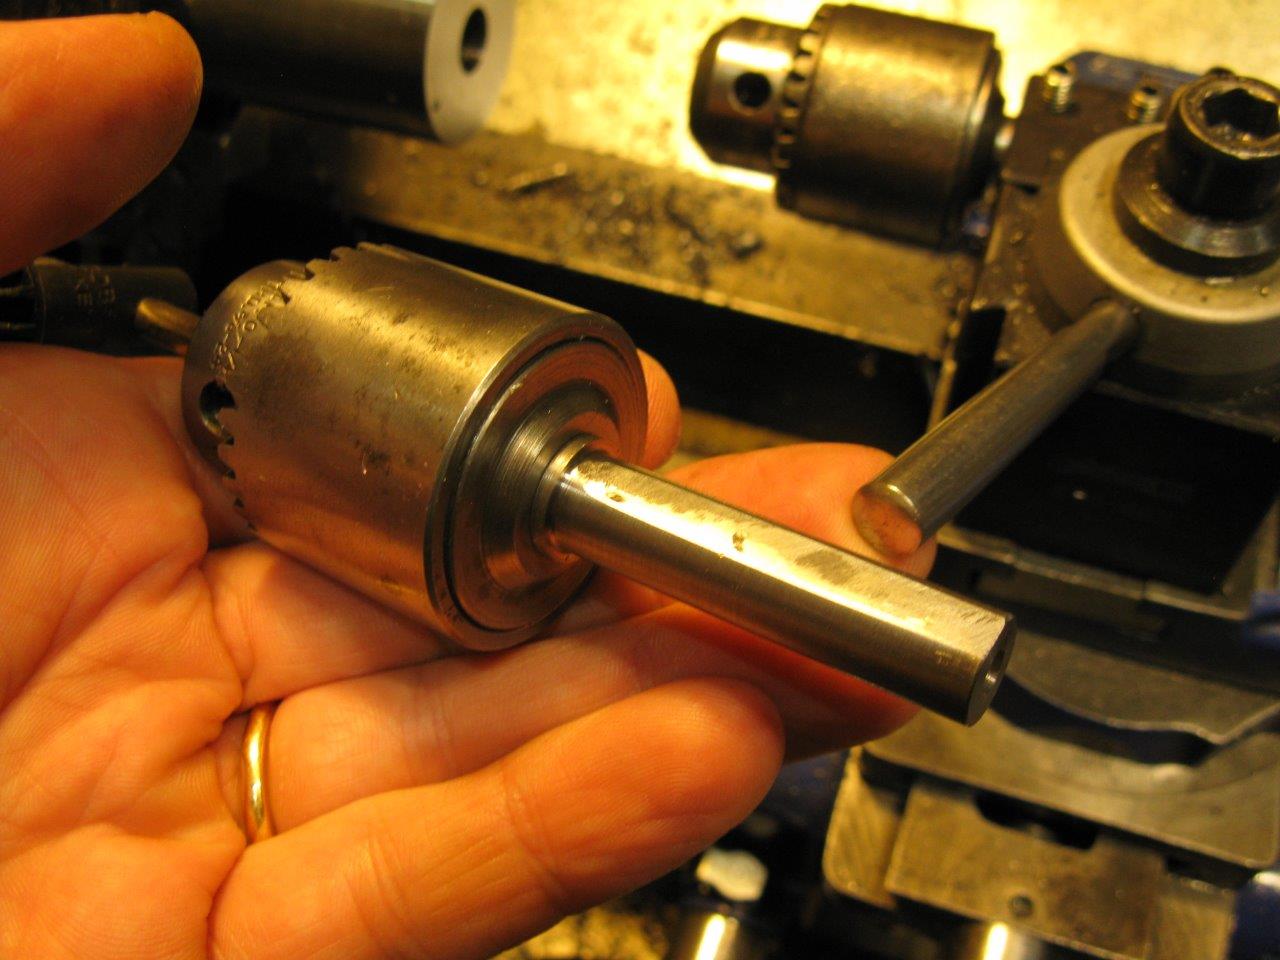
    Parted it off, turned it around and cut the MT1 taper (not shown)
    Click image for larger version. 

Name:	IMG_5415.JPG 
Views:	268 
Size:	195.0 KB 
ID:	14816

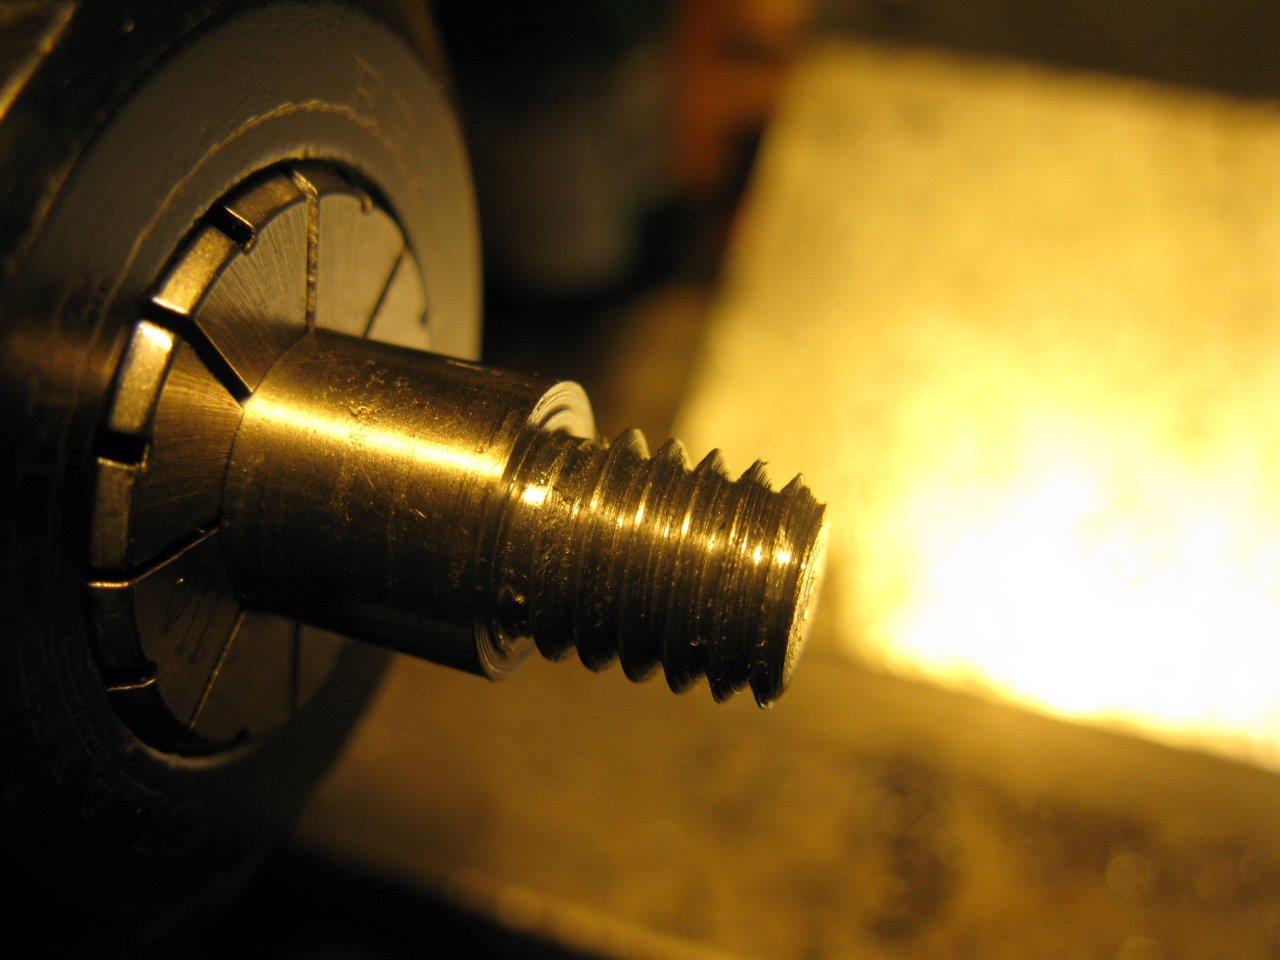
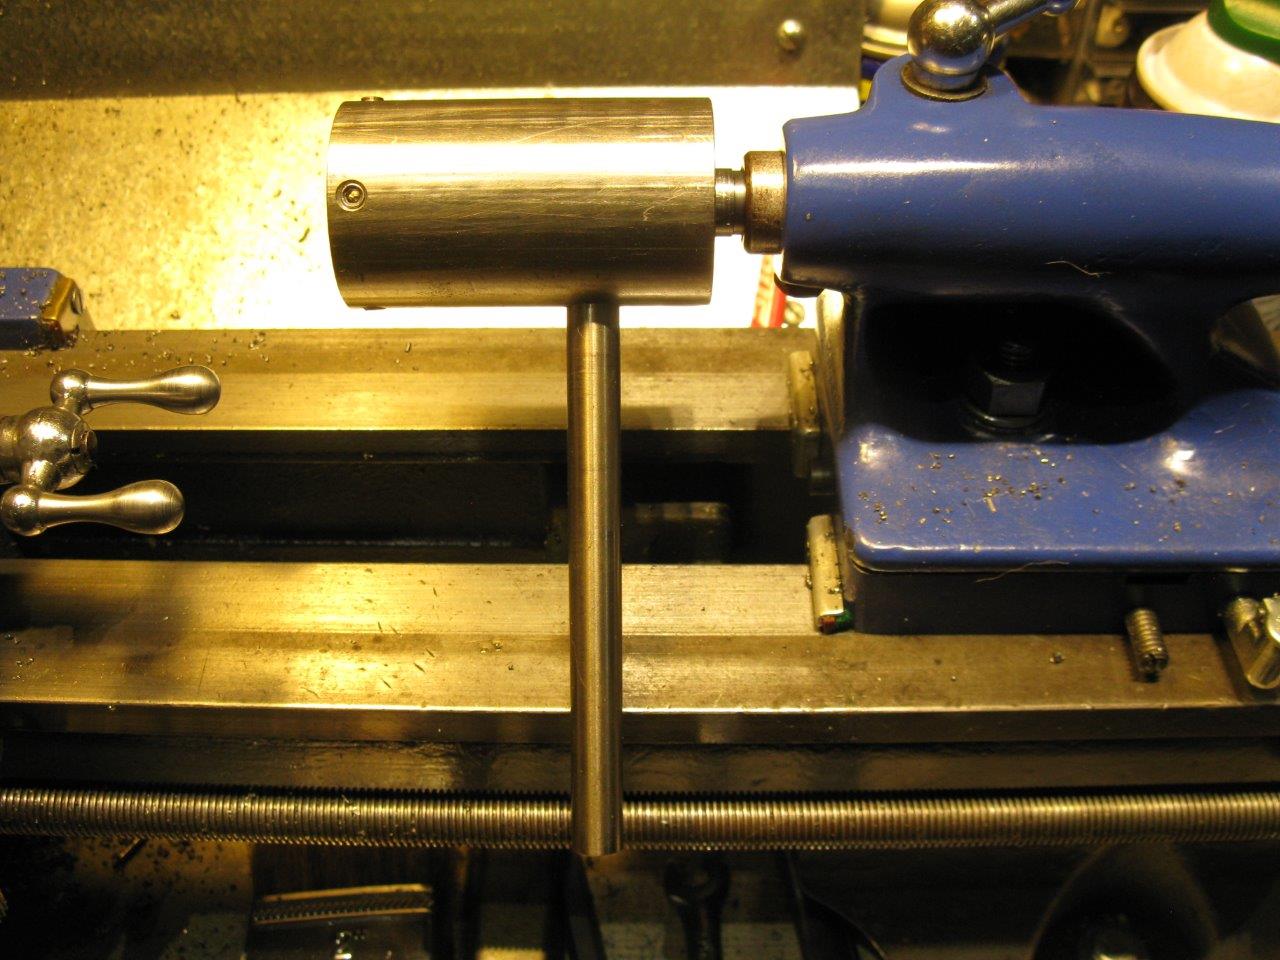
    Turned down the handle to the major diameter for 5/16-18 (drilled and tapped a matching hole in the side of the die holder)
    Click image for larger version. 

Name:	IMG_5420.JPG 
Views:	294 
Size:	109.0 KB 
ID:	14817

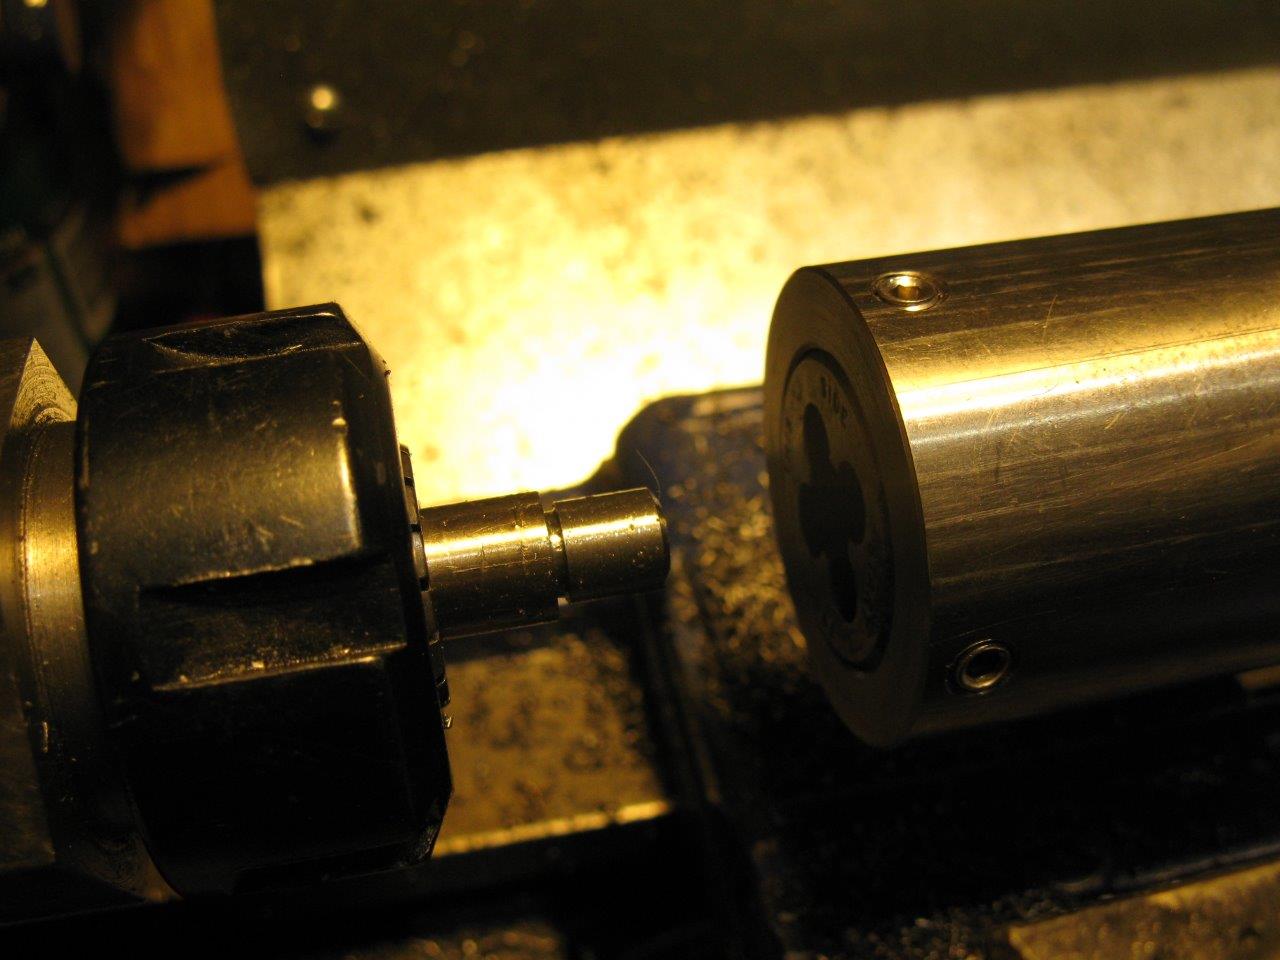
    and threaded it using my tailstock die holder
    Click image for larger version. 

Name:	IMG_5421.JPG 
Views:	294 
Size:	95.2 KB 
ID:	14818

    all finished
    Click image for larger version. 

Name:	IMG_5422.JPG 
Views:	276 
Size:	160.6 KB 
ID:	14819Click image for larger version. 

Name:	IMG_5423.JPG 
Views:	305 
Size:	204.8 KB 
ID:	14820

    also made sure that the arbor was long enough to pop the die out - my USA made dies are a bit larger than my Chinese ones (which I think are actually 25mm, not 1")
    Click image for larger version. 

Name:	IMG_5424.JPG 
Views:	268 
Size:	126.1 KB 
ID:	14821

    anyway, feels good to get another little project done and another useful tool. Also got to use several different useful tools I made a little while ago
    Last edited by mattthemuppet; Nov 2, 2016 at 05:37 PM.

  2. The Following User Says Thank You to mattthemuppet For This Useful Post:

    Paul Jones (Nov 3, 2016)

Thread Information

Users Browsing this Thread

There are currently 1 users browsing this thread. (0 members and 1 guests)

Bookmarks

Posting Permissions

  • You may not post new threads
  • You may not post replies
  • You may not post attachments
  • You may not edit your posts
  •